• Skip to primary navigation
  • Skip to main content
  • Skip to primary sidebar
  • Start Here
  • Shop Favorites
  • About
    • Welcome To My Repurposed Life Home of Repurposed Furniture
    • More About Gail
    • Disclosure
    • Privacy Information
  • Gallery
    • Repurposed Furniture
  • Repurposed Items
    • Building Supplies
    • Miscellaneous Household Items
    • Picture Frame/Chalk Board
  • DIY
    • Home Reno
    • outdoor living
    • Painting
    • Shop Talk
    • Tips for Around the House
    • Build It
      • Furniture
      • Home Decor
      • Storage
    • Crafts
      • Dollar Store
      • Easy
      • Holidays Seasonal
  • Furniture
    • Chair
    • Desk
    • Dresser/Chest
    • Headboard | Bed Parts | Cribs
    • Kids Furniture
    • Table
    • Kids Furniture
My Repurposed Life® Rescue Re-imagine Repeat
menu icon
go to homepage
subscribe
search icon
Homepage link
  • About
  • Start Here
  • Project Index
  • Furniture
  • Subscribe
    • Email
    • Facebook
    • Instagram
    • Pinterest
    • RSS
    • Twitter
  • ×

    Home » DIY » Build It » Speech Bubbles with Chalkboard Paint (DIY)

    Speech Bubbles with Chalkboard Paint (DIY)

    Published by Gail | Published February 10, 2011 | Updated April 9, 2019
    As an Amazon Associate I earn from qualifying purchases.

    Pin
    Share
    Tweet

    Jamie told me that she would love to have some chalkboard speech bubbles for the photo booth at her wedding. I had a lot of scrap luan laying around the garage, and we had temps around 50 one day recently, so I got to work.


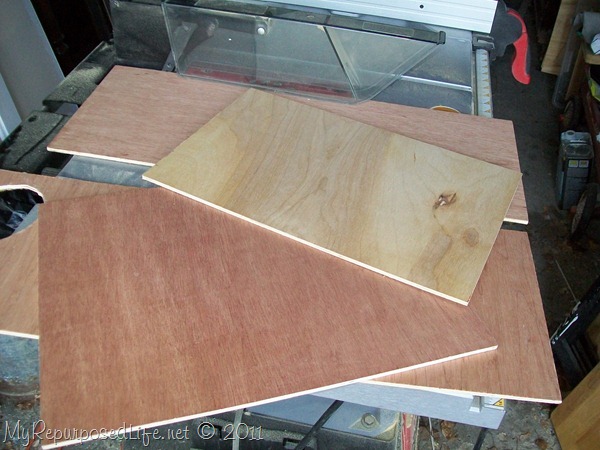
    Scrap plywood pieces

    thin pieces scrap plywood

    I gathered my scraps of wood, and cut them down to size. (all sizes for variety)

    *this post contains affiliate links,  read more here*

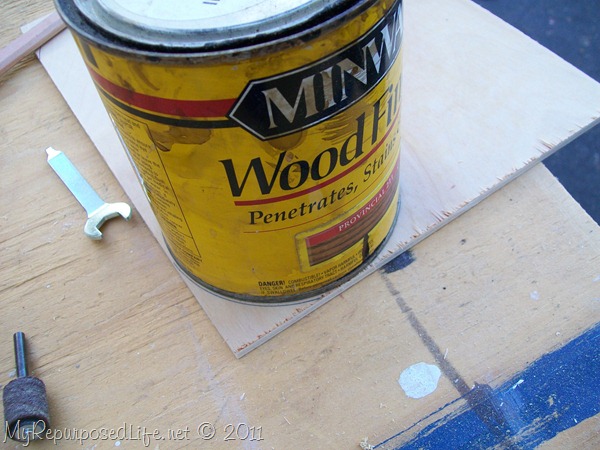
    The curve of a can rounds speech bubble corners

    use a can to make a curve  pattern on plywood

    After I cut the boards, I used a can to draw a line to round off the corners.

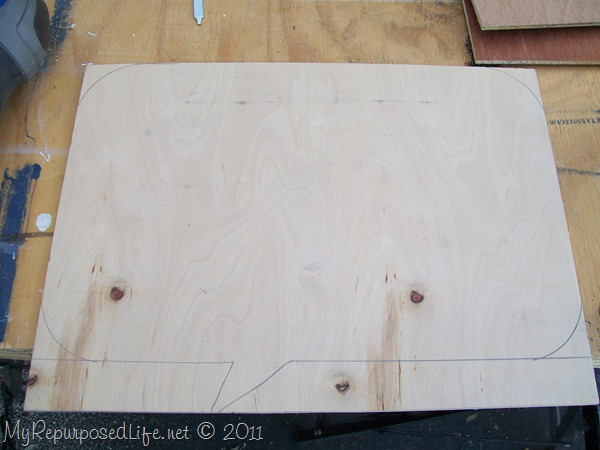
    chalkboard speech bubble pattern on plywood

    I free handed the little pointy thing. (I googled it, but seems like it might not have a technical name)

    Use a Dremel or Jigsaw

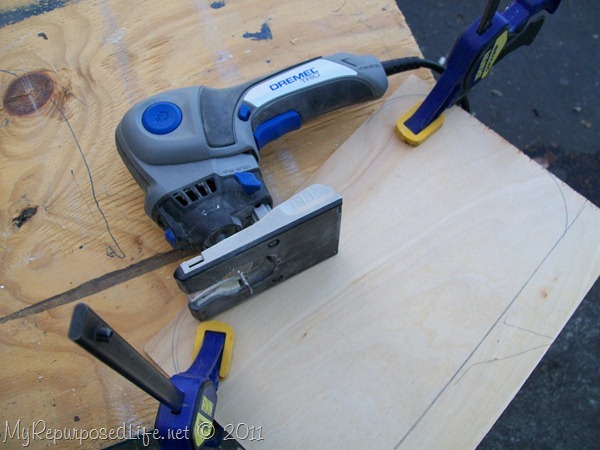
    cut wooden speech bubble out of plywood

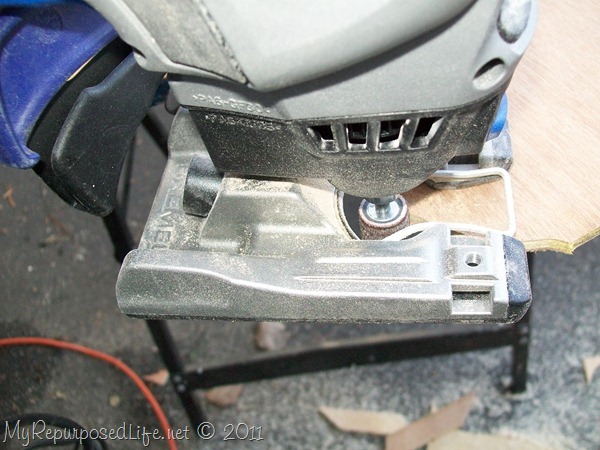
    My Dremel Trio was perfect for cutting around the curves. However, if you don't have this tool, you can use a jigsaw.

    Sand rough edges

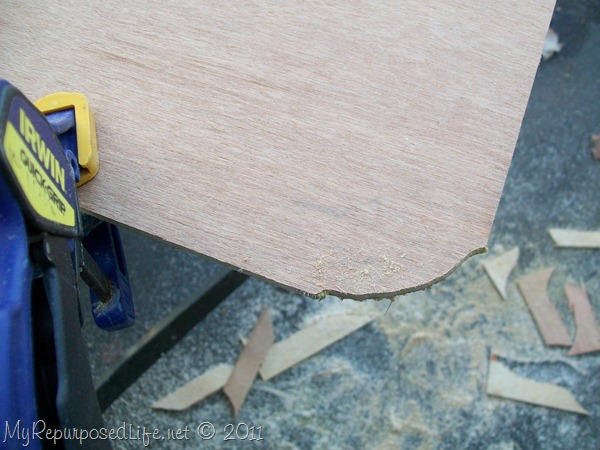
    round off corner of plywood speech bubble

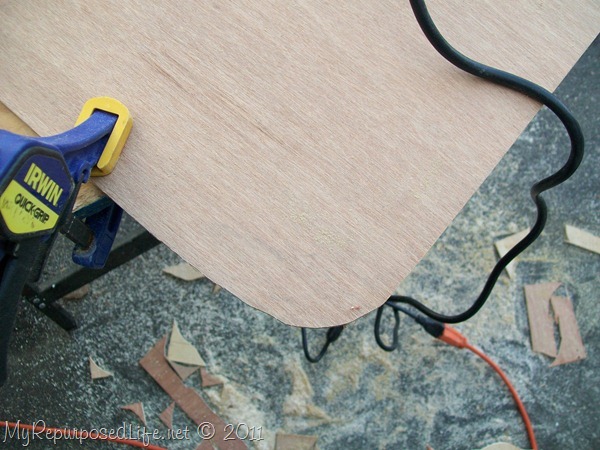
    Okay, so it may seem I need a little more practice with the Dremel Trio, but the drum sander makes it all good! Look at all those scraps on the driveway!

    dremel trio

    I really love the sanding feature of this little Dremel Trio! It works like a charm!

    quick clamp project

    see?

    Paint speech bubbles with chalkboard paint

    chalkboard speech bubble painted with chalkboard paint

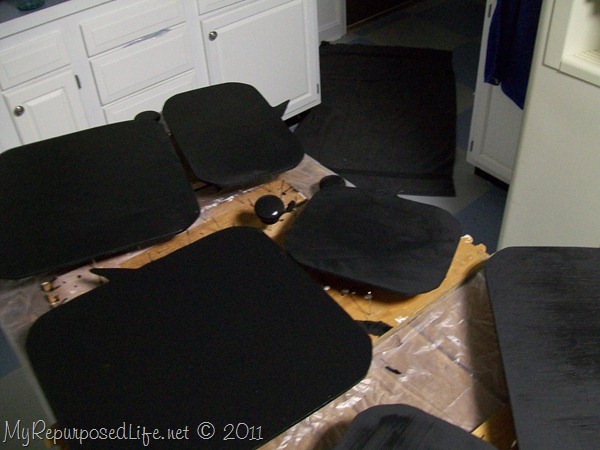
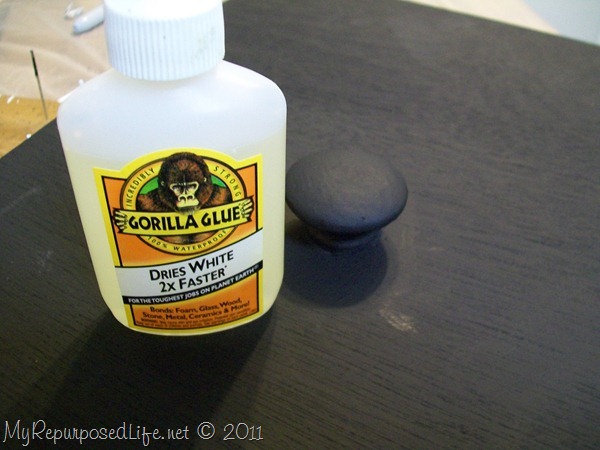
    I brought them in the house and painted the backs of them black, and the front of them with chalkboard paint. Do you see those knobs? I glued them on the back with--

    Add handles to back of chalkboard speech bubbles
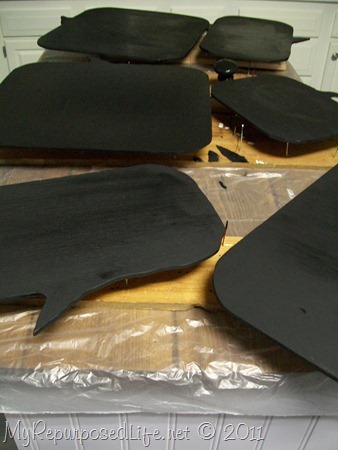
    add handles to back of chalkboard speech bubbles
    --Gorilla Glue (dries white two times faster) The knobs are for Andy and Jamie’s guests to hold onto as they use them for pictures.


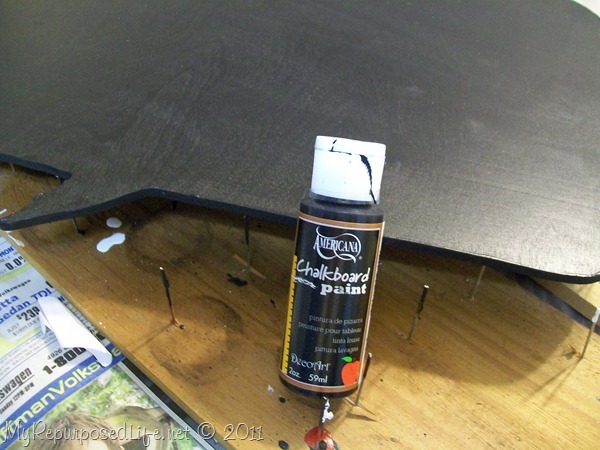
    craft paint chalkboard paint

    I used DecoArt (Americana) chalkboard paint.
    random shapes and sizes of chalkboard speech bubbles
    I made them all sizes and shapes. Some of them are oval, and some are more of a square shape.
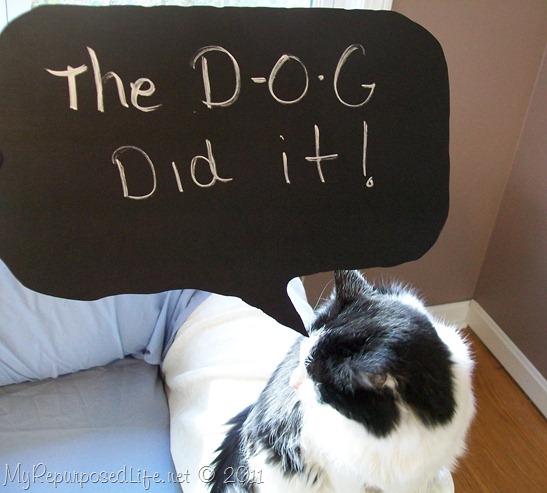
    chalkboard speech bubble
    This would be my Kitty.

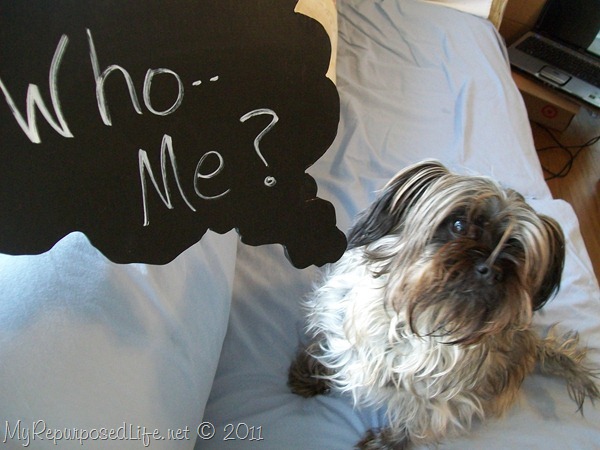
    chalkboard thought bubble

    I even made a couple of them into “thought” bubbles! (Louie)
    I ended up making 8 speech bubbles of different sizes and two thought bubbles. It was a lot of fun making these.
    Check out the video that appeared in the Dremel Newsletter (June 2011)

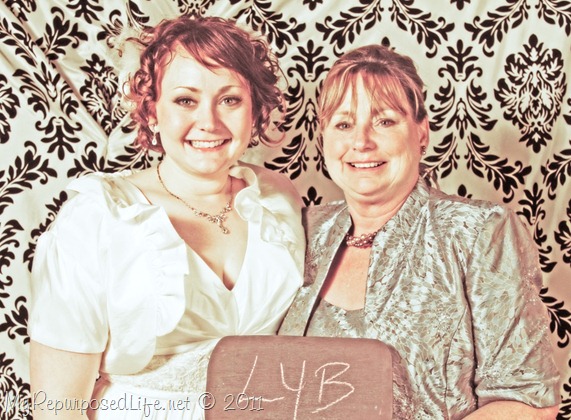
    chalkboard speech bubble wedding prop

    Photo credit Pearimagephotography
    Pin It
    Related Content:

    fun diy chalkboard speech bubbles

    DIY Chalkboard Speech Bubbles 

    How To Make Small Chalkboard Tags

    Liquid Chalk Stenciling for Chalkboards

    Small Chalkboard Tags using Counter Samples

    Dollar Store Chalkboard

    See other great chalkboard ideas here


    Print Friendly, PDF & Email
    Pin
    Share
    Tweet

    Related Content:

    • DIY Chalkboard Speech Bubbles
      DIY Chalkboard Speech Bubbles
    • chalkboard ideas
      chalkboard ideas
    • Portable Folding DIY Pallet Bar - great for weddings, tailgating and more!
      Portable Folding DIY Pallet Bar - great for weddings,…
    • Scrap Wood Christmas Decor
      Scrap Wood Christmas Decor
    • Pallet Projects plus Tips for Dismantling Pallets
      Pallet Projects plus Tips for Dismantling Pallets
    • Dollar Store Chalkboard | Easy Project
      Dollar Store Chalkboard | Easy Project

    Reader Interactions

    Comments

      See comments Cancel reply

      Your email address will not be published. Required fields are marked *

      This site uses Akismet to reduce spam. Learn how your comment data is processed.

    1. Carolyn Windley

      July 05, 2011 at 3:31 pm

      Gail girl,
      I love that you are brave enough to post a live tutorial and even more that you posted your bloopers!

      Great idea and project! ANd i appreciate you very much.
      Carolyn

      Reply
    2. Katie

      April 18, 2011 at 2:08 am

      Gail these are so flipping cute! I can't wait to see the pictures of them from the wedding! Isn't it coming up soon?! Hope it all goes well!

      Reply
    3. Laura Ingalls Gunn

      February 14, 2011 at 3:36 pm

      Your metamorphosis is absolutely fabulous. I so hope the dogs enjoy every bit of it.

      Have a very Happy Valentine's Day!

      Reply
    4. Kim @ Savvy Southern Style

      February 14, 2011 at 2:28 am

      Gail, those are so cute an such fun. Thanks for dropping by.

      Reply
    5. michelle

      February 14, 2011 at 1:45 am

      OHGOSH! That is the cutest thing ever! I love this idea, how clever and creative and just FUN!!!

      Reply
    6. ⚜ ↁℯℬℬᴵℰ⚜

      February 14, 2011 at 1:44 am

      You are amazing!!~

      Reply
    7. too Blessed to Stress

      February 12, 2011 at 9:27 am

      Love the idea for speech/thought bubbles - but taking them to a wedding? Now that is just fantastic!!!! What a great idea. I'm sure everyone will love them 🙂

      ~ Emily N. from "too Blessed to Stress"

      Reply
    8. Megandvd@Beauty in the Attempt

      February 12, 2011 at 2:43 am

      Ummm....you already know I want one. I think these are SO FABULOUS. WHat a great thing for the wedding too....so...so...so. CUTE! I love them. {but...you already know this}

      Cheers~
      e

      Reply
    9. Sew DoggyStyle

      February 12, 2011 at 2:16 am

      Nooooo, I think the cat did it!! Lol, love it!!

      XOXOXO,
      Erika and Sebastian
      http://www.sewdoggystyle.blogspot.com

      Reply
    10. Yanet @ 3 Sun Kissed Boys

      February 12, 2011 at 1:47 am

      These are so cute! How fun to do a little photo shoot with these.

      Reply
    11. Amy at Ameroonie Designs

      February 12, 2011 at 1:38 am

      I love this idea. What fun pictures those will be! Great job!
      xoxo,
      Amy

      Reply
    12. Stephanie

      February 11, 2011 at 5:29 am

      Oh Gail you out did your self with those! They are even more fun with your "examples" with your pets. Makes me want to have a party just to use them. Jamie and Andy are gonna love those!

      Reply
    13. Debra@Dejarenew.blogspot.com

      February 11, 2011 at 3:39 am

      lol! I love those! What a cute idea. You should come up at my Friday Linky Love party. Awesomeness.
      Take care.
      Deb
      http://dejarenew.blogspot.com

      Reply
    14. Kim

      February 11, 2011 at 12:39 am

      How fun is that? What a great project... you must be jumping at the chance of spring coming fast... I am in San Diego and shall throw some sunshine and hot weather your way.

      -Kim and Mr. gnome

      Reply
    15. Jenni

      February 10, 2011 at 10:55 pm

      What a great idea! Those are super cute. I think I have Dremel jealousy.

      Reply
    16. Anita @ GoingALittleCoastal

      February 10, 2011 at 10:46 pm

      This will be such fun at the wedding! How are the plans coming along? I'm sure Jamie is getting excited.

      Reply
    17. Holly

      February 10, 2011 at 10:10 pm

      So darn cute...love the idea of using them for the photo booth. I would love to show this off on my wedding blog!

      Reply
    18. Ellie

      February 10, 2011 at 8:49 pm

      So very cute! I'd love to see pictures of them post-wedding. 🙂

      Reply
    19. Anonymous

      February 11, 2011 at 12:47 am

      This post was copied by The Design Confidential without giving you credit:
      http://www.thedesignconfidential.com/2011/02/express-yourself-with-diy-chalkboard-speech-bubbles/#comment-3886

      Reply
    20. Midwest Cottage and Finds!

      February 10, 2011 at 7:20 pm

      the photo booth was a HUGE hit at my sons wedding--and the speech bubbles are the BEST idea ever!! Good job--you will treasure the pictures that come from the booth forever!!
      chris

      Reply
    21. the cape on the corner

      February 10, 2011 at 7:11 pm

      i love this! it will be so cute and fun in wedding photos-such a great idea!

      Reply
    22. Kate@TwentySixToLife

      February 10, 2011 at 6:29 pm

      What a fun idea!

      Reply
    23. Corn in my Coffee-Pot

      February 10, 2011 at 6:07 pm

      These would make a great gift for the photo hound of the family... the budding photographer, I think they'll be so funny at the wedding. OR! any get together really.

      Fun! project!
      Pat

      Reply
    24. Cassie @ Primitive & Proper

      February 10, 2011 at 5:58 pm

      way too cute, gail!!! i love "the dog did it!" hilarious! jamie is going to be so happy with these.

      Reply
    25. Cassie @ Primitive & Proper

      February 10, 2011 at 5:58 pm

      way too cute, gail!!! i love "the dog did it!" hilarious! jamie is going to be so happy with these.

      Reply
    26. Anne

      February 10, 2011 at 5:57 pm

      Love it!

      Reply
    27. Suzanne@Meridian Road

      February 10, 2011 at 5:33 pm

      Those are so fun and so original! Jamie is going to have some great photos to enjoy!

      Reply
    28. Emily [On the V Side]

      February 10, 2011 at 4:45 pm

      What a FUN idea!

      Love love love!

      Reply
    29. Emily [On the V Side]

      February 10, 2011 at 4:45 pm

      What a FUN idea!

      Love love love!

      Reply
    30. shannon i olson

      February 10, 2011 at 4:30 pm

      these are fantastic! I sure wish winter was gone here but I have not been near as creative as you!

      Reply
    31. allenaim photography and design

      February 10, 2011 at 3:50 pm

      ...a little shout out to you here... http://anestforallseasons.blogspot.com/2011/02/wanna-sit-at-lunchtable.html

      Reply
    32. allenaim photography and design

      February 10, 2011 at 2:27 pm

      I need to learn to use one of those saws PRONTO...I love this idea so much!

      Reply
    33. Judy

      February 10, 2011 at 2:04 pm

      Those are too cute. What a great idea.

      Reply
    34. June@I will craft

      February 10, 2011 at 2:00 pm

      What a great idea. Very fun for a wedding or just about any time!

      Reply
    35. Jester

      February 10, 2011 at 2:00 pm

      What a cool idea!! THinking I need to get myself that Trio thing too!!

      Reply
    36. Something Nice and Pretty

      February 10, 2011 at 1:48 pm

      Really neat and 50 degree weather? What I wouldn't give to have one day of that, hopefully soon, right now it is 5 here in Pa.

      Rondell

      Reply
    37. Carmen at Primcats

      February 10, 2011 at 1:39 pm

      Adorable!!!!

      Carmen and the Primcats

      Reply
    38. MMB Creations

      February 10, 2011 at 1:20 pm

      I love these!

      Reply
    39. Laurel

      February 10, 2011 at 12:54 pm

      Too fun...great idea for a wedding! How creative 🙂 Laurel@chippingwithcharm

      Reply
    40. I Play Outside The Box

      February 10, 2011 at 12:49 pm

      The wedding guest are really going to have fun with these!! Hope to see pictures too. Cute idea!

      Reply
    41. Sharon

      February 10, 2011 at 12:26 pm

      I am sooo ready for spring!! I have alot of projects waiting!! I would love to have known about these when my daughters were married 3 years ago....7 weeks apart! We could have had ALOT of fun with them!!

      Reply
    42. SSH

      February 10, 2011 at 12:24 pm

      Now I have seen it all, I needed one of those signs over my head when I saw the title of your post? I had no idea what you were talking about but I knew it was going to be cool and interesting... I was right... Amazing!

      NOW I see a new tool I have got to have, the trio gotta' love Dremel and your blog.

      Reply
    43. Granny

      February 10, 2011 at 11:48 am

      Those are great. Bet some would sell well at a craft fair also. Love that picture of Louie. He's a cutie.

      Reply
    44. Proper Prim

      February 10, 2011 at 11:04 am

      Great idea Gail... love those. I am sure they are going to be a big hit.

      Have a great day...

      Hugs, Deb

      Reply

    Primary Sidebar

    Hi, there! I’m Gail Wilson, the author and mastermind behind My Repurposed Life. I’m obsessed with finding potential in unexpected places and believe that with a little hard work and imagination, any old thing can be made useful again—myself included! I hope you’ll enjoy the journey and pick up a few tools along the way… literally!

    More about me →

    Join Our Mailing List

    ​

      Click the topics you're interested in below:

      Subscribing above means you agree to our Privacy Policy​

      Footer

      ↑ back to top

      SEEN ON

      Might I Suggest

      • Start Here
      • Furniture Makeovers

      Newsletter

      • Sign Up! for emails and updates

      About

      • Gail's Favorites on Amazon
      • About

      As an Amazon Associate I earn from qualifying purchases.

      Copyright © 2023 My Repurposed Life · Privacy Policy · Disclosure