Today I am sharing fun DIY Corner Planter. I guess technically I used a corner cabinet door, but I decided to shorten it. 🙂
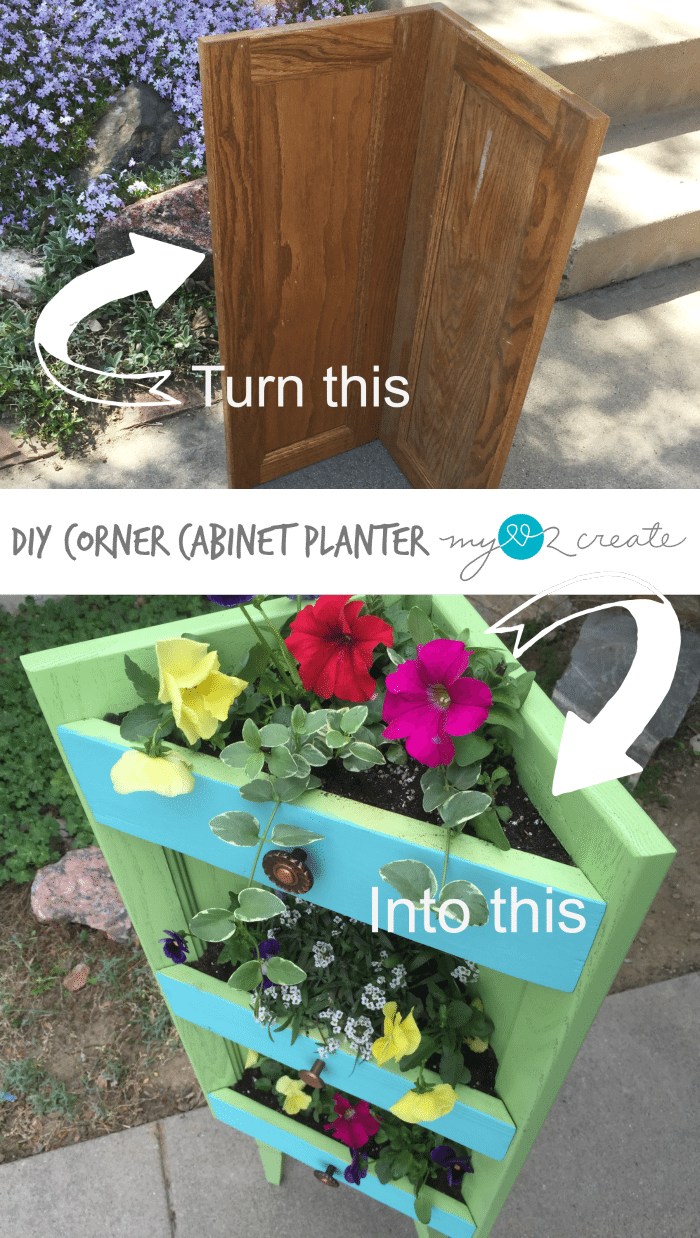

Last year I made Old Drawers into Porch Planters, which I shared on My Repurposed Life as one of my contributor posts. They were such a pretty addition to my porch I decided to add another planer, but a corner one.
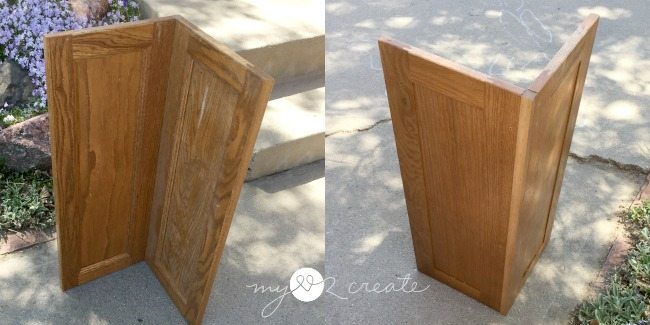
It all started with some old kitchen cabinet doors my friend gave me...man I hit the jackpot on those, they were free and I have a TON! Yes, a happy dance was necessary! I also got this lone corner cabinet door, which sparked my interest.
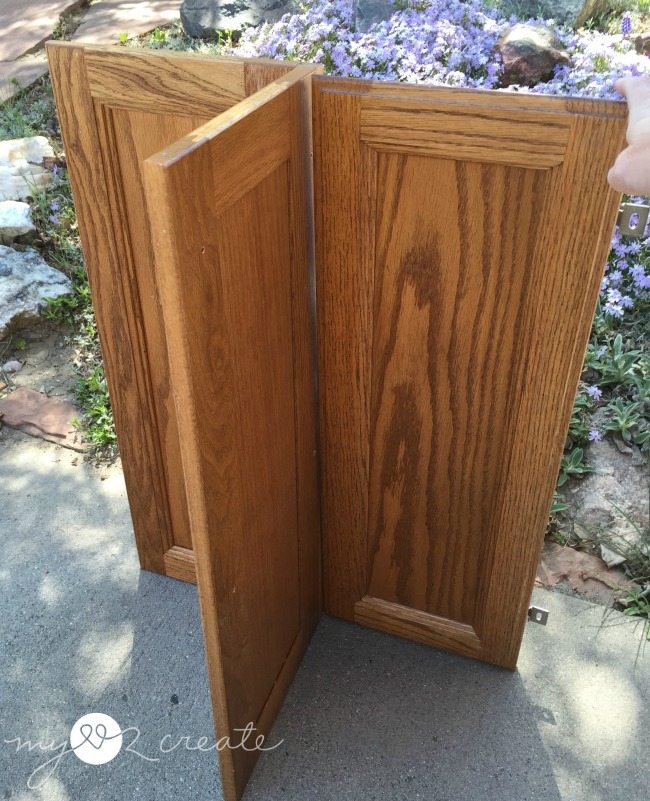
My first idea was to add another cabinet door to the other side, and make a table with shelves. I still like this idea. But the corner on my porch won out and I choose to make a corner planter instead.
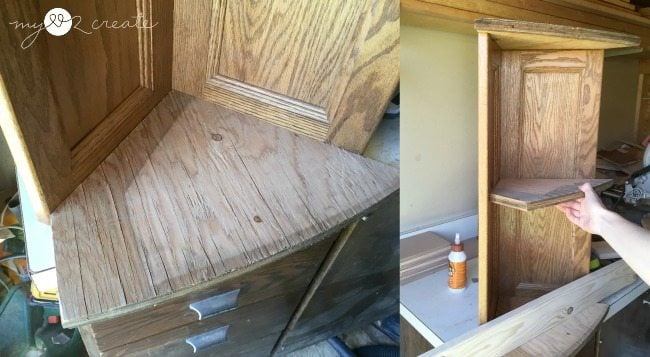
I began by pulling out some left over scraps from my Drawers and drawer slides, Master closet makeover. There were three that were about the perfect size to make some shelves! You can also see I was trying out a scrap 1x4 for a faux drawer front too. I placed the wood in the corner cabinet and drew a line flush with the front. This way I knew where to cut.
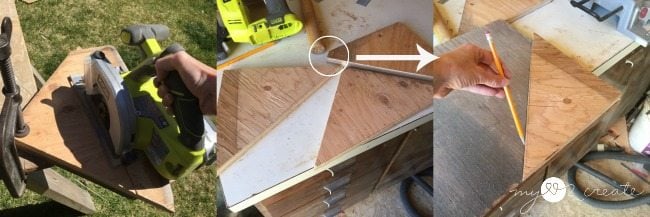
I cut out the triangle shelves with my circular saw. In the middle photo you can see I circled where one shelf was too short on one end. So I got a different piece of scrap ¾'' plywood and traced and cut out another triangle shelf. Since the wood was pretty rough I gave them a good sanding.
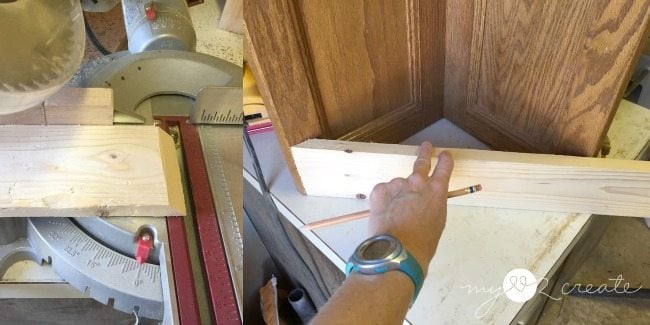
With my scraps of 1x4's I cut one end at a 45 degree angle. Then I measured it up against the corner cabinet doors and marked and cut the other end. It took me several tries to get it just right, when I don't have written measurements, I always cut it a little too big, just in case, and then I can trim off the end to the right size. Better safe than sorry!
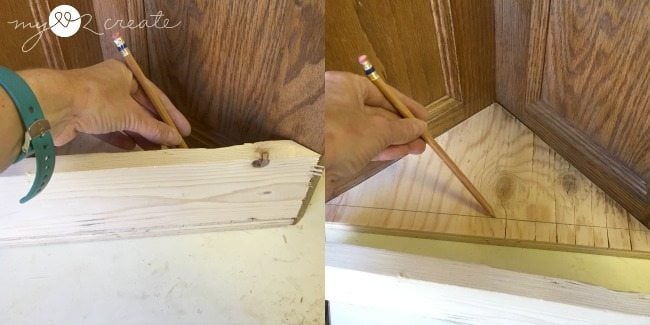
I put the shelves and faux drawer fronts into the cabinet door to test them out, and realized that I would have the plywood edges showing. Since I didn't want that, I needed to cut the triangle shelves smaller. I placed the 1x4 on the shelf and drew a line of where to cut, then I cut all three shelves with my circular saw.
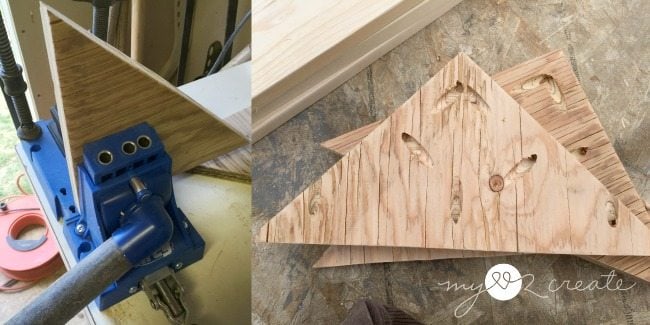
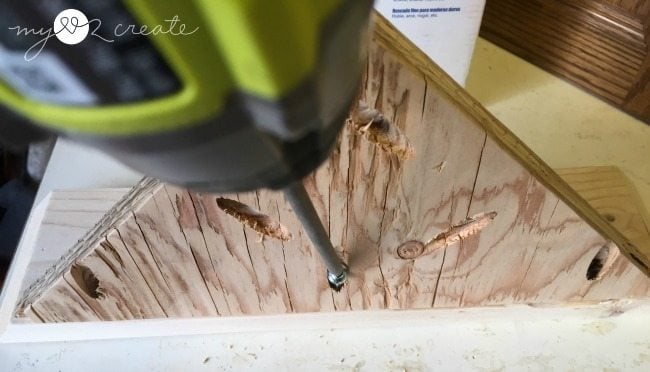
For attaching the shelves to the cabinet doors I drilled pocket holes with my K5 Kreg Jig into the triangles.
Need more details on using a Kreg Jig? See my articleHow to use a Kreg Jig Pocket Hole System

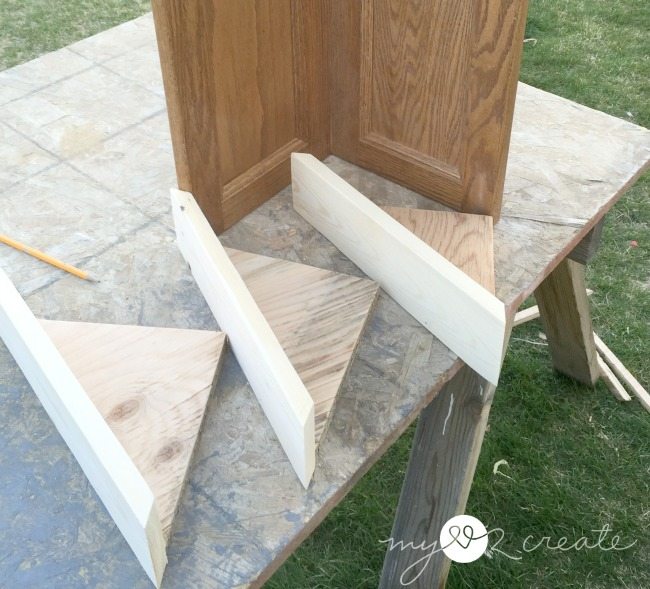
I built all three shelves using the above method. I first added glue to the front edge of the shelf, and then set it between the cabinet doors. Then I placed the 1x4 front so it was flush to the cabinet doors on both sides, and nailed them together.
By doing this I knew my faux drawer fronts (1x4) would be perfectly placed, and I wouldn't have to mark and measure to drill my pocket holes. Sa-weet! It worked really well and I just zipped in the pocket hole screws.
Here they are all ready to go! The next thing I did was clean and then spray paint the corner cabinet doors.You may have noticed that I used the same green color as my Old drawers into porch planters. I forgot to take a photo of that process, I also painted the shelves.
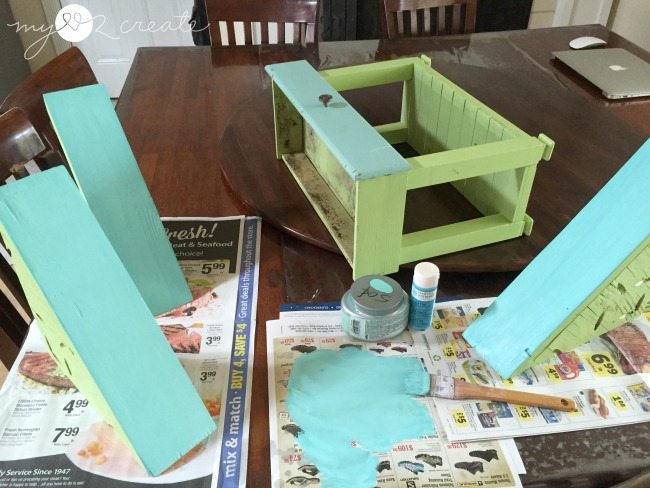
Oh how I wanted to try and match the faux drawer fronts to the old drawer fronts and did a decent job, but not a perfect one, good enough though. 🙂
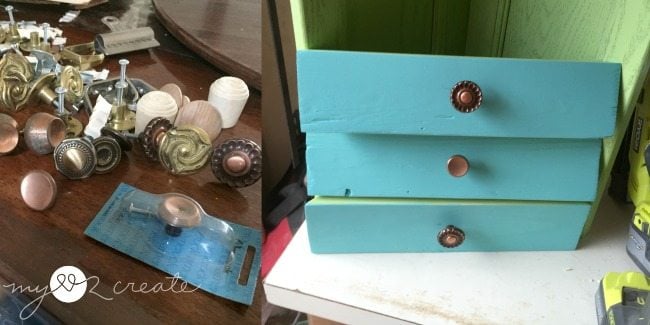
I had toyed with the idea of adding chalkboard labels to the front, which would have been cute, because I Love Chalkboards, but decided to do knobs instead. But, I had forgotten about a stash I had scored from an estate sale a few years back. I only found two matching ones that I liked so I used a brass one that matched in color...sort of...but it worked.
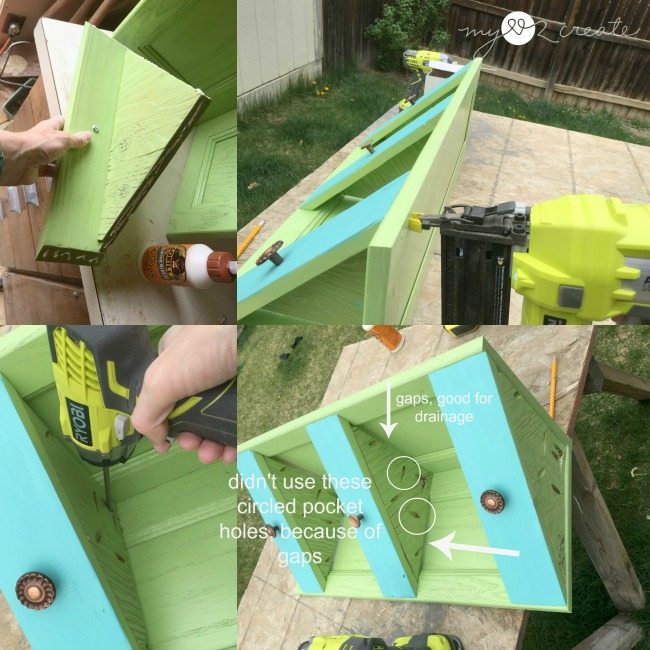
With the knobs attached I was ready to build! I used gorilla wood glue, and my nail gun to secure the bottom shelf. For the middle and top shelves I nailed into the front sides first and then the back. Then I added the pocket hole screws to really give the shelves stability. For the bottom shelf I was able to use all my pocket holes, the top two shelves had the gaps so I didn't use the middle pocket holes. The gaps were perfect for drainage.

Since the bottom shelf didn't have gaps, I drilled some holes for drainage to prevent rot.
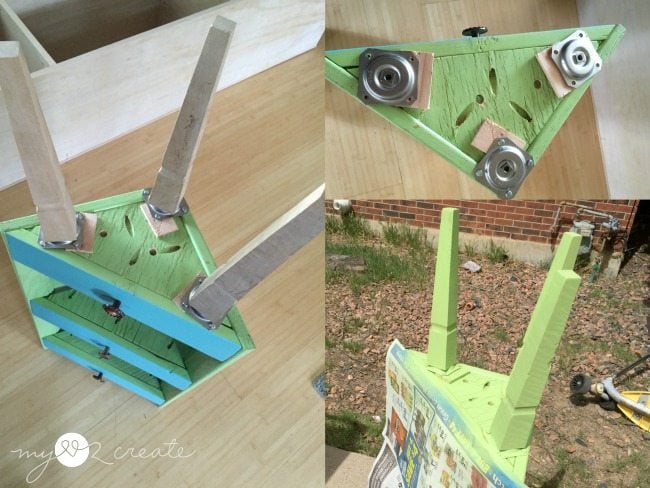
My corner planter would be kind of hidden by furniture on my porch so I gave it feet to raise it up. I happened to have some legs I had gotten long ago for free. In this type of leg, I had a set of four and a set of three, so it was perfect to use my set of three.
You can buy mounting plates at Home Depot, I got these ones at the Restore a while back for $1, which is way cheaper! Because I wanted the legs to angle out a little bit, I decided to use lath scraps under the inside edge of each mount, to give the legs the tilt they needed. I made sure to pre drill holes before I screwed the mounts on. It worked perfect! I gave them a spray of green to match, and I was done!
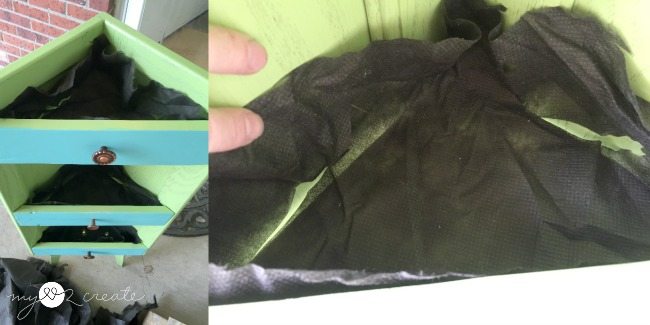
It's a good idea to line planters to help protect the wood. I am a use what you have kind of gal, so I used the material my kids had pulled off of the underside of a twin box spring. It's important to cut some holes for drainage. Finally I was ready to plant.
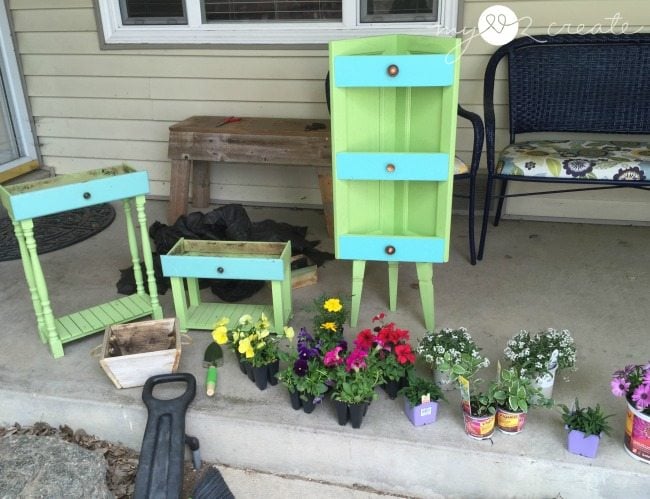
Here is a shot before I added the liners and the flowers.
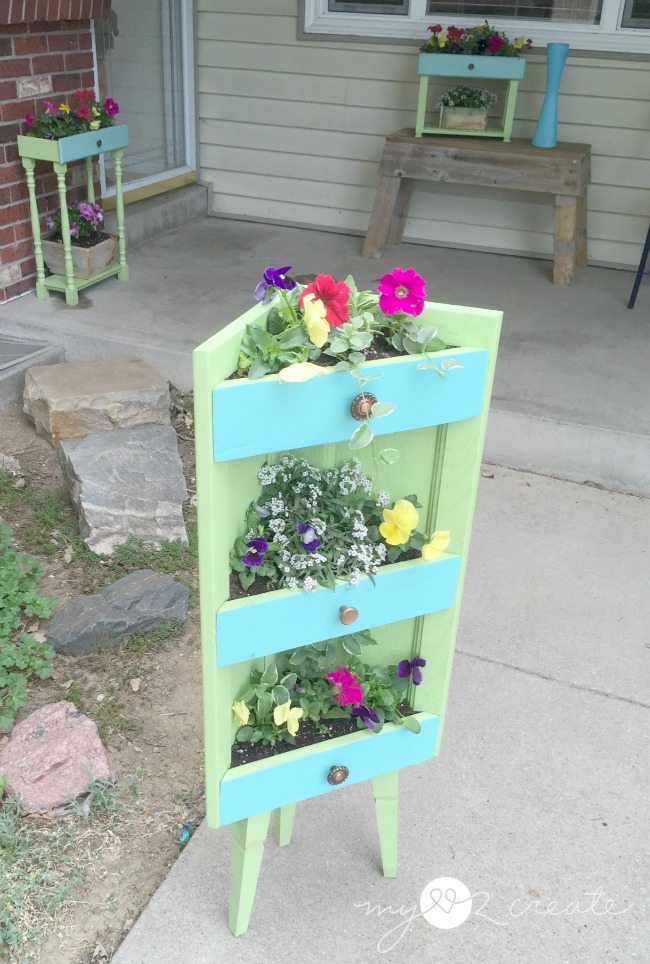
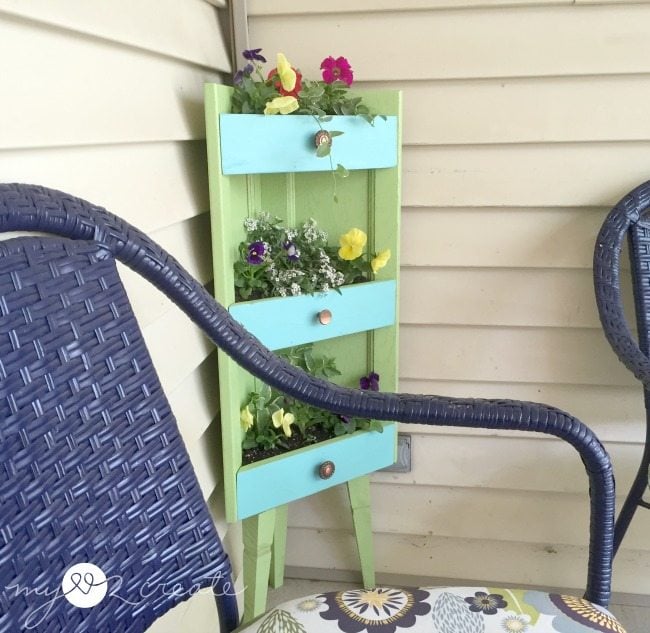
I love all the bright pops of color, this is adding to my porch!
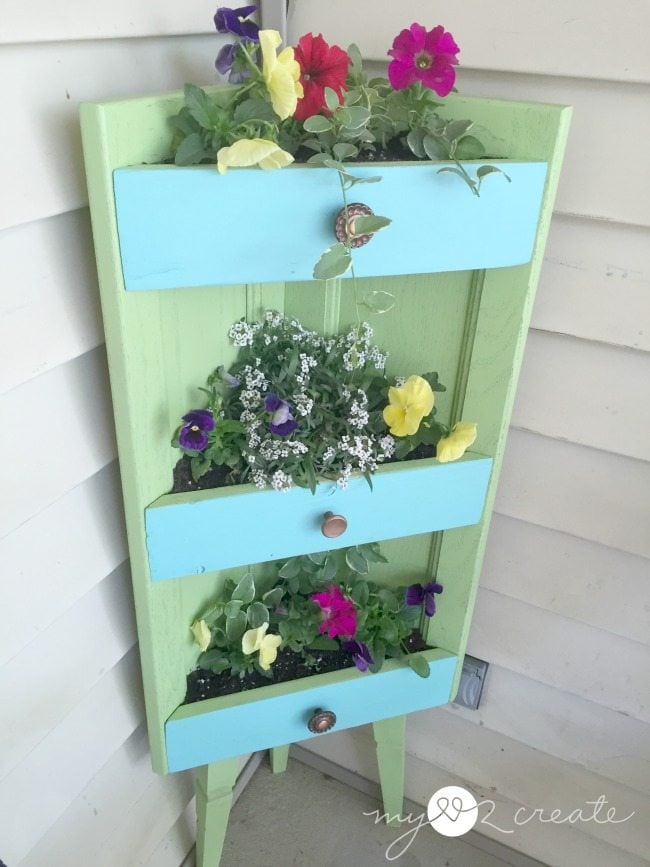
My planter fits in the corner so nicely, and I am loving the faux drawers!
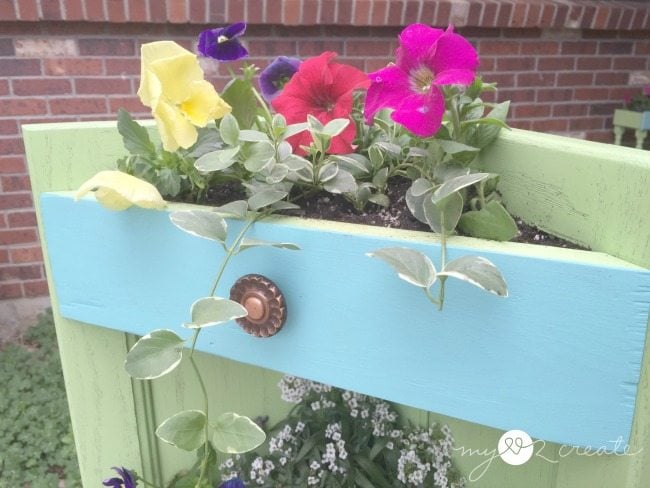
The knobs are pretty cute, can you believe I got that whole box for $1? Estate sales rock.
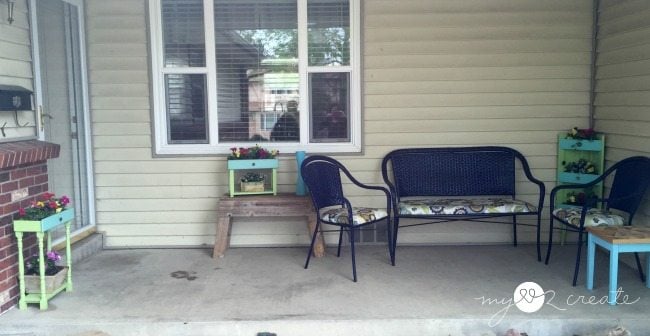
Here is a shot of my porch, complete with wet spots from when I was planting and watering, and I also forgot to replace my door mat, hee hee. You can spot my Wicker Furniture Makeover, my Old Fence wood bench, and my Pallet top Table too, I really think the corner cabinet planter ties it all together, it was so bare before!
So there you have it! Have you seen any corner cabinet doors like this? If not you could easily just put two cabinet doors together to make one.
The planter is very sturdy on it's funky legs. I like the character they add, not to mention the height. What do you think?
Hugs!
Mindi
Genna
So cute! What color blue did you use?
Tracy@www.bluridgevintage.com
Wow!! What a great Spring porch idea. This really brings out Spring front and center with that POP of color. Love this idea and to make it out of free pieces and scrap, even better. Great job Mindi
phyllis panza
Hi Gail, loved all your little planters. they are so cute. I need to get one of those kerig jigs. was thinking about it last year but than winter came and I had no projects. You do real good; love to see all your things.
take care Gail. hope to see more ideas soon.
Phyllis
gail@myrepurposedlife.com
Thank you Phyllis, but these planters are actually from Mindi, a friend of mine. 🙂
gail
Lisa W.
OH MY! These are so cute!
gail
Mindi
I love your newest planters. They are the perfect compliment to your drawer planters. The addition of the knobs is so much better than making chalkboards. Even though I love everything chalkboard. 🙂
I hope it warms up soon so you can put them on your porch for the duration of the spring, summer, fall season. 🙂
gail
Sheila
This is so cute, I just love it! You are so creative. You make me want to go home and start planting but still too soon in MI!
Sharon @ Elizabeth & Co.
Oh my goodness, how totally cute! I love the pops of color for your porch! And the knobs are a great addition too! You'll be enjoying your flowers all summer long!
Patricia
those are so stinking cute!
Gilmer Gal
Love these planters. They would look so great on my screened porch. I need to do something to change it up, and these would work great. Thanks for more inspiration!
Julia - Vintage with Laces
Great project, Mindi! I love the idea and the colors you chose!
Pam
That is so cute. I love the colors, I love the design. Nice job.
cassie
such a great way to fill up a corner! love it, gail!