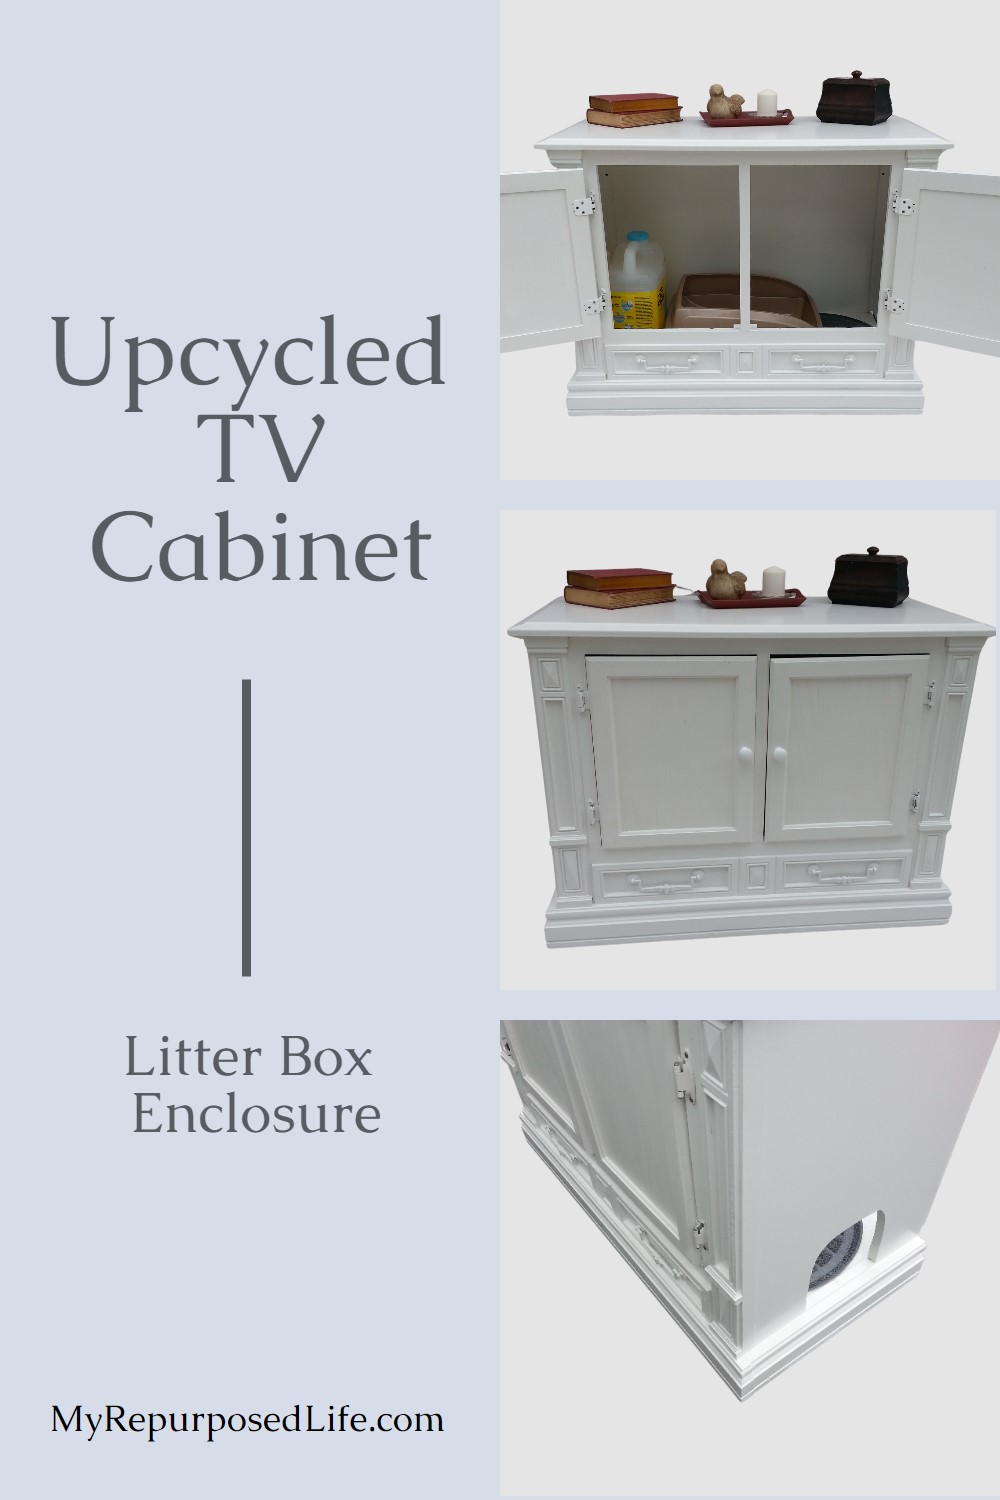
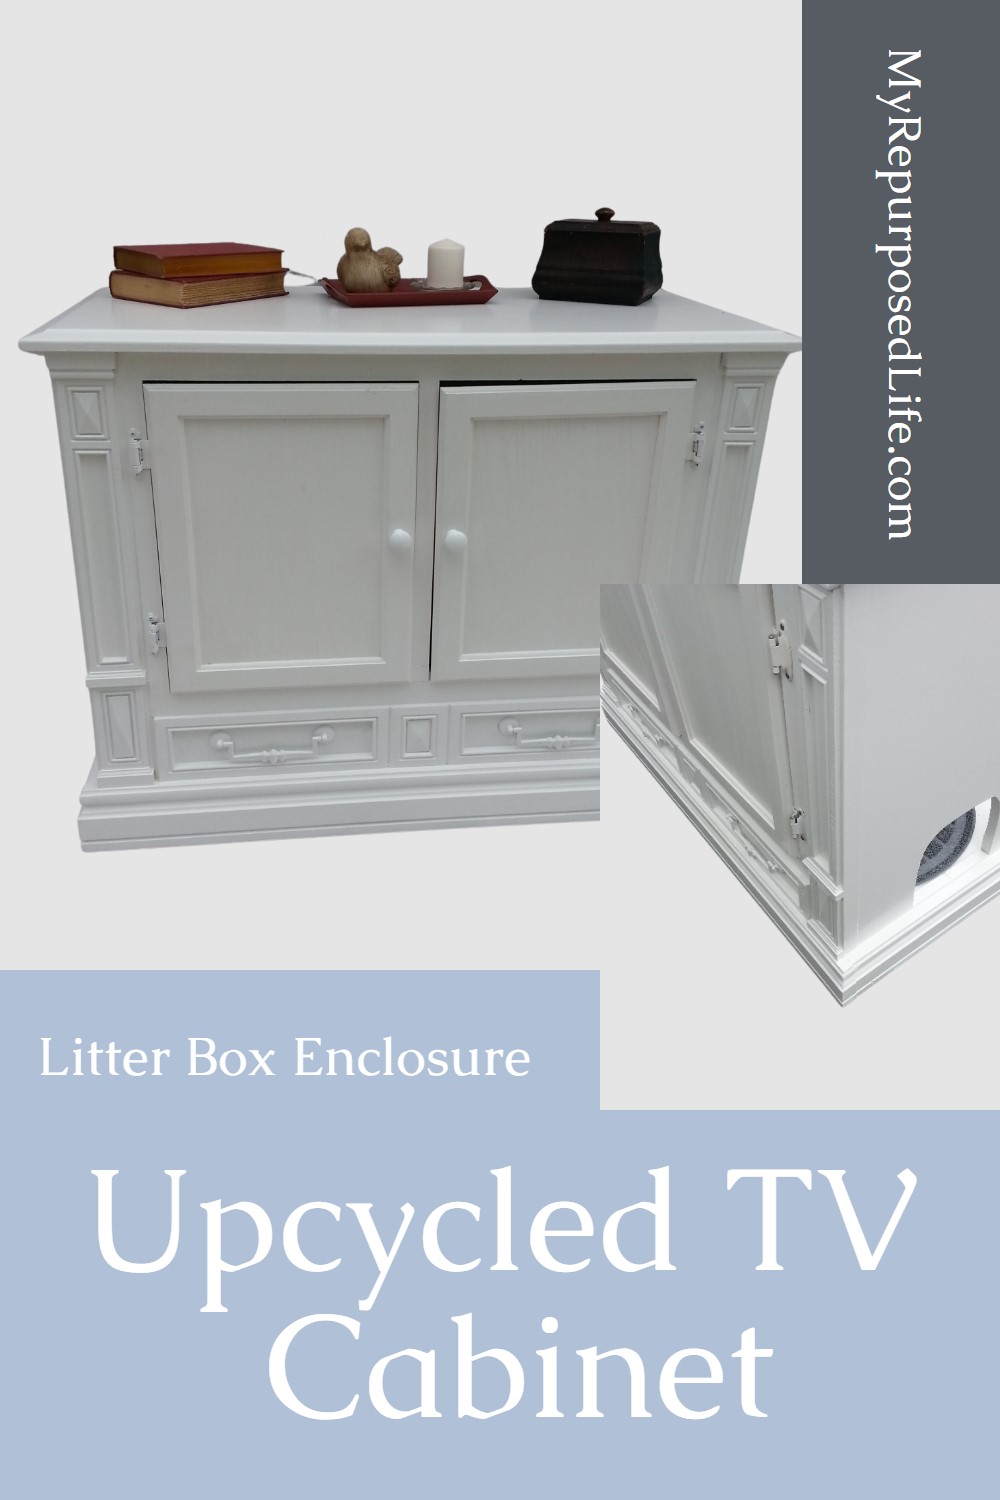
Creative Cat Haven: DIY Litter Box Enclosure
This is a fun and easy repurposed furniture project for your cat. I'll show you how to hide your cat litter box in a cabinet, making your own cat house. Your new hidden litter box will give your kitty the privacy they need. In addition, the litter box will be hidden away. Bonus! If you have dogs in your house, you can make the top of this cabinet a feeding station for your cats, keeping their food away from the canines.
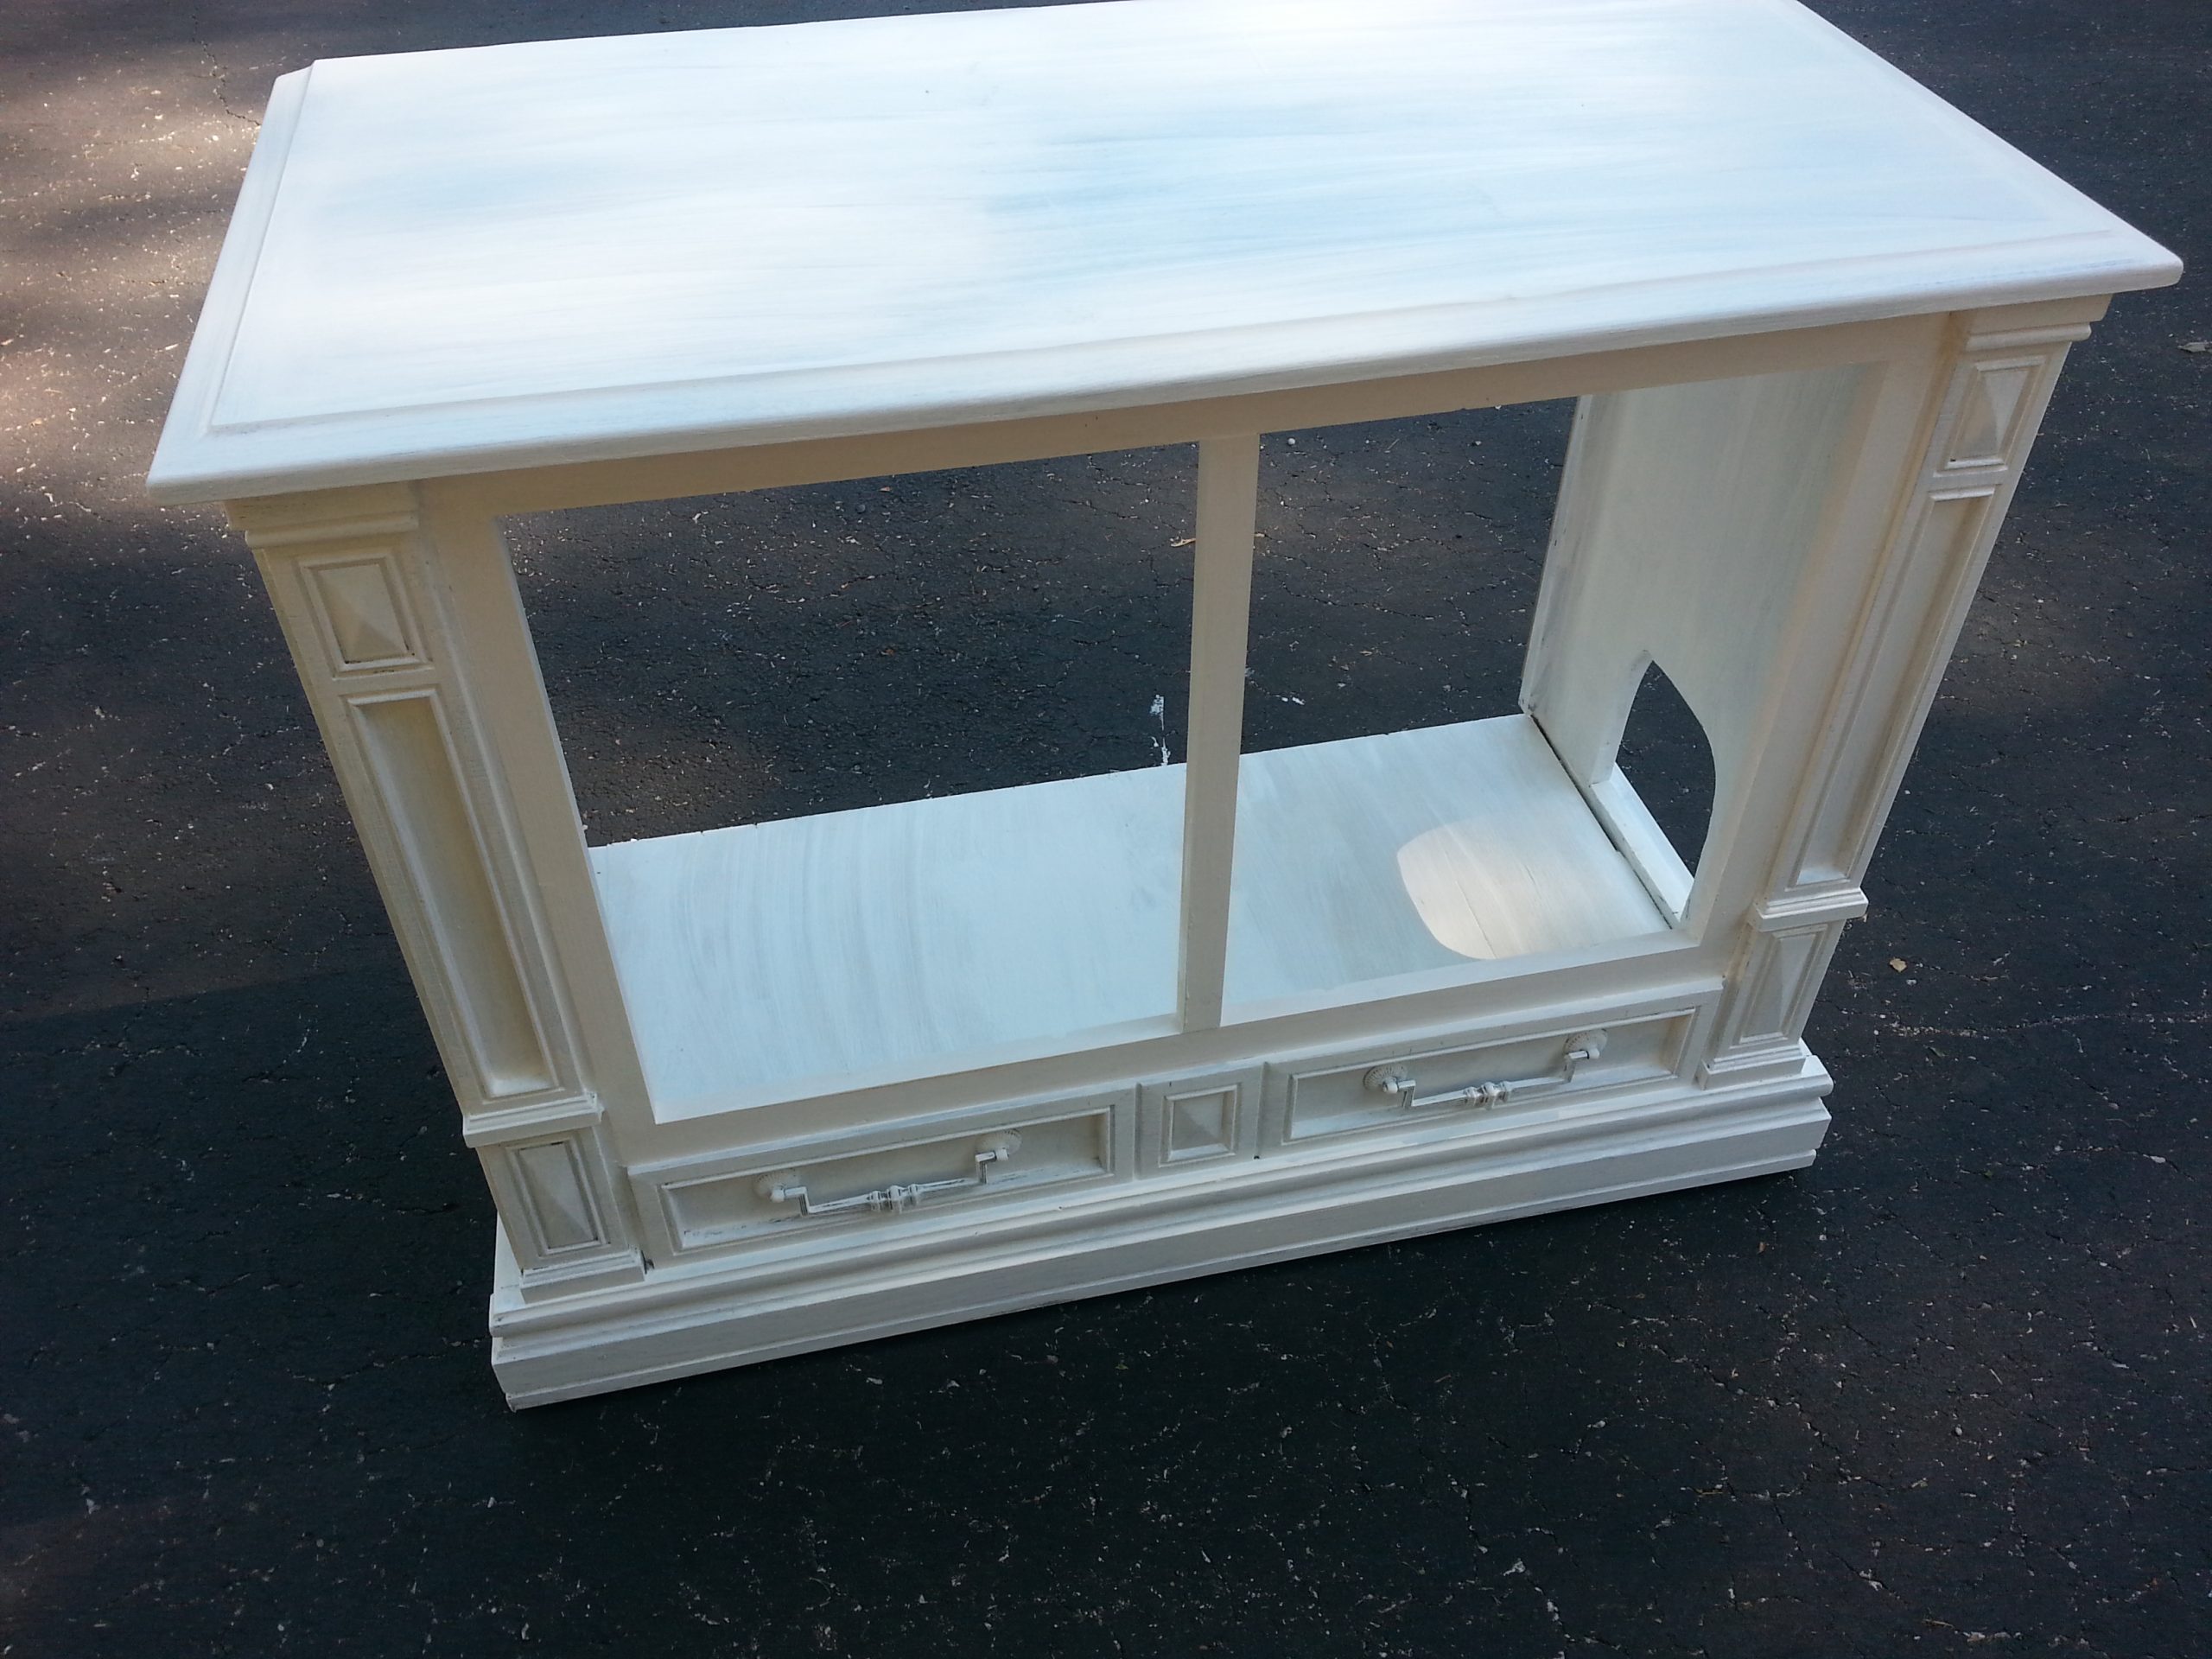
How to Upcycle an Old Console TV
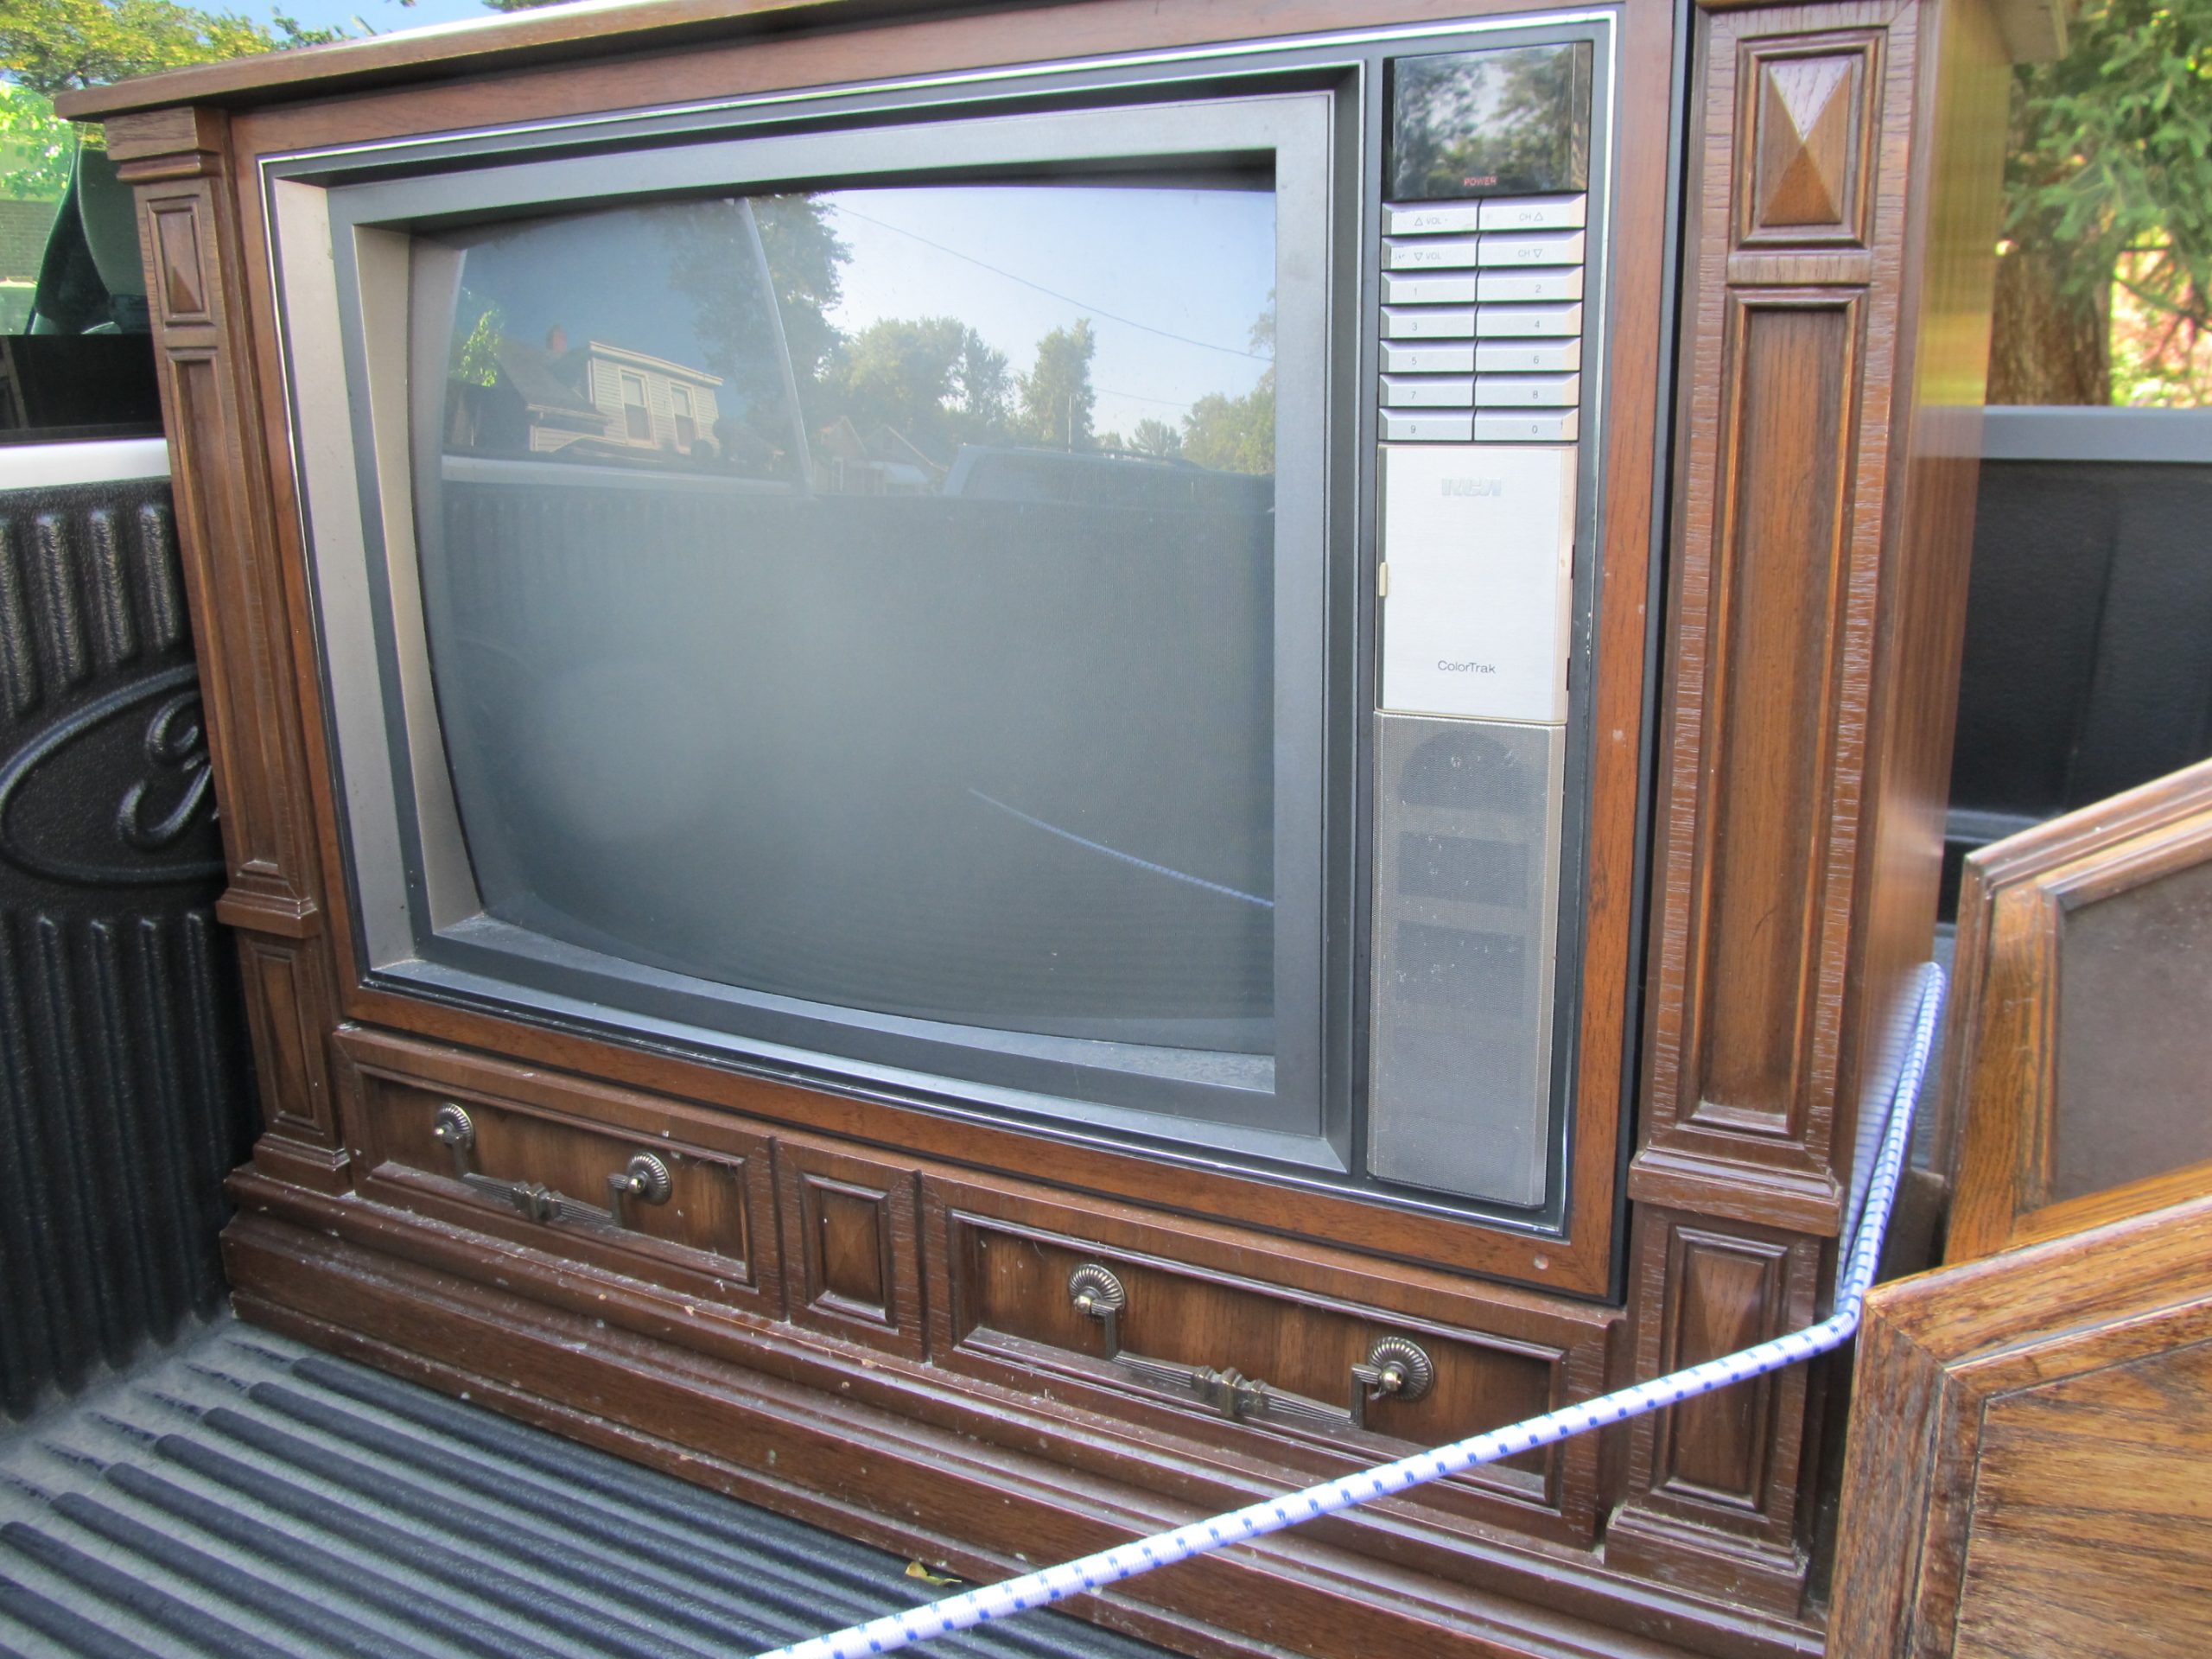
Last August, I got this old console t.v. from the Habitat for Humanity ReStore in Hardin County.
After gutting it, I gave it a coat of primer and many other pieces. Then it sat all winter and spring waiting for its makeover.
Designing a DIY Litter Box Enclosure
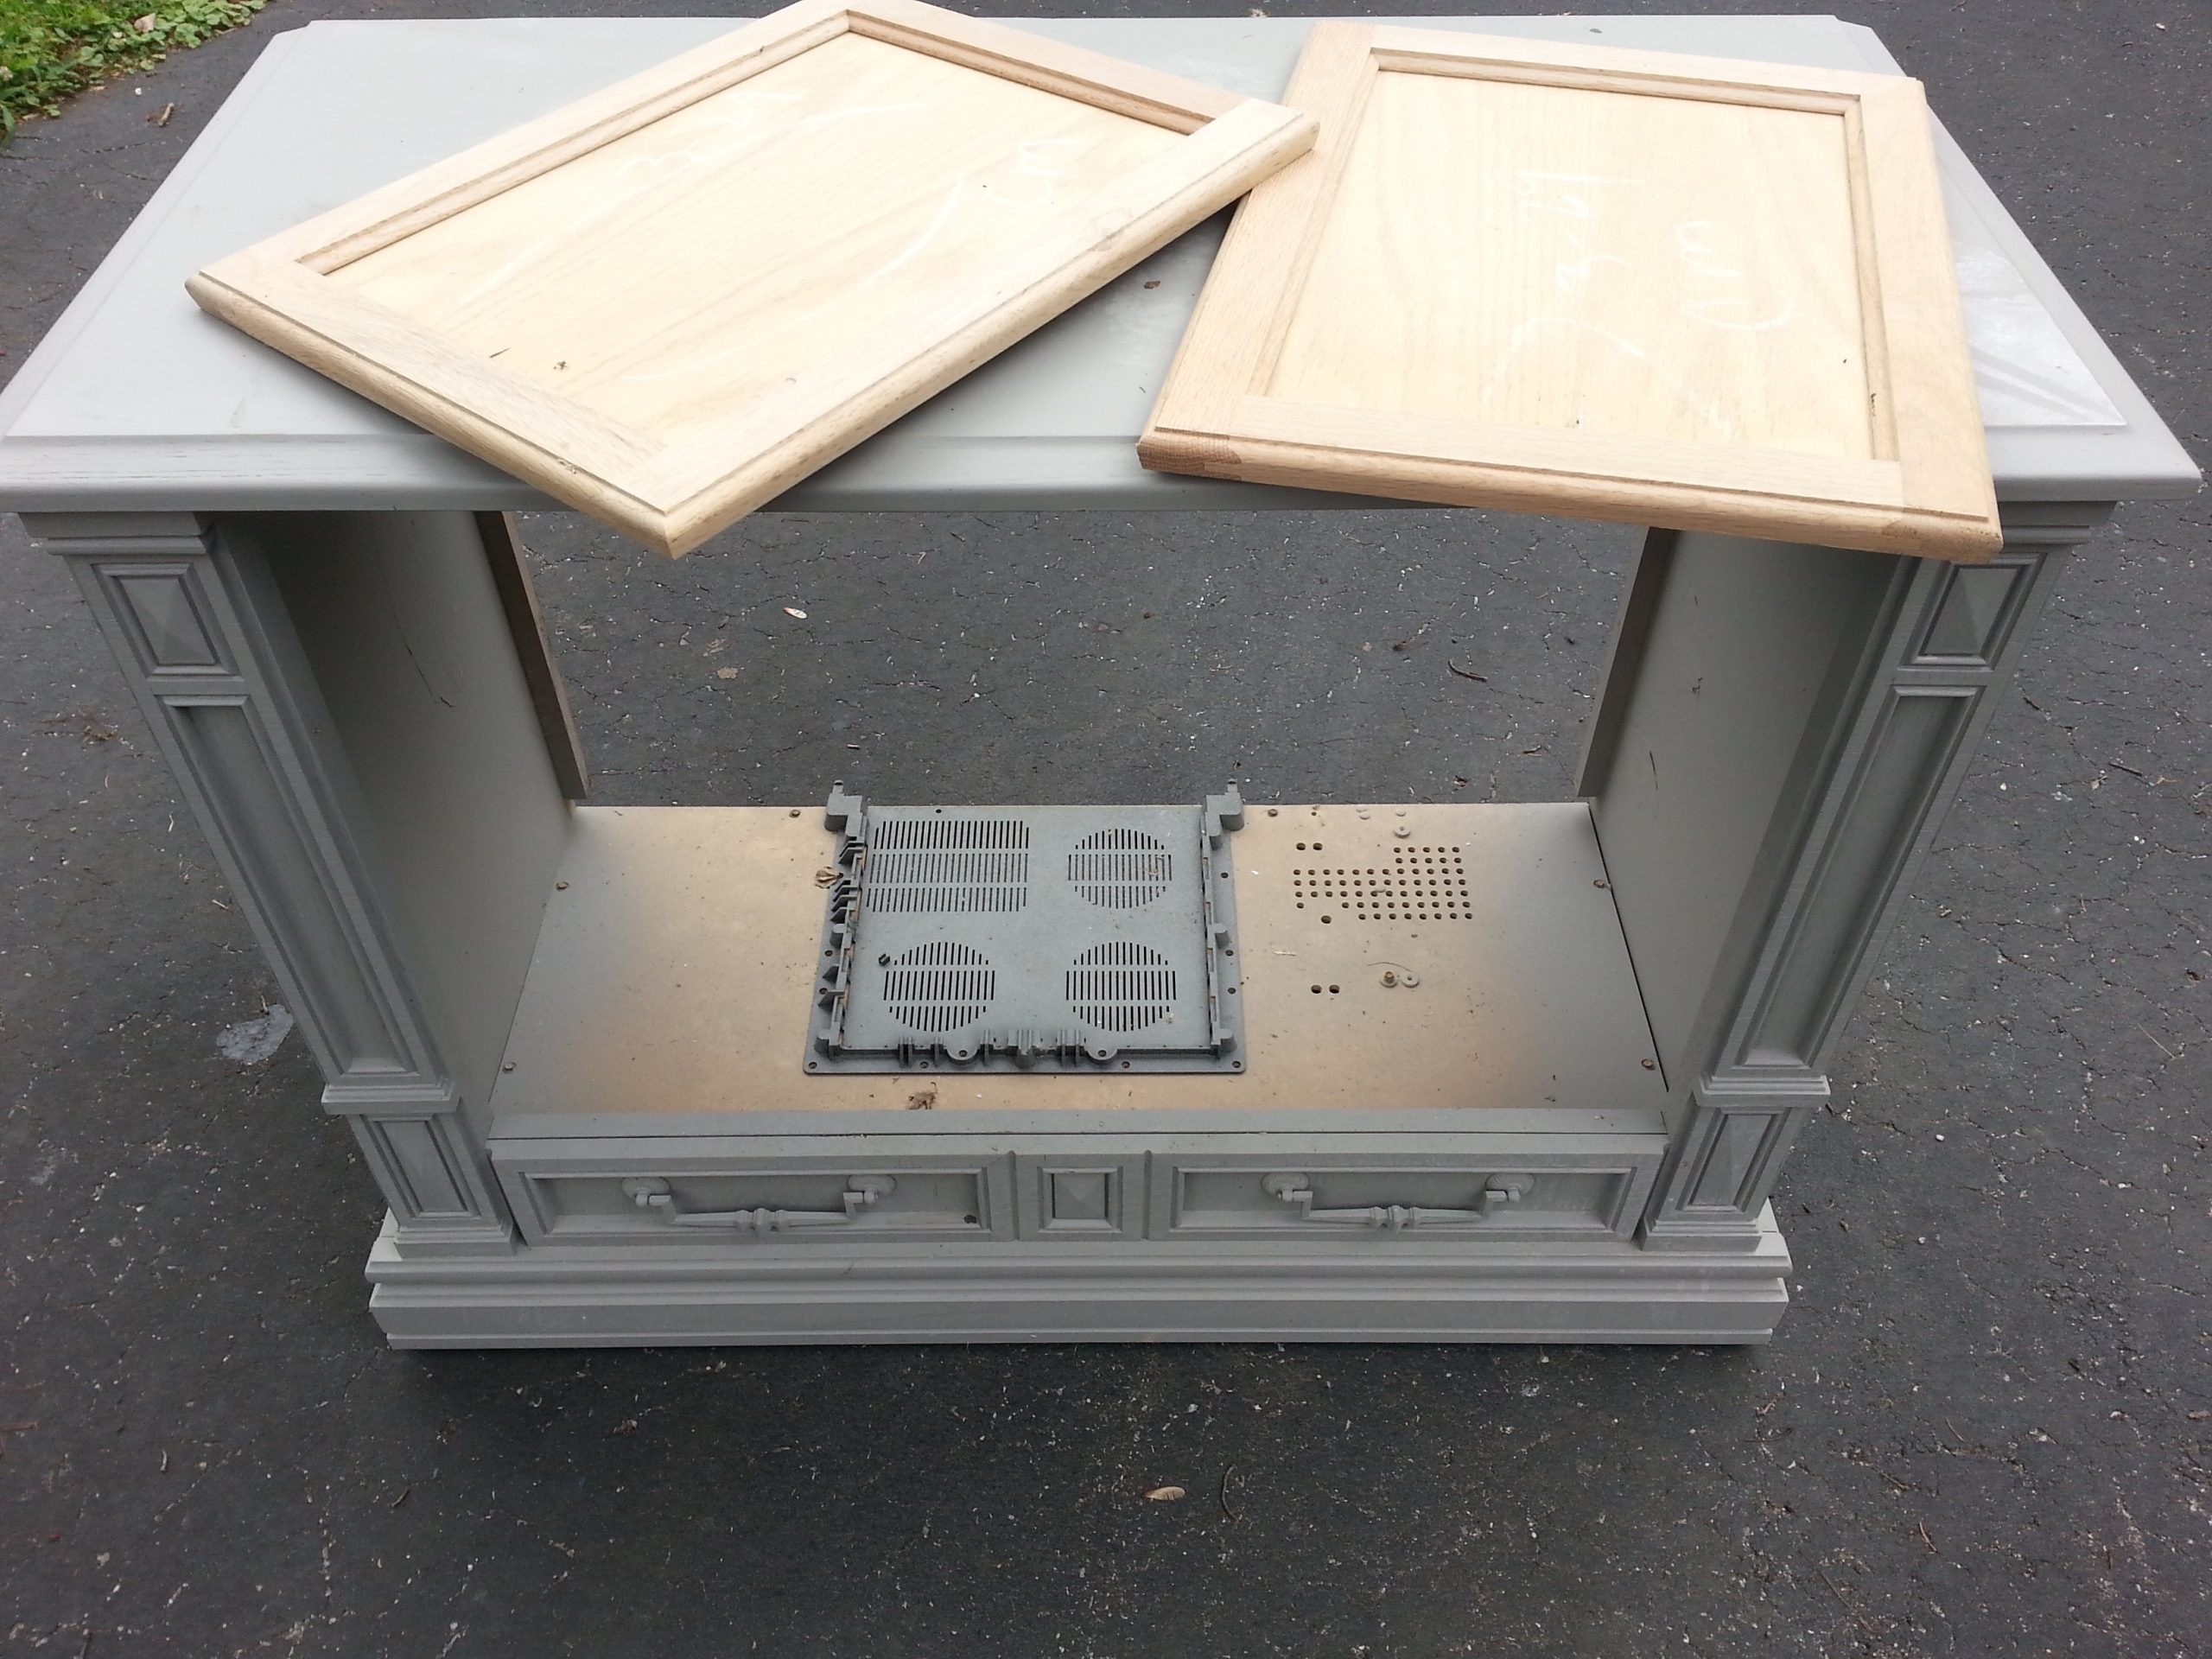
I've wanted to make some litter box furniture for a long time. If you're not handy with tools, you could add a tension rod and cafe curtains to enclose your litter box. But I wanted to enclose the cat loo, so I found two cupboard doors in my stash that were a good fit.
This is the design stage of adding the upcycled cabinet doors.
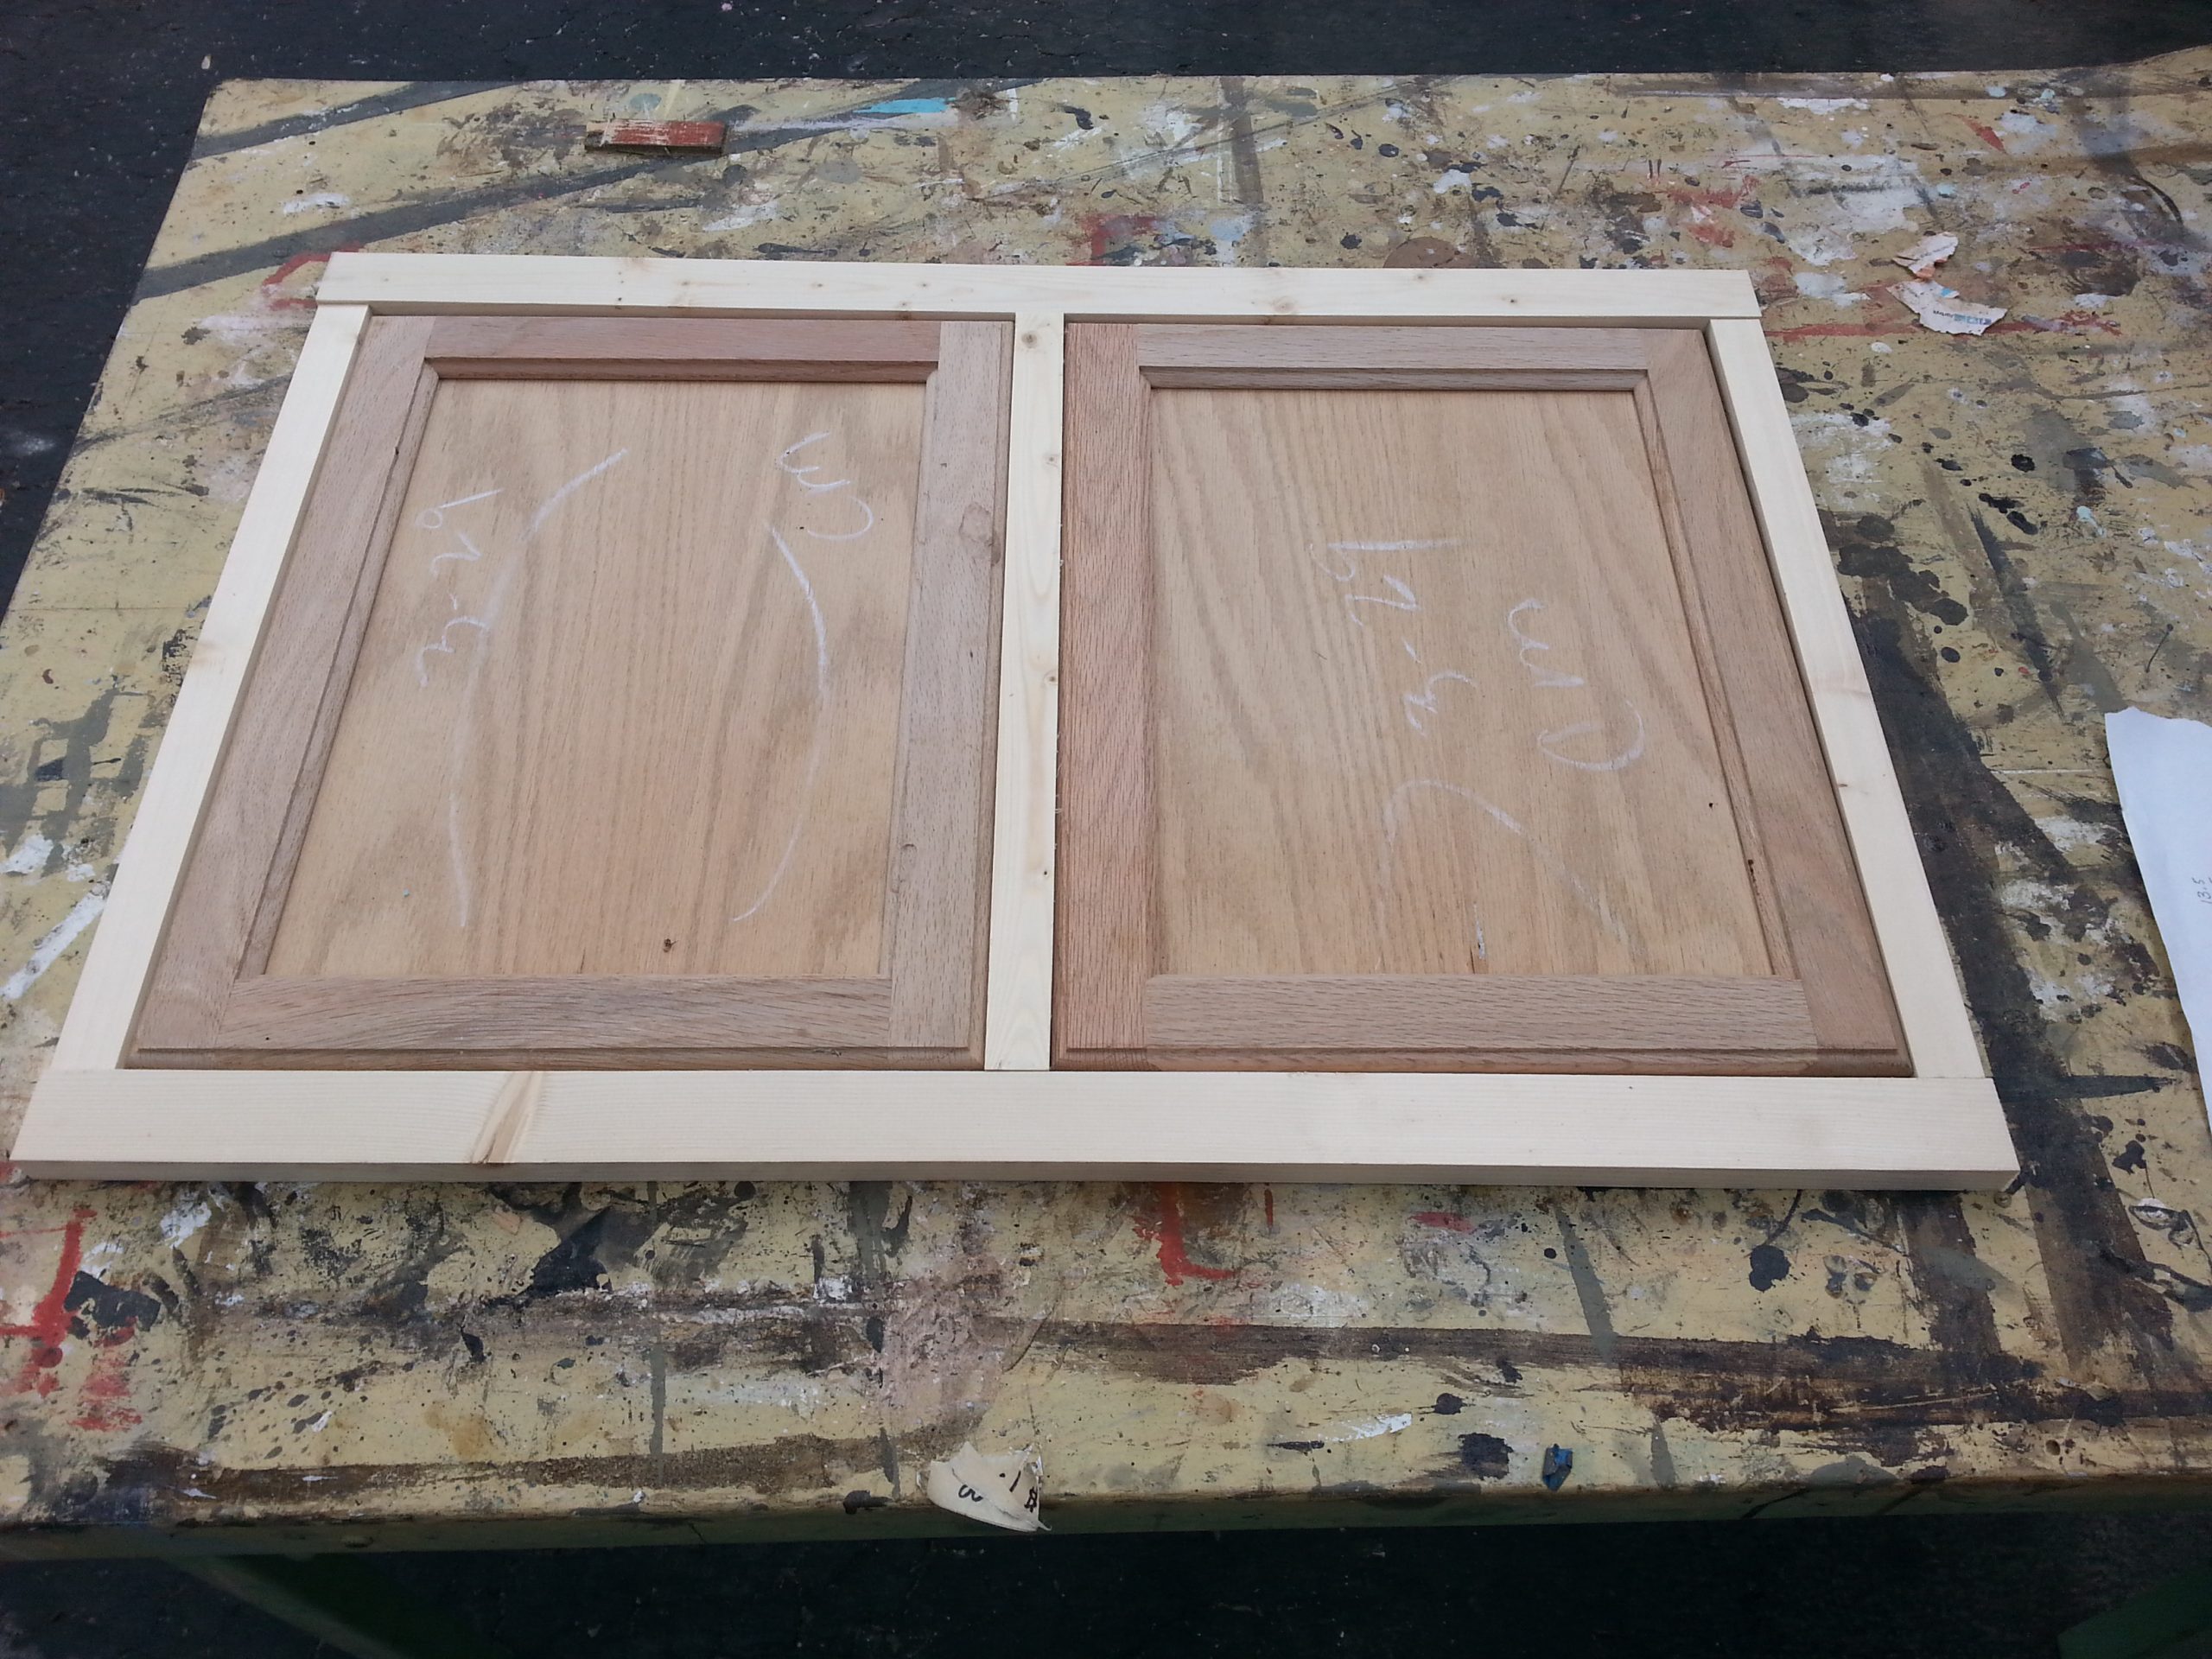
Making Doors for Your Modest Cat
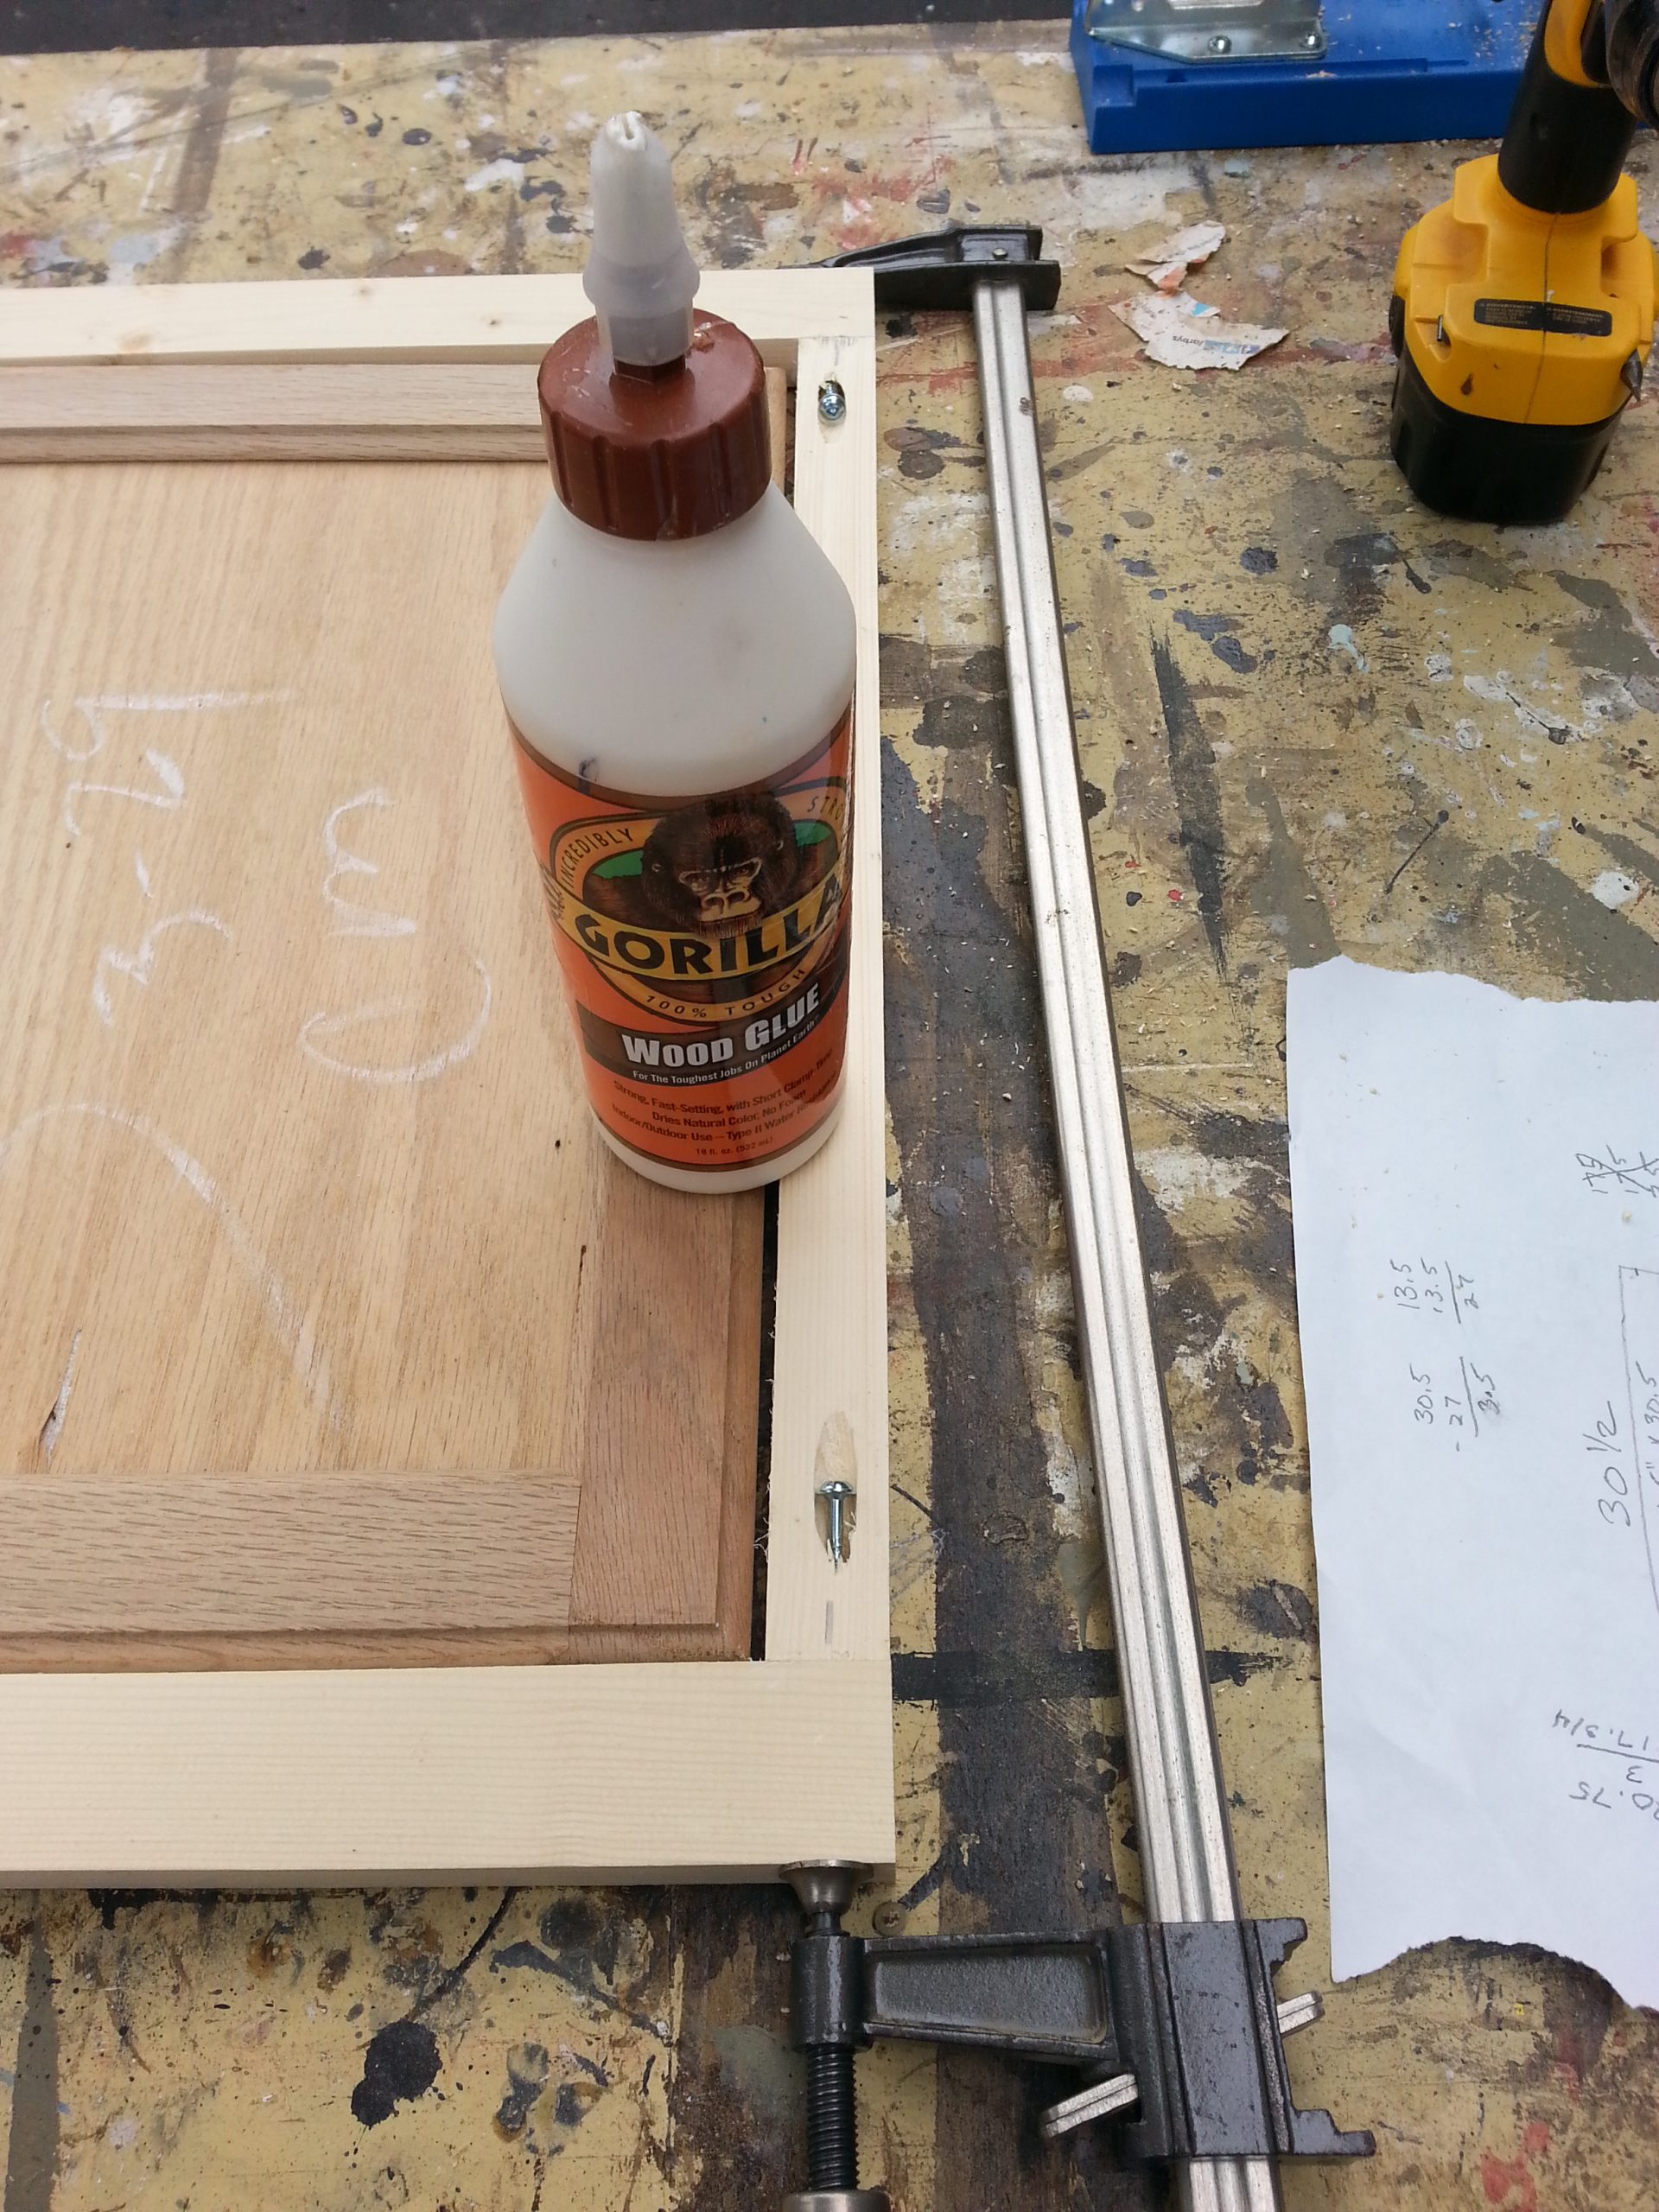
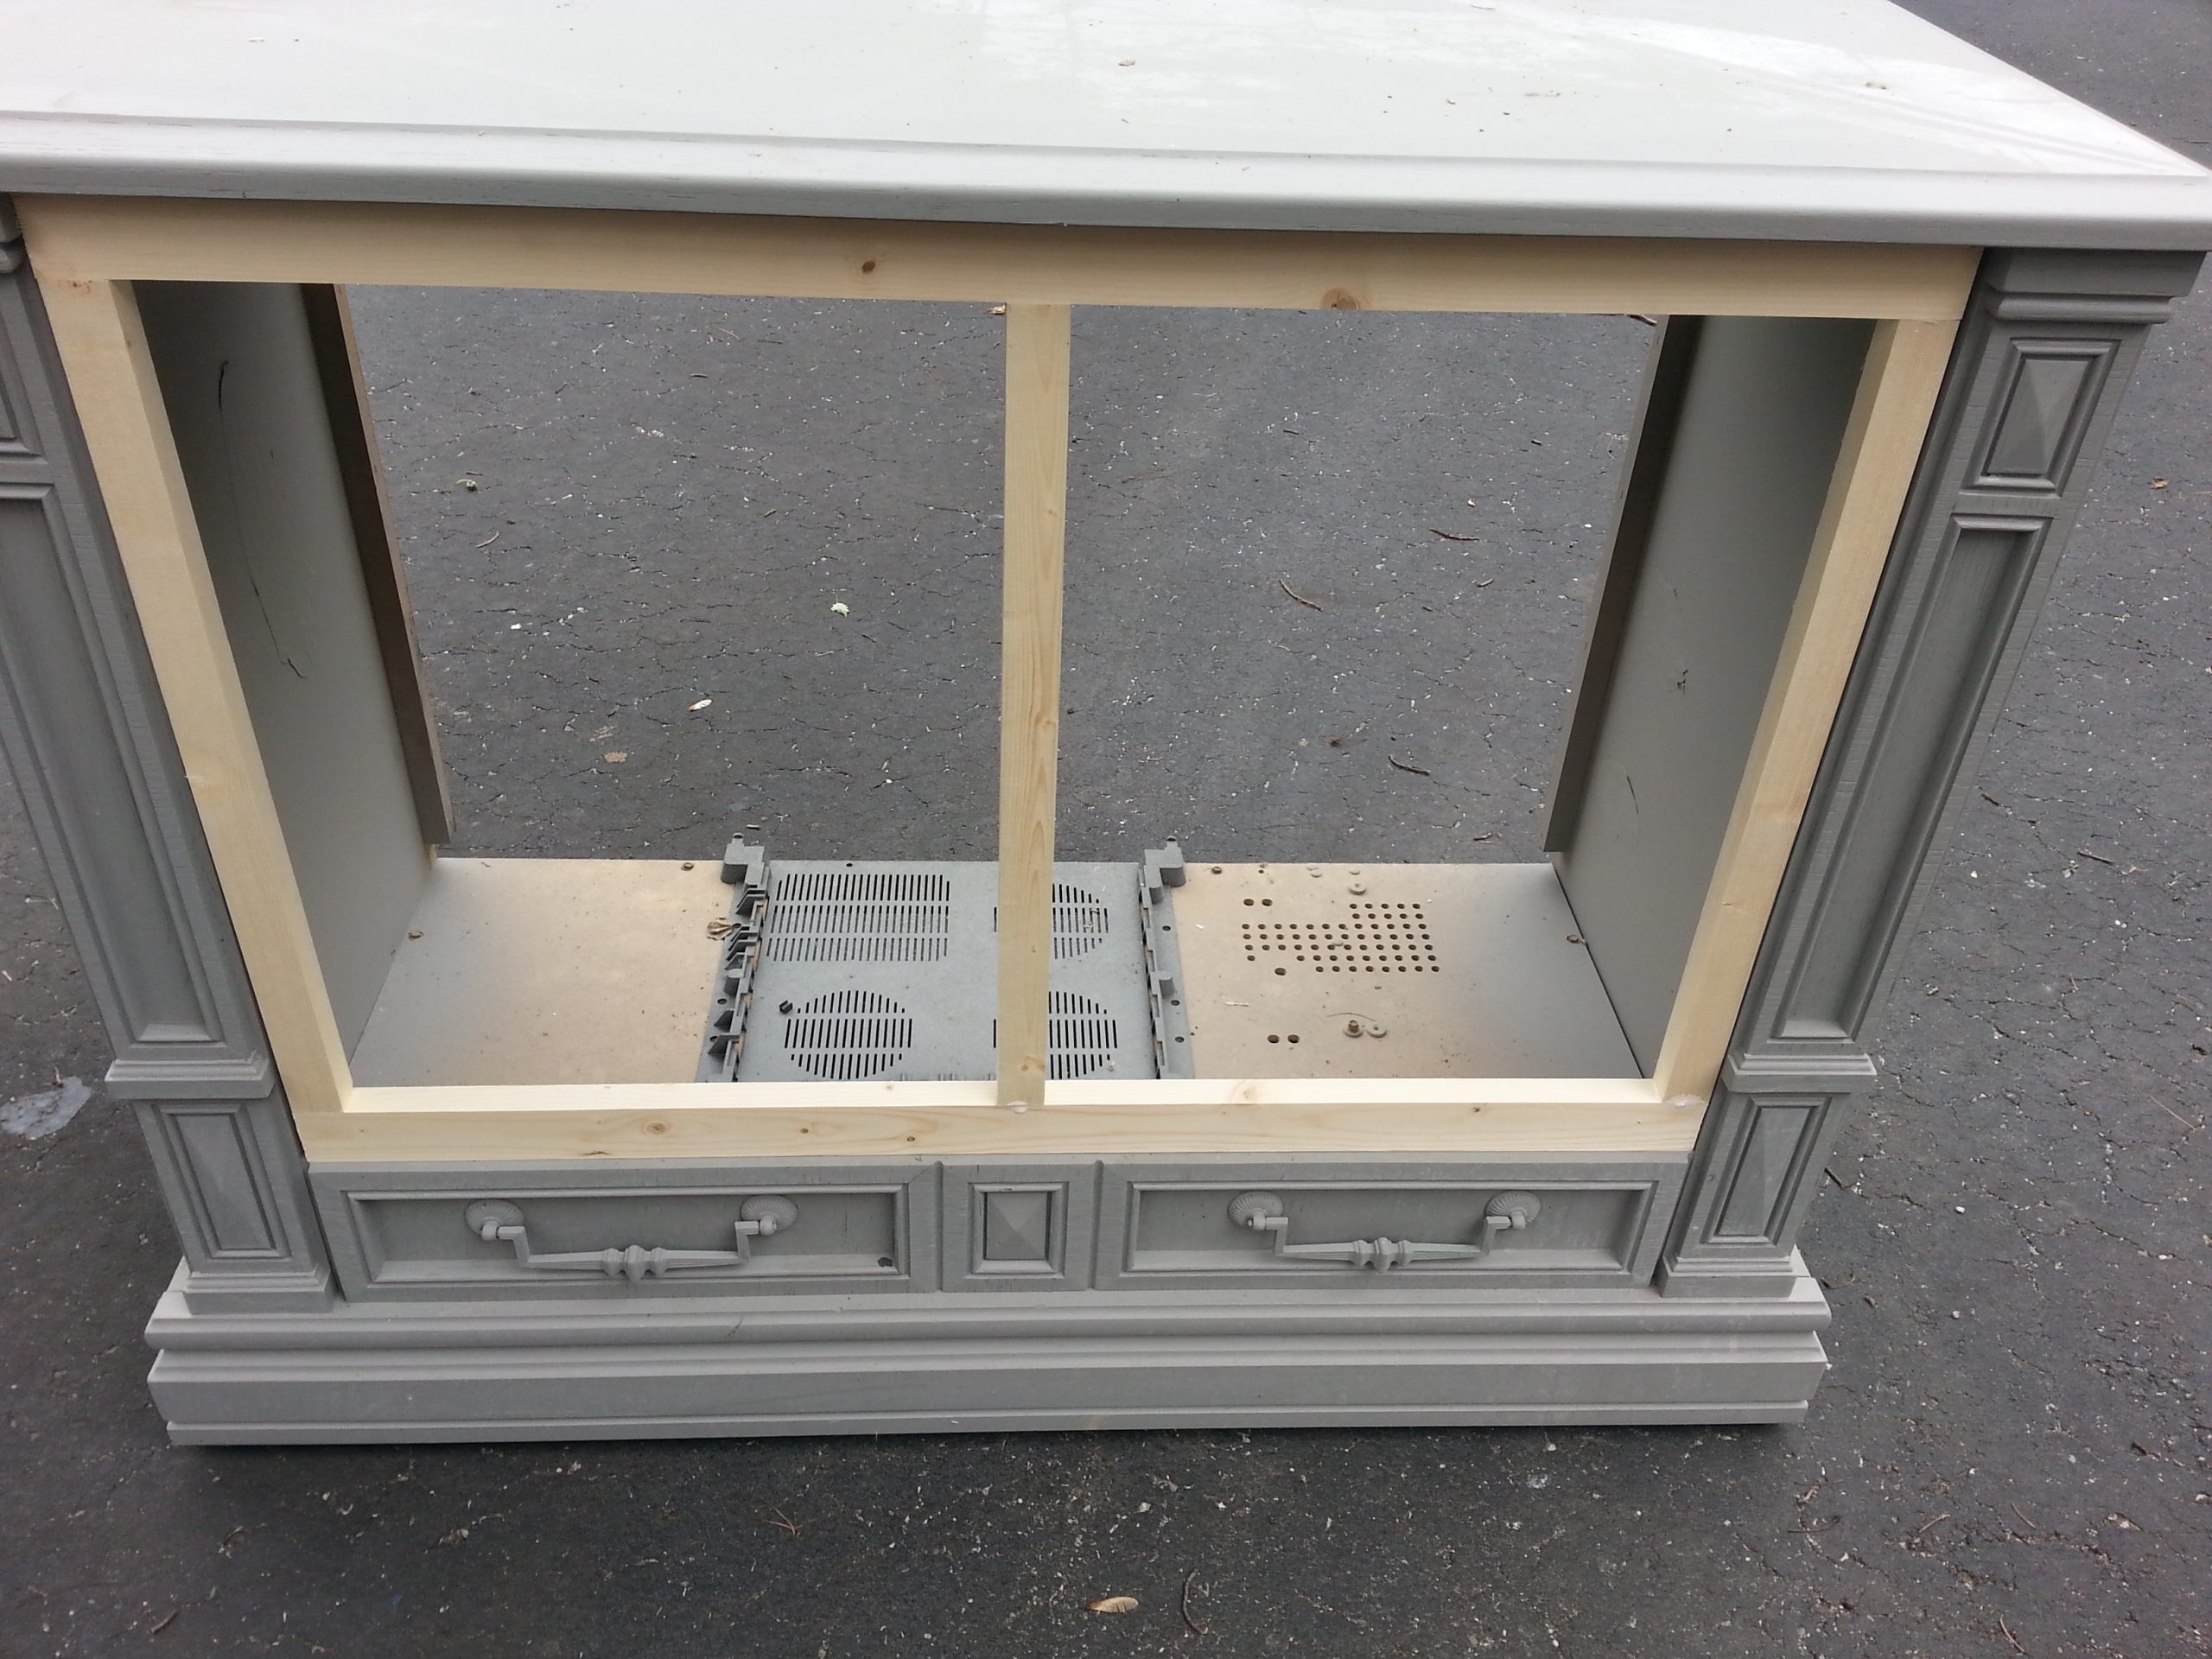
I drilled pocket holes with my Kreg Jig to make the front facing come together. With only one screw felt it needed extra strength, so I used Gorilla Wood Glue. I used a bar clamp to hold it gently while I secured it with the screw.
TIP: You don't want to clamp it too hard, or all your wood glue will ooze out. You can see my sketch to the right.
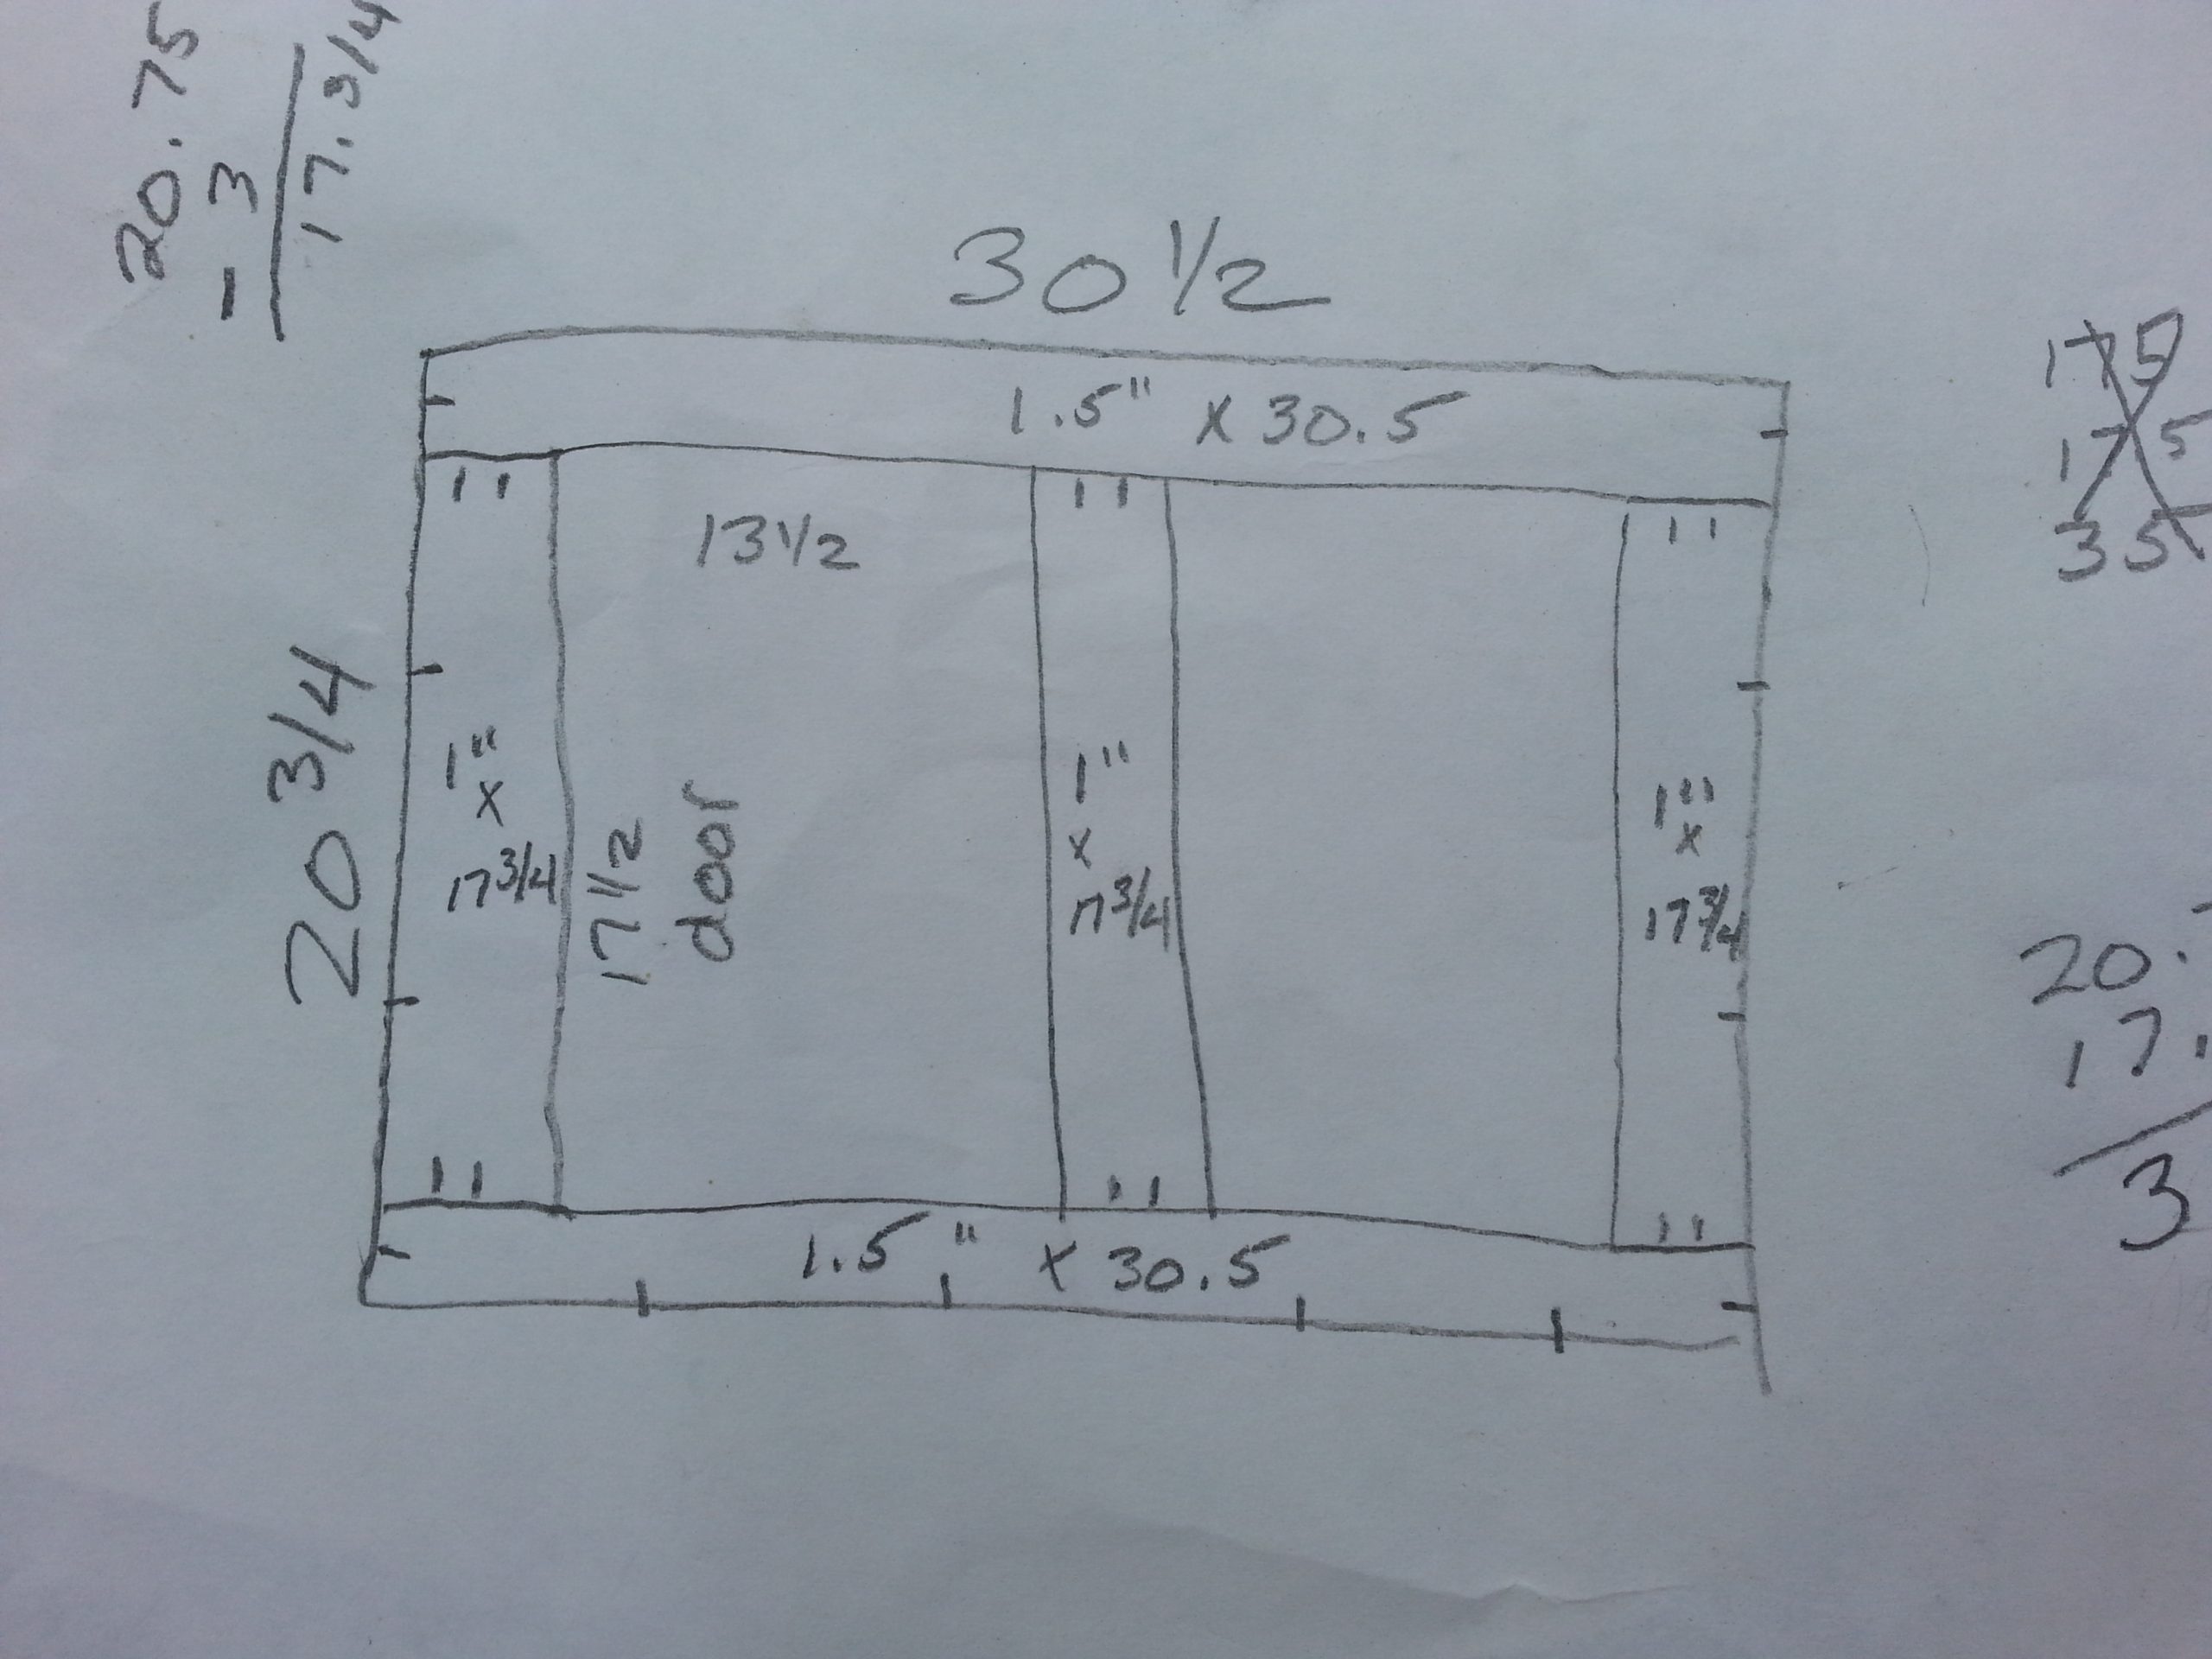
I rarely ever draw anything out on paper. But this had to be exact in order to fit snugly inside the cabinet and have the double doors fit correctly inside the facing.
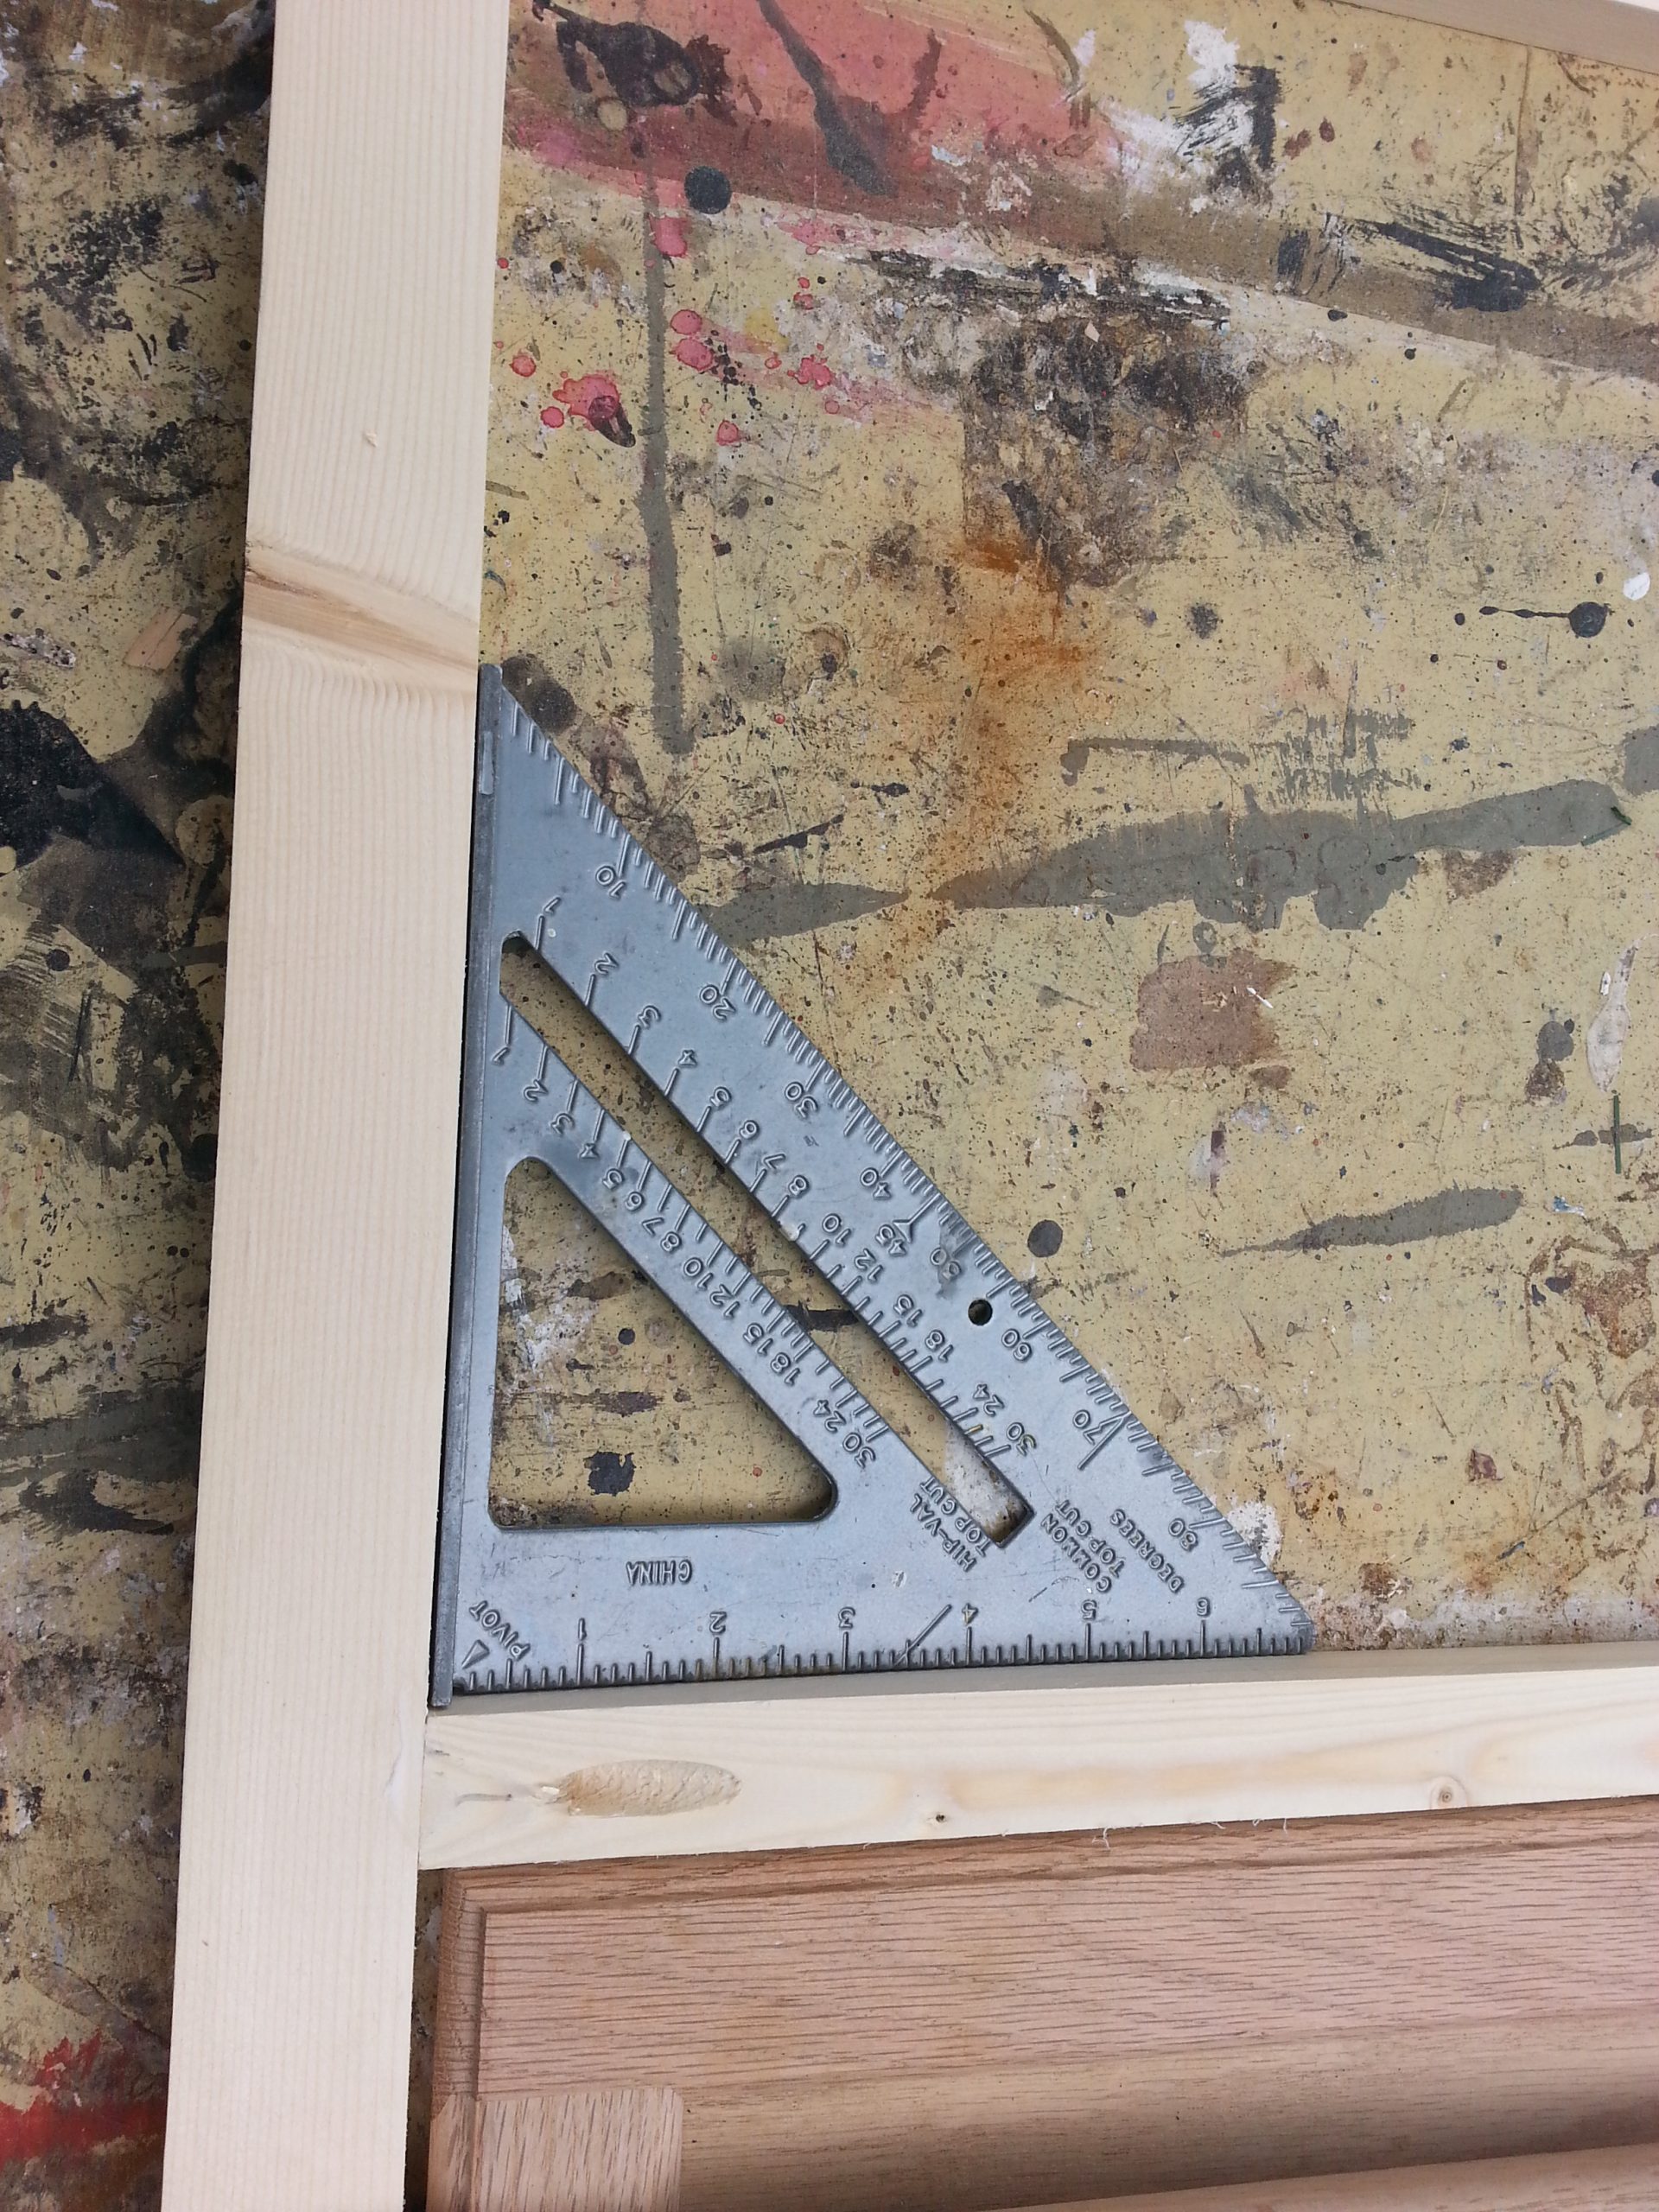
TIP: be sure to use a speed square when joining corners.
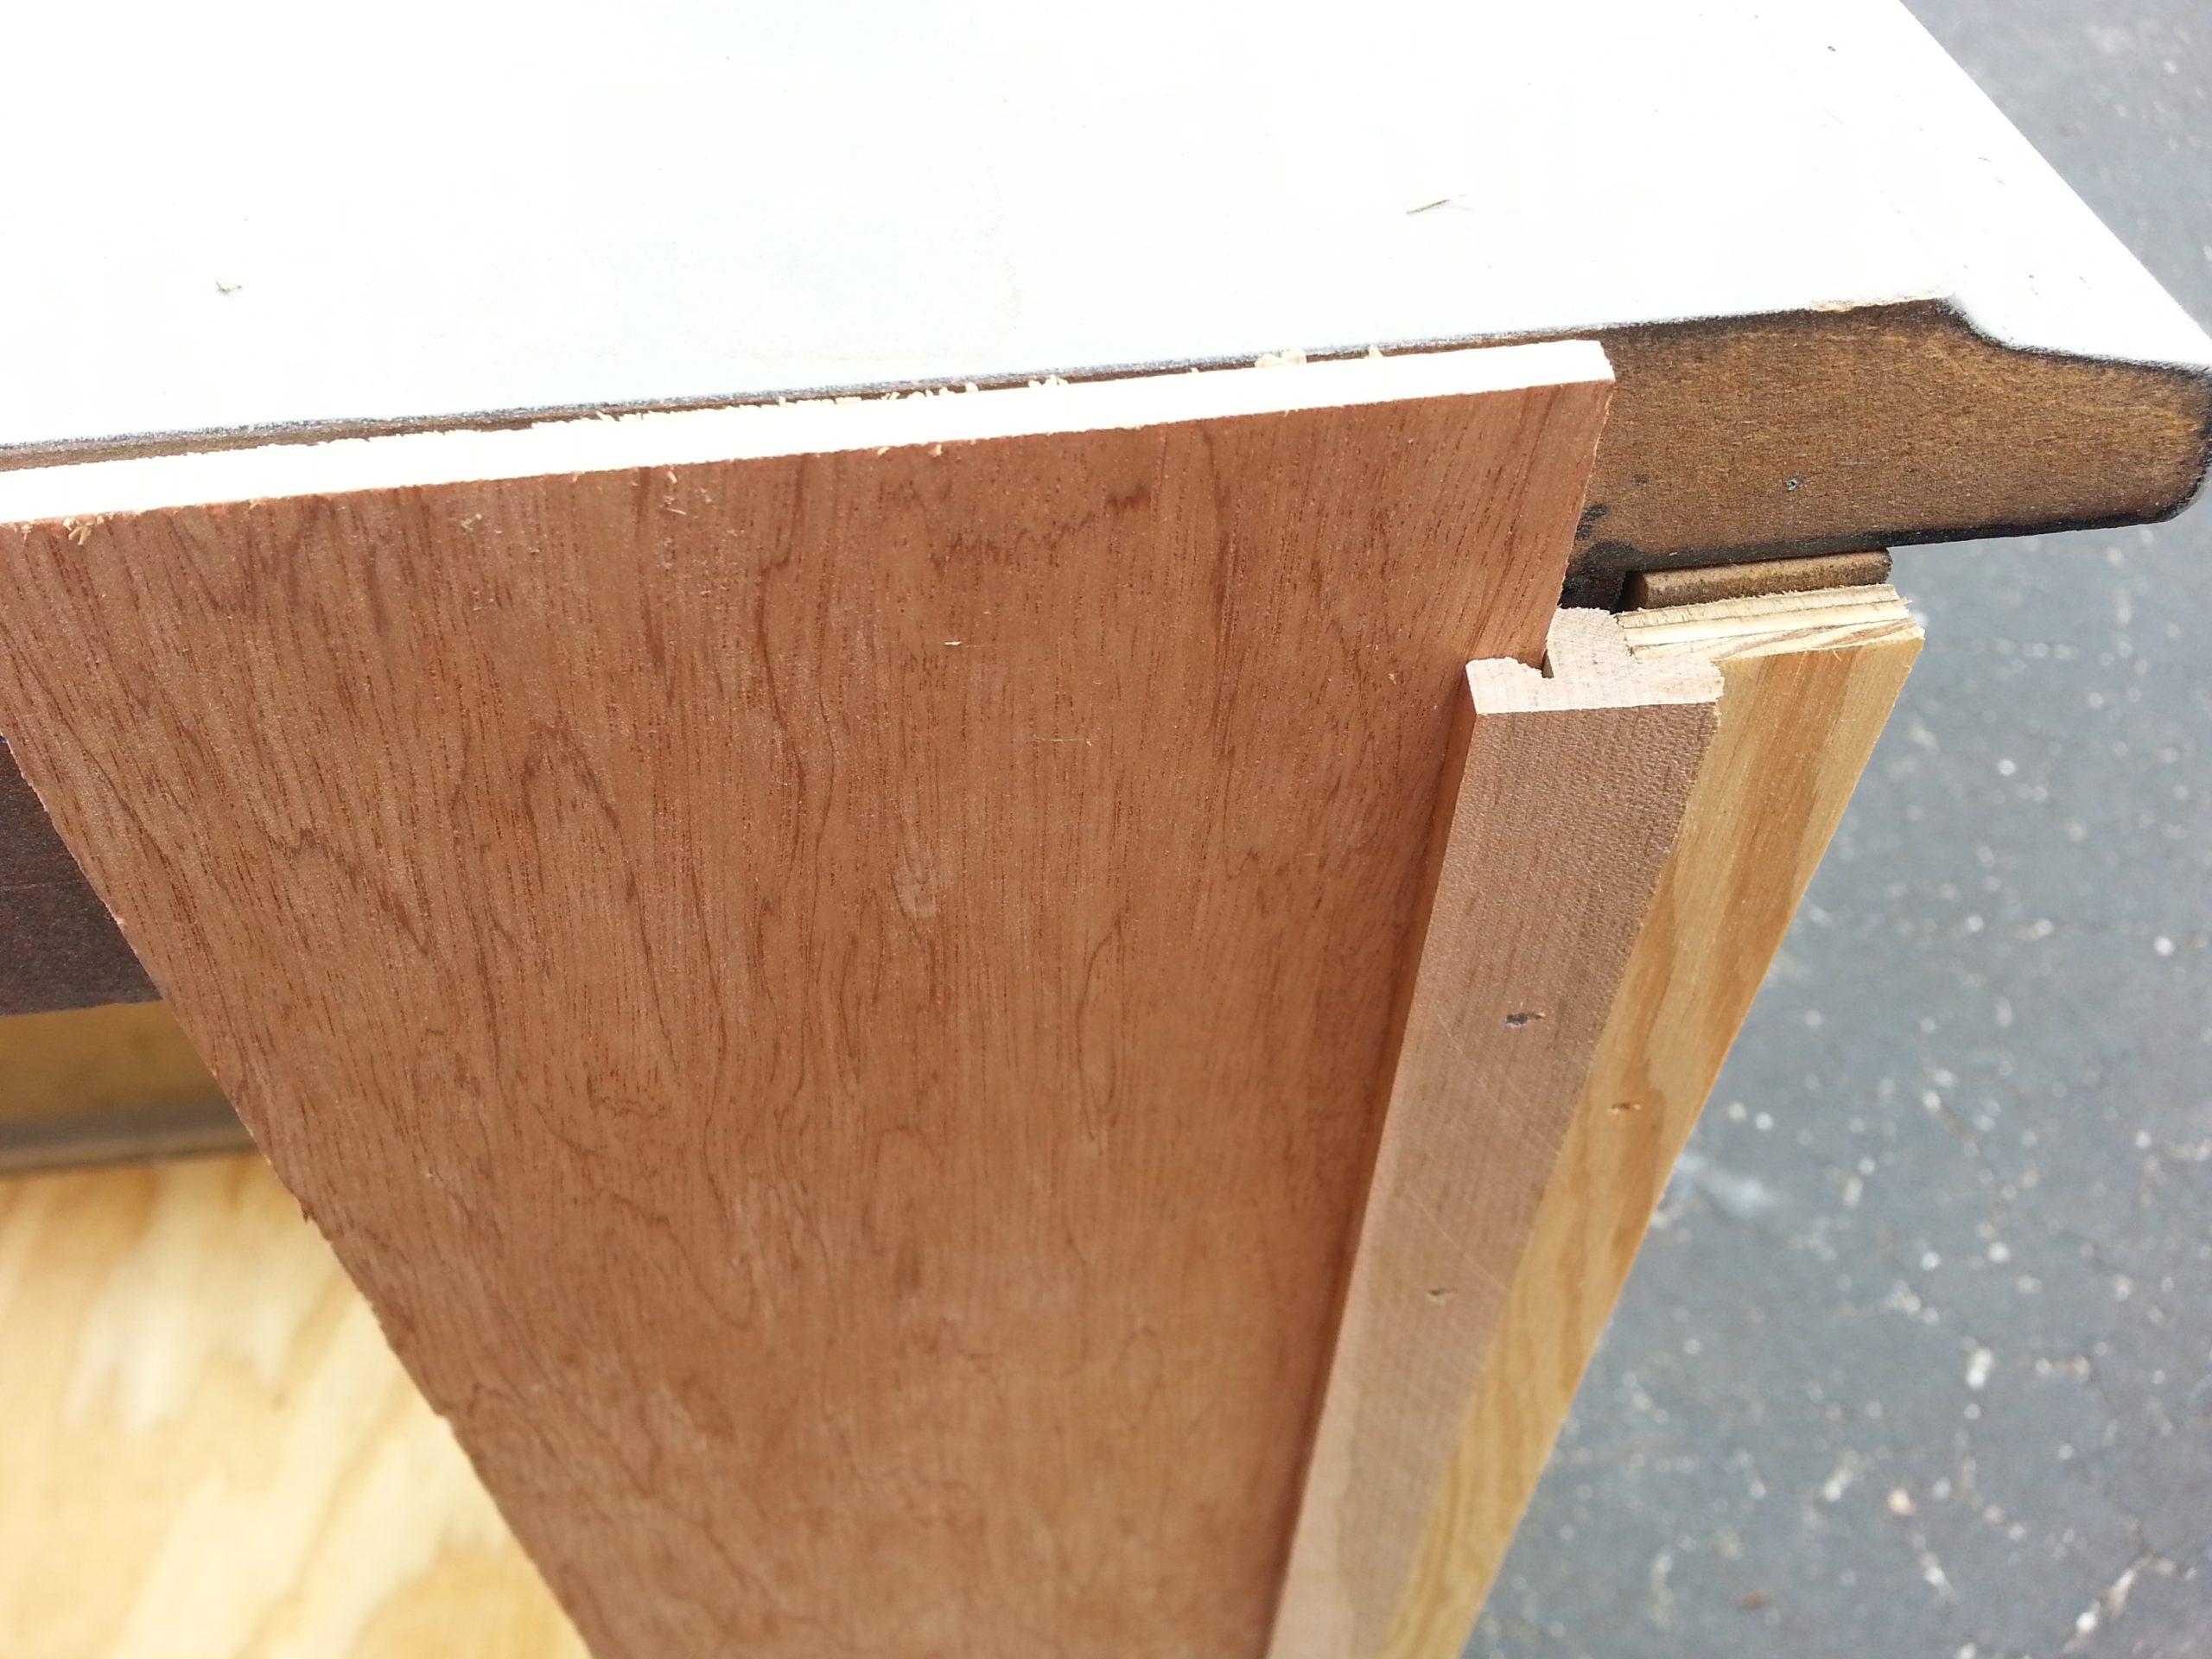
The facing fit is snug, but I wish it were wider.
Reinforce the Original Base
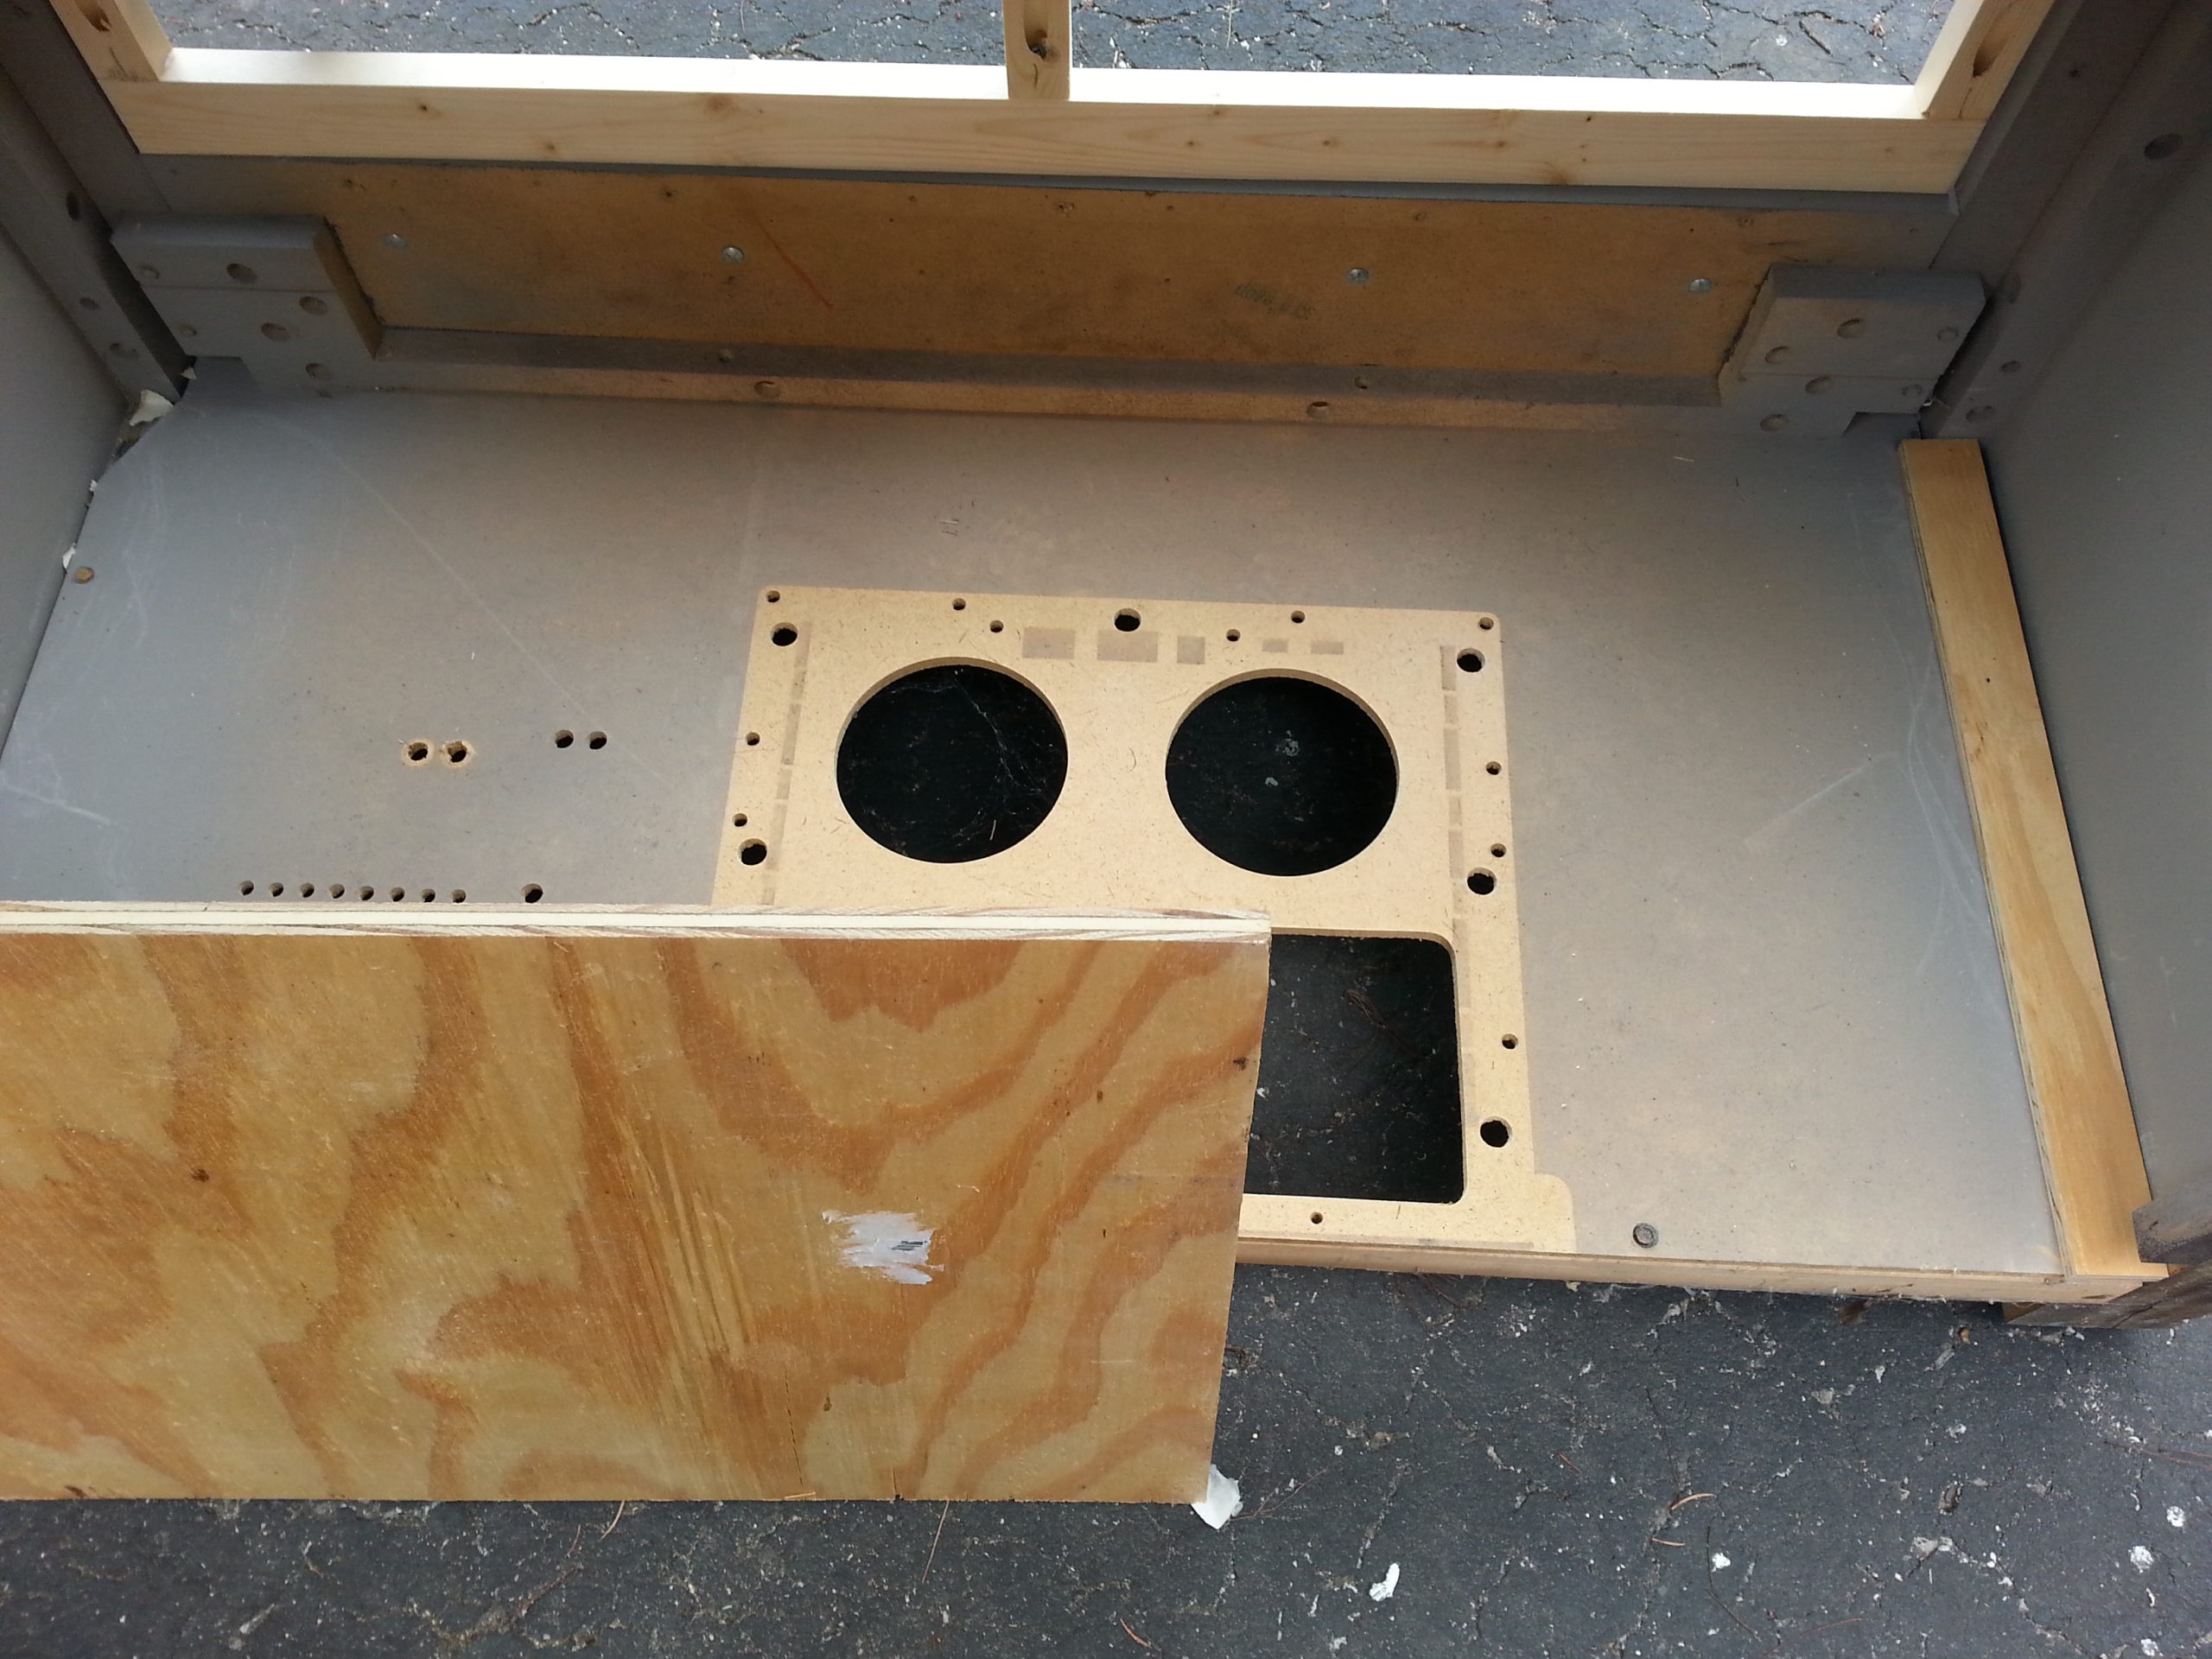
Because the bottom of the old TV console was MDF wood, I used a scrap piece of plywood to make a new bottom. But first, I had to remove the plastic thing-a-ma-bob that held the speakers.
Note: While the front facing was inserted for a dry fit, I marked it for pocket hole screws.
I decided cleaning this piece through the "front" doors might be challenging. Therefore the back panel would need to be removable for occasional cleanings.
Options to Enclose the Back
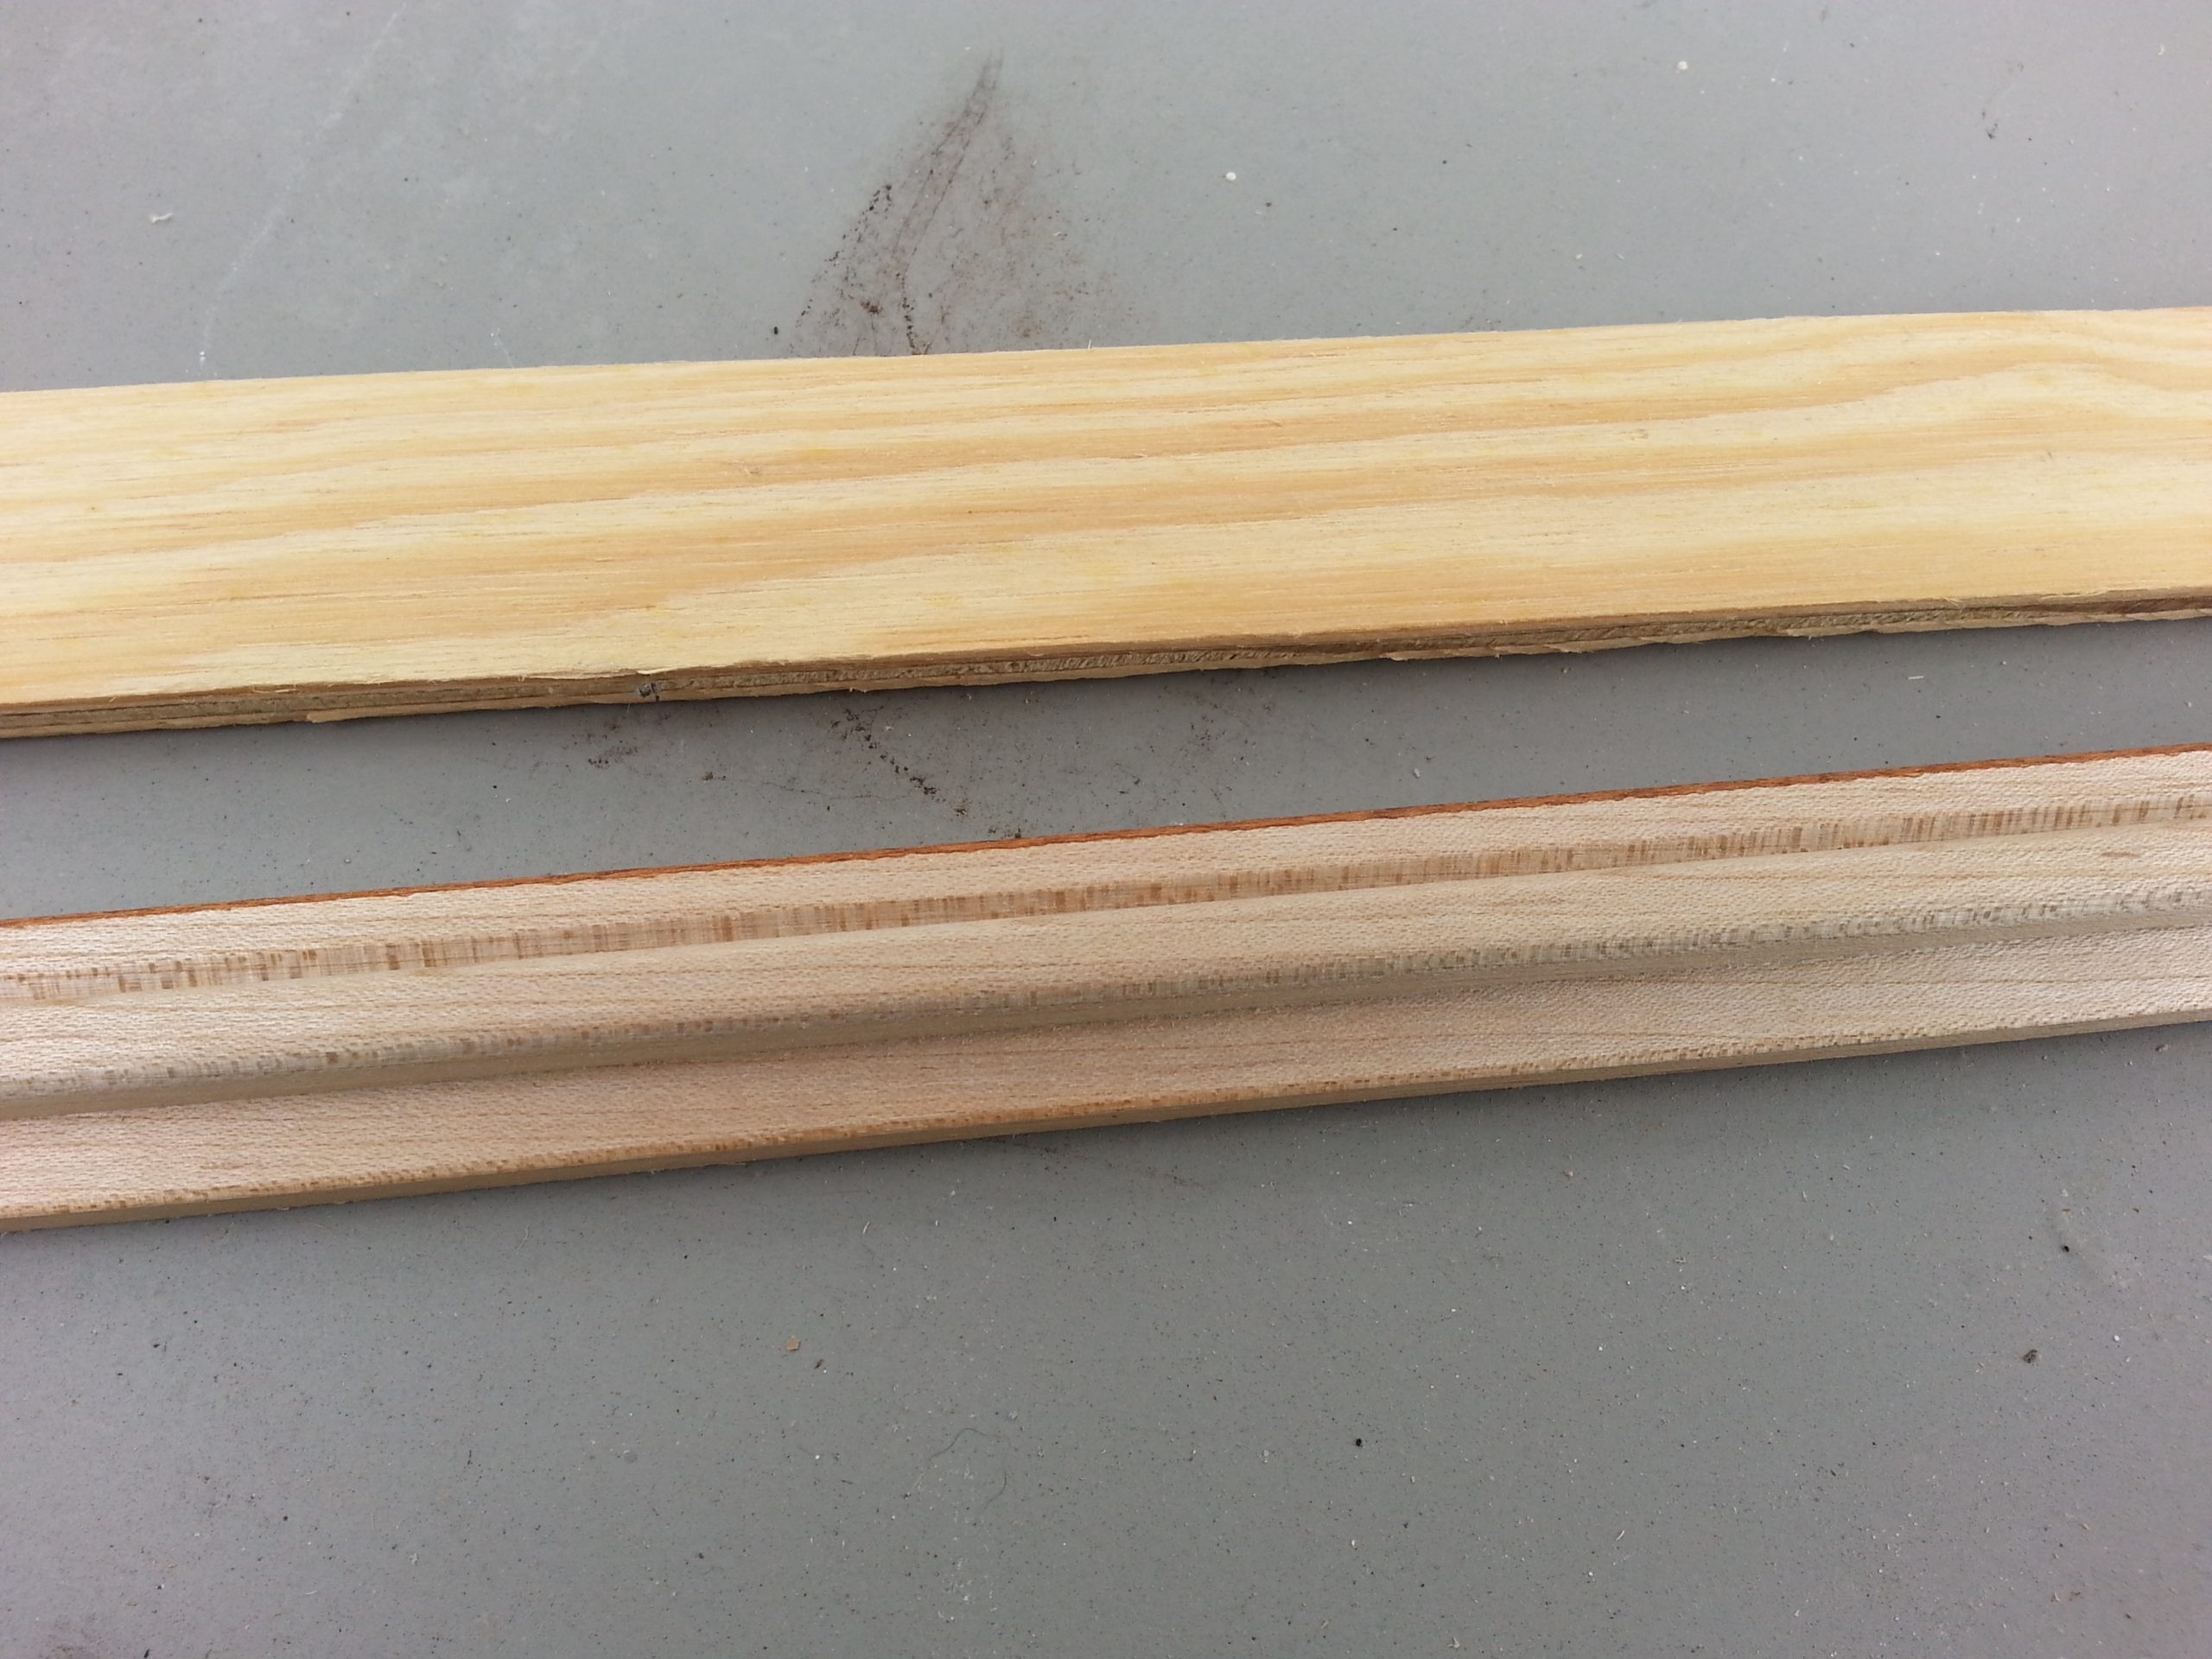
Looking through my scrap pile, I found a piece of the tongue that I had ripped off some hardwood tongue and groove flooring when I made the table base for my wooden tool chest. I ripped a narrow piece of thin plywood to support that small piece.
I attached the tongue to the narrow plywood and then secured them to the back of the t.v. cabinet with Gorilla Wood Glue and brad nails using my nail gun.
Note: this small piece of plywood is a test piece to see if my design will work—allowing the plywood to slide down from the top and out again for cleaning.
It's a tight fit, but I move forward.
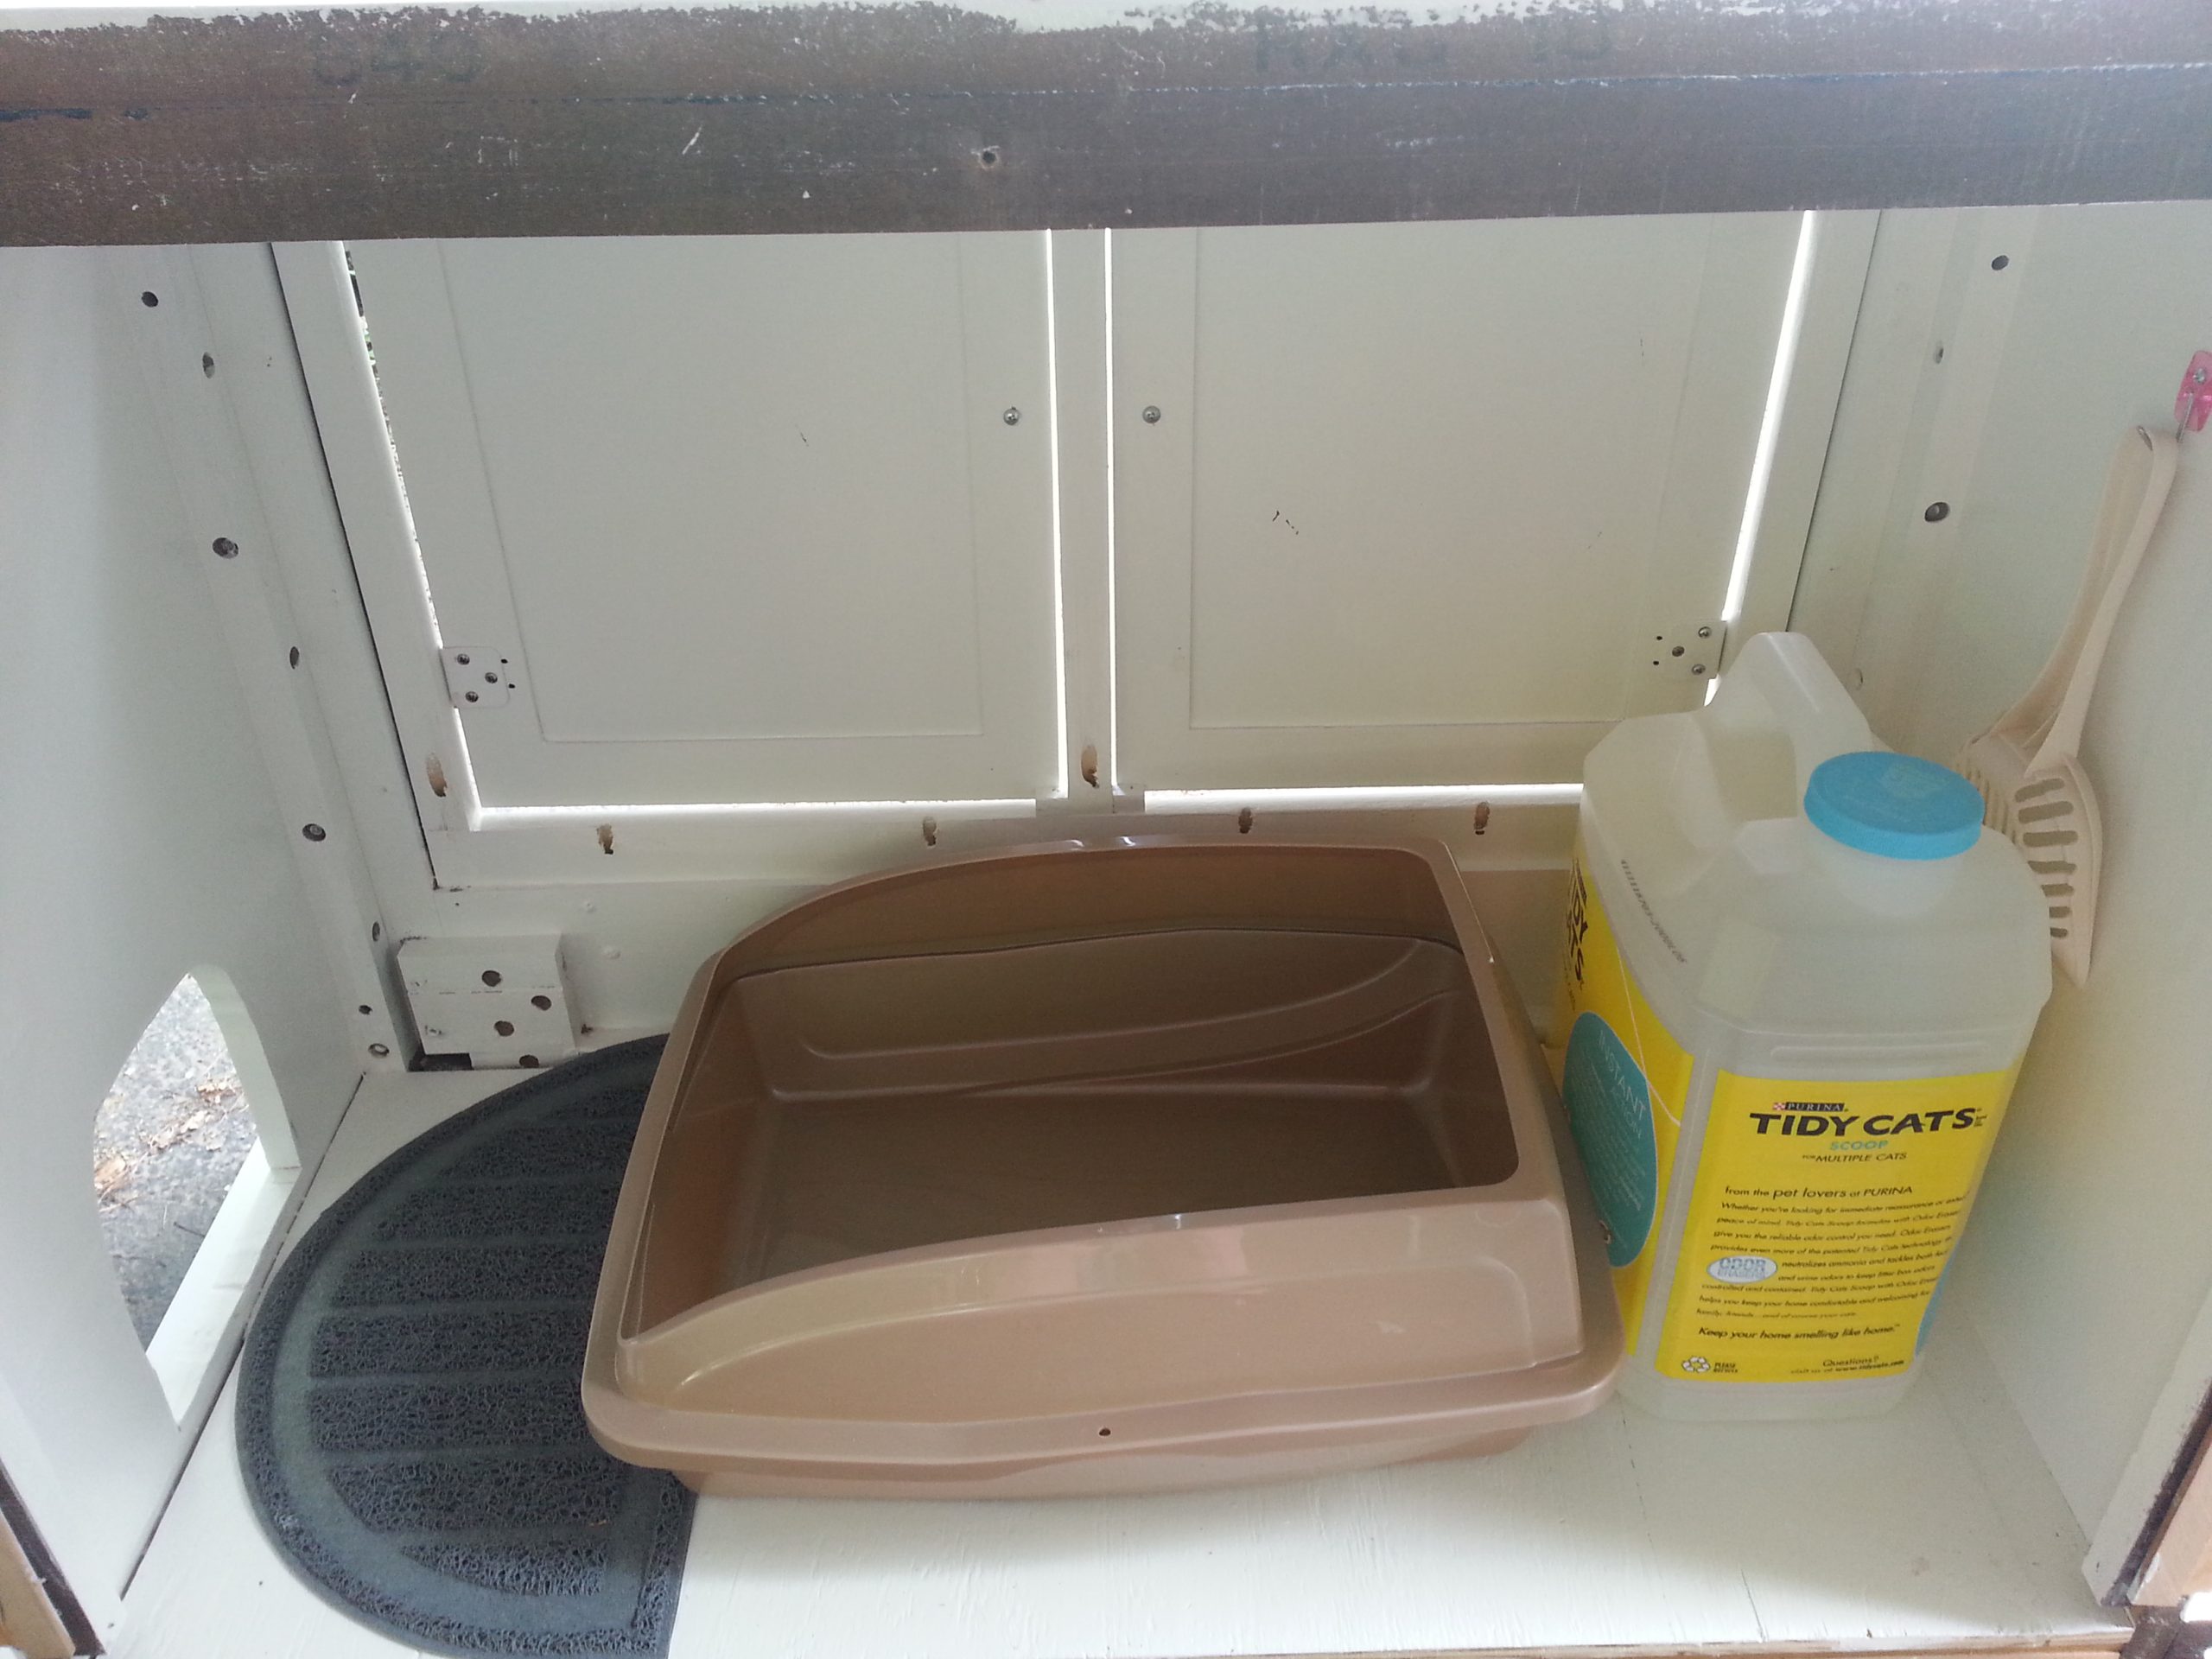
Cut a Mouse Hole for Easy Access
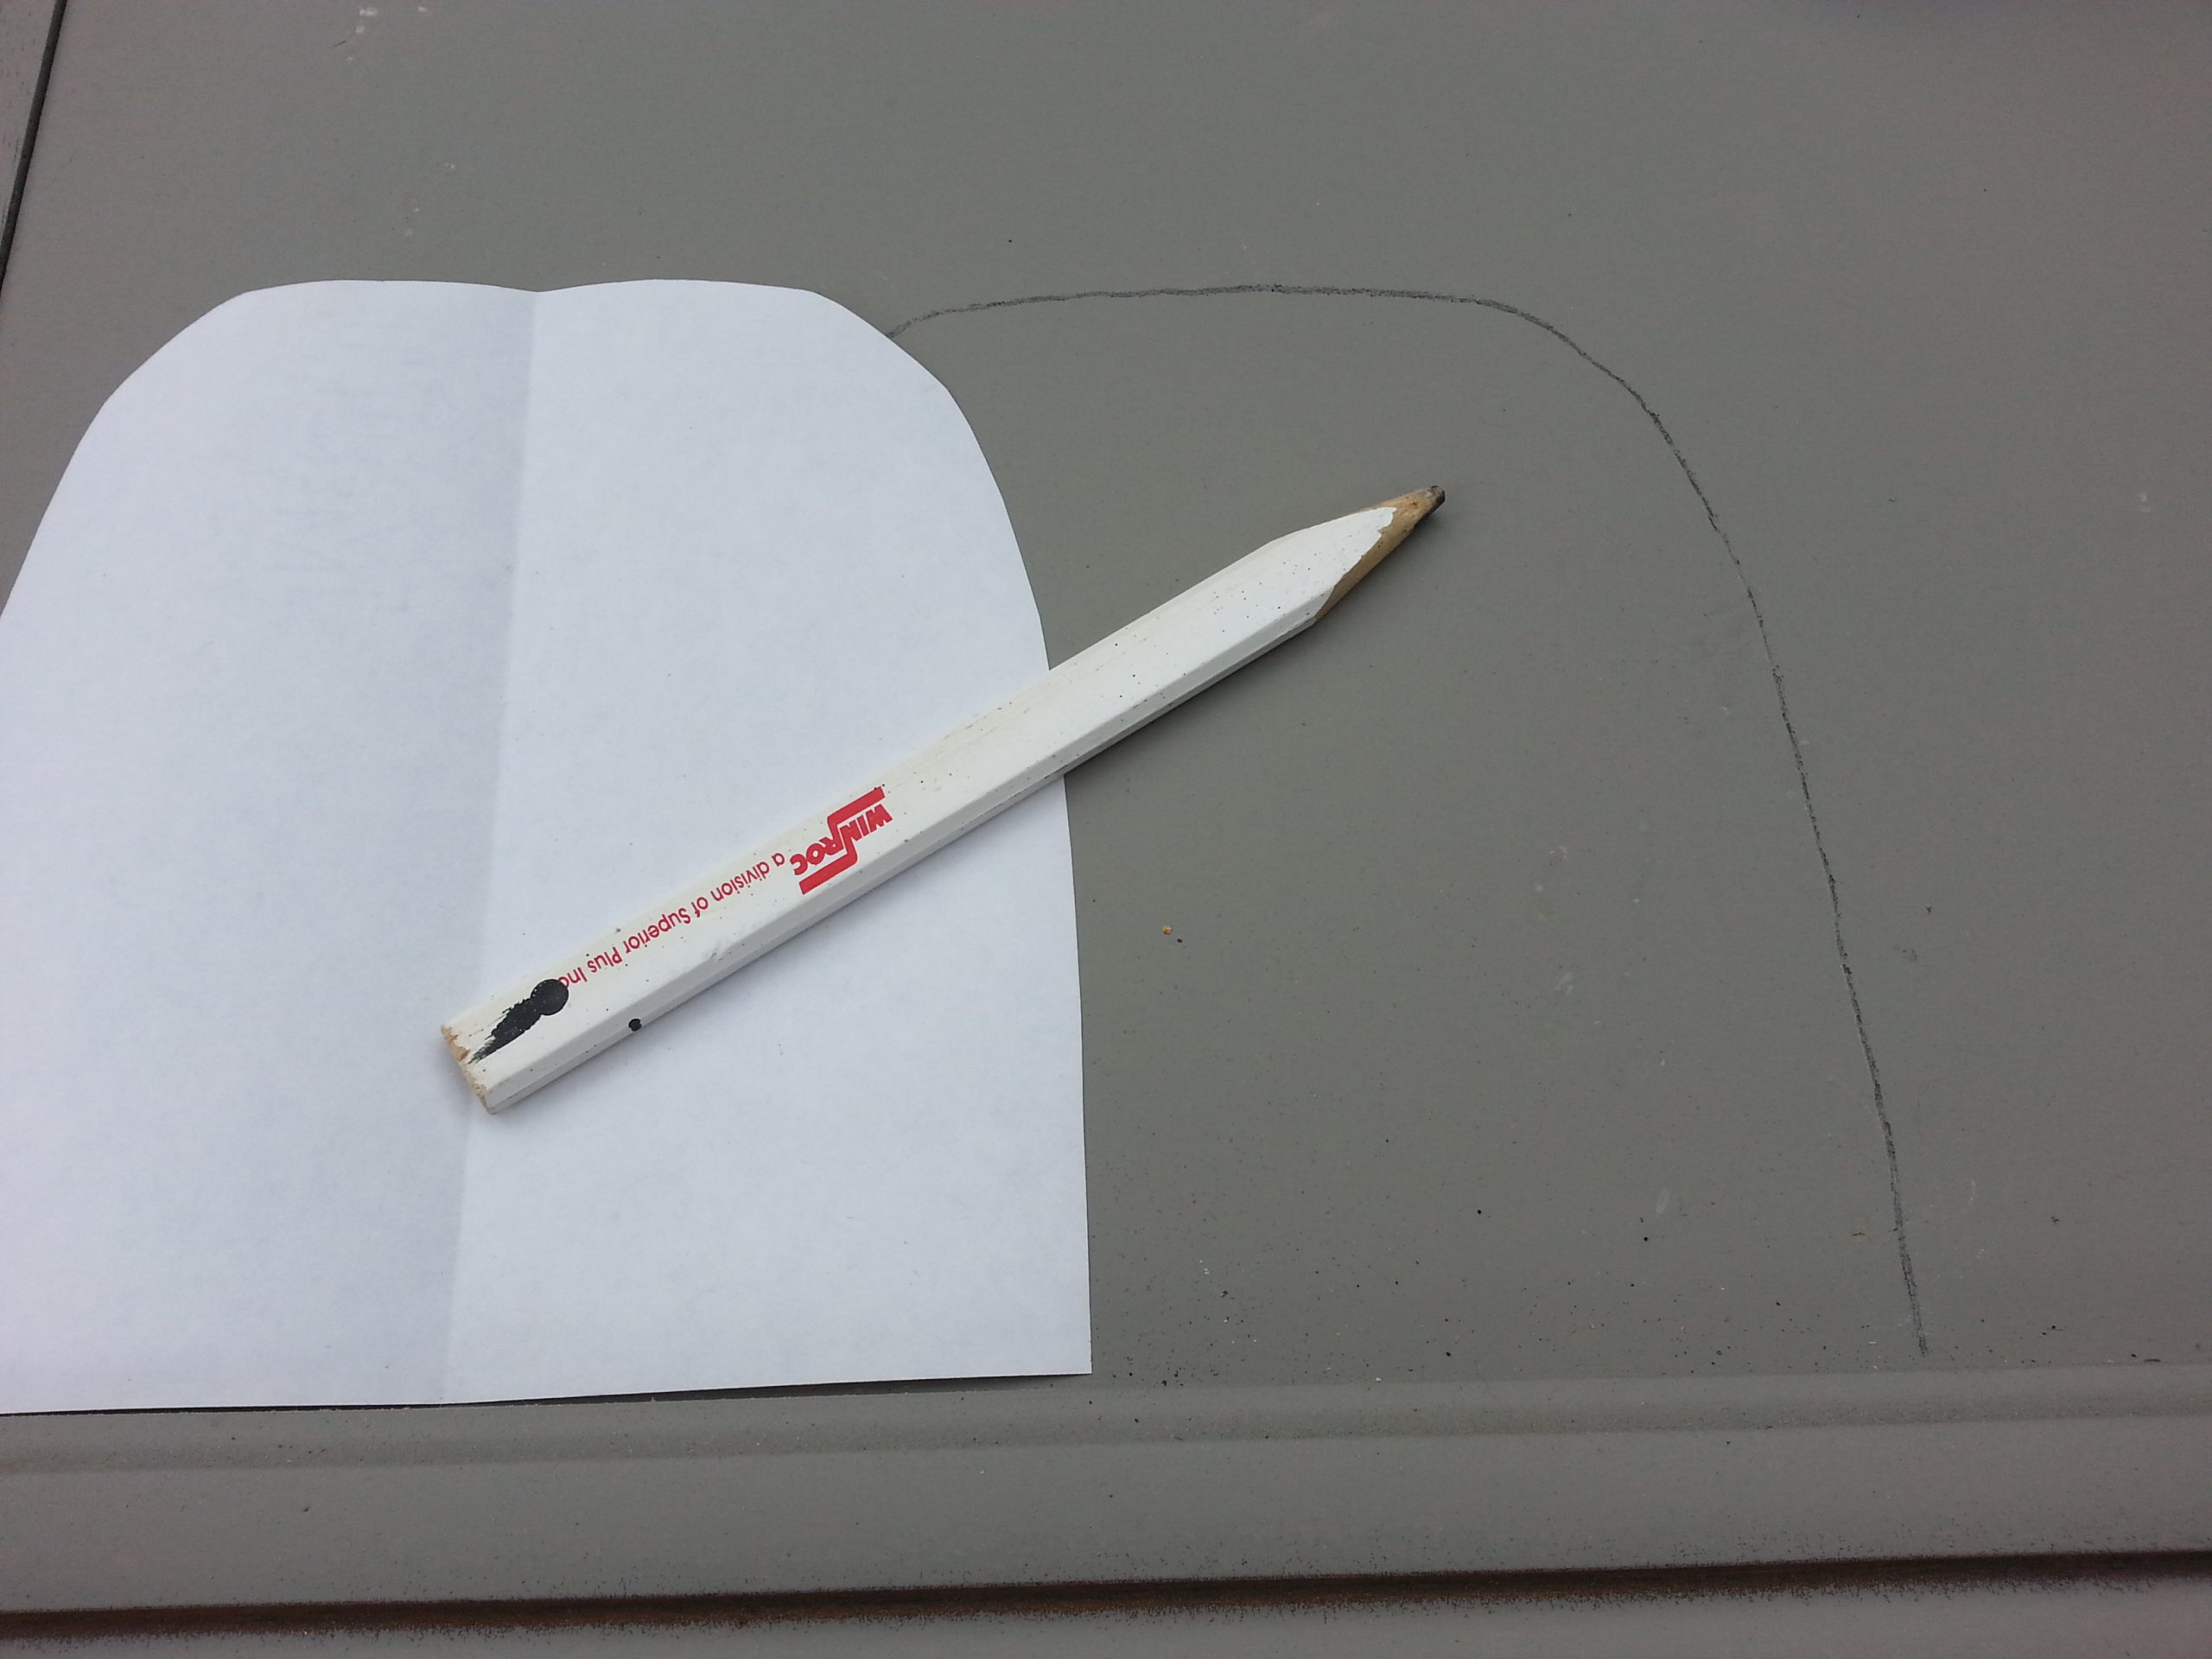
I drew a paper pattern for the mouse hole and traced it onto the side of the TV cabinet.
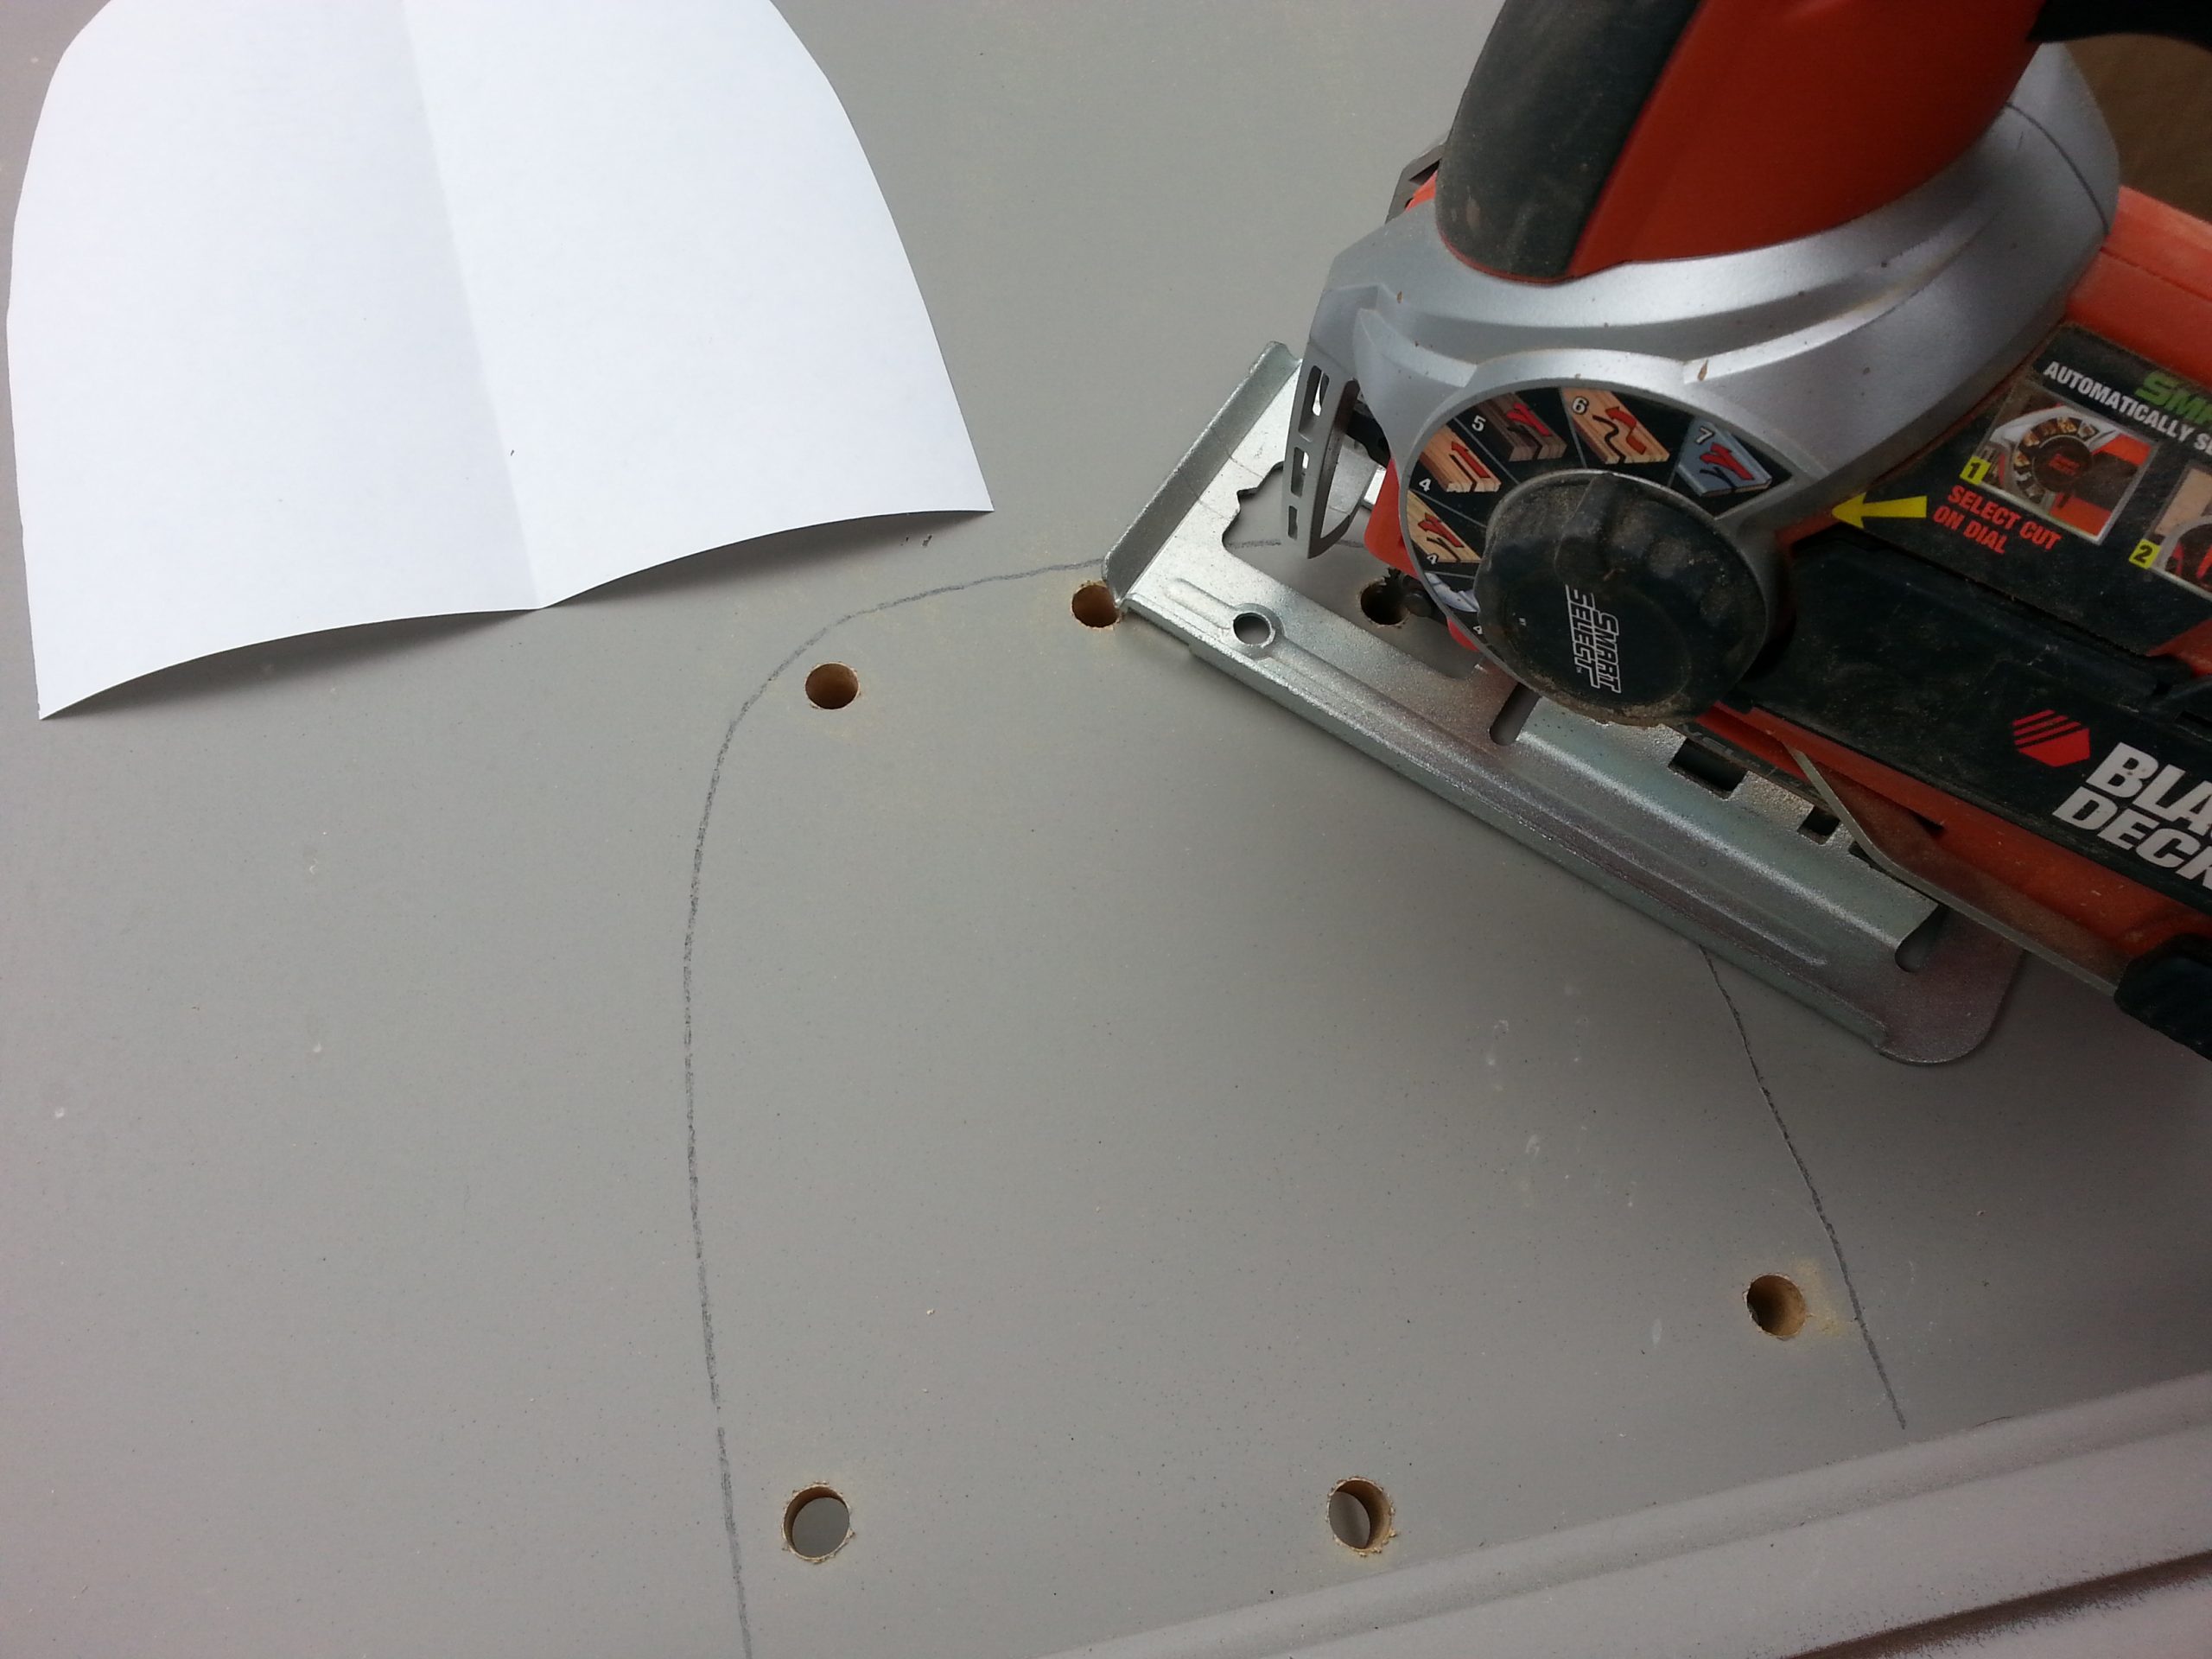
Next, I drilled some holes to allow my jigsaw room to move. This was much more difficult than it looks. As the jigsaw rounded the corner and moved toward the bottom of the cabinet, the baseplate hit the trim and wouldn't let me get close enough to the bottom.
Since I am self taught, I do what I can to get the job done. I'm not sure that the way I achieved my end goal was the best way, but I got the mouse hole cut. However, I was so frustrated I didn't take any pictures. ![]()
If you choose curtains, your kitty can go in and out of the front without needing a mouse hole.
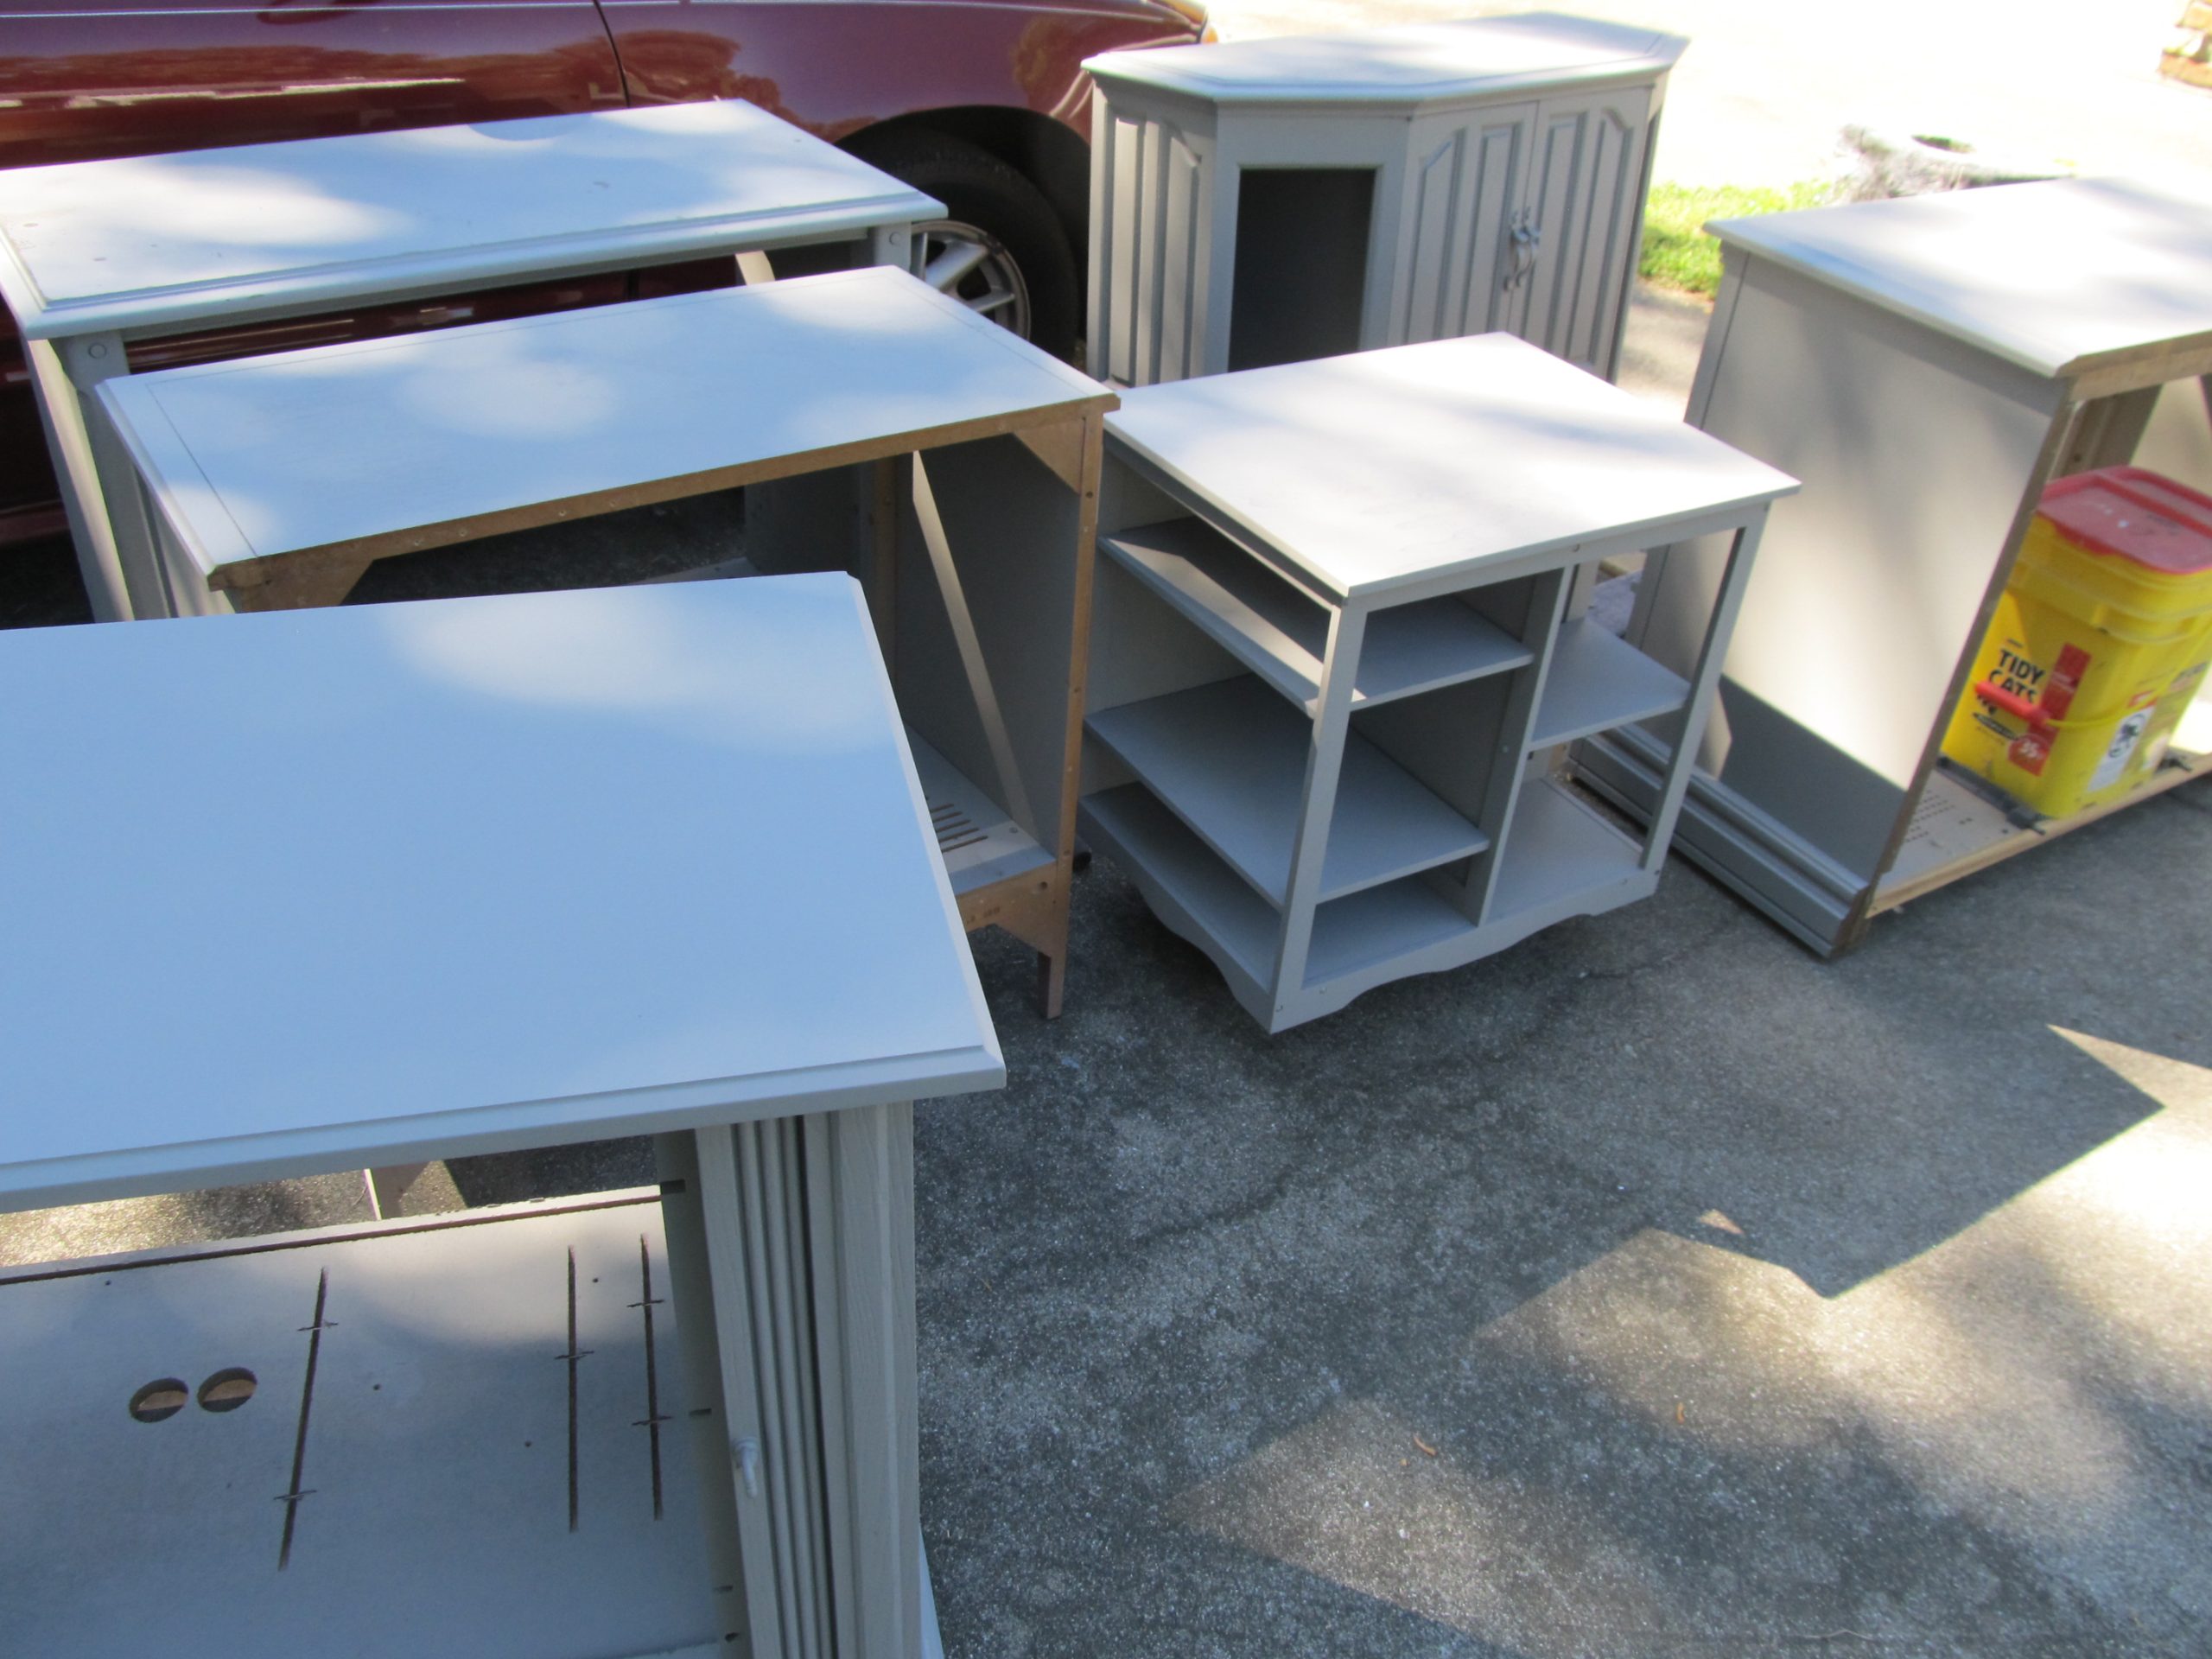
Paint Hidden Litter Box Furniture
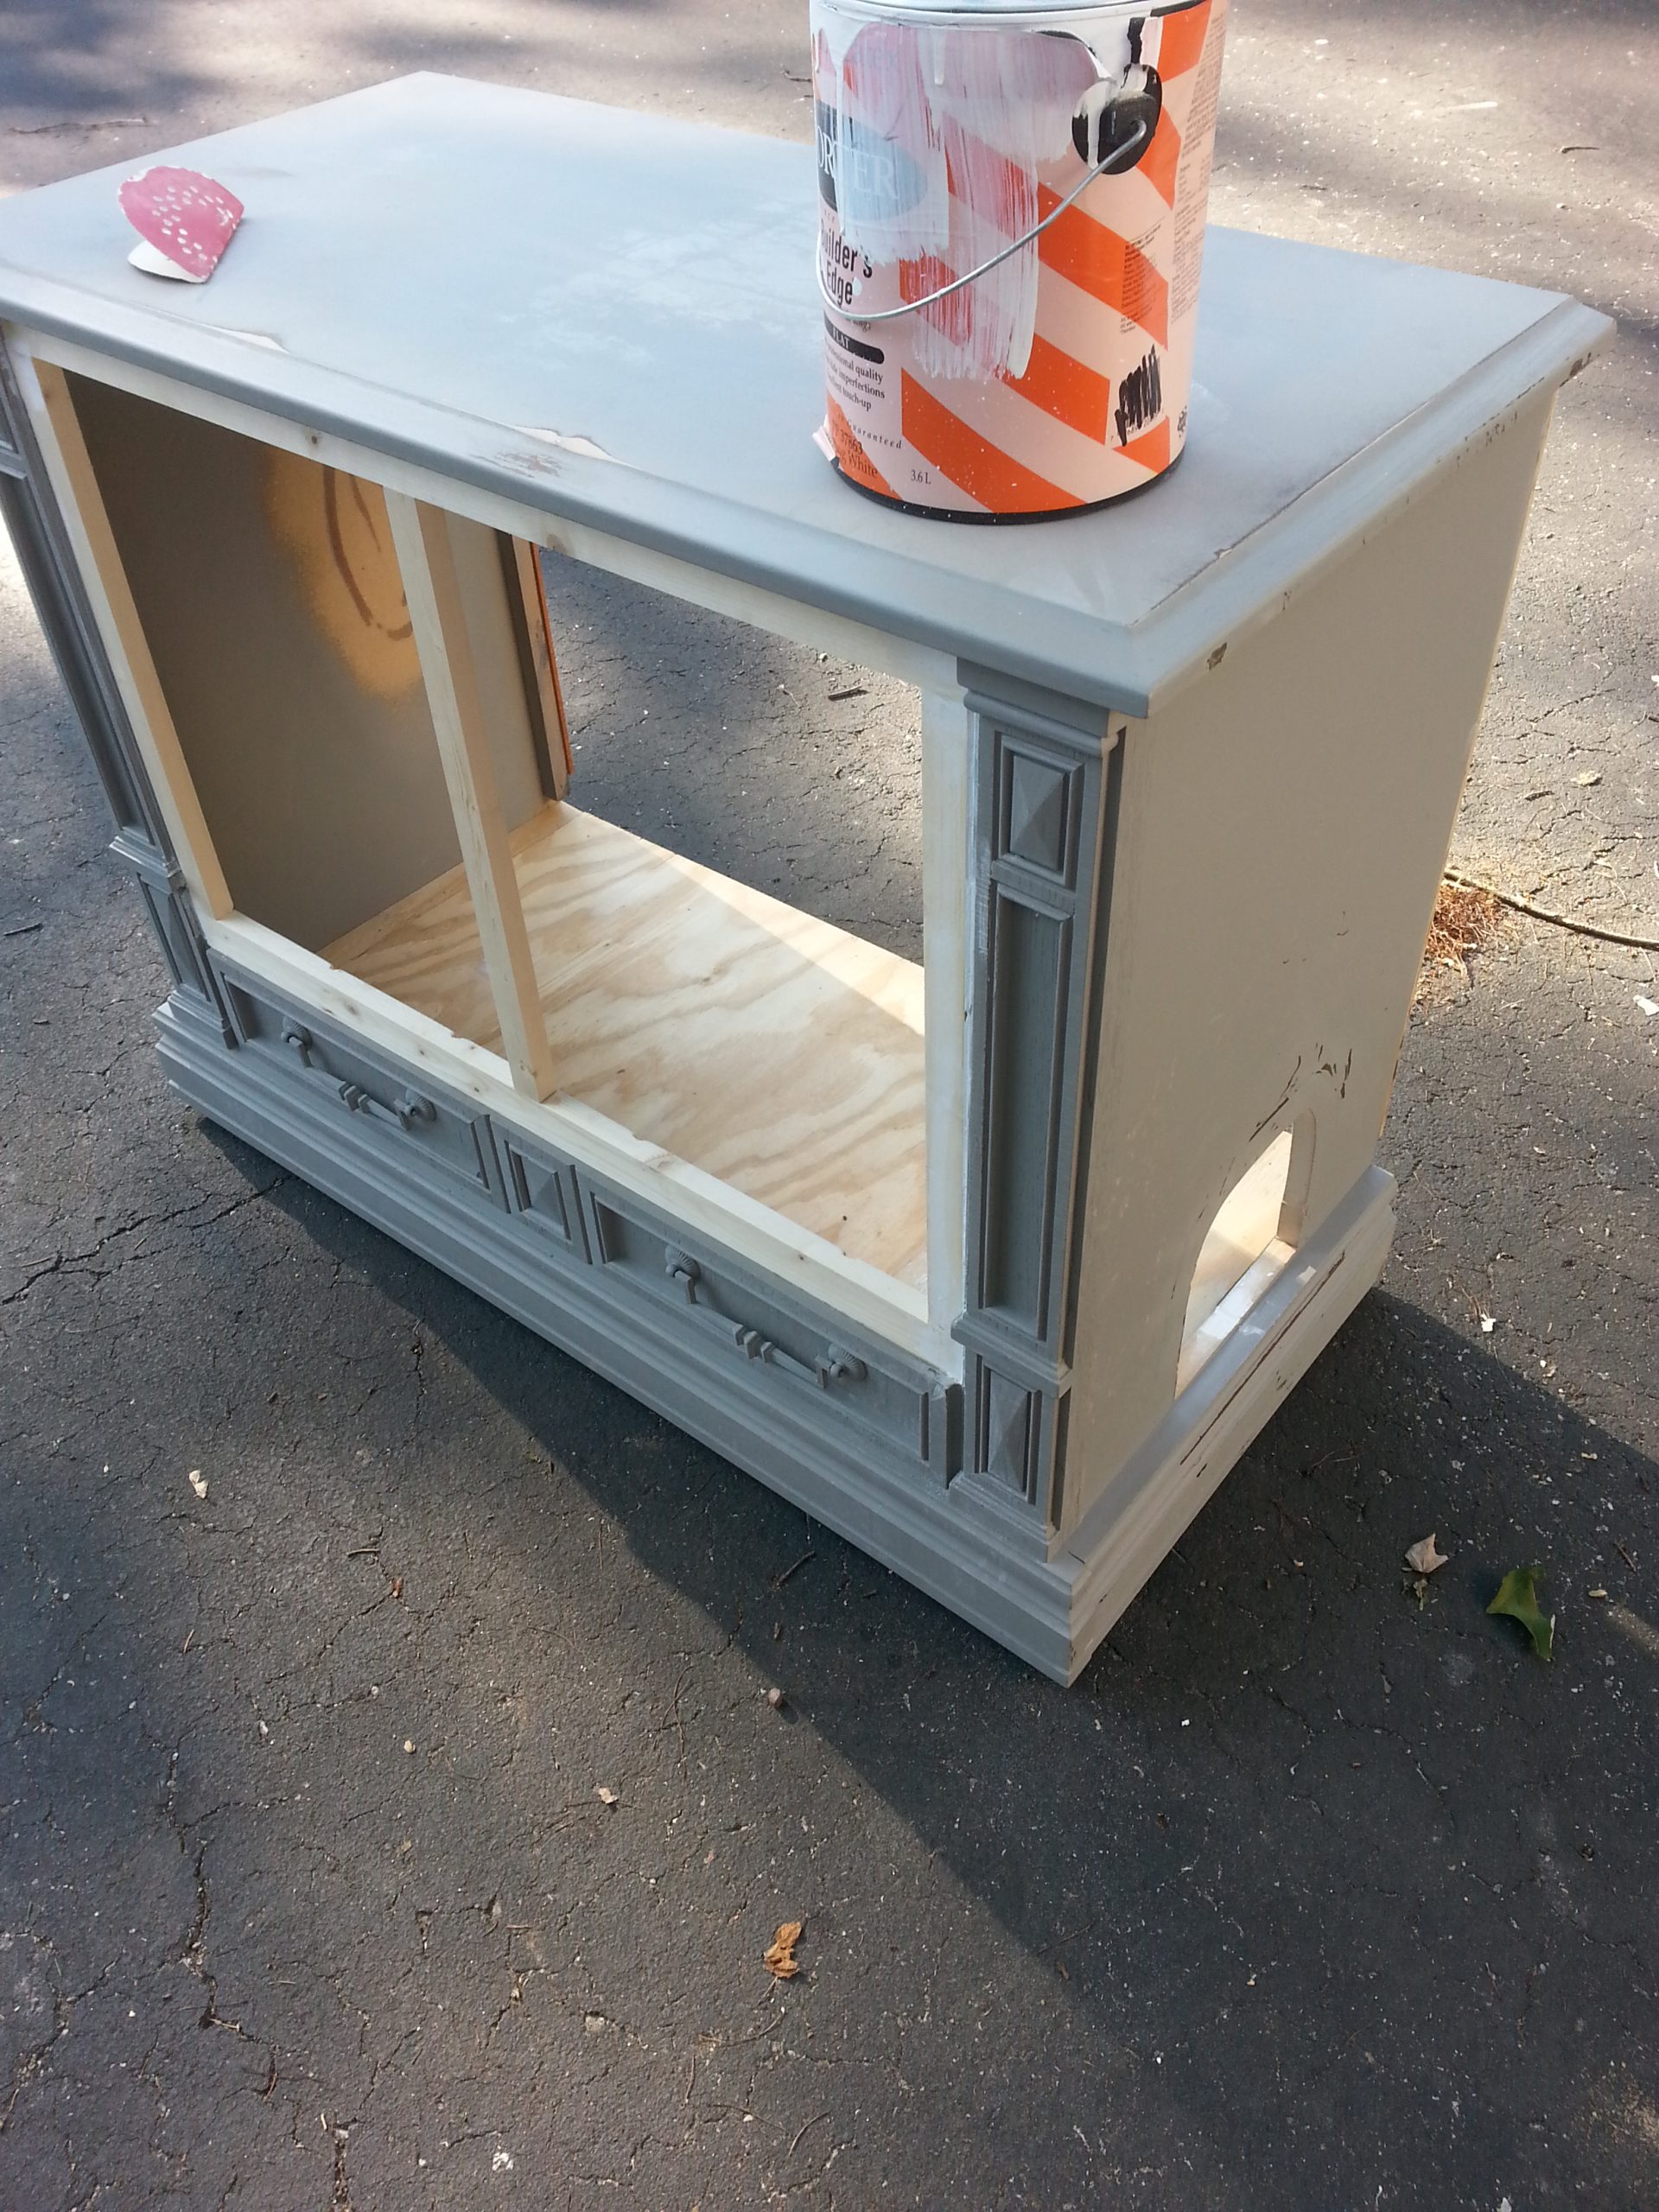
You can see here that the hole is there, and the jigsaw scraped some of last year's primer off. The kitty hideaway is ready for some paint.
I did a quick coat of DIY chalk paint as a primer, then a coat of Behr Premium Plus Ultra with some extra little touchups where I didn't get good coverage.
Style Your New Kitty Condo
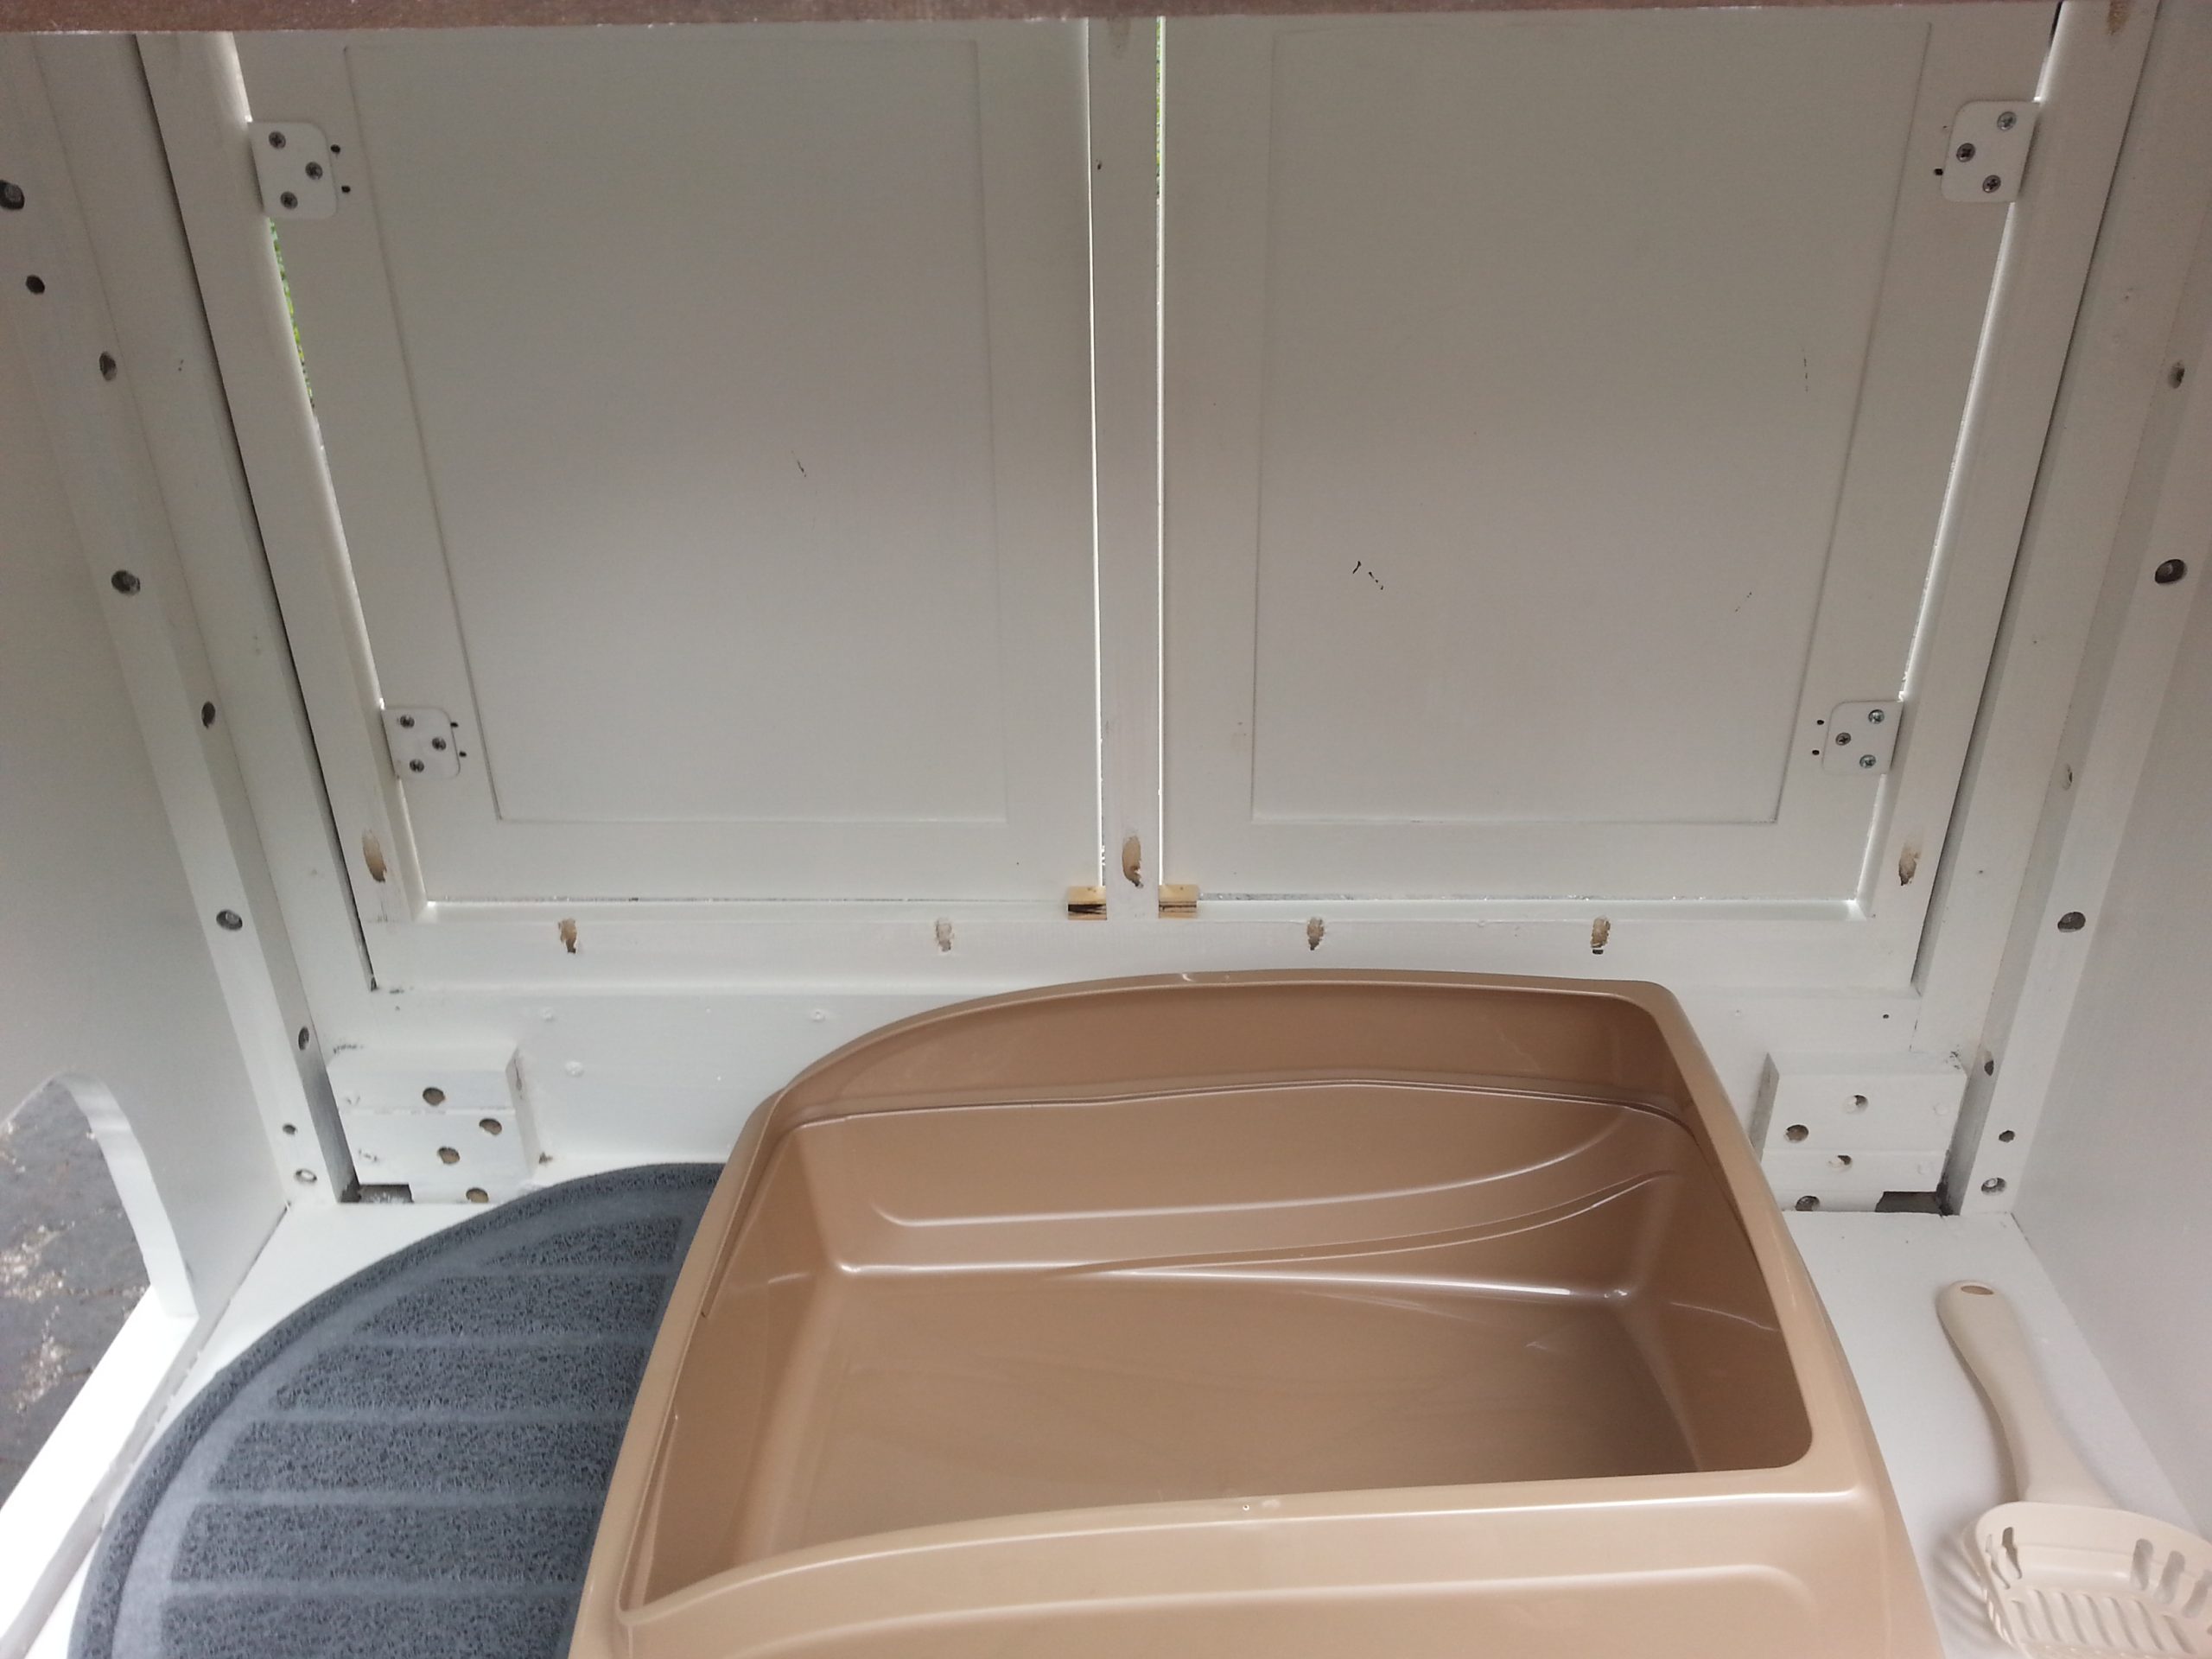
After I got the doors on, I added a couple of small "stops" to hold them in place. I bought a new pan, mat, and scoop—I'm testing to ensure the pan fits. At this point, the back is still off. You can see how I used the pocket holes across the bottom (and the top) to secure the front facing to the t.v. cabinet.
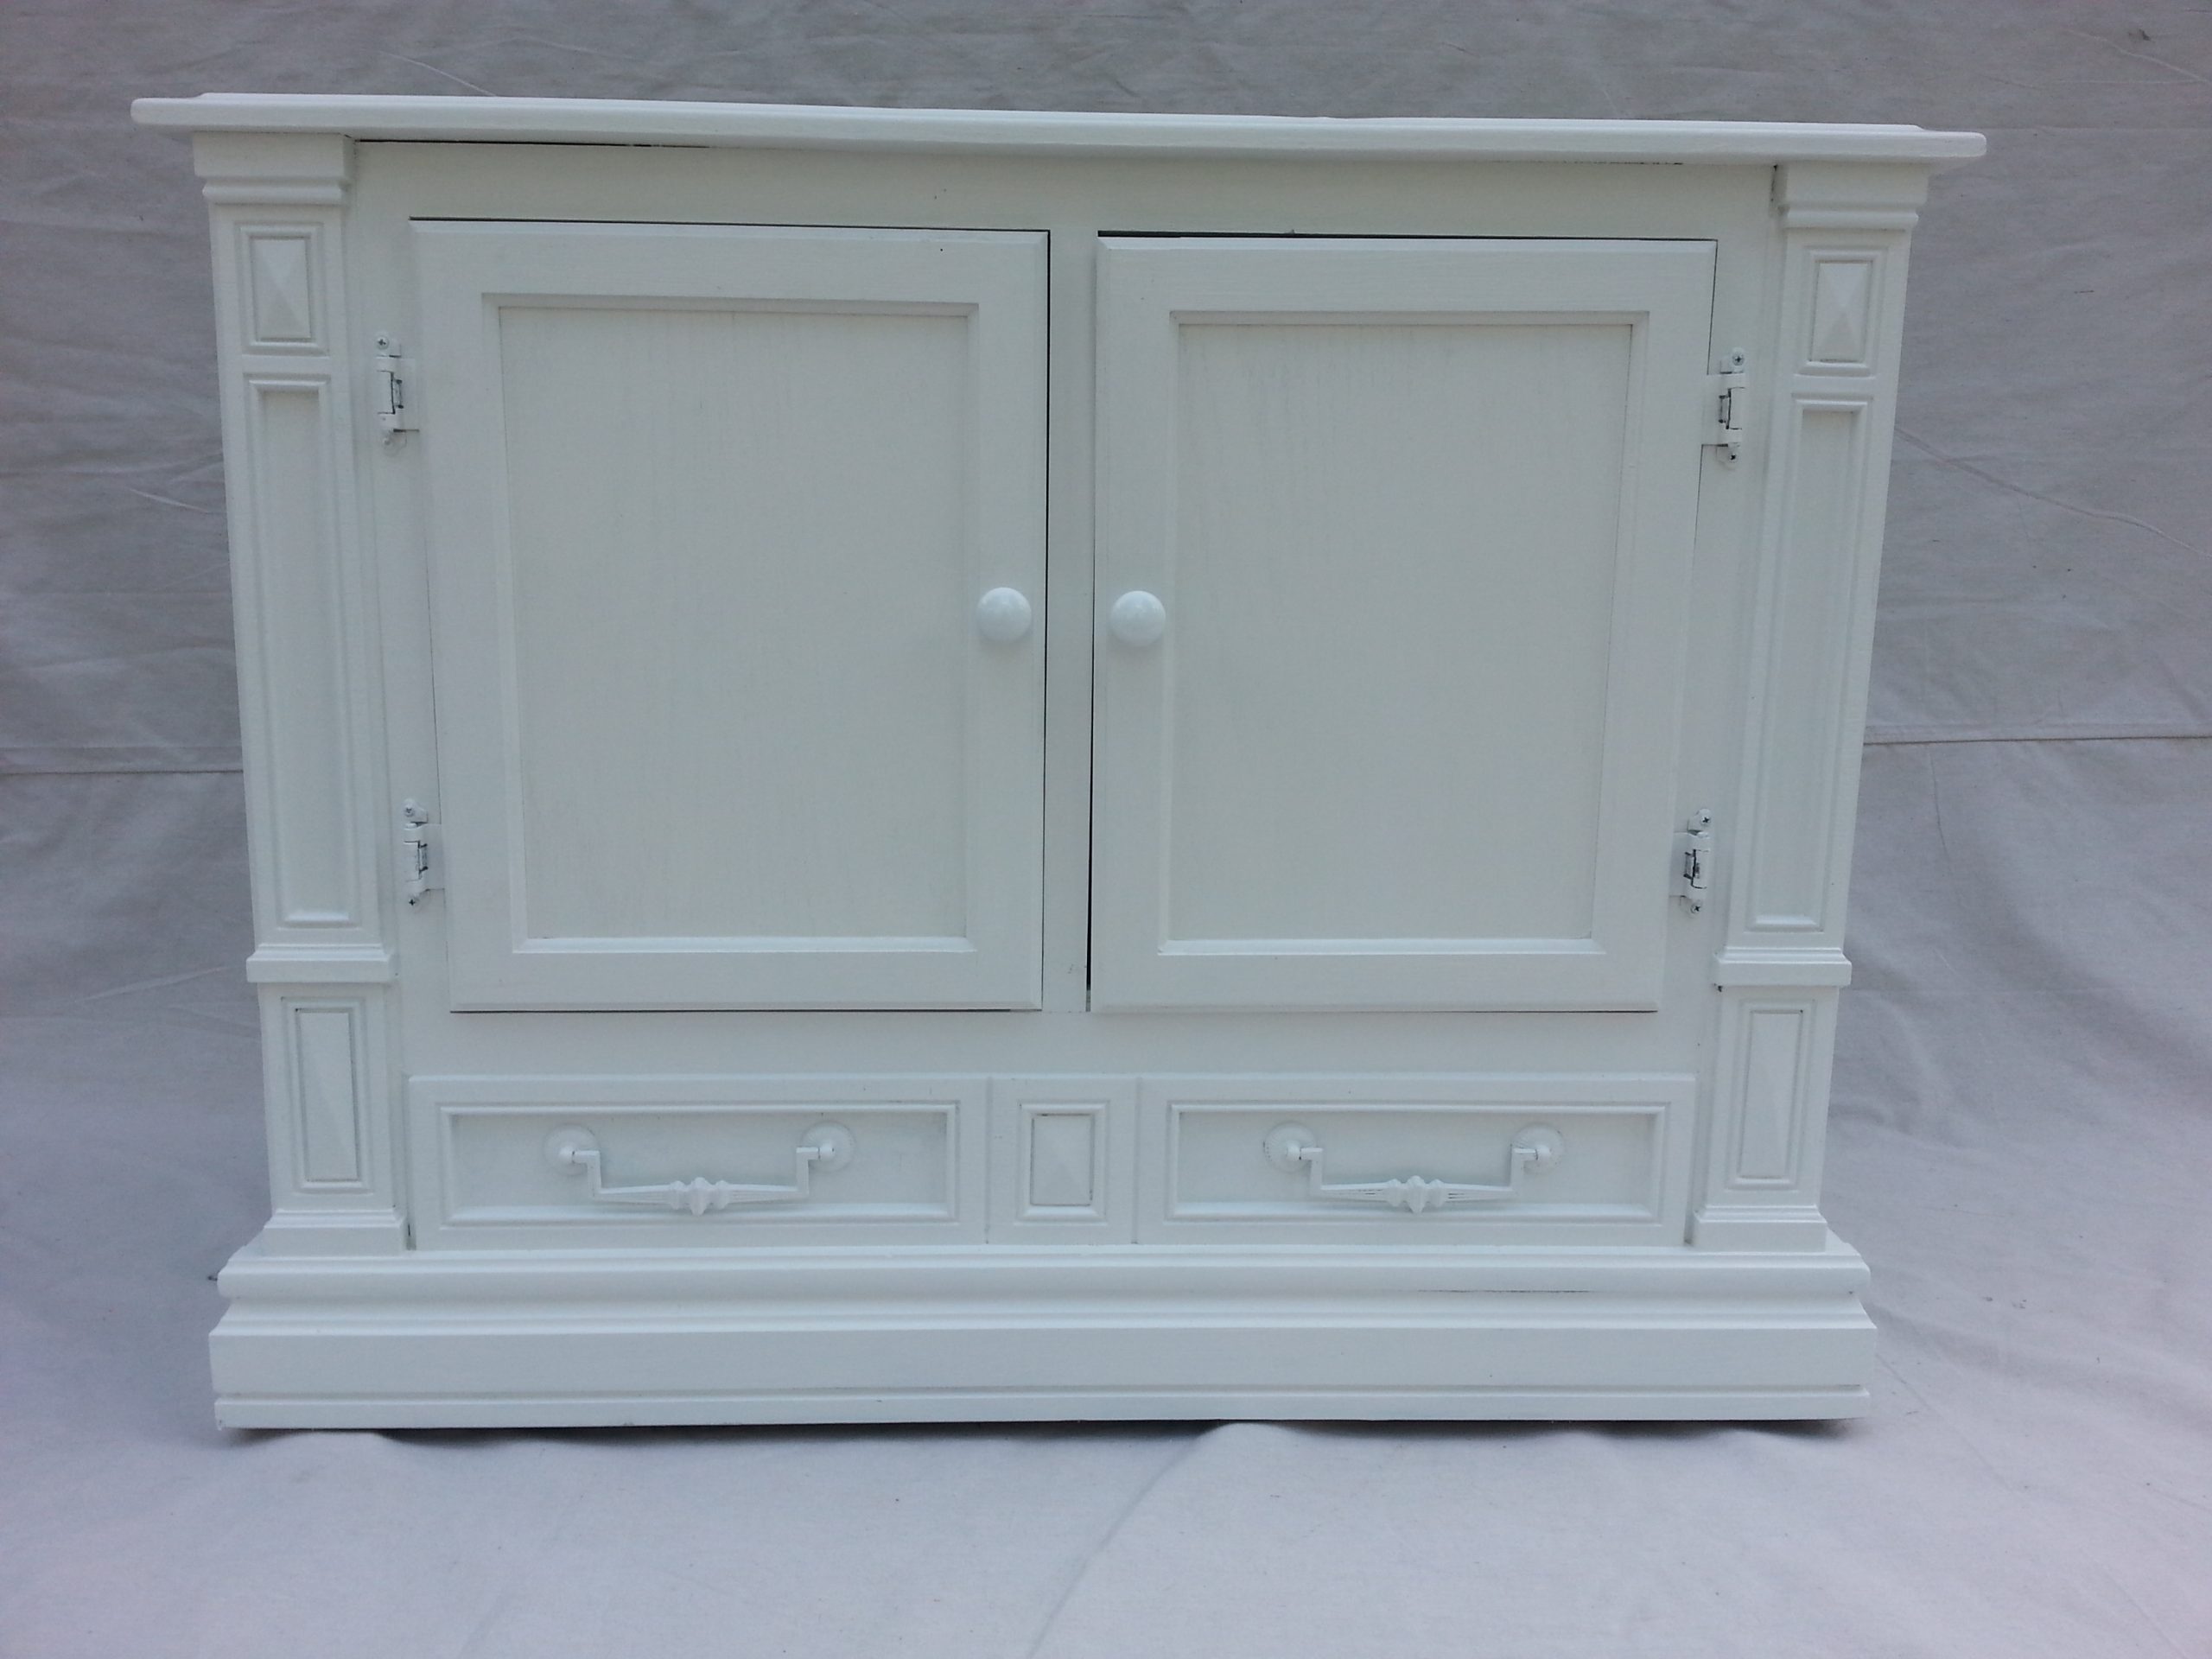
It wasn't until I was painting the cabinet doors that I noticed one of them was caddywampus! It doesn't lay flat on a table, and it caused me issues as I was installing it.
I added small knobs painted with Krylon Rust Protector in White Gloss.
A hook was added to hang the scoop on the inside of the cabinet, and I tested to see if a jug of standard litter would easily store in the cabinet. I bought a framed cat litter pan to help reduce spillage.
Hide The Litter Box
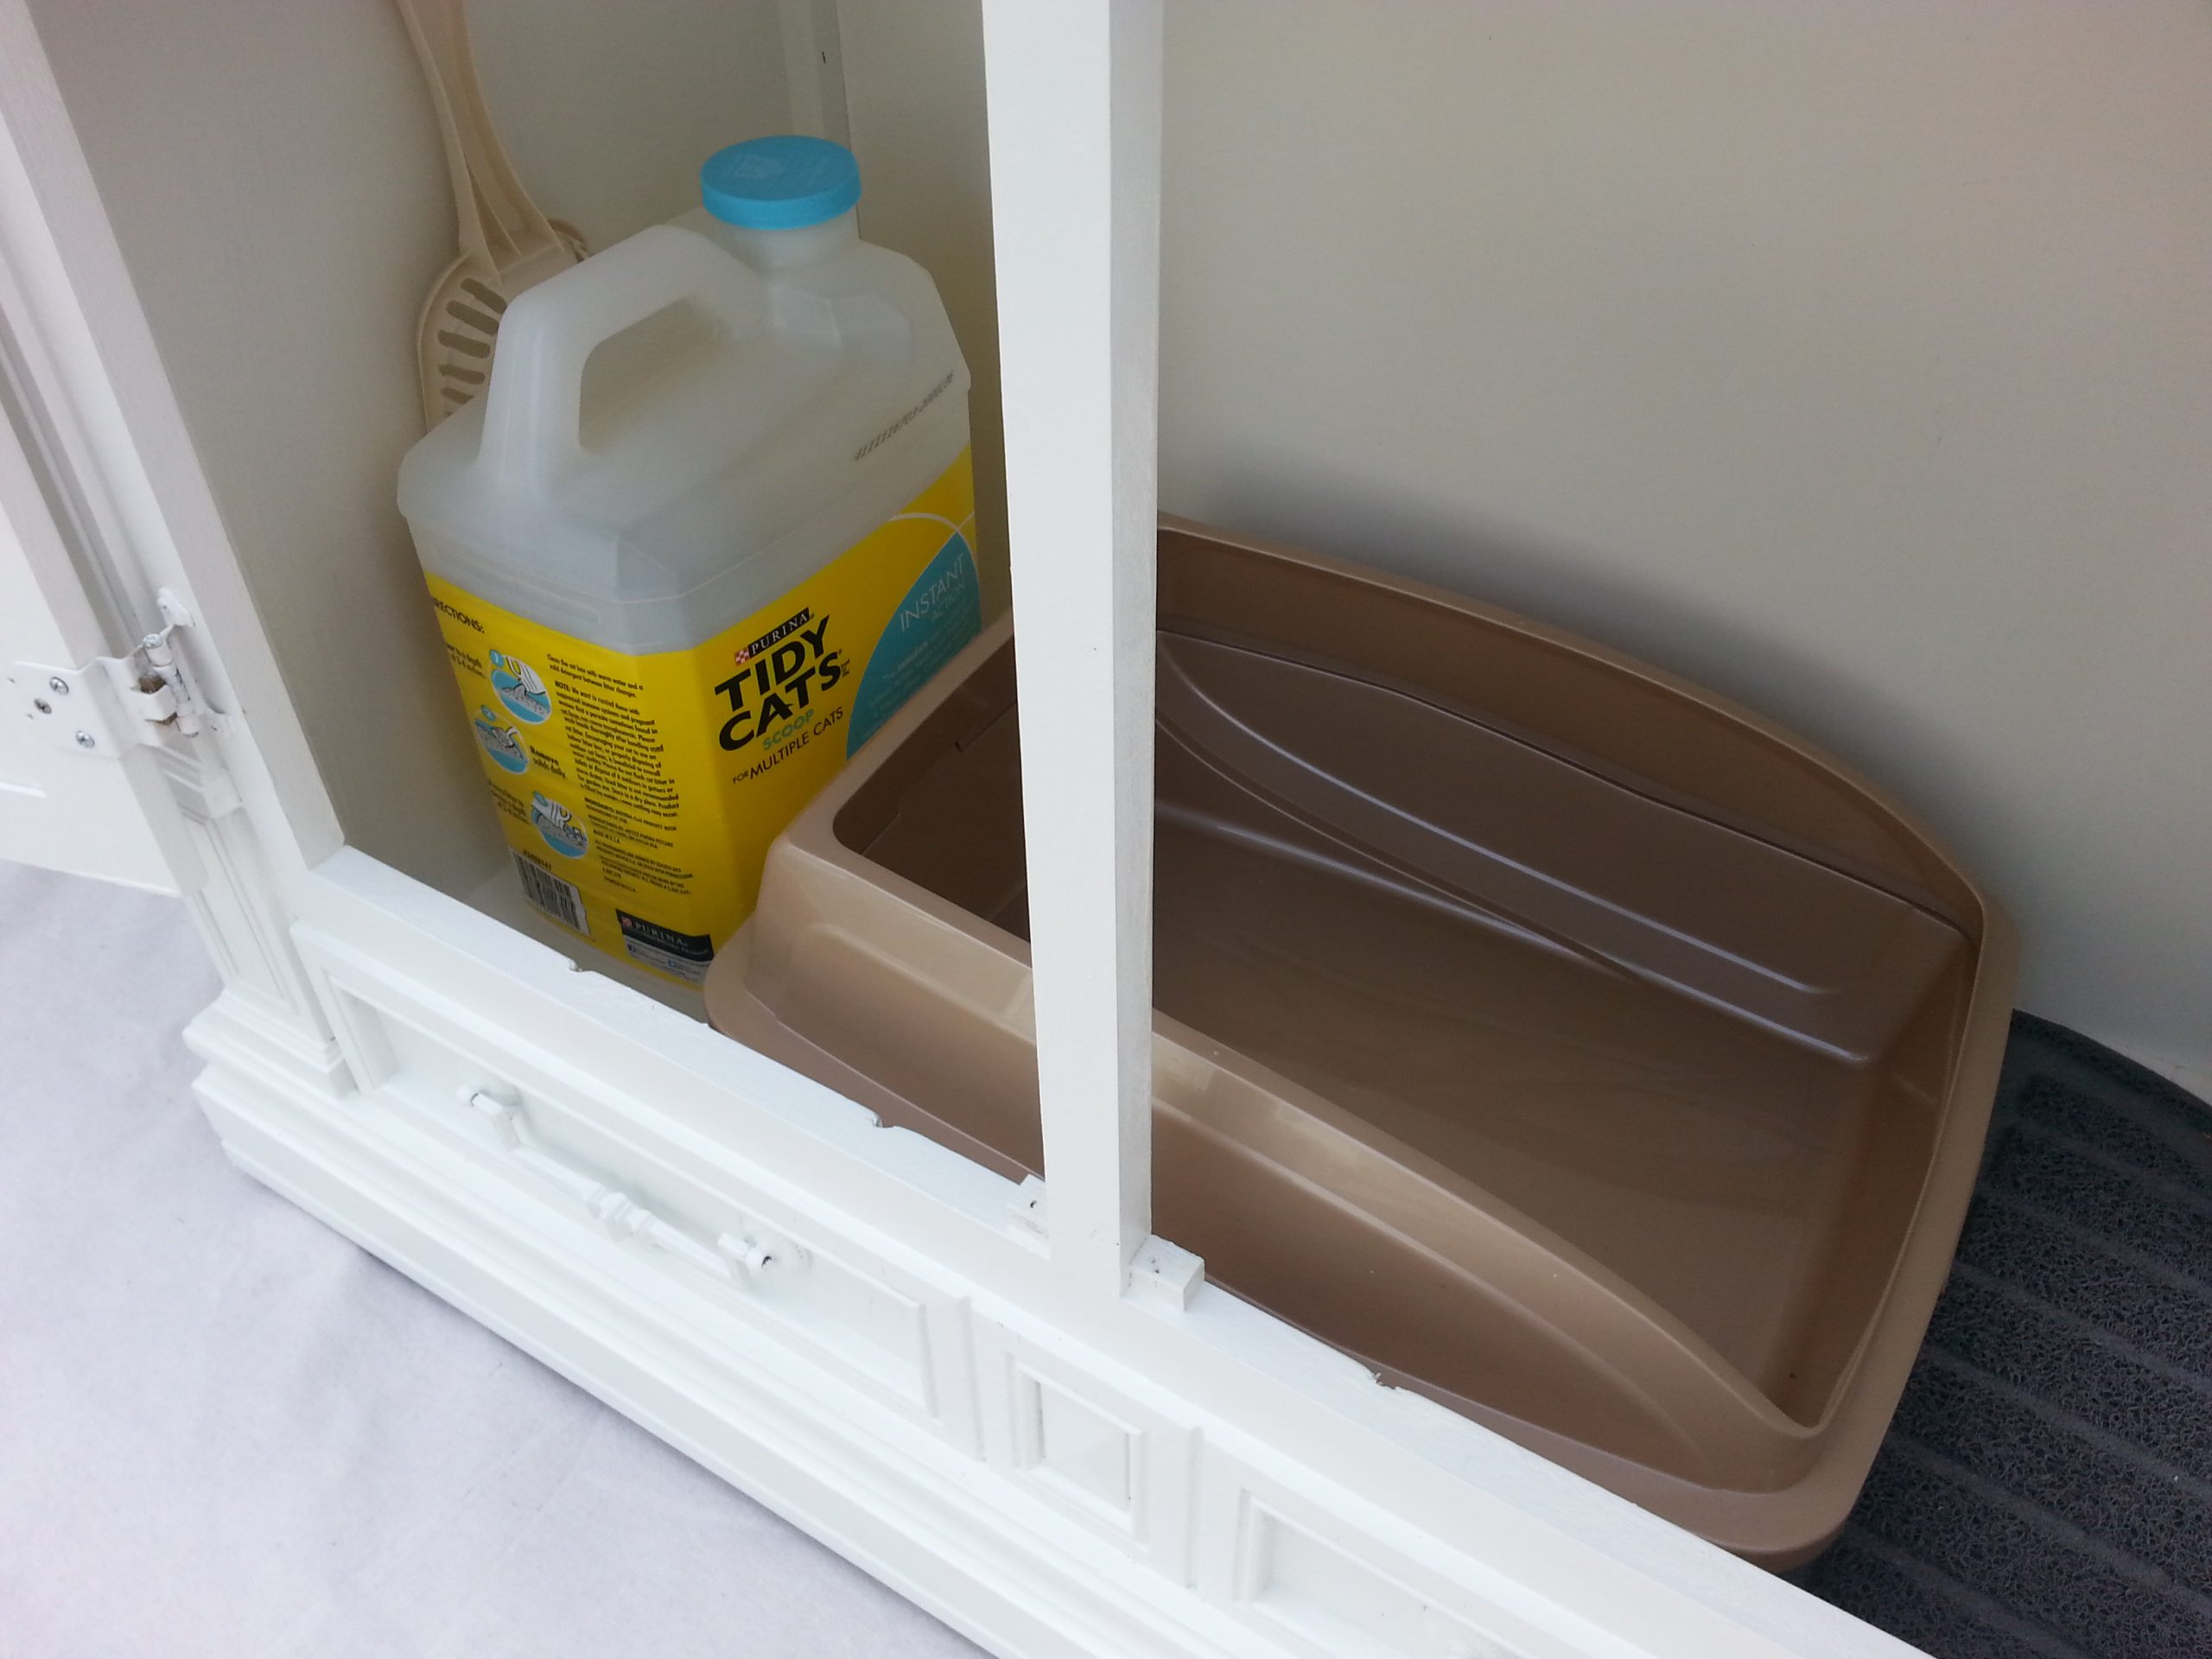
The litter tray will lift out through the doorway for quick cleanups.
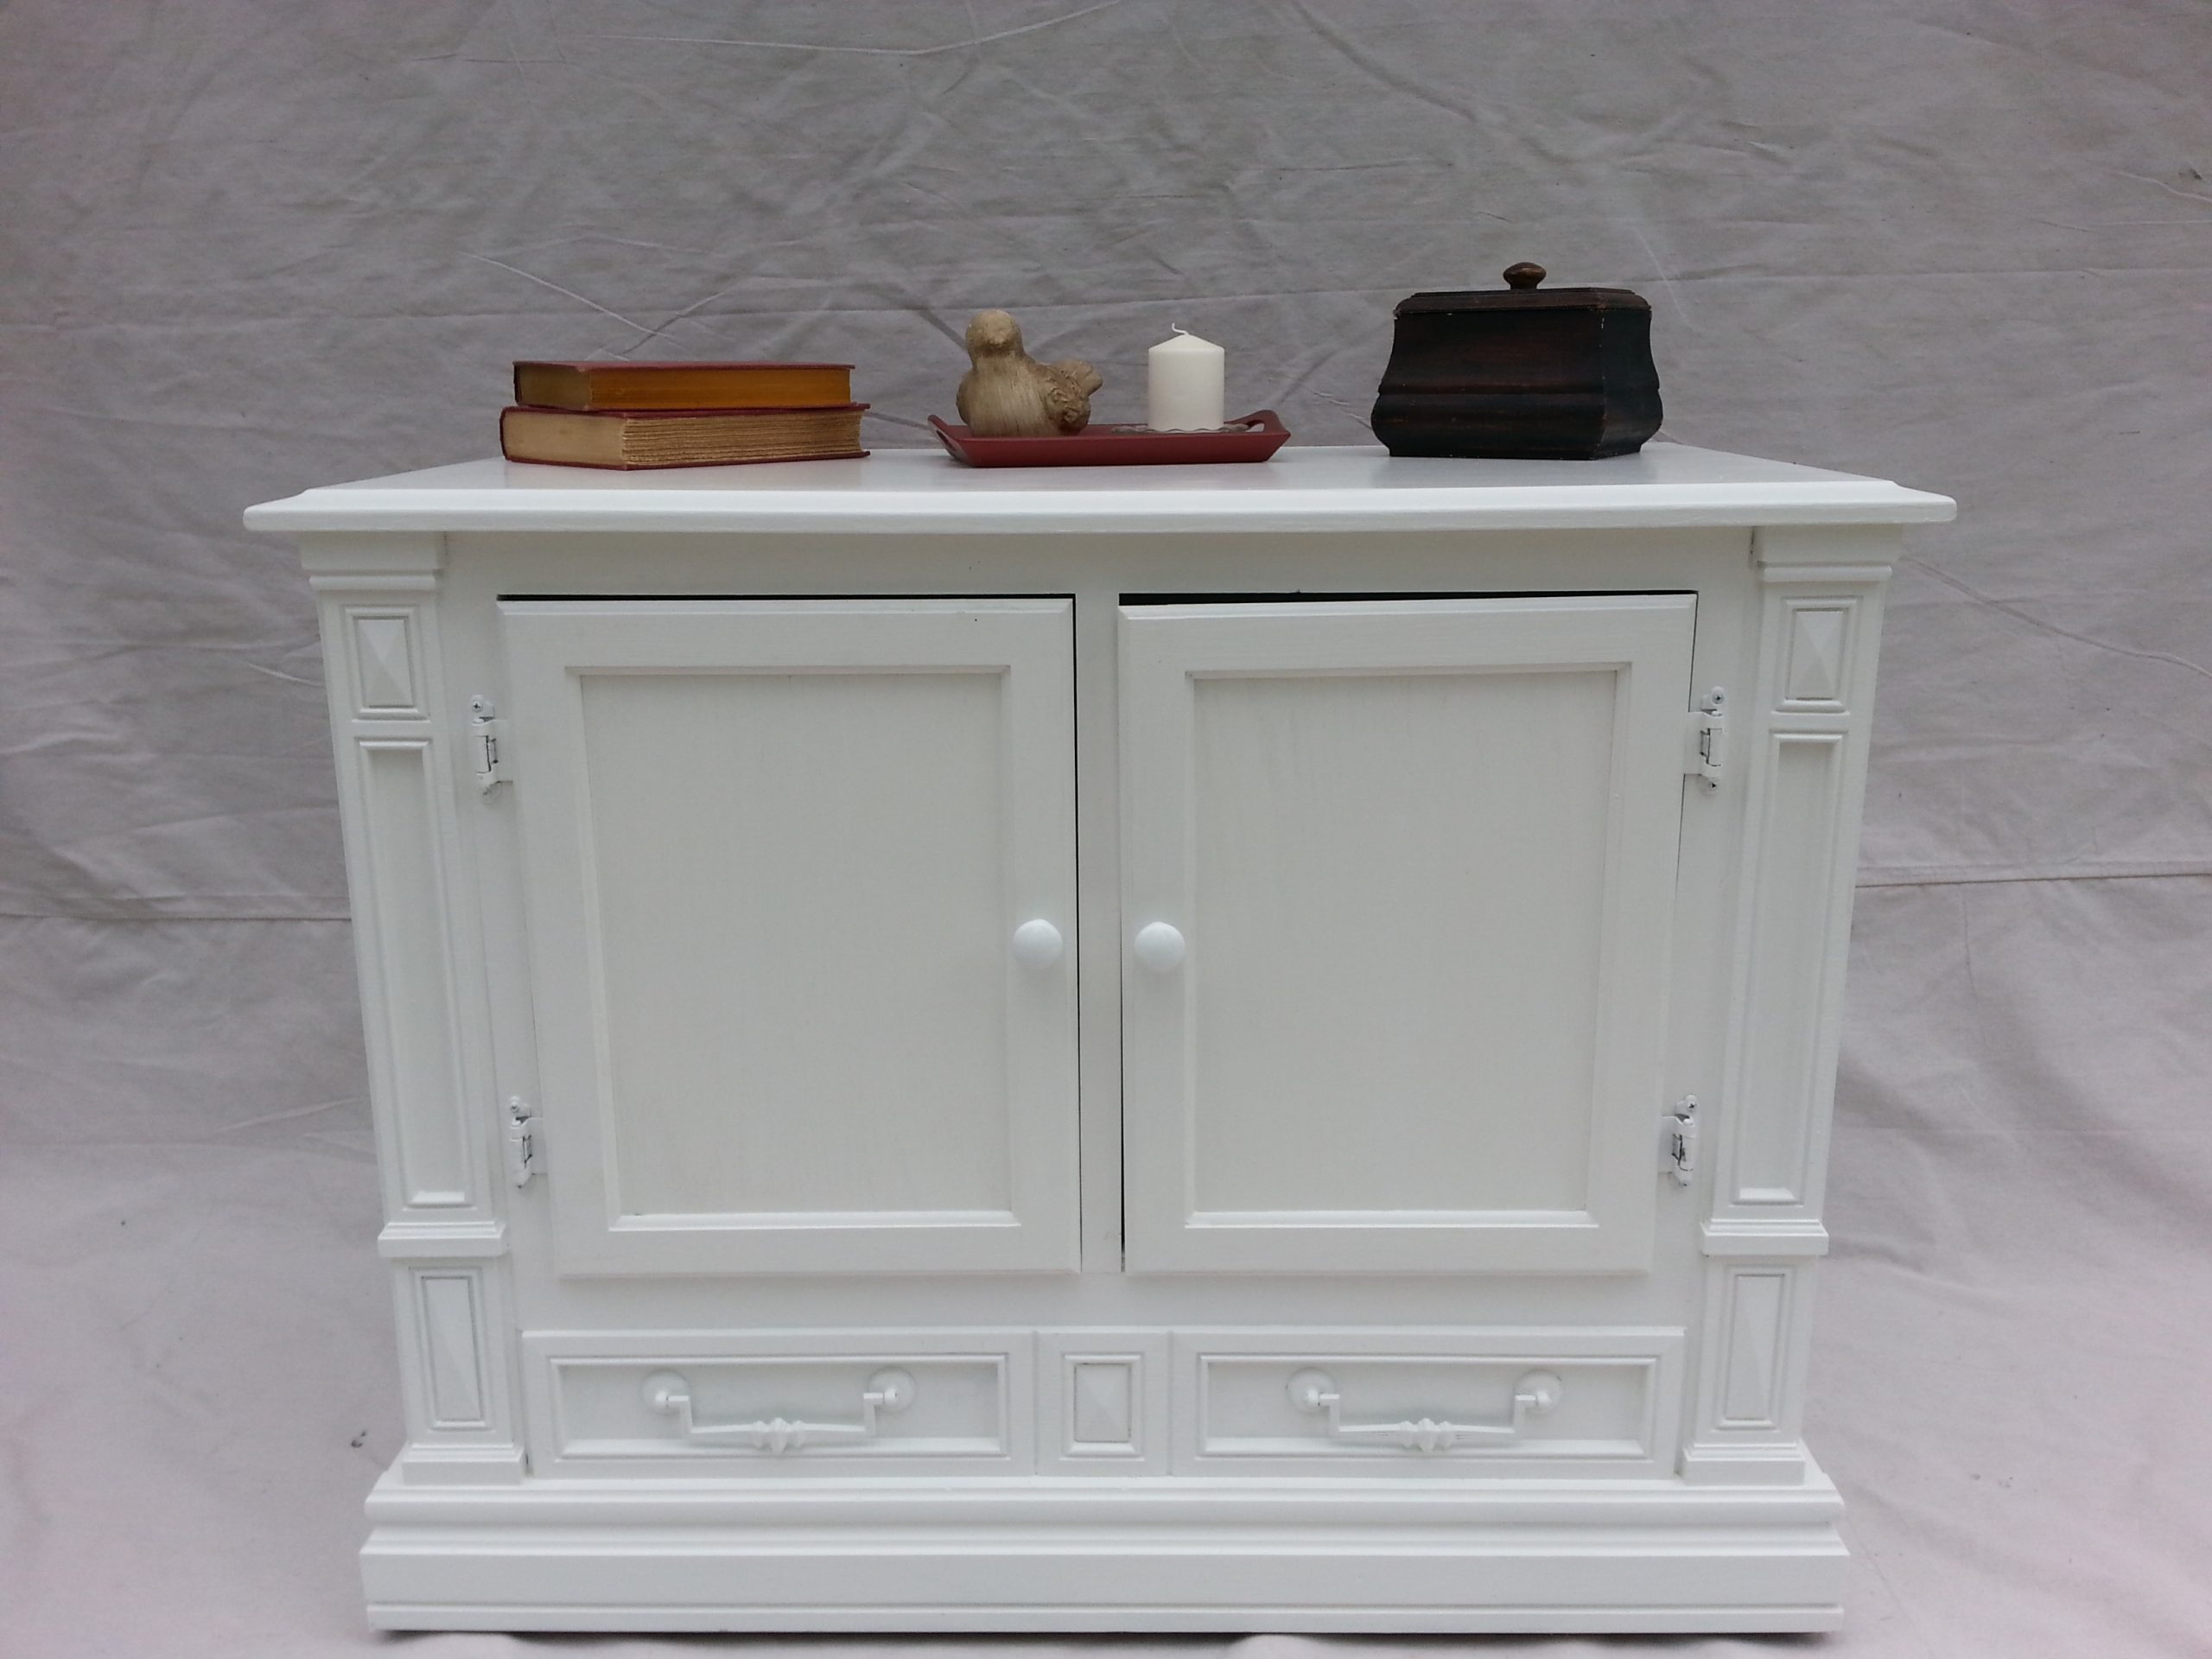
You can display home decor items on the top of the side table if you want to use it as furniture.
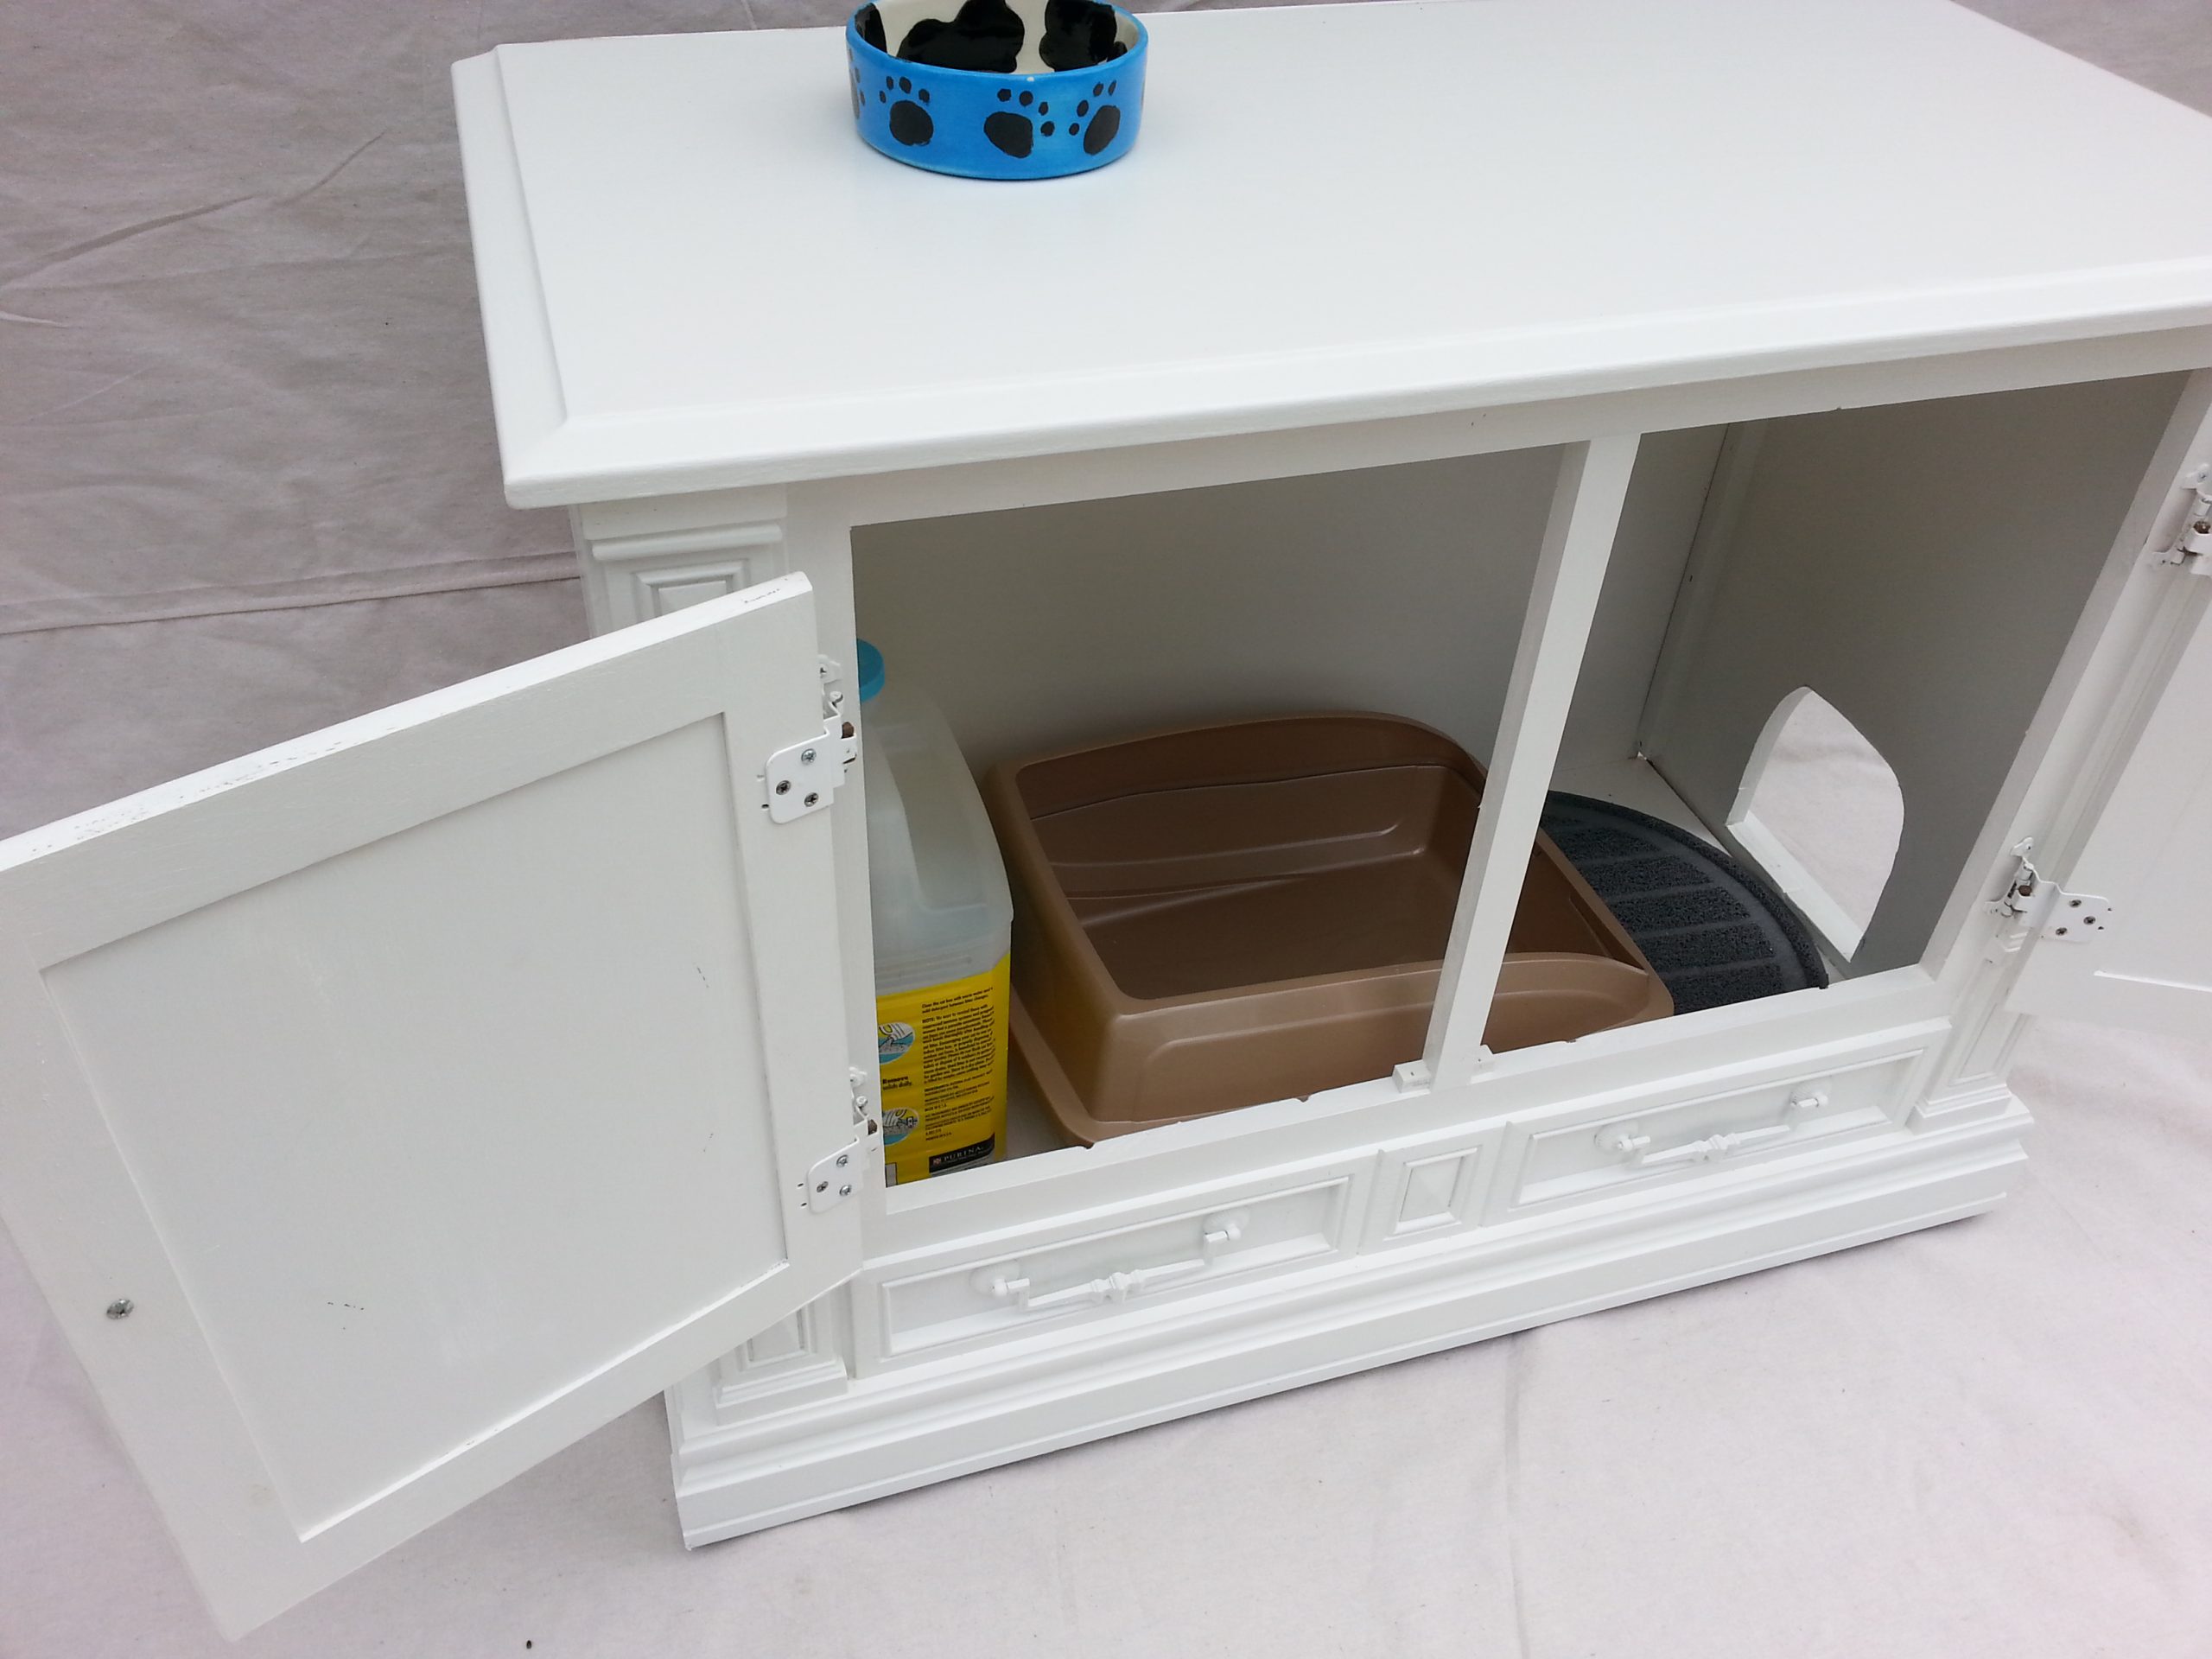
As I mentioned earlier, If you have a dog and would like to feed the cat up high or if your feline would like to take a catnap, you could add a small rug or cat bed to the top. When you customize your own pet house, you can make it your own. You may consider not installing a back panel for better air circulation. If you have multiple cats with many toys, consider adding a shelf for storage.
I hope I've inspired you to make something similar or at least taught you something with my tips. ![]()
gail
Gail Wilson is the author and mastermind behind My Repurposed Life. She is obsessed with finding potential in unexpected places and believes that with a little hard work and imagination, any old thing can be made useful again, including herself!
Gail reinvented herself during a midlife crisis and has found purpose again. She hopes you will find new ideas for old things and pick up a few tools along the way.
Ron
Cool idea for the cat lovers out there. Next time you get a TV cabinet to carve up here's an idea. Dirty clothes hamper. Cut a hinged lid in the top with a finger hole to open it, then doors in the front to hide the clothes basket inside. You can stack two baskets, then when the top one gets full you take the baskets out, put the full one on top, empty one on the floor in front of it to sort out lights and darks. Just an idea....
gail@myrepurposedlife.com
Ron,
That's a great idea for a tv cabinet, or even some other pieces of furniture. I'll have to remember that.
thanks for your input, I appreciate you taking the time to leave a comment.
gail
Jennifer Brown
I made an enclosure like this a few years ago, used a cat door to keep the dog out, jigsawed a rectangular opening for a floor grate to fit to allow light and ventilation.
Val
What a fantastic idea Gail! We need something just like this for our kitty. We could keep his food dish up top, too! (We have a sneaky little ShizTui who steals his food). I love the little access door too. Thanks for sharing a great tutorial.
Val
LindaZ
I would love to do this for my cat. But please tell me what you do with the insides of the old tv. Can they just be thrown away in the regular trash or do they have to be recycled? Thank you I love everything you do. Keep up the good work. I look forward to your to your next projects.
Debra
This is the cat's meow!!! hehe. I absolutely adore it and its has inspired me most definitely.
Sharon @ Elizabeth & Co.
Wow, you never cease to amaze me with your creative ideas! I did not see that one coming!
Bliss
You did inspire me, but in a different way. We already have the litter out of view, but there is a problem with the food and our dog doing everything in his power to get it. If I make an enclosure that only the cat can fit in, problem solved and the food is off my laundry counter. See how that inspiration thing works, excellent!
Sue Z.
Perfect idea for that console! And yes, it has inspired me. I do rescue work and have ferals and/or abused cats here as fosters til they can be placed in their furever homes. Teaching them that love is a good thing and not all humans are bad. I most likely will need 3 of these, strategically placed of course. ^.~ Thank you Gail, for helping me to help the furbabies in a much "nicer" way!
Meari
THAT is a great idea, Gail.
kirby carespodi
So timely! I am getting ready to move the grandkittens upstairs (they will not be happy), but I need my guestroom back! This is such a good idea...I may have to do something like this. Thanks, Gail!
Holly
Nicely done. The easiest way to cut that mouse hole at the bottom where you jig saw doesn't fit is to use a reciprocating saw. It makes a nice flush cut. Sorry you had trouble with it. A reciprocating saw is one of those must haves (at least in my shop). But even though you were frustrated, it turned out great.
Susa n
Brilliant, Gail! What a great idea.
Paige @ Little Nostalgia
I was just talking to a friend the other day about hiding litter boxes. This is WAY better than sticking it in the corner of a bathroom or mudroom. It could even work for little dogs that are taught to use litter boxes, too.
Jan Boone
Truly inspired! Best repurpose, EVAH!