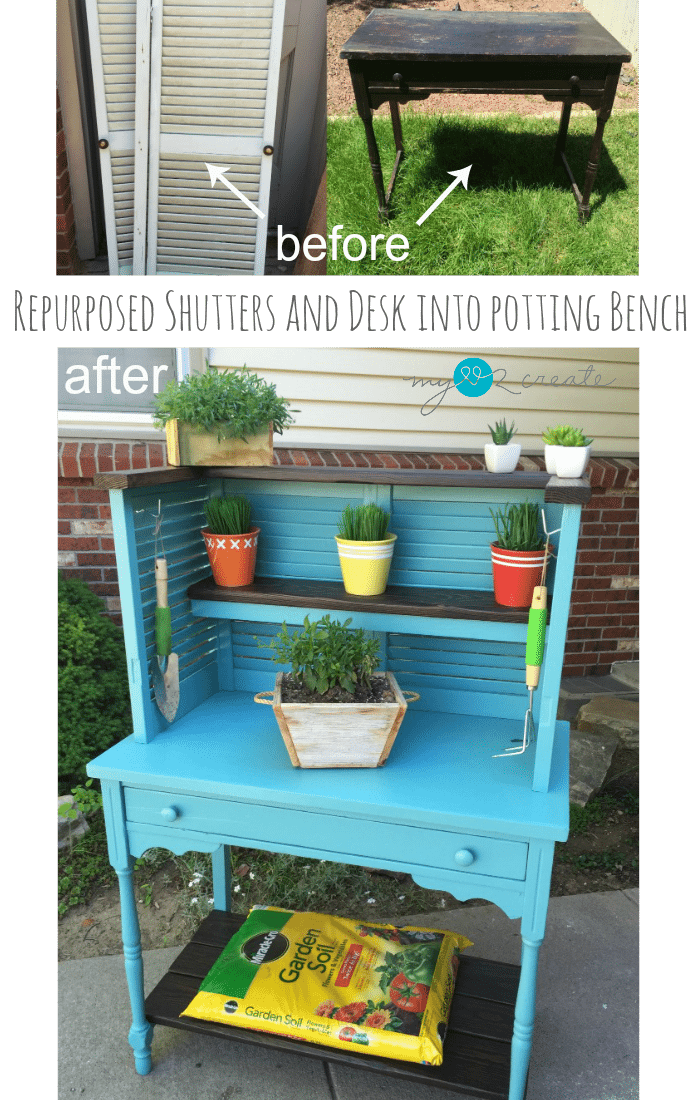
Hi, I am so excited to share my latest project with you, my upcycled shutters and desk into potting bench!
Would you believe this project happened by accident? It totally did...and I couldn't be happier about it!

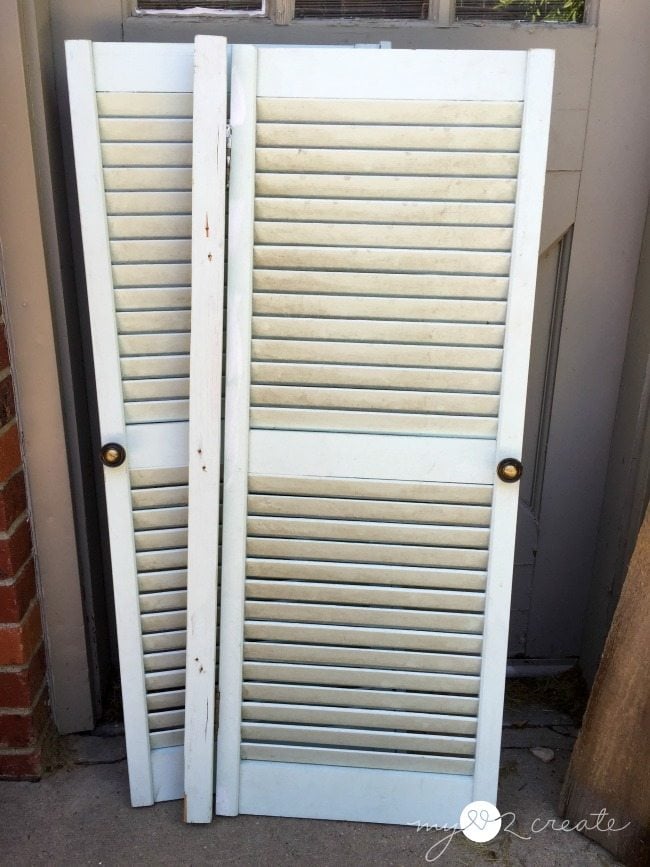
I went out to my hoard back porch to see if these old shutters my friend had given me would work to make some benches. For the longest time I have been wanting some for my back yard. So, I thought these would be perfect. I pulled them out and was ready to get to work when I spotted this...
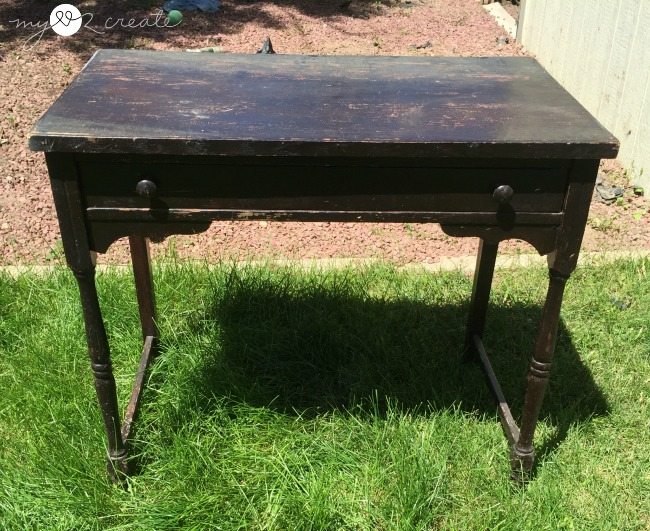
An old beat up desk. I had gotten this for free off of Craig's list a few years ago. I never had a place for it in my home to redo it...so it was exiled to the back porch. As I was holding my shutters and looking at this desk inspiration struck...I guess I wasn't going to make benches after all, but a potting bench.
First, I needed to cut the upcycled shutters in half so I got to work removing all the hardware.
Cut Upcycled Shutters in half
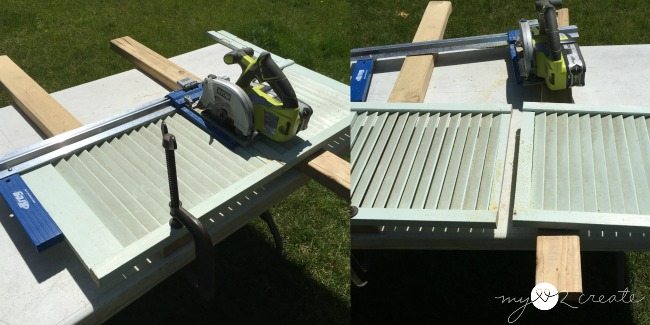
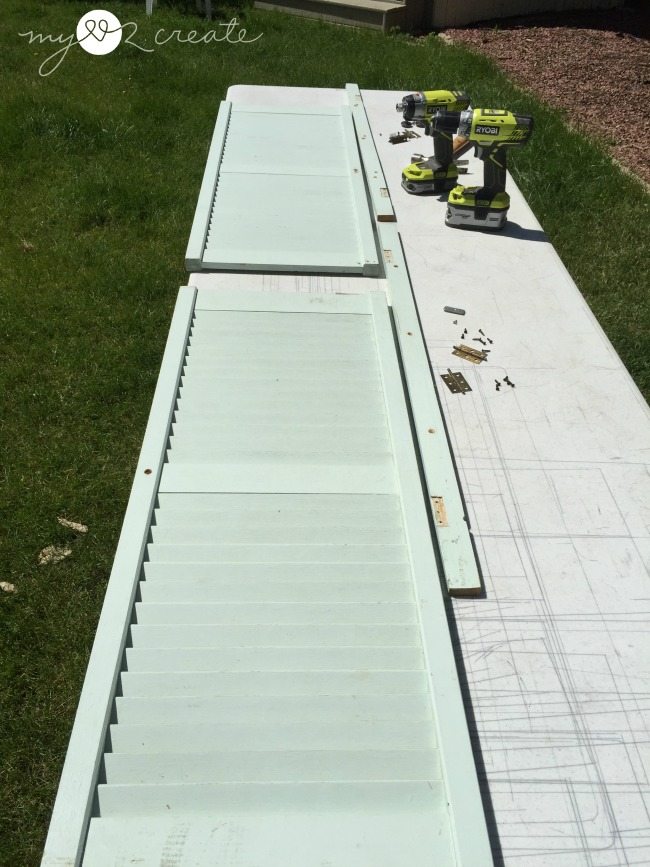
I measured the halfway point on the shutters and used my new toy, my Kreg Rip-Cut , to cut the upcycled shutters in half. It was awesome!!
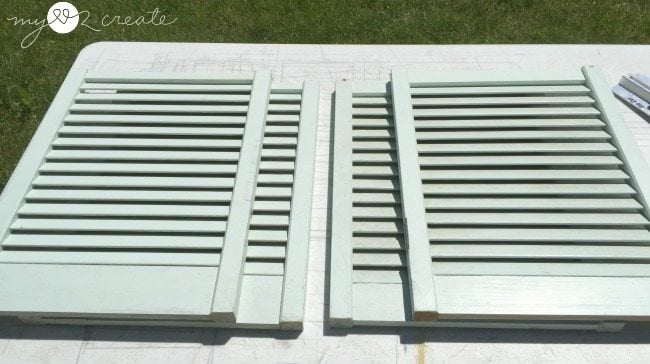
With my shutters cut in half I now had four smaller shutters.
Test the fit of the shutters
I did a test to see if the shutters would work on top of the desk. They fit just right, so I marked with a pencil where I needed to drill pocket holes. Then I got to work.
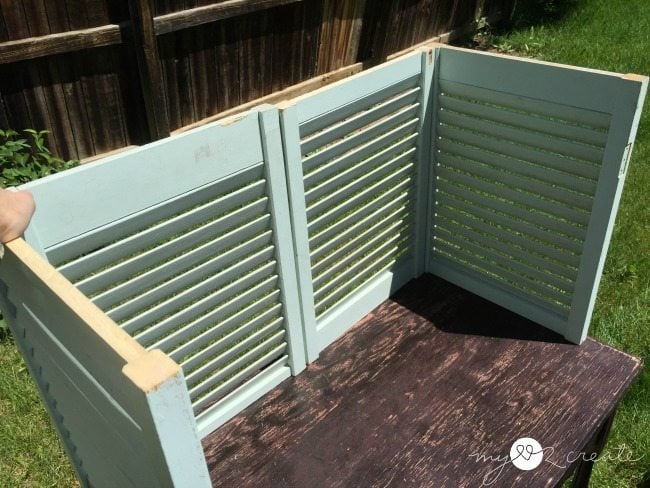
How to attach shutters to desk?
I drilled pocket holes into the ends of the shutters so I could attach all four of them together.
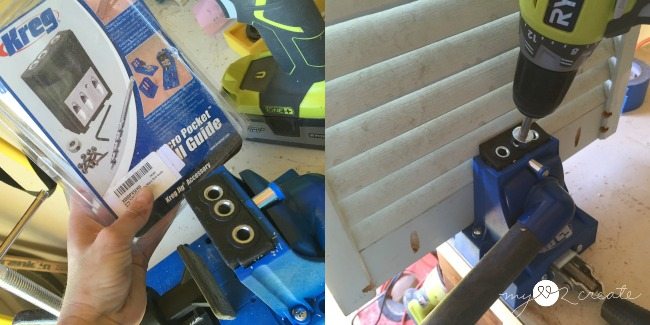
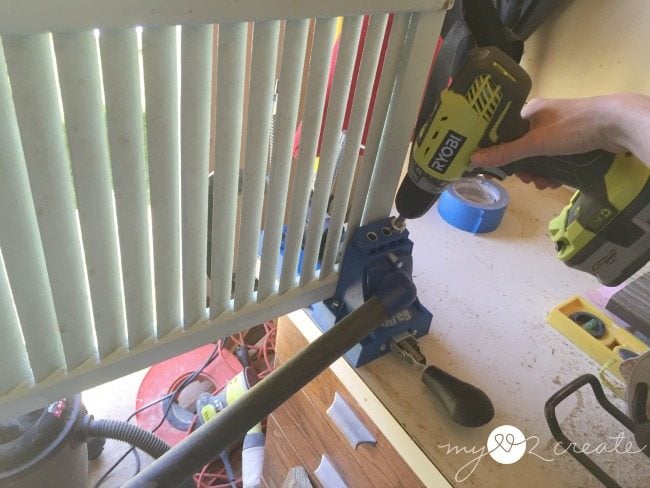
In order to attach the upcycled shutters to the desk, I needed to use my Kreg Micro Drill Guide System because the bottoms were only ½ inch thick. I drilled three smaller pocket holes on the bottom of all four shutters.
Need more details on using a Kreg Jig? See my article How to use a Kreg Jig Pocket Hole System
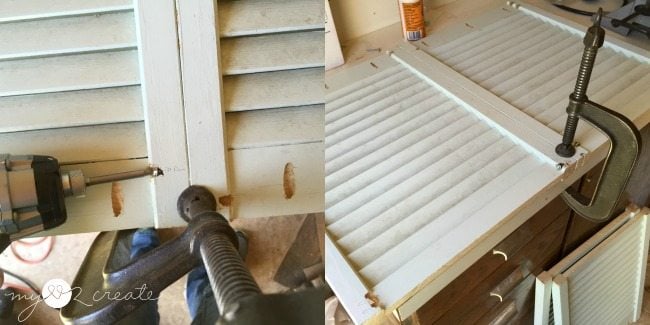
Then, I started by attaching my back two shutters together. I used my Gorilla Glue and 1 ¼ inch pocket hole screws. I always clamp when I am drilling pocket hole screws to ensure my pieces go together perfectly. If you notice I drilled a pocket holes on both shutters to attach them on the top and bottom.
Then I added my side shutters to the back shutters. I used my right angle clamp to hold them together for adding my first screws, then removed it to add my last ones.
Add a shelf to the upcycled shutters

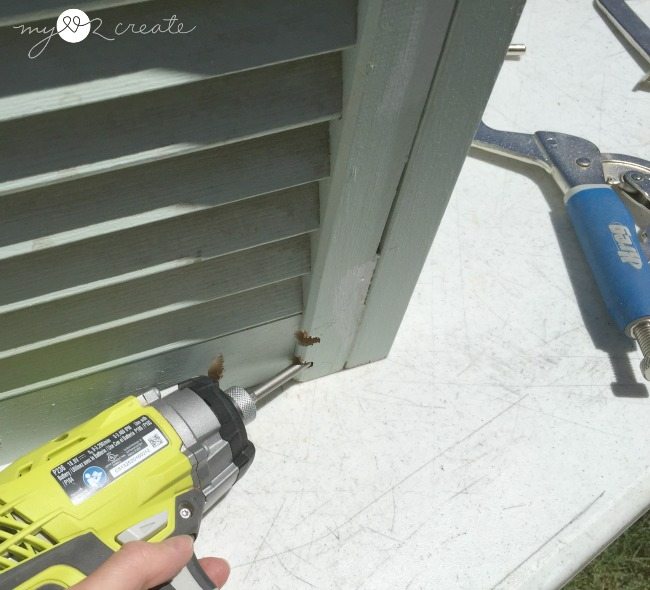
Thinking it would be good idea to add a shelf to go in the middle of the shutters but I realized that I could use the 1x2's that I had removed from the shutters, sa-weet! So, I cut two long pieces to fit the length of the back shutters and then I cut four smaller pieces to make my shelf support. I used wood glue and nails to attach them together, with two small pieces on the very ends and two in the middle.
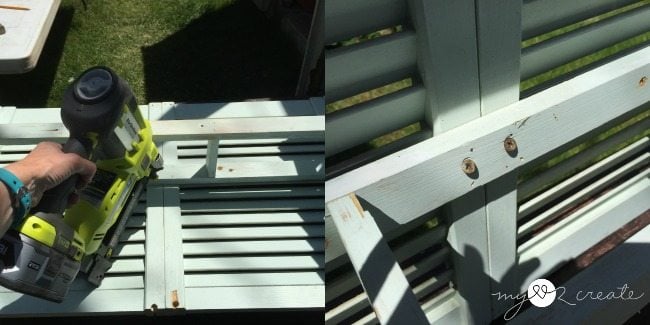
In order to secure the shelf support on the shutters I nailed them in first, then pre-drilled holes at an angle and added screws to secure the shelf support in the middle and on the ends.
Making a lower shelf
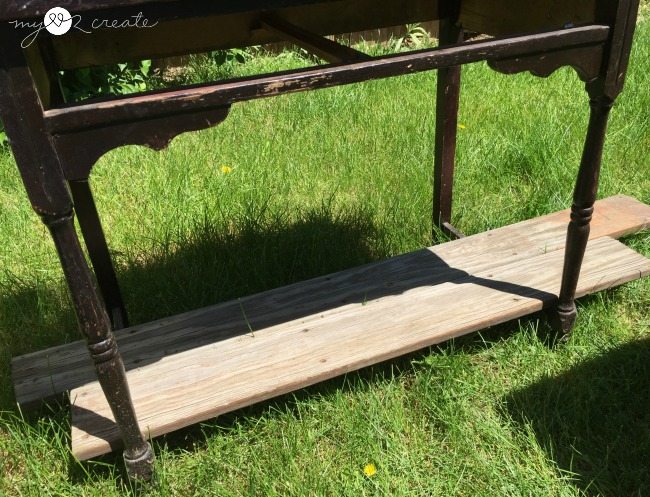
Now that I had my shutter shelf support secured I went to get some old deck wood to make the shelves. I used this same free deck wood for my Entry Table made from Reclaimed Lumber. I started by seeing if it would fit on the bottom of my desk for a lower shelf. Only two boards fit, so I decided to cut a third one.
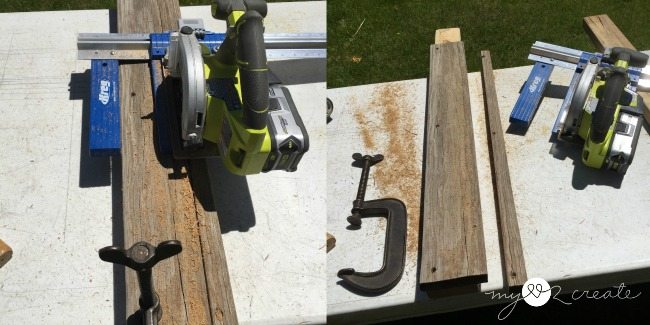
Of course, as it goes, the boards were too wide. So I had to rip them.
Much better.

Oh, and I also had some gluing and clamping to do on the desk drawer to get it back in working order.
Framing out the top of the shutters
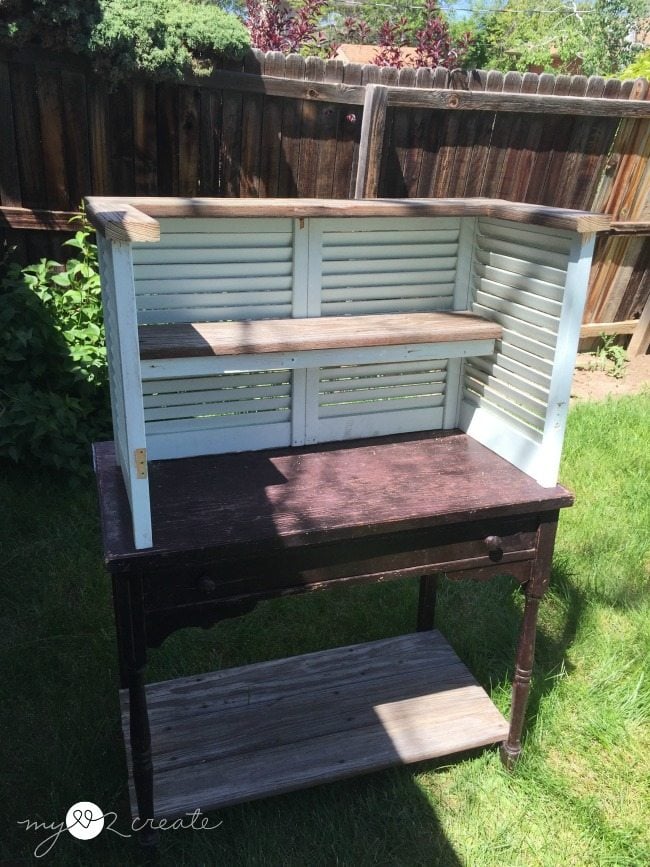
Here is a dry fit with the deck boards on the shutters to see how they look. I was happy with how it looked at this point.
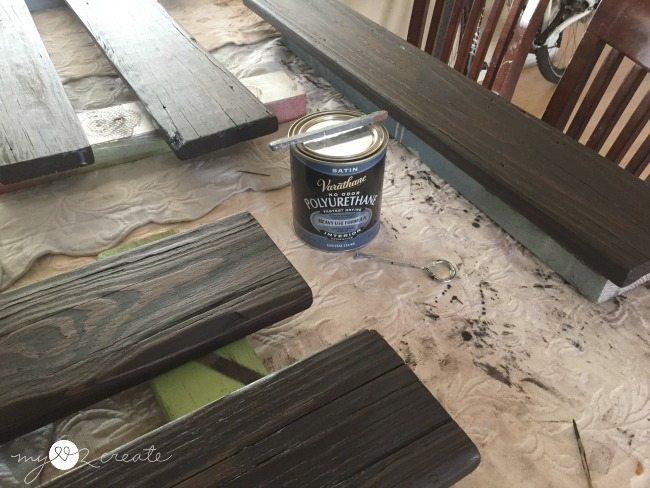
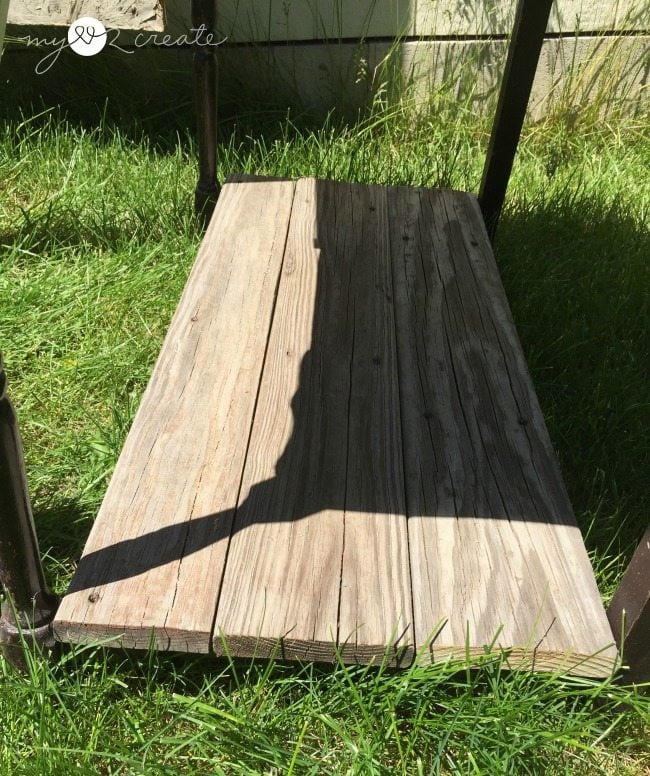
After doing a serious sanding job on the very weathered deck boards I stained them with Rustoelum's Kona. Then I sealed them with three coats of poly.
Kreg Pocket Holes attach upcycled shutters to desk
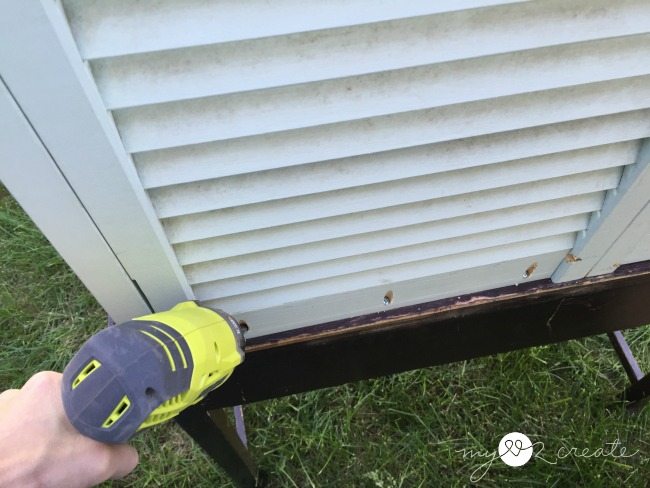
I used my smaller pocket hole screws to attach my upcycled shutters to the desk top. Then it was ready for paint. Before I painted I gave it a good cleaning, especially the shutters, they were dirty!
Using a Finish Max Prop Paint Sprayer
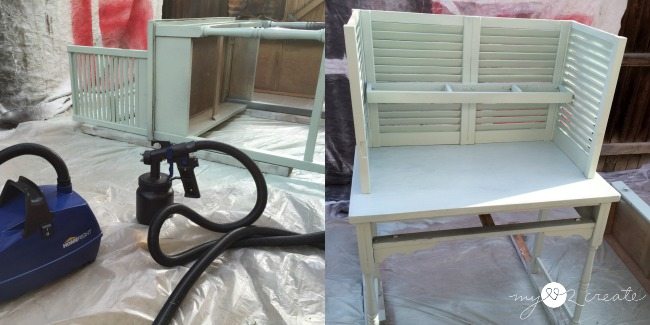
I was soooo excited to use my new HomeRight Finish Max Pro on this project! I used Gail's chalk paint recipe with some oops paint as a primer. It just happened to be almost the exact color as the shutters paint, crazy!
Anyway, I was super impressed with how well the sprayer worked and may or may not have done a happy dance. 🙂 I had this baby primed in less than ten minutes, I can't wait to used this sprayer again! I started painting with the bench laying down, then finished with it upright.
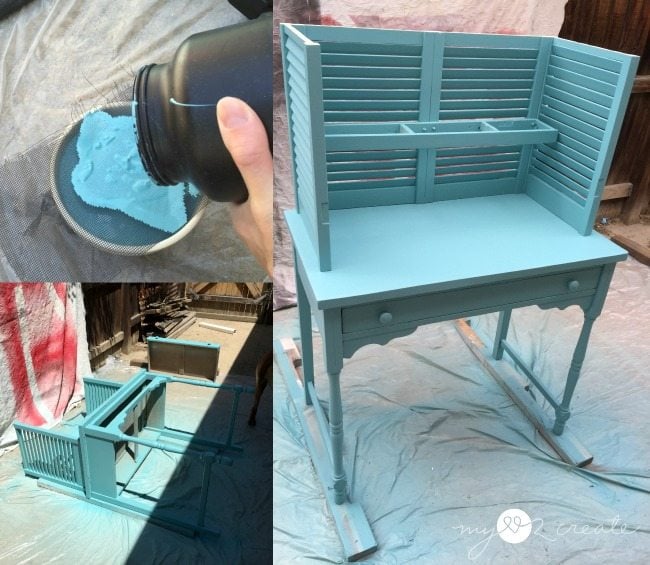
To finish off my potting bench I used another oops paint I had laying around. I got so excited that I forgot to strain the paint before I put it in the sprayer. When I tried to spray the paint wasn't coming out very well that is when I realized my mistake.
I grabbed a bowl and a piece of screen from the screen door that my dog ripped up, and used it to strain my paint. Look at all the chunks of dried paint! No wonder it wasn't working. I poured the strained paint back in my sprayer and it worked perfectly. I was super happy with the results, just remember to strain your paint. 🙂 The clean up was super easy too, so nice!
Battery operated nail gun makes diy fast and easy
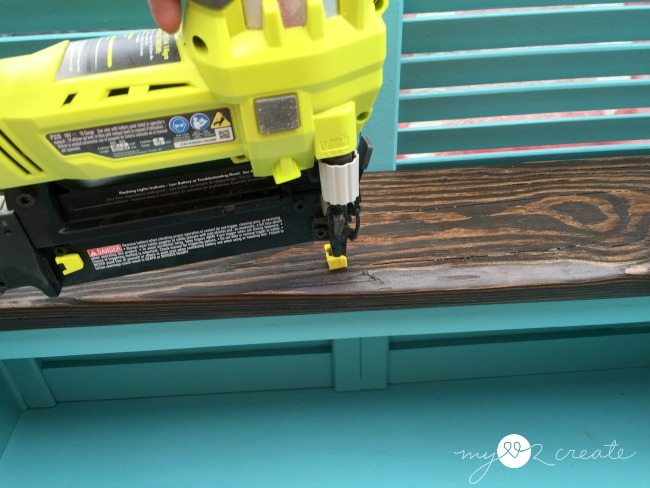
All I had to do was attach my finished deck boards to my potting bench and I was done, I used my nail gun to do the job.
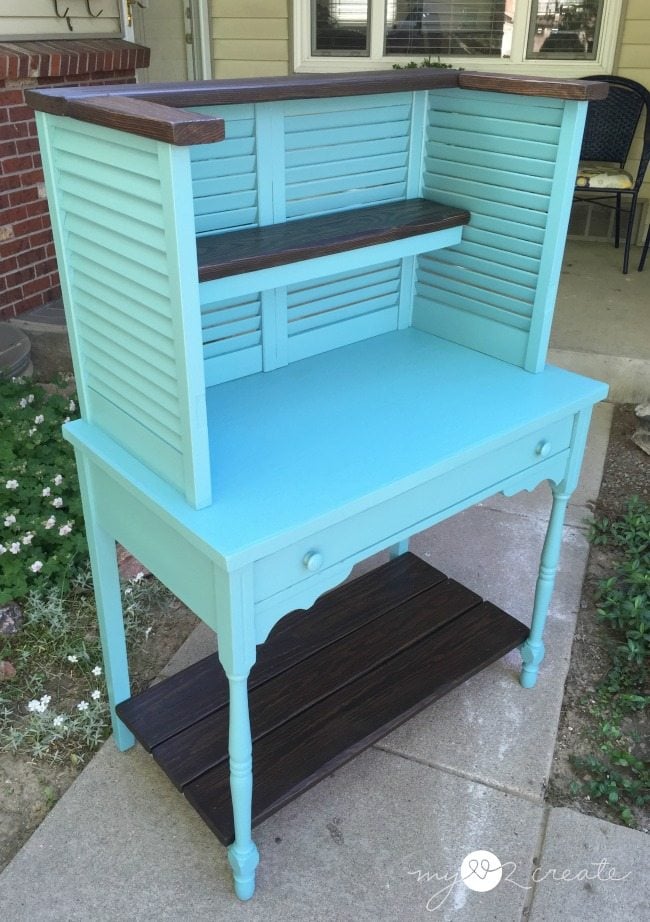
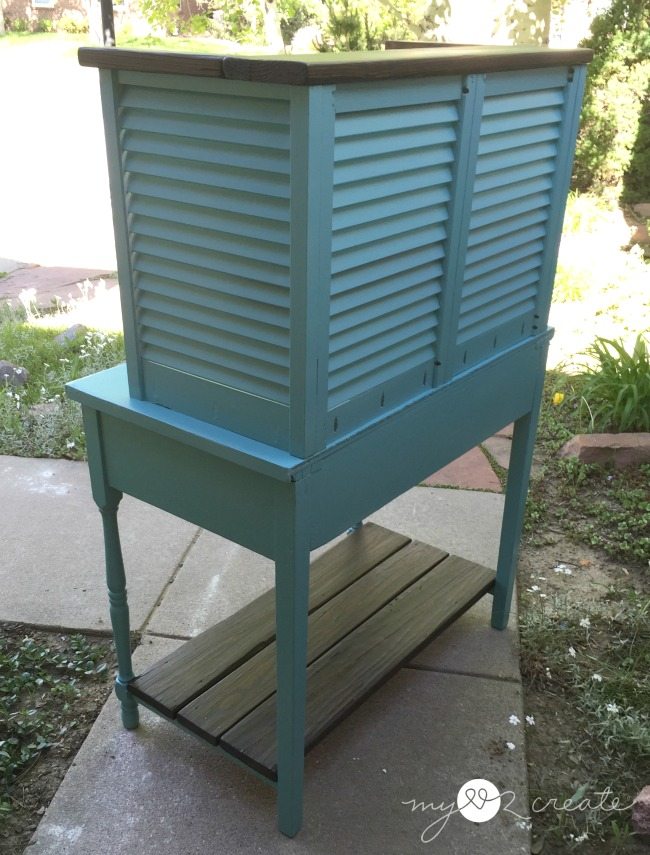
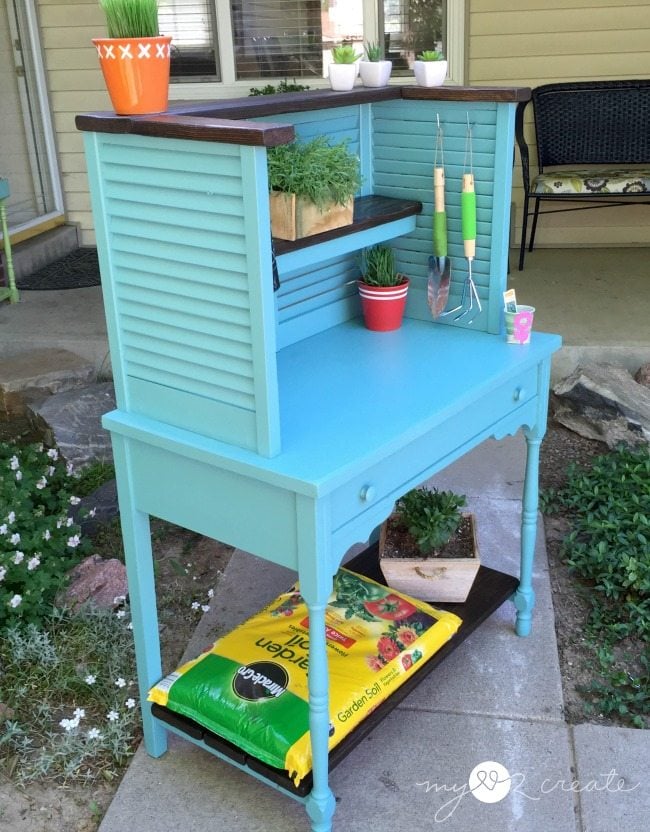
Here is my new upcycled shutters potting bench! It was so fun to make this on the spur of the moment, and I know it will be put to good use. I think the shutters give it a certain charm.
Here is a shot from the back. I decided not to fill in the pocket holes with spackle like I did on the side shutters.
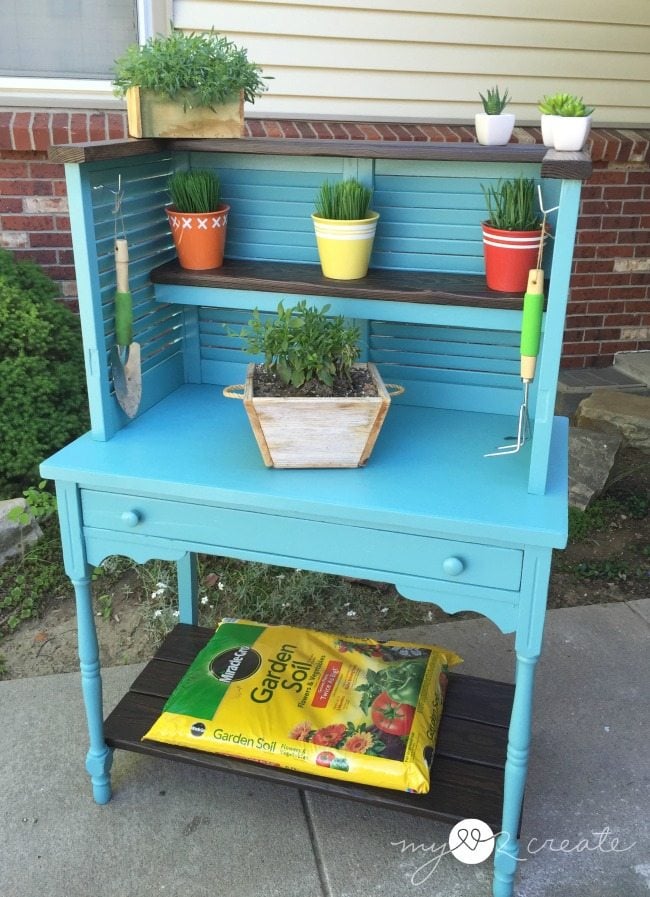
Potting bench can be a hutch!
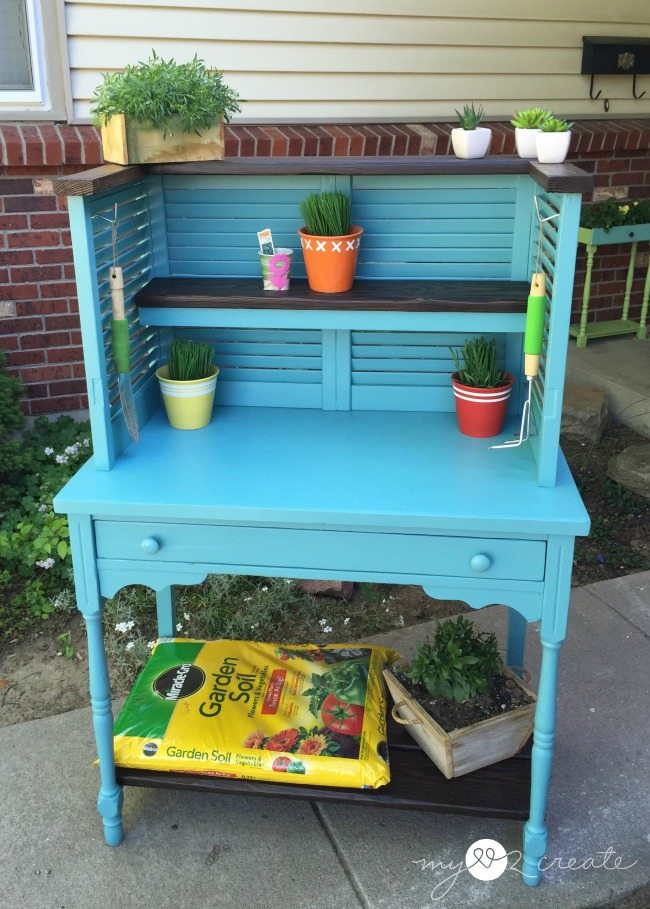
I grabbed some supplies to give you an idea of how useful it can be. Wouldn't this upcycled shutter potting bench make a great hutch?
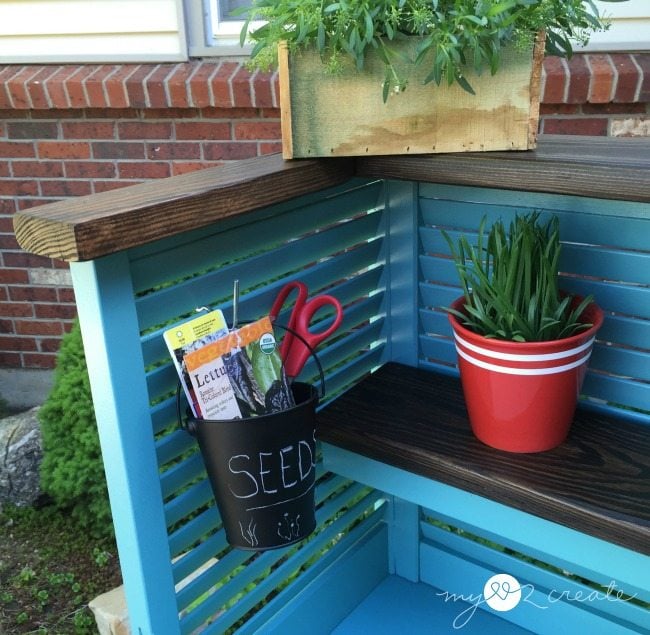
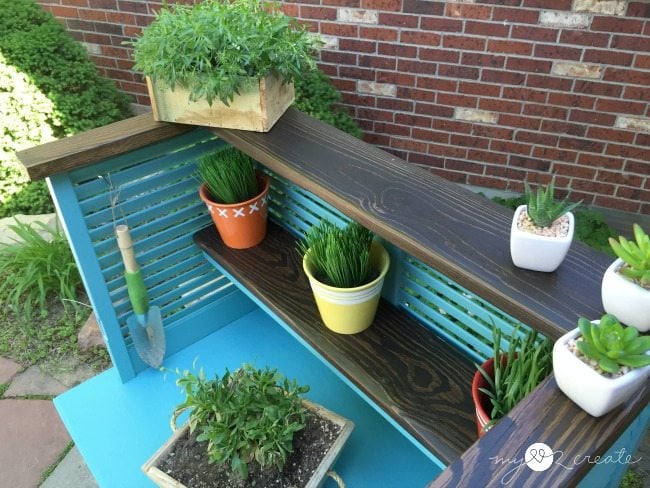
A dollar store bucket hanging from a pegboard shelf pin that fits nicely between shutters, can hold all sorts of supplies. When I am planting I find scissors very useful to cut open seed packets and the plastic containers that annuals come packaged in.
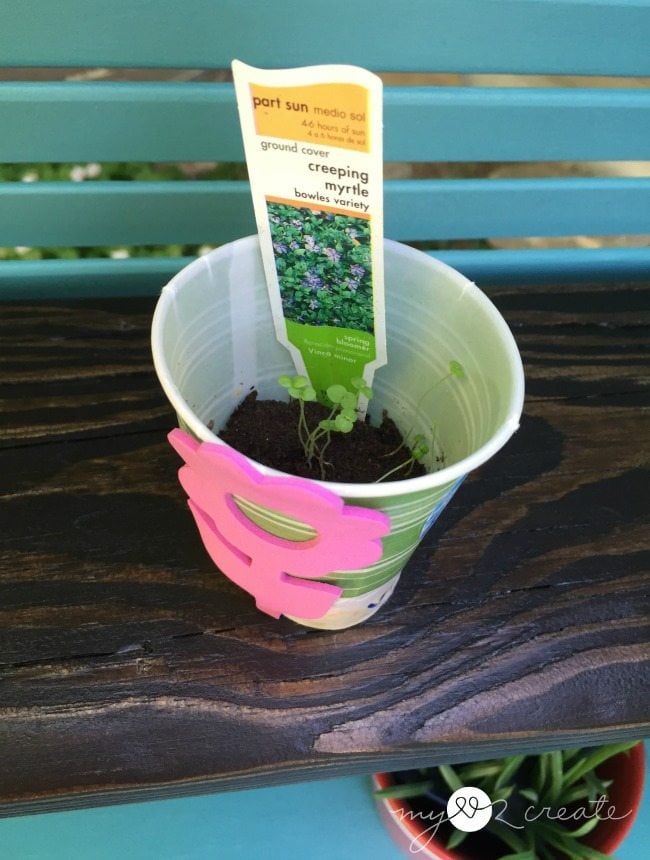
Here are some seeds my daughter planted, she loves watching them grow!
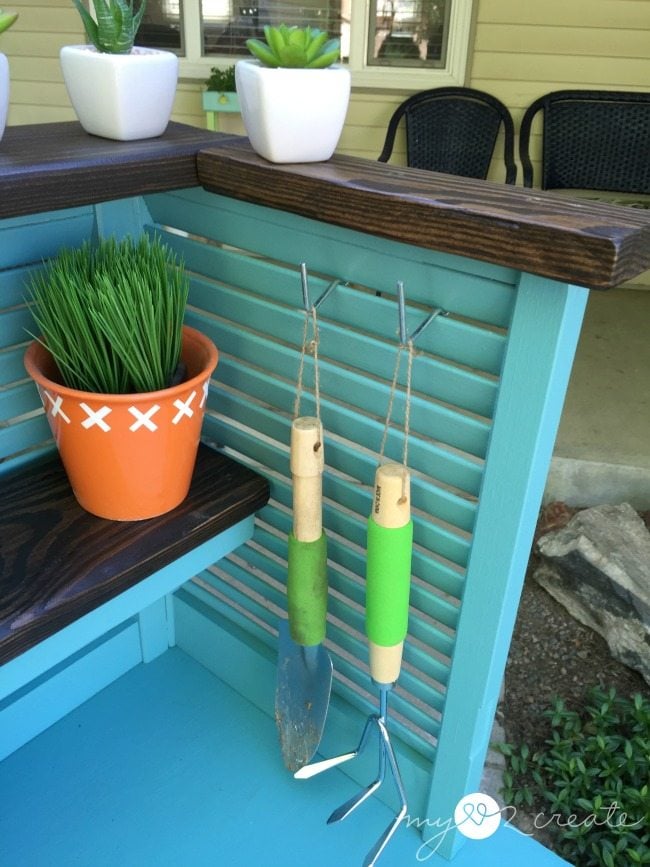
Using the shutters and pegboard hooks can also be a great way to hang tools.
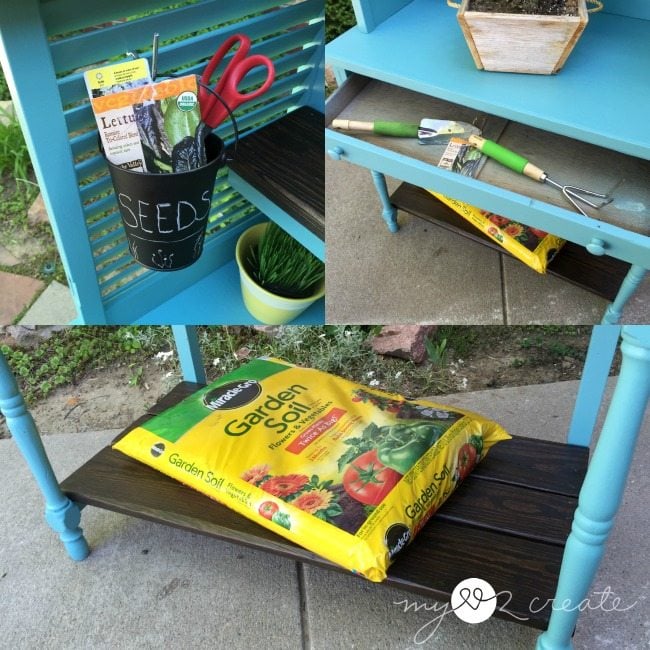
Of course the desk drawer can hold all sorts of things, and the bottom shelf is great for bags of soil.
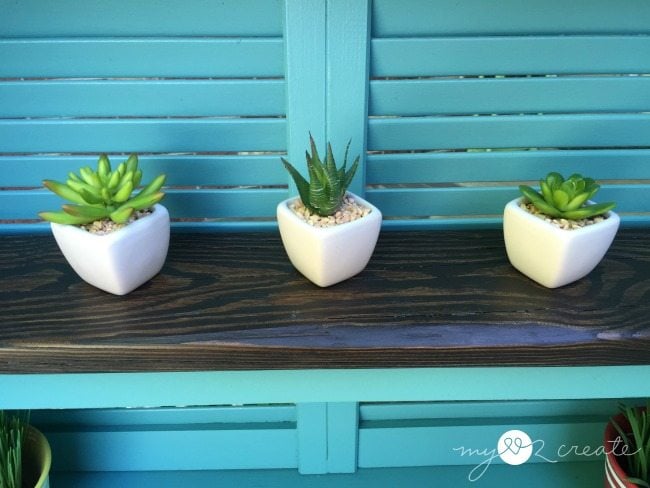
I love that the shelves can be filled with plants to keep the potting bench pretty.

My dollar store pots dressed up with contact paper add their own cute statement and some pops of color.
Even if I didn't get my benches made, I am super thrilled with my new shutter potting bench, it makes me want to start planting. I love surprise projects!
The wood is so pretty and turquoise is my favorite color, so that might have some thing to do with why I love it so much...
Or, maybe the fact that it was FREE! That is a bonus too. 🙂
So do you have a potting bench? Or, maybe some shutters and an old desk or dresser laying around that you could build one?
Hugs,
Mindi
Randolph Conrad
Looks great. It would be a nice addition to a kitchen laptop or tablet, basket for catching keys, cells, hang basket from shutters for all incoming mail. Anyway just a thought, I seem I always have to make it different but I don't love what you did with it.
KATHY
THIS IS TRULY AWESOME - I CAN SEE USING IT FOR A BEVERAGE STATION IN A KITCHEN, OR AS A LITTLE VANITY IN A BEDROOM - COULD HAVE MANY USES. YOU HAVE INSPIRED ME. I HAVE AN OLD VANITY TABLE, AND SOME SHUTTERS TOO - GUESS I KNOW WHAT MY NEXT PROJECT WILL BE. THANKS FOR YOUR GOOD TUTORIAL AND CREATIVE SPIRIT.
girlfromwva
LOVE this!!! (love the color, too!)
Toni Vitrano
Awesome!
Mary
This is a combo that is truly worthy! I have been holding out using my shutters, now I know why-thanks you so much!!!
Bobbie at Hue New Painted Furniture
A.W.E.S.O.M.E!!!! You are so creative and talented! I love your following along with you. You inspire me to try to use power tools.
Debbie
Love it!! I need one 😛
Pam
LOVE it....I love the color, love it as a potting station. Great job.
Julie @ follow your heart woodworking
HOLY COW Mindi, that is amazing! I have lots of shutters just waiting for me.
Cassie
Seriously awesome. 🙂
Catherine
Great job Mindi--looks really cool--and handy!
Catherine
gail@myrepurposedlife.com
Mindi,
I love your new potting bench. Potting benches are so versatile these days. They are great for outdoor entertaining as well as potting flowers.
My favorite part is the two toned look with the stained wood. Loving the shelves, and the top frame of the shutters. It really pulls it all together. A perfect marriage of shutters and a desk!
gail
Anne@DesignDreams
Super cute Gail! and you couldn't have picked a better paint colour 😉
xo