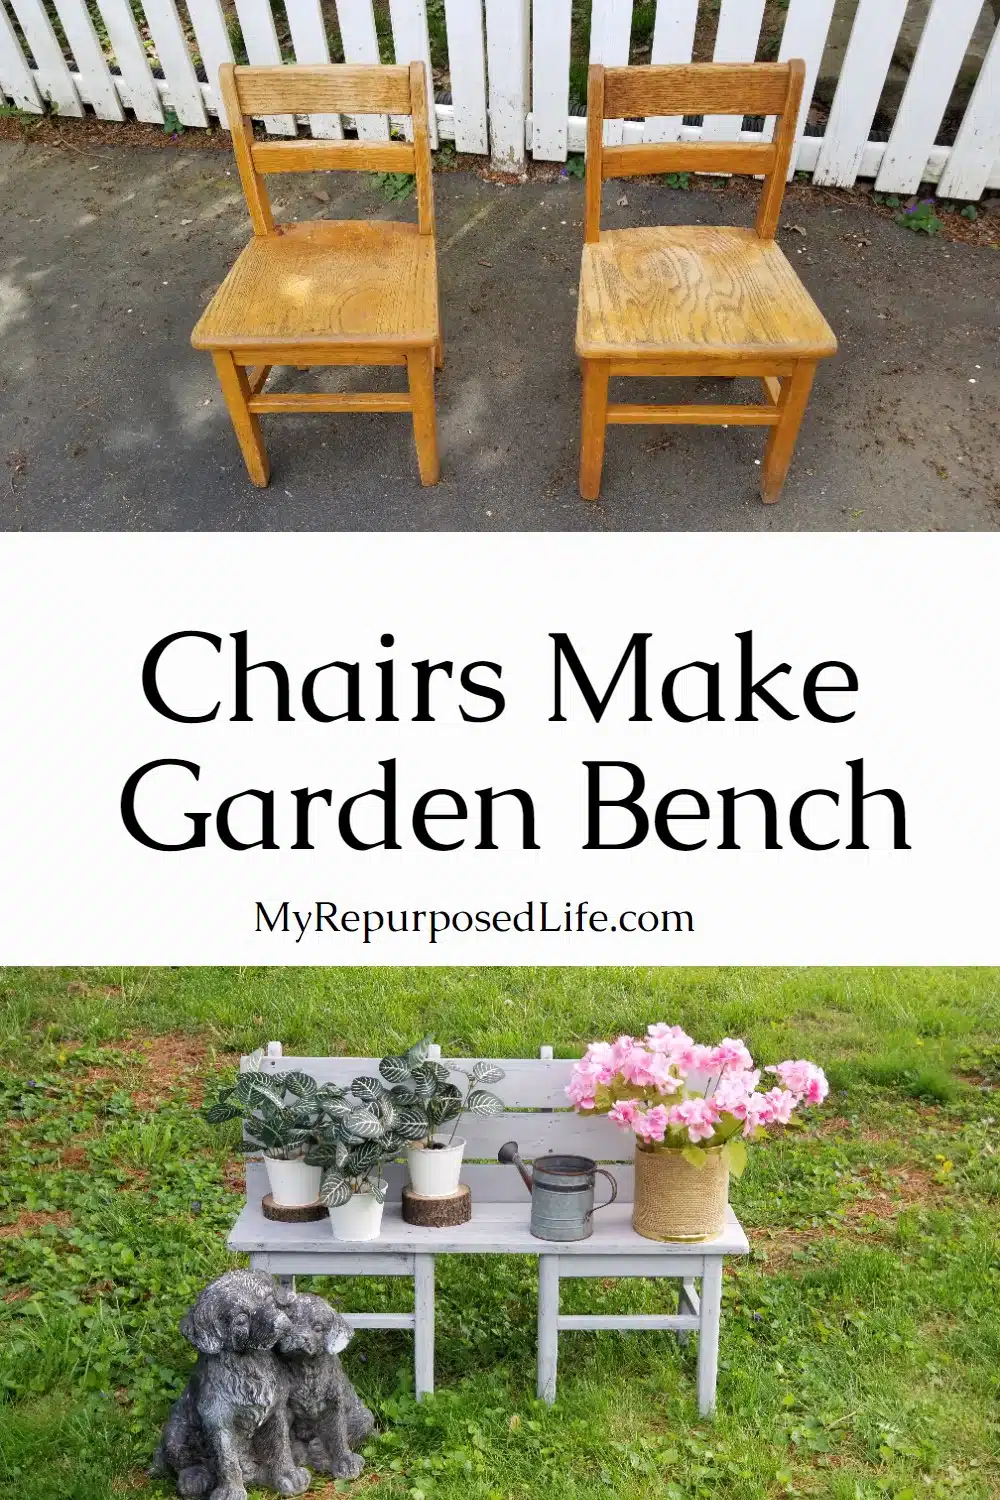
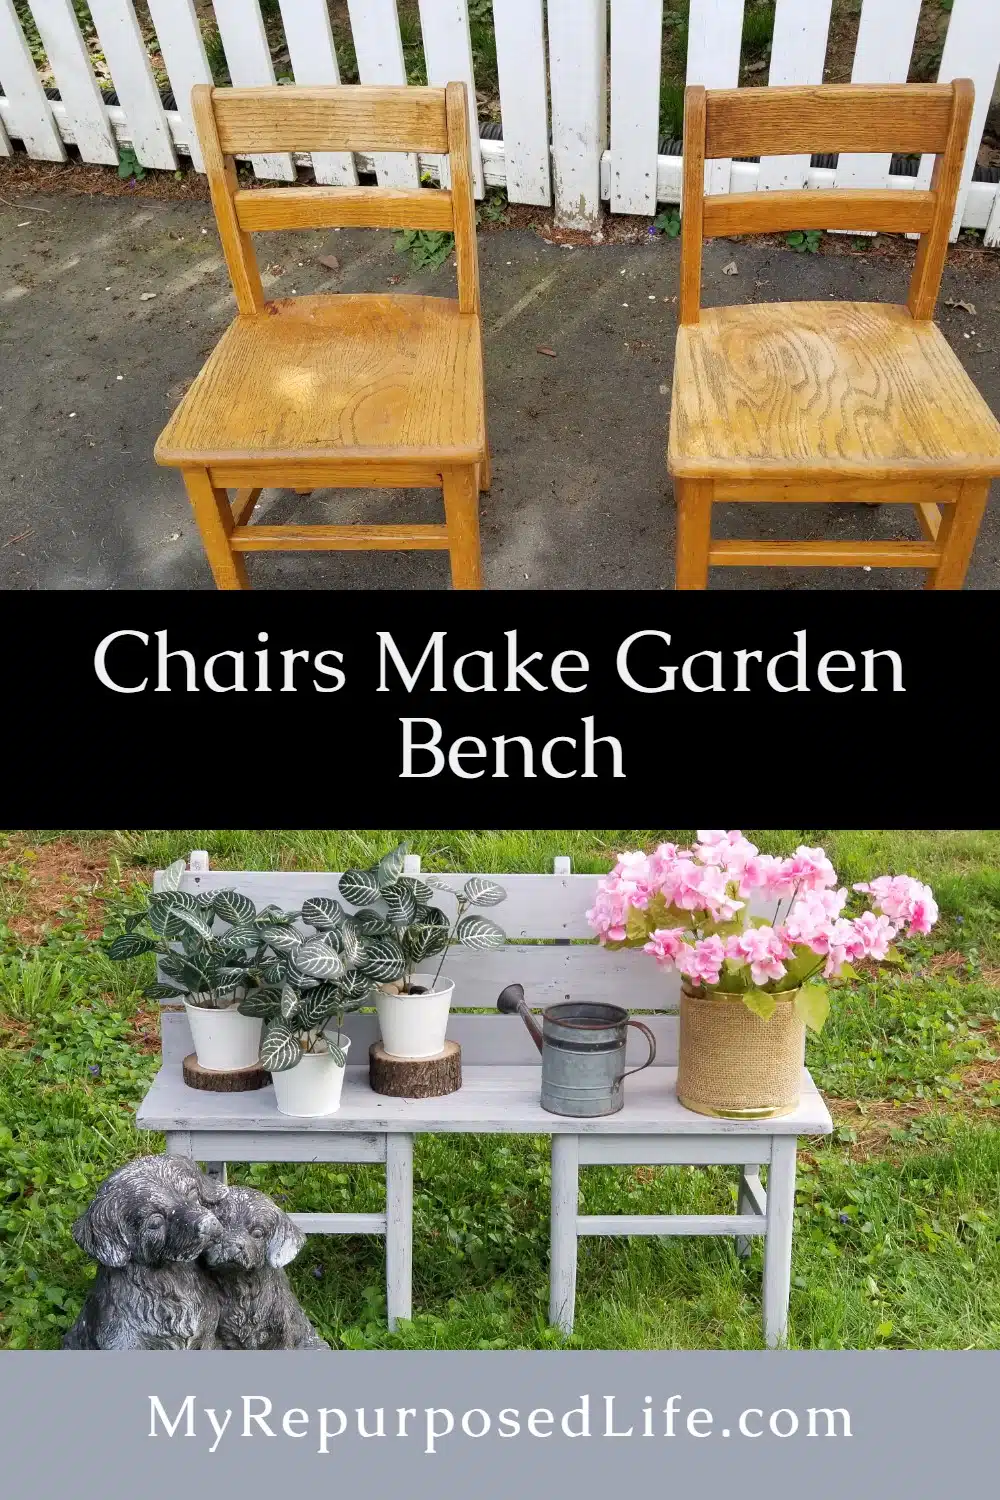

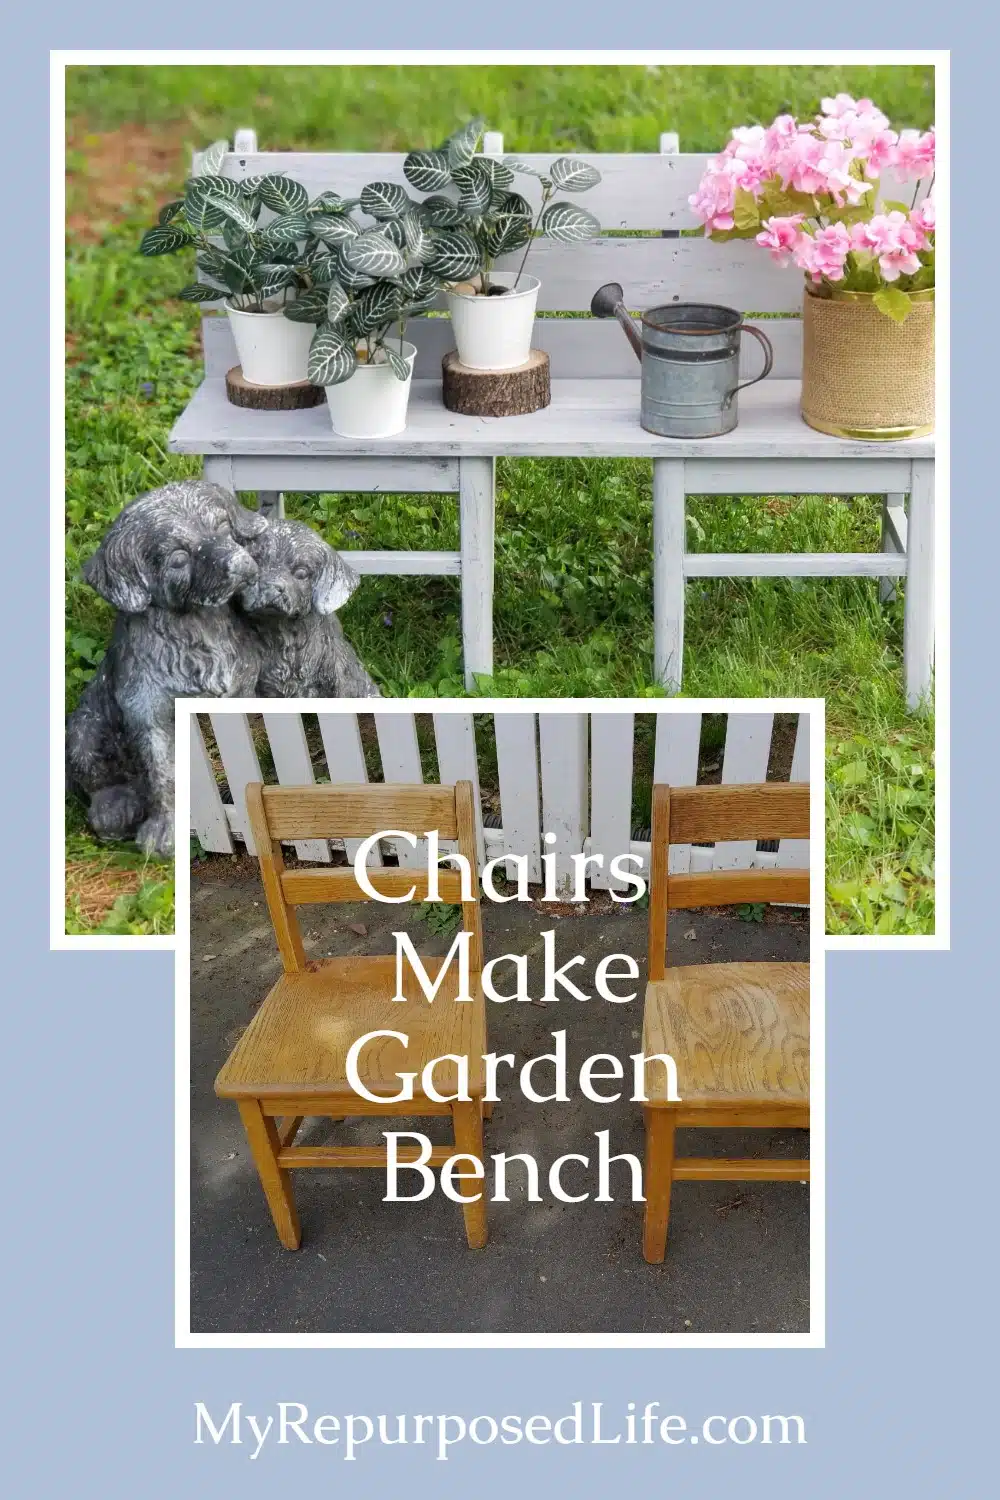
This repurposed garden bench made from chairs was going to be a kid's bench. But, as you will see I had some issues with the color. In the end, it seemed perfect as a garden bench instead.
The garden bench was made from kindergarten chairs from my teacher days.
How to Make a Repurposed Garden Bench out of Kindergarten Chairs

While digging for chairs, I had difficulty finding two identical school chairs. These odd-sized chairs remind me of Goldilocks!

Finally, I found two that were close enough.
Dismantle Kids' Chairs

First, I had to remove the screws to take the chair seats off.
I was making a double-chair bench for kids, but the tutorial will be the same if you have grown-up chairs. But, like I said, my plans changed to make a repurposed garden bench instead.
Visit the My Repurposed Life Amazon Store to shop my favorite items.
Remove Chair Back Cross Pieces
I need to remove the existing backs because I want to use wood planks for the back of the bench. The jigsaw made this task very easy. Please don't attempt to take a rubber mallet to them to separate the chair back.

This photo shows why you want to use a saw to remove the back of the chair. You will be cutting the dowels with the jigsaw. By leaving the dowel attached, you don't have a hole that you need to patch.

When you cut both back rungs, your chair should look like the one on the left.

You may need to sand the dowels down a little. But if you had pounded them with a rubber mallet, you would have had many holes to fill where the dowels had been.
Thoroughly Clean Chairs

All of these chairs were very, very grimy. I used TSP, washing and rinsing with the hose.

However, this might be the first time TSP didn't complete the job. I had to resort to Krud Kutter. After spraying it on and letting it set briefly, I rinsed it away. The chairs felt squeaky clean after all of that.
Cut Planks for Repurposed Garden Bench
My lumber inventory was getting pretty slim, so I worked with what I had on hand. I chose two wide planks for the seat and three narrow planks for the back. You may know I always stress over paint colors. I wanted to do a two-toned look—staining the planks and painting the chairs.
Sand & Stain Planks

I used the orbital sander to smooth all the boards and rounded over the edges for a smoother finish.

I chose a hickory gel stain for the planks, as I am still undecided about what color to paint the school chairs. I applied it with a chip brush.
Then things started going very wrong, and it took quite a while to make all of this come together.
Use Gel Stain on Chairs

Since I used a gel stain on the planks, I also decided to stain the school chairs. Did you know that gel stains will adhere to previously finished surfaces? Can you believe the difference between the two chairs?
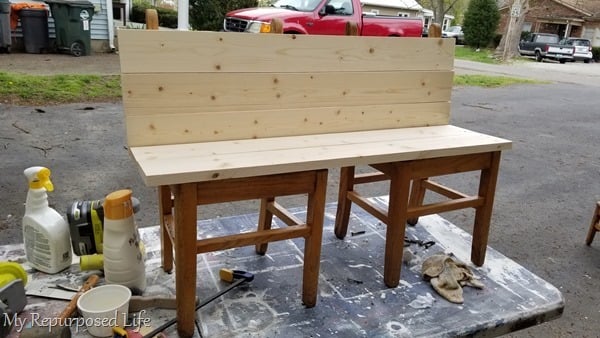
Attach Repurposed Garden Bench Planks

At this point, I was trying to decide the placement of the wood planks on the school chair bench. The Kreg Multi-tool is helpful when you want the overhang to match.

I used scrap wood pieces to help me decide how to separate the planks for the back of the chair bench. The boards/planks were tacked in place with my nail gun.

So, I don't love it in pictures. It looks better in real life, and I'm pleased with the stain.
Why Doesn't the Stain Match?

Applying a second coat of stain on the planks seemed like a good idea, but it still didn't match the chairs.
Why Not Try Sanding?

I sanded it a little to try to lighten the stain. Yeah, that didn't work. I secured the planks with screws after pre-drilling countersink holes. At this point, I was getting pretty discouraged. I have said SO often that COLOR can make or break a project. Getting the color right on this project was challenging for me.
Okay, it gets worse before it gets better.
Plan B is a Bust!

I put all these pictures in a collage to make it easier. Generally, I love using Vaseline to get a chippy distressed look. However, I was not too fond of how the plank boards looked WITH the chair color. I put the bench away for a few days, tired of working on it.
Last Ditch Effort to Redeem the Repurposed Garden Bench Color

When I was ready to revisit the repurposed garden chair project, I used the same gray paint that I had used above on the chippy section. I mixed the paint with Plaster of Paris to make my diy chalky paint primer. Regular latex paint would never adhere to the stained chairs.

The gray looks much lighter than it should have. I took this picture as an "in "progress" shot because I had planned for this to be a primer coat. But, the repurposed garden bench was finally growing on me. Can you tell it's small in the picture? Or does it look like full-sized chairs? It's a bit of an optical illusion.
I am "calling it DONE". For a simple build, this project took much too long to finish.
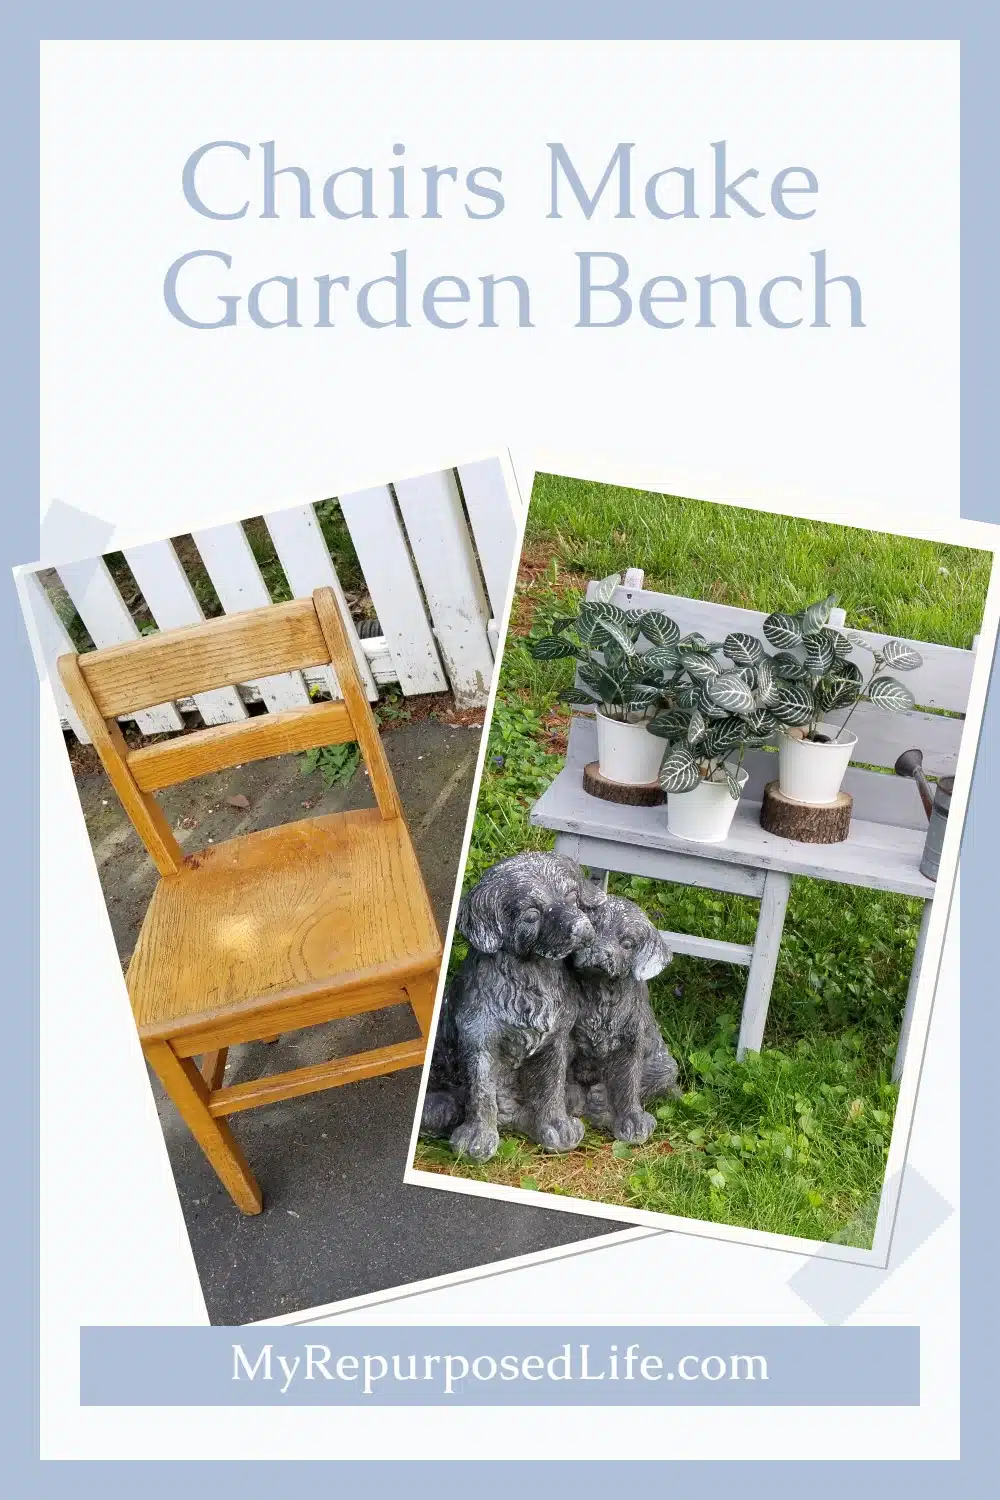
Pretty Repurposed Garden Bench (finally)
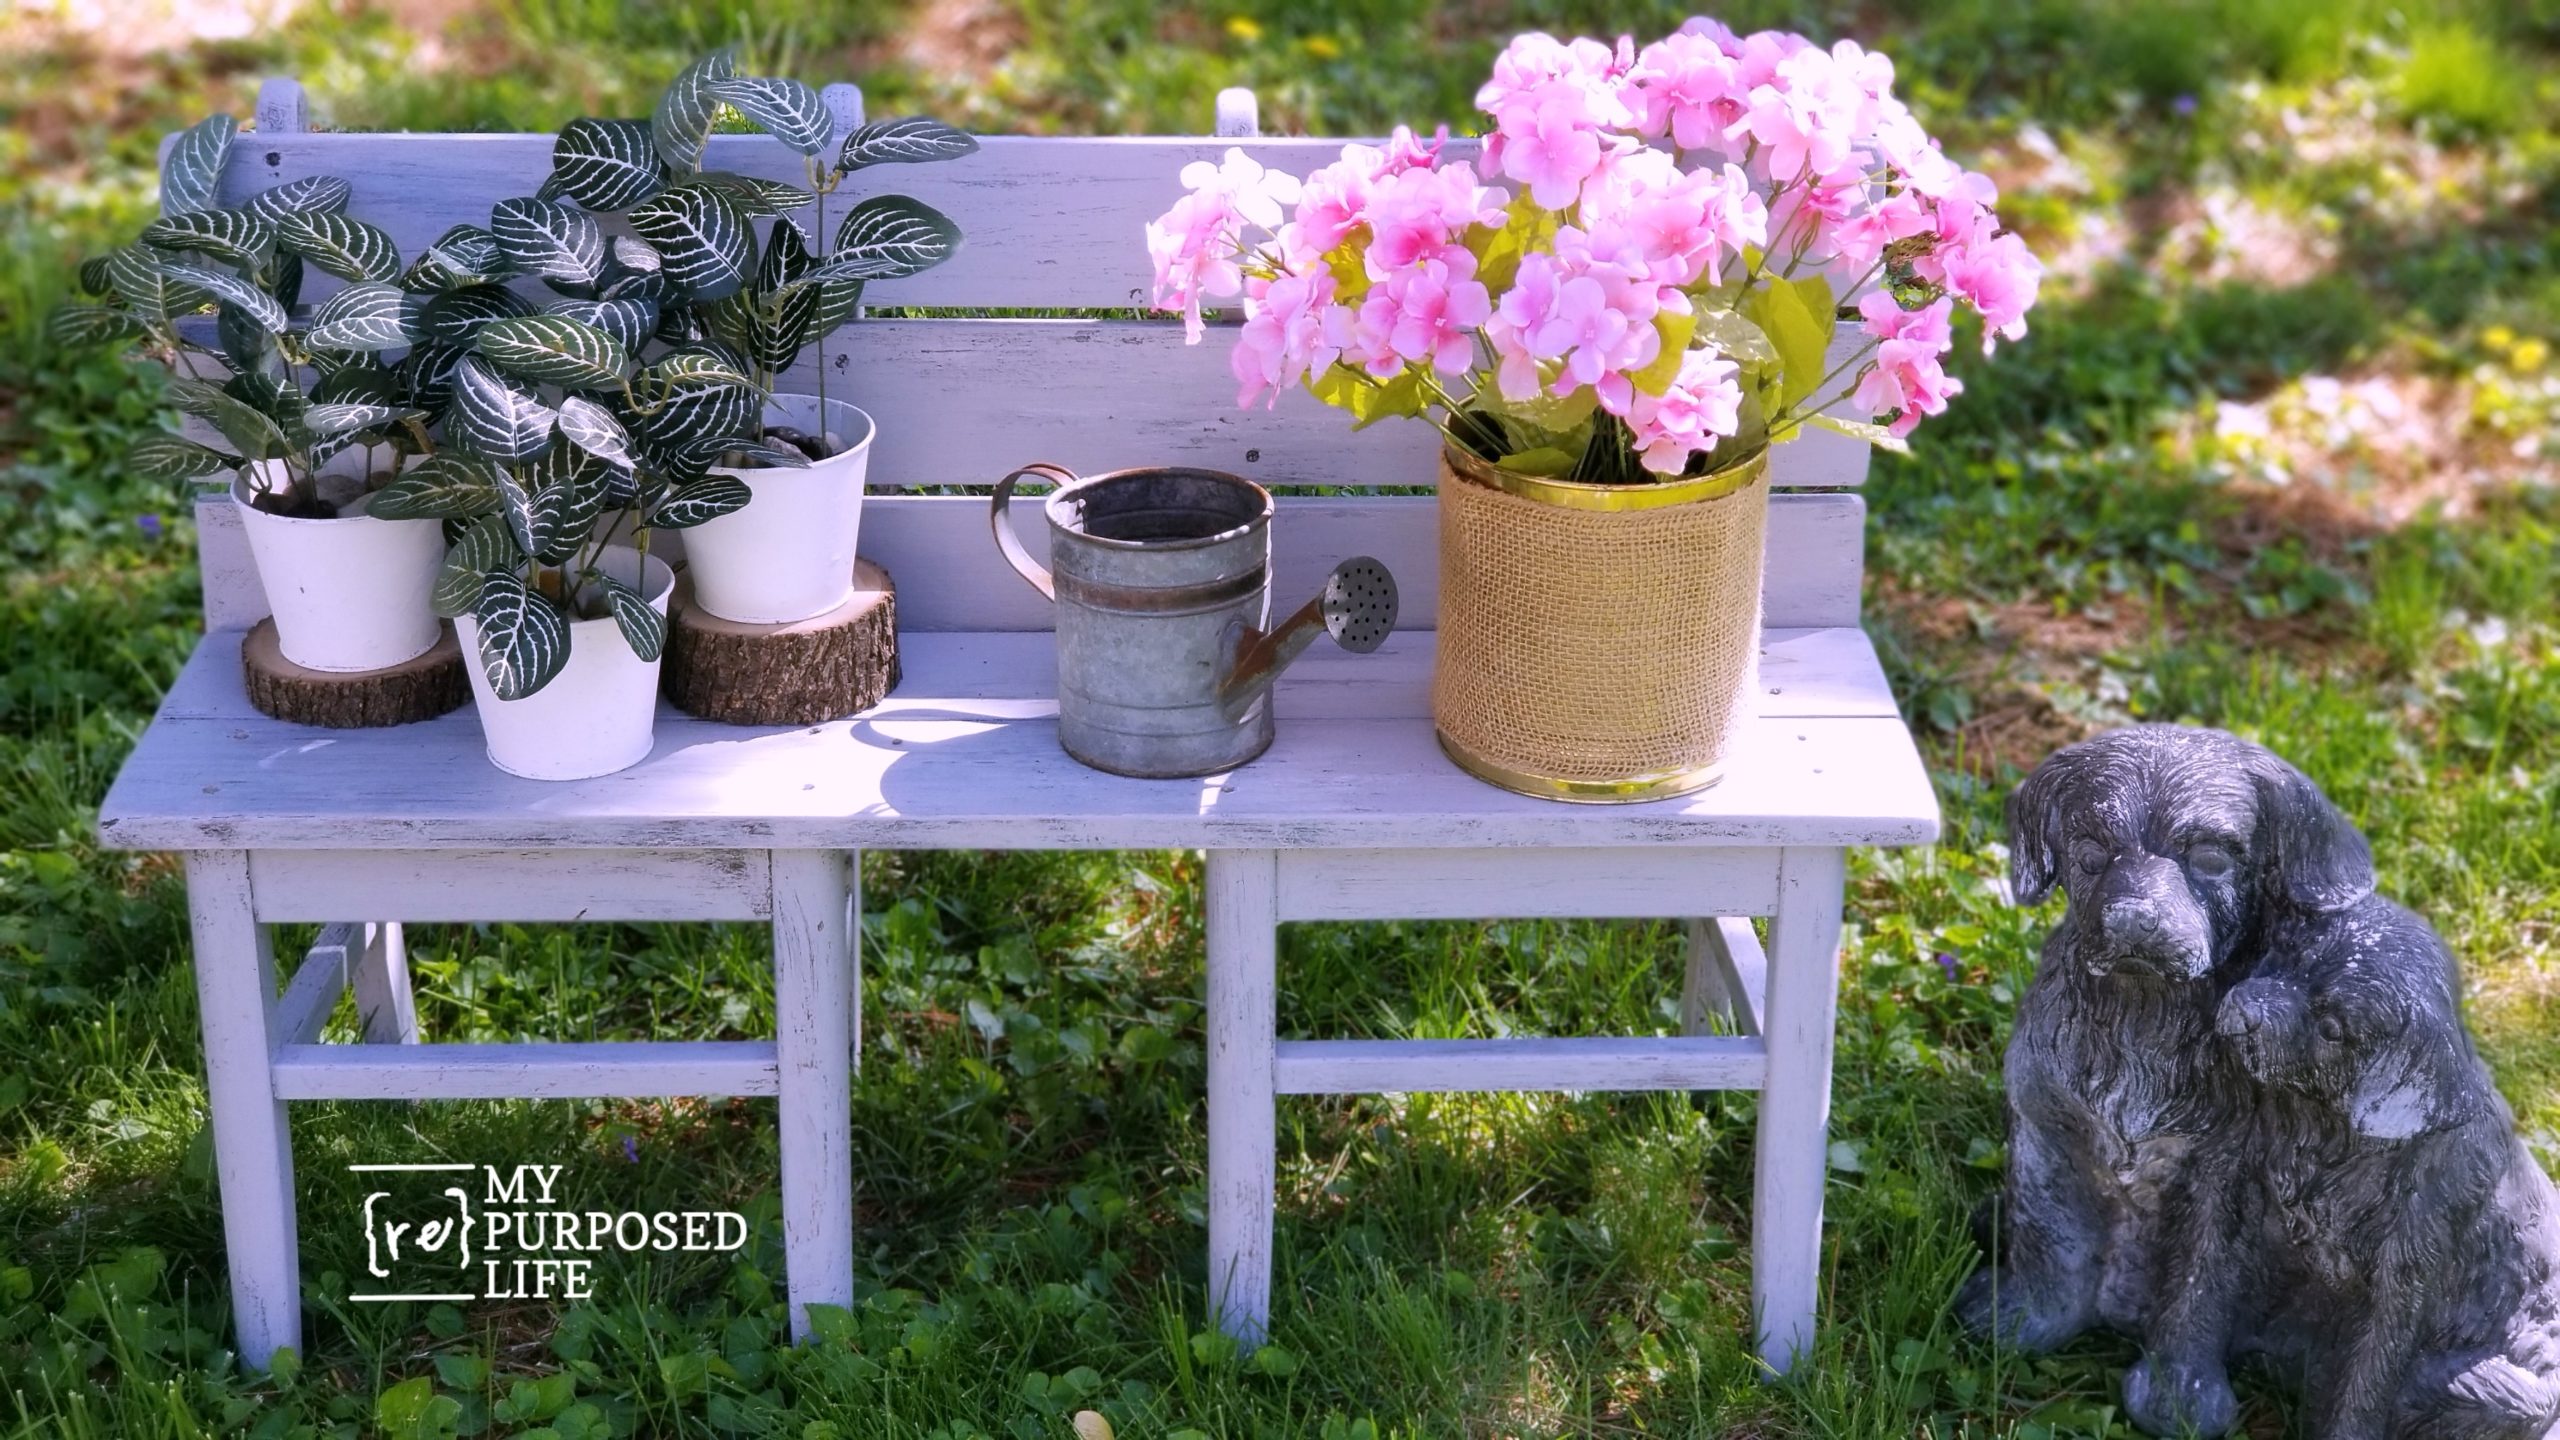
Do you love it? I can honestly say I do now, even after it put me through all that stress and work!

This garden bench isn't the one I've made. Years ago, I used dining chairs to make a kid's bench, but then it got a do-over and became a bench for flowers and more.
I have a lot of patience, but this repurposed garden bench almost ended up in the burn pile! No, not really—but I was tired of working on the color. Do you think it ended up okay? Or would you have left it the original wood tone I started with?
UPDATE

Well, a week later, I couldn't leave well enough alone. I had already written this post and put it in the queue for publication. The bench got a little scratched as I was staging it for photos, meaning it needed to be waxed or sealed. I had spent a few hours waxing a chest of drawers that turned out less than perfect, so of course, I opted for my favorite smoked glaze.
Using a chip brush, I applied the glaze very lightly.

Finally, I'm calling this repurposed garden bench done!
Do tell me what you would have done differently.
gail
Gail Wilson is the author and mastermind behind My Repurposed Life. She is obsessed with finding potential in unexpected places and believes that with a little hard work and imagination, any old thing can be made useful again, including herself!
Gail reinvented herself during a midlife crisis and has found purpose again. She hopes you will find new ideas for old things and pick up a few tools along the way.
Sherry
I love the kid chairs to garden bench idea! I actually like the lighter gray color better! It had a wonderful weathered look...I think I would have stopped there. But, you had a wonderful eye for things and the finished bench looks great too! I love the tutorial, I just might try this. Wooden kid chairs are easy to come by in my area.
Karolyn
The final result is my favorite! Sometimes we just have to struggle a little (Lol) to get something to look just how we saw it in our mind's eye!! You achieved that with the glaze....I really love it now!
Katie
The bench turned out fantastic! It's so cute the way you're showing off your hard work.
Gail Wilson
Thank you so very much!
I do love what I do.
gail
Cathy
Love the bench! I have some old ladder back chairs I would like to do. Thanks for the ideas!
Gail Wilson
That would be awesome Cathy! Good luck if you decide to try this project.
gail
Audra @ Renewed Projects
Wow! I love the final final look with the smokey glaze. Great tutorial!
Susan Lancia
Absolutely love anything that has been saved from the landfill! And with the finished bench looking top notch, who wouldn't love it. the first picture on the internet looked purple, not just a little lilac, but down right purple. Thank you for all your inspiration. Susan
Gail Wilson
Susan,
About the purple.... I think it was more through the photo editing process that made that happen. yikes!
I'm happy you love the bench in it's end result.
thank you!
gail
girlfromwva
looks great in the final pics. i thought it was lavender color... you did a great job overcoming the stain!
Jennie
At first I thought it was lavender and thought how cute for a little girls room, maybe with a cute picket fence and garden mural. But it’ll be darling out in garden with plants on it too.
Elic McGrew
I'd'a probably passed on trying to stain it. Part of the problems I have with stain is actually the age and the differences of woods taking stain. I would have gone straight to paint. You haven't said if you have sealed it against the weather and I know you have different weather issues than we have in Texas. Our summers are hot and humid, but the sun bakes everything, it can even do it in the winter.
Gail Wilson
In the end, I did seal it with the glaze. So, not a poly.... I guess it depends on where the new owner puts it. 🙂 Surely they won't live in Texas. hahaha (I'm in Louisville KY)
I think I've learned my lesson about staining!
gail
Rodney
I love it.The work is marvelous and the color goes with Spring.👍’s up to you Gail.I always say you have an eye for repurposing✌️My Friend
Gail Wilson
Thanks neighbor! I'm happy you're around to bounce ideas around and lend a hand when needed!
gail