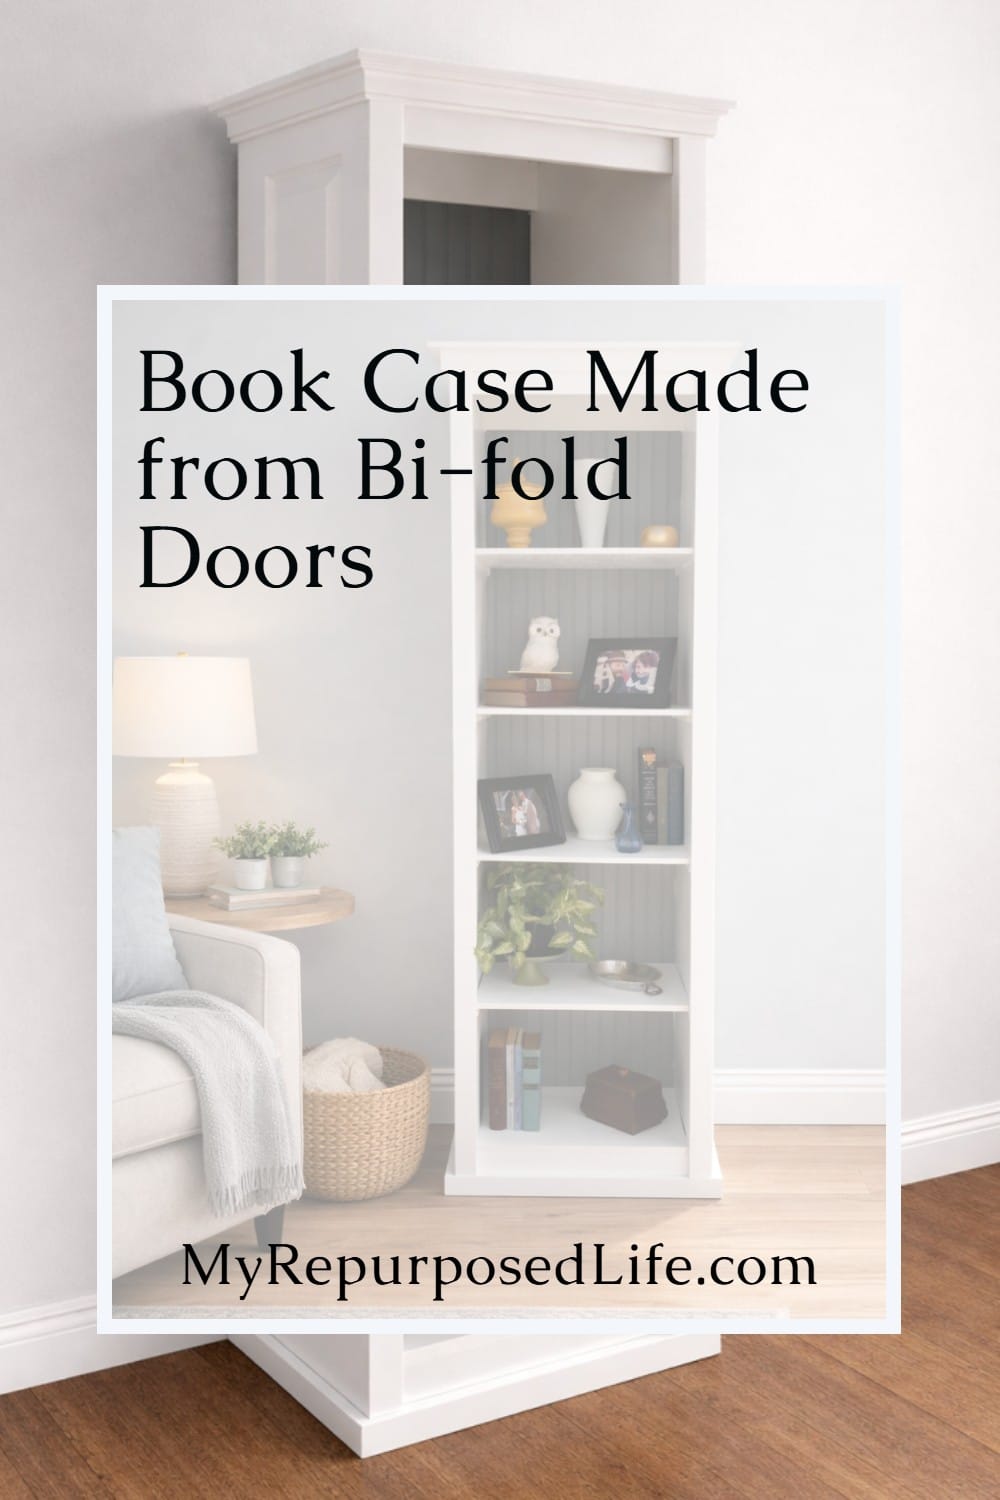
Bi-fold Door Bookshelf
As an Amazon Associate, I earn from qualifying purchases.
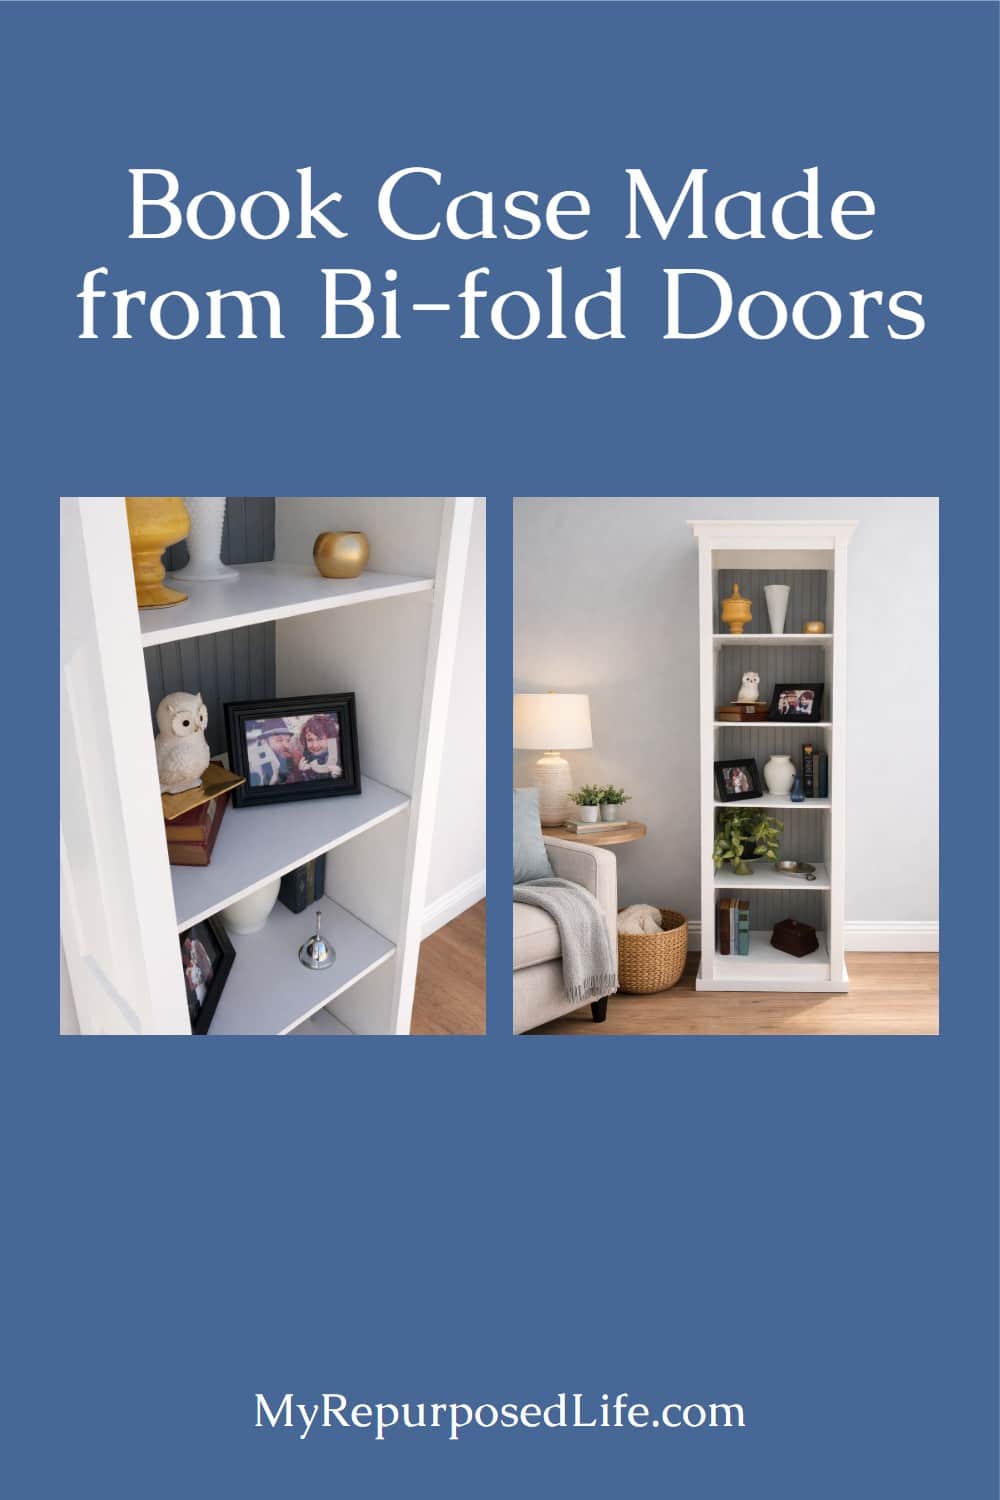


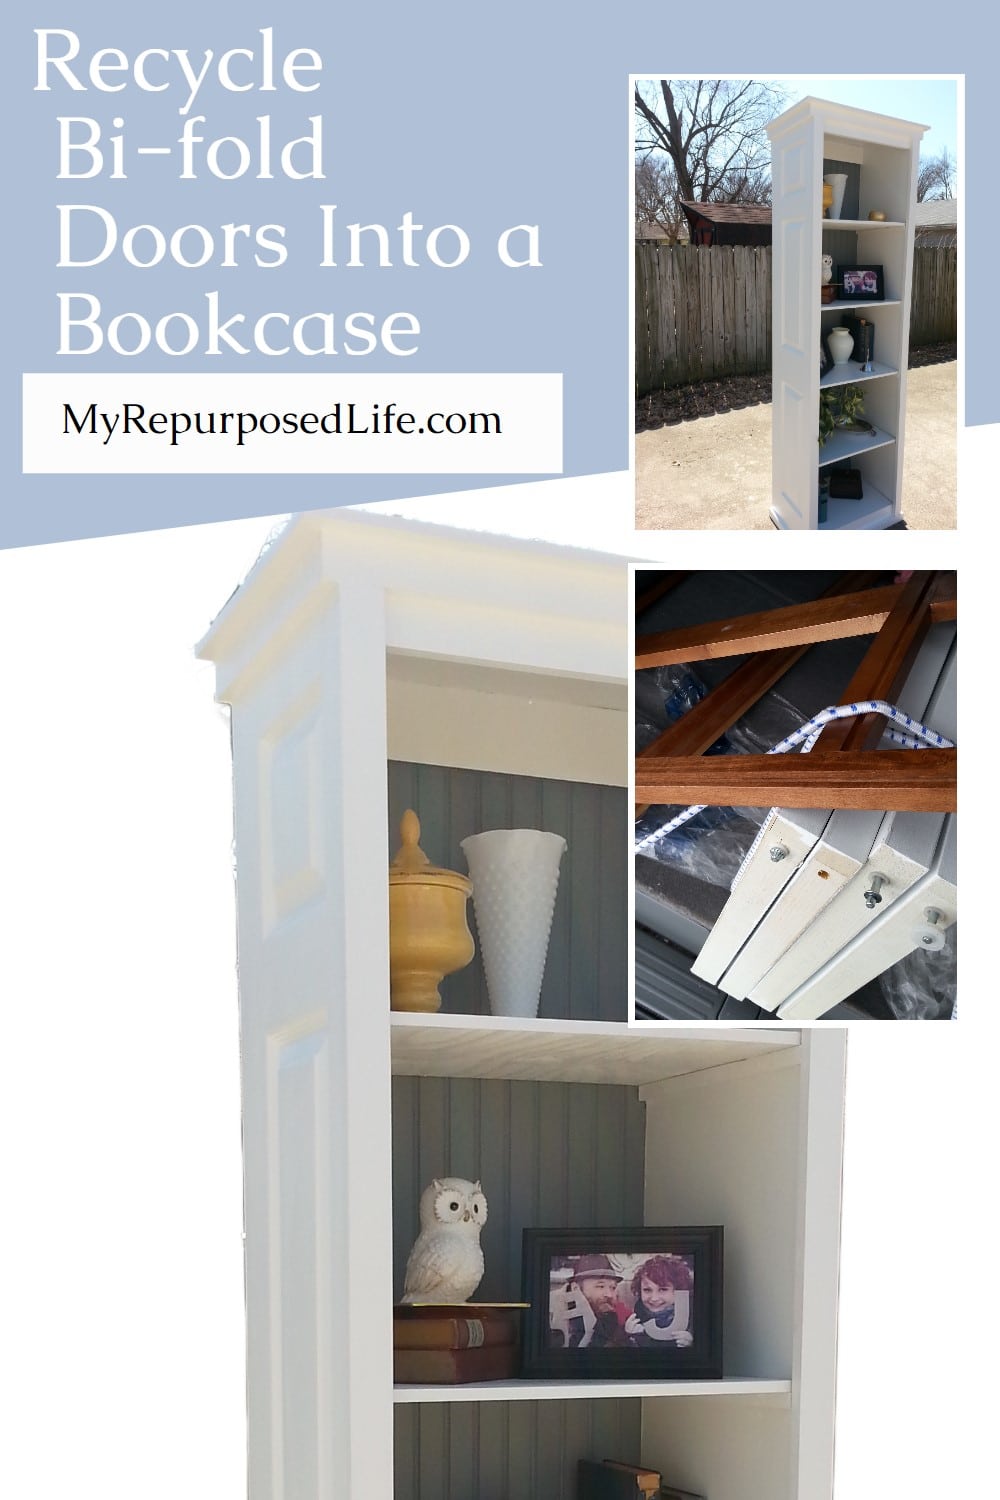
If you ever spot a pair of bi-fold closet doors at the Habitat for Humanity ReStore, grab them. They are the perfect “already-built” sides for a tall bookcase, and they keep the cost down without looking like a cheap shortcut. This bi-fold door bookshelf is one of those projects that doesn’t look very easy, but it really is just doors, shelves, and trim, one step at a time.
Use Two Bi-Fold Doors

The Habitat for Humanity ReStore is a great resource for buying surplus building materials such as doors. Bi-fold doors are available at a reasonable price.

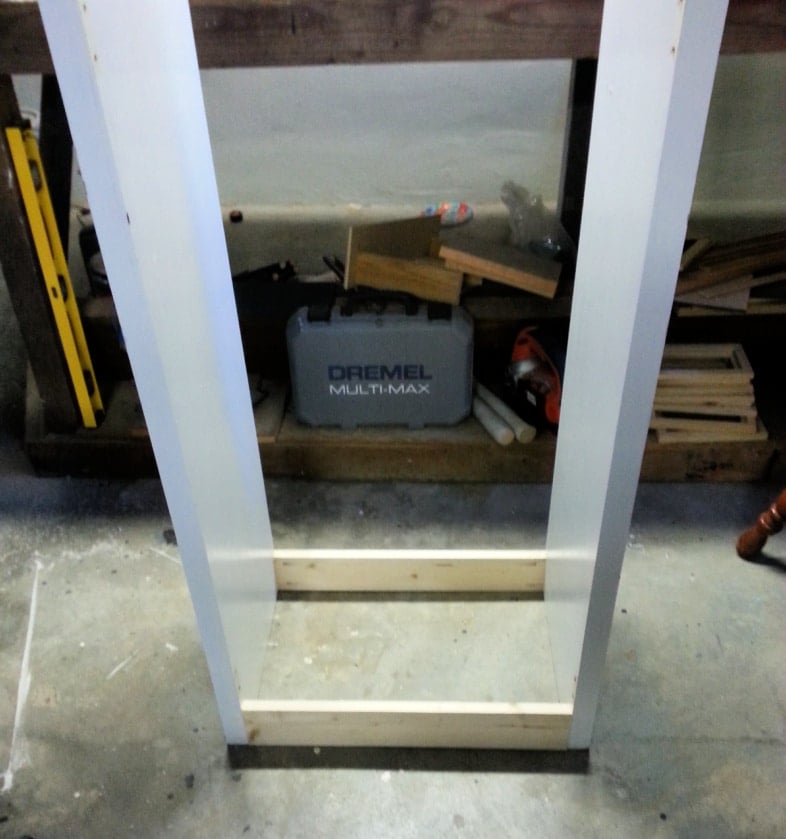
Please excuse the less-than-perfect photos taken in the basement shop. To begin, I removed the hinges and added 1x4s to the top and bottom of each door. If you look closely, you will see this was done with pocket hole screws from the inside.
Add Shelves
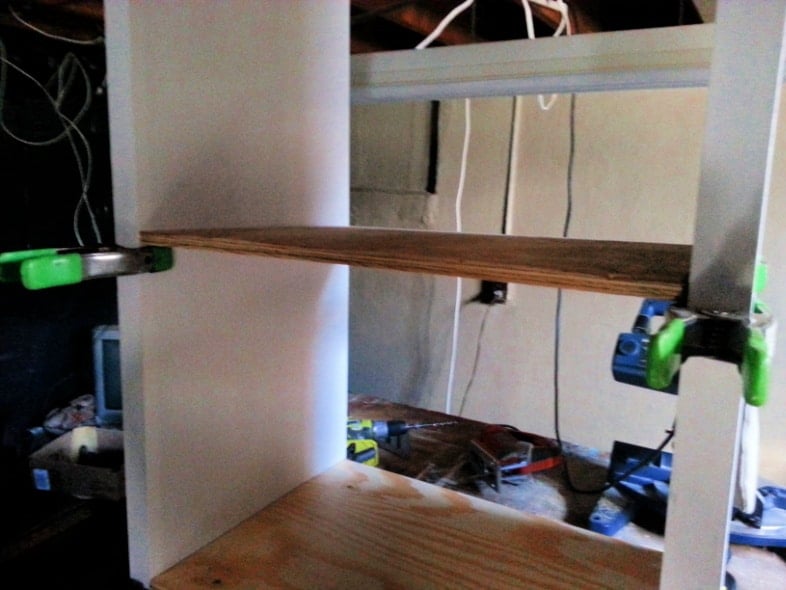
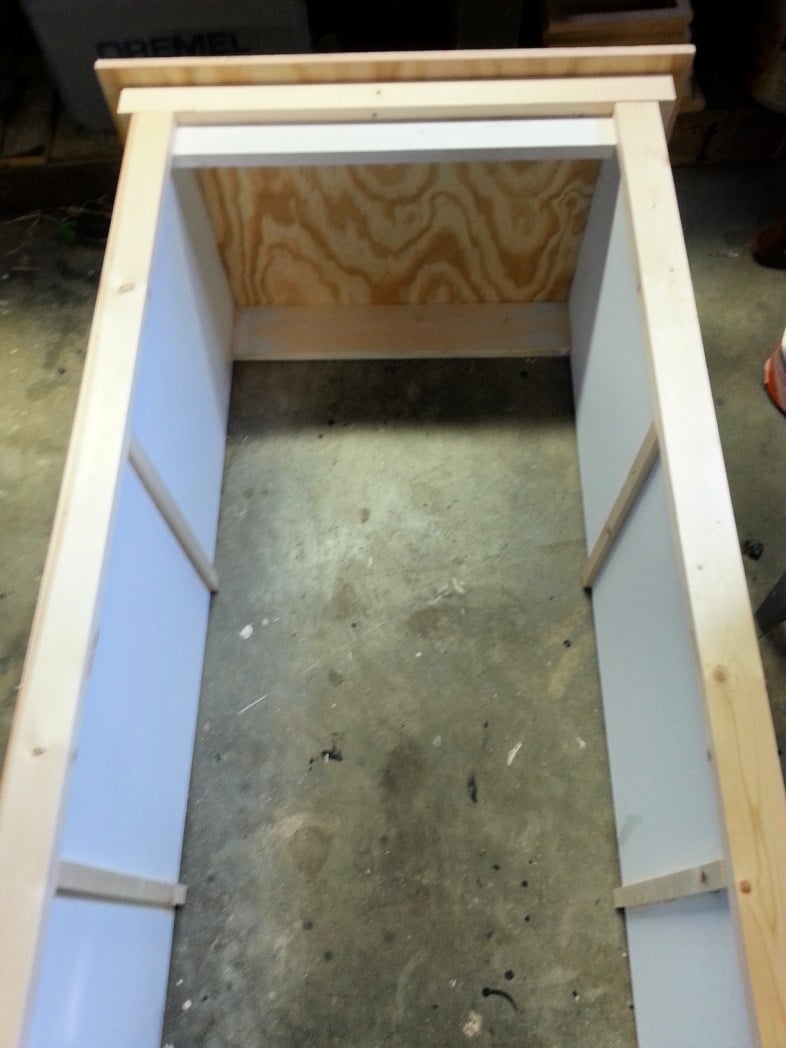
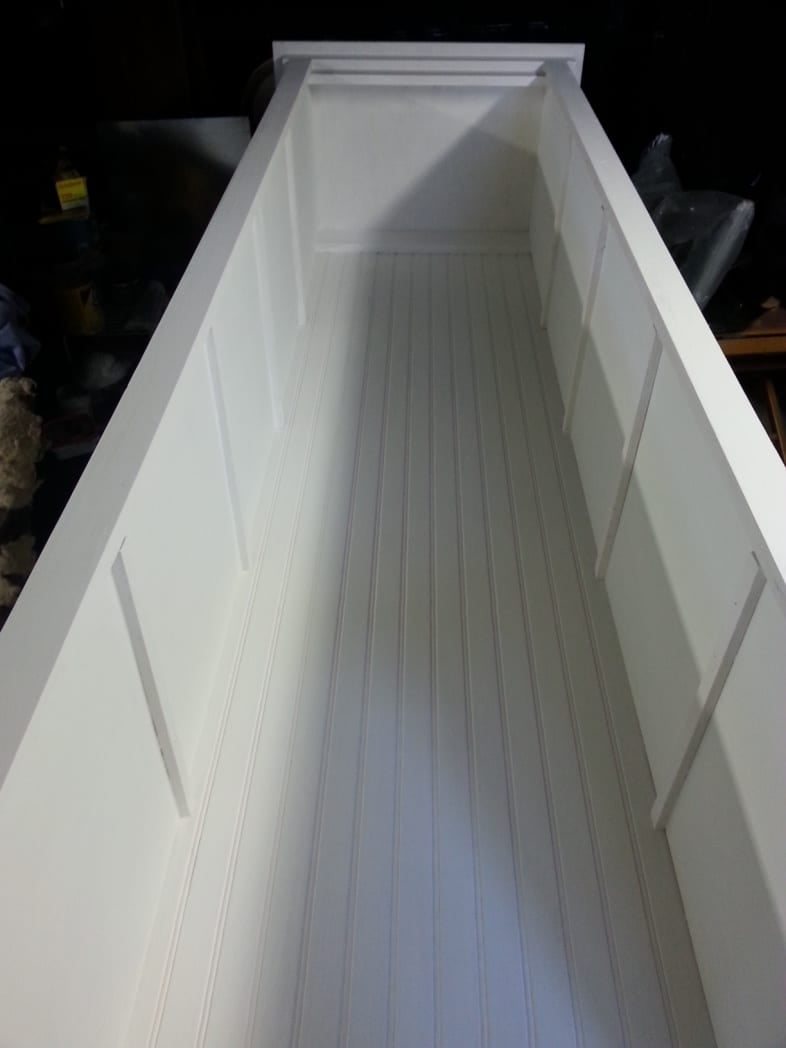
Shelves were cut from plywood. In this photo, I am trying to figure out how to space the shelves connected to the doors. Clamps are helpful to “hold” the shelves during this process.
How To Use Edge Banding

Have you ever used this Wood Veneer Edge Banding? This was my first time using it on the raw edge of the plywood.
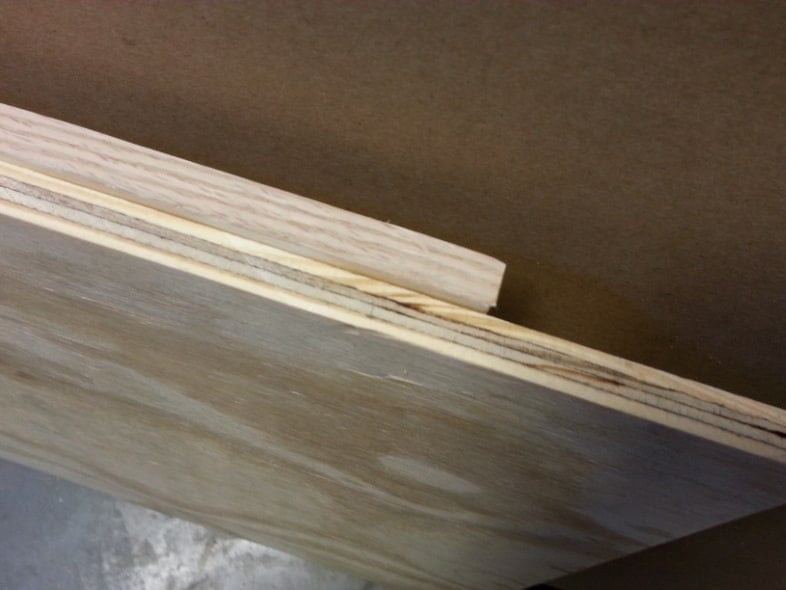
To illustrate the difference in the outcome, here are two boards: one with it and one without.
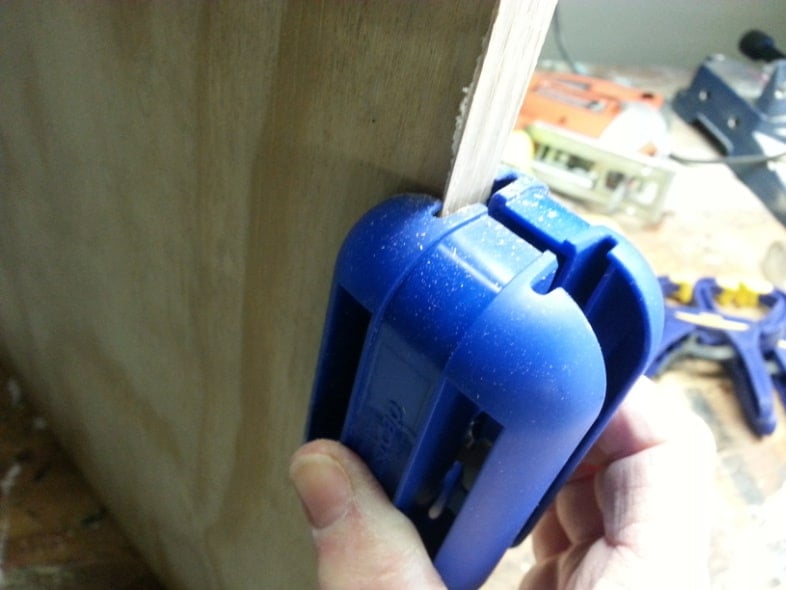
After ironing the edging, I used the Quad Trimmer to trim off the overlapping edge.

I added cleats to the inside of the doors to support the shelves.
Cleats Help Support Shelves
I added some front facings to make the doors look a little less like doors. You can also see that I added a top and some trim.
Trim and Beadboard
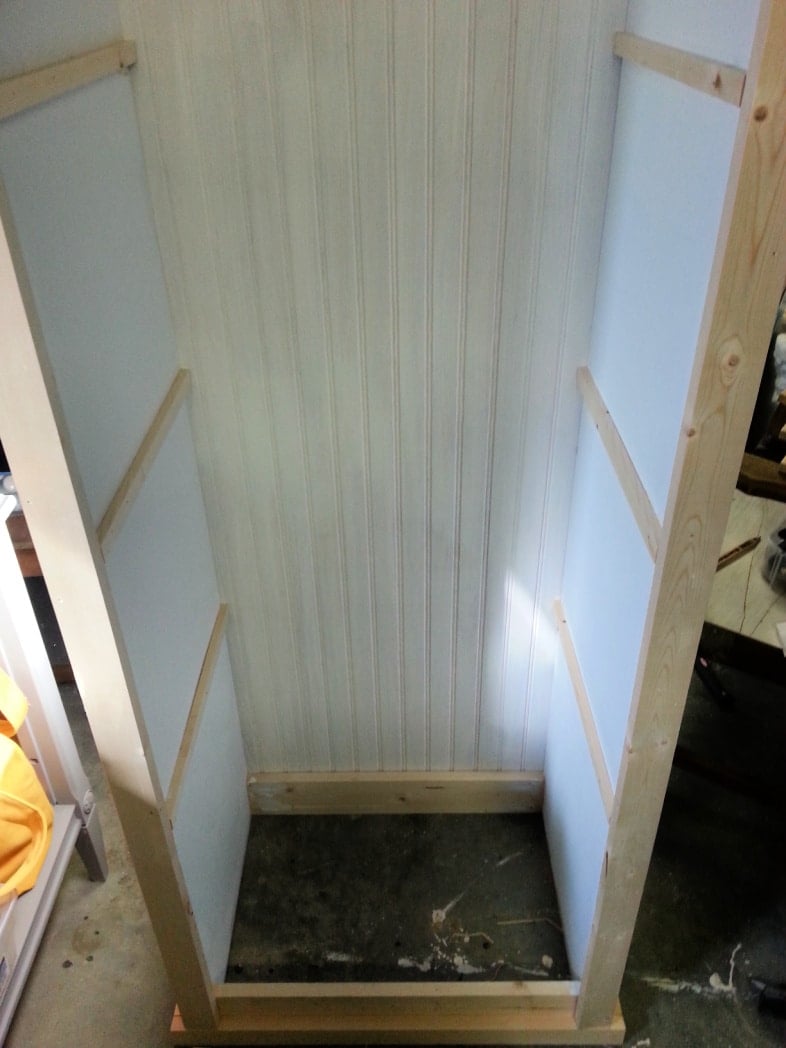
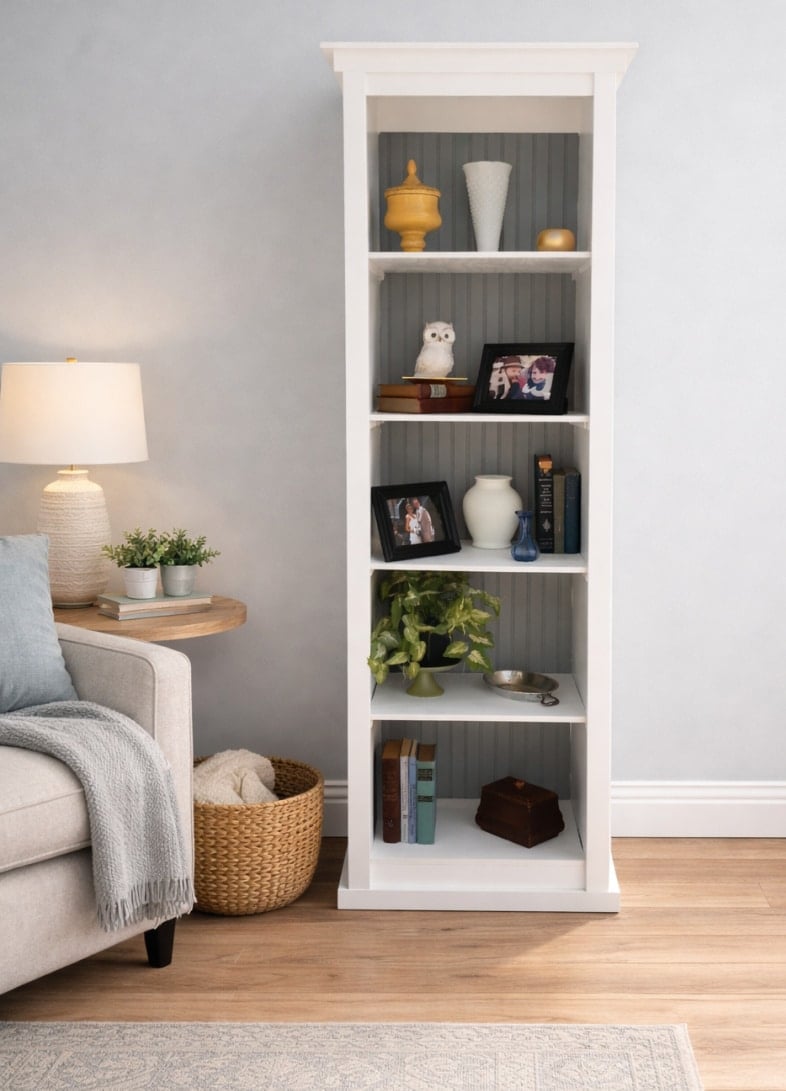
You can see the beadboard on the back and some extra trim around the bottom.
Painting the Book Case
This project is so tall that it barely fits in the basement because of the rafters and ductwork. To make painting easier, I set it up on sawhorses and applied a couple of coats of primer.
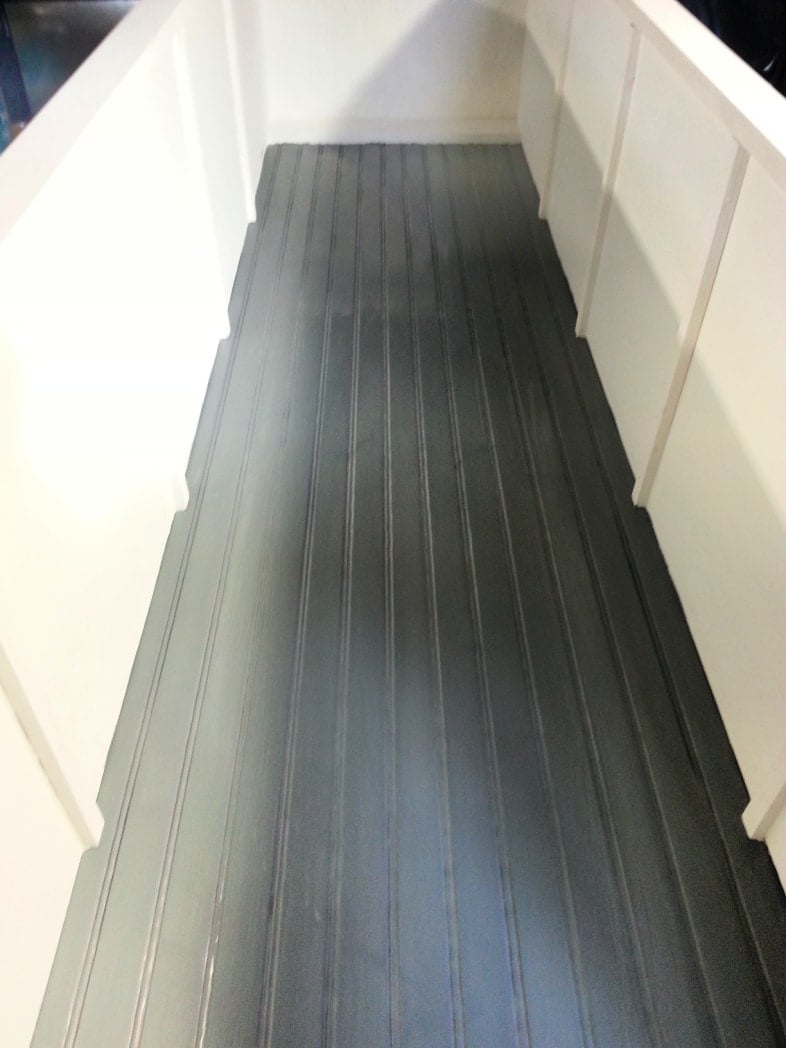
I decided to paint the beadboard gray.
It sat finished in the basement for over a week while I waited for help to get it outside.
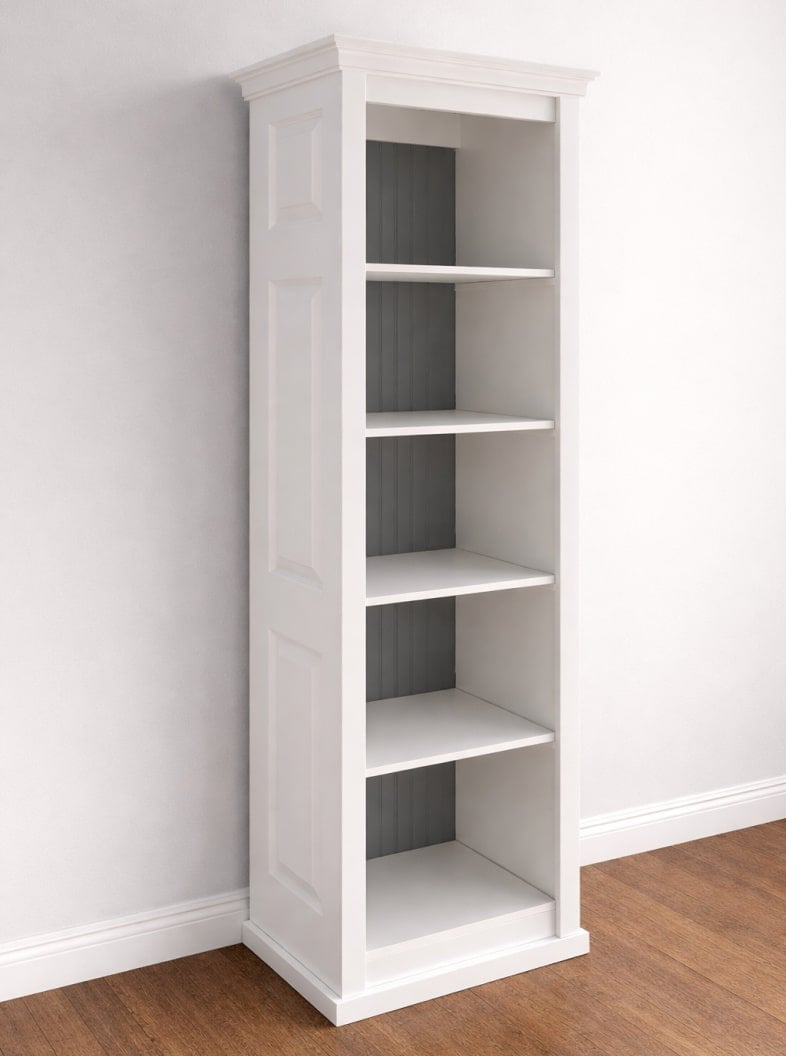
Recycled Bi-fold Doors Make a Great Bookshelf
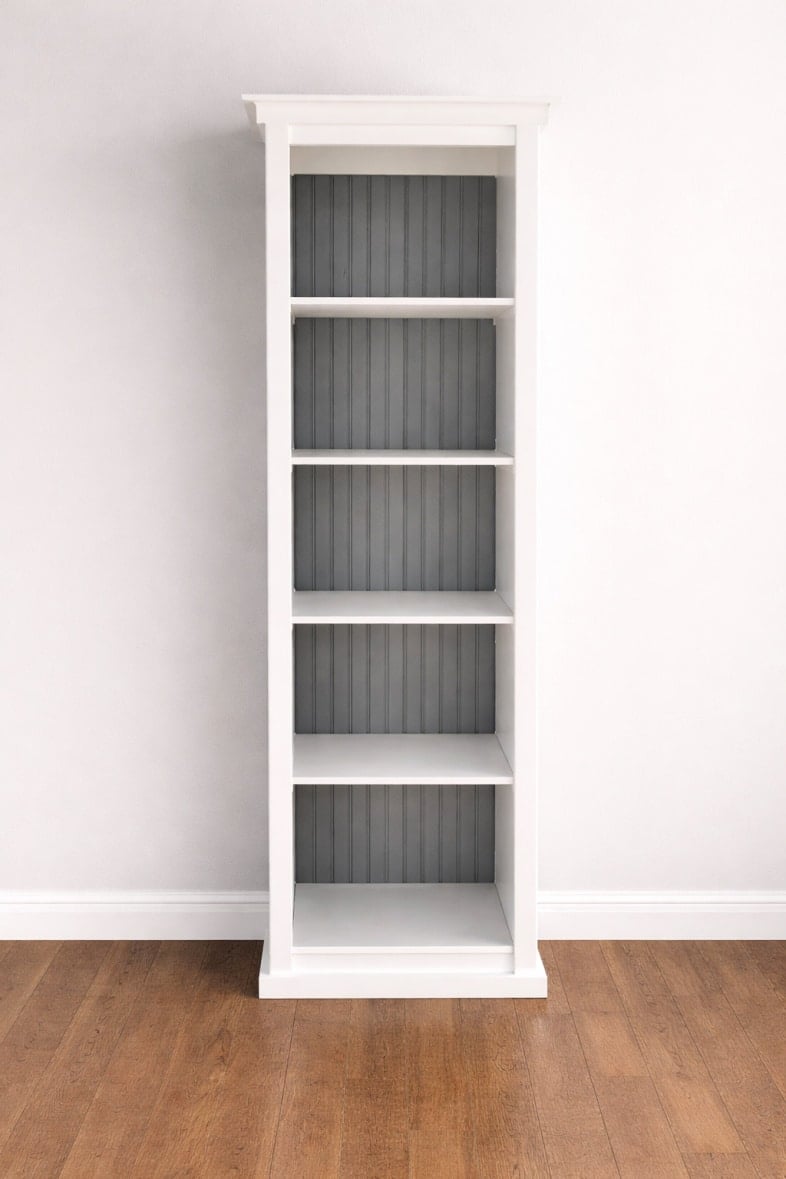
A project like this may seem daunting. By breaking the task into steps, I hope this tutorial will help you build your own bi-fold door bookshelf.
What do you think about the gray beadboard?
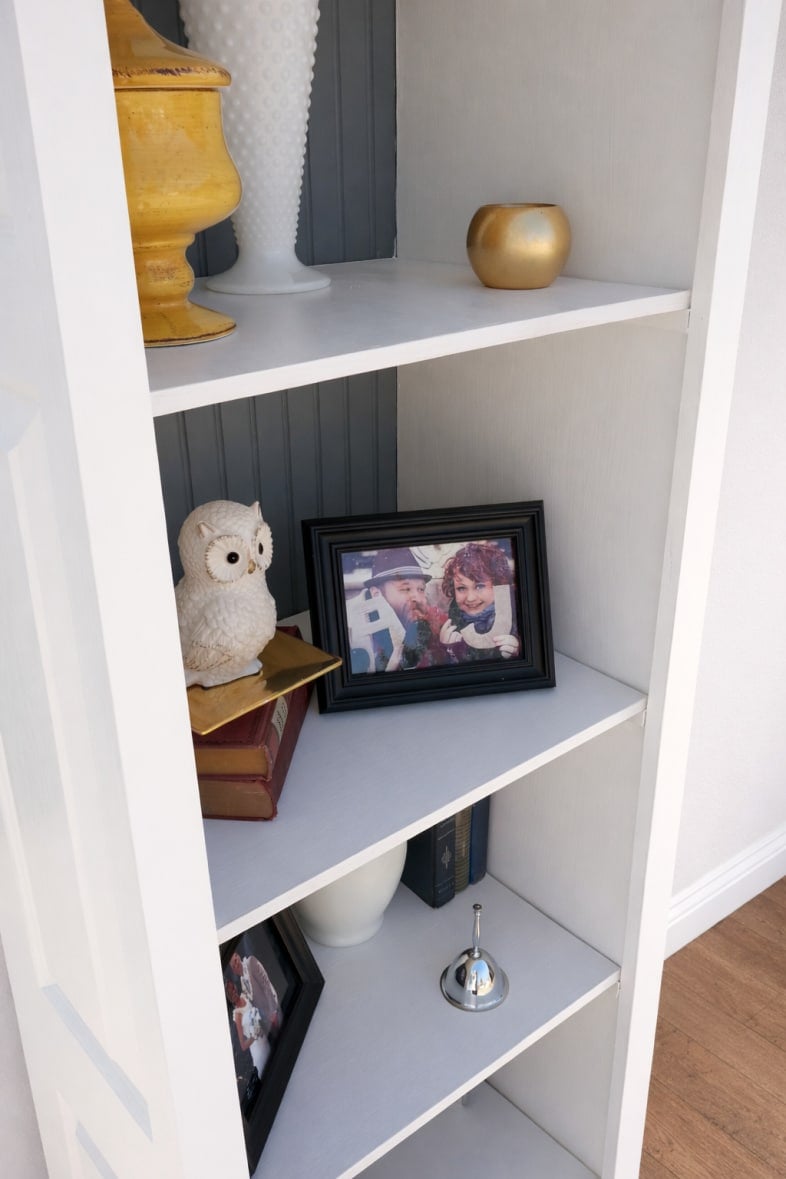
A bookcase like this is useful for organizing your books and displaying your decor.
It took me weeks to complete this because I worked on it intermittently and applied multiple coats of primer and paint by hand. I’m pleased it’s done.
gail
Hello Gail,
Do you think the shelves and cleats are strong enough to hold books? Would love to try this.
Cindy,
To hold books, I would think you would need strong cleats secured with wood glue and screws. 🙂
I hope that helps!
gail
How did you attach the 1×4 at the top and bottom and the facings of the door? Nails?
I do almost all of my projects like this with finish nails and Gorilla Wood Glue. This was a few years ago, so I can only assume that’s what I did. If there is room, I’ll use screws, but with these doors, I’m sure there was minimal room. That Gorilla Wood Glue is good stuff!
gail
How did you attach the shelves to the cleats?
Curtia,
Thanks for stopping by and leaving a comment. I didn’t attach the shelves to the cleats. They just are sort of locked in place by the front trim and the back of the shelf.
Hope this helps.
gail
There were several questions about the doors being hollow… Was hoping you might answer them?
Cindy,
I answered those questions via email when they came in initially. Yes, they were hollow doors. I added the cleats using Gorilla Wood Glue and brad nails with no problem.
What else would you like to know?
gail
It looks great!!!!
Never thought of it making a very classy beautiful bookcase out of doors!!!!
And of course if u try to go even lower budget go to a rehab store,I have seen them doors at $10 a piece.
Nice job.
Yes! ReStore is a great place to find cheap doors!
This must have been solid wood bi-fold doors. All the ones I see are hollow. Again you out did yourself! Such a beautiful job!
Gail-
As usual, you did a great job on this cabinet! You have come a long way– and all your work looks so professional now!
It looks great…and you styled it so well. 😉
Patricia
You are the queen of doors! I love that one. Nice job.
Another great and beautiful project!
Hip deep snow has gone, some melting the past few days has even shown some ground. Finally days above 30. Some day hopefully I can get into my garage and start a project.
Bi-fold doors are great for projects. I picked up some at a thrift store for a few dollars (they wanted to get them out!). I’ve used them to make a long firewood box for my porch and a built-in bench in the kitchen. I still have some left, so I may have to copycat your bookshelf project.
I cannot believe this. I just got home with two sets of bi-fold doors just like these that I got from thrift store! Thank you for great idea!!!!