

This type of furniture can be very useful, but let's face it, they are not much to look at!
With a little TLC and some inexpensive wood we can fix that!

Last week I went to pick up some free wood (that I found in the free section of craig's list) and was surprised to find they had a few other things for free too. Like the above cheap laminate cabinet, and a beat up folding table. I grabbed the wood and threw the other two items in as well...you never know right...

Though, I hadn't planned on using the cabinet anytime soon a few days later while thinking of a spot in my living room that needed a bench I had an idea, I could turn the cabinet into a storage bench!
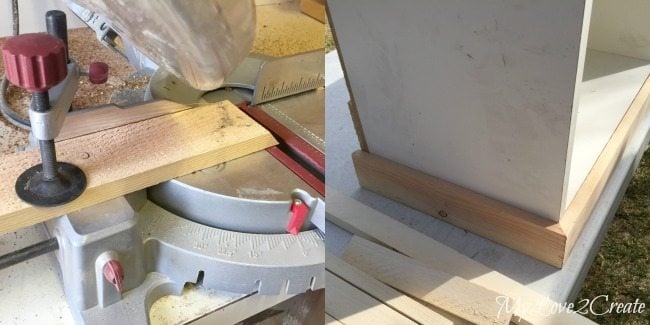
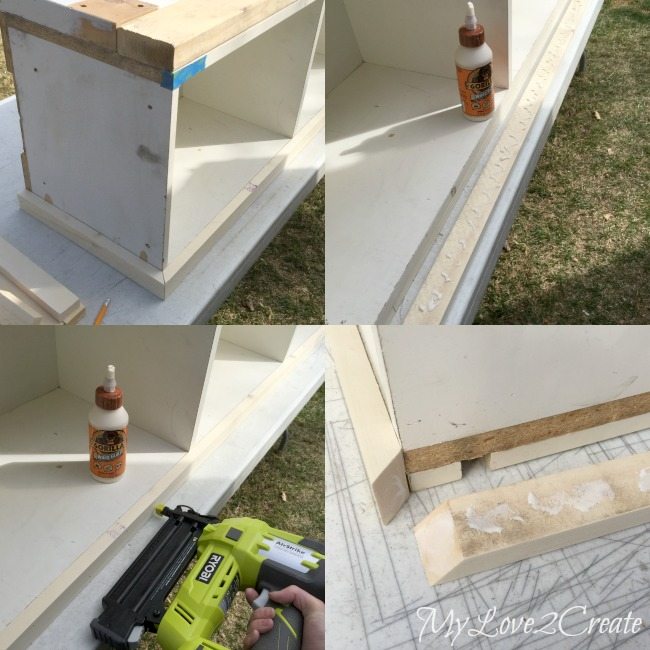
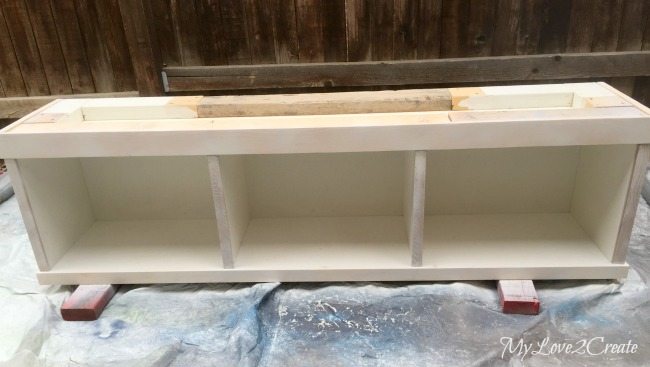
I quickly set to work, using some of the scrap wood I had gotten and pieces from my own huge scrap pile. You can see I used 2x4's on the bottom and glued and nailed them all around the bottom edges. This serves two purposes, to beef up the base so I can add trim and have somewhere to nail it into, and to have a place to add feet or casters on the bottom.

Once the base was added I flipped the cabinet over and looked for scraps to add to the top. I wanted to use a thinner material so I could add 1x2's for the trim later and I happened to find some fun scraps...Can you guess where they are from?
Ok, probably not...they are from one of my recent contributor posts here, my Kid's Old Drawer Media Cabinet. When I repurposed the drawers to make it, I had to trim off the edges of each drawer and these were the left over scraps. They were the perfect thickness, so I glued and nailed them on! You will also see the weird shaped ones in the middle...I was out of the drawer scraps and wanted some middle support for the bench top, and these scraps were also the same thickness. They were left over from the Repurposed Crib Dog Crate that Sunny is still loving. Moral of the story...never throw away anything!! Actually throwing things away is good, but scraps can come in handy. 🙂

This is what it looked like after bulking up the top and the bottom. Next up? Trim!
I grabbed a piece of 1x3 from my stash and cut the ends it at a 45 degree angle to the length I needed to cover the front of my cabinet. Then I cut a smaller piece for each side. Though I like the look of the angled corners but you could do straight cuts instead like I did in my DIY Tray Stand. I eventually glued and nailed it on, but I did it after I had finished the top trim.
I had several 1x2 furring strip scraps left over from other projects and I used them to do my top trim. So, I cut first and made sure they fit. Then I added glue and nailed them on. I made sure to put glue on each corner as well. See how nicely the trim covers up the ugly edges and makes it clean and crisp.

Once I got the top and bottom trim attached, it was time to add the vertical trim. Although I could have just used 1x2's here, and that was my original plan. But I found these random strips of wood that were a little thinner and so I used them instead. I measured each one to where it needed to go, then marked and cut it. Of course I made sure to use shorter nails so they didn't poke through on the inside when I nailed them on. On the front edges I doubled up the trim (top right photo). I filled all holes with spackle when I finished.
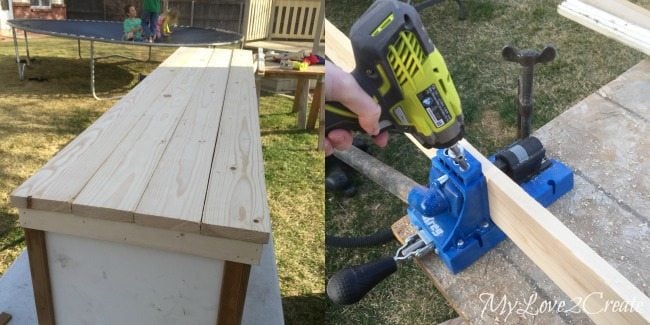
All that I had left to do was make the top. I had purchased some 1x4 furring strips for something, I can't remember what, and they were still laying around unused...so I used them! I cut them to fit the top with a very small overlay on the sides and front (like ¼ inch). Then I marked them for pocket holes and drilled away with my Kreg Jig.
Need more details on using a Kreg Jig? See my article How to use a Kreg Jig Pocket Hole System
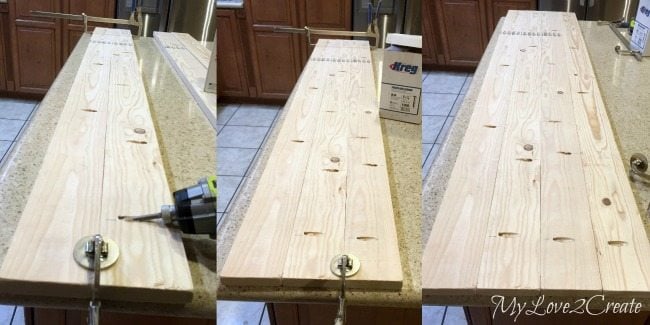
Since it was getting dark and cold I came inside to finish. My good old standby, the kitchen. 🙂 To create the bench top I clamped two boards together and added the pocket hole screws . Then I added the third board, and then the fourth. Super easy!
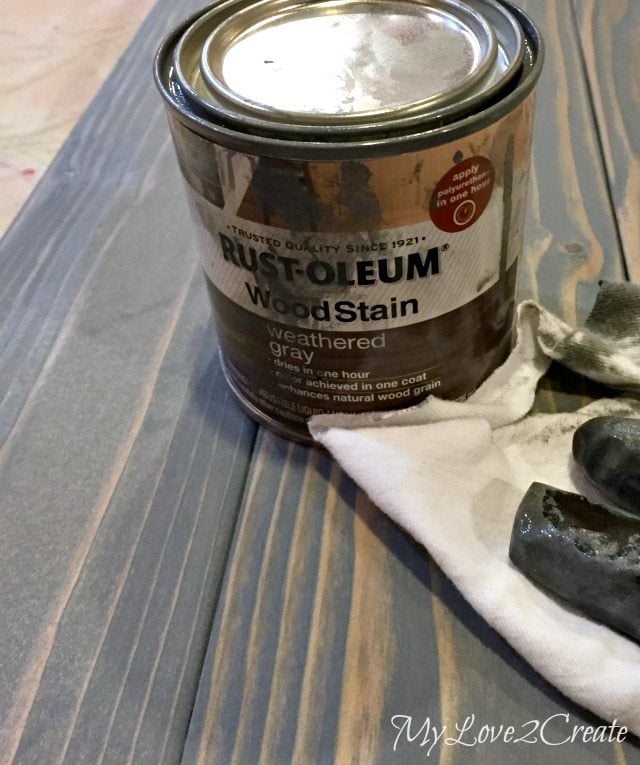
This is where I had an internal conflict. What stain to use? I almost ALWAYS go for the dark stain, I LOVE it! But, I wanted to try something different, so I busted out my Rustoleum's Weathered Gray. It is such a pretty stain and reminds me of blue (my favorite color). I used it for the first time on my Old Deck Wood Laundry Crate and have loved it ever since. I gave the top of the bench one coat.
Next morning I took the old cabinet, soon to be new bench, outside to paint. Here it is after one coat. I had a can of white spray paint so I used that, and used half of another.
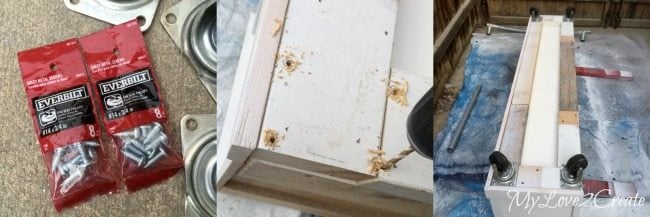
After I was done painting I grabbed some casters that I had gotten for free at a city clean up, and pre-drilled and screwed them on.
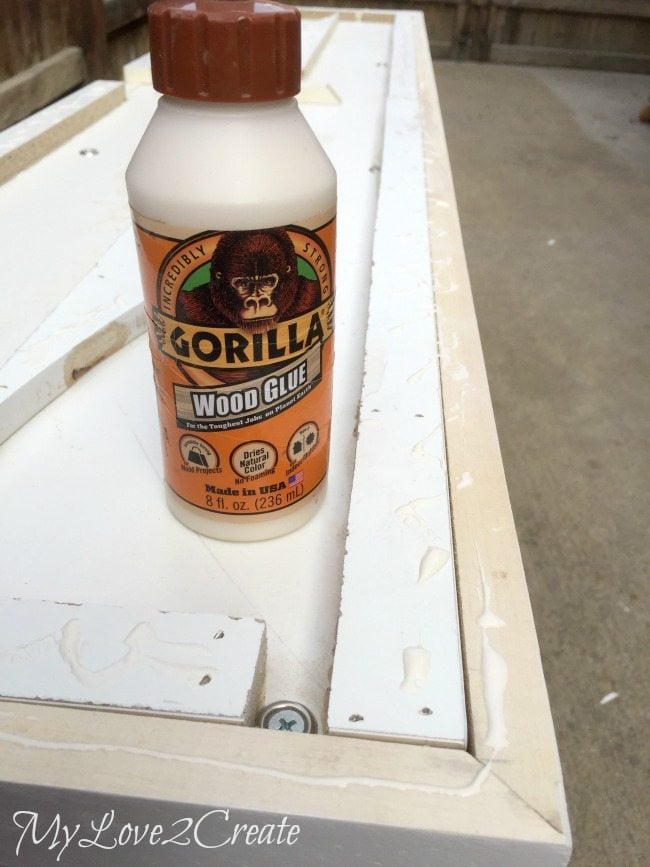
I sealed the bench top with three coats of poly after staining, making sure to sand with 400 grit sand paper between coats 1 and 2, and it was ready to go on the new bench. Then, I applied my favorite Gorilla Wood Glue and then nailed the bench top on. Sorry no picture. I did want to point out that I when I added my scraps to the top I had to avoid these random sticking up screws...I worked around them, and it was just fine. 🙂

All done! It really is such a simple fix. No one would ever know that this used to be a cheap old cabinet! Using furring strips from the Home Depot, it would be less than $20 for what I did.

Look at all that storage! I have plans for those cubbies, and if you know me well you could probably guess what I am going to build to put inside each of them. Regardless, that is a post for another day, and I will be sharing it here in a few weeks, so stay tuned!

I have to be honest, these pictures are just not getting the stain color, it is much prettier in person. 🙂

I made a pretty weak attempt to stage some books in the bench...

But, it gives you an idea of how useful this bench can be! If I had a spot for a mudroom this would be a great candidate for that job.
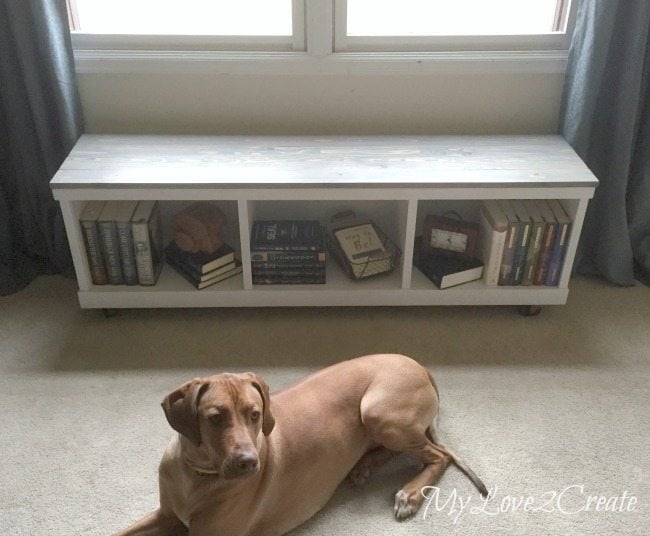
For now it is going under my window, and it is perfect there! Now, I just need some cute pillows. Sunny kept photo bombing, so I just gave up and let her stay.

I know I have said it before, but I am always amazed at what you can do with free junk!
I hope you look at cheap laminate furniture in a new light. Maybe you have your own that you could revamp...Would you be willing to give it a go?
It never hurts to try, you have nothing to loose!
Hugs,
Joan
So much fun to reuse/recycle. Trash to a real treasure here, Mindi. U go, girl!
Gail Wilson
On behalf of Mindi, I thank you!
Mindi does awesome work, eh?
gail
Dee Bell
That is a really great repurpose! Sunny is the best assessory to show it off too! I wont pass up the next old cabinet I come across. Thank you.
DD Rose
This is fabulous! I cannot wait to score a beat up bookcase to do the same. Since this is laminate over particle board did you sand the sides and cubby areas before your first coat of paint? Did you use a primer and, if so was it water or oil based? Thank you for (10 sharing this post and creative makeover and (2) responding to my questions.
Mindi
Thanks DD Rose, I am so glad you like it!! I did sand this down before painting, I ended up using an oil based spray paint with primer to paint it and it worked pretty good!! For the best results with laminate, I recommend sanding it down first (100 to 150 grit sand paper) then clean it off with TSP. Next use an oil based primer (zinsser with stain blocker and bond coat) you can brush it on or spray, but spray will get smoother results) Then sand again with a 320 to 400 grit sand paper after the primer is dry, vacuum and wipe it clean with a damp cloth. Then paint and finish as desired! I hope that helps!!
Jenn
Okay, I'm late to the party but I LOVE this! We just moved into a townhouse that's VERY small and I am looking for something like this to turn our front "coat" closet into a mud room. I have a question though, did adding all the 2x4's make it sturdy enough to sit on? I have little boys (under 3) that will be using it to put shoes on...
Mindi
Hey Jenn! Oh yes, this is very sturdy to sit on with the 2x4 supports. You will have no problem at all, I have had multiple children and teens on it at a time, even several adults. This would be perfect for a mudroom bench! Good luck! 🙂
Joe
Nice work Mindi
Bernadette
The bench is my favorite, one which I may try myself. It's a good example of turning cheap and unappealing furniture into something useful and attractive.
lyn moon
Well you've done it again. Your bench is fantastic. Can't wait to try something like that myself.
Julie @ follow your heart woodworking
I always am amazed at Mindi's projects. Mindi you have such vision! I must try that grey stain, it looks great.
Tracy@www.bluridgevintage.com
You have done a marvelous job on this cabinet....can we say turned an ugly duckling into a beautiful swan. I love the idea of casters, this makes it so easy to change things up in other areas of the house with this cabinet/bench. Great Job.
Catherine
Great vision Mindi--great job! LUV IT as a window bench! Looks sO inviting!
*Sunny needs a new name--STARR : D .
I REpurposed mom's old laminates into a built-in library--use what you've got to save money, y'know!
https://freddyandpetunia.wordpress.com/2014/02/10/the-journey-of-a-stylish-renovation-the-library/
Catherine
gail@myrepurposedlife.com
Mindi,
I love your cabinet into bench transformation!! It's absolutely perfect in every way. Super tutorial. I look forward to your next post.... so curious to see what you will be using for storage in your new bench.
You are the queen of FREE! I just don't look on craigslist enough.
gail
Bliss
Mindi, that is an excellent upcycle, way to upgrade that cast off and put it to good use. You also gave me an idea, I'm gonna stalk local towns clean up day, who knows what people will be tossing out.
Pam
Great job...I love it. It looks perfect in front of the window.
Christina
Oh Gail, this is stellar! I love the stain color on the top. The bench is fabulous. Love wheels on just about anything.
Thank you for all the details you share. I completely adore your blog. 🙂
Christina
Oops... thank you to Mindi! 🙂 I have to learn to read closer and not get so excited about the project. 🙂
gail@myrepurposedlife.com
🙂 I love that you got so excited about Mindi's project Christina!