DIY Small Kitchen Island from Sewing Cabinet Upcycle
As an Amazon Associate, I earn from qualifying purchases.
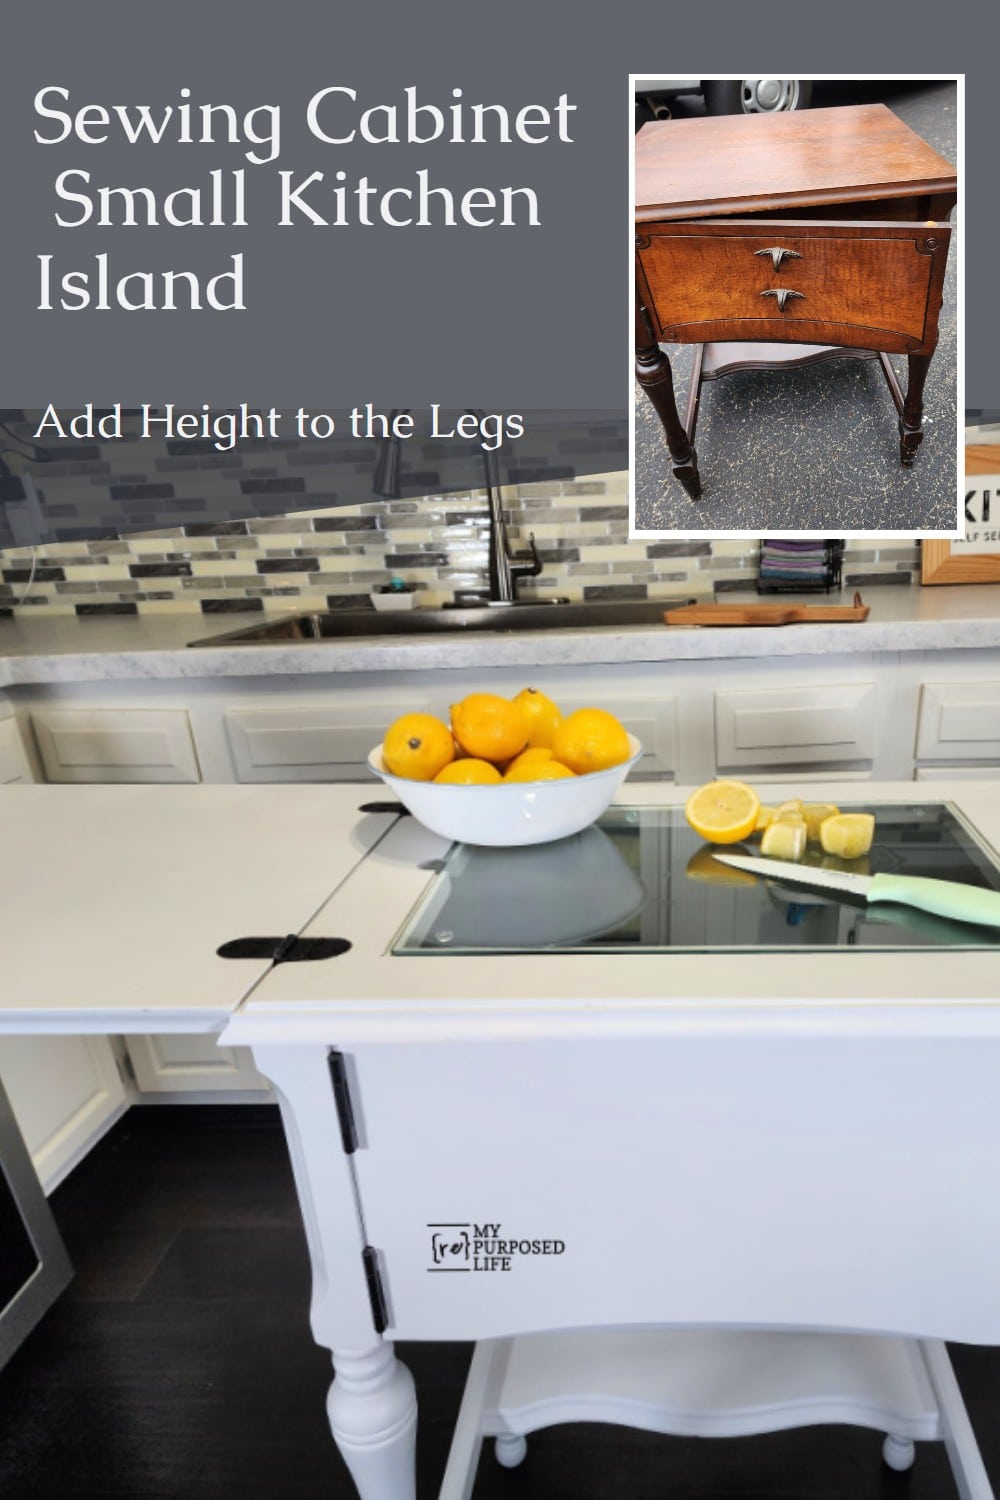
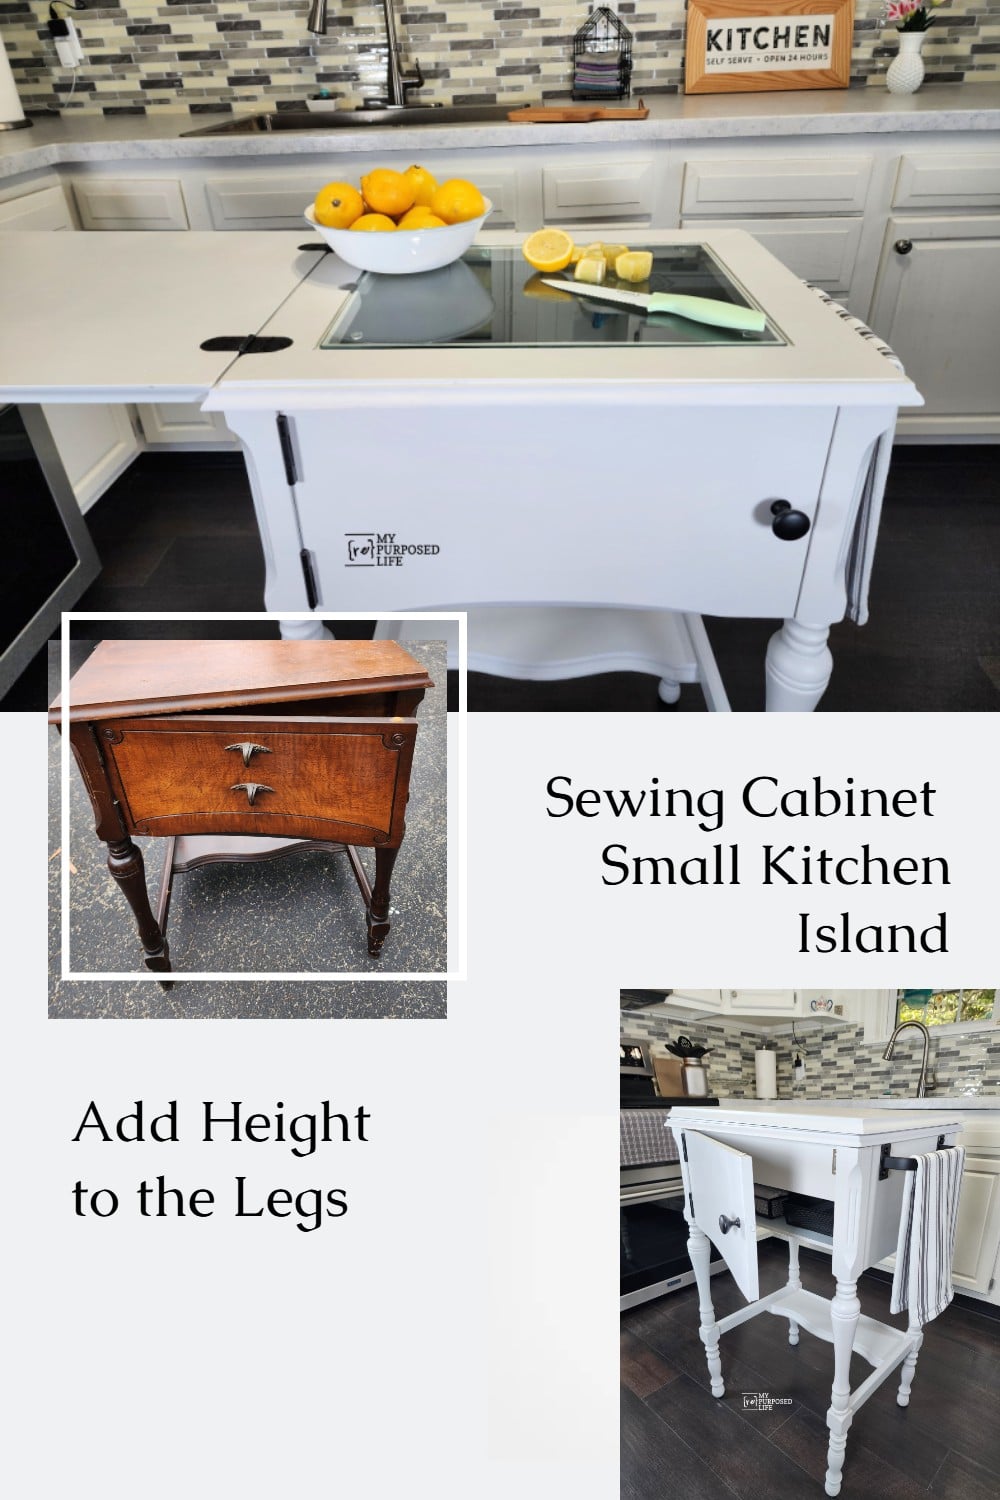
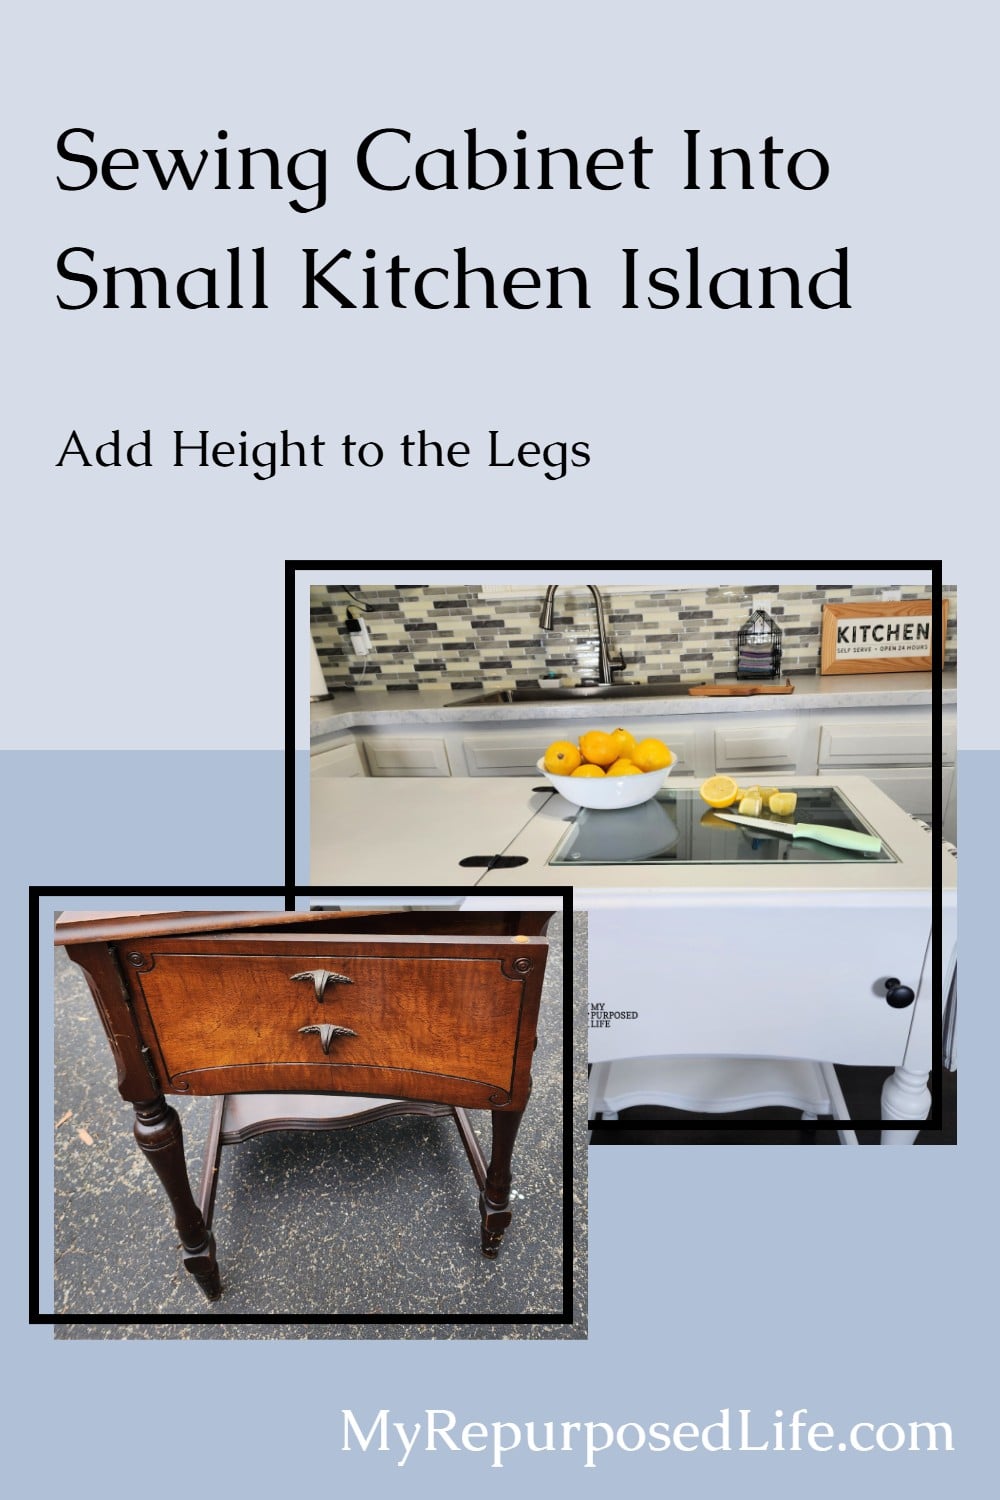
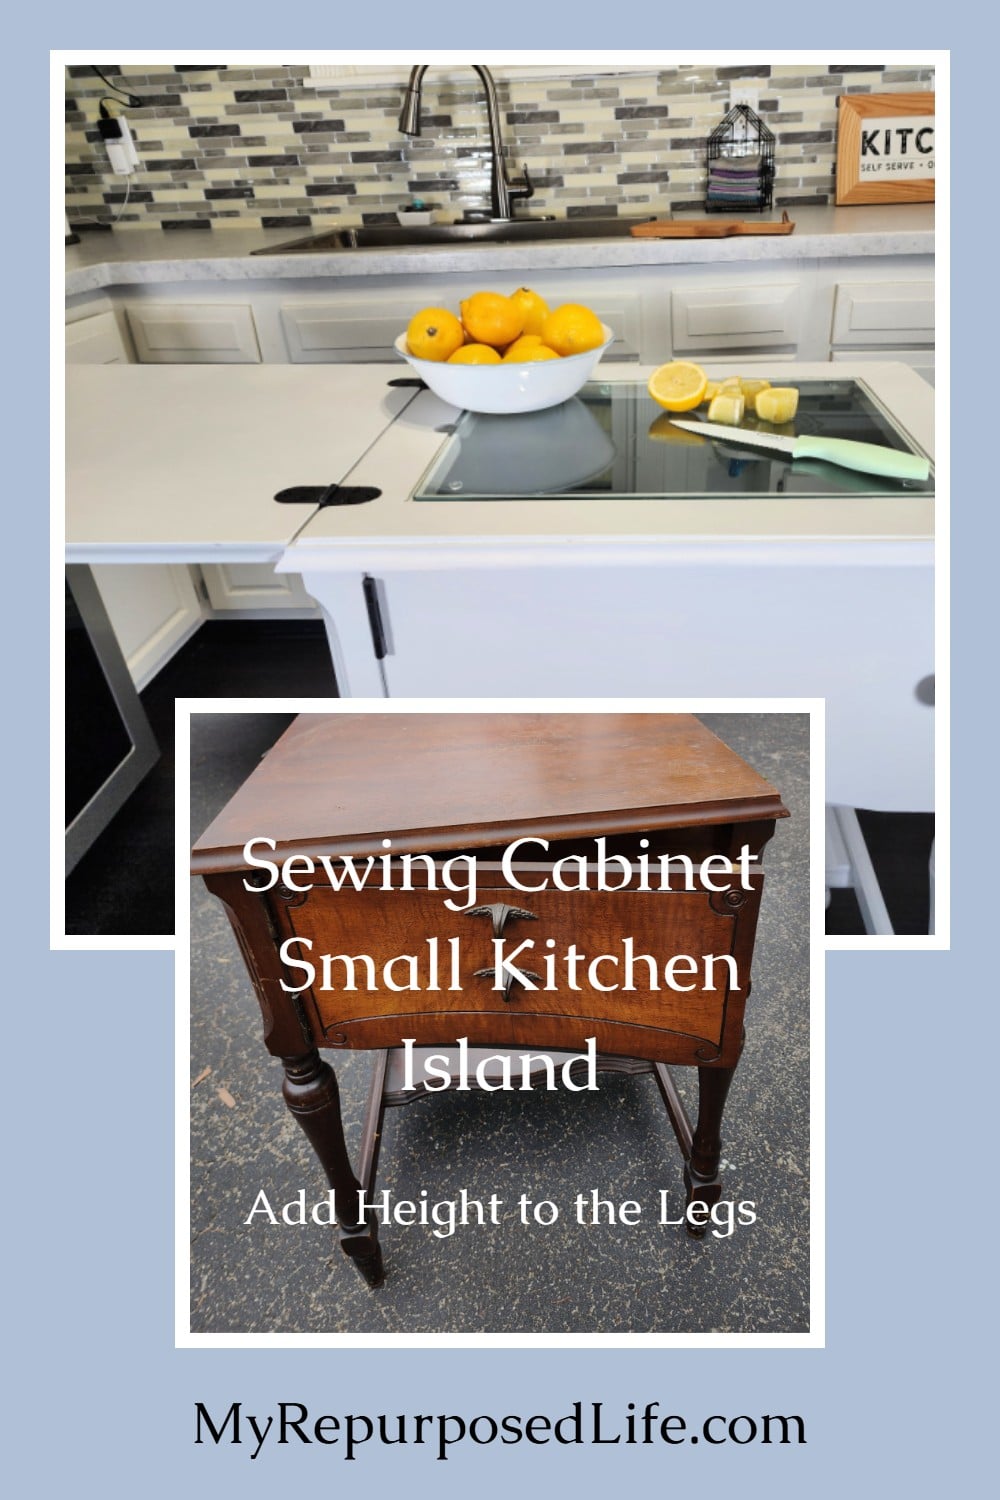
If you’ve been looking for a budget-friendly way to add extra counter space, this DIY food prep station, made from a repurposed sewing cabinet, is the perfect solution. With a bit of paint and a few upgrades, I transformed a dated piece of furniture into a small kitchen island and food prep station. This sewing cabinet makeover demonstrates how to transform old furniture into a stylish and practical piece for everyday use.
This old sewing cabinet has a new purpose, and it’s ready for use in practically any room in the house. At the end of this article, I’ll provide you with ideas for utilizing this new small kitchen island in alternative ways.
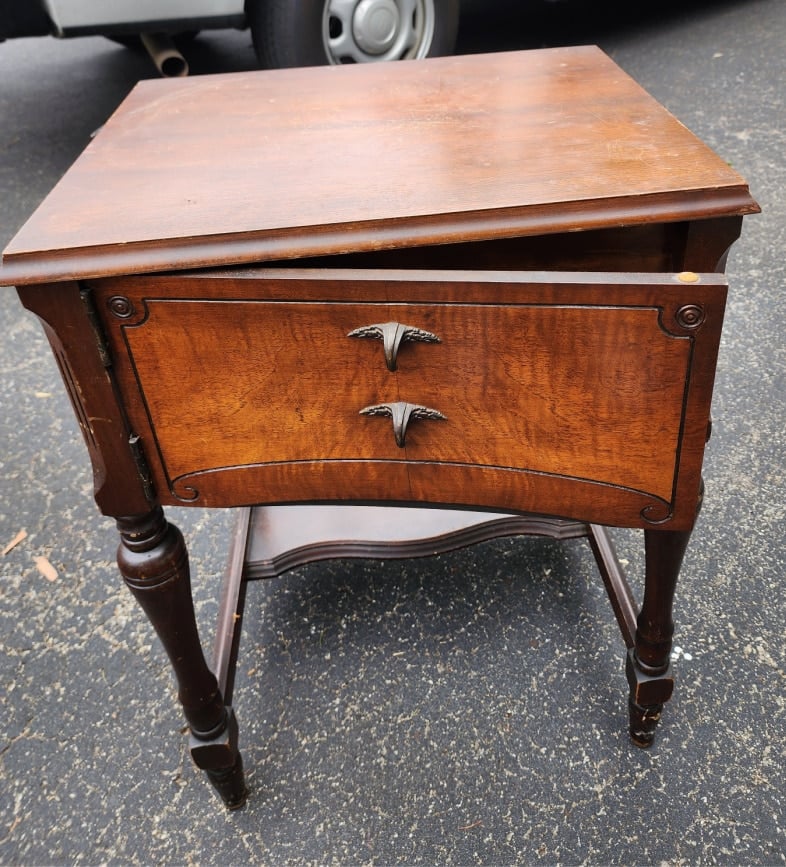
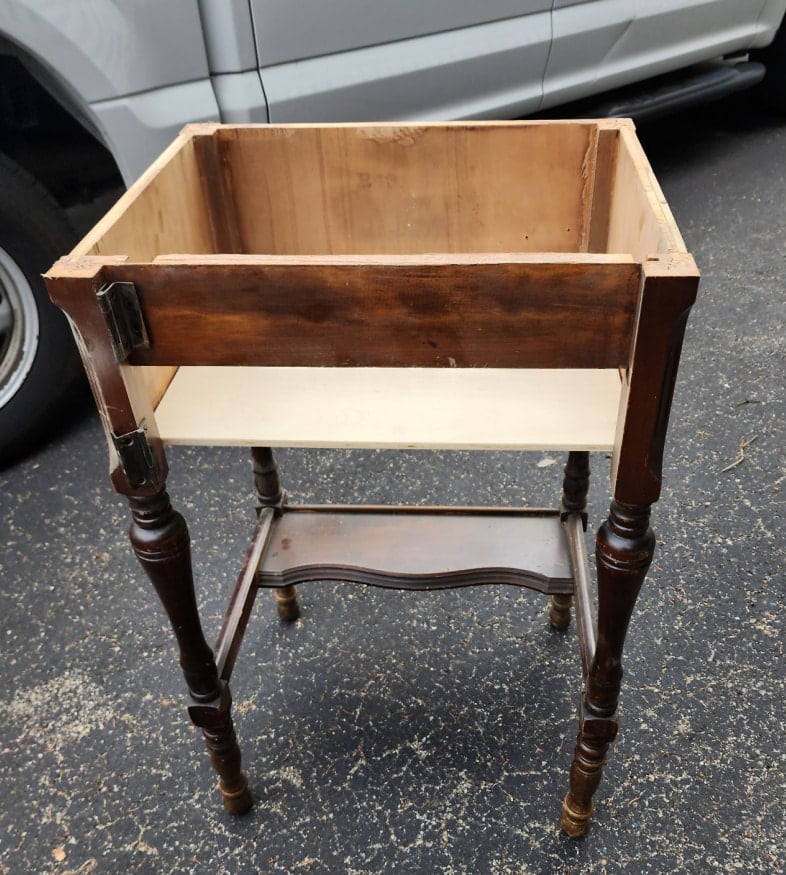
Vintage Sewing Cabinet

This vintage sewing cabinet was in the back of one of my favorite thrift stores. It was marked with a sticker for $8.
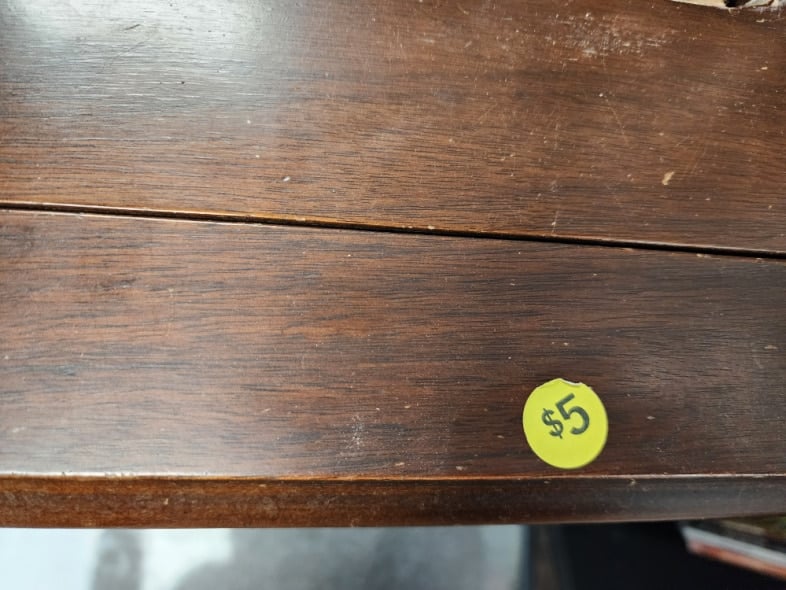
However, when I opened the lid, I noticed a $5 price tag. Upon checking out, I asked about it, and the very friendly cashier honored the cheaper price.
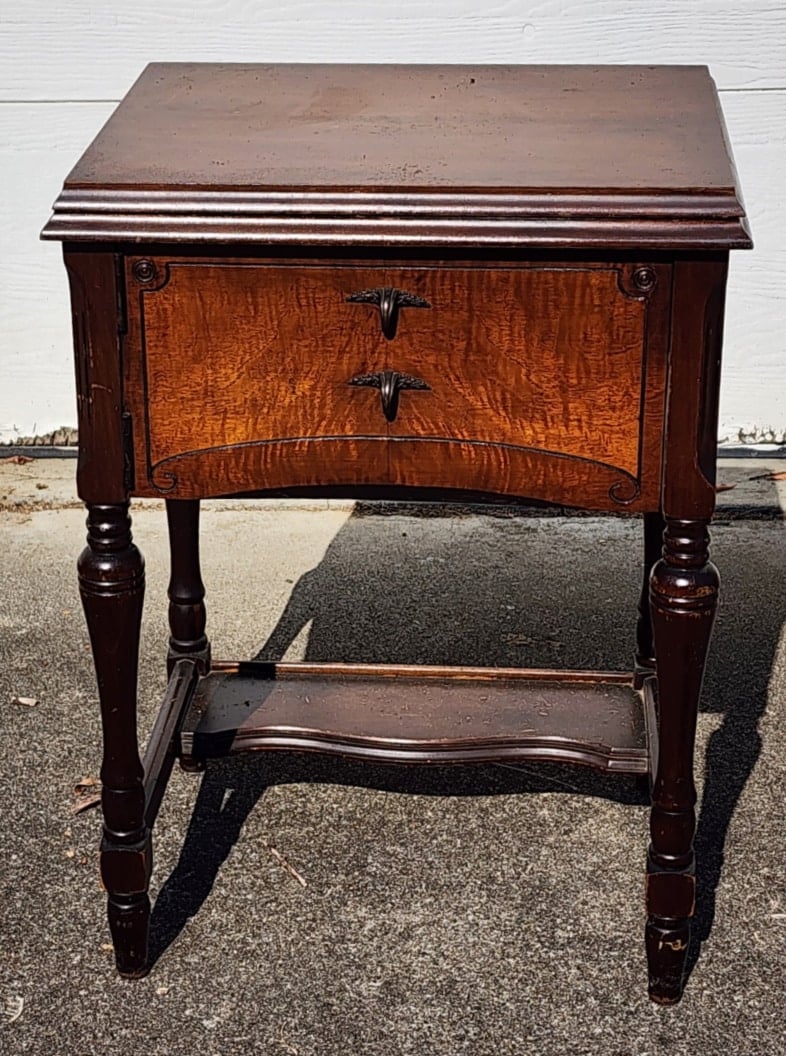
There are a few scratches on the top, but overall, it’s a lovely, sturdy table. Luckily, someone else had removed the vintage sewing machine.
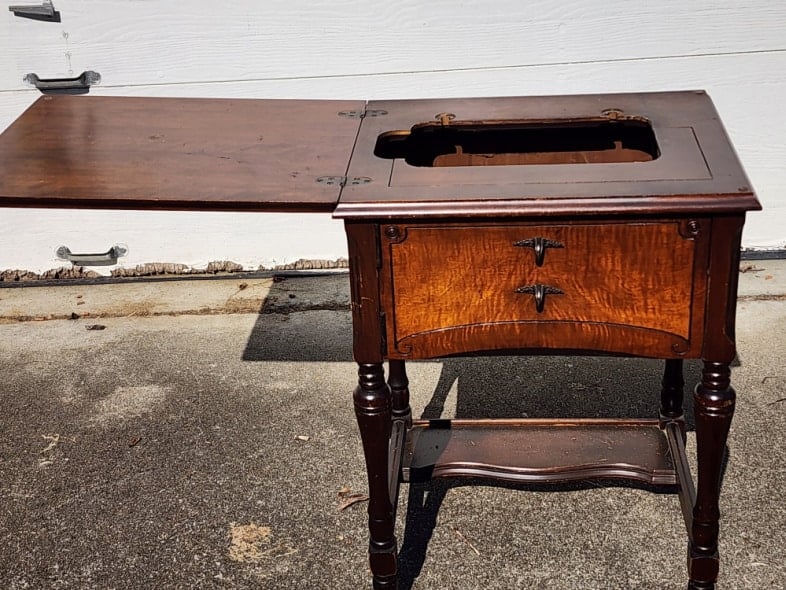
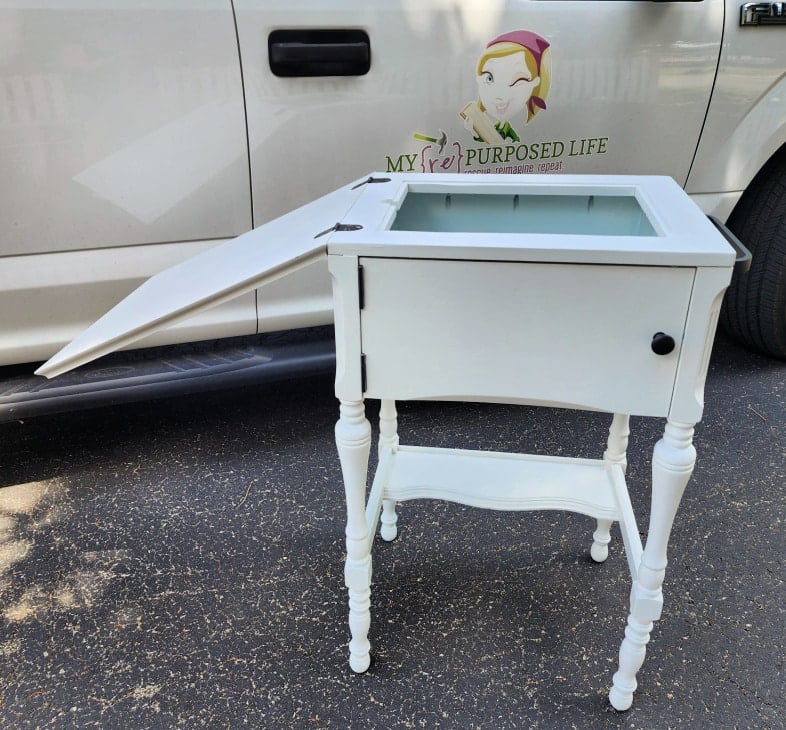
Can you see that with the lid open, the vintage sewing cabinet will make the perfect prep station for a small kitchen?
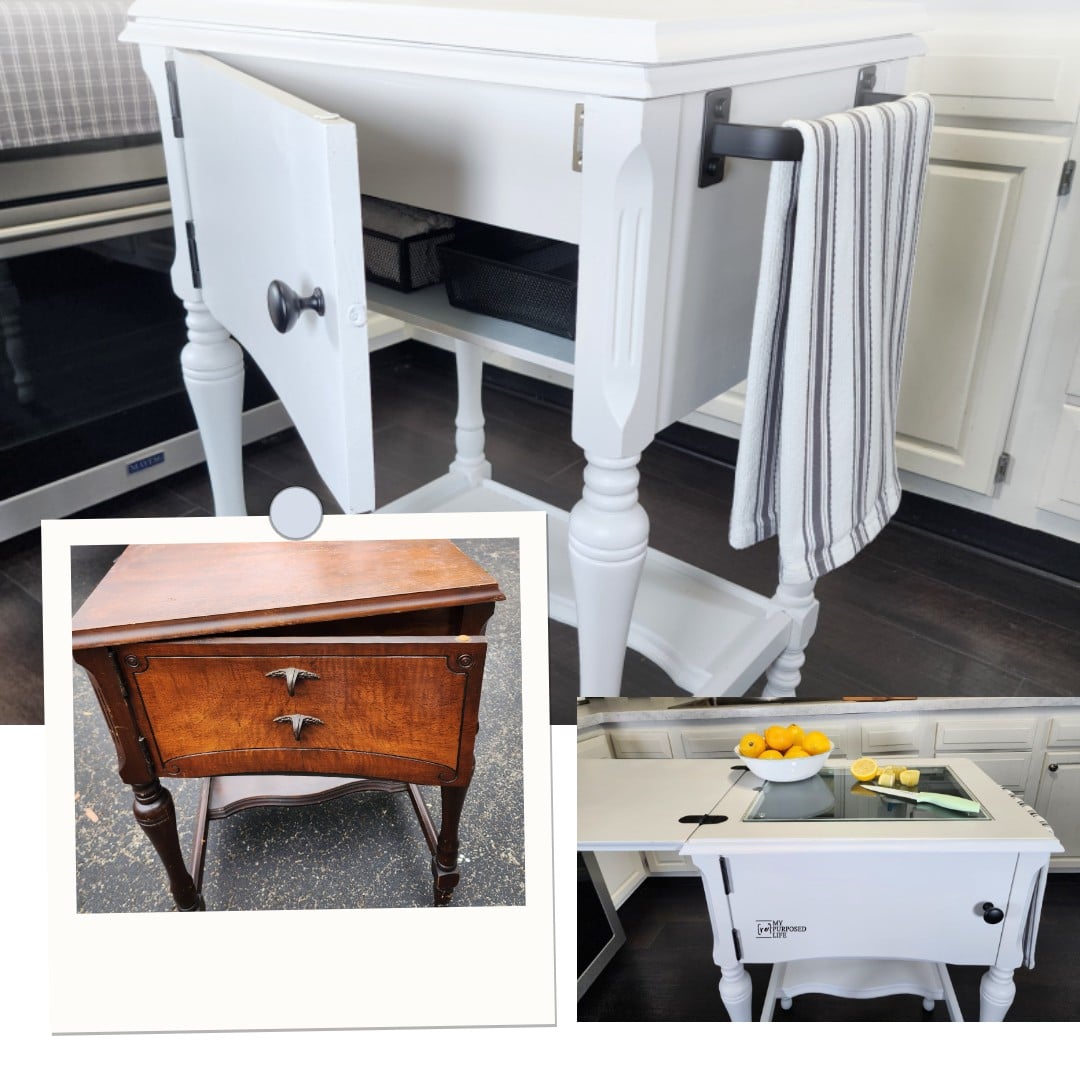
As this article is quite lengthy, here’s a sneak peek at the final project. Please scroll down to see the things that went right and the many challenges that arose.

It’s Furniture Fixer Upper Tour Day! Be sure to visit my friends’ projects at the bottom of this post.
Dismantle the Sewing Cabinet
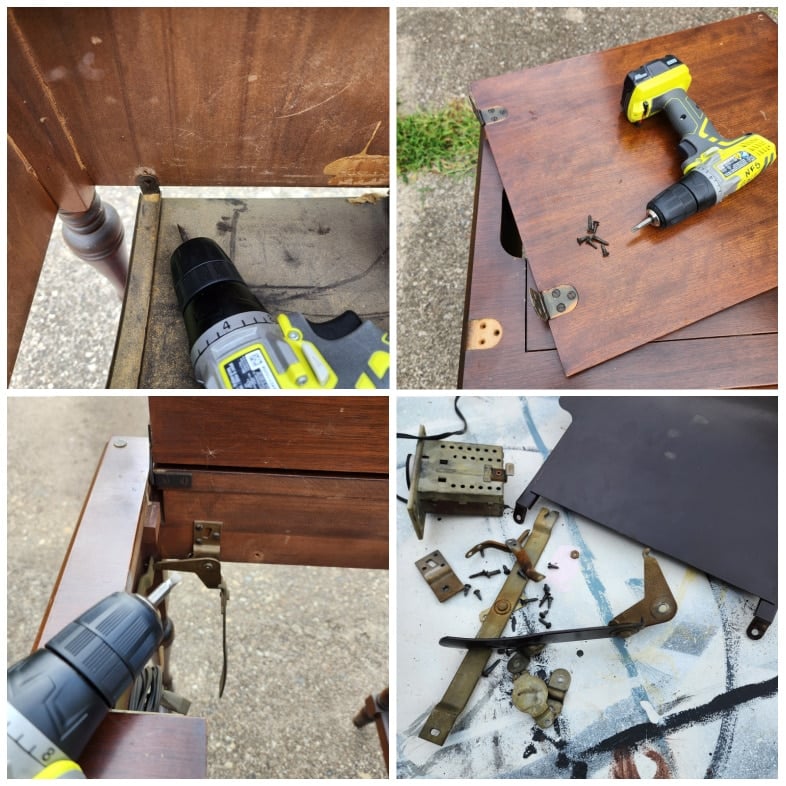
The first step was to remove all the extra parts inside the cabinet. This was quite tedious because the screws are old and have flat heads. I saved all of the bits and pieces for now.
Related Content: 20 Creative Ways to Repurpose Sewing Machine Cabinets
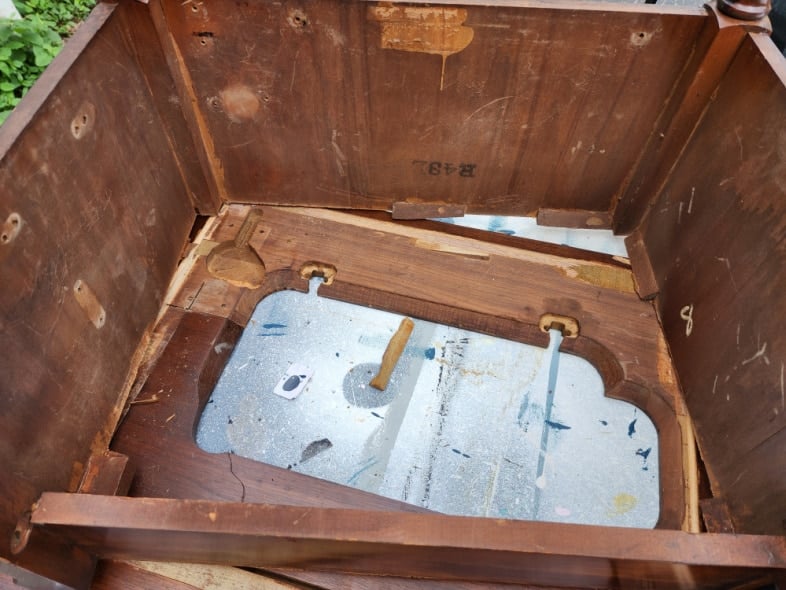
Next, I had to remove the insert that held the original sewing machine. At first glance, I thought it would not be easy due to all the glue. I was unable to get my pry bar under the edge or support pieces. Moving it to the side of the worktable, I gently struck the underside with a hammer, and it easily separated.
I’ve seen this little ledge on other sewing cabinets I dismantled and upcycled. Using a heavy-grit sandpaper and my orbital sander, I began whittling away at the extra wood.
To make this the easiest repurposed sewing cabinet ever, you can stop here. Glue the top onto the frame and call it done. But, no, I can’t do that.
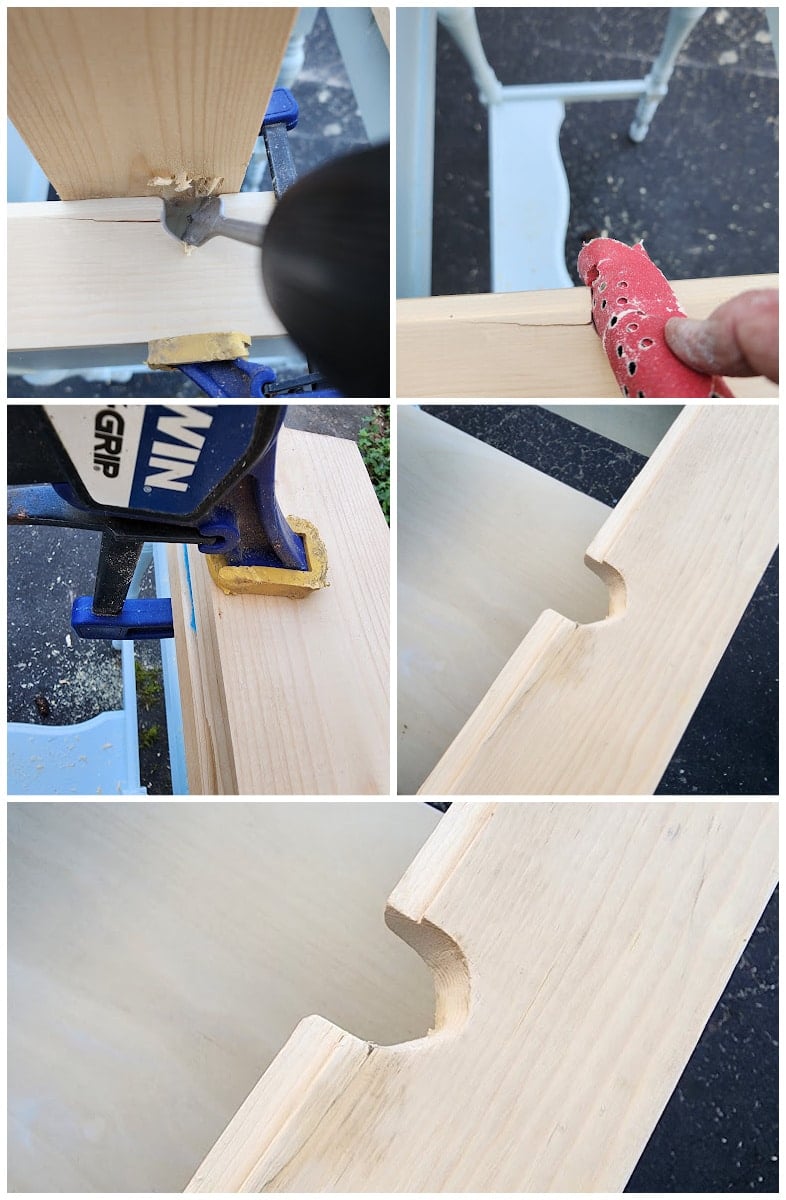
How to Reimagine a Sewing Cabinet Into a Food Prep Station
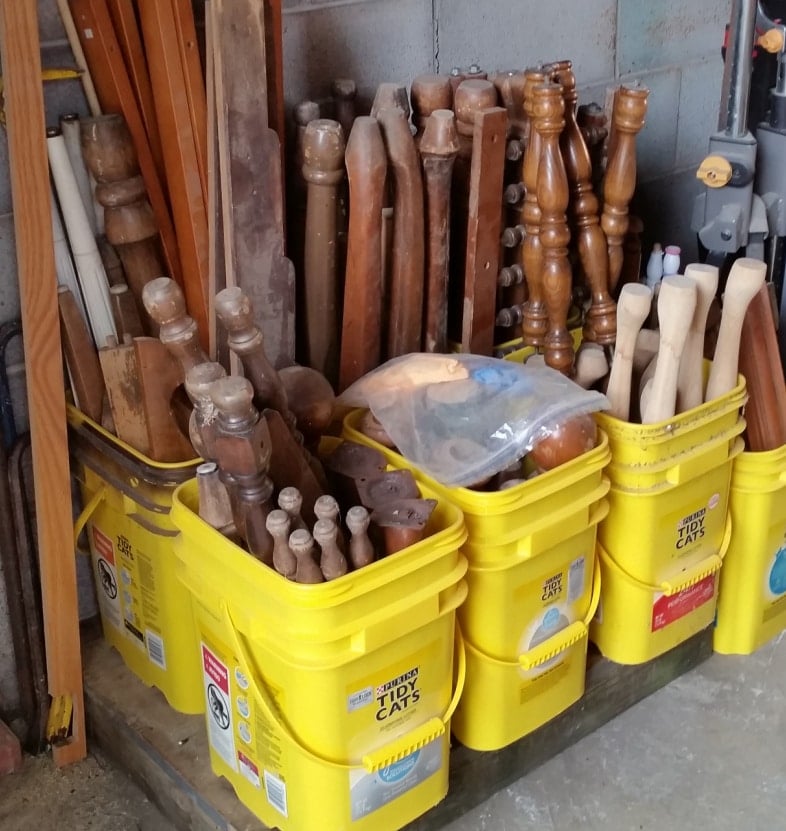
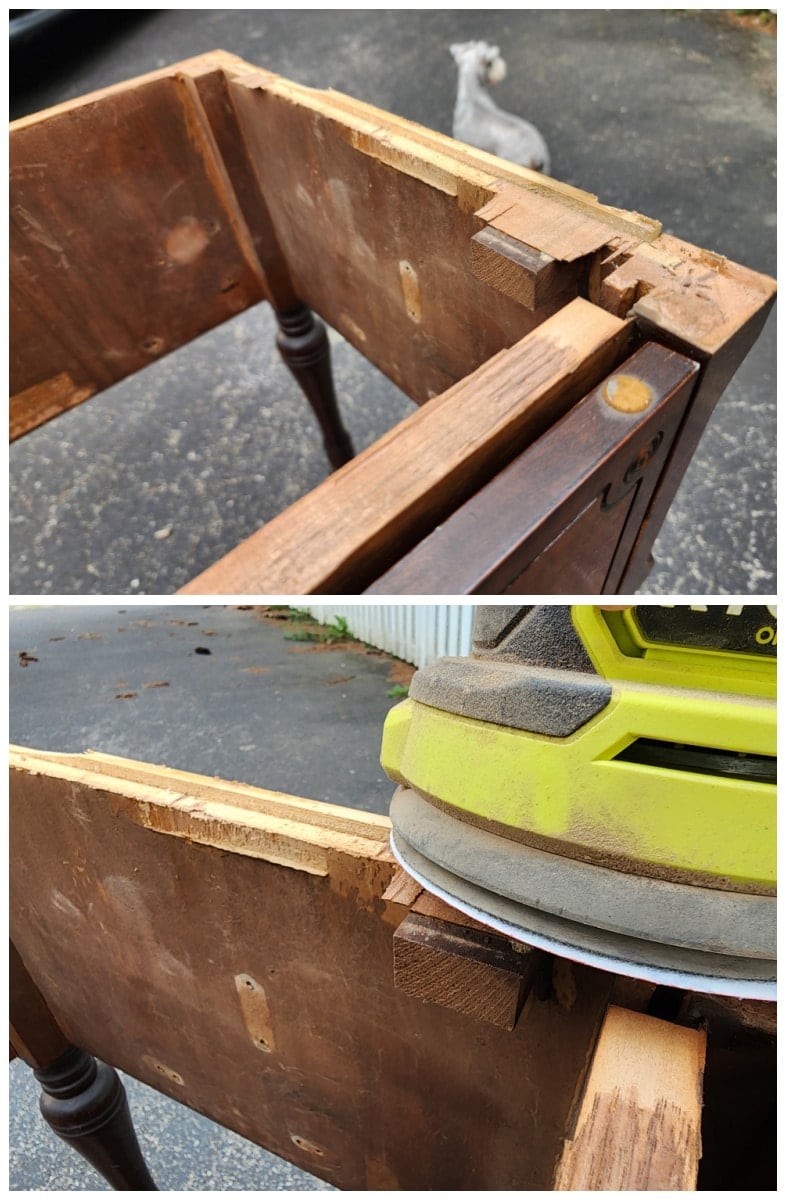
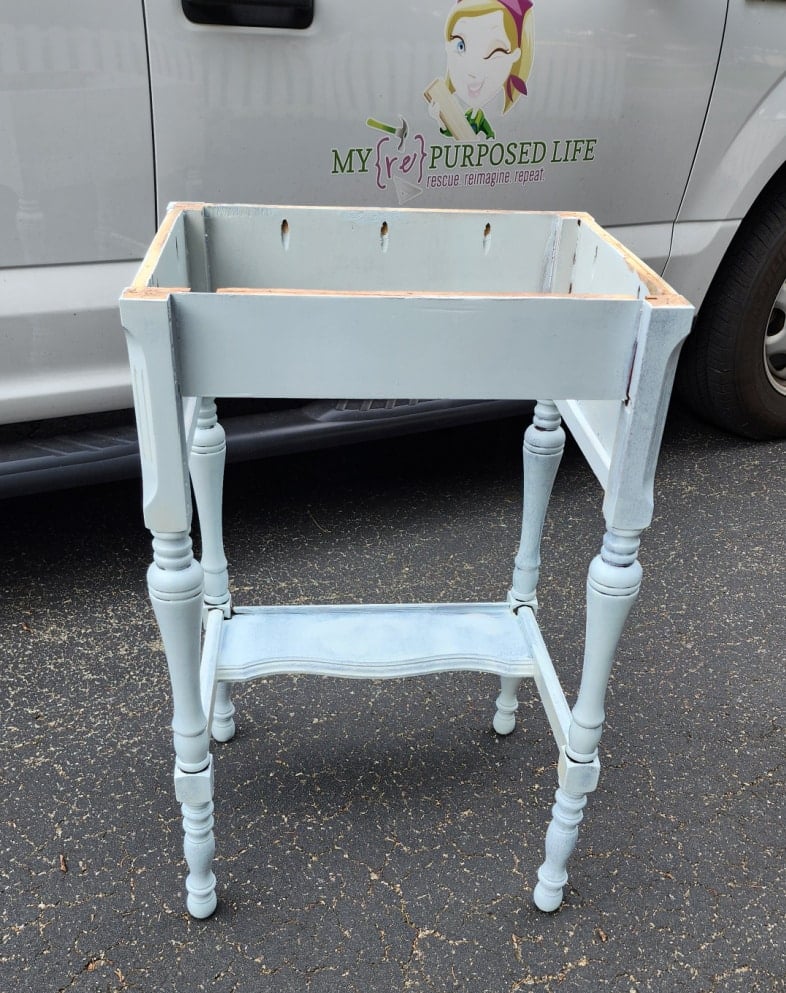
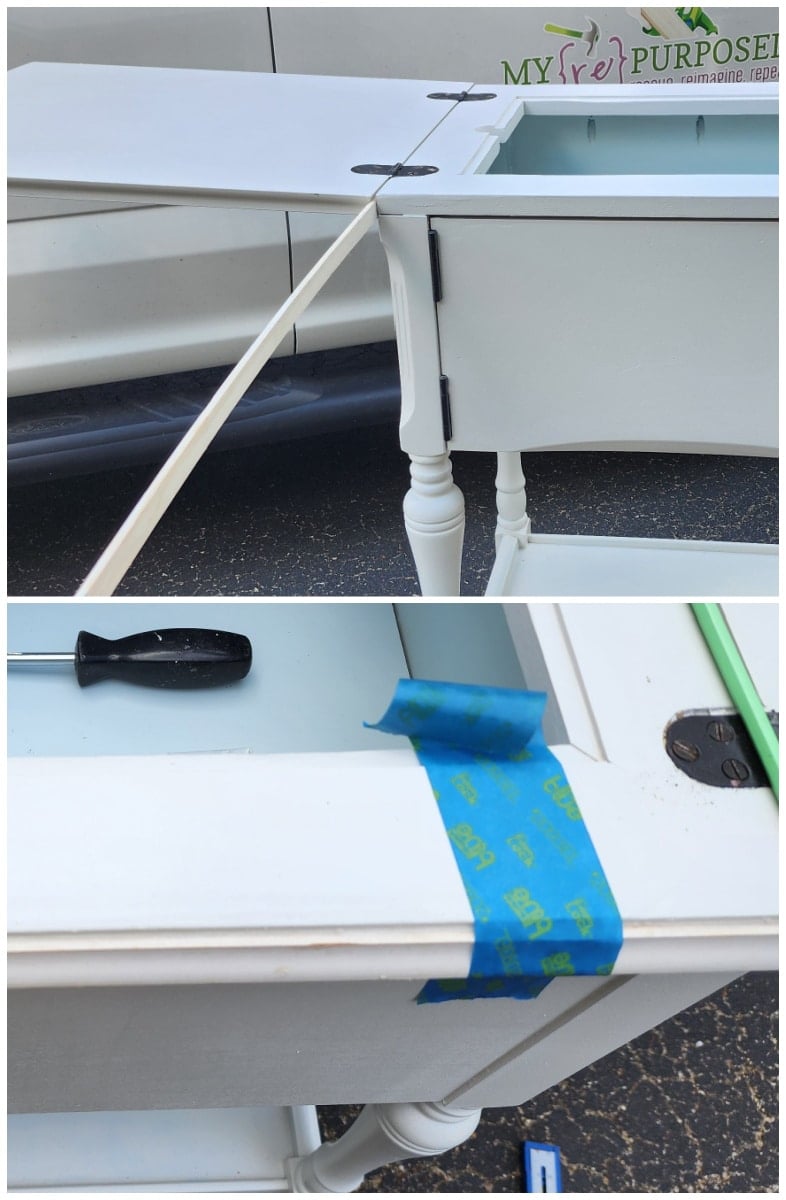
The original legs on the vintage sewing cabinet are too short for it to be counter height, making it easy to prep food. I went to the “spindle” department in my garage. I quickly found some pieces similar to those legs in the front left corner.
How to Add Height to a Too Short Table

Top left, I used a jigsaw to remove the lower part of the legs. The top right shows the old leg, the new legs, and the wooden furniture dowel that will hold them together.
At the bottom left, you can see that I have marked the center of the table leg. I placed painter’s tape on the drill bit to drill a hole half the length of the dowel. Finally, the image on the bottom right shows the table with the newly attached longer legs.

The holes aren’t perfect, but I’m okay with that. They will be very strong due to the sturdy furniture dowels and the Gorilla Wood Glue.
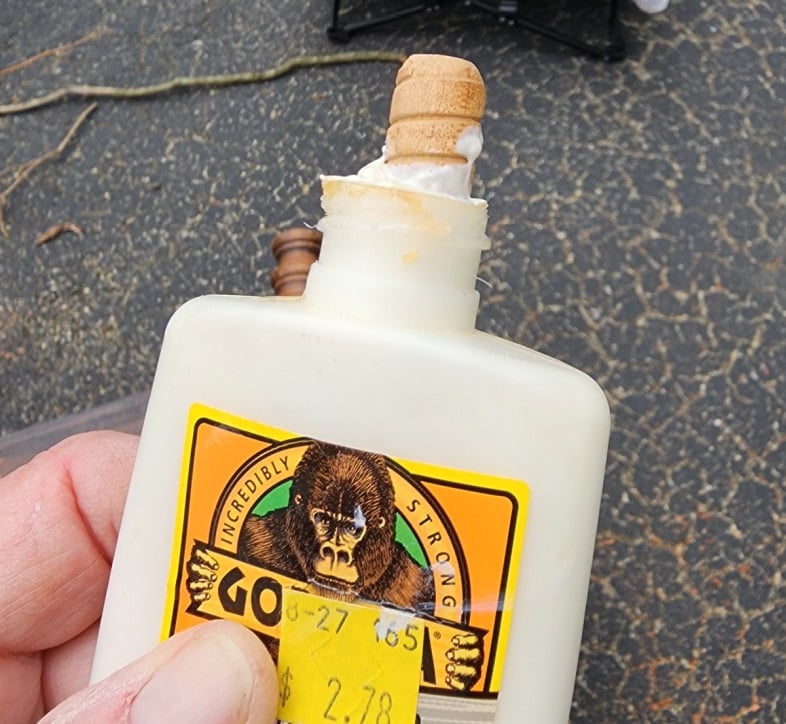
To coat the wooden dowels, I slipped them into the bottle of wood glue.
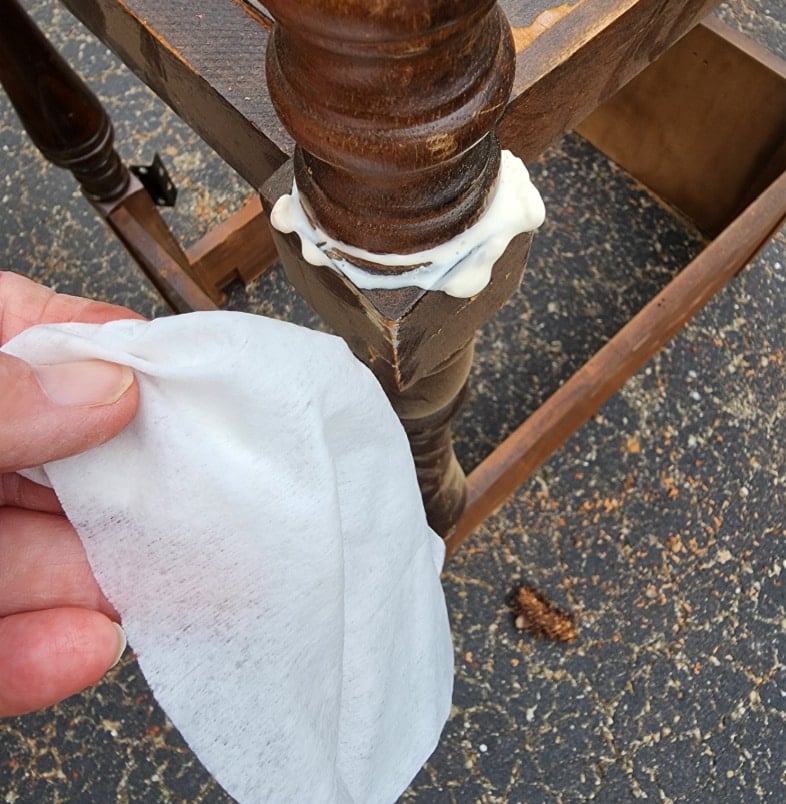
The wooden dowels fit very snugly into the holes. I used a hammer to tap the legs in place. There was seepage of the glue. A wet wipe will remove the mess before it dries. Once the glue dries, it’s difficult to remove.
Remove the Door-Store Screws in a Safe Place
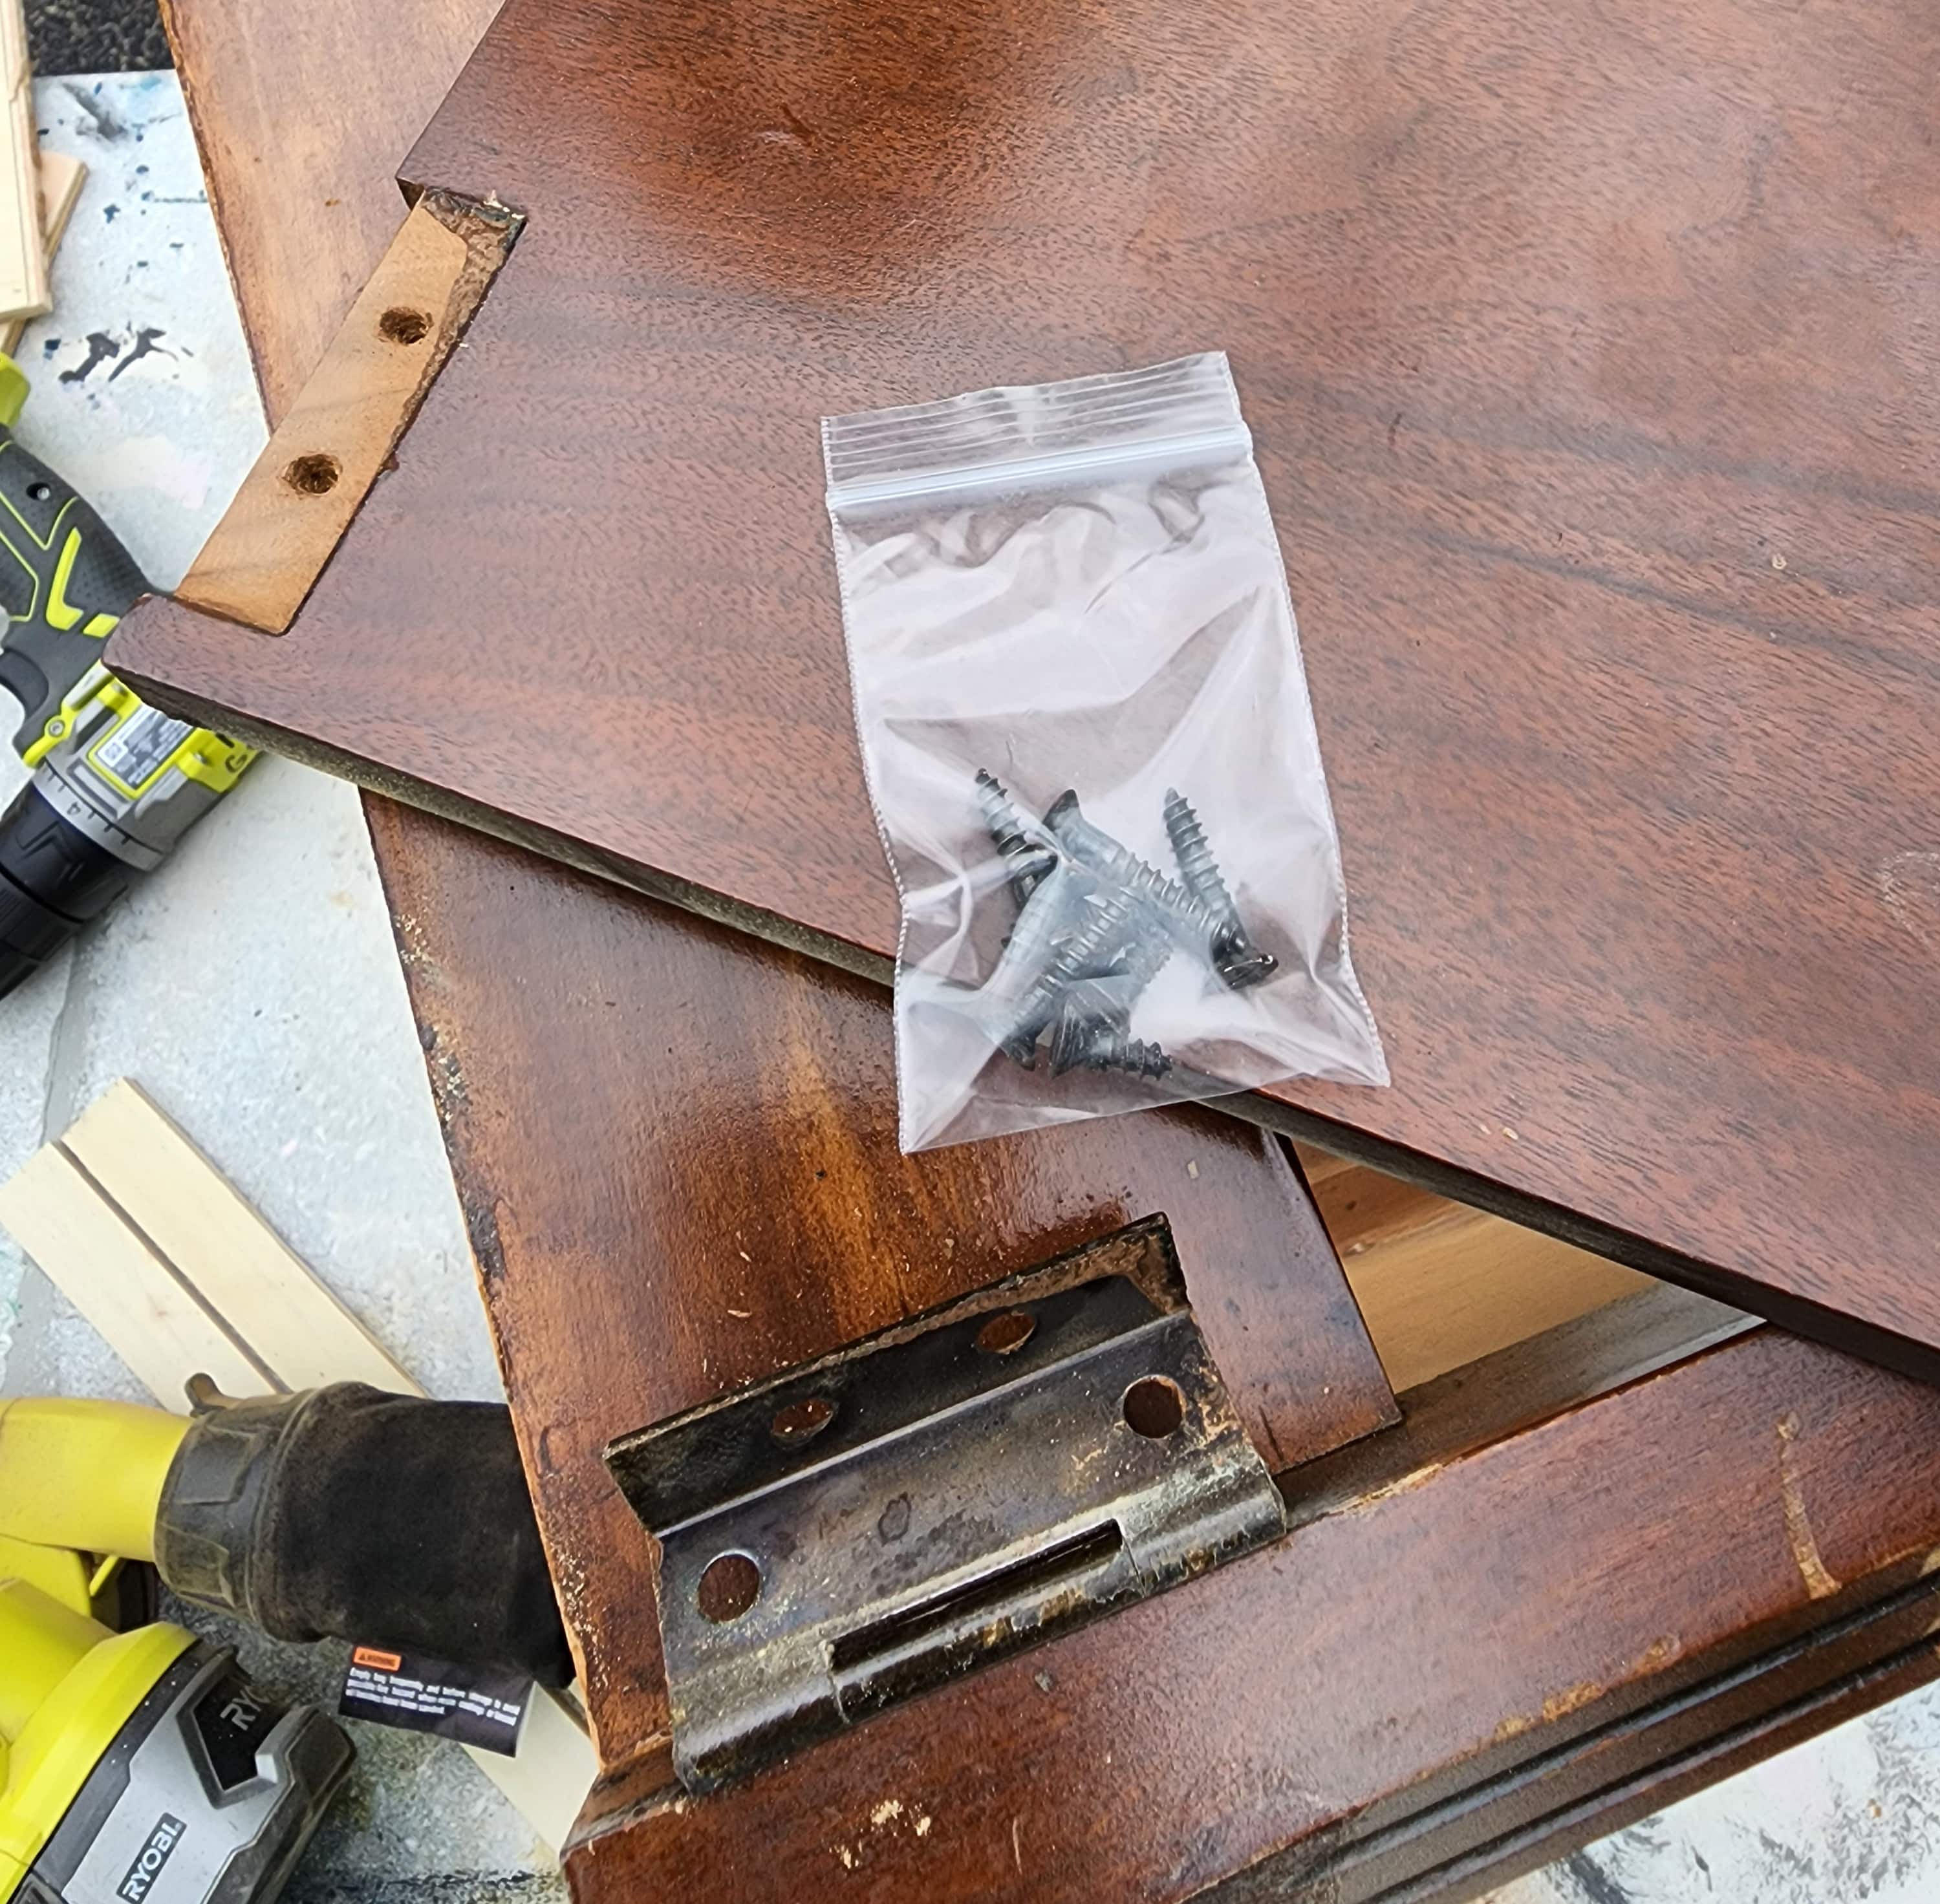
I always try to save hardware and screws in a safe place. However, some of my project pieces can take days or weeks to complete, and they are often misplaced. Do you have a special place to store such items? I also recommend taking photos as you go, to ensure your reassembly goes well.
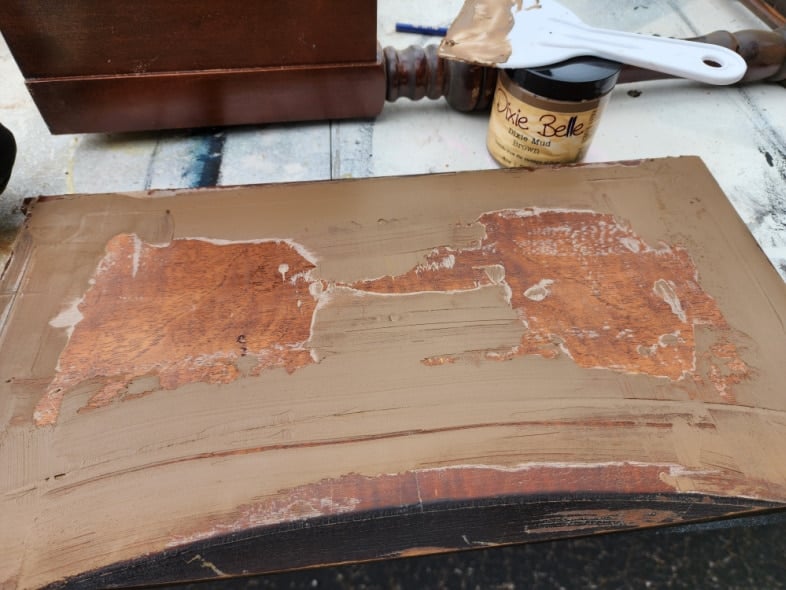
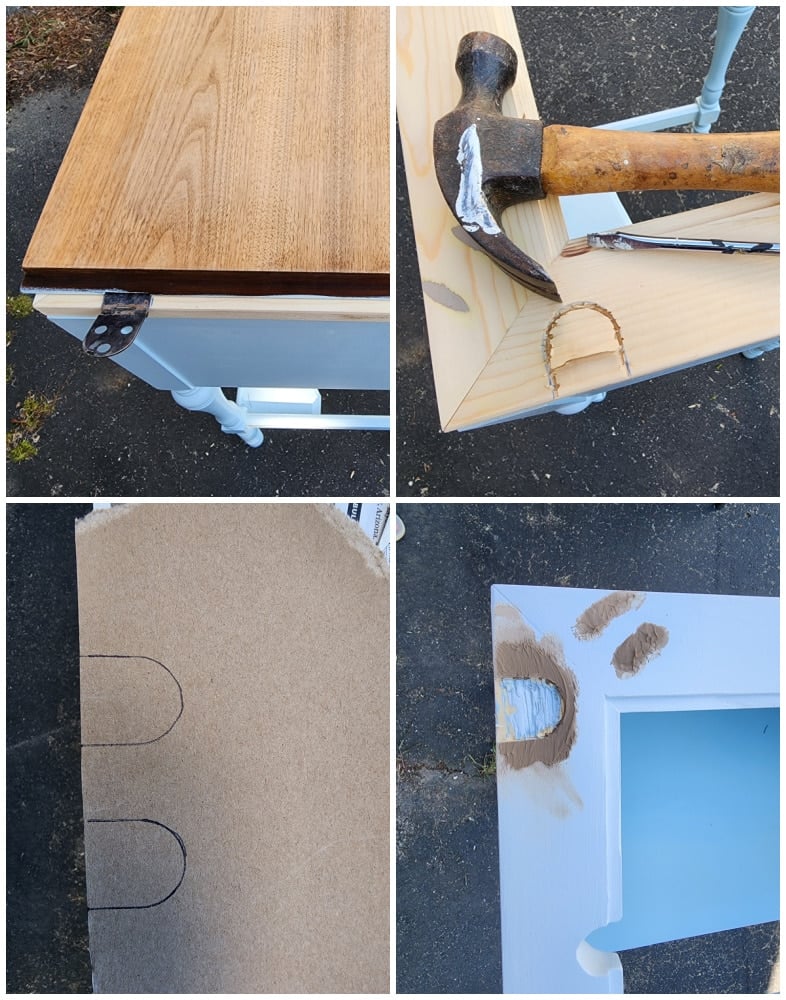
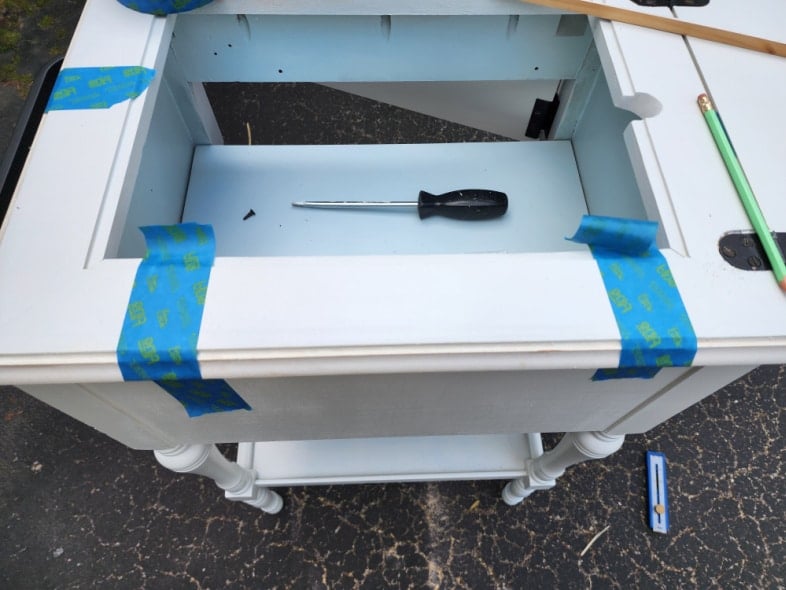
The front of the sewing cabinet had a decorative, carved detail (that resembled inlay), which I chose to fill in with Dixie Mud for a smoother finish. This is a several-step process. I let the mud dry and set, sanding each time until I achieved the desired look. You may notice that I also filled in the holes where the antique hardware used to reside.
Adding a Lower Shelf to the Small Kitchen Island
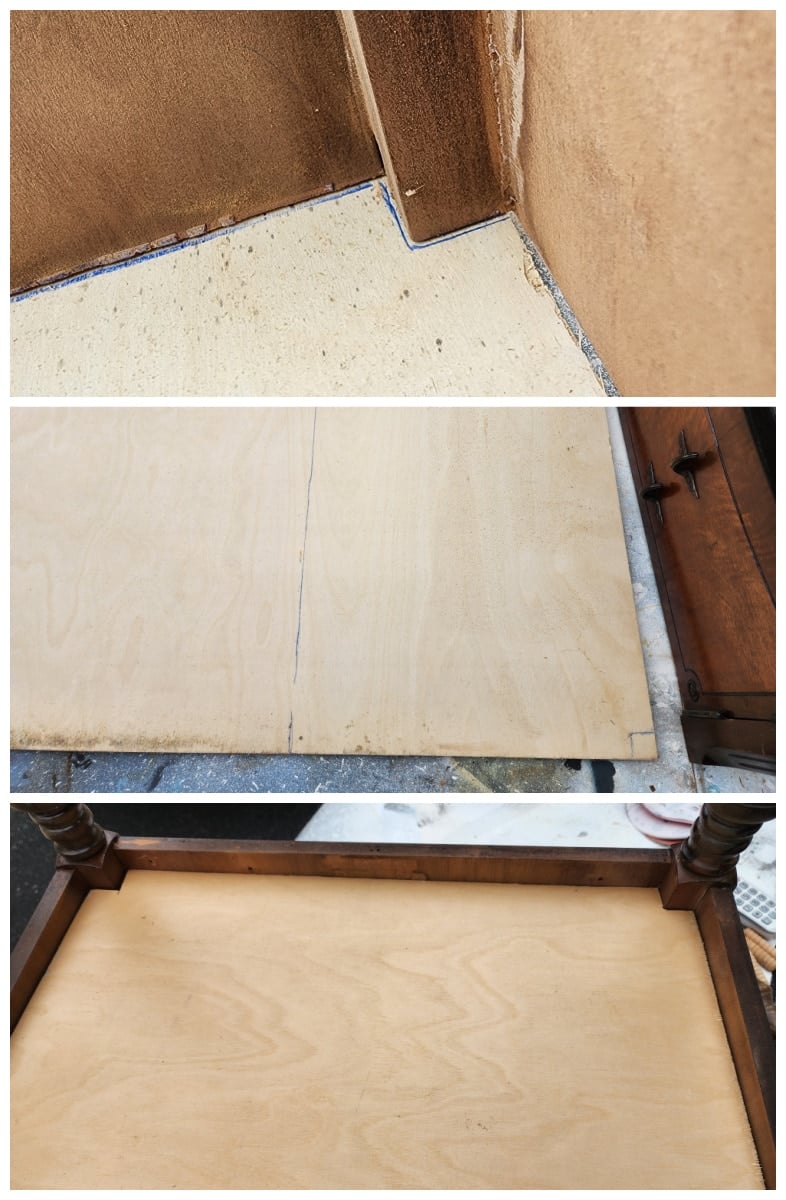
Placing the cabinet upside down onto a small piece of plywood, I drew lines to notch the board. The small notches were made with a jigsaw. The last image was a test fit to make sure it worked.
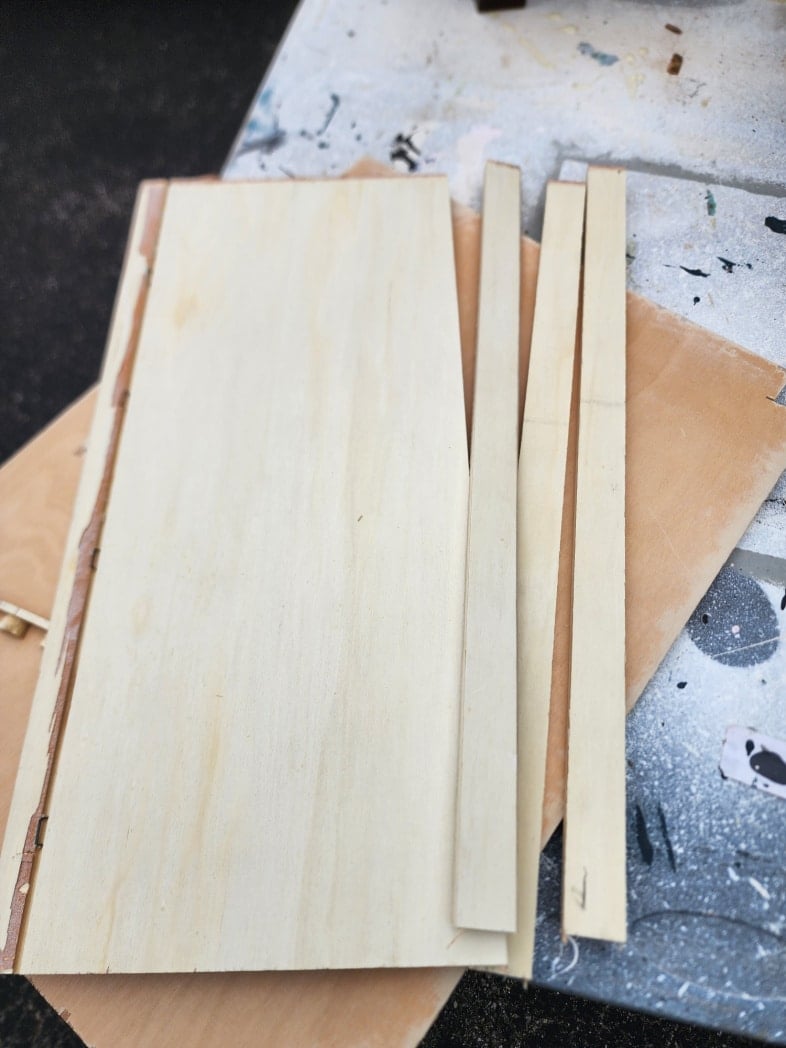
I recently published an article, “Repurposing Wood From Old Furniture.” This section of a drawer is some of that wood. Drawer parts are handy to reuse for future projects. For the shelf I notched out, I will need cleats to hold the shelf in place. I ripped three small pieces on the table saw. Instead of ripping lumber, think outside the box for items such as heavy-duty paint stirrers or hobby wood from the craft store.
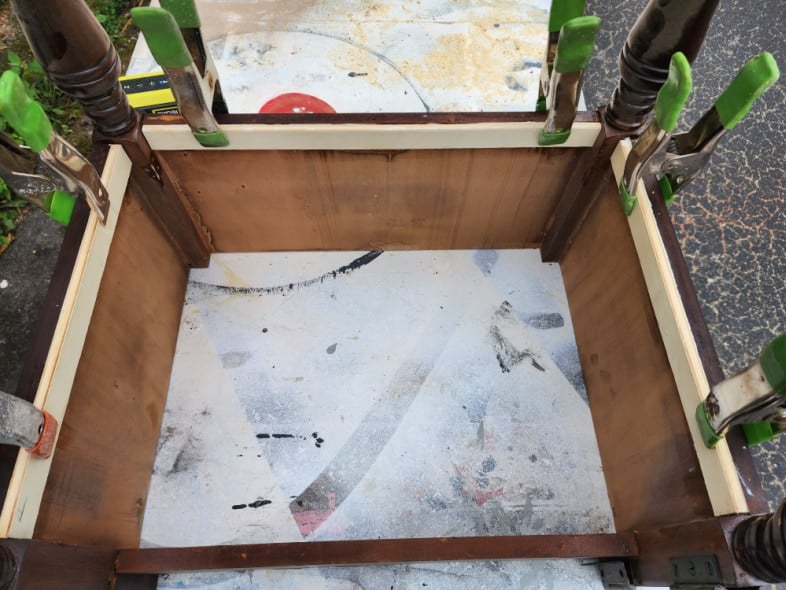
I used Gorilla wood glue and clamps to secure the cleats, lining them up with the bottom edge of the kitchen island cabinet.
The shelf will be accessed through the front door of the food prep station or by opening the lid and removing the cutting board.
Making a Cutting Board Insert Frame
Opening the top of the food prep station will reveal a glass cutting board. I plan to create a frame that will replace the insert that initially held the sewing machine.
See the pictures below:
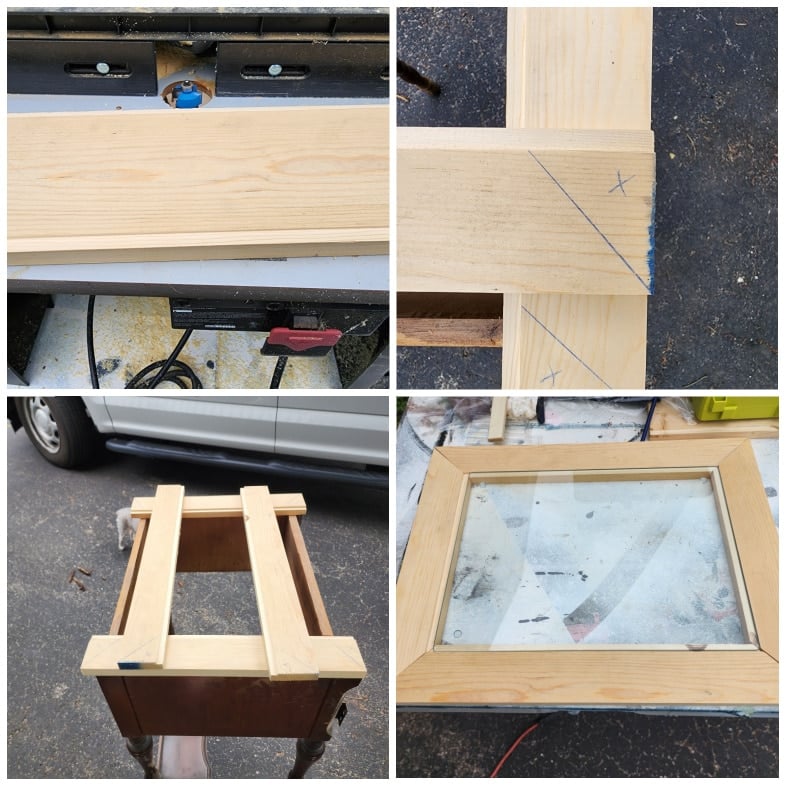
On the top left, I used a router table to carve out a lip that will allow the cutting board to rest on top of the former sewing cabinet.
Top Right: The boards were measured and cut to size. To ensure that I miter the corners in the correct direction, I drew lines on the boards. These are not cutting lines; their sole purpose is to guide me in cutting the boards to the proper length.
Bottom Left: More measuring and marking.
Bottom Right: Can you see that the glass cutting board is set in place to make sure it fits?
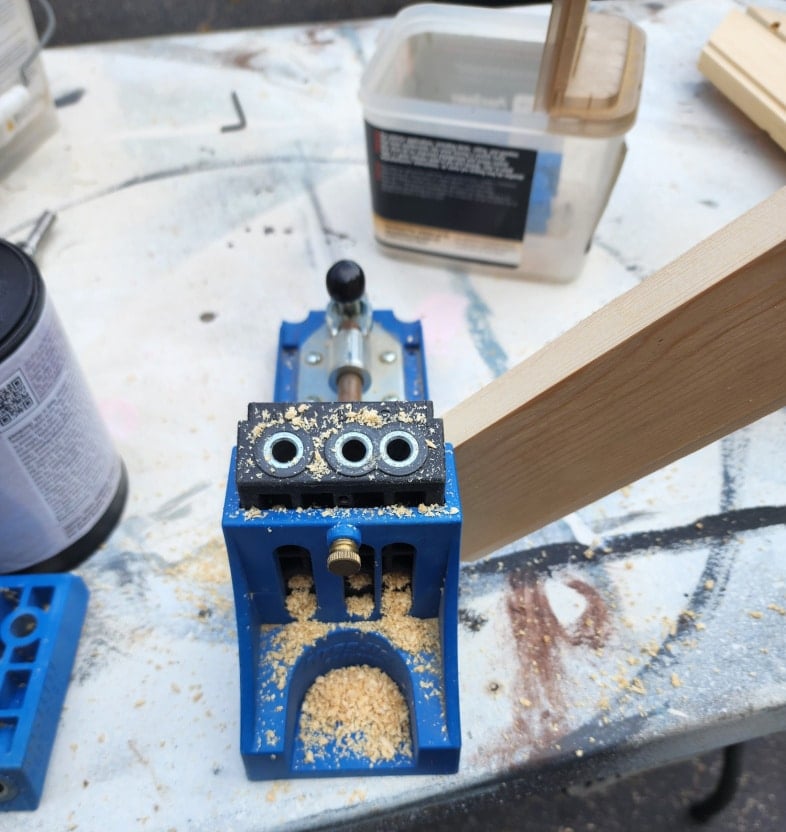
While the cutting board was in place, I marked the pocket hole locations on the left and right on the two longer boards. I switched the larger Kreg Jig for the smaller black jig. This jig uses a narrower bit and thinner pocket hole screws.
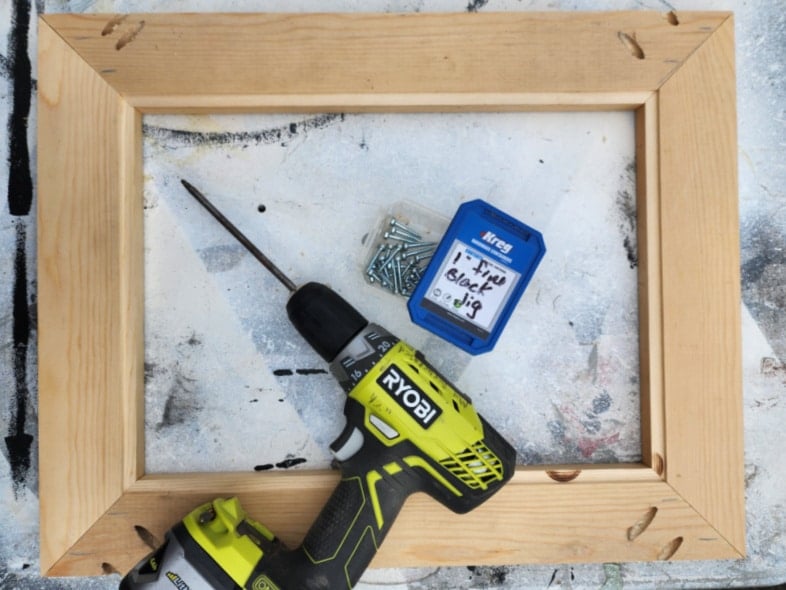
I proceeded to secure the pocket hole screws. Do you see a problem with this? I know better! In a rush, I forgot to flip all the boards over before marking them so that the pocket holes would be on the underside of the frame. There was no way I was going to do all the routing over again.
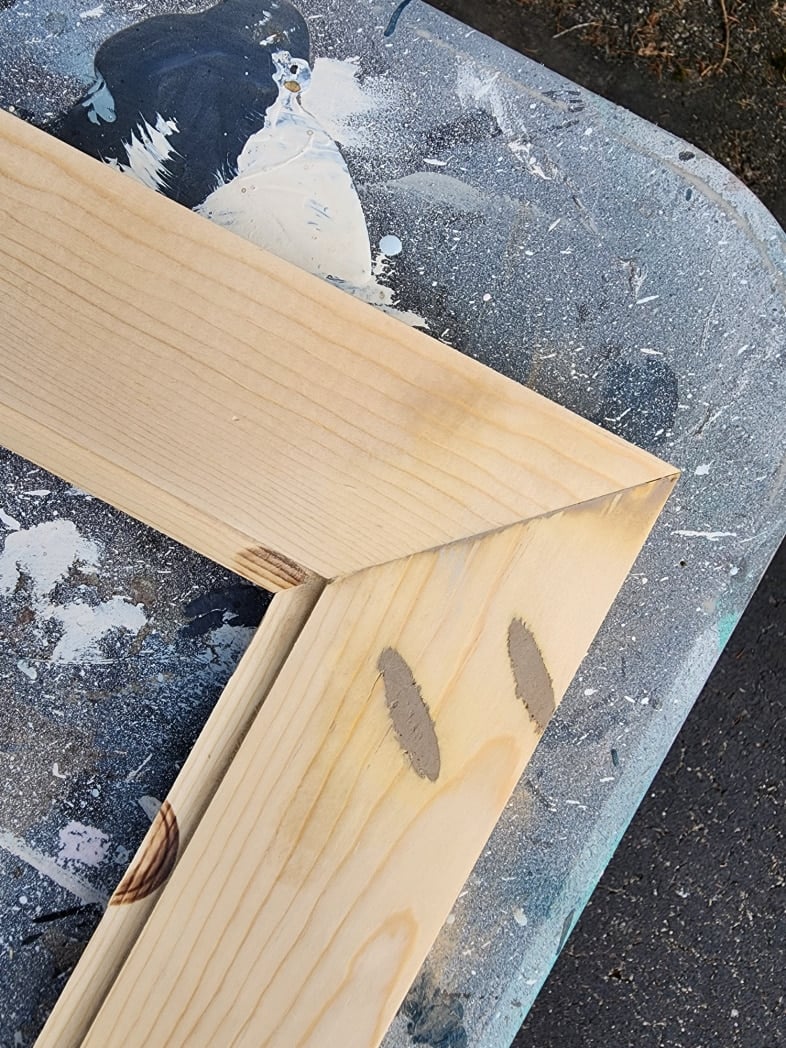
I used Dixie Mud to do the patching. Again, this is a multi-step process, allowing the mud to set up and then sanding each time.
It would be helpful if I could provide you with more details on the routing process. I have several tools in my arsenal, but I consistently use the same one for all my projects. I had to make some adjustments to the depth of the bit, testing on a scrap piece of wood. For the framing, I used 1x5s, routing on both sides, then ripping the boards down the middle. The cutting board frame was set aside while I started painting the new food prep station base.
Prepare to Paint the Small Kitchen Island | Food Prep Station
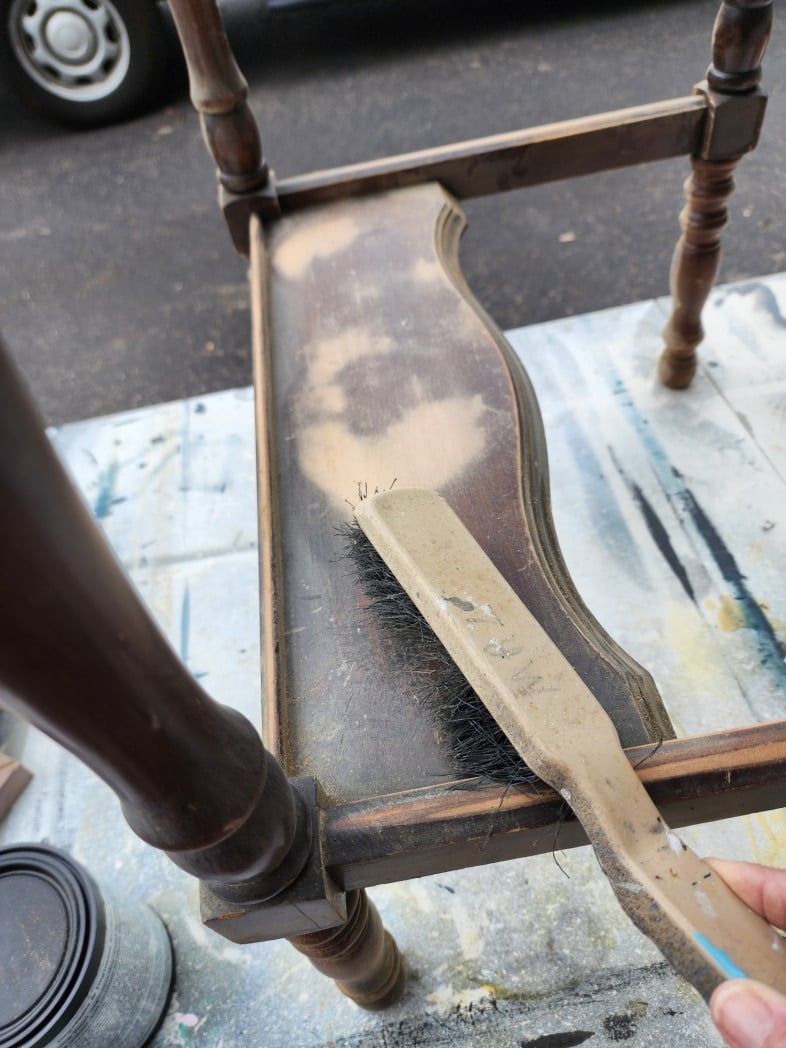
Because the vintage sewing cabinet was shiny, I chose to scuff sand it. A few areas required additional attention to ensure a smooth finish. There are several ways to remove the dust, including my well-loved dust brush.
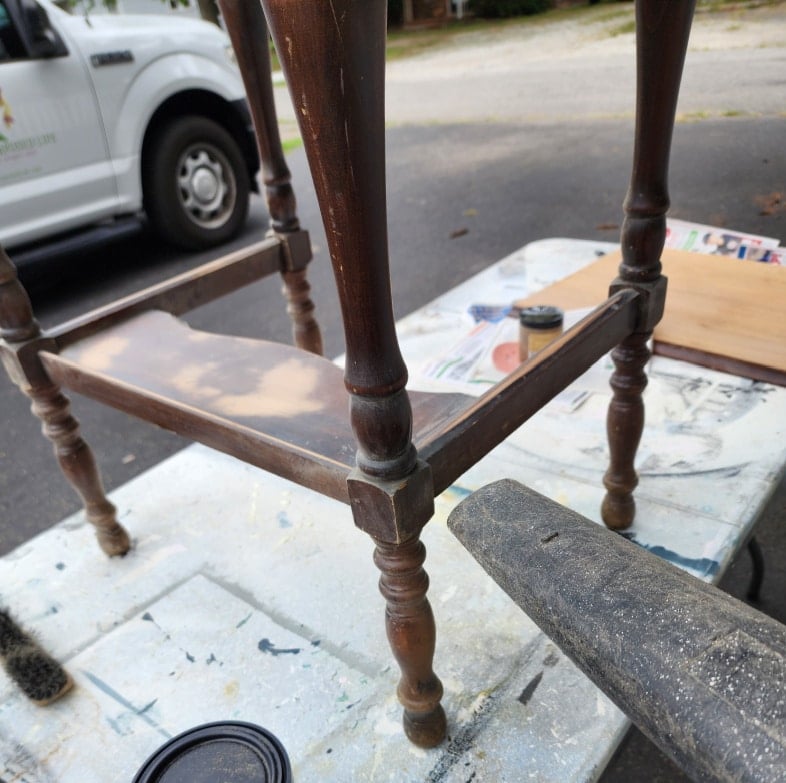
The lower shelf, which is actually a footrest for the original sewing cabinet, is also used for the new kitchen island/prep station. The corners were extra dusty, so I brought out the leaf blower. Of course, you can use your tack cloth to remove the dust.
Clean the Wood Before Painting
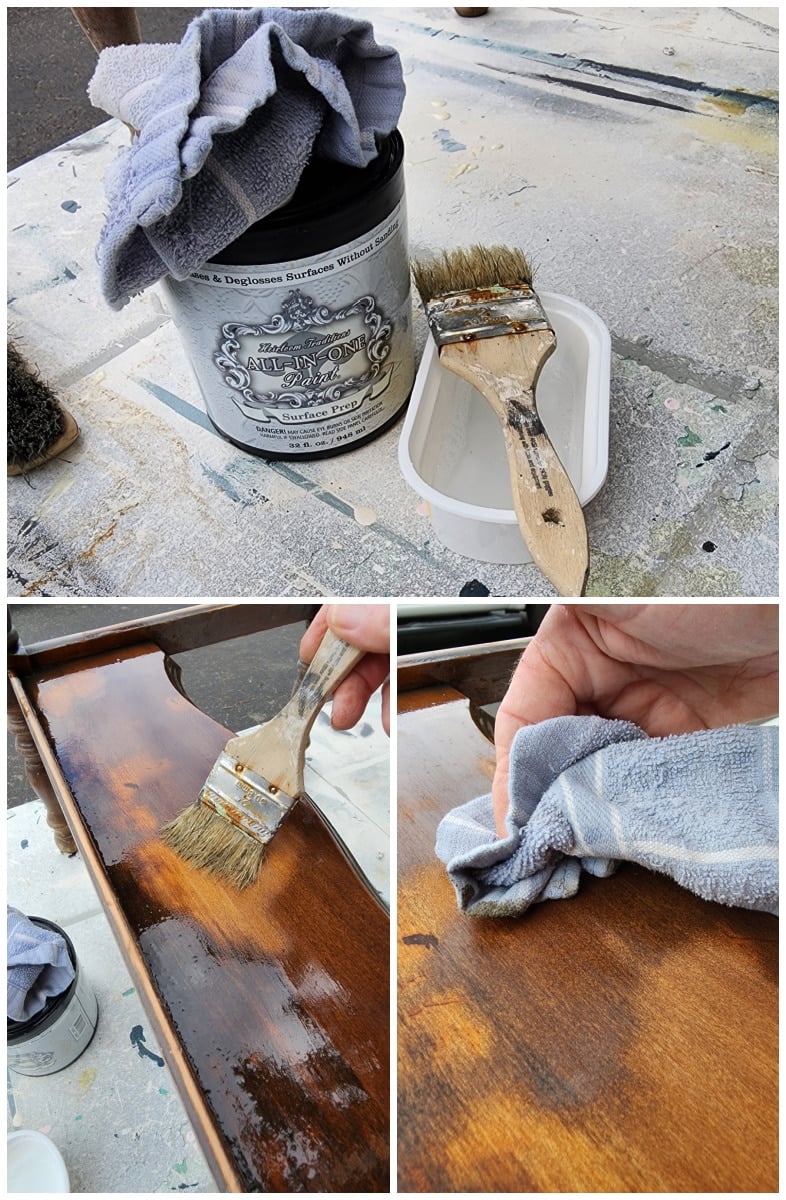
Heirloom Traditions Surface Prep is a simple way to prepare your wood project for painting. It cleans and deglosses. Brush on the solution and wipe back with a cloth. For heavily soiled wood, use a scrubby pad before wiping off. I don’t usually rinse; however, some parts were heavily coated with nicotine, which needed more care to ensure good paint adhesion.
Paint Supplies
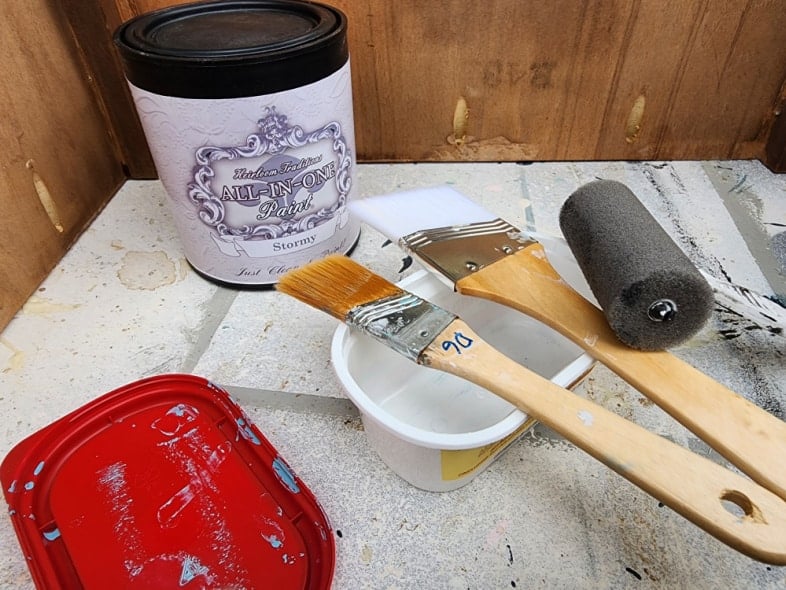
For this project, I chose the color Stormy from HTP. My favorite small brush is no longer available, so I’m using a small brush from Dollar General and a wider brush from a local clearance warehouse store. The small roller is my favorite from HTP. Using a combination of paintbrush and roller gives a beautiful, flawless finish.
This is the “ugly” first coat of paint. It’s best to apply several light coats of paint rather than a couple of thick coats.
We’ll talk about those pocket holes next.
How to Add a Table Top With a Kreg Jig
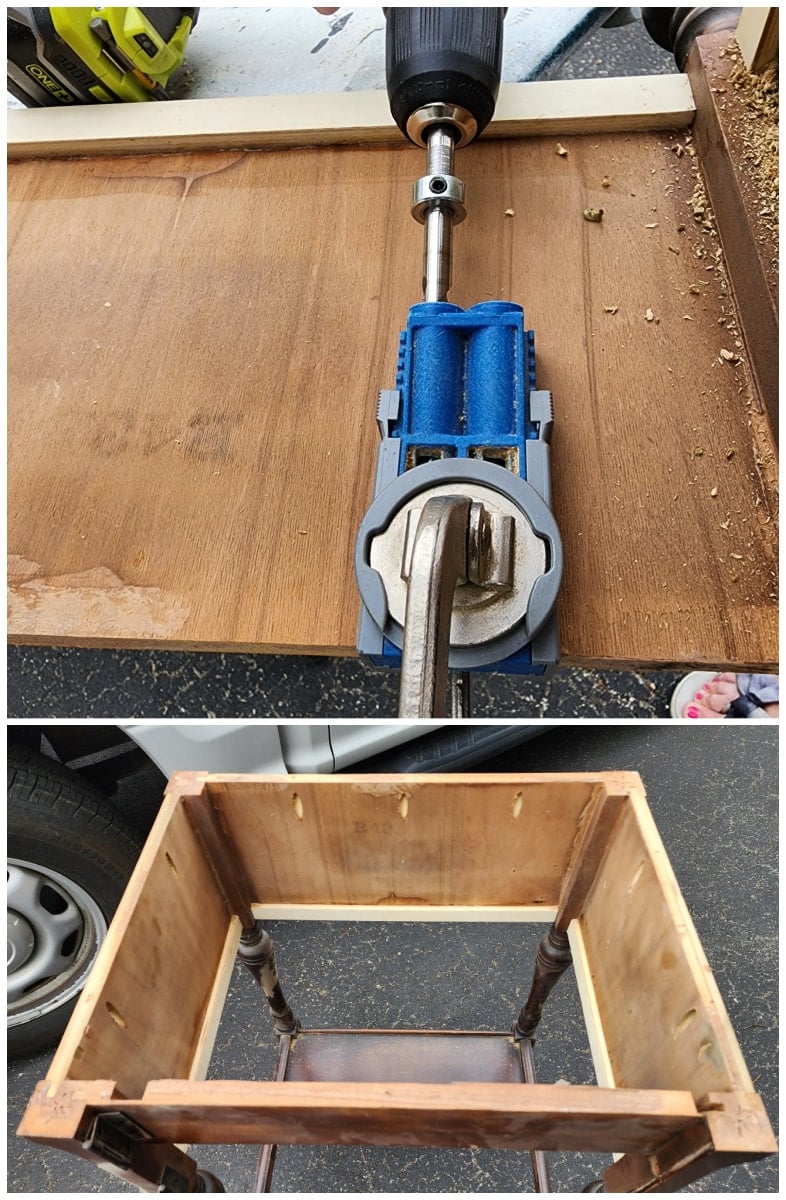
This was my first Kreg Jig. It’s perfect for its portability, which allows it to go wherever you need it for your project. The clamp inserts and stays connected, making it easy to move around your project. I drilled three pocket holes on the broader sides of the cabinet and two on each side.
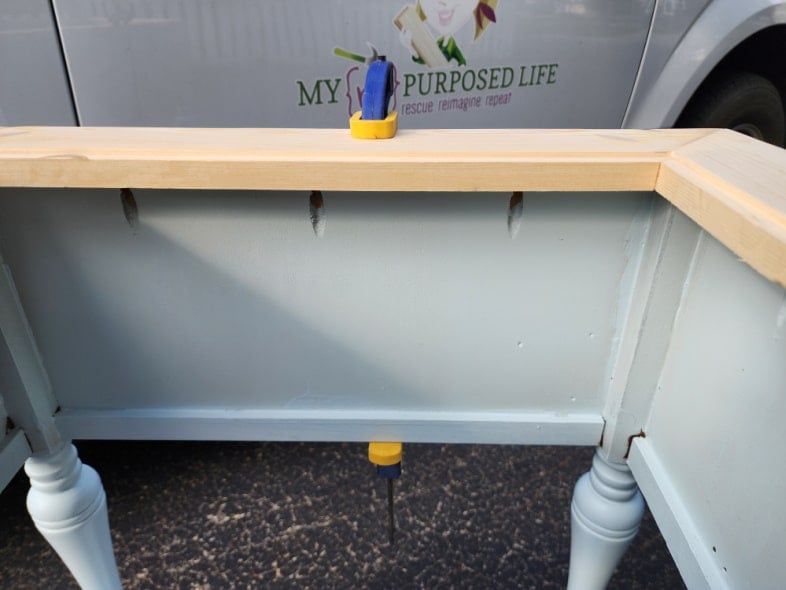
Using the quick clamps, I was able to attach the cutting board frame to the small kitchen island.
How to Add a Finger Pull to Easily Remove the Glass Cutting Board from the Inset
The top left shows drilling a one-inch hole with a paddle bit. The scrap board is clamped to aid in a clean hole. Note: It split the wood slightly.
Top right: A piece of sandpaper is wrapped around the handle of a screwdriver to smooth the finger pull. While sanding, I held the split piece of wood in place.
Middle left: The split wood is repaired using Gorilla Wood Glue, a scrap board clamped to hold the repair in place. Painter’s tape was used to keep the scrap board from becoming attached to the repair.
Middle right: The repair was a success!
Bottom image: A close-up of how nice the finger hole (notch) looks when completed.
Adding Hinges to the New Cutting Board Insert
Top left: The hinges are aligned using the original top of the sewing cabinet. An outline of the hinge was drawn.
Top right: A screwdriver was used to notch a new place for the hinges. When it was time to add the hinges, the area required a minor patching. In hindsight, I should have used a utility knife to fine-tune the area, rather than a screwdriver.
Bottom left: The hinges were traced and cut out of a piece of cardboard, which was placed in the hinge area, while patching was done with Dixie Mud.
Bottom right: The cardboard was removed, and the mud was allowed to dry. Not shown: the mud was sanded to a smooth finish.
How to Paint Furniture With a Roller and a Paintbrush
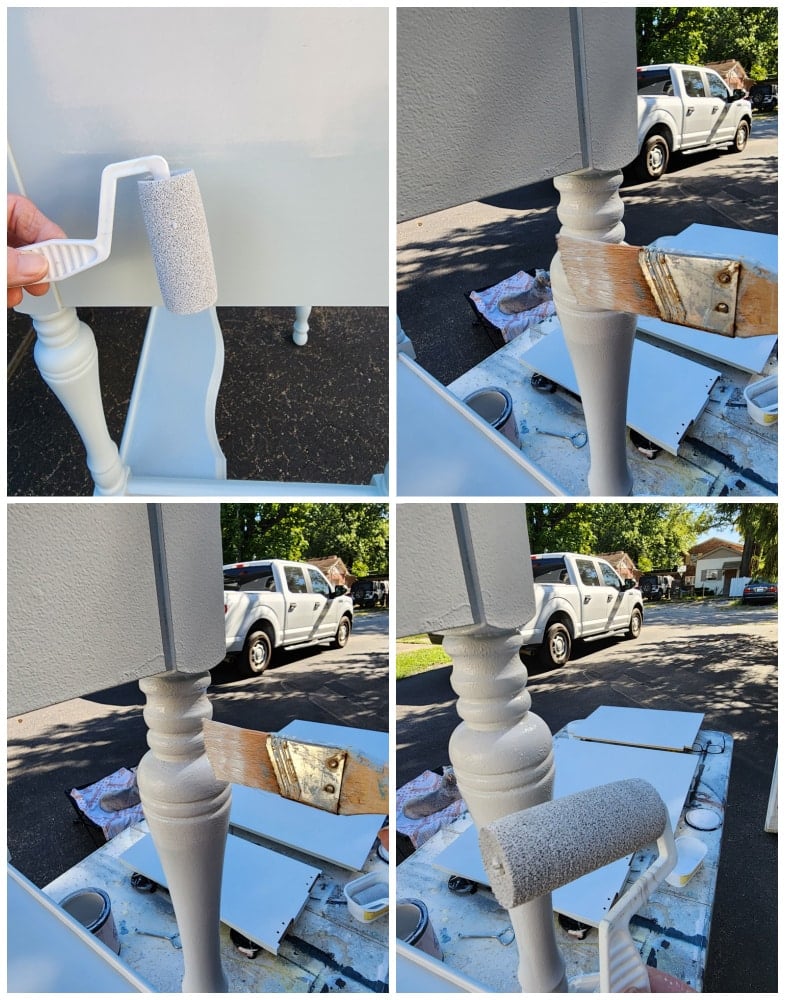
Why do I love the small foam roller so much? First, it doesn’t waste a lot of paint during cleanup. Secondly, it gives a nice finish. Lastly, it makes painting spindles and lathe-turned legs very easy.
Top left: A small foam roller paints a large flat surface.
Top right: I think we all know how to paint spindles and turned legs. The brush goes ‘slap slap, slap slap’ as you try to paint without brushstrokes.
Bottom left: Use a softer touch to slip-slap the brush.
Bottom right: Immediately use the roller in an up-and-down motion to smooth out the paint. The finished look resembles that of a paint sprayer finish.
The Glass Cutting Board Doesn’t Fit the Frame Insert
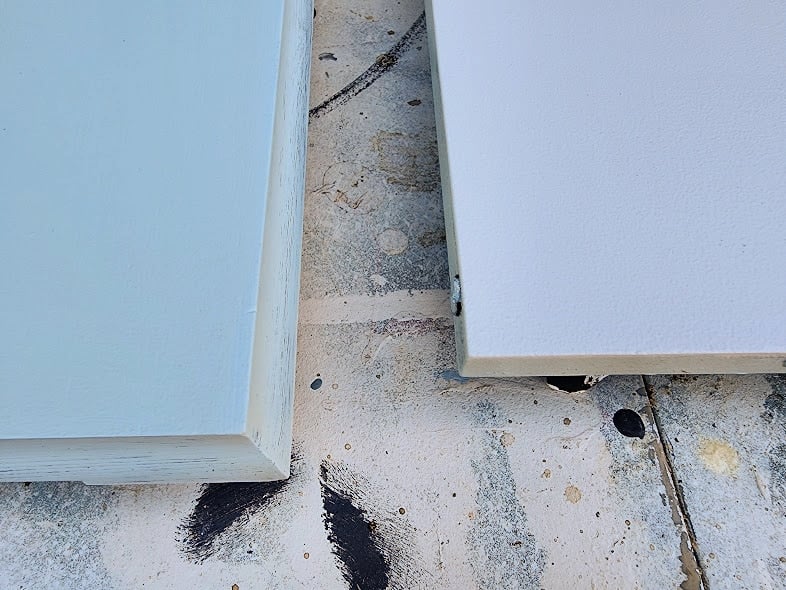
I didn’t realize that joining the frame with the pocket screws would draw it in so much. Imagine my surprise when I went to drop the glass cutting board in, the area was too small on one side. I used a T-square, clamps, a utility knife, and sandpaper to remedy the situation.
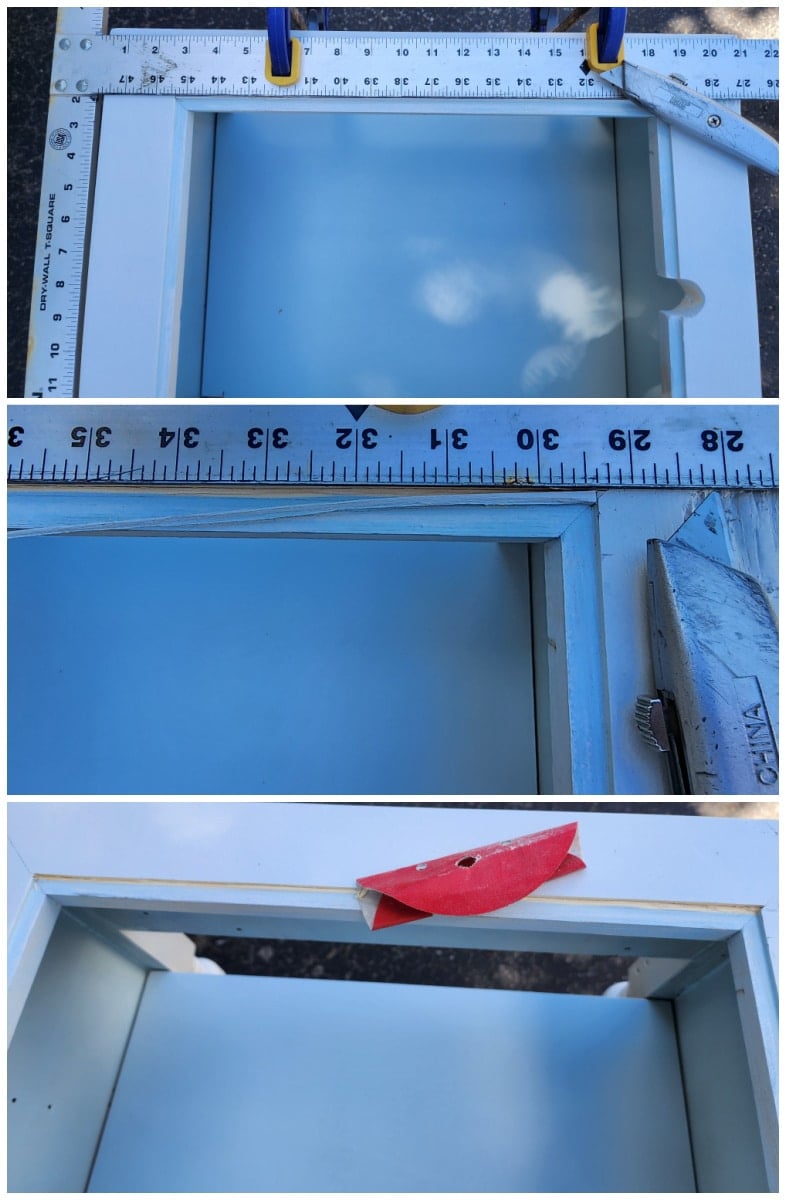
Top: Clamp a solid metal piece, such as a T-square or metal yard stick, to the wood frame.
Middle: You can see how little needs to be removed.
Bottom: Folded sandpaper smoothed out the area, which was touched up with paint.
More About the Paint Colors
I chose the paint color Stormy (HTP) All-In-One. After two coats, it was a little too blue. I was going for a gray. For the final coat, I switched to Colliseum (HTP). The image above shows the top of the small kitchen island as Stormy, while the door on the right has already received the Colliseum. Basically, I went from the lightest blue to the lightest gray. Colliseum is the color I used to paint the kitchen cabinets in my Vintage Cruiser Camper. It appears white until you see it next to something else that is also white.
Install a Towel Bar on the Small Food Prep Station
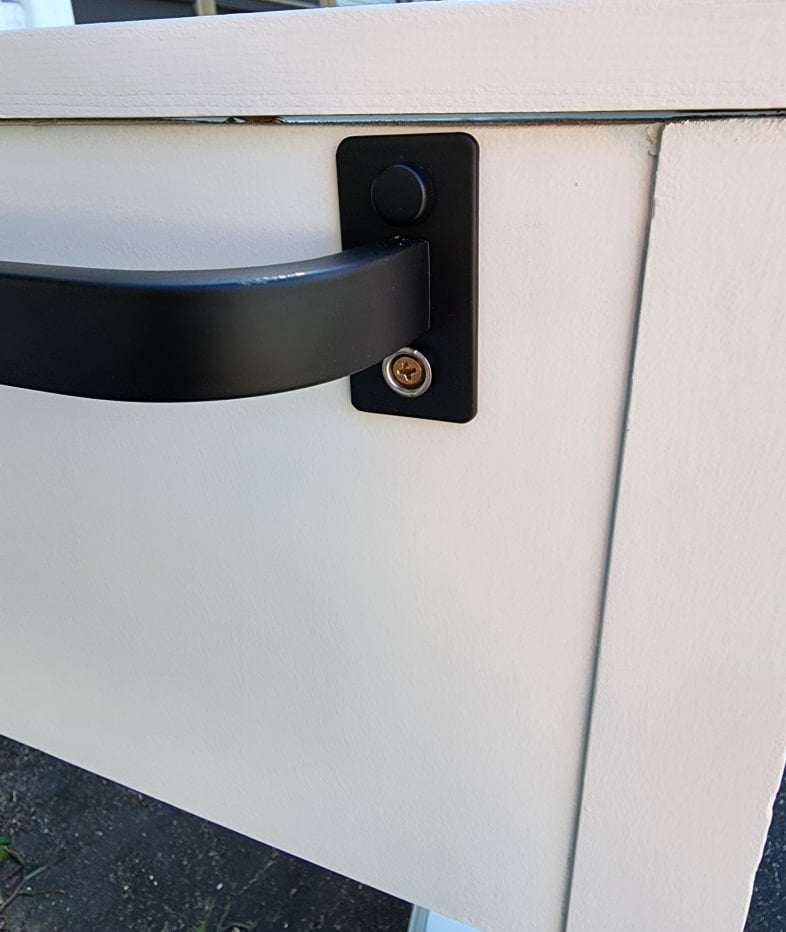
I love the new towel bar. It has small metal buttons that cover up the screws. While making the finishing touches, I ended up adding a dab of hot glue to the buttons to ensure they stayed in place.
Oh NO! A Huge Design Flaw in the New Kitchen Island
What!? After installing the hinges, I went to lay the top open, and this is what I saw! I hadn’t realized that when I added the new cutting board insert frame, it wouldn’t properly support the lid when opened. I was eager for this project to be completed.
Not only that, but I was also hoping to keep this project simple enough for those who regularly work with frankenfurniture. Which, by the way, I haven’t done in a while, and I was feeling pretty good until things started to go wrong.

I rummaged through my stash and found a random piece of trim that would work to hold the lid in place when open. It’s not store-bought moulding per se, it’s been ripped off of something else, probably years ago.
Not shown, I measured and cut the pieces on the miter saw at a 45-degree angle. Gorilla Wood Glue and Painter’s tape secured the pieces quite nicely.
This collage shows the flat edge of the cutting board frame (top image). The bottom image shows the small pieces of trim I cut on the miter saw and glued in place using painter’s tape to hold the pieces until they dried. This small rim around the frame fits the profile of the lid when closed.
I. Am. Calling. It. Done.
Small Kitchen Island Made From a Vintage Sewing Cabinet
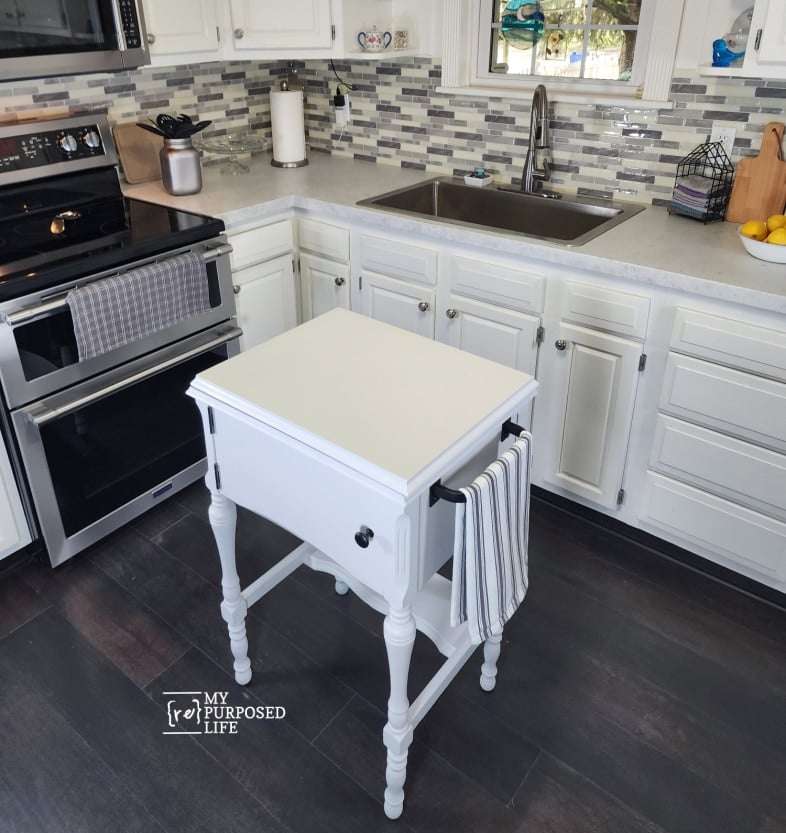
Was it worth all the trouble? I think so. I am glad I changed the door on the small kitchen island. I bought a simple black knob on Amazon. All of the original hinges were spray-painted to give them a fresh new look.
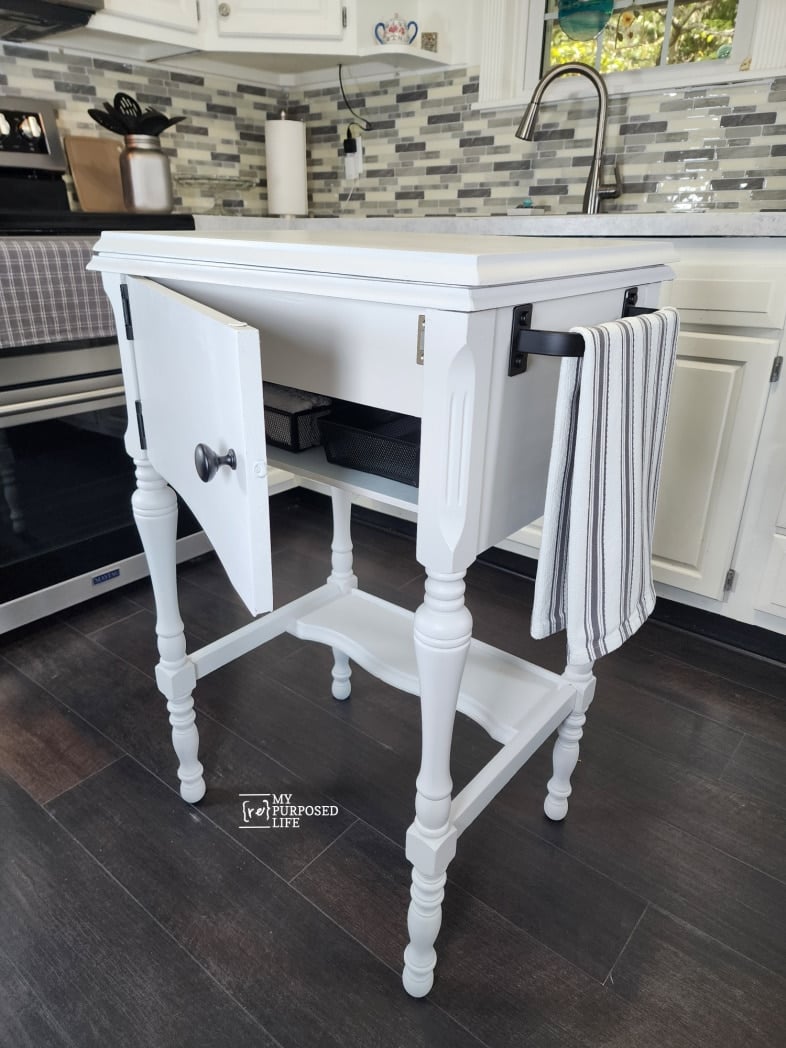
A magnetic catch was added to keep the door closed. The two small black baskets were purchased at Ollie’s years ago. I keep them in a tote of baskets used for staging. Do you love the black accents with the light gray DIY food prep station?
Do you remember how I mentioned that the small foam roller achieves the best paint finish?
To protect the paint finish over the years, you may want to seal your project with a water-based poly product. I prefer Minwax brand.
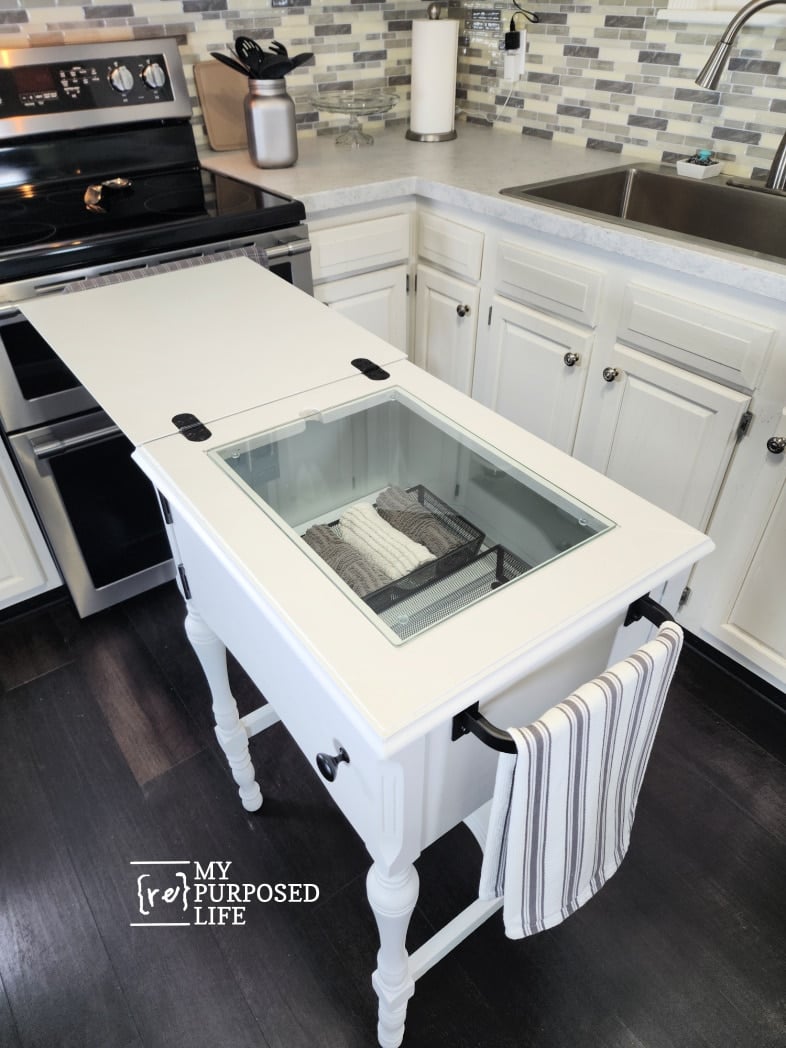
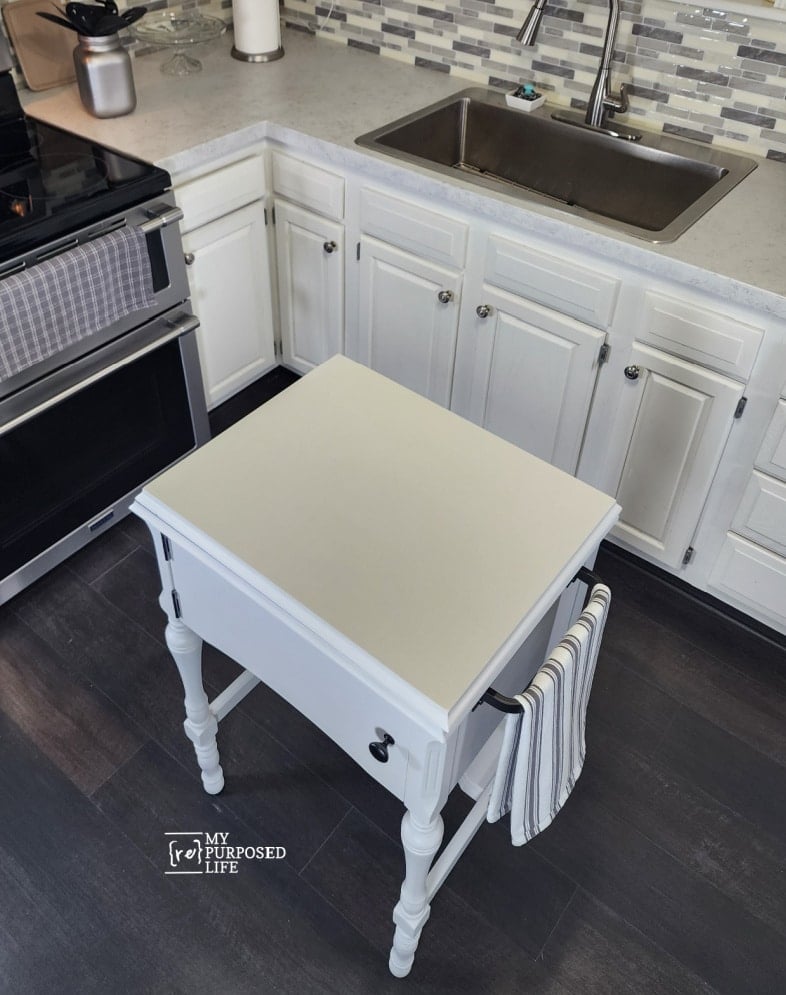
Here’s a peek inside. The cutting board fits perfectly in the framed insert, easily removed using the finger notch. Inside, you see the two baskets, one with t-towels and the other with a few knives. With the lid open, it extends all the way to the stove. Too close? The little kitchen island moves smoothly with felt pads attached to its feet. I may add casters. What do you think?
As I mentioned earlier in this article, you could remove the sewing machine insert and glue the lid down on the original cabinet to get this look. However, you wouldn’t have the functionality.
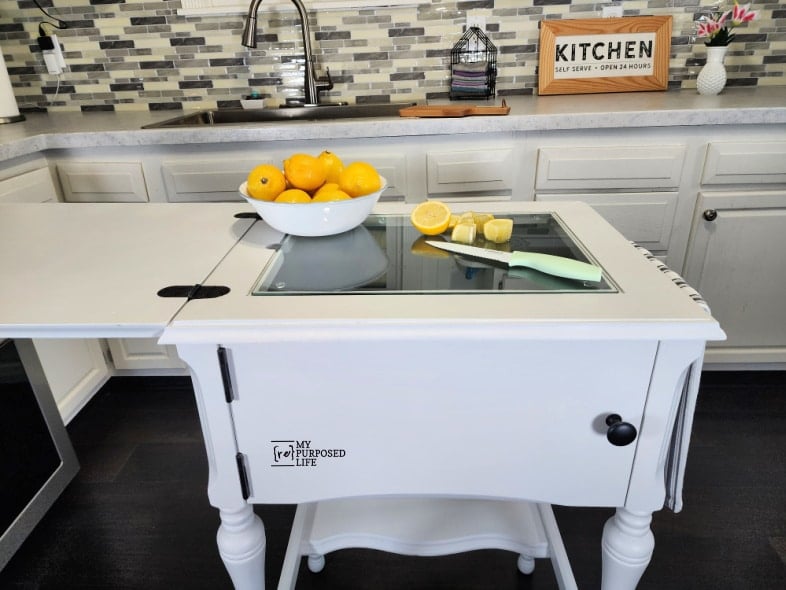
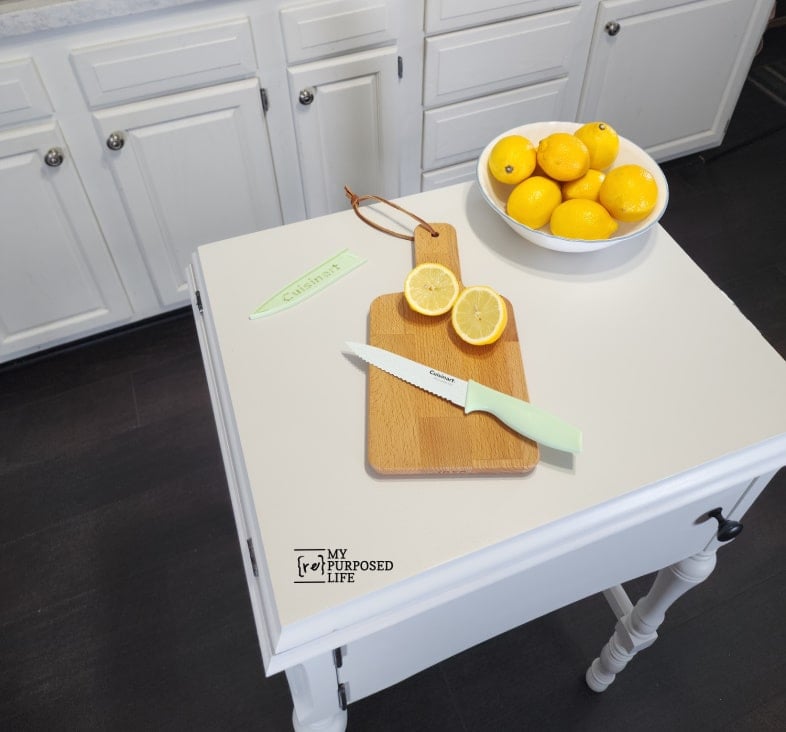
The glass cutting board allows you to see what is inside the small kitchen island.
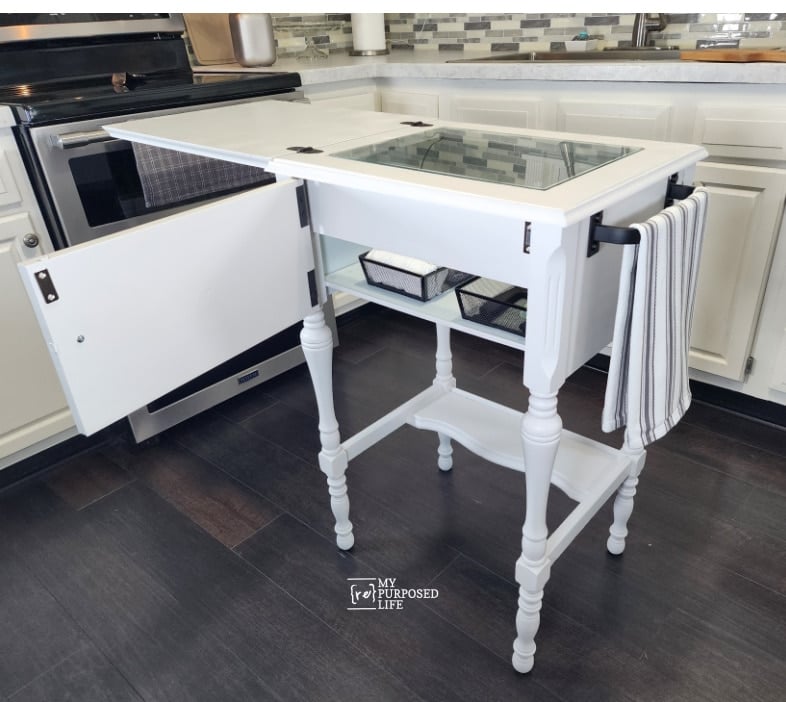
Due to the original front-facing design, storage is limited when accessing it from the front. However, it’s really roomy if you access items from the top by removing the glass cutting board.
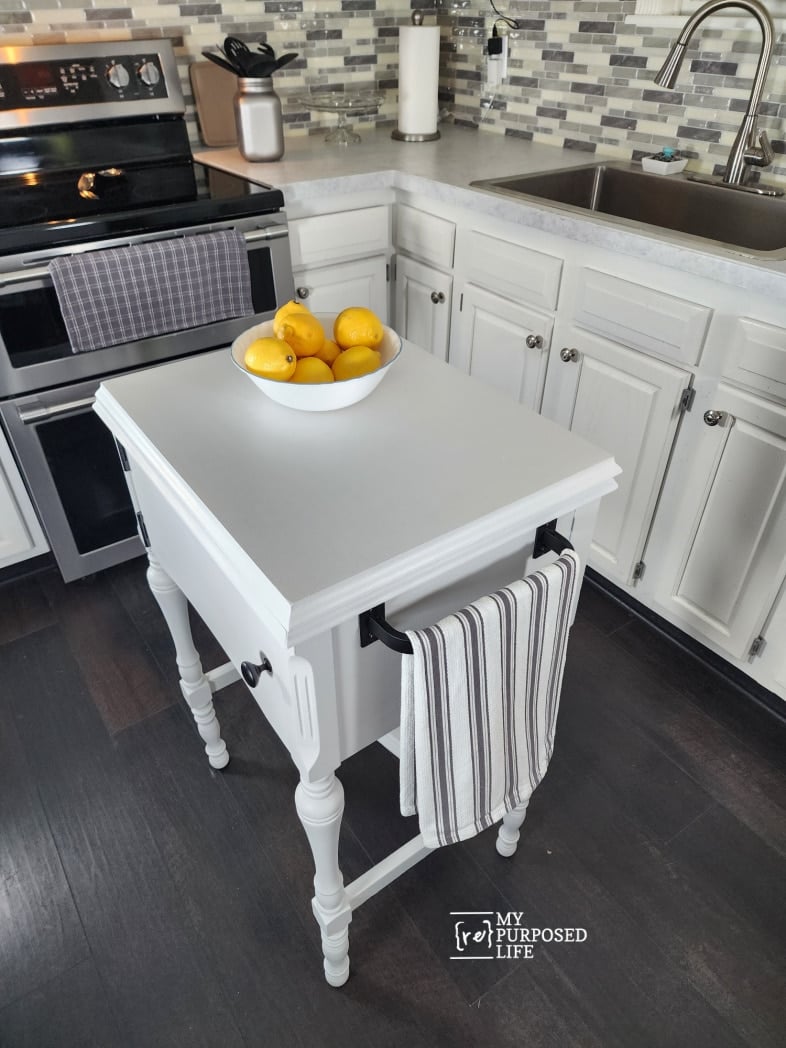
Currently, it’s being used as a small kitchen island; however, the possibilities are endless. It’s just a little shy of counter height, but still tall enough for uses listed below.
Tip: Paint takes about thirty days to cure thoroughly. A piece of wax paper is being used to prevent the top from sticking when closed.
More Uses for the Modified Sewing Cabinet
- Coffee or Beverage Bar
- Breakfast Bar/Snack Station
- Craft or Sewing Table
- Laundry Room Folding Station
- Entryway Organizer
- Standing Desk
- Potting Station for Plants
What started as a dated sewing cabinet has been transformed into a small kitchen island that adds extra counter space, storage, and style. The neutral paint, updated hardware, and new top make it look fresh and functional, while the compact size means it can work in almost any kitchen. This simple upcycle shows how a thrift store piece of furniture can become one of the most useful spots in the house, proof that a DIY kitchen island makeover doesn’t have to be expensive.
More Great Furniture Fixer Upper Projects From My Friends
Now it’s time to visit my friends to see what they’ve been up to.
- Refresh Wrought Iron Chairs With Spray Paint
- How to Take Orange Out of a Wood Dining Table
- DIY Kitchen Island (You are here, thank you)
- Furniture Makeover for Beginners
- Painted and Stained Nesting Tables
Furniture Fixer Upper Tour Projects
If you love seeing old furniture get a second chance, be sure to visit more Furniture Fixer Upper Tour makeovers. Each project starts with good bones and ends with a fresh new story.
See more Furniture Fixer Upper makeovers here
You will find everything from small side tables to large statement pieces, all transformed by talented DIY bloggers who believe in saving furniture rather than replacing it.
I still don’t get what you did to make the lid open flat. Could you add more detailed pictures or explain in words of one syllable?
My dad (the original repurpose) once removed the corner legs from a table to make it a kitchen table. He supported it with a base in the center that was on wheels. It looked a little strange, but it was very useful in moving the table in and out of the alcove.
This is your first project that I have read. It’s great! I’m a big fan. 🙂
Alexis
Welcome to My Repurposed Life! I’ve been on a family vacation, that’s why my reply is delayed.
When I removed the piece that held the sewing machine, it lost it’s ability to support the lid. I added a small piece of trim all around the DIY cutting board insert. I apologize for the confusion. I was rushed to get this project published for the Furniture Fixer Upper group. I added an extra photo to th article. I hope that helps.
This is such a clever upcycle! I honestly love that you saw the potential in a sewing cabinet, of all things. Most people wouldn’t think twice about it, but you turned it into something beautiful and practical.
So creative!! Fantastic job – I would love it in my kitchen!
Gail, totally cool re -use for that sewing machine table. Cudos to you for all the hardwork. Where ever this piece ends up, someone will get a lot of use out of it. I would like to add a couple of comments/concerns. I am really glad you specified glass cutting board, hopefully others will realize you cannot use regular glass in something like this as it is not tempered
I really think it would have been wise to fill, sand and paint the Kreg jig holes on the inside of the cabinet, it would give things a much more professional look to the finished piece.
For a piece of furniture like this water is the enemy; it really wasn’t necessary to add a finger hole in the top when the glass can easily be popped up from the door. That finger hole is an open space for any liquid to find it’s way to the bottom of the drawer and anything stored in that space. It also makes me wonder if there is some kind of “water proof” paint you could add around the edges of the cutting board? Lastly, that 1/2 shelf at the bottom begs the other half to make it a whole shelf.
I have an old sewing cabinet like this and this project would be perfect if I can get to it! Thank You
Ohmygoodness Gail, this was a labour of love – I LOVE this repurposed upcycle. You gave this sewing cabinet a fresh new look and purpose! Beautiful! Pinned XOXO
Thanks for pinning Denise! I appreciate your kind comment.
gail
Wow Gail, this was a lot of work with unexpected challenges, but what a fantastic repurpose! I love it!! XOXO
Thank you Christy! I am very happy with the end result, but you’re right-there were many unexpected challenges.
gail