pickets and jig |DIY Picket Fence
As an Amazon Associate, I earn from qualifying purchases.

Last week, while talking about my DIY picket fence we left off with putting in the short posts and the very tall arbor posts. The fence is coming along, but with Christmas and some cold and rainy weather, we’re sort of in a “hold” pattern.
Some readers have offered some tips on how to make this job easier. I knew this was going to be a tedious project, due to the fact that I wanted a very specific look for my new fence. Panels weren’t an option because I didn’t like the look of the pre-made panels—vinyl or otherwise. Regular gothic picket fence panels have the pickets spaced too far apart to suit me.
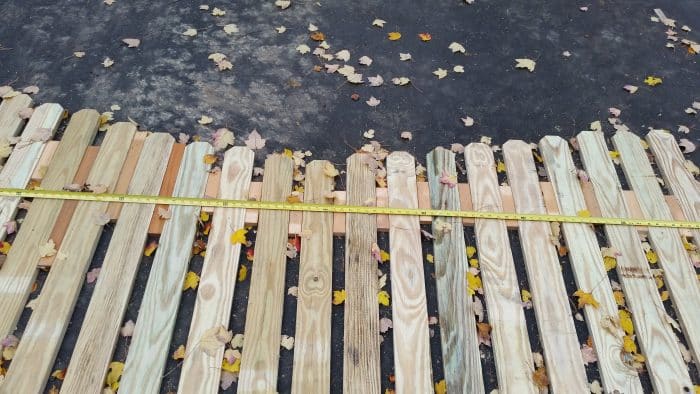
As soon as I got the first batch of pickets cut and dog-eared I worked on establishing a pattern for my diy panels.
After explaining the pattern to Rodney, he used a piece of my scrap plywood to draw a jig.
We laid out the pickets to see how much of a “dip” the pickets will make once they are installed. I’ll show you more details on that later in this post.
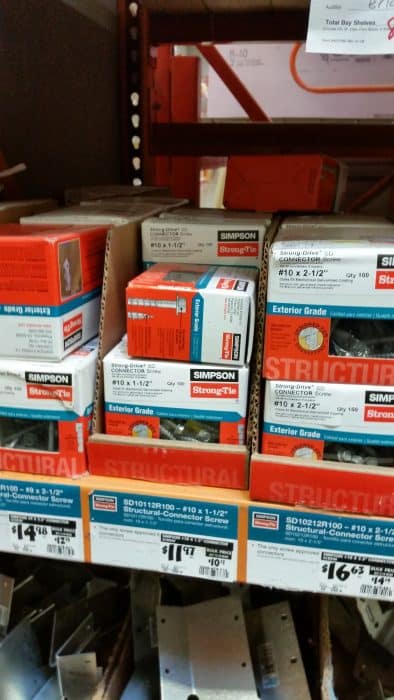
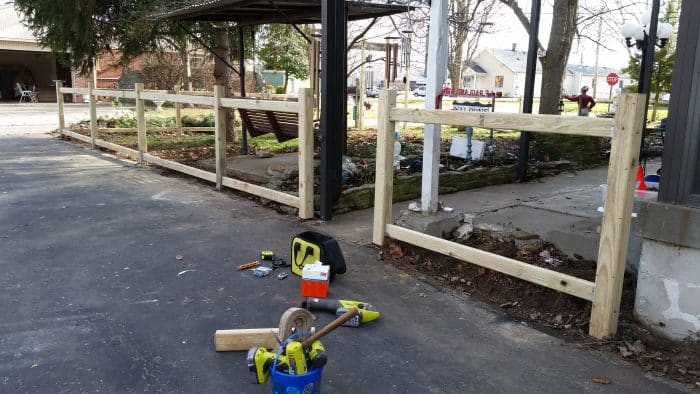
Simpson Strong Tie Fence Brackets
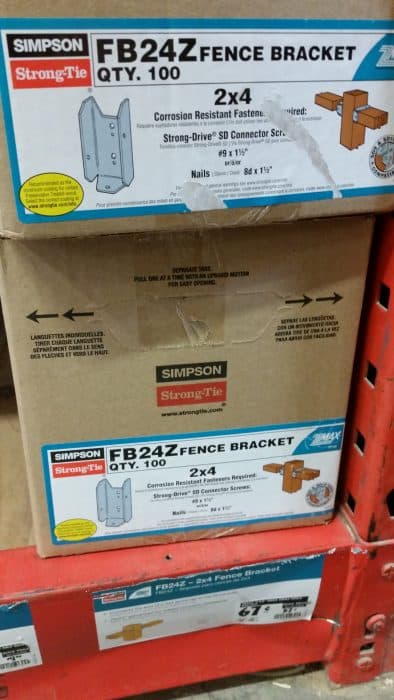
Meanwhile, it was time to secure and install the 2×4 rails. My friends at Simpson Strong-Tie supplied the FB24Z fence brackets for this purpose.
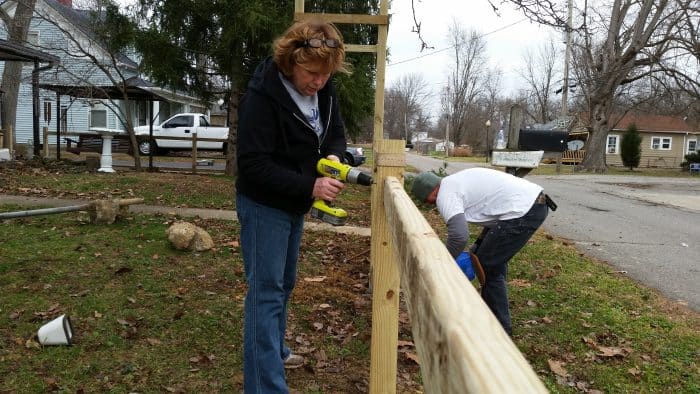
Rodney measured and recorded the exact length of all of the 2×4 rails and cut them. After cutting all the 2×4’s, he routed all of the edges of every 2×4 to make them look nicer.

As Rodney was measuring for the brackets . . .

. . . and installing them with the nails
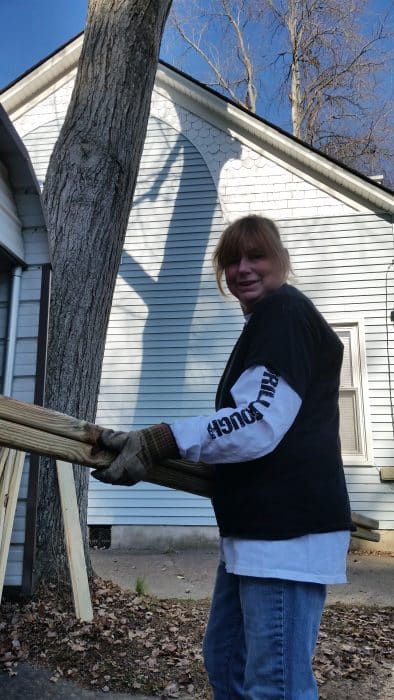
I carried all the 2×4’s to the proper section. (they had all been numbered as we cut them)
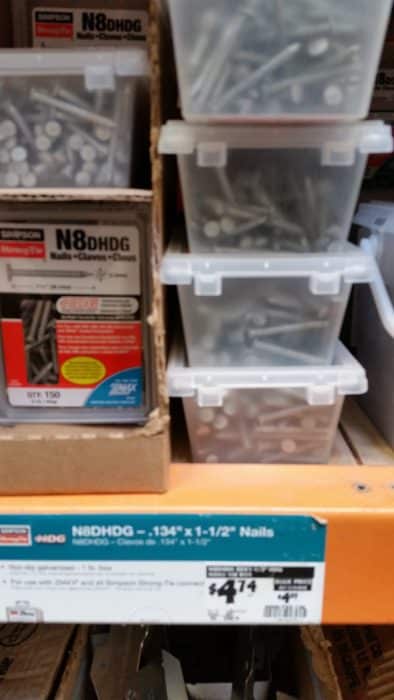
These are the nails that were used to secure the Simpson Strong-Tie brackets.
These are the fasteners we used to (eventually) secure the 2×4’s into the brackets.

We actually put in all the 2×4’s into the brackets, then went back a few days later to add the fasteners.
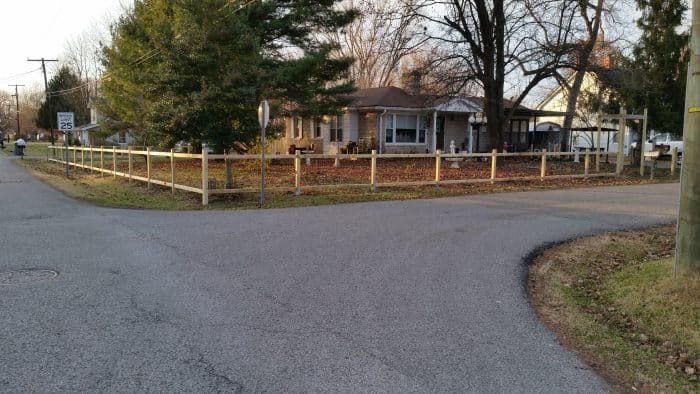
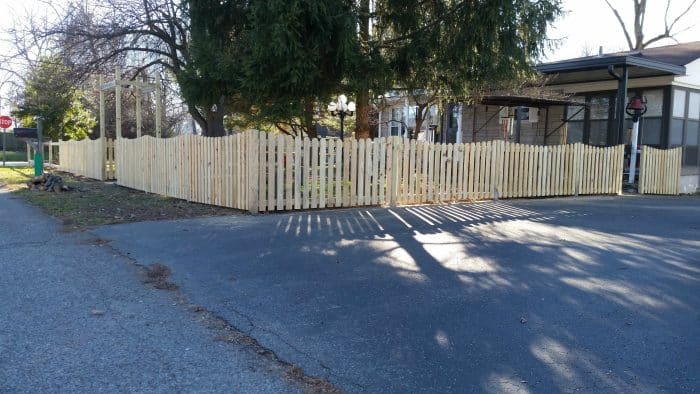
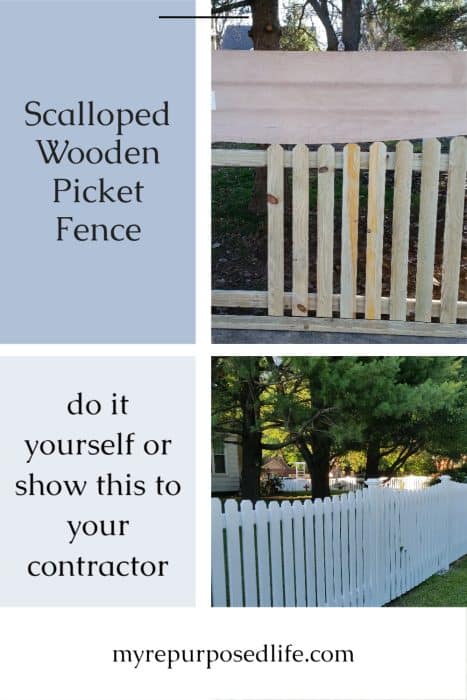
DIY Scalloped Wooden Picket Fence
The 2×4’s fit very securely into the brackets—don’t they look fabulous?
It was so wonderful to see it all coming together.
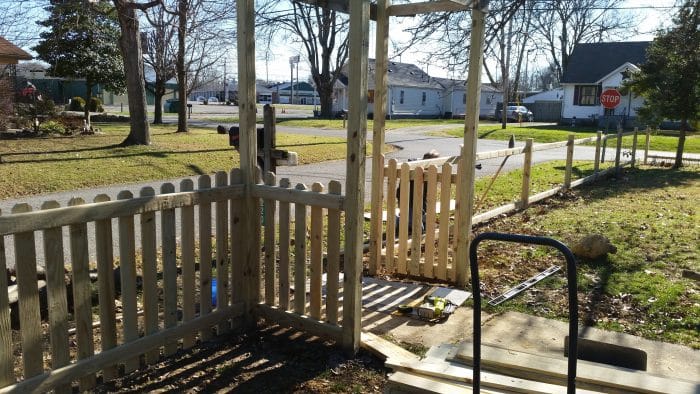
It may be several more weeks before I actually have a gate here, but it’s all going to happen eventually.

We used a ratchet strap to pull the sections together . . .
. . . then inserted the fasteners, moving along from one section to the next.
Then…. on the best day in the world, the first picket went up! I was absolutely giddy about it.

This is the way we did each section. Rodney did all the measuring, and I did all the cutting. He’s so much better at math than I am…. we kid about it all the time.
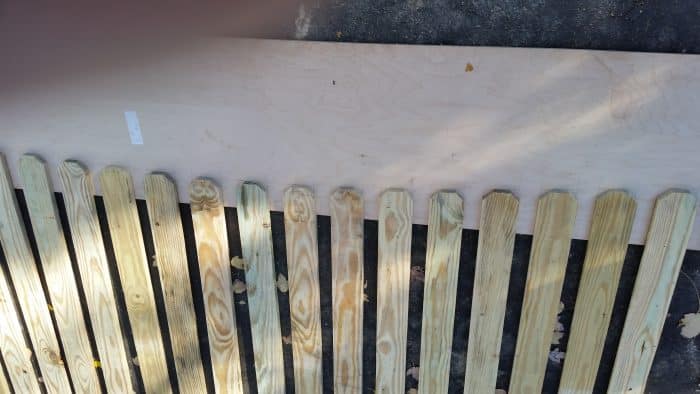
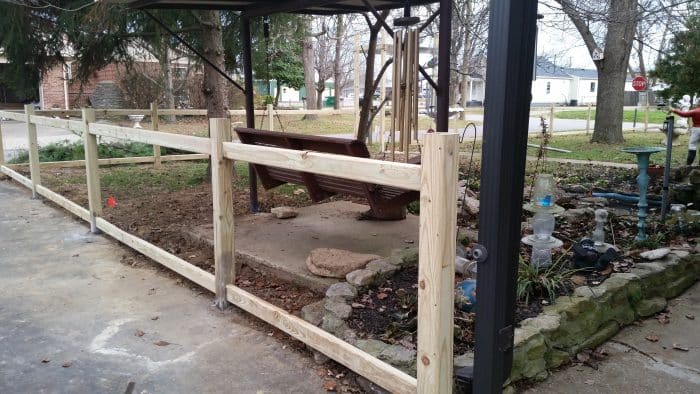
DIY Picket Fence Template
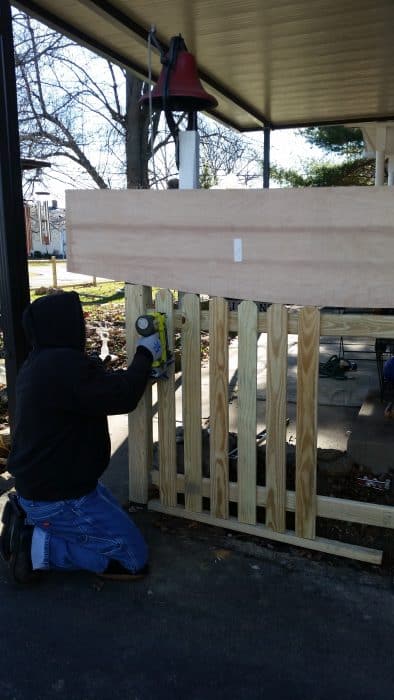
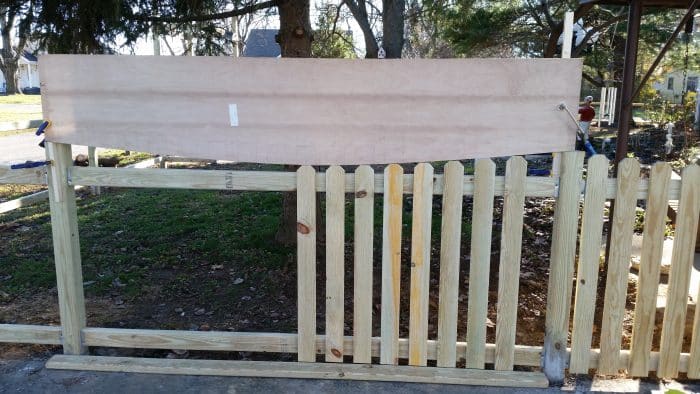
Here is the template (jig) that Rodney drew up and cut, it helps us keep the pattern consistent among all of the sections.

Do you see the pattern? It has a slight dip—making it a custom diy picket fence—one of a kind!
So, here’s how we used the jig to do one side of the panel at a time.

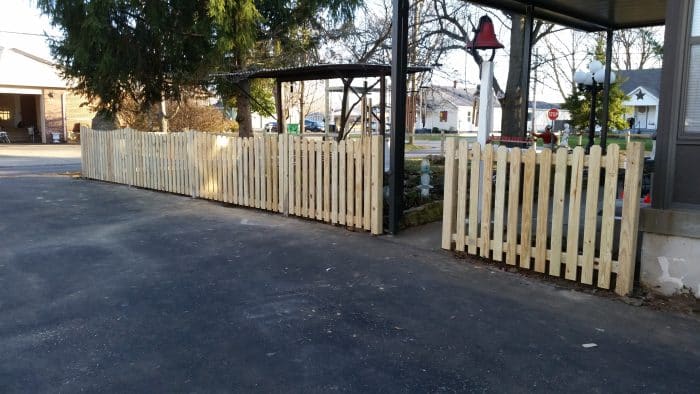
The driveway side was done on this first day of putting up pickets. It was like a dream come true, and I couldn’t stop looking at it. Are you loving it as much as I am?
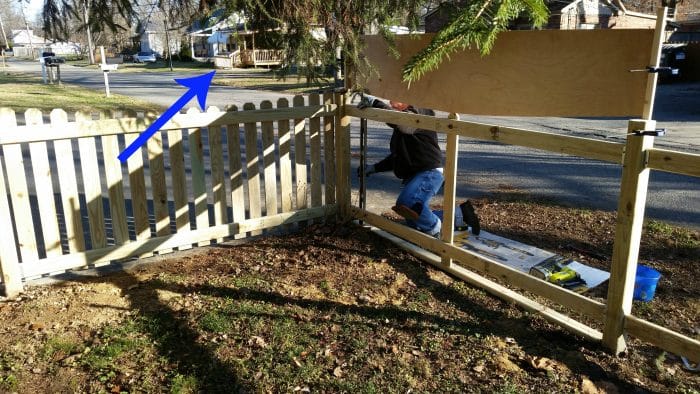
Our next day of work, we rounded the corner and did about 6 more sections, and the arbor portion. The blue arrow? It’s where Rodney lives—but more importantly, check out his new porch he and his wife built over the summer.
We have used my Ryobi nail gun to temporarily secure all the pickets, then we will be using the Simpson Strong-Tie fasteners for our more permanent solution.
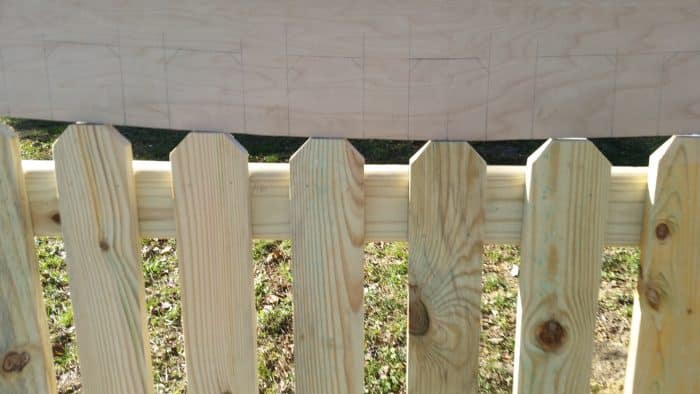
Here is a close-up of the template/jig that we have been using to keep the pickets lined up and matching. This seemed to be the best way to keep the pattern uniform throughout the entire scalloped wooden fence project.

I LOVE it! Like I said, we’re in a holding pattern for now—I hope the weather improves without turning too cold.
The plan is to paint it after the chemicals dissipate from the treated wood.
What do you think? Do you know anyone that has a picket fence? Do you love it as much as I do?
Update:
You can see more DIY picket fence details here
gail
disclaimer: I would like to thank Simpson Strong-Tie for supplying the brackets and most of the fasteners for this diy picket fence project. This is not a paid content post.
Absolutely love it! I’ve been wanting a picket fence–where we live, it’d have to be in the back yard–but that’d be ok–We have French doors looking out into the back yard–that’d be so nice to look out at a picket fence like yours!
It sure does make me smile every time I look out the window!
gail
Amazing job! I have always wanted a picket fence. I can’t wait to see it all finished.
That looks great, so updated over the old chain link fence, no wonder you can’t stop looking at it.
LOVE it, Gail. We, too have a picket fence, and ours is curved as well (a bit more than yours but very similar) but not dog-eared. It was here when we moved and we are very fortunate because it keeps our dogs in the yard. Most houses here do not have a fence of any kind. Yours looks so neatly done and makes your house look better, don’t you think?
I love the traditional look of picket fencing. It let’s the wind through whilst still acting as a barrier. We’ll done to both of you for all your hard work.
SO great!!! glad you were able to share it with us. can’t wait to see it done and what you do with it come Spring!
I don’t know anyone personally with a picket fence but yours is perfect and I would love it.
The fence looks awesome! It will be gorgeous once you get it completely finished! Can’t wait to see it all done!
WoW Gail- it looks FABulous!
I know -I- would be out there looking at it a lot too!
Sorry the weather is messing with your finish-schedule, but it’s got to be better than our ‘just now happening’ first snow storm, a blizzard–of course! Yuck! Here’s to better weather, and more cool projects in the New Year!
Catherine