
How To Repurpose Furniture and Household Items
Welcome to My Repurposed Life-The best place to learn how to repurpose furniture, turning trash into treasure! This START HERE page will give you just what you need to know about My Repurposed Life.
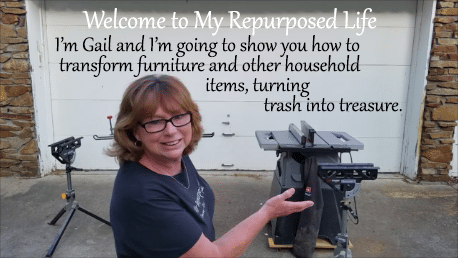
Click PLAY on the video below to get a quick introduction . . .

Now that you have a good idea of what I do, let’s take a look at some of the most popular projects around My Repurposed Life.
- New Uses for Old Desks
- Repurposed Crib Projects
- Using Reclaimed Shutters
- Repurpose Furniture | Dresser Project Ideas
- Headboard Bench Projects
- Window Project Ideas
- Broken Chairs Repurposed
- Repurposed Coat Rack Projects
- Change up That Table
- Glass Plates Bottles and Jars Repurposed
- Ideas for Using Old Picture Frames
- Repurposed Chalkboard Project Ideas
- Build it Using Reclaimed Wood
- Repurpose Ideas for Drawers
- Furniture Makeovers
- Repurpose Furniture Projects for Kids
- Outdoor Spaces
- Reclaimed Pallet Projects
Search Google For My Repurposed Life
There is a handy search function here on the site where you can type in what you’re looking for. Google is also a great search engine. Simply type in My Repurposed Life with any repurposed furniture or household item. After the search results come up, click IMAGES for easily finding what you’re looking for.
You will quickly find out that I love collecting old, unwanted furniture pieces. Using saws on these furniture pieces is what I love doing.
Free Exclusive Email Updates
Sign up to receive weekly email updates.
Unsubscribing is very easy if you decide it’s too much.
Thank You For Being Here!
I am here to help you learn how to turn trash into treasure. I’ve been doing this for years, showing my friends exactly how I do projects step by step. I’m a one-woman show; if you reach out to me, I will be the one replying. I want you to love doing this as much as I do. I want My Repurposed Life to be your go-to when you need inspiration or have questions.
Affiliate Links
Unless you know a blogger or site owner personally, you probably have no idea how much overhead can be involved in running a successful site. If you make a purchase after entering through my Amazon Influencer Store, I may make a small commission without costing you any additional money. Even if you buy diapers or pet supplies.
Click HERE to enter Amazon through my portal. While your on the site, just look for the SHOP button.
Let’s Keep In Touch
I will work on responding to questions as soon as I can. You can reach out to me here . . .
gail@myrepurposedlife.com
Don’t be a stranger! Let’s be friends!
gail