Just a peek!
As an Amazon Associate, I earn from qualifying purchases.
My cousin Terry stopped by over the weekend to see my progress, and offer some advice. We talked about the hearth and discussed some things I could do. We talked about painting or tiling it. We decided the best option for me would be to “box” it in just like I did the mantel.
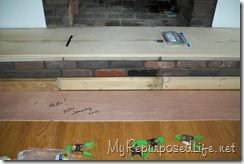
I went to Home Depot today to gather more supplies, another sheet of lauan, molding, quarter round, trim and (more) paint. I used the same technique with the molding as I did with the mantel.
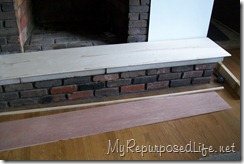
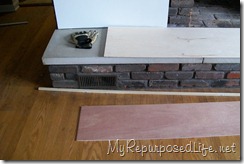
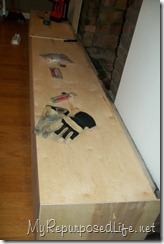
Because the hearth is over 9 feet long and lauan comes in 8 ft lengths, I had to piece it. I pieced the top piece on the left, and the front piece on the right.
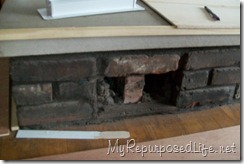
You may remember this little dilemma. When I pulled the carpet up a few months ago I found a little surprise. Apparently when the fireplace was installed, they made a mistake with a cut.
I decided to extend my “box” over the length of the top in order to cover up the concrete mishap.
See? It’s all gone!
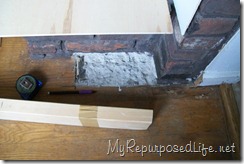
This is where the vent was. Isn’t that a silly place to put a heat vent? I chiseled out the old vent cover, and most of the extra mortar in order to make room for my new vent cover.
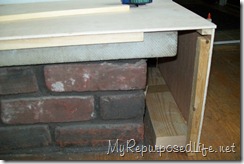
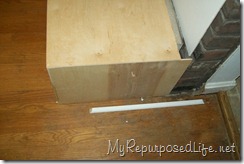
If you’re a long time follower of my blog, you know that I always leave a note for the person who may renovate years down the road. Here you can see that 2×4’s were a perfect “spacer” for the bottom of the front facing. The original hearth ledge extended over the brick. I then added another 1/2 inch (molding). In order to stabilize the front facing, I nailed it to the 2×4’s.
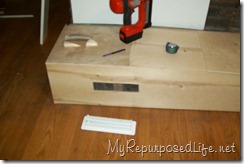
You can see that the top is pieced. I glued it and nailed it. I also cut a hole for the vent. I purposely centered this new one, where the other one was lower to the floor. I have plans for the front facing that needed the vent to be centered.
This is a shot from the end, all the way down the hearth.
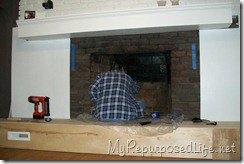
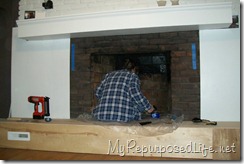
This firebox is huge! I’ve told you that before, but in these pictures you can really get an idea of how big it is. I am painting the firebox and surrounding brick black.
stay tuned!
gail
Linking to these parties:
Susan’s Met Monday
Kimba’s DIY day
Kimm’s Trash to Treasure Tuesday
Blue Cricket Design’s Show and Tell
Gina’s Transformation Thursday
Donna’s Saturday Night Special
I appreciate you reading my blog in your reader and/or via email.
You can reach me at gail@MyRepurposedLife.net



I love what you are doing with it. What a job, but well worth the finish! Can’t wait to see how it all looks finished!
Wow, you do have a huge fireplace. It is looking great though,can’t wait to see it finished.
It’s looking so good!!!
Hurry up and finish, I can’t wait to see the end result! 🙂
Anne
great progress!!
This is such a huge undertaking, Gail, but you are rockin’ it girl!
I can’t wait to see the finished product, it’s gonna be fabulous!
VERY nice work. You should be proud. Can’t wait to see finish.
Agree with everyone you’re amazing! This will be so cool when you’re done. And what a nice idea to leave a note for the future. I did that when I had my house built..
omg, that really is huge! You’re making some great progress at this!
good luck with the painting.
Rose
Can’t wait to see it all finished!
Wow! This is a DIY project extraordinaire! I am impressed at your work–and at your courage. You go, girl!
All this work is going to be worth it! You are doing an amazing job! I like that nice big firebox! I just did a fireplace update too. Yours is amazing! Karyn
This project is inspiring me to do the same to a pain in the neck corner fireplace with raised hearth in my living room. I have disliked it forever (25 years we have lived here so far) but you are opening my eyes to the possibilities-many thanks!!!
It’s going to be beautiful!
It’s going to be beautiful!
Woot Girl! You are amazing! I can’t wait to see what you do to finish it up. I”m so inspired to do something with my eyesore firplace….
WOW! That is going to look so good when it’s done! Good work!
I had no idea the fire box was THAT big! Looks like you’ve done alot of work since the last time I looked. I am excited to see the final result!
Wow, it is big. Did not look that big until you stick a person in it! Fireplace is looking great and I think its a great idea to box it in like you did the top. Great job
It’s really looking good so far. I can’t wait to see the finished results.