• Skip to primary navigation
  • Skip to main content
  • Skip to primary sidebar
  • Start Here
  • Shop Favorites
  • About
    • Welcome To My Repurposed Life Home of Repurposed Furniture
    • More About Gail
    • Disclosure
    • Privacy Information
  • Gallery
    • Repurposed Furniture
  • Repurposed Items
    • Building Supplies
    • Miscellaneous Household Items
    • Picture Frame/Chalk Board
  • DIY
    • Home Reno
    • outdoor living
    • Painting
    • Shop Talk
    • Tips for Around the House
    • Build It
      • Furniture
      • Home Decor
      • Storage
    • Crafts
      • Dollar Store
      • Easy
      • Holidays Seasonal
  • Furniture
    • Chair
    • Desk
    • Dresser/Chest
    • Headboard | Bed Parts | Cribs
    • Kids Furniture
    • Table
    • Kids Furniture
My Repurposed Life® Rescue Re-imagine Repeat
menu icon
go to homepage
subscribe
search icon
Homepage link
  • About
  • Start Here
  • Project Index
  • Furniture
  • Subscribe
    • Email
    • Facebook
    • Instagram
    • Pinterest
    • RSS
    • Twitter
  • ×

    Home » Repurposed Furniture » Repurposed headboard Command Center

    Repurposed headboard Command Center

    Published by Gail | Published April 15, 2010 | Updated April 9, 2019
    As an Amazon Associate I earn from qualifying purchases.

    Pin
    Share
    Tweet
    Good morning! I’ve been busy. Wednesday I worked on parting out some cribs, and that lead to making a table. But it’s in the middle of an experimental phase at the moment. Ya’ll know that little boy in the Family Circus cartoon…how he runs all around the neighborhood to get next door? That’s sort of the way I work. I just hop all around, not really knowing where I’m going!
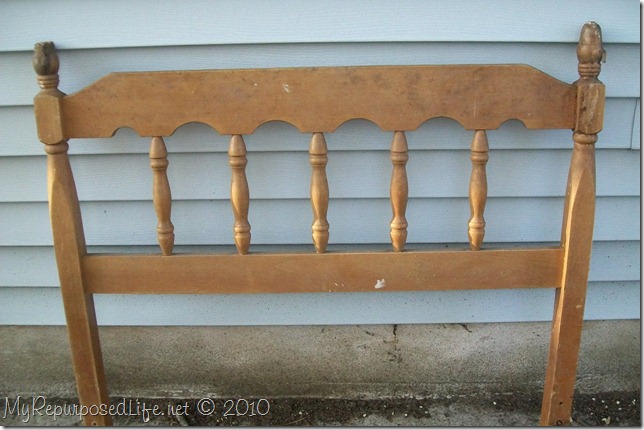
    On with today’s post, cause that’s why you’re here! I have had this junky headboard for quite a while. It was curbed of course.
     junky headboard
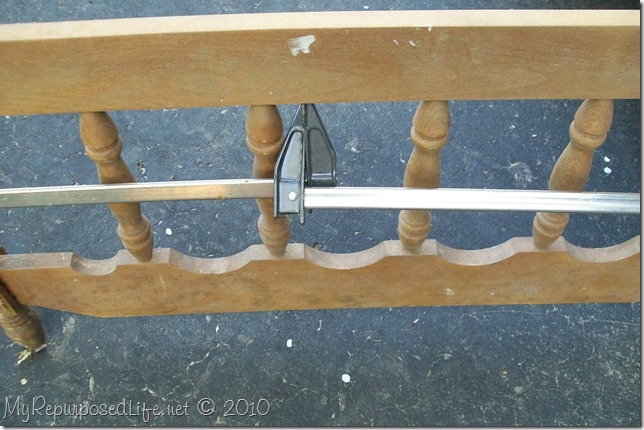
    clamps repair headboard
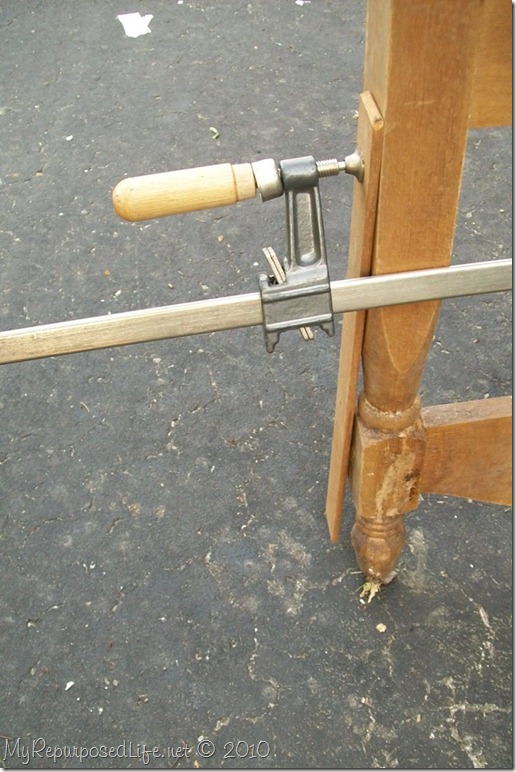
    When I picked it up to start working on it, it came apart. I glued it, but I needed to clamp it. Look at the new way I’ve learned to clamp! My clamp was not long enough so I “hooked” two clamps together! voila! It worked like a charm.
     clamps
     clamp
    When I clamp my wood pieces, I always try to use a scrap piece (in this case, a shutter slat) especially on the end that has the “screw” round part of the clamp. If you don’t, you will end up with a little dimple.
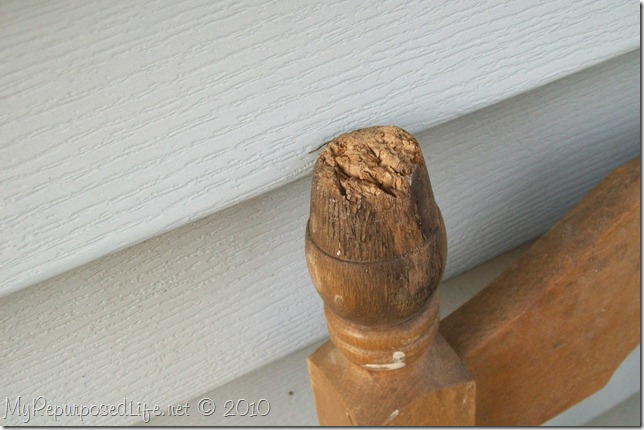
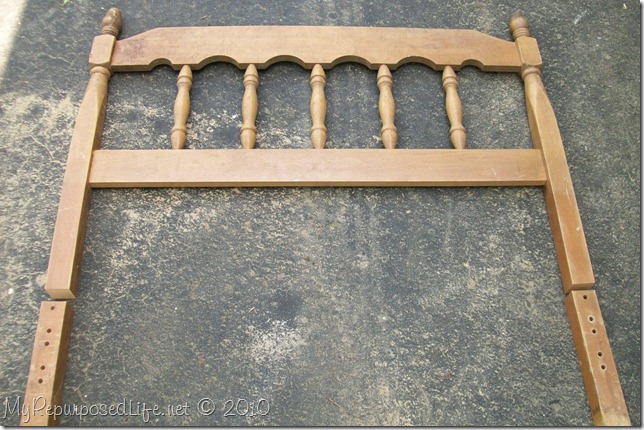
     damaged headboard
    This baby has seen better days! You will notice farther down in this post that I ended up cutting off part of the finials. I felt that would be easier than sanding or reshaping them.
     vintage twin headboard
    I did not want to fill all the holes where the bolts were, so I simply used the compound miter saw to cut some of the legs off.
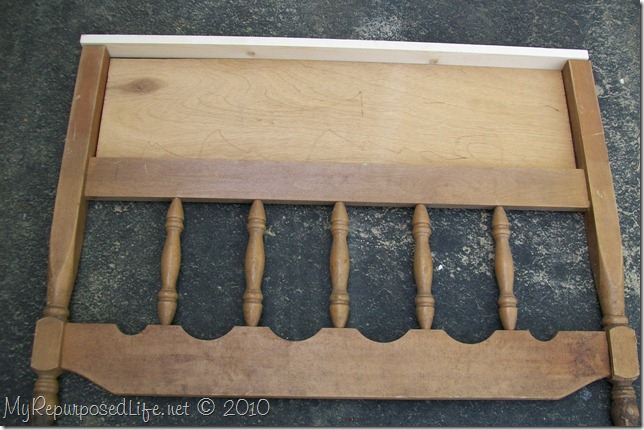
     repurpose headboard
    Then I inverted the whole thing! I cut a piece of luan for a chalkboard.
     
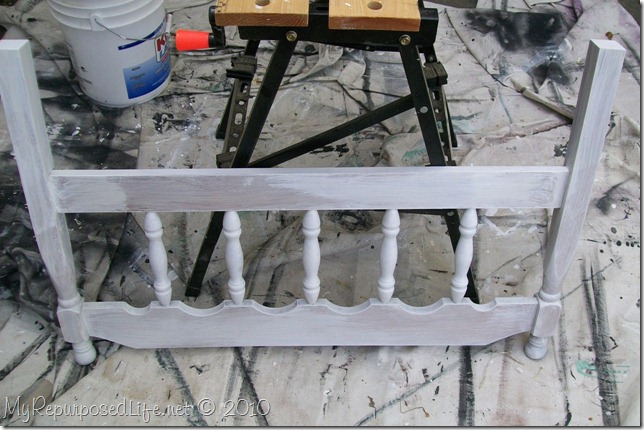
    I used Kilz primer before I started painting.
     
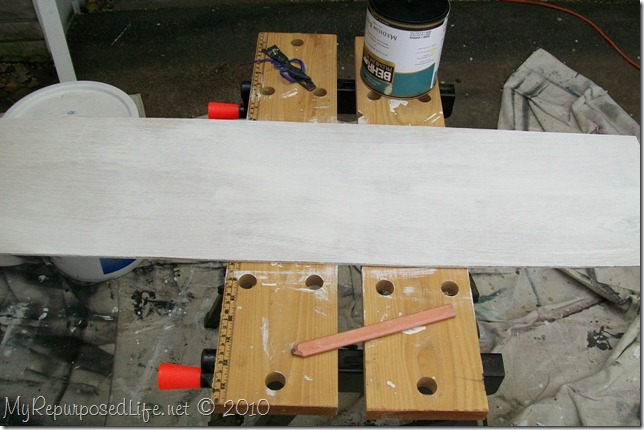
    I also used Kilz on the chalkboard part. I think it helps the chalkboard paint “take” better.
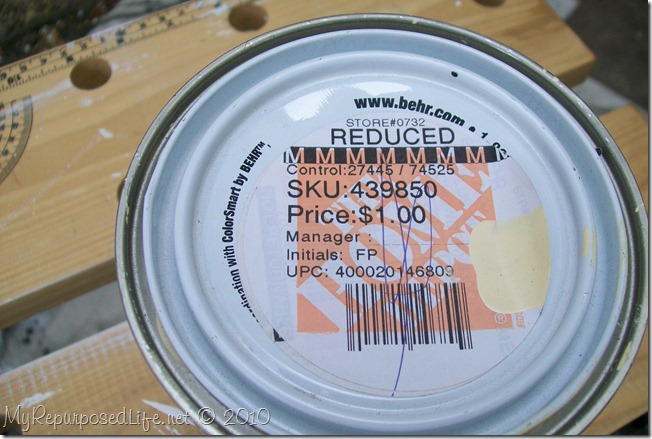
    This is some oops paint Jamie bought me for Christmas. Isn’t she the best?
     
    I painted about 3 coats of the yellow. I know that’s overkill, but it just didn’t seem to be covering very well. It certainly wasn’t because it was too thin. This paint was very thick. In this picture you can see that I’ve cut the finials off.
     repurposed crib parts
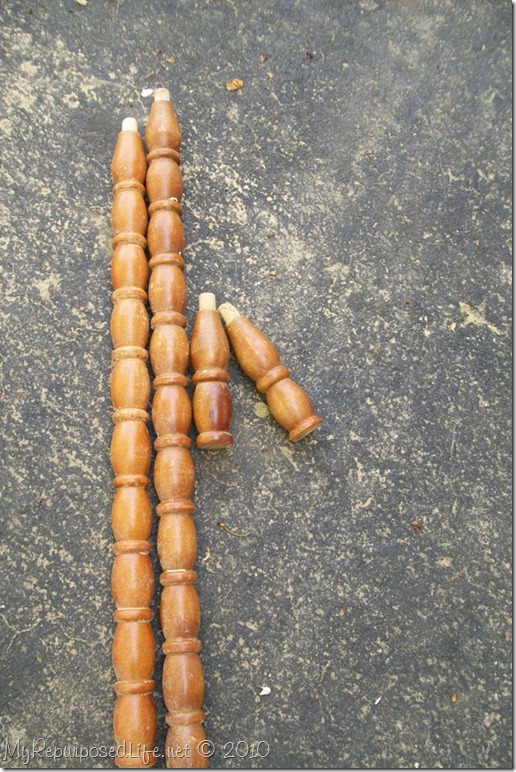
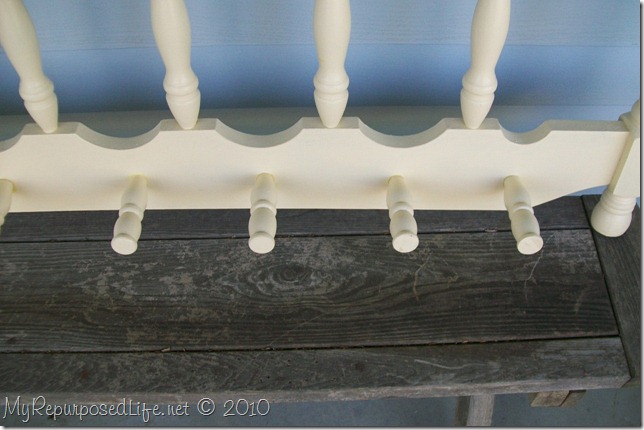
    Do you know what these are? Crib spindles, or maybe they were from a changing table. I can’t remember, but I have a whole bucket of them. I used the compound miter saw to cut a couple of inches off of each end of 3 spindles, which gave me 6 pegs.
     
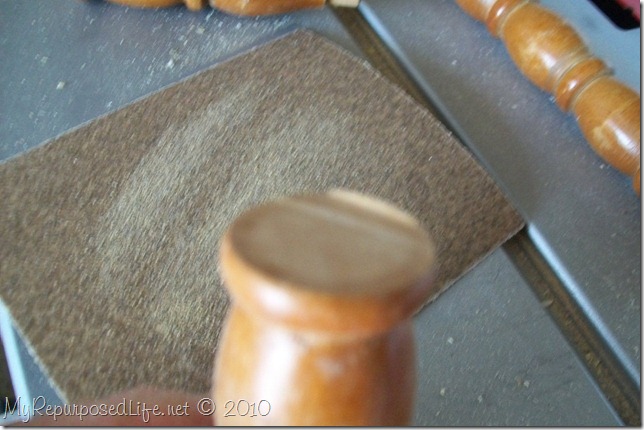
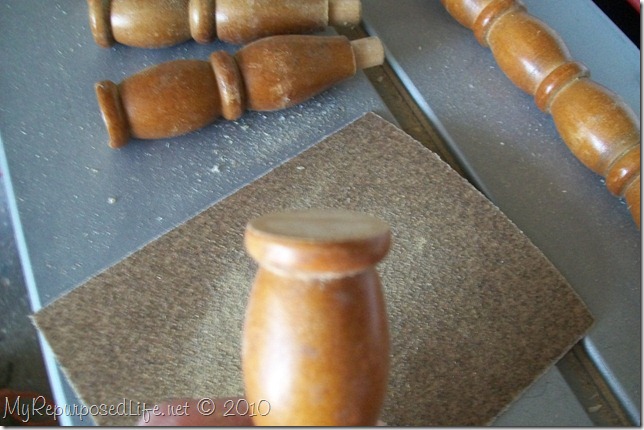
    It is very hard to get a straight cut on a round spindle. See that little raised part?
     sanding small pieces
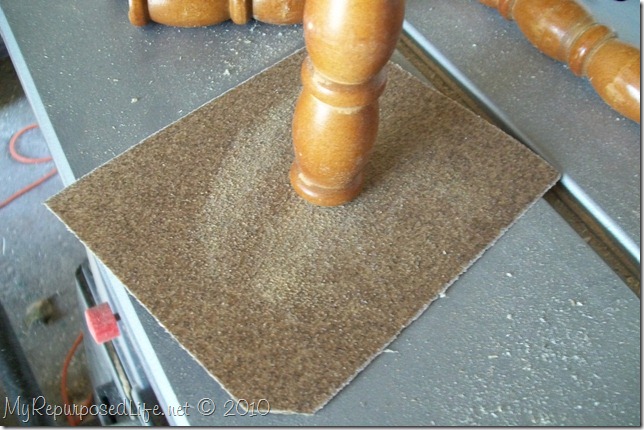
    Here’s a tip for you. To sand this off, lay your sand paper down on a flat surface and move the spindle back and forth.
     
    See how smooth it came out?
     
    I used a paddle bit to drill some holes.
     
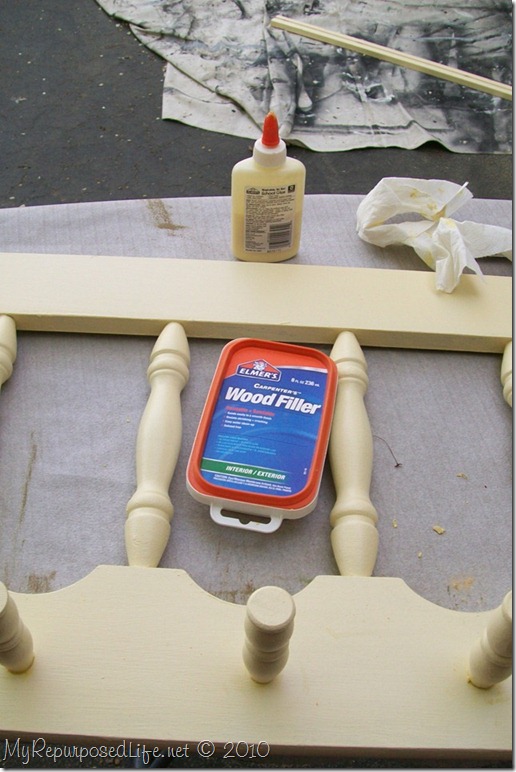
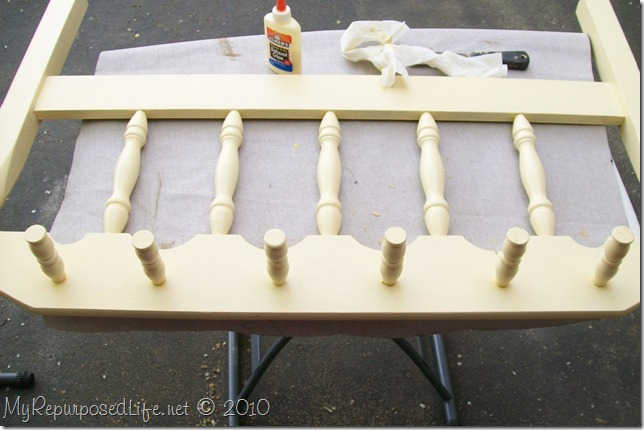
    I used wood filler and wood glue to insert the pegs into the holes.
     headboard and crib parts
    You like so far? You know I’m the repurpose queen! I did not want to buy hooks or pegs for this project. I wanted to use what I had, which took a little imagination!
     
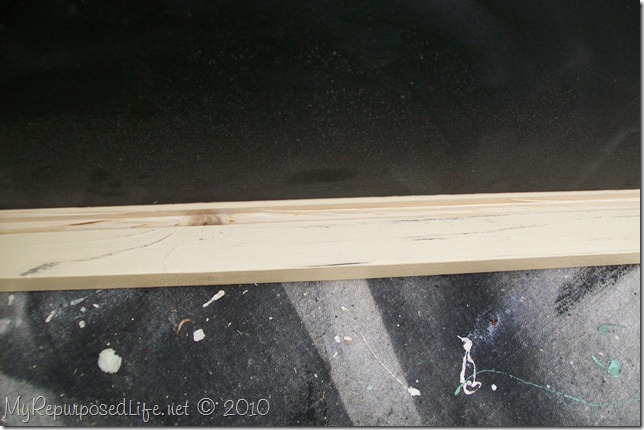
    I made a dado with my table saw  on a small scrap (leftover from my media center) to insert the luan, and hold it in place.
     
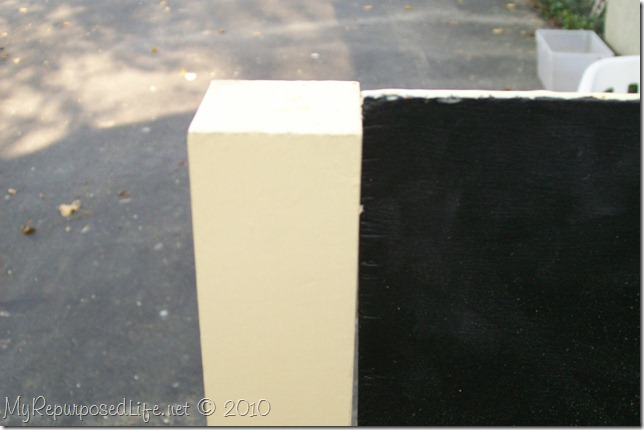
    Adding the small scrap for the luan to rest on, raised it above the end.
    I made  dado groove in another scrap piece for the top of the chalkboard to fit into.
     repurposed headboard
    It’s coming together. I had never used a dado groove before, and I thought this would be a great time to try this technique.
     repurposed headboard coat rack
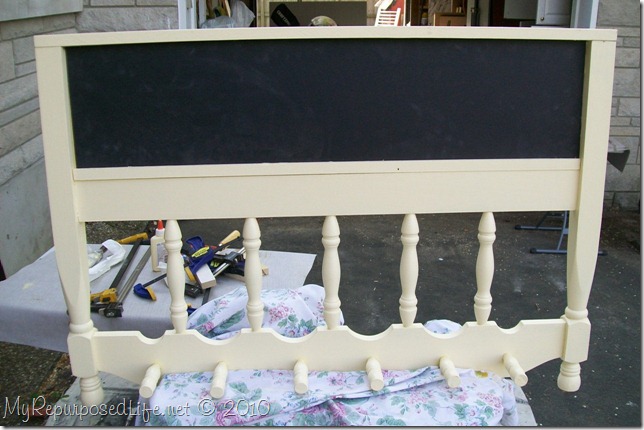
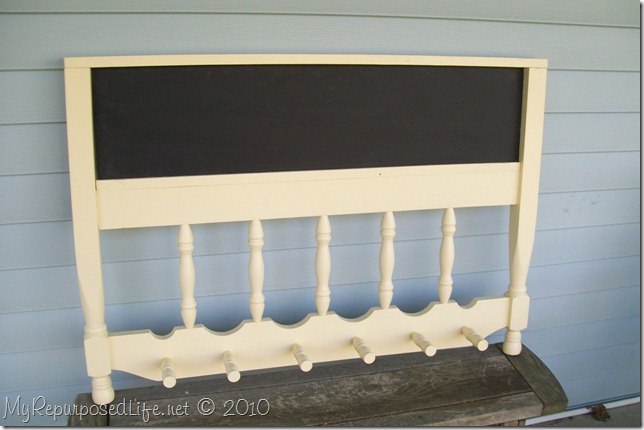
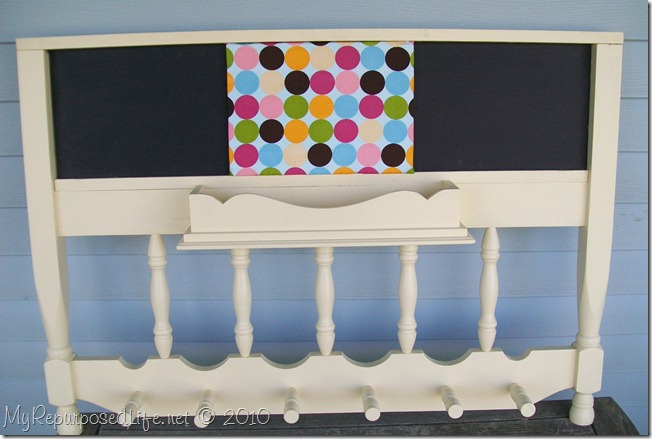
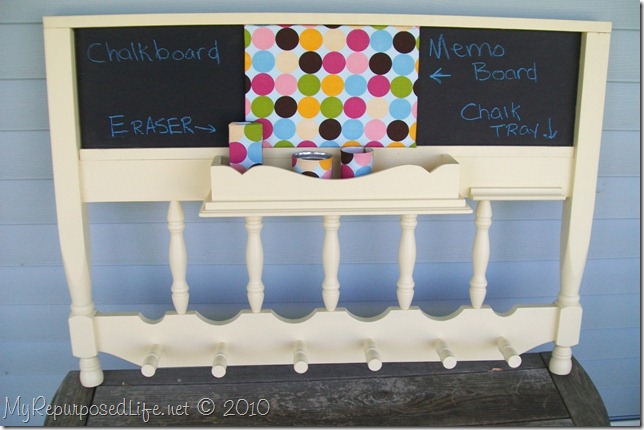
    After a few touchups, here is the (almost) completed project! This would be great in a mudroom or laundry room, by the back door. It’s intended purpose is for backpacks with the chalkboard being the perfect place to write reminders about field trips or special events. It’s not totally complete yet. I still need to attach something to hold chalk and an eraser. I’m also wondering if some small hooks or something would be helpful. Do you moms have any suggestions? It’s been too long since I had to rush out the door to get any kiddos to school. What else would be helpful to organize your busy life?
     headboard upcycled

    Command Center

     
    I would prefer it to be glazed, but for now it will remain this pale yellow color.
    Edited to Add updated pictures:
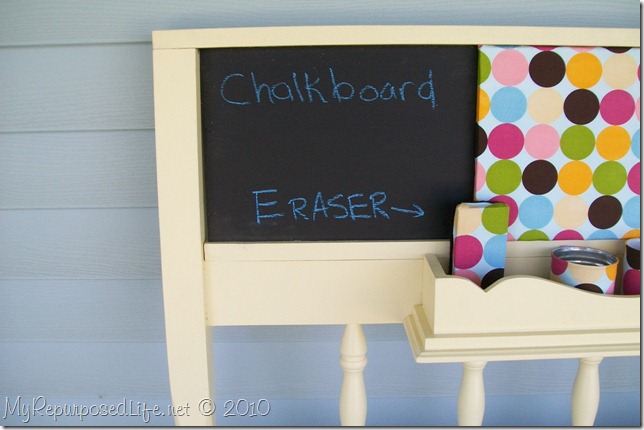
    upcyled headboard coat rack chalkboard
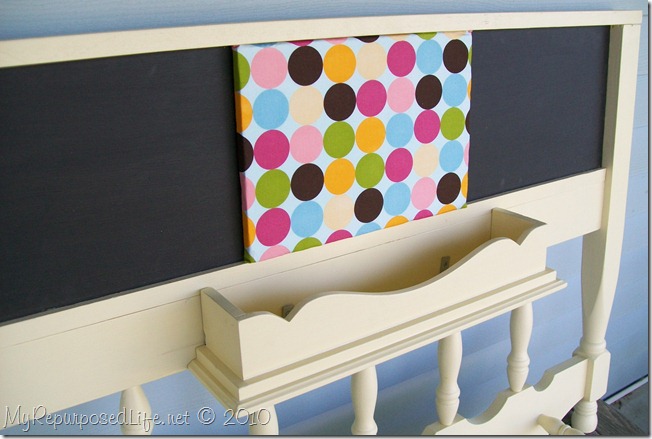
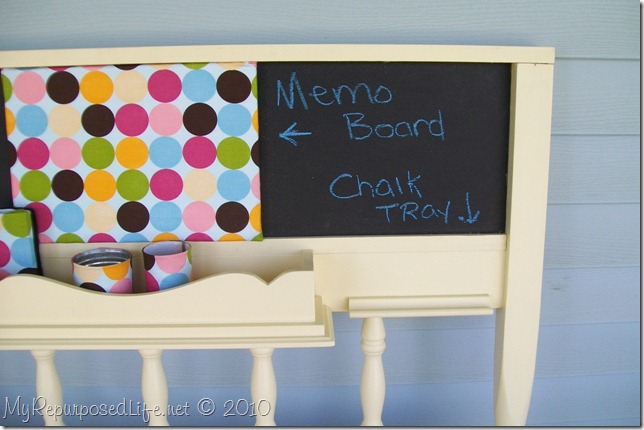
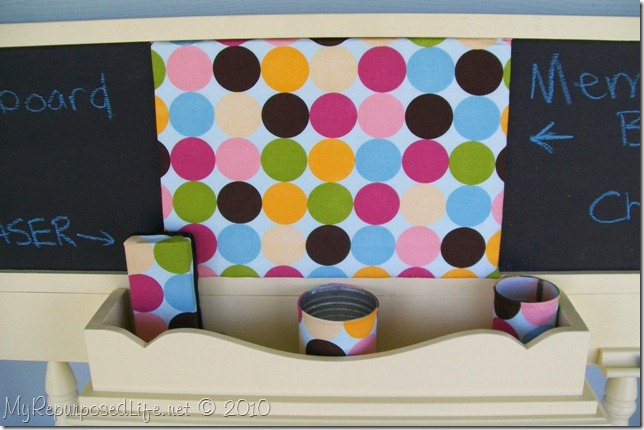
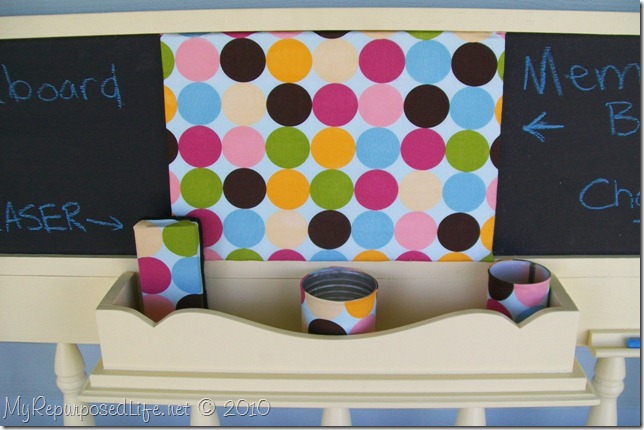
    This wonderful fabric was a gift from my daughter Jamie. I used it to cover a piece of a ceiling tile to be used as a memo board.
     upside down shelf makes a basket
    I added a shelf (also turned upside down) to become the tray to hold some accessories.
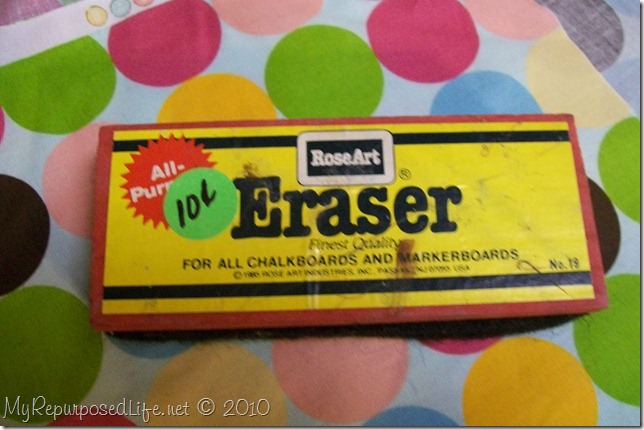
     

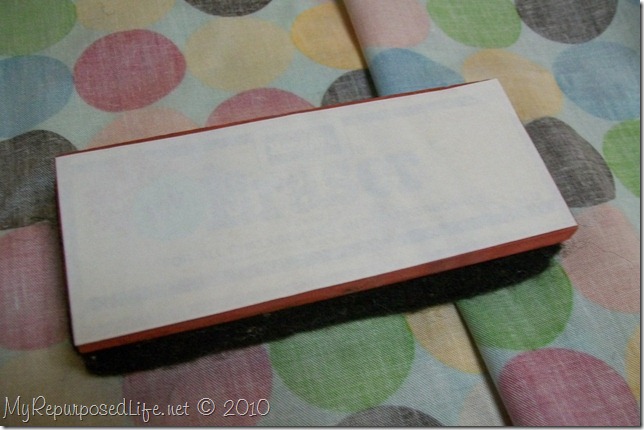
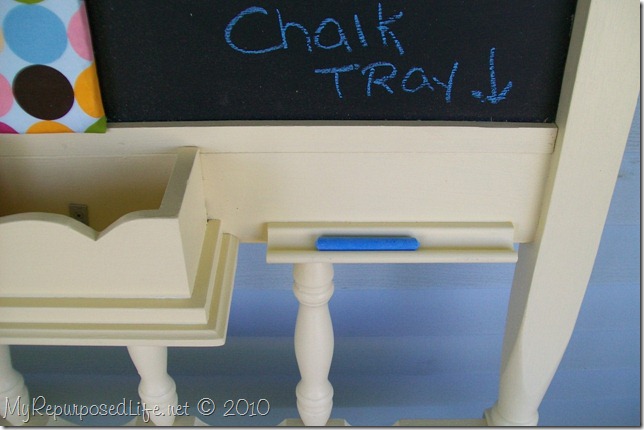
    Every chalkboard needs an eraser, right?


    covering a chalkboard eraser
    The words on the eraser were showing through the material, so I used a big sticky label to cover them.
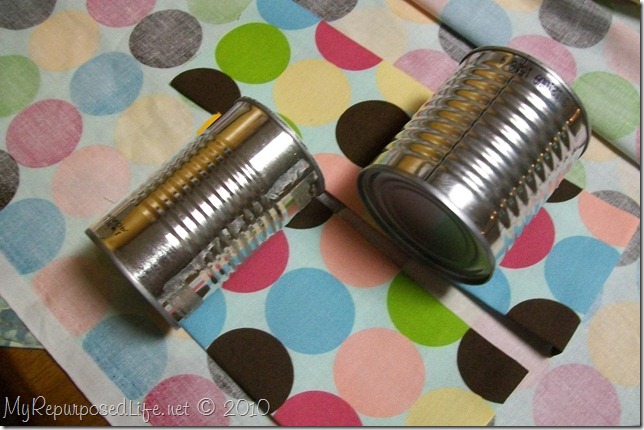
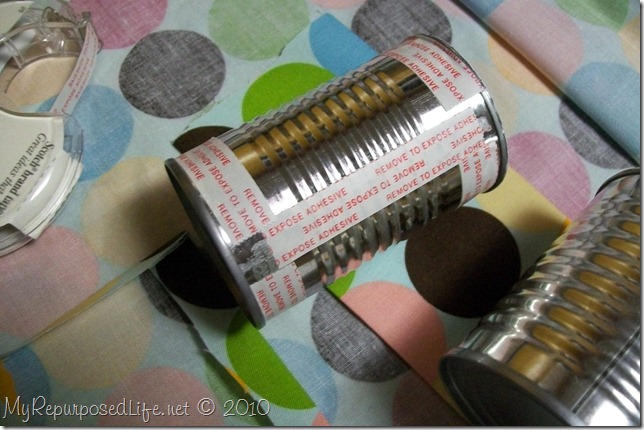
    I cut some fabric and ironed down a hem . . .
    tin cans fabric
    . . . to fit these cans.
    repurposed tin cans
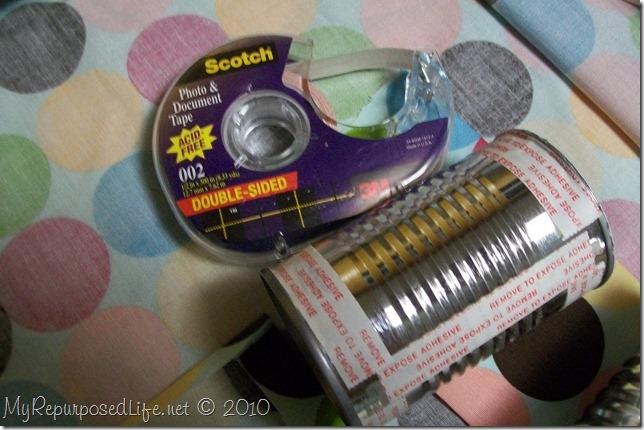
    I used double stick tape to adhere the fabric to the cans.
    scotch double sided tape
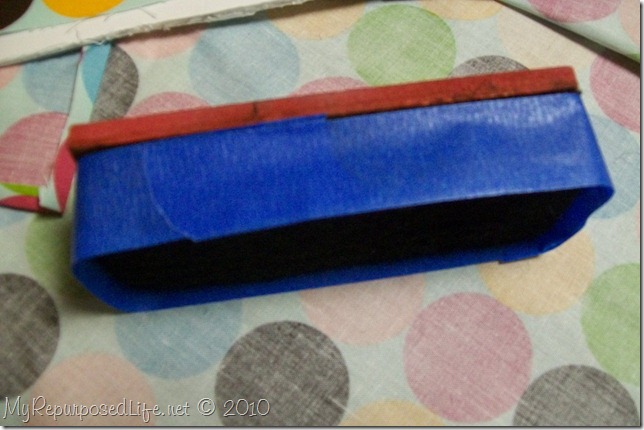
     spray adhesive
    I taped around the felt so that I could adhere the fabric to the top of the eraser with spray adhesive.
     upcycled headboard into coat rack
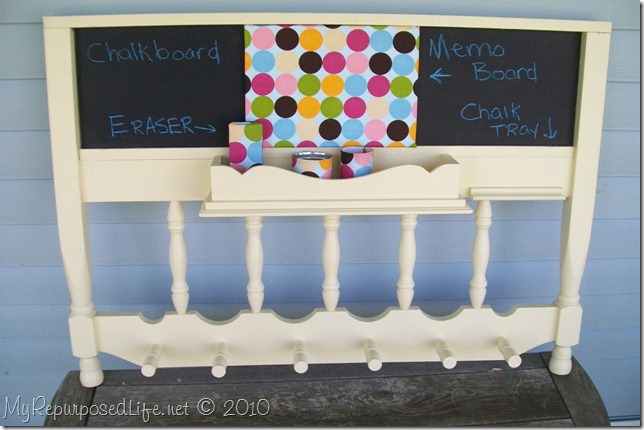
    It IS finally completely done!
    Chalkboard memo coatrack
     chalkboard memo board
     repurposed scrabble game parts
    The chalk tray is a repurposed Scrabble game tile holder.
    family command center
    The little cans are to hold pens, pencils etc.
    upside down shelf becomes a box
     upcycled headboard shelf crib parts tin cans ceiling tile

    gail

    See other great chalkboard ideas here:
    [categorythumbnaillist 77]

    and more coat racks here:

    [categorythumbnaillist 85]

    Print Friendly, PDF & Email
    Pin
    Share
    Tweet

    Related Content:

    • chalkboard ideas
      chalkboard ideas
    • repurposed table ideas | dining tables | coffee tables
      repurposed table ideas | dining tables | coffee tables
    • 50 headboard bench ideas
      50 headboard bench ideas
    • Repurposed Cabinet Door Project Ideas
      Repurposed Cabinet Door Project Ideas
    • Repurposed Door into a Trunk
      Repurposed Door into a Trunk
    • tufted upholstered headboard bench
      tufted upholstered headboard bench

    Reader Interactions

    Comments

      See comments Cancel reply

      Your email address will not be published. Required fields are marked *

      This site uses Akismet to reduce spam. Learn how your comment data is processed.

    1. Love Of Quilts

      November 06, 2012 at 9:27 pm

      Wow thats one heck of a brainstorm you had. Great!

      Reply
    2. Athena at Minerva's Garden

      November 06, 2012 at 9:04 pm

      What a great repurpose idea, Gail. I love the crib spindles you turned into knobs to hold backpacks or purses or scarves--a fantastic idea!

      Reply
    3. BarbMed

      February 02, 2012 at 2:50 am

      Love this idea!!!

      Reply
    4. Nana's Fun Stuff

      June 18, 2010 at 3:48 pm

      Wow! This is too cute!! I have been browsing your blog and just love it. You have so many creative ideas that I wouldn't have even imagined. Thanks for sharing and have a great day!! ~ Laura

      Reply
    5. Tumaini R.

      June 11, 2010 at 7:46 am

      I'm in LOVE with this project. I know what I'm doing this weekend.
      Have you thought of selling your furniture??

      I am the owner of Flippin Factory blog, which features AMAZING recycled furniture makers!

      Take a look around! Tell me what you think.

      I am in the process of creating an enterprise-level ecommerce site that will allow you to sell your furniture online.

      T. Rivera
      http://www.flippinfactory.wordpress.com

      Reply
    6. thedomesticfringe

      May 01, 2010 at 1:56 pm

      You are creative! Never would have thought of something like this. It looks fabulous! You really did a nice job.

      -FringeGirl

      Reply
    7. Traci@ Beneath My Heart

      May 01, 2010 at 3:24 am

      Okay, now that is creative! I cannot believe how cute that turned out. Just plain adorable!
      Thanks so much for linking up to my party.
      blessings,
      Traci

      Reply
    8. Kimmy

      April 30, 2010 at 3:11 pm

      I love this project! It turned out so cute!

      Reply
    9. handbags*n*pigtails

      April 30, 2010 at 12:29 pm

      Looks great! Actually, my favorite part of this project is the shelf turned upside down:)
      Sarah

      Reply
    10. Amber @ Two Nuts in a Shell

      April 30, 2010 at 4:58 am

      Geeze you repurposed everything for this project! Love the way the fabric adds a pop of color.

      Reply
    11. Becky@Beyond The Picket Fence

      April 30, 2010 at 3:38 am

      It turned out so well-was worth the hassle. I love the little details, the eraser is fun!

      Reply
    12. Miss Mustard Seed

      April 30, 2010 at 2:21 am

      Soooo clever. Oh my. You are too cute....making your eraser match everything else. Great job.

      Reply
    13. Chocolate Sundaes

      April 26, 2010 at 3:31 am

      wow that looks awesome! I love all the detail put into it. I'd love for you to link up here http://iheartnaptime.blogspot.com/2010/04/sundae-scoop-link-party_24.html

      Reply
    14. The DIY Show Off

      April 26, 2010 at 2:01 am

      Gail! I love your talent and creativity! This is just amazing - as usual! I'm including it in the DIY Project Parade highlights. Thanks so much for sharing. 😉

      Roeshel

      Reply
    15. {All Thingz Related}

      April 21, 2010 at 12:31 am

      HOLY COW you have a great eye for seeing what could be! THis is GREAT! I am so glad you chose to link it up to our Anything Related Party! Hope to see more of you on Tuesdays! 🙂
      ~Bridgette

      Reply
    16. Marsha's Mpressions

      April 19, 2010 at 3:04 am

      WOW! You are so creative. This turned out awesome!

      Reply
    17. Stephanie Lynn

      April 18, 2010 at 4:32 am

      FANTASTIC! Love the creativity! Looks fabulous - great job!

      Reply
    18. Casual (dash) Cottage

      April 17, 2010 at 4:10 am

      Gail-
      How in the world do you come up with these ideas?
      Seriously... i can stare a HOLE through something, until my eyes are burning...and still...
      NOTHING!

      You've got a creative imagination.

      This is spectacular.

      Reply
    19. Rose

      April 17, 2010 at 12:01 am

      You and I should do a feature where we take similar items and do our thing without talking to each other about it, then post them at the same time. It's scary how we think alike! I showed you the headboard last night that is so similar to this one that came out so much like this. Would that be fun, or would it be weird?
      Do you still have that same birds eye maple TV cabinet that we both picked up last fall? We could start with that!
      Rose

      Reply
    20. Margo

      April 16, 2010 at 10:22 pm

      Clever idea. I used to have a head board like this for one of my boys but we got rid of it... Kicking myself for that now... Have a great weekend!!!!! :O)

      Reply
    21. Kelli

      April 16, 2010 at 2:07 pm

      As I said before, this is SO clever, so please don't take this as criticism. What if you put a line of cork right below to chalkboard to hang time-sensitive papers you don't want to file and forget about (like I do)? Like I said, though, just a thought. I love the finished product!

      Reply
    22. michelle@somedaycrafts

      April 16, 2010 at 5:51 am

      I forgot to say I am featuring your candlestick lamp at somedaycrafts.blogspot.com!

      Reply
    23. michelle@somedaycrafts

      April 16, 2010 at 5:35 am

      you are a refinishing genius! This is beautiful!!!! You are just too talented!!!!

      Reply
    24. Brenda

      April 16, 2010 at 3:24 am

      Thanks for stopping by and spending some time at my site. I have saved the Christian music site you sent me and hope to have more time to look it over and listen over the next couple of days.

      Reply
    25. Nicole

      April 16, 2010 at 12:09 am

      I agree with Dawn that you could put a shelf between the chalkboard and spindles for the chalk and erasers. Maybe a small box for pens, I am always being told "Mom I need lunch money" as we are headed out the door and have had to write a check. But what a really cute idea. I have just found your site and can't wait to check out the rest!

      Reply
    26. Marie-Andrée

      April 15, 2010 at 8:12 pm

      that's great. I love it. you make a good job.

      Reply
    27. Alicia@Thrifty And Chic

      April 15, 2010 at 7:27 pm

      Wow, you have great imagination. I would have never ever had thought to turn a headboard into this. This is just simply amazing. Great job!

      Reply
    28. Lee Laurie

      April 15, 2010 at 4:00 pm

      Wow! I love it. I need one of those! Perfect for the mudroom!

      Reply
    29. Kelli

      April 15, 2010 at 3:15 pm

      This is SO clever! I never would have seen that potential, and I LOVE how it is turning out! Great job!

      Reply
    30. Cassie @ Primitive & Proper

      April 15, 2010 at 2:55 pm

      you are so stinkin' clever, gail! you amaze me! 🙂

      Reply
    31. Cassie @ Primitive & Proper

      April 15, 2010 at 2:55 pm

      you are so stinkin' clever, gail! you amaze me! 🙂

      Reply
    32. Laurie

      April 15, 2010 at 1:37 pm

      That came out great! Love it

      Reply
    33. Suzanne

      April 15, 2010 at 12:54 pm

      Wow -- you are amazing. Seriously. Amazing.

      Reply
    34. Pam

      April 15, 2010 at 12:44 pm

      I bow down to you and your talents....as usual, fantastic job.

      Reply
    35. Kelly Howard

      April 15, 2010 at 12:15 pm

      I LOVE this! I have NO entry areas in my house...all my doors cause you to just fall right into my rooms...and that is SAD! Oh, you are so crafty it stinks!

      Reply
    36. One Life Many Journeys

      April 15, 2010 at 12:02 pm

      How creative! You are the bomb!

      Reply
    37. Dawn

      April 15, 2010 at 12:00 pm

      I'm going to brainstorm with you all the way from Texas.... here are some of the ideas that just popped into my head - they could all be bad ideas, but might lead you to something useful.

      - You could try some molding or trim of some sort above the chalkboard
      - Put a strip of cork or metal on the little rectangular area between the chalk board and the spindles of the headboard. I'm forever signing papers for the boys to take to school, and then I could "hang" them there so they don't forget to take the next morning
      - Or some cork or metal behind the spindles themselves
      - Another idea for the rectangular shelf between the chalkboard and spindles would be a little tiny shelf with a raised lip for chalk and eraser - the lip would keep it all from falling off when kids are jiggling the board taking coats and backpacks off.

      Ok, I'm shutting up now. Feel free to dump all those ideas, I do realize its 7am and having just woken up, i can have really bad ideas, LOL

      Love your transformation though - it is such an awesome idea, cute and functional - we all need cute AND functional! Happy Thursday!

      Reply
    38. Brenda

      April 15, 2010 at 11:44 am

      Too cute! I love this make-over! I also like your new blog header. I guess I have not been by in a while.

      Reply
    39. angie

      April 15, 2010 at 12:45 pm

      You just have a way with headboards. Another great idea, but I'm running out of space for all your great ideas.

      Reply
    40. Anonymous

      April 15, 2010 at 9:00 am

      I love your ideas....I've been keeping my eye peeled for free or extremely cheap head/foot boards! I check back often to see what you come up with! Thanks for sharing!
      -Nicole

      Reply

    Primary Sidebar

    Hi, there! I’m Gail Wilson, the author and mastermind behind My Repurposed Life. I’m obsessed with finding potential in unexpected places and believe that with a little hard work and imagination, any old thing can be made useful again—myself included! I hope you’ll enjoy the journey and pick up a few tools along the way… literally!

    More about me →

    Join Our Mailing List

    ​

      Click the topics you're interested in below:

      Subscribing above means you agree to our Privacy Policy​

      Footer

      ↑ back to top

      SEEN ON

      Might I Suggest

      • Start Here
      • Furniture Makeovers

      Newsletter

      • Sign Up! for emails and updates

      About

      • Gail's Favorites on Amazon
      • About

      As an Amazon Associate I earn from qualifying purchases.

      Copyright © 2023 My Repurposed Life · Privacy Policy · Disclosure