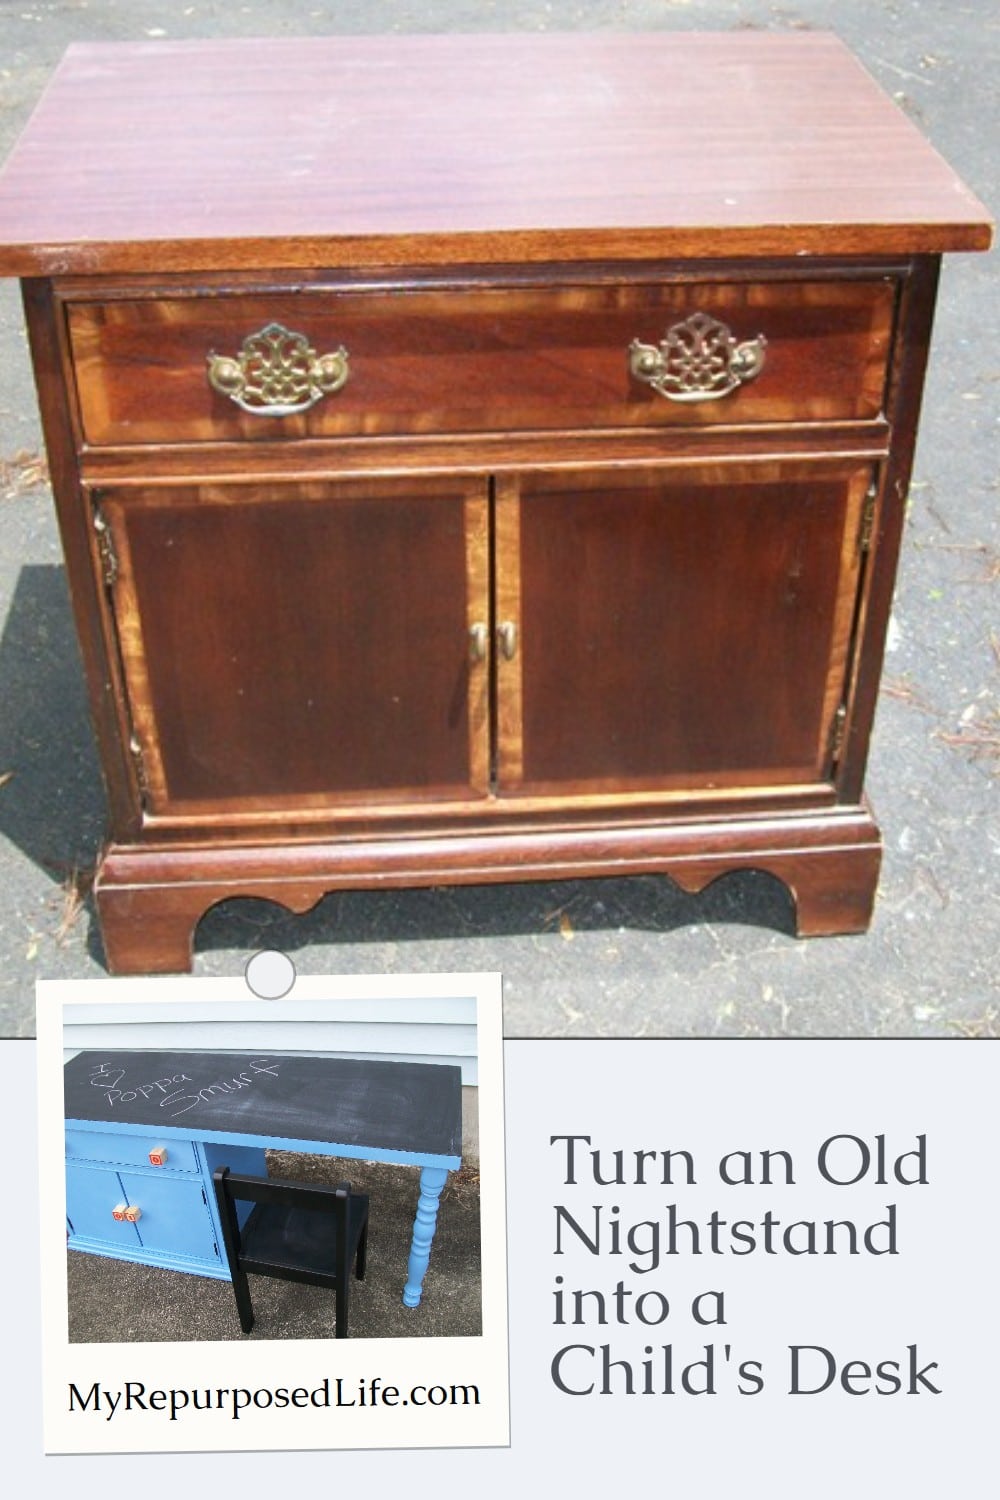
Repurposed Nightstand into Child’s Desk
As an Amazon Associate, I earn from qualifying purchases.
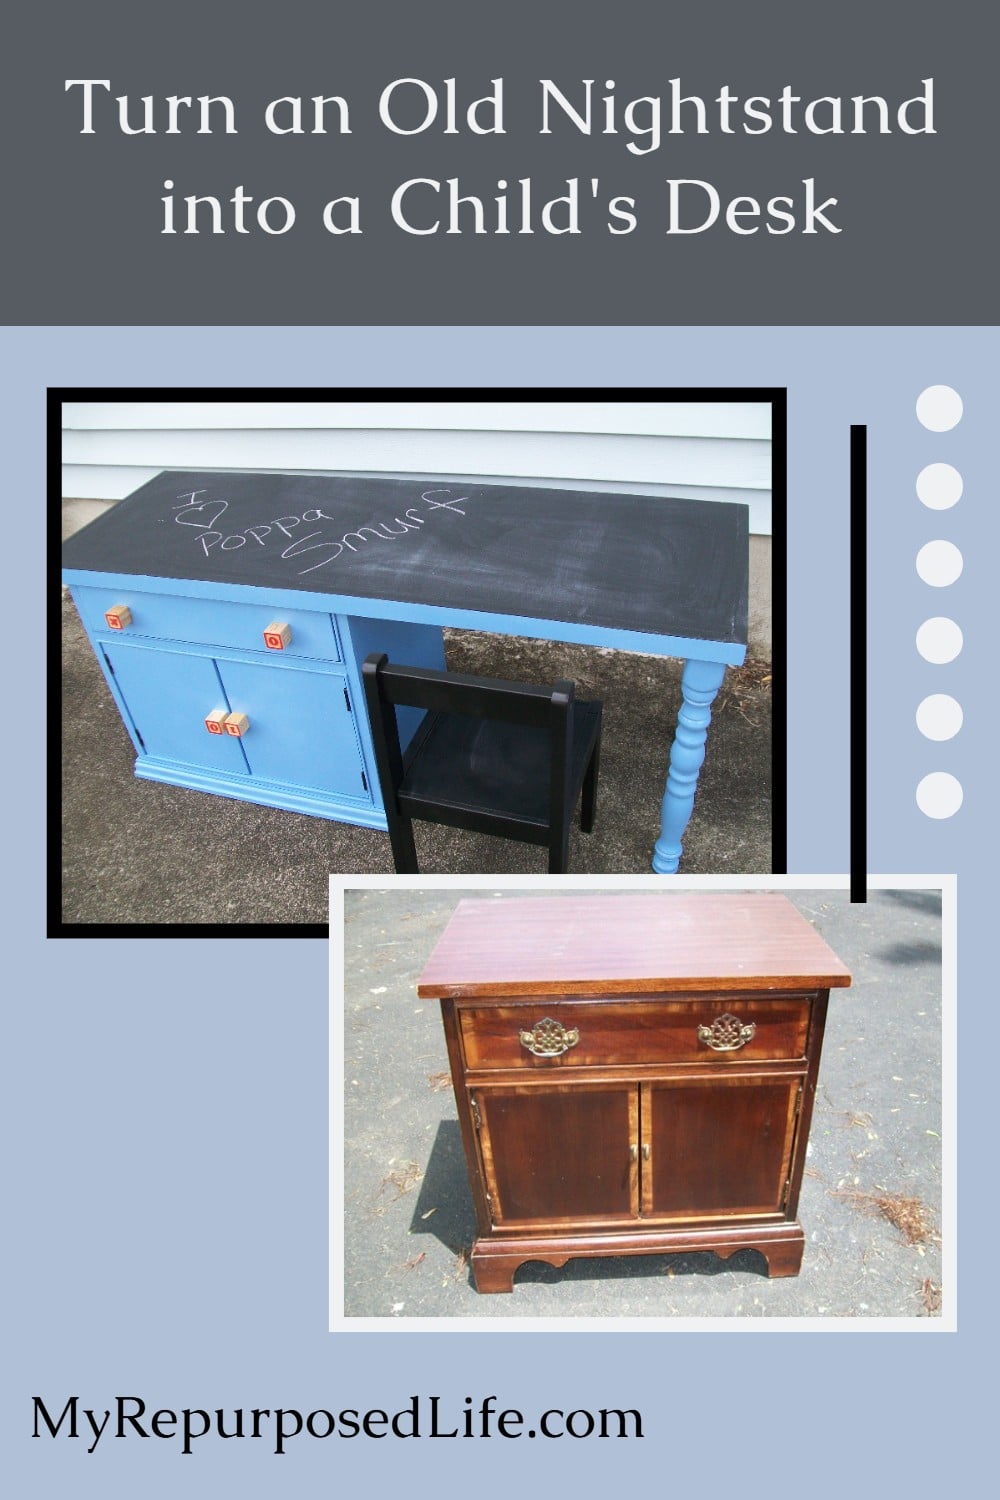
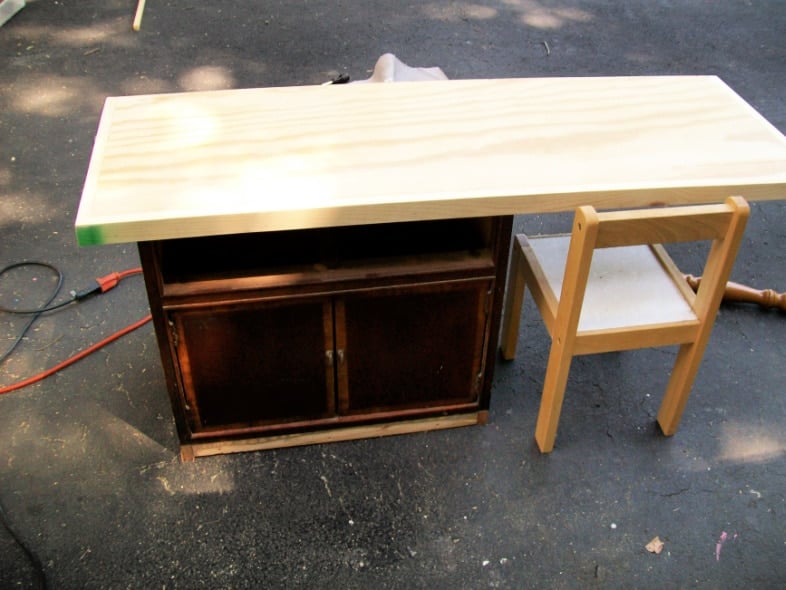
Sometimes the best furniture makeovers start with a “what if?” This outdated nightstand was nothing special until I saw its potential as a sweet little desk for a child. With a few simple modifications and a dash of creativity, it went from forgotten to functional! If you’ve got an old piece hanging around, this easy transformation might just spark your next project.
This is a very heavy picture post! You might want to grab a cup of coffee or your other favorite beverage.
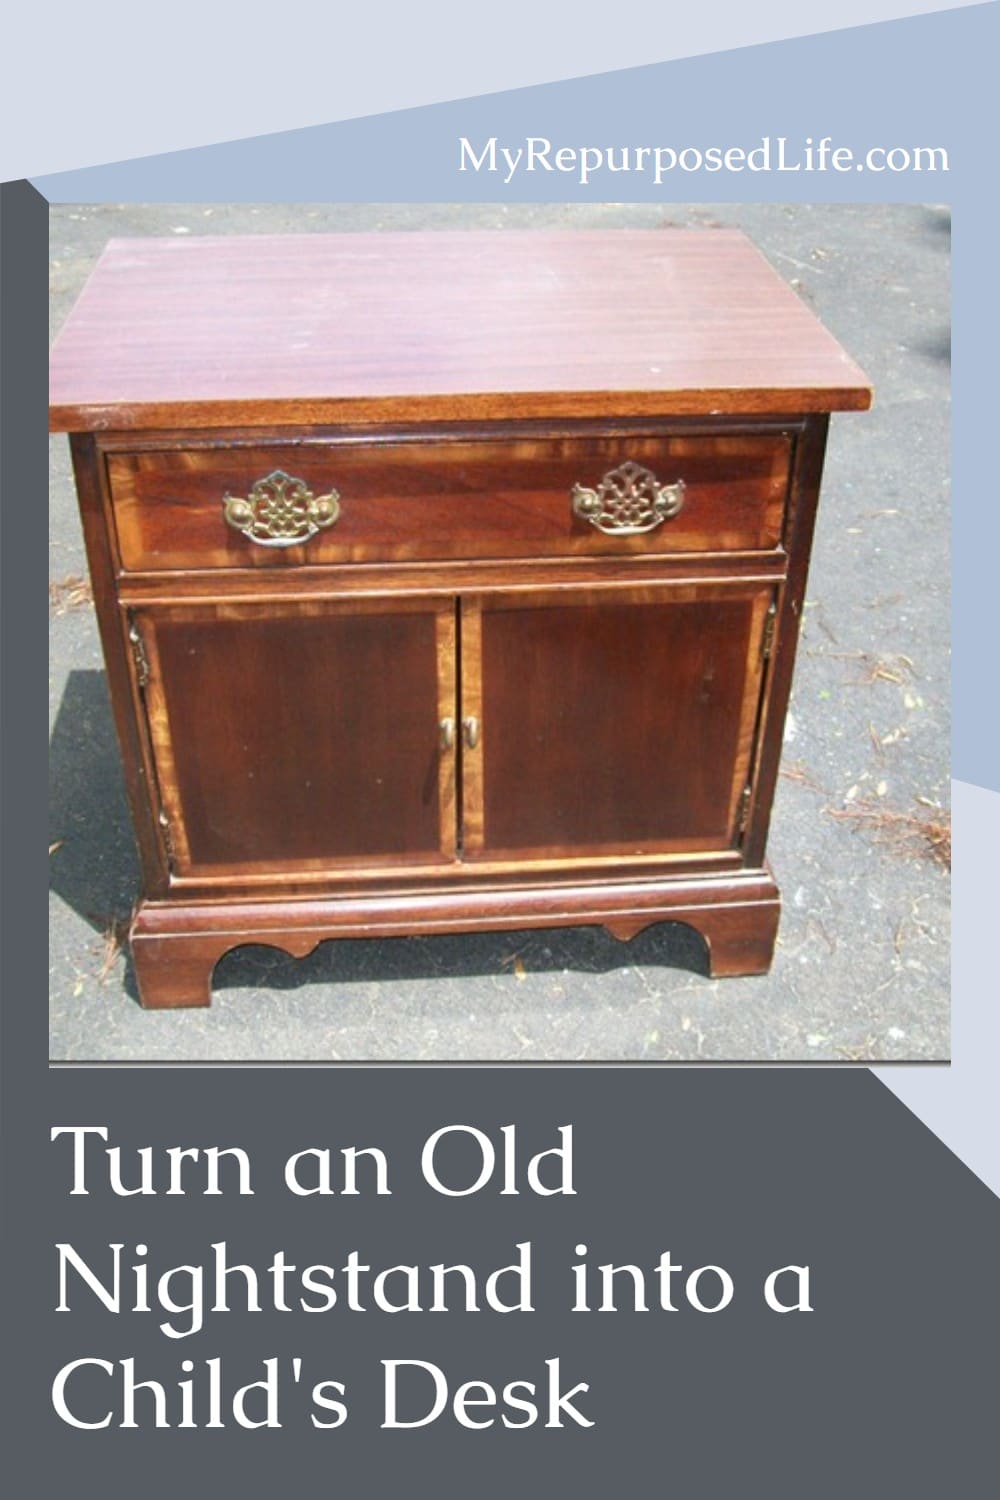
Cheap Yard Sale Nightstand

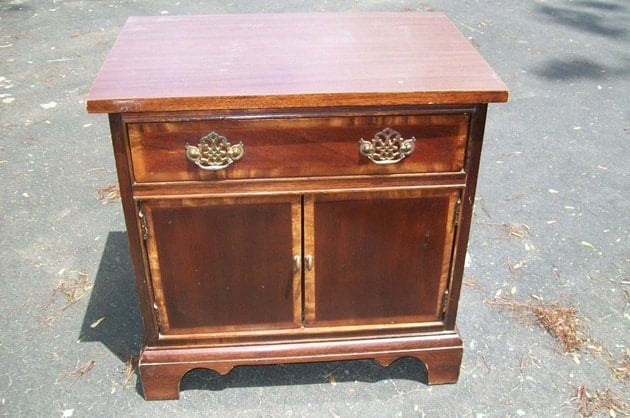
I got this nightstand/side table last year at a yard sale. After a year in my garage, it suffered some water damage. (We had a very wet spring and early summer)
Inspect Furniture to Assess Damage

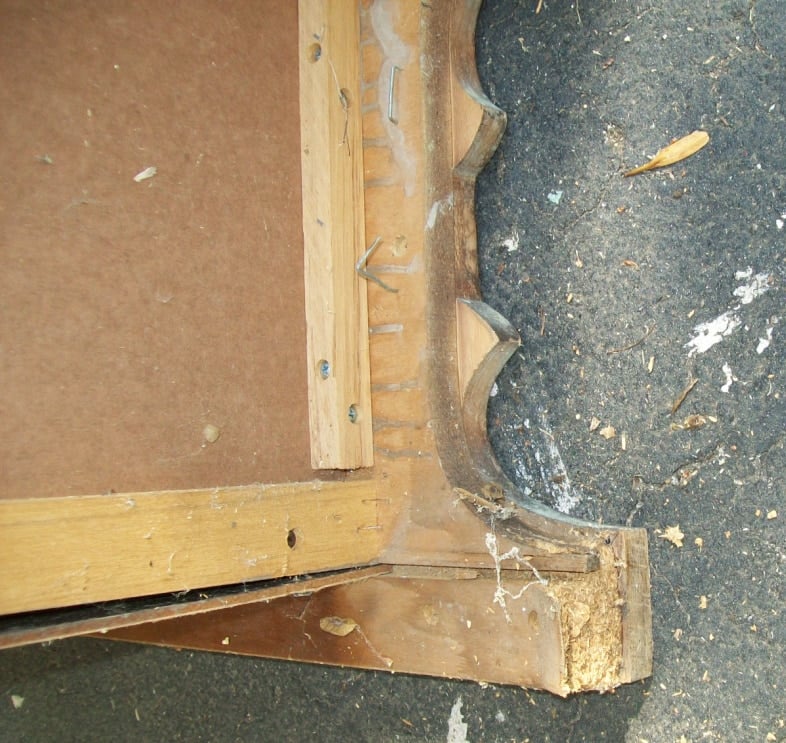
However, I wasn’t going to throw out a table with good bones.

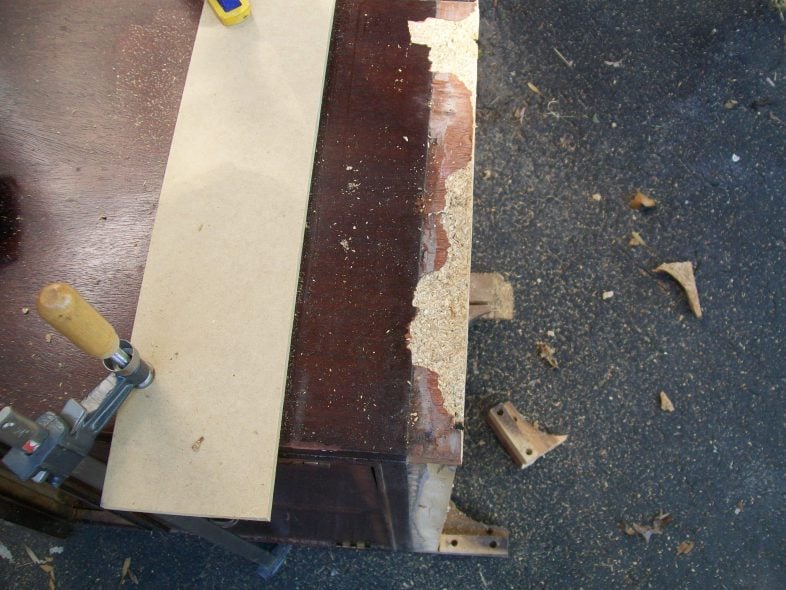
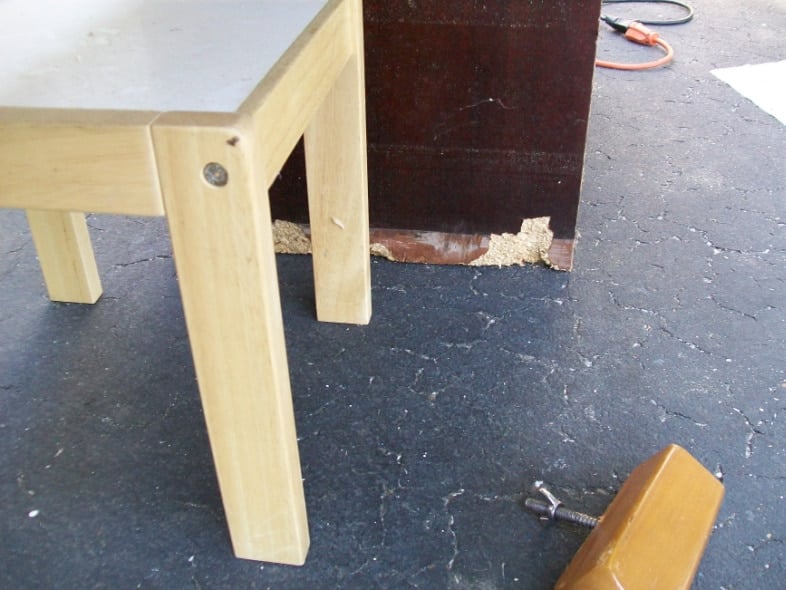
I pried off the bottom trim and used my circular saw to trim off the rotten wood. Clamping a new piece of lumber acts as a guide to ensure a straight line.
Designing a Repurposed Nightstand Desk

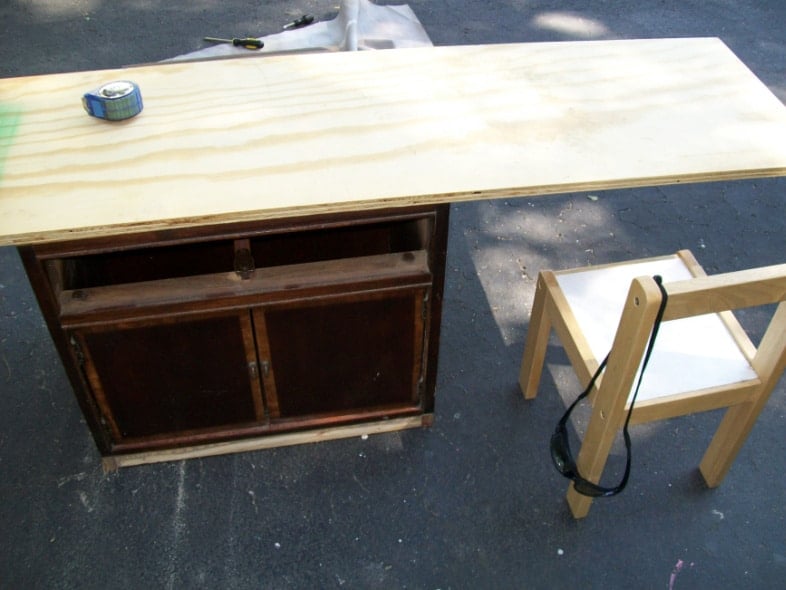
I located a piece of plywood in my stash, and it was nearly the PERFECT size to turn this nightstand into a kid’s desk. Adding a chair to see if it all comes together to suit me.

I removed the top from the table by locating the screws that were securing it to the base.
I Have Two Options for the Legs

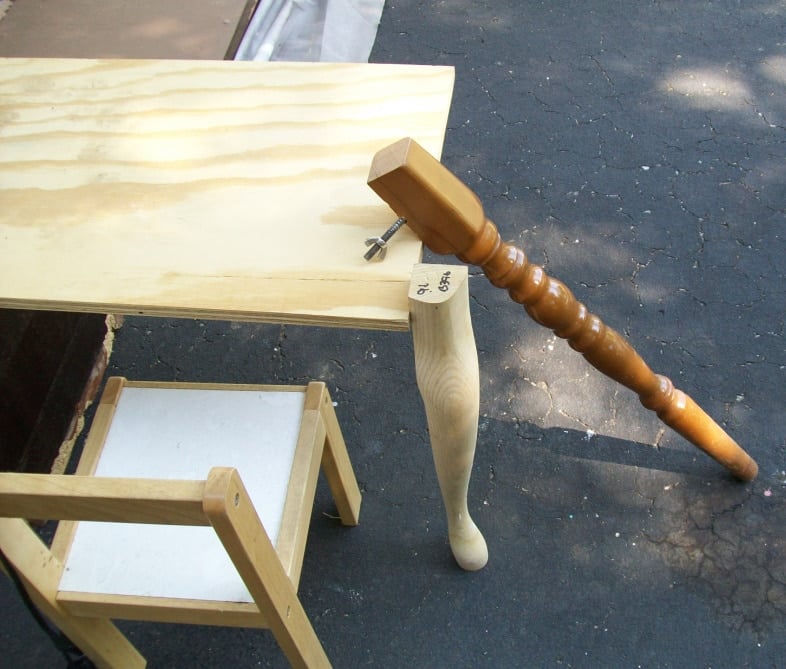
To complete the kids’ repurposed nightstand desk, I needed two legs. I have a couple of options, including a Queen Anne-style leg and a turned kitchen table leg.
Using Plywood is a Frugal Option

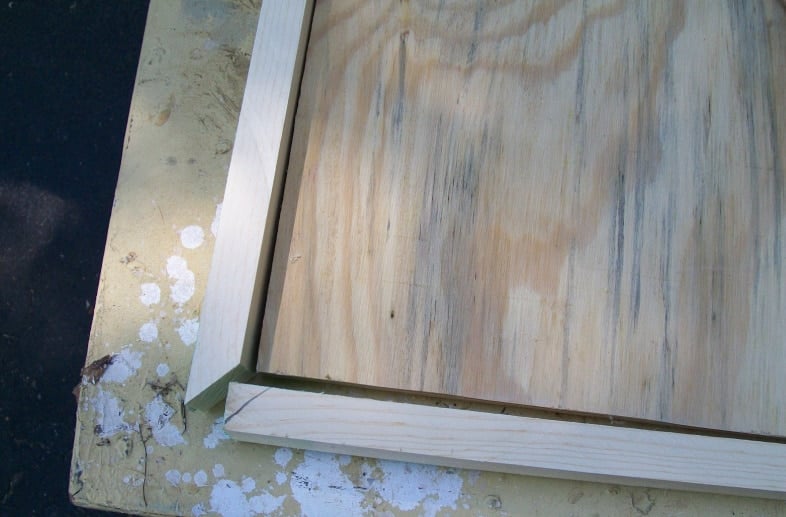
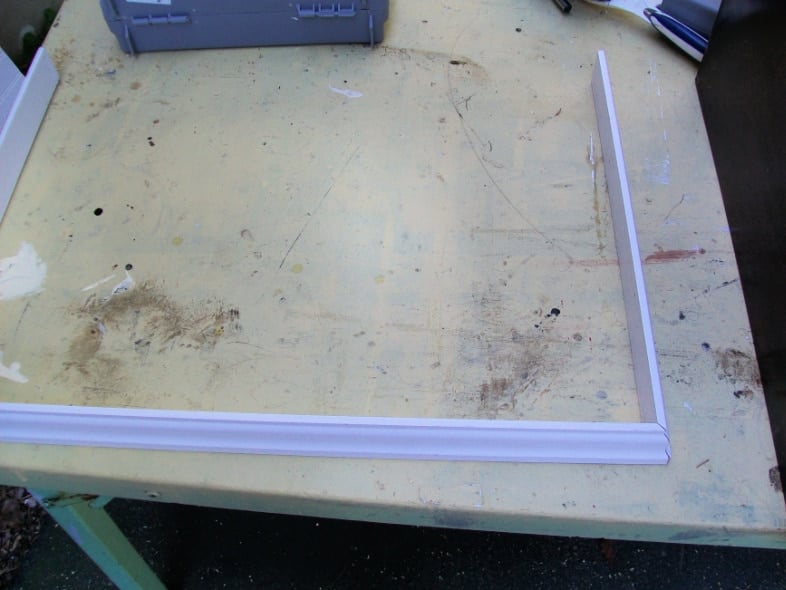
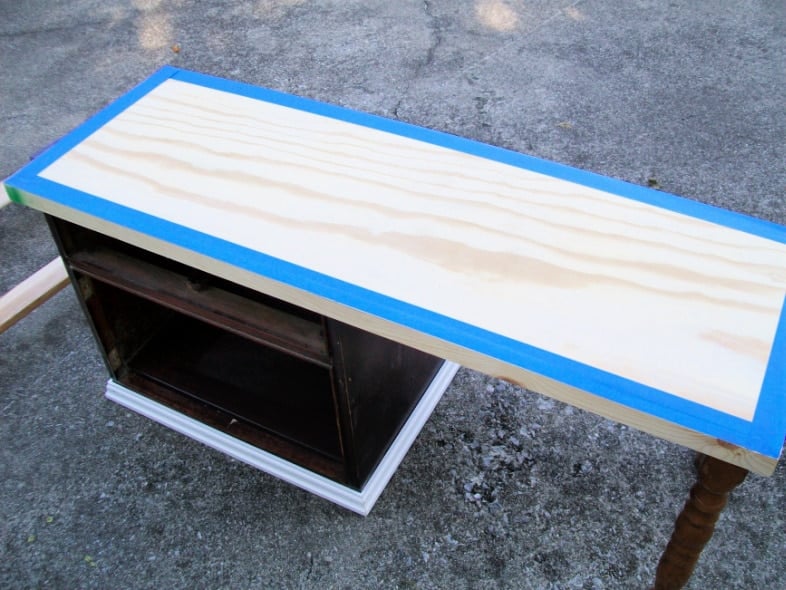
I wanted to frame out the top of the plywood so that you wouldn’t see the raw edges with small pieces of trim. In this photo, I had already cut one on the miter saw.

I mitered the corners. This trim will give the repurposed nightstand a more finished look, eliminating the raw edge on the plywood.

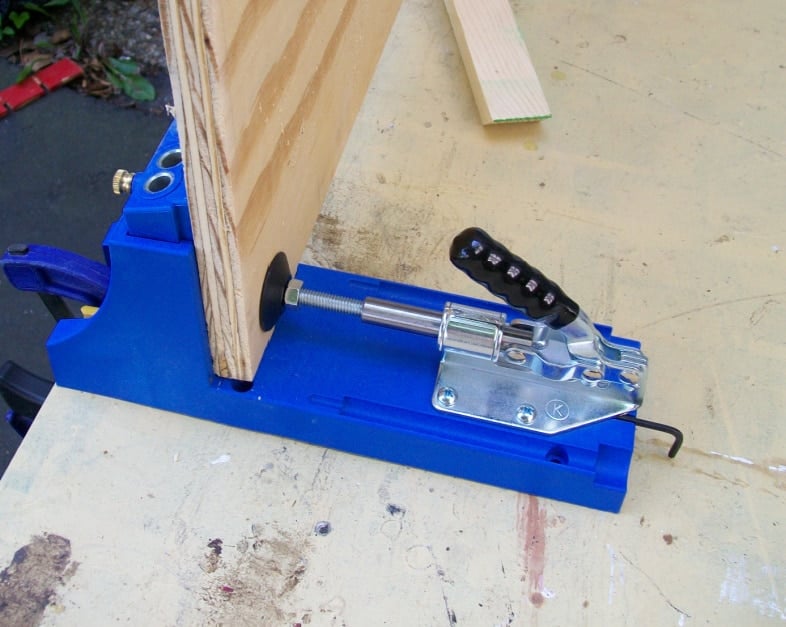
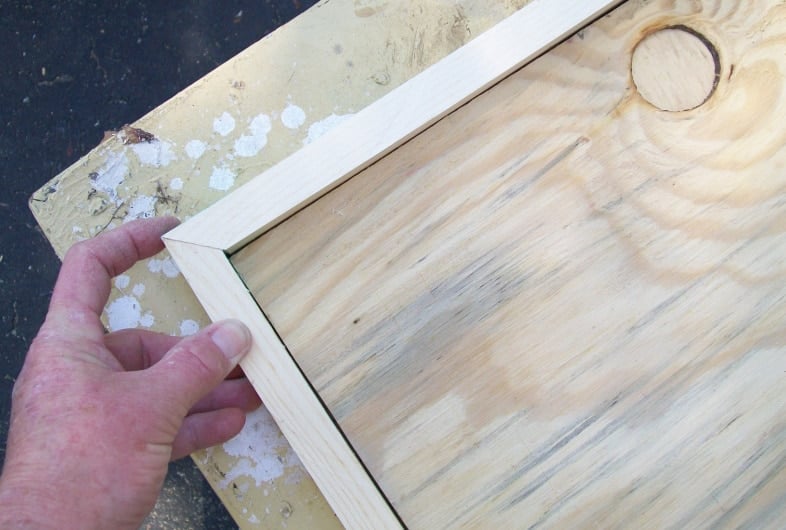
I used my Kreg Jig® K4 to make pocket holes in the plywood, allowing short pocket hole screws to attach the trim to the plywood.

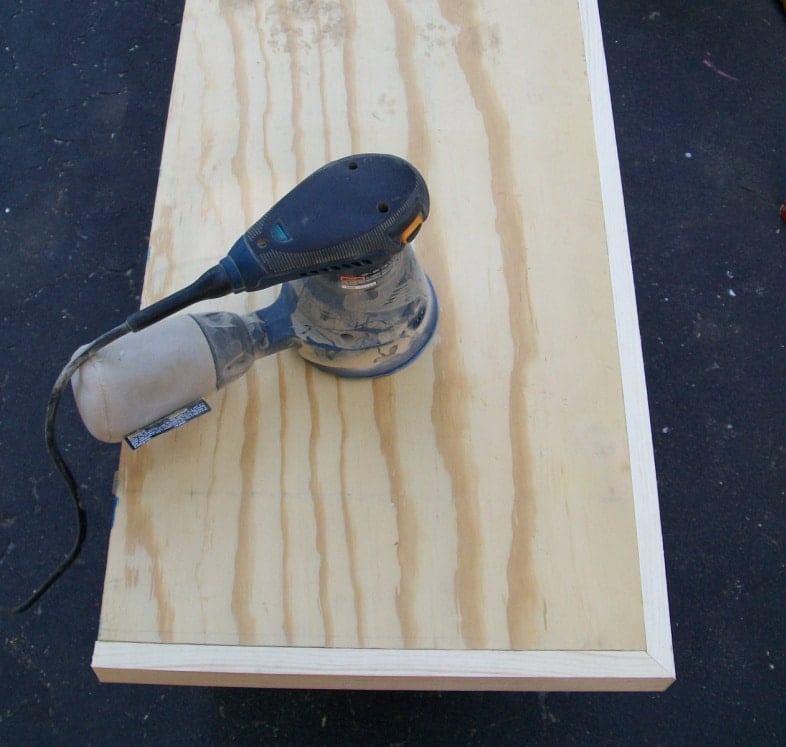
I screwed the facing onto the plywood, then sanded it all down with an orbital sander. Sanding the edges of the trim on both sides and the front will make the joint look flawless.
Repurposed Nightstand Desk in Progress

The new kid’s desk, made from a nightstand, is quickly coming together.

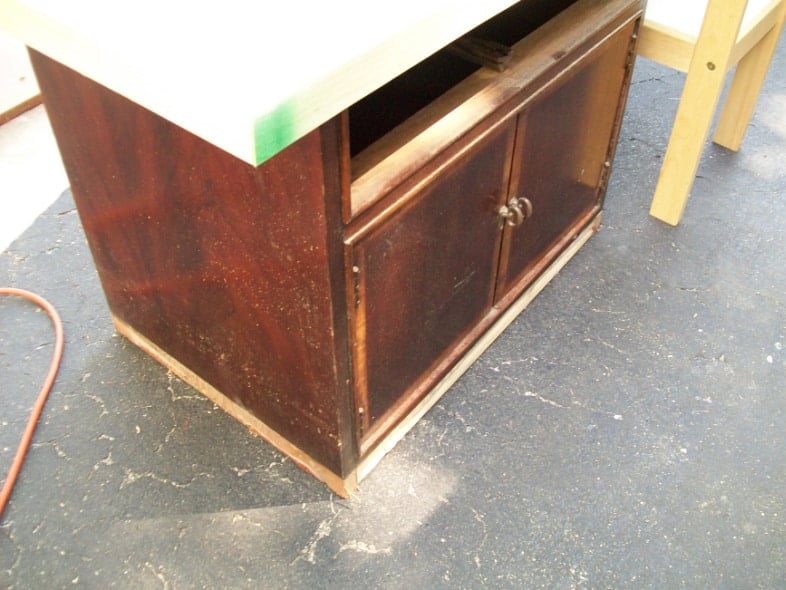
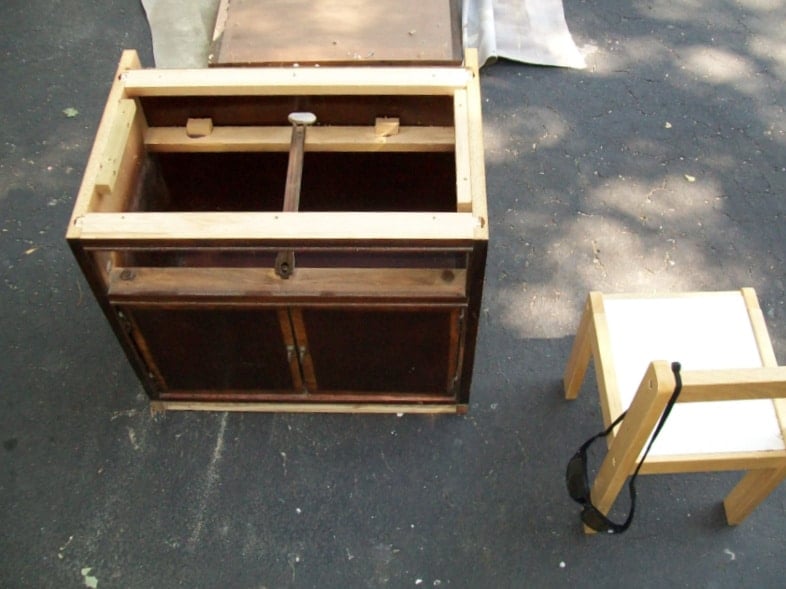
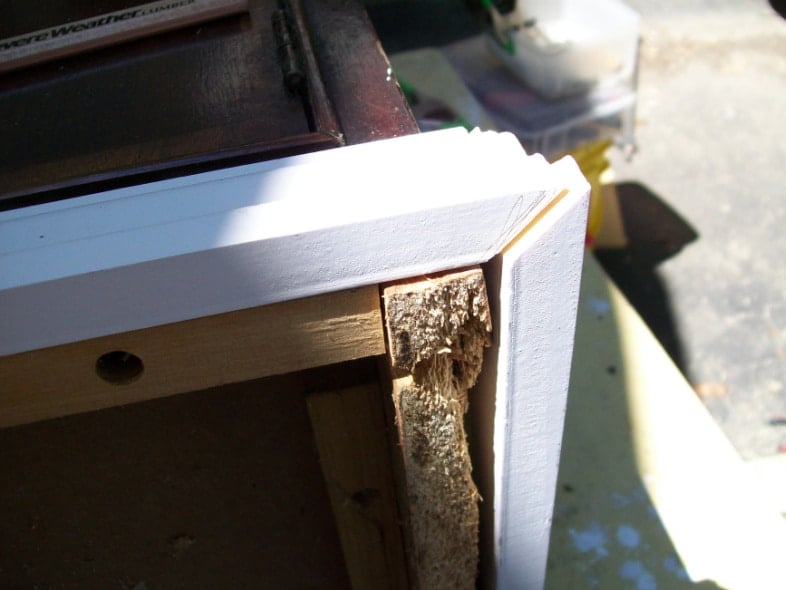
The left side and front of the nightstand are in rough shape.
It’s Time to Address the Trim Situation

But the right side requires a significant repair.

First, I grab some molding out of the garage and get busy measuring and sawing.

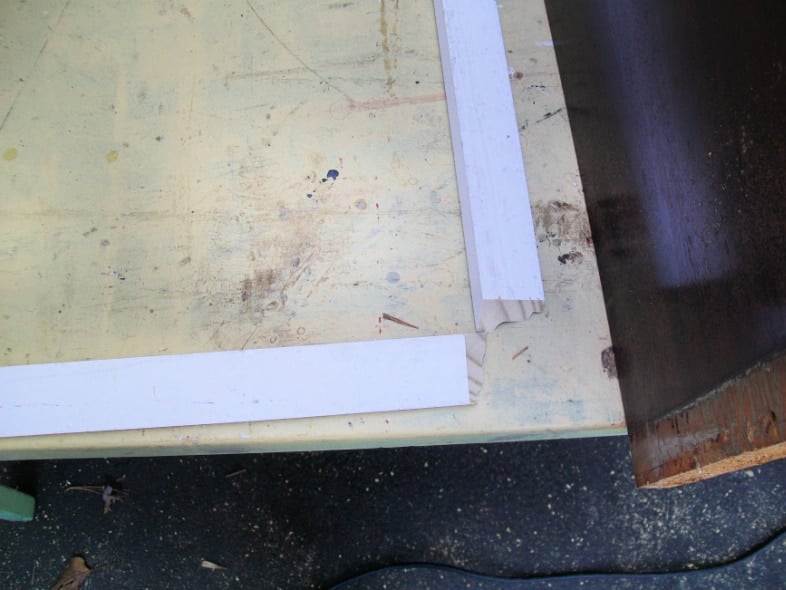
I want to explain how to trim out the bottom of a piece of furniture. I hope you can follow along with the pictures below.
Tips for Adding New Trim to Old Furniture

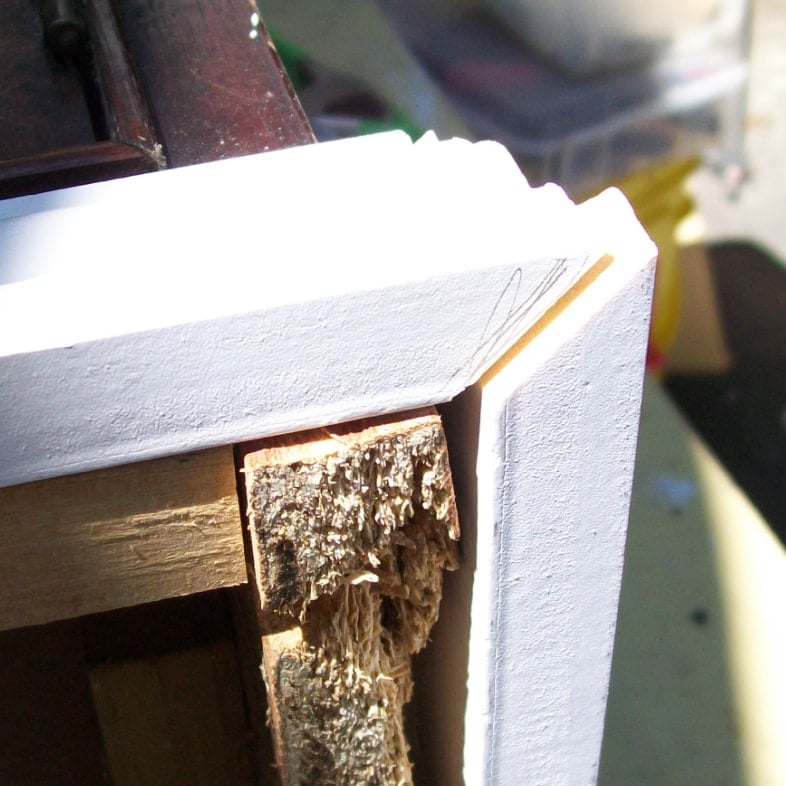
Do you see that line? It’s not a measuring line, it’s a directional line. When I lay my board on the piece of furniture, I draw a line indicating the direction I need to cut the wood.

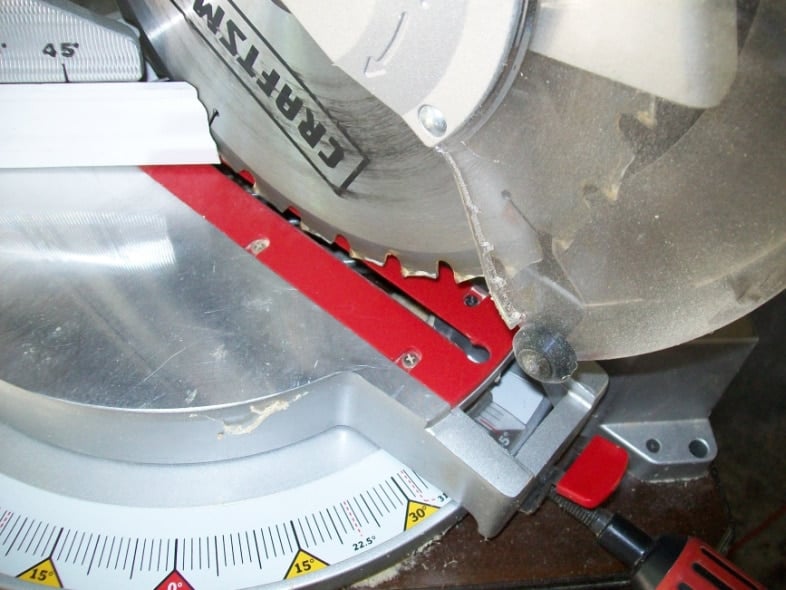
To the compound miter saw. I cut it at a 45-degree angle, with the flat part of the board directly up against the fence.

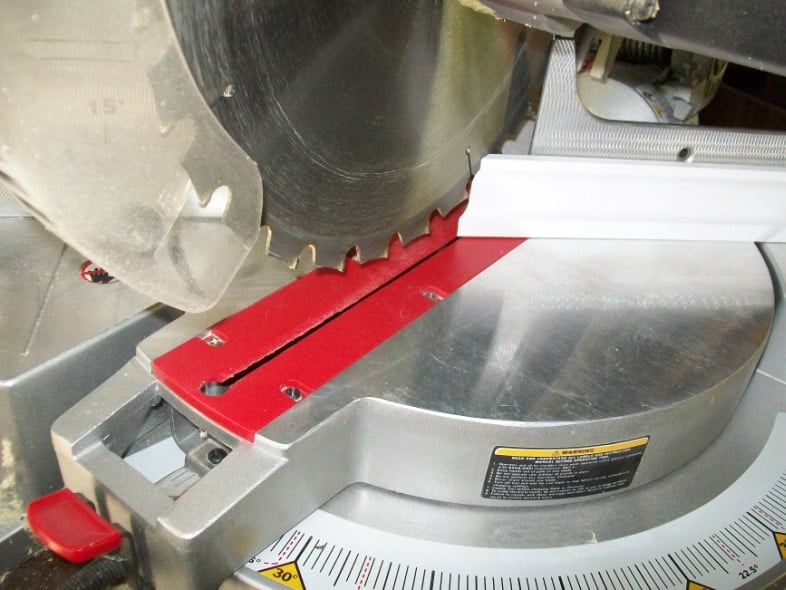
For the opposite end, I slide the saw to the other side. Again, holding it up against the fence of the saw.

When I do this trim, I do the angles/corners first. The left and right pieces I cut a little long, because I can always straight cut them to the correct length. I nailed it in place with my nail gun.
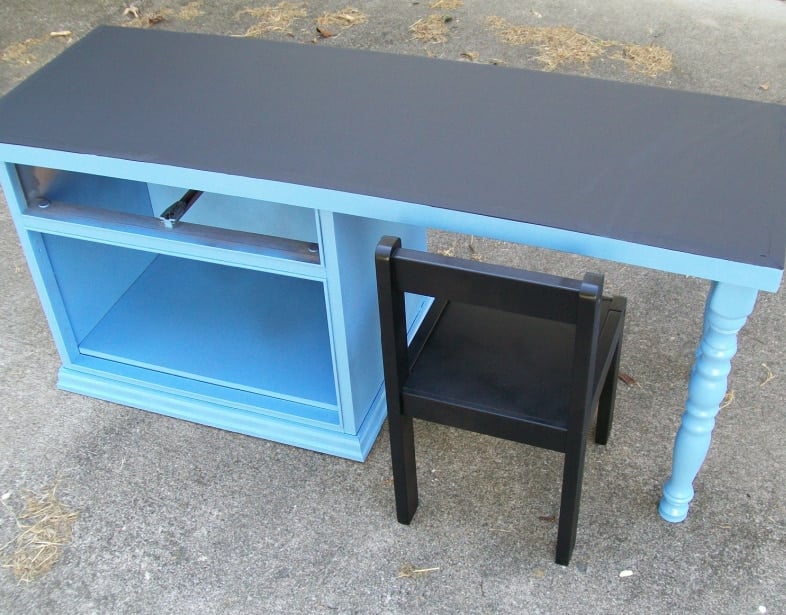
Add Legs to the Desk

I measured, marked, and cut the legs to the correct height.

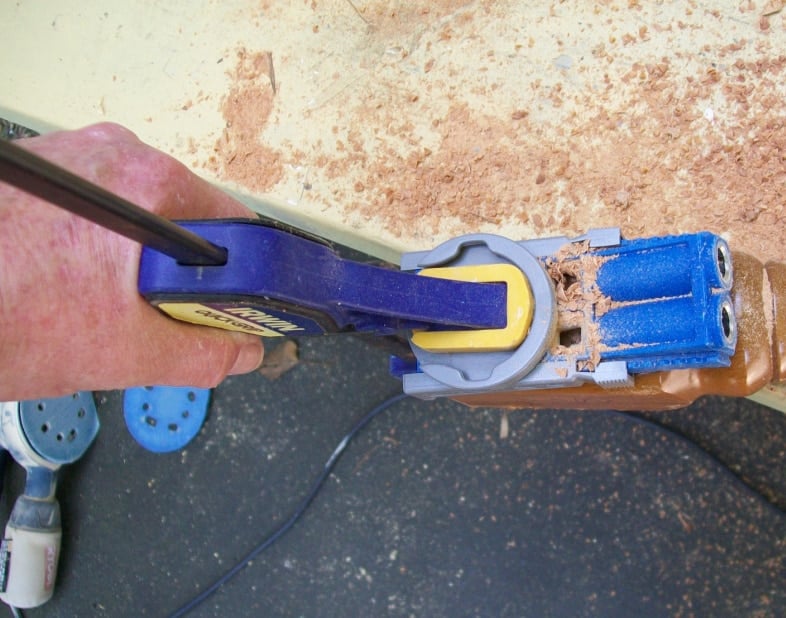
Now, I’m on to the legs. I used my Kreg Jig to make pocket holes on the legs. The pocket hole screws will secure at an upward angle into the bottom of the desktop.

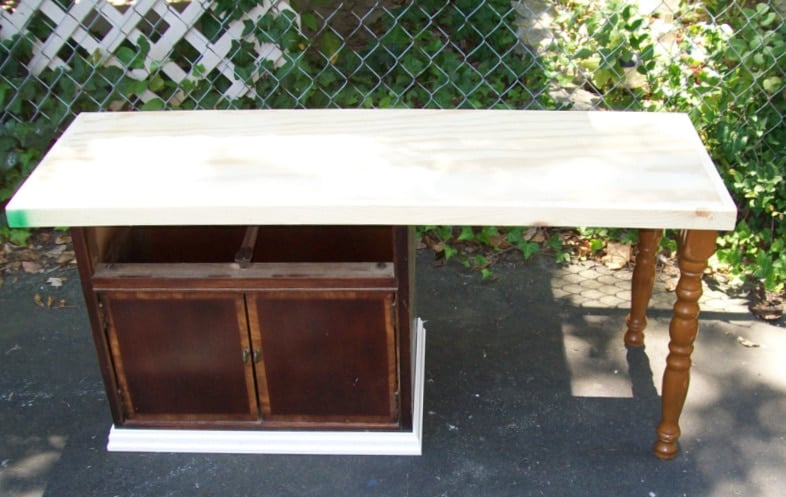
This is a dry fit to make sure the legs are at the proper height.

In this picture, you can see the pocket holes I drilled to attach the facing. I placed the leg on the piece and drew lines to determine the direction of the pocket holes on the legs.

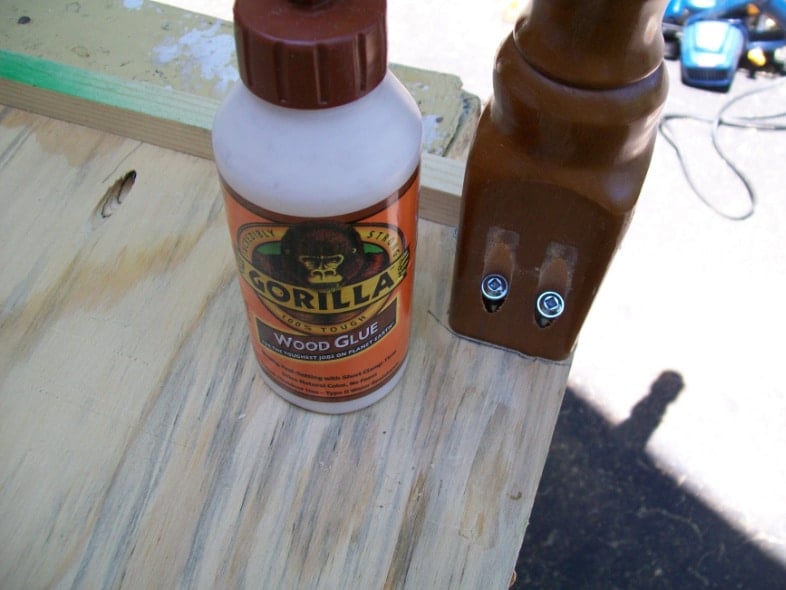
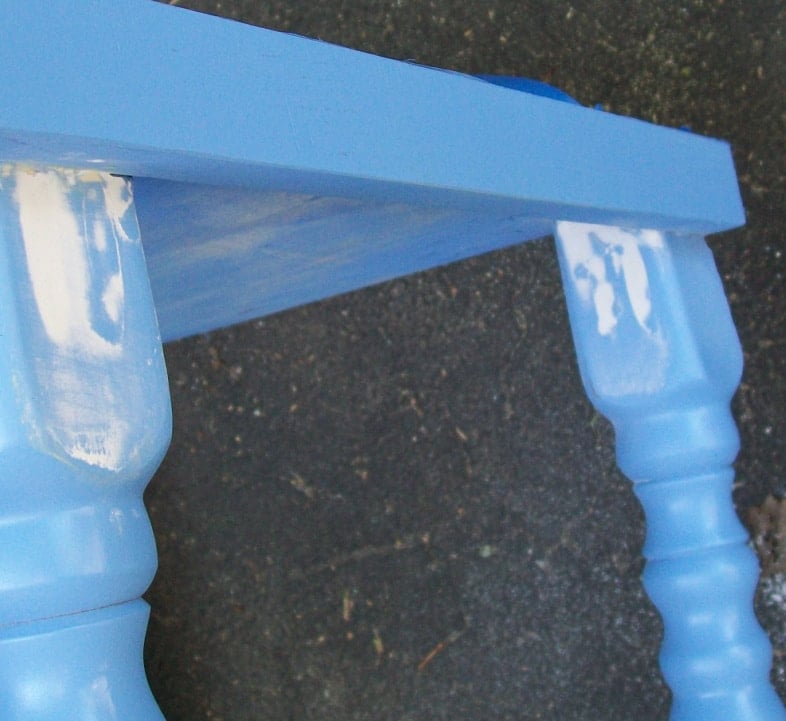
Why did I use Gorilla Glue with pocket hole screws? I typically don’t use glue with the pocket hole screws, but I wanted to ensure I had a great hold when I secured it with my pocket hole screws.
Prepare the Kids’ Desk for Painting

After I got both legs on, I started taping off the desktop for painting. I taped all around the top . . .

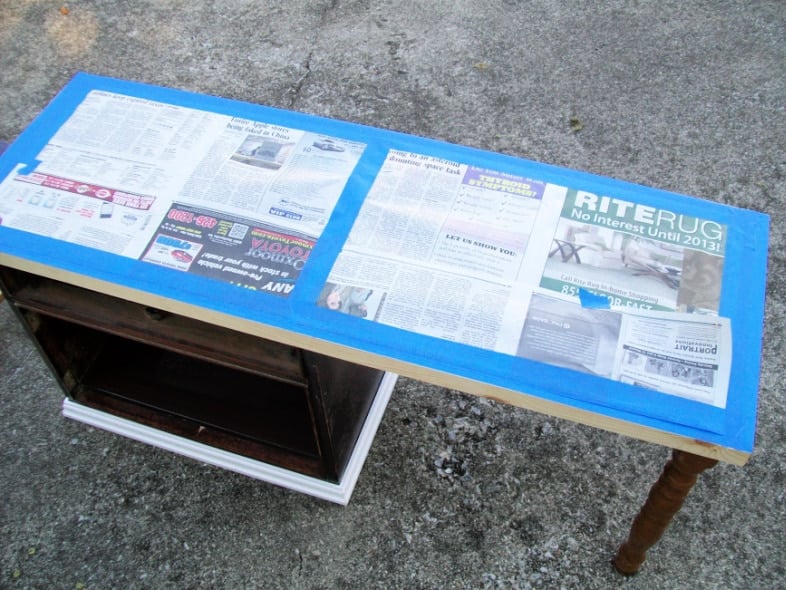
… then I put a newspaper on top and taped it again.

Then I broke out the spray paint! Last year, my sister gave me tons of spray paint, and I’m about 1/3 of the way through the stash.
Add the Finishing Touches to the Nightstand Desk

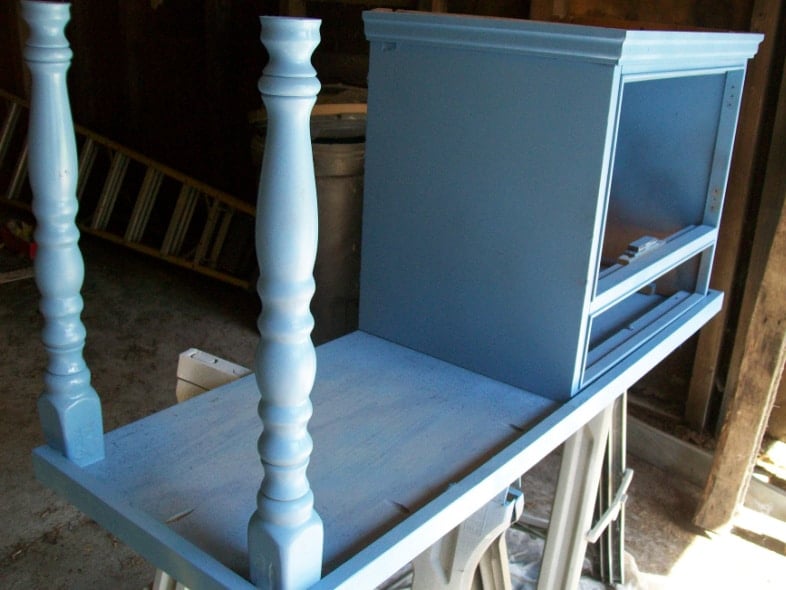
I filled the holes with drywall mud. What does this color (blue) make you think of?

After I finished spray painting the desk, I applied several coats of chalkboard paint to the top.

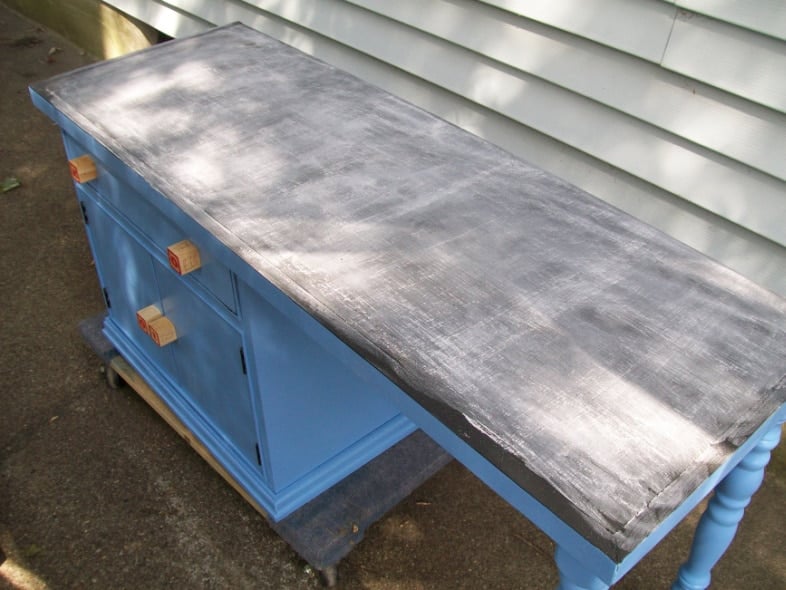
I conditioned the top with chalk.

Once I started spray painting it, I thought to myself, this looks like a Smurf! I was trying to make the desk non-gender-specific.
I’d love for you to share this idea on Pinterest with your friends.

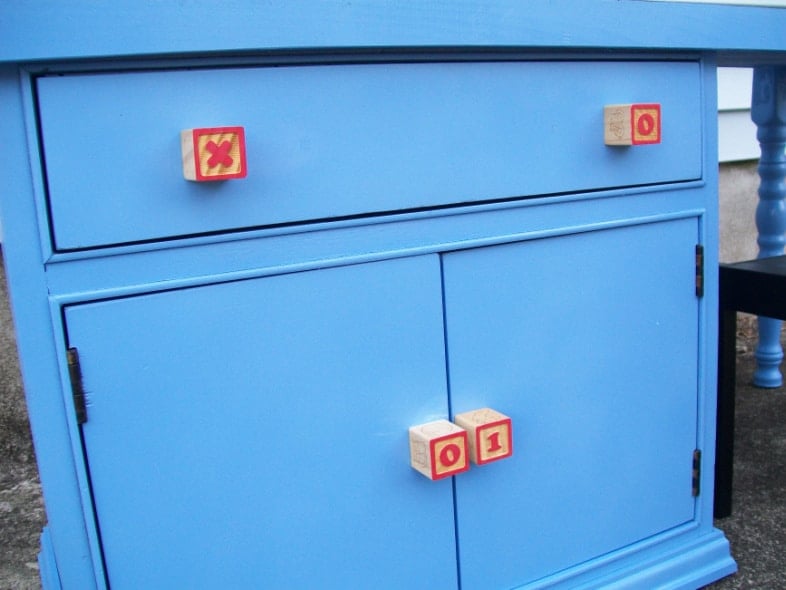
What do you think of the knobs? The original hardware is not suitable for children.

What have you repurposed lately?
gail
Related Content: See More Desk Projects Here
We make these little desks but in our effort to repurpose using all repurposed items, we use a leaf from a table ( one that no longer has a table of course!!) They are generally already the right depth and often times will have a rim that did match the table but now becomes the perfect leg brace!! Try one !!
Jo,
Thanks for stopping by and leaving a comment. Great tip! Although I’m having a little trouble understanding exactly how you bring it all together. I have a couple of table leafs in my stash…
gail
Wow! I am so totally amazed by what you do. I “save” clothing for myself and my family, but have never tried furniture. Maybe some day. In the meantime, I just enjoy looking! 🙂
So cute, beautiful work!!!!
You are so talented! I love this idea! I am looking for re-purposed items to sell in my online store, http://www.latter-daycrafters.com Take a look and see if there is any of your items you would like to list for sale then let me know what you think! Trina
I think you should be crowned “Queen of the Repurposed World”. That is one heck of a transformation. Well done!
What a Lovley job 🙂
and do not miss…..
S
A
T
U
R
D
A
Y
S
H
O
W
O
F
F
WELCOME 🙂
Håkan ( The Roseman)
Cleaver idea! I do love the blocks as hardware and the poppa snuff shout out!
The millers
This is amazing!! I love how you made the transformation but the cutest detail is the knobs!! This really inspires me to think “out of the box” and imagine what furniture could be instead of just what it is. Thanks so much! 🙂
This is adorable. Love the wood blocks for the handles.
Sharon
That is the cutest darn thing! How creative! I can think of lots of shorties I have around that could fill in for this project. How cool!
Very nice! I love the way it turned out. I did sort of the same thing a few years ago for my nephew. Only instead of legs on the end, I made a book case and turned it to the side. Great job Gail!
Holly
Thats just amazing! Trish
Gail, I love your creative, think outside the box, problem-solving thinking! your kid’s desk turned out adorable!
Brittany
Thanks Brittany for checking out my projects! I’m lucky to be doing what I love to do!
gail
Wow. This is truly amazing! This project was obviously A LOT of hard work, and it turned out beautiful in the end! LOVE the chalkboard top! ~Becka
Wow, that turned out great! It was a terrific way to repurpose that nightstand. I can’t wait to get my jig to try it out!
Another ingenious idea from you! I “Love” the handles! I can also see a kid really enjoying that chalkboard desk top!
Great idea! I just happen to have 2 sets of night tables in my shop. Guess what will happen to one set. I love the step by step pics.
Now that is repurposing at it’s best!
What a great idea, love how you think! The chalk board paint is the perfect touch. I see you have two Kreg jigs, lucky lady 😉 Oh and the knobs, darling!
Hey sweet girl! 🙂 Glad you liked my mirror molding post, I love how much it changed the room. 🙂 Funny that you knew who was behind the camera before I told….was it the angle of him looking up to me in the video that gave it away?! lol He’s such a good little boy! I felt weird going the vlog, but I figured nobody really cares what I look like as long as I’m teaching them something. 🙂 hee hee hee OH and yes I do know about the caulking guns with the pokey things on them…I’m just too cheap to go buy a new one as long as this one is still working. 🙂 lolLove ya girl!Missy
You are so creative! I would have never thought to make a desk out of a night stand. Love the chalkboard top!
SO gorgeous!! Would LOVE it if you would link this up at my turquoise lovin’ party going on right now!! 😉 http://www.sweetlittlegals.com
Looks fantastic!! You really did a great job repurposing that night stand!
Very creative Gail! You may just have given me an idea. . . Thanks for sharing!
jen
This is super cute! I like the knobs! I finished a large vintage library table with chalk board paint on top then mod podged newspaper on the legs. Looks cute I think!
I love this! What a great and creative way to use old pieces of furniture
Coley @
http://www.whatyoumakeit-coley.blogspot.com
You are so good! Awesome transformation, Gail! Love it! 😉
You’d be proud – I used my air compressor/staple gun finally! haha! Thinking the Kreg Jig is next on my list.
Thanks SO much for the vote! Your help is appreciated!
Roeshel
this is amazing! So creative, great job!
xo dana
thewonderforest.com
Yeah, you’re a GENIUS! Seriously. You come up with things that are brilliant! Thank you for the tips on the miter saw…I need to get out there and try it again! I also love the knobs! 🙂
That childs desk is fantastic. I really love the furniture tranformations you do. I so want to try some myself.
OK, I’m speechless….I could NEVER seen this vision like you did. It’s SO CUTE!
Wow this is a serious project with great results!! You know how to work the tools!
I love the tools you work with and am making a wish list for myself!
This little desk…is the bees knees! I love it!
I think it’s my favorite too!
some lucky child is going to get this cute desk an make lots of memories there!
Pat
WOW! What a transformation! You’ve done an awesome job! Looked like it was alot of work, but you pulled it off. You amaze me with all your talent!
This project is the best! What a great repurpose! You are so SMART, Gail! I don’t think I’d have thought of this in a million years.
I really love the knobs~ and the chalkboard top.
you are so stinking clever!
and papa smurf rocks!
you are so stinking clever!
and papa smurf rocks!
Gail
This is one of the cleverest ideas yet!
I often pass up single nightstands but this would make a super gift for the grandkids.
May I borrow your idea?
This is amazing! I love how your mind works. Super cute project, and love those pulls!
Hey, Gail,, that is just so cute. Never can tell it used to be a nightstand table. Some little kid is gonna love it.
That’s so smart! And I love the blue.
I’m probably not repurposing anything this week, but I am doing a mirror removal in the bathroom. It’s glued to the wall. Ugh.
Great job! I love it! 🙂
adorable! 🙂
O-M-G…is there anything you can’t build?! This is freakin’ adorable! Love how you used those blocks for the knobs…genius~
I wish you lived around here…I just bought a new (to me…it was actually purchased from an estate sale) miter saw, and I have no idea what to do with it…I haven’t even had the nerve to turn it on yet (although I know that it does work). Sadly there was no owner’s manual and I have not been able to track one down yet. I am very intimidated and sadly my hubby knows less about this stuff than I do! LOL! I just knew that I NEEDED it though!
You never cease to amaze me! So cute and what a great job. I bet this gets snatched up quickly. I love the “knobs”
Do you have a “photo album” at your booth of all the projects you have made?
Jan
I never would’ve dreamed of turning a nightstand into a desk like this. It’s genius!
This is so neat! You did a great job, and I especially like the blocks you used as knobs… so cute!
Absoultely Fabulous! Love the smurfiness too 🙂 I bet this desk will get sold in a hurry!
GENIUS, Gail!! I LOVE what you come up with!! The desk is so fun!!!
Your recreations leave me speechless every time, great job, love the desk! What amazes me the most is what you are able to see the potential of an old piece of furniture. Here in Frankfurt in Germany people can bring all unnecessary items on Tuesday evening out of their house and just leave them on the pavement for Wednesday rubbish collection. I check out the little piles of furniture every time in the hope of spotting something nice…but my eyes always let me down. Any tips?
Whodathunk!! What talent you have!
I like the transformation. Great job of repurposing the nightstand and also making the top a chalkboard. Some child is gonna love that desk.
Love the whole thing! This is truly awesome. Thanks for showing how to attach legs w/pocket holes…I’ve been wondering about that.
Your talent amazes me, and you are an inspiration. Good job!