
Small Sofa Side Table | Custom Build
As an Amazon Associate, I earn from qualifying purchases.

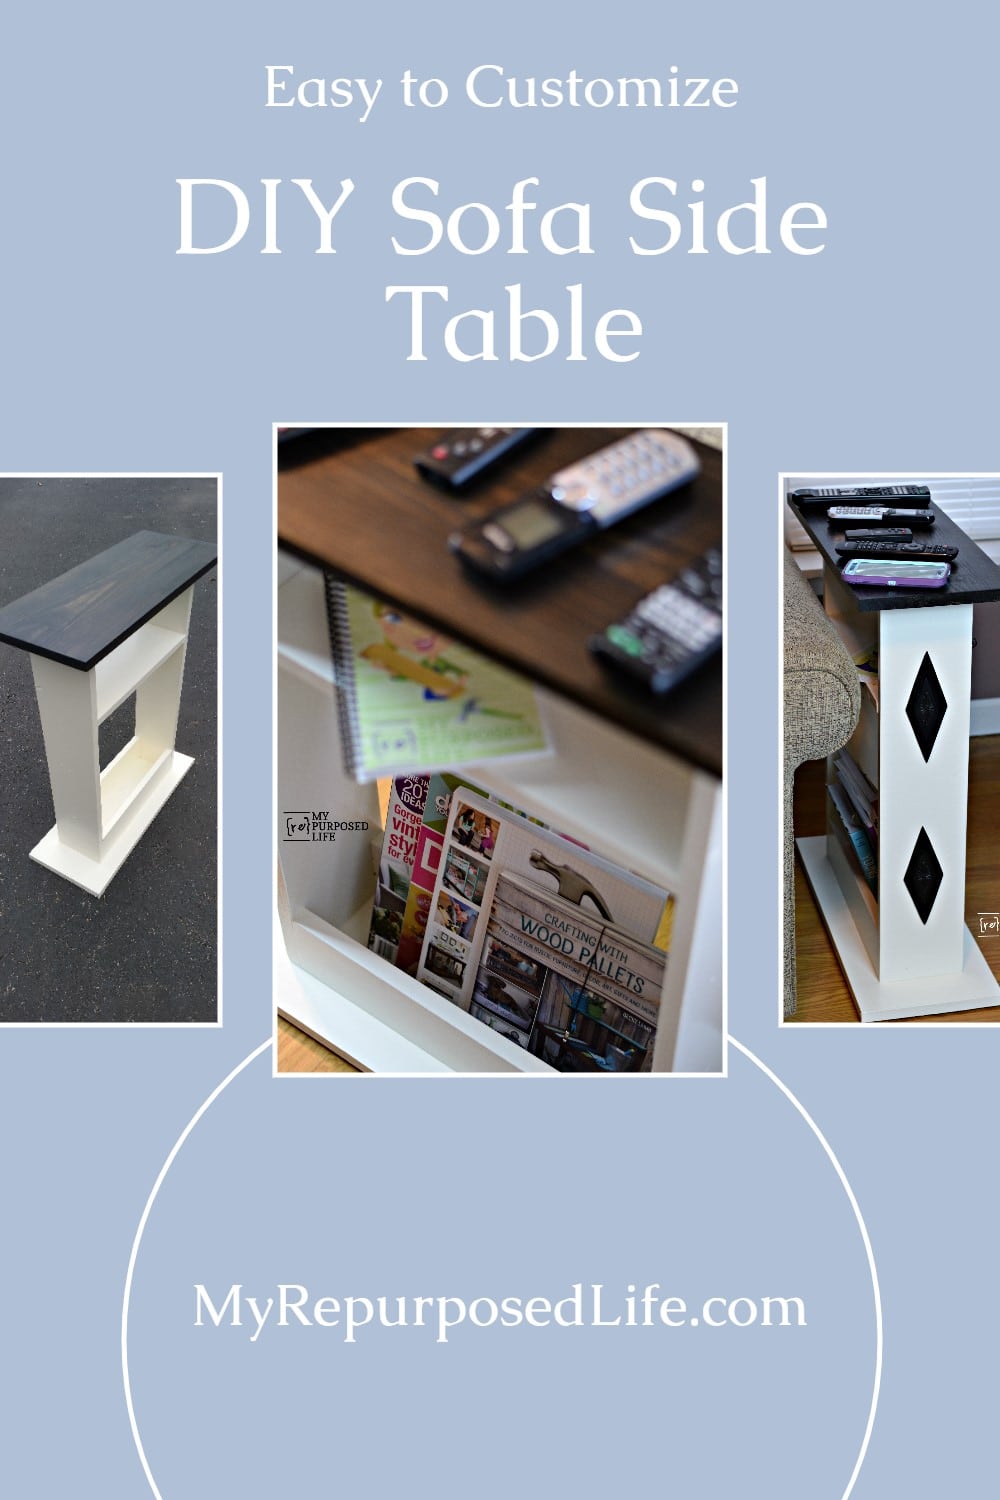
I’m so excited to show you my small sofa side table that I custom-built for my little corner of the world. I’ve been needing a solution to a problem, and since this month’s Power Tool Challenge is all about home décor, I stopped repurposing and made something for myself.
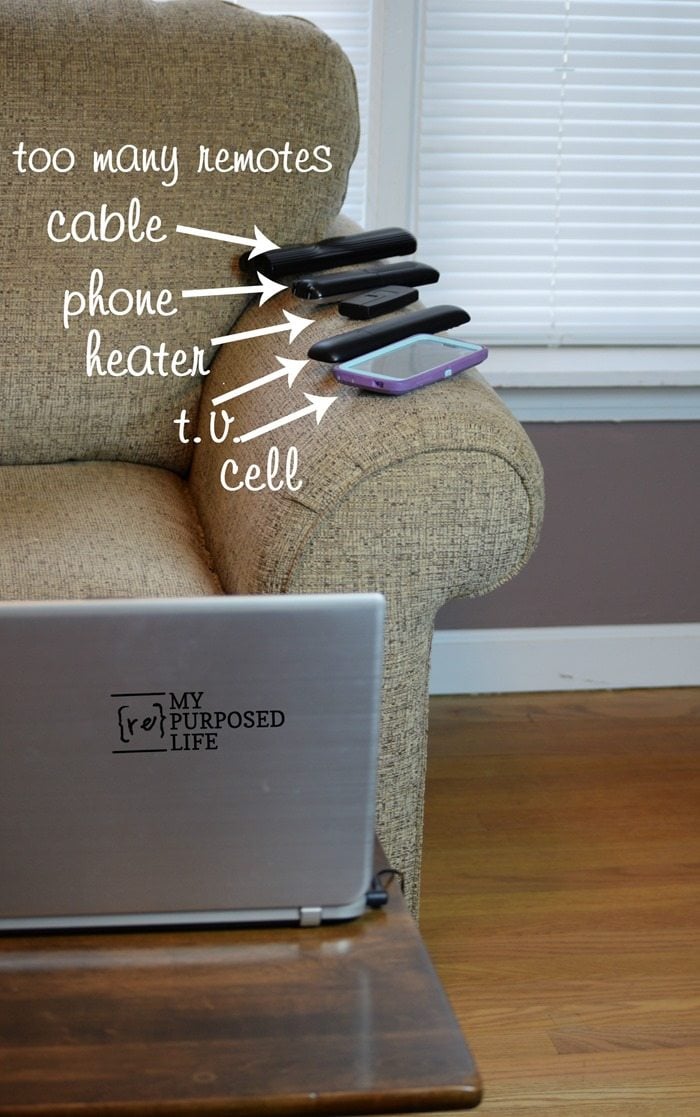
This is/was my dilemma. Every night as I work on blog posts and such I need all of these random remotes and phones handy. I have been lining them up on the arm of the couch for a long time. I have to put them upside down so the rubber “buttons” help hold them in place and keep them from sliding off.
Because this table is custom, your size will vary.
How to Build a Sofa Side Table
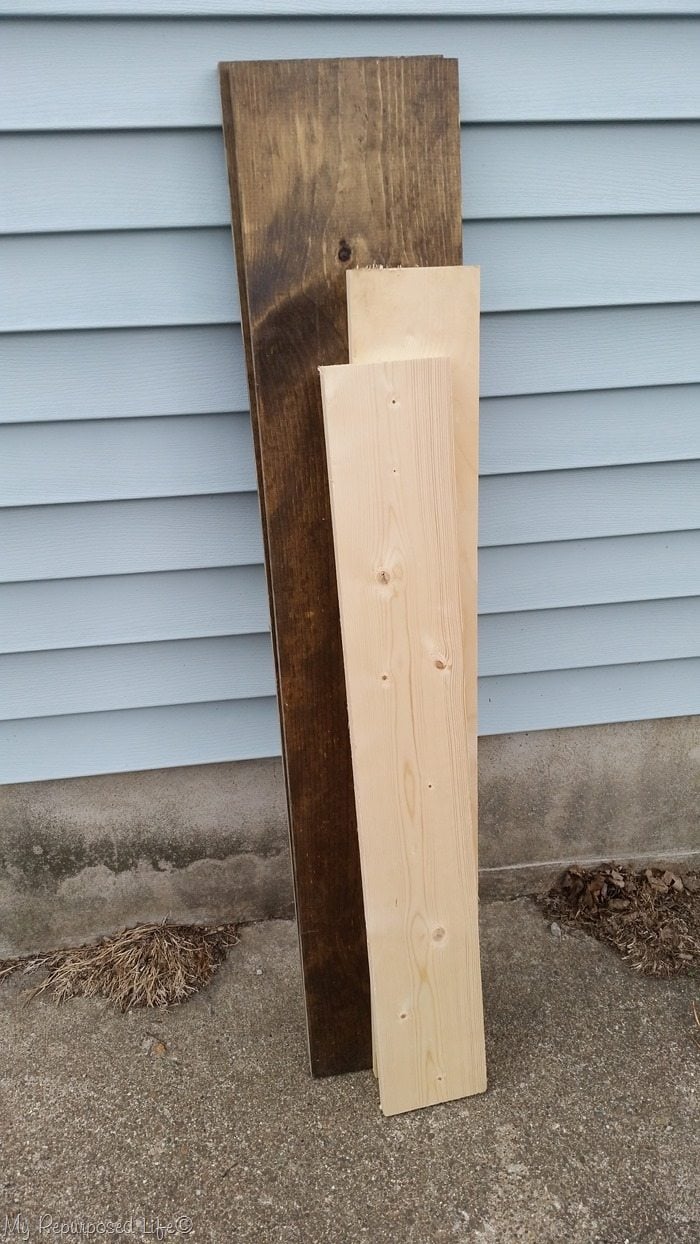
The stained 1×10 is a “hand-me-down” from my daughter Jamie. She used it for shelving when she had an antique booth. The other boards are 1×6. These boards will be perfect for building a table.
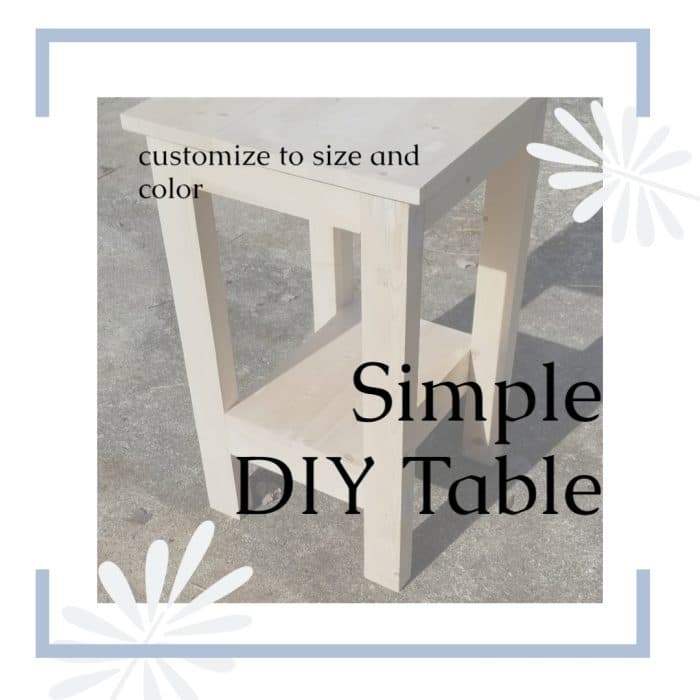
Related Content: Simple Table Build
Measure the Boards for Your Custom Table
You probably know that a 1×10 isn’t 1 inch thick by 10 inches wide. It’s 3/4 inch thick by 9 1/4” wide.
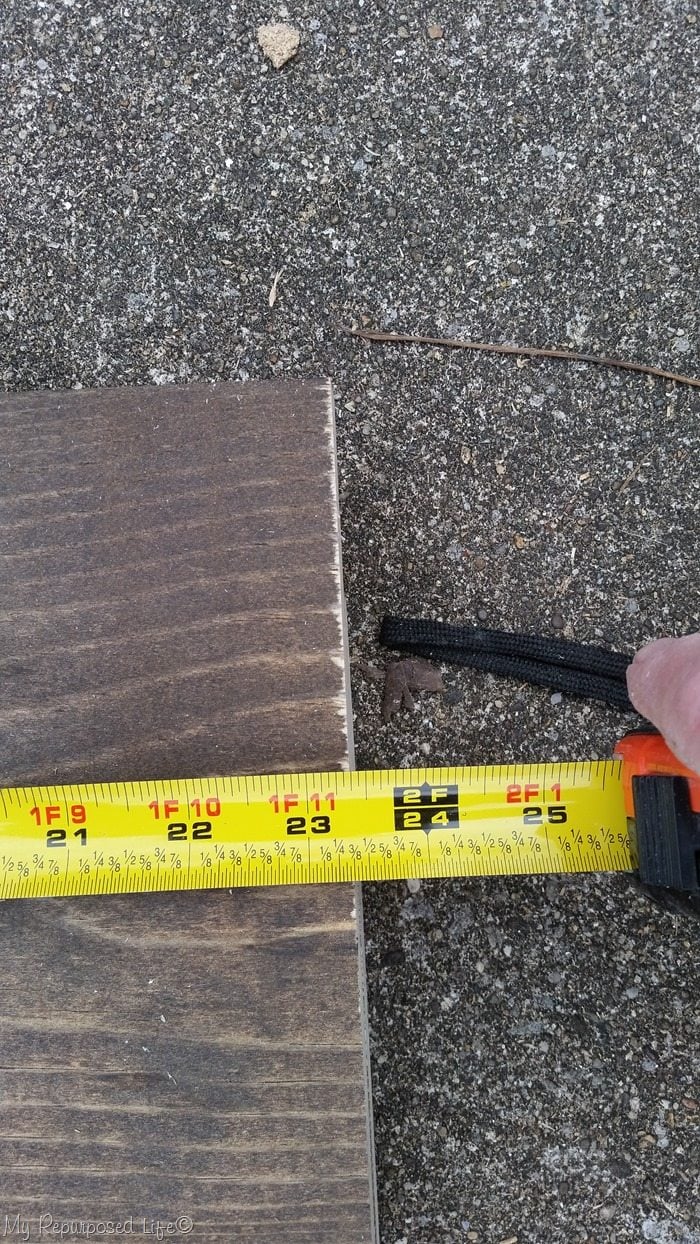
I made very specific customized measurements to suit my needs. Searching on Pinterest, I didn’t see anything that really fit my sofa problem. Most of the sofas are more modern and have straight lines. Mine does not. I wanted my table to run the full depth of my sofa armrest. As you can see, 23” was the magic number for my table. I cut two boards at this length for the top and bottom of my table.
Visit the My Repurposed Life Amazon Store to shop my favorite items.
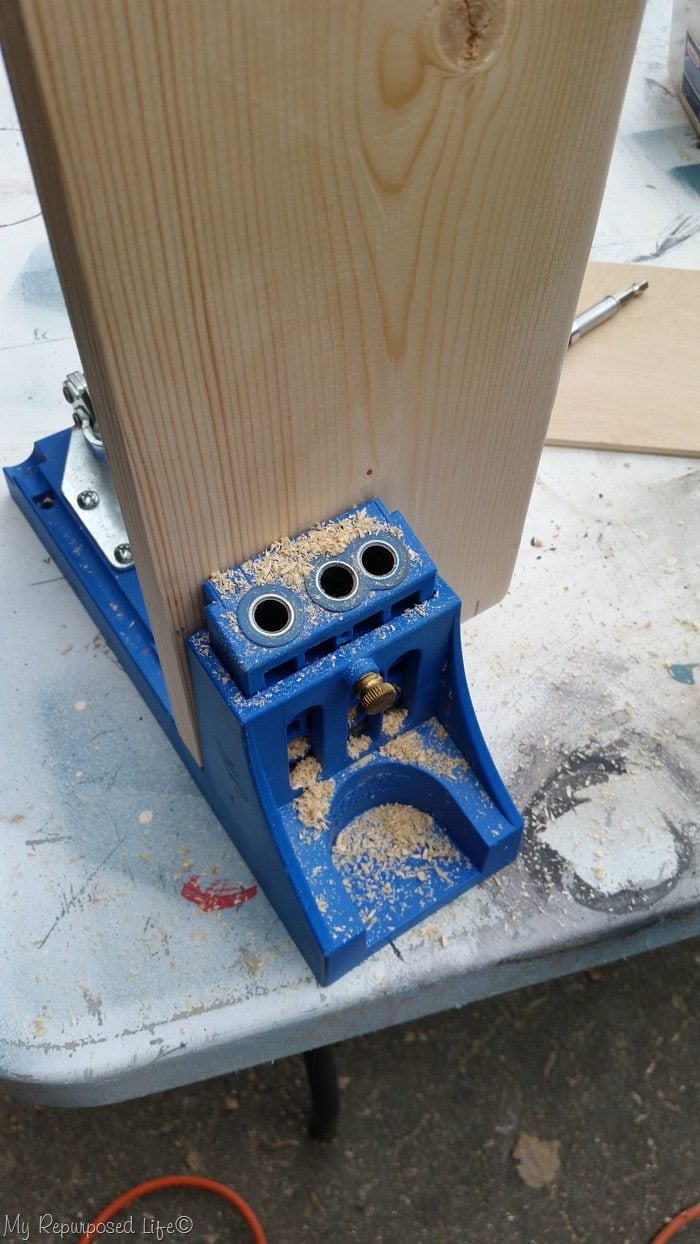
This simple build starts with pocket holes using my Kreg Jig.
If you don’t have a pocket hole jig, you can use “L” brackets. However, if you do a lot of projects, I highly recommend investing in one of these jigs. For more details, see my post How To Use A Kreg Jig
How to Build a Table
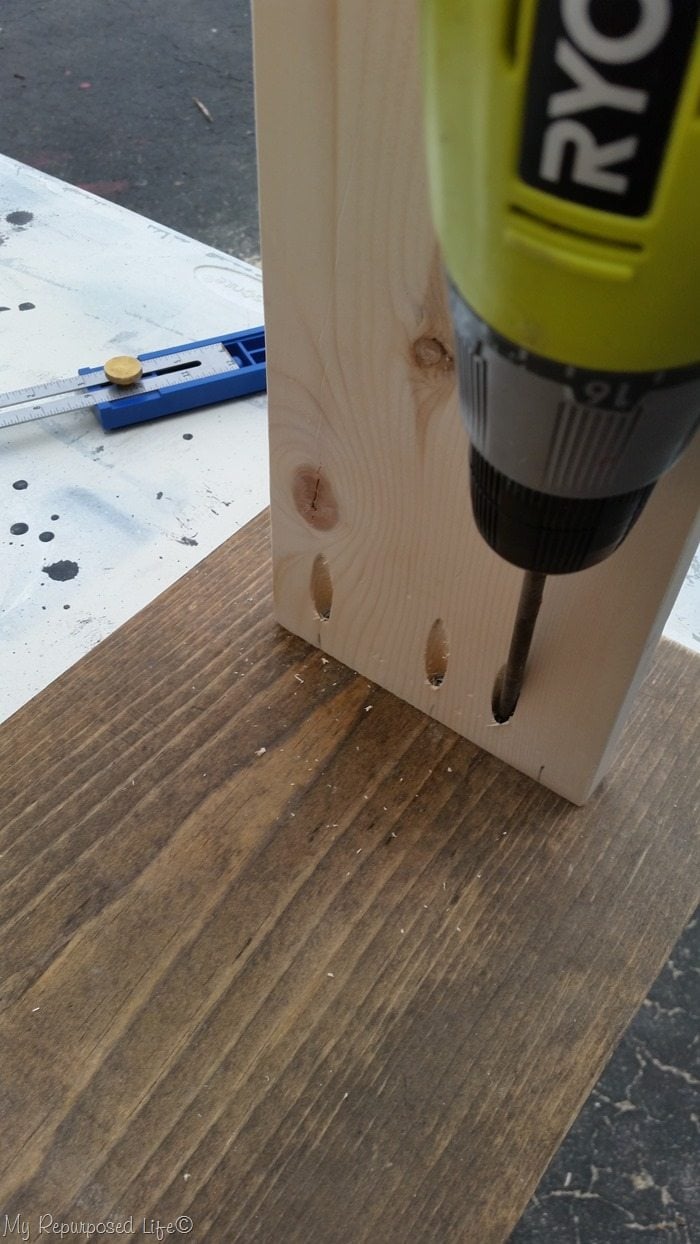
I used my kreg multi-mark tool to ensure each leg was the same distance from the end. (about 3”) and secured the top and the bottom boards with pocket hole screws.
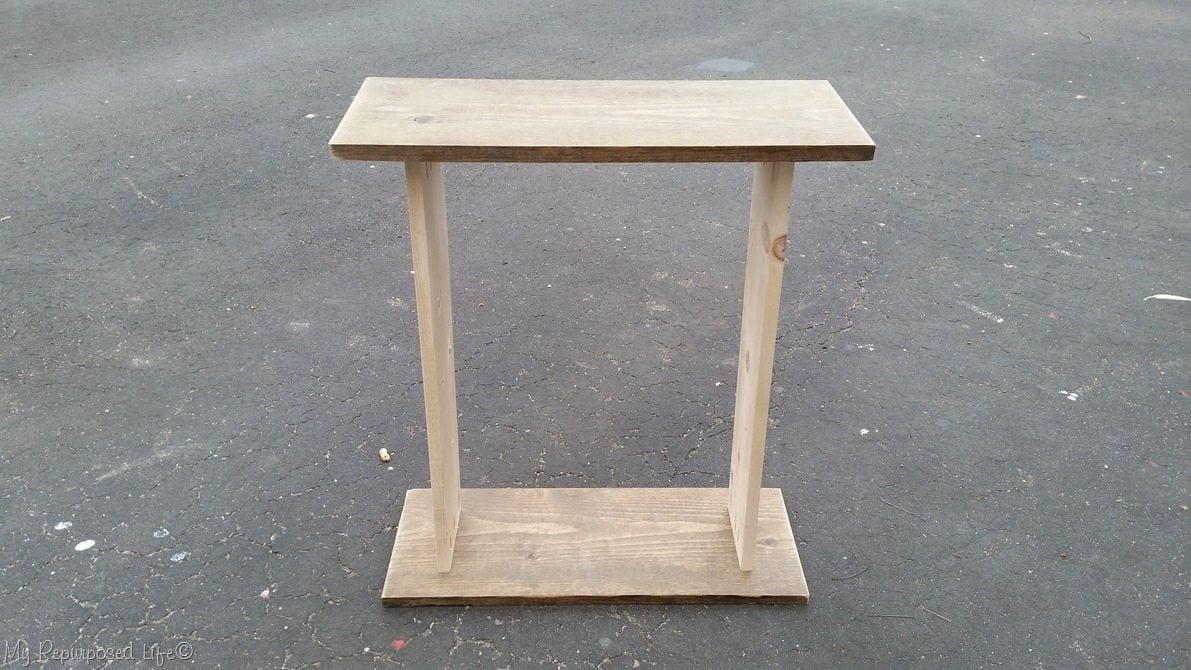
This simple build came together quickly, but it needs something more.
Add Skirt Boards to the Bottom of the DIY Table

I added two 1x4s on each side of the bottom, using my nail gun to secure the boards. I cut them to fit very snugly.
Attach a Top Shelf
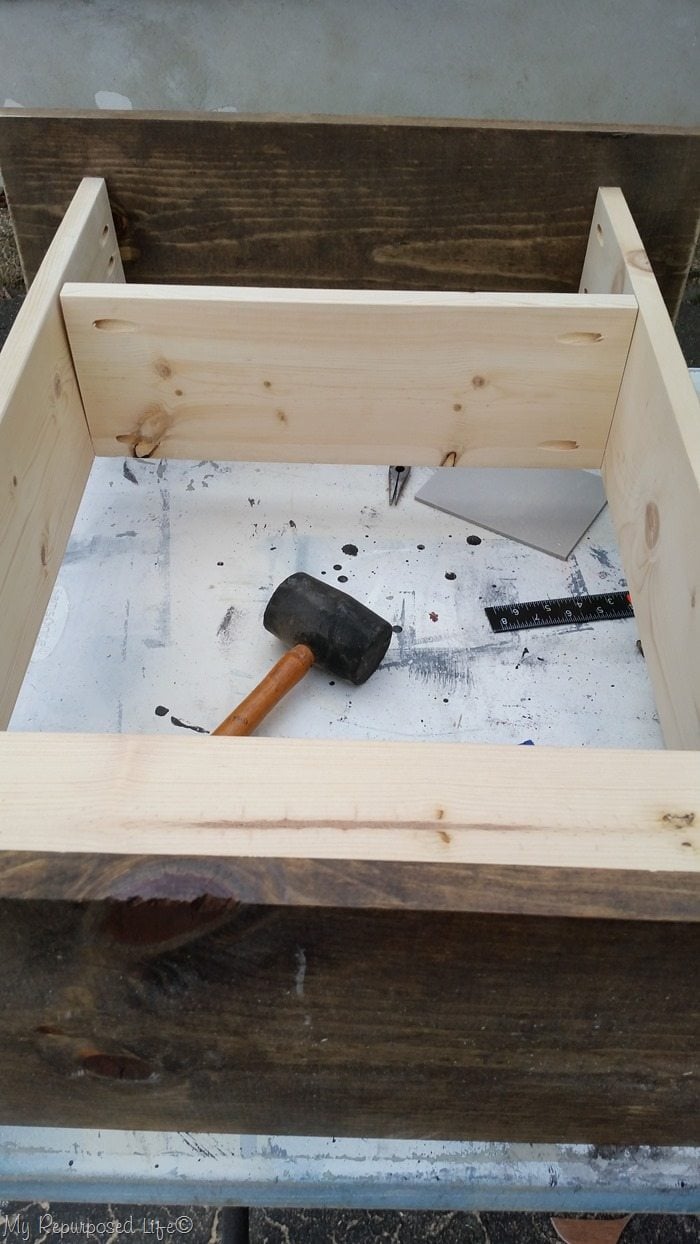
To help stabilize the table and hold it square, I added a shelf near the top of the table, using pocket holes and screws to secure it.
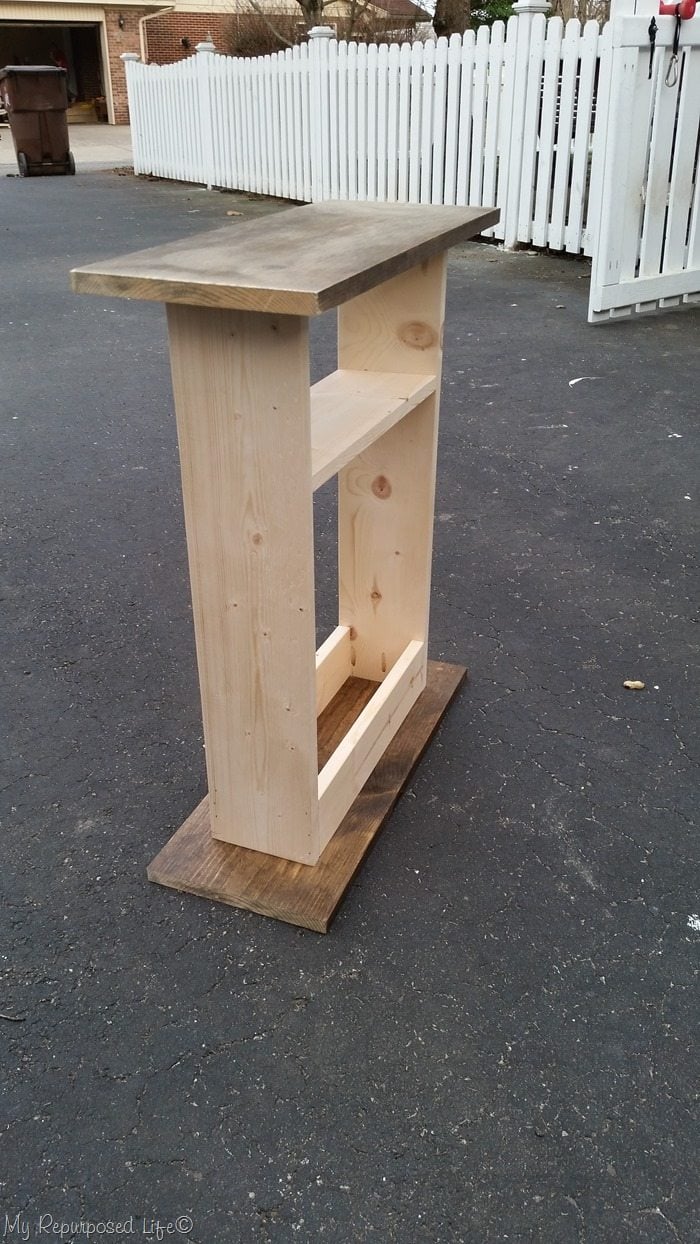
Oh my gosh! I’m so happy to see it at this stage! I was so tired of having all the remotes lined up on the arm of the sofa.
Use Shellac to Disguise Knot Holes
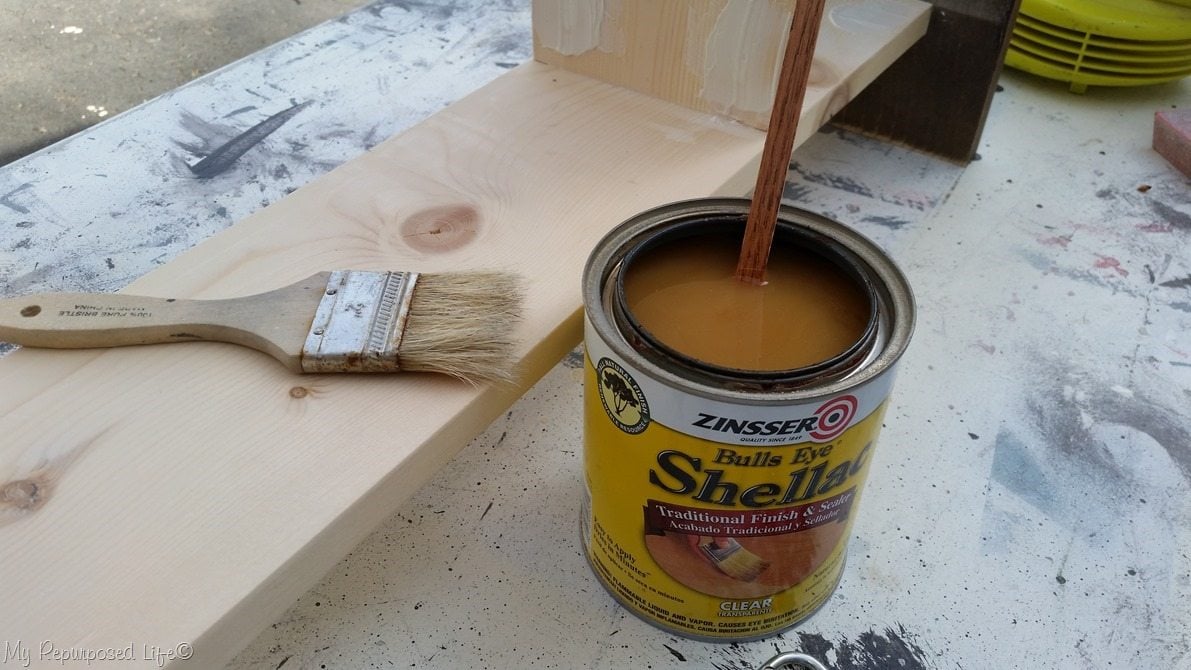
I patched the holes with drywall mud and used clear shellac to seal the wood knots so I could prepare to paint. Meanwhile, the weather turned cold, so I took the table in and used it for days like this.
Paint DIY Sofa Table with Chalky Paint
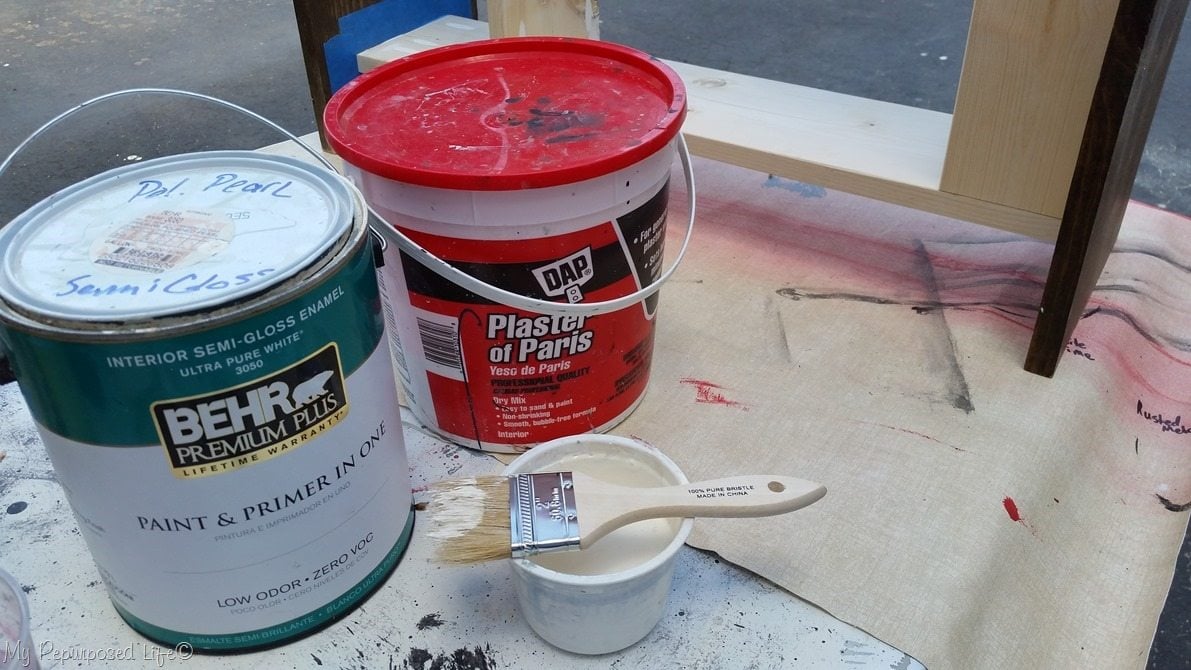
Finally, the weather warmed a little, and I got back to work. Of course, I used my favorite DIY chalky paint primer mixture to prime the table. I used blue painter’s tape and a cheap chip brush to make this job go quickly.
I painted two light coats of the chalky primer.
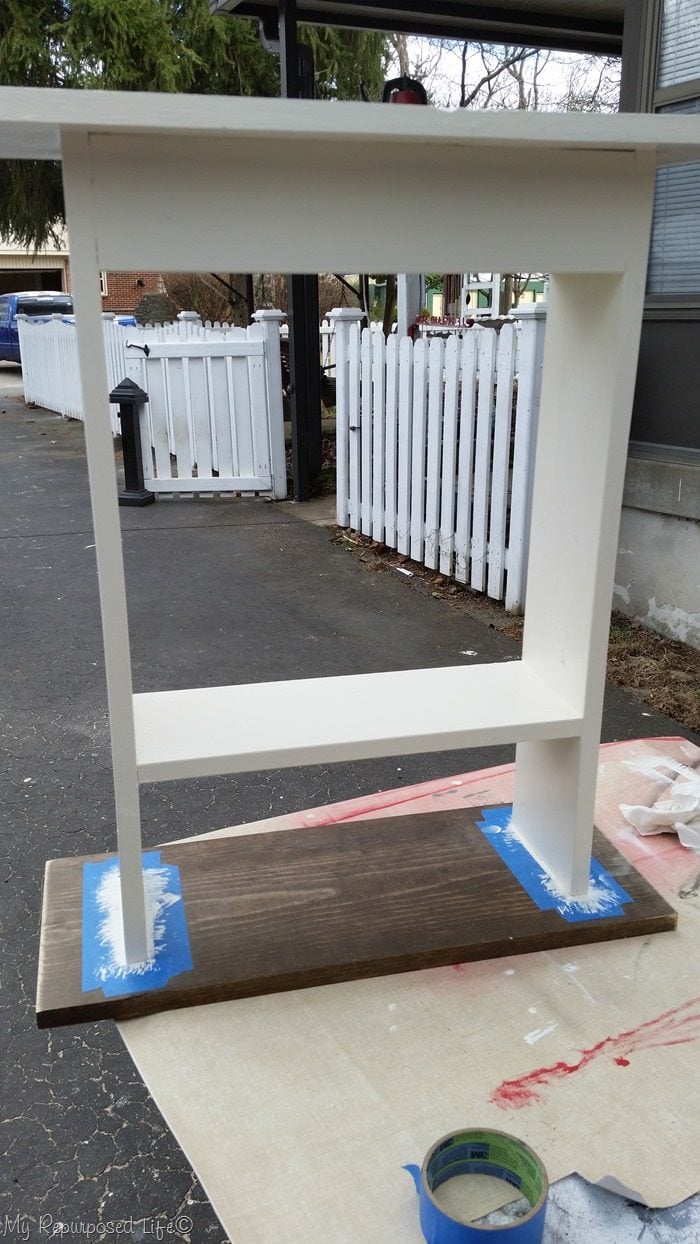
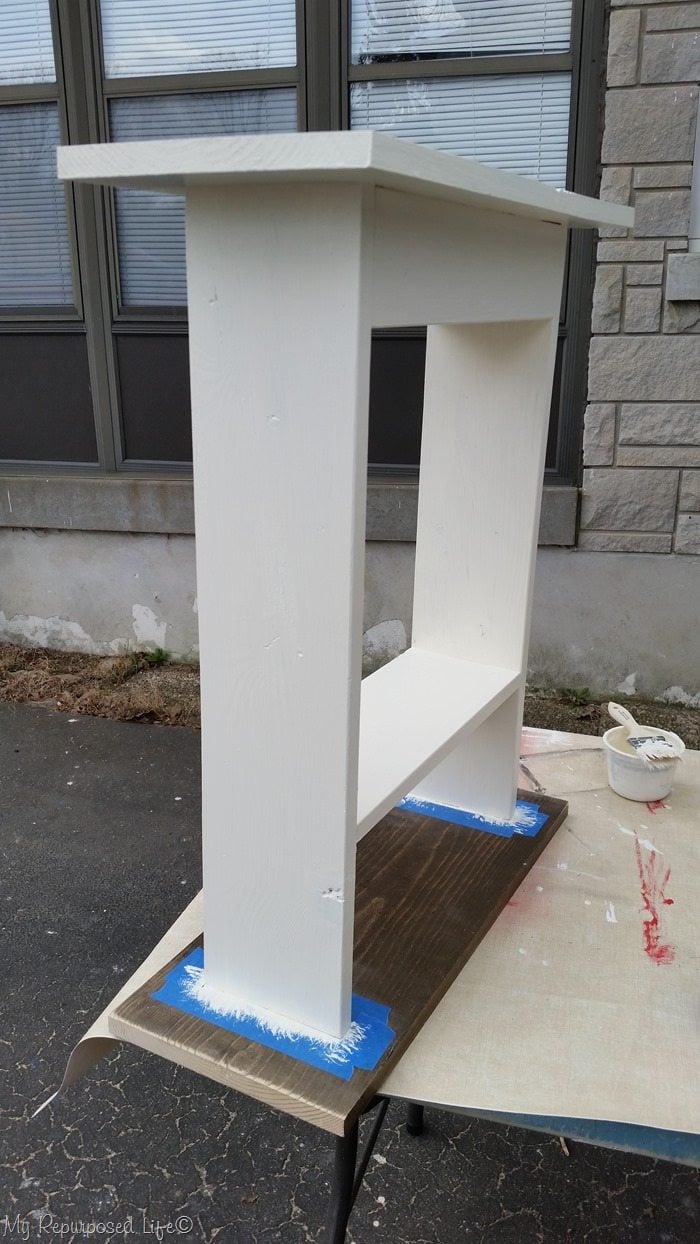
Then, I painted two coats of Polished Pearl semi-gloss.
Again, I took my new table into the house and used it “as is” until I could finish it.
Minwax Polyshades Stain
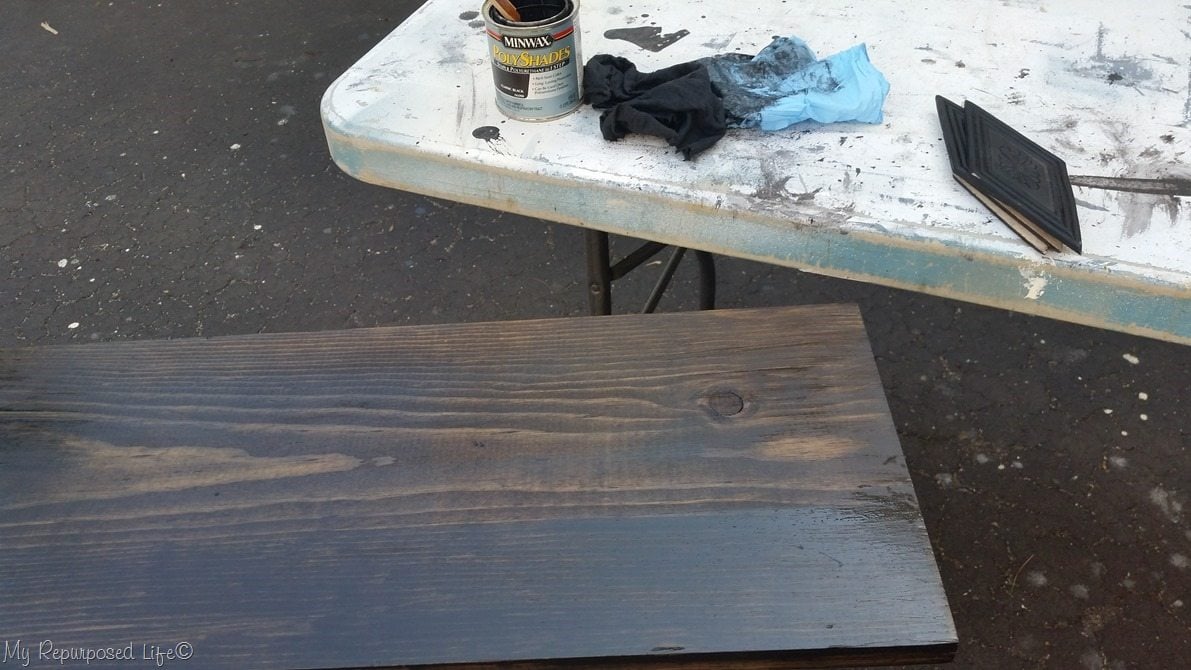
We had another batch of warm weather, and I was able to stain the tabletop using Minwax Classic Black Polyshades.

I love the two-toned look of the light paint and the dark stain!
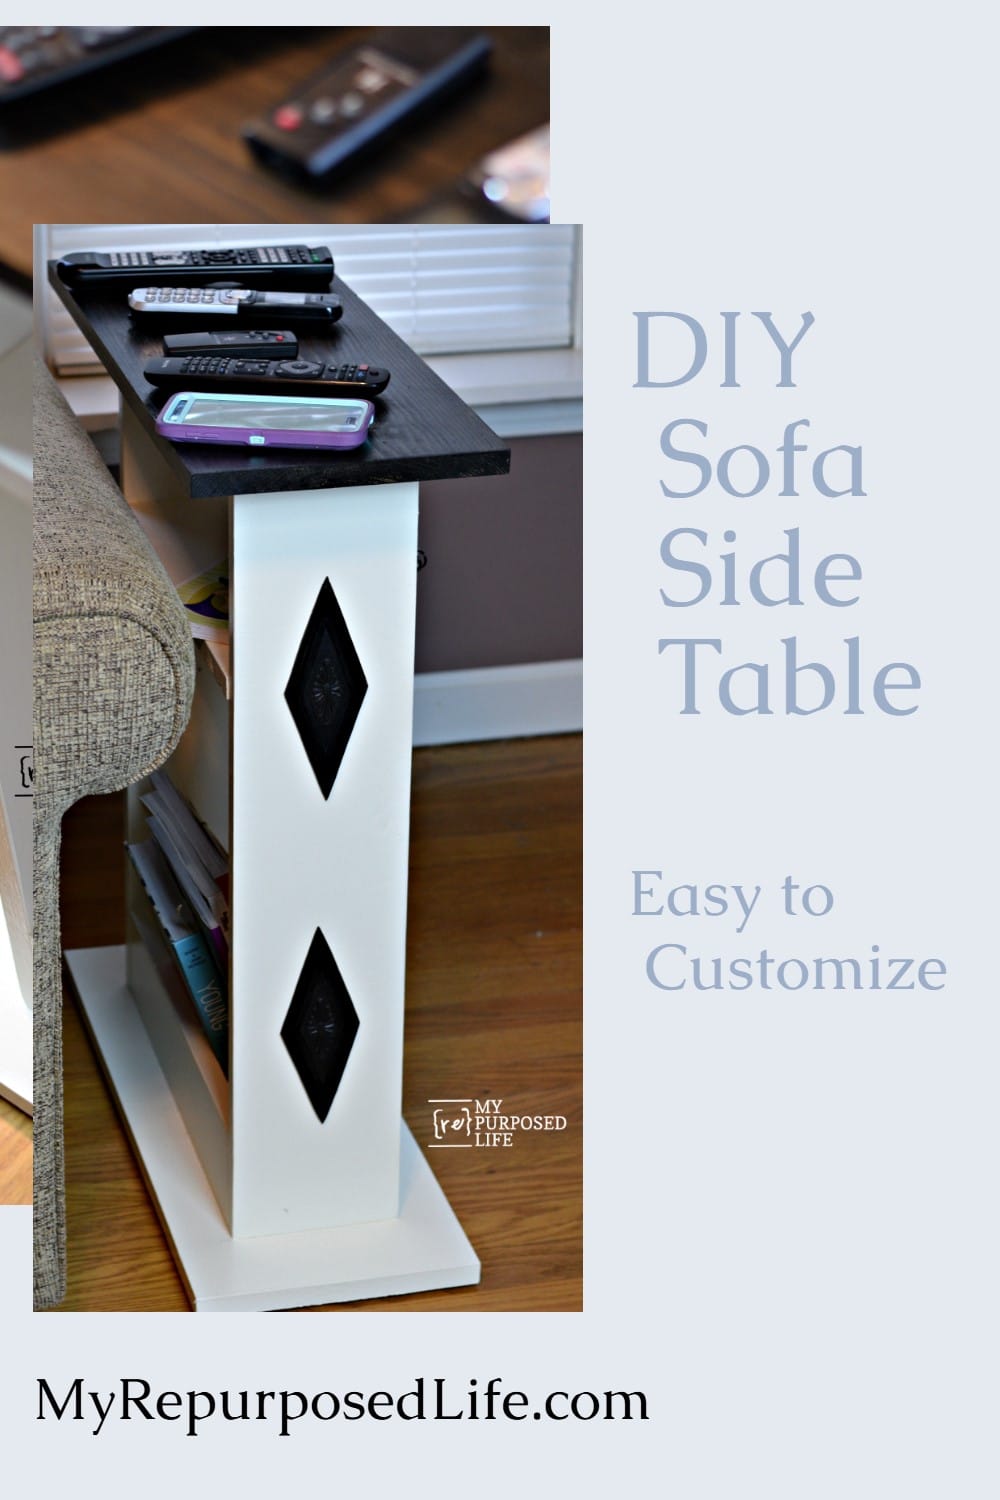
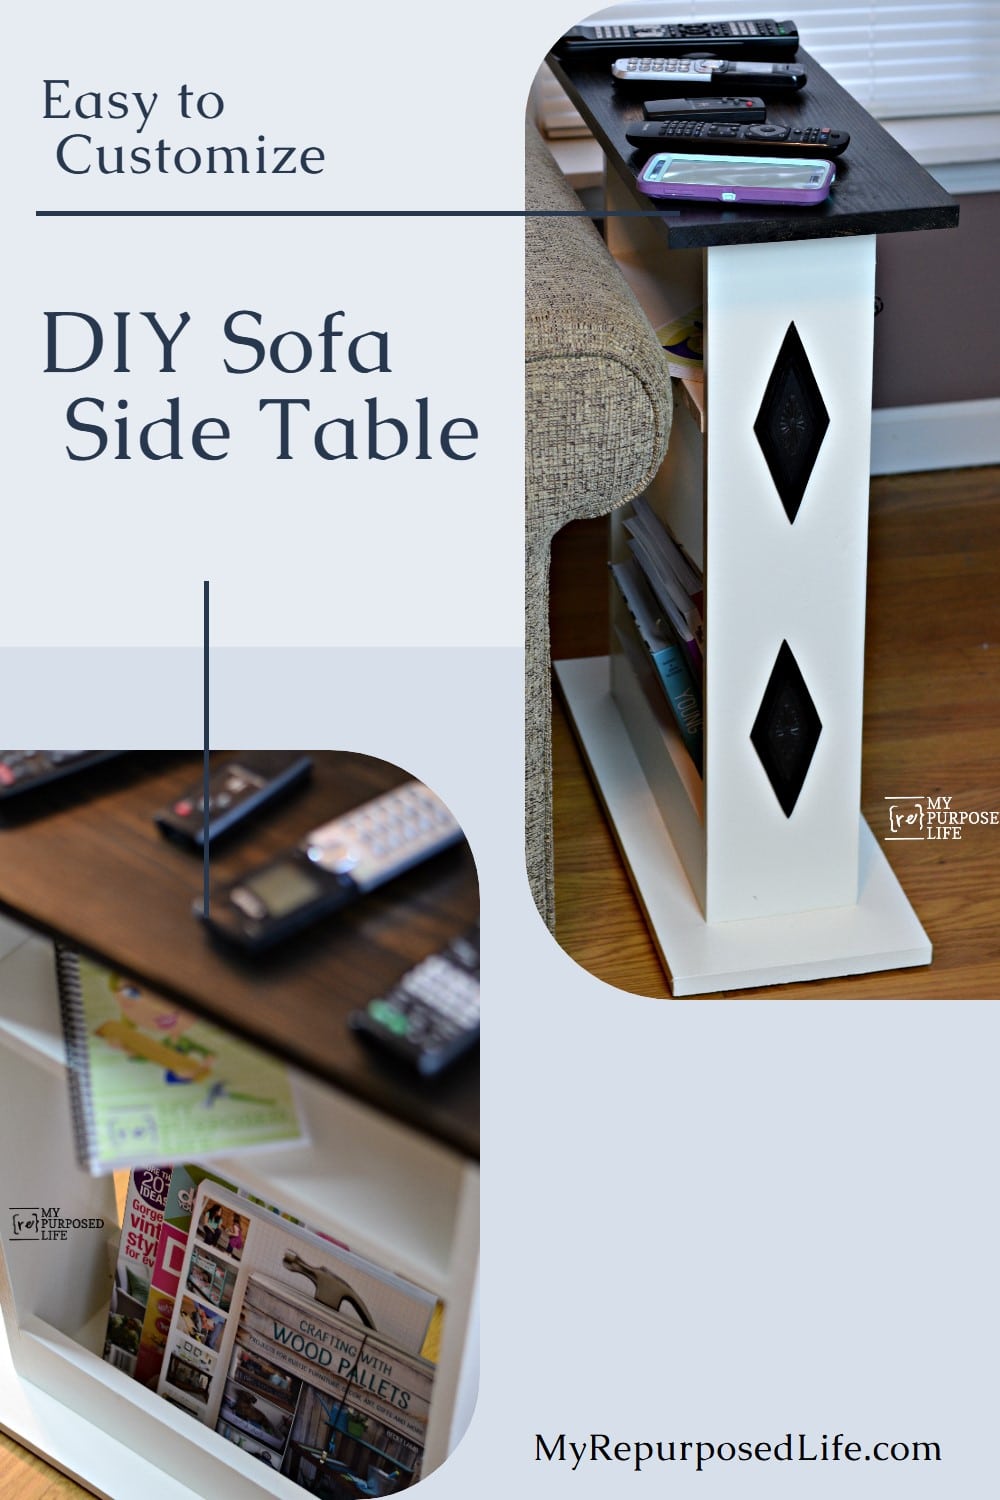
Add Embellishments to Your DIY Sofa Side Table
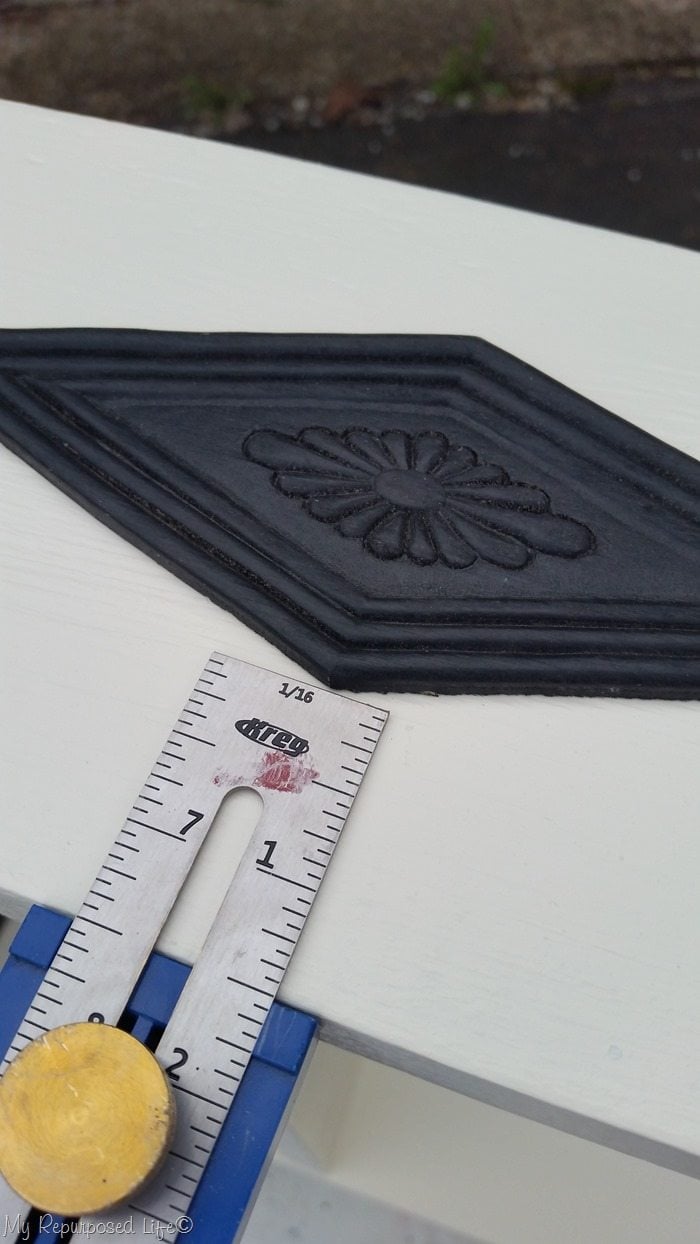
While test-driving the table for a couple of weeks, I felt like it needed a little something—some embellishment of some sort. I dug in my stash and found these black wooden appliques from D. Lawless Hardware. Again, I use my Kreg Multi-tool to help me center the appliques.
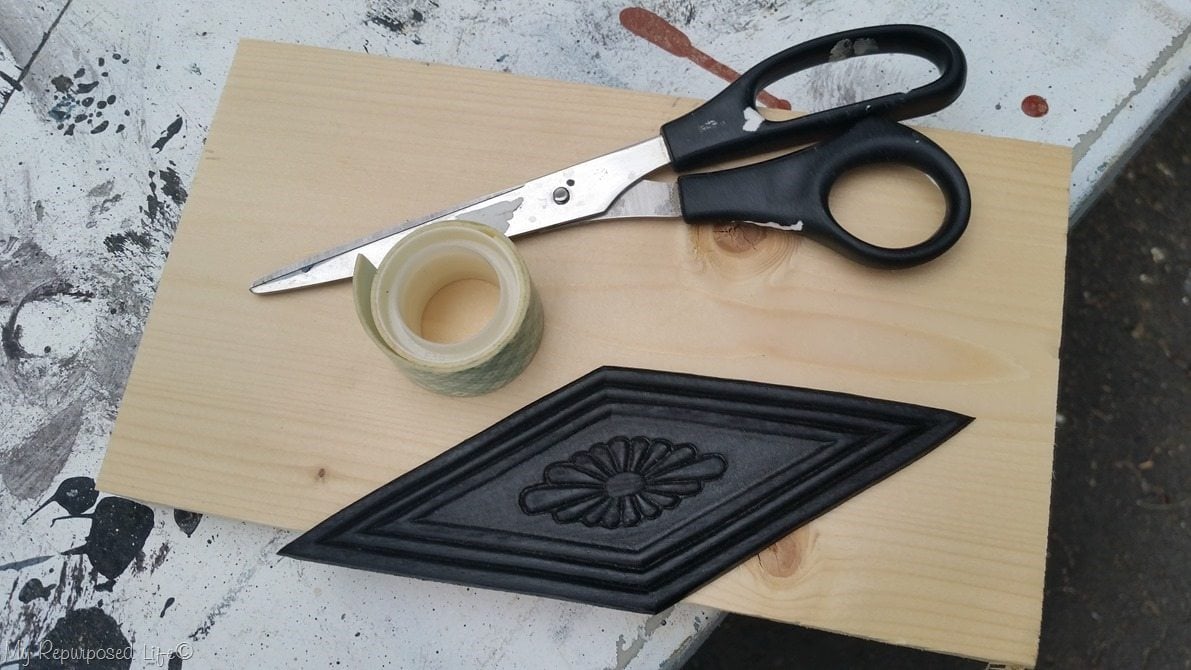
Because I’m not positive I want to leave the wooden appliques in place, I used double-stick tape for a more temporary hold. If I decide to keep them, I’ll just put a couple of brad nails in them the way they are.

What do you think?
Custom Table Build

Remember all the remotes/phones?

Voila! So much better!
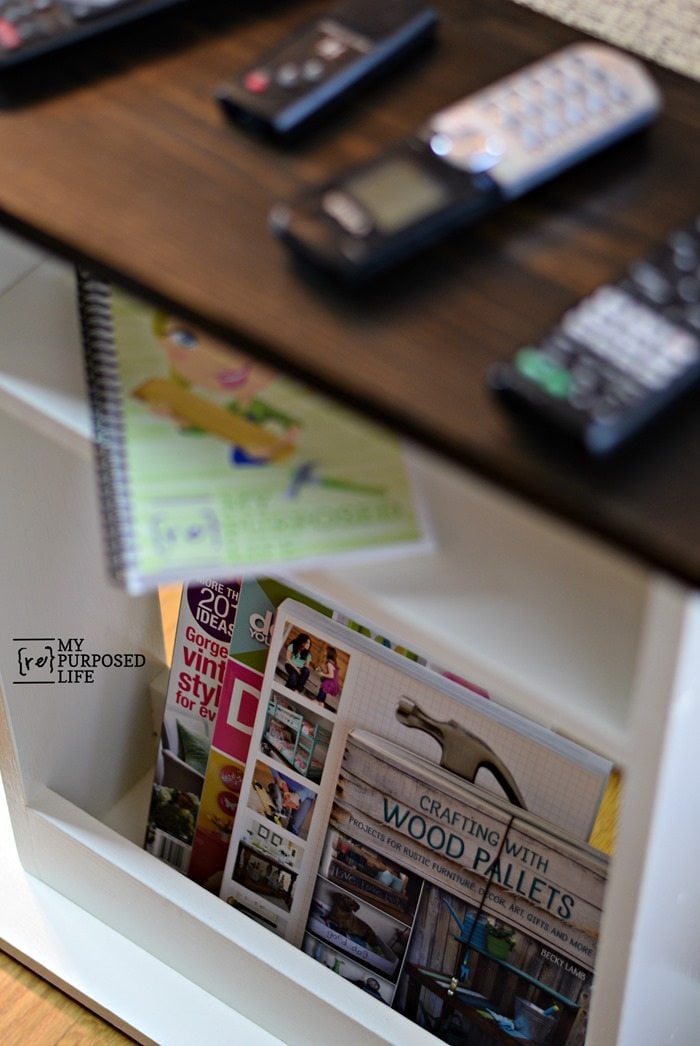
The shelf is perfect for my notebook, and the lower area corrals books and magazines. Front and center is a book my friend Becky from Beyond The Picket Fence published. I bought my copy of Crafting with Wood Pallets on Amazon, and you can buy it!

Well, can you tell how much I LOVE my new table? It makes me wonder why I didn’t do this sooner!
Creative DIY Projects
Now, here are my friends’ projects!

The Kim Six Fix – Pottery Barn Inspired Concrete Top Coffee Table
Domestically Speaking – Large DIY Wall Sign
H2OBungalow – DIY Live Edge Coffee Table With Hairpin Legs
My Repurposed Life – Sofa Side Table
My Love 2 Create – Fabric and Wood Wall Hanging
Virginia Sweet Pea – Card Display Holder
The DIY Bungalow – Repurposed Fire Screen
Designed Decor – Upcycled Wall Shelf
Create and Babble – DIY Wood Plank Walls
Thrift Diving – DIY Bath Vanity
gail
Gail, What if I just used power drill to make those glass flower decorations for the garden. Would that count for the challenge?
JJ
Such a perfect little table! I love that you were able to make it with supplies you already had! Pinning!
Oh my word, how brilliant is this? I need one, no maybe two! Definitely on my list of projects. Thanks for sharing!
Thanks Kim! I could probably use one more for the other couch where visitors sit, but I’m just so happy I finally have my remotes in place!
gail
I so hear you about having so many remotes on the sofa – at least you were smart and had them on the arms. Mine are usually spread all over the sofa and oftentimes myself or the cat sits on them. Great idea for corraling them in one place that doesn’t take up too much room but has them off the sofa. Pinning to share.
Lulu Mae insists there are no remotes in her spot (on her blanket) next to me. I still find myself forgetting about the table and putting something on the arm of the couch. But my drink has a new place to rest, and that really makes it easier for me.
Thanks for pinning Marie!
gail
Perfect! Necessity is the mother of invention – and this is not only useful, but beautiful! Great project! Pinned and shared!
Thanks for pinning and sharing Karen! Functionality is a must, pretty is a bonus!
gail
Gail, The side table turned out great. I love that you added the appliques on the side to give more detail. Turned out great!
I appreciate your kind comment DeDe! This was a fun challenge for sure!
gail
Great to make something for yourself that you will use everyday. I am planning on something for beside my couch, but not for remotes but for my mug of tea!
Julie,
I bet your table will be awesome! I keep my glass of water on my new table as well as all of those remotes. 😉
gail
Simple but GENIUS!! I love it!
Thank you Kimberly!
I seriously love my new sofa side table. Not sure it’s GENIUS, but it sure solved my problem.
gail
Perfect side table for a small space! Love it.
Thank yo Maryann. Yep, small table for a small space for sure. I’m still so giddy over it!
gail
Love your project! It turned out great! I work in the paint department at Home Depot, and am glad you are using Behr paint. The chalk paint using plaster of paris is a good recipe, but it works better with flat/matte paint than semi-gloss (you want a final flat finish with chalk paint), and it works better as a top coat. If you are just wanting to prime the wood as a base coat, Kilz or Zinsser primer works better, and is half the cost. Seal the knots in the wood by spot-priming with Kilz oil-base primer spray to prevent the tannin in the knots from bleeding through the final coat and leaving brown stains on your project, and then paint your desired color and sheen over it.
Love that Kreg jig too, I am going to have to get me one!
Patsy,
Thanks for stopping by and taking the time to leave a comment. I love using Behr. I have used satin, flat and semi-gloss for my diy chalky paint primer. I haven’t really seen a difference. My goal is never to have a final flat finish like chalk paint. My goal is quick and easy, 2 light coats of the diy primer, and two light coats of the semi-gloss. d.o.n.e. 🙂 I love using my own primer because I can make it with any color paint I’m using. That’s the beauty of it. Red paint? no problem. Red primer under red paint. easy peasy. Generally all done in my Homeright Finish Max paint sprayer.
Thanks for the info, it will be helpful for others who stop by.
Yes! You need to get a Kreg Jig. I love it!
gail
Gail it looks so awesome and does the job perfectly! Isn’t is great to get to projects that you put off, and then they make you so happy when you finally do them! I am sooo that way! Pinned!
I guess I really didn’t put it off…. it just never occurred to me to make a table. 🙂 How silly!
gail
This is so useful! We have the same challenge with remotes everywhere! Love how slim your table is and that it stores items too. Smart! Pinned and shared!
Wendi,
Thanks for pinning and sharing! Such a little thing has made such a huge difference!
gail
Love it Gail! I need several around my living room!! Pinned it for later 🙂
Thanks for pinning Debbie.
gail
The table that you designed and made is perfect for your space. I like that it is narrow so it doesn’t take a lot of space yet it holds quite a few essentials. I know you are glad to get those remotes off of your sofa arm!
Paula,
You are so right, the narrowness of the table is perfect and I do love being more organized.
gail
Great job on this and I especially appreciate the detailed tutorial. I am still fairly new to using a Kreg jig so your closeup views of that are very helpful to me. Thanks!
Terry,
I’m so happy the Kreg Jig closeups help you. The best advice I can give you is to mark your boards. I have drilled in the wrong place or wrong side more times than I want to count.
gail