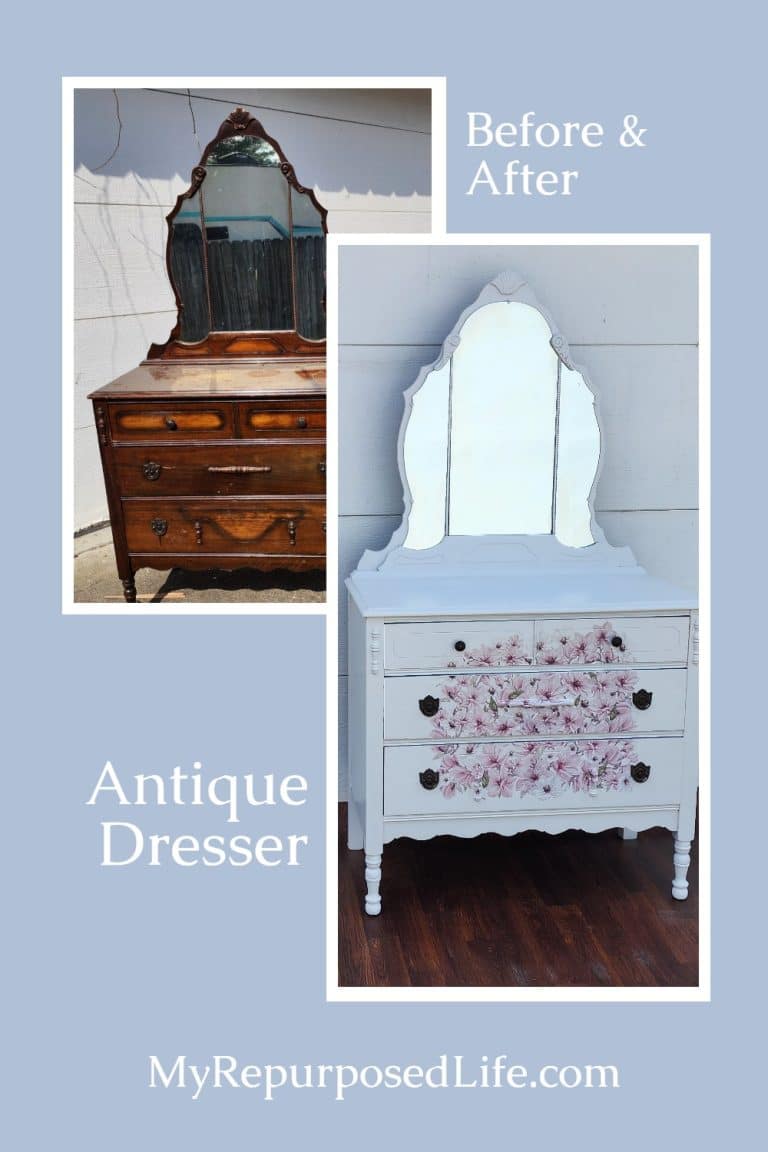
Antique Dresser with Triple Mirror
As an Amazon Associate, I earn from qualifying purchases.
Transforming an antique dresser with a triple mirror into a stunning, refreshed piece is a rewarding way to blend vintage charm with modern style. Whether you inherited a family heirloom or discovered a forgotten gem at a thrift store, a fresh coat of paint can breathe new life into the dresser’s ornate details and mirror frame. This project revives the furniture’s beauty and preserves its character — creating a one-of-a-kind statement piece that fits seamlessly into your home.
Antique Dresser with Triple Mirror
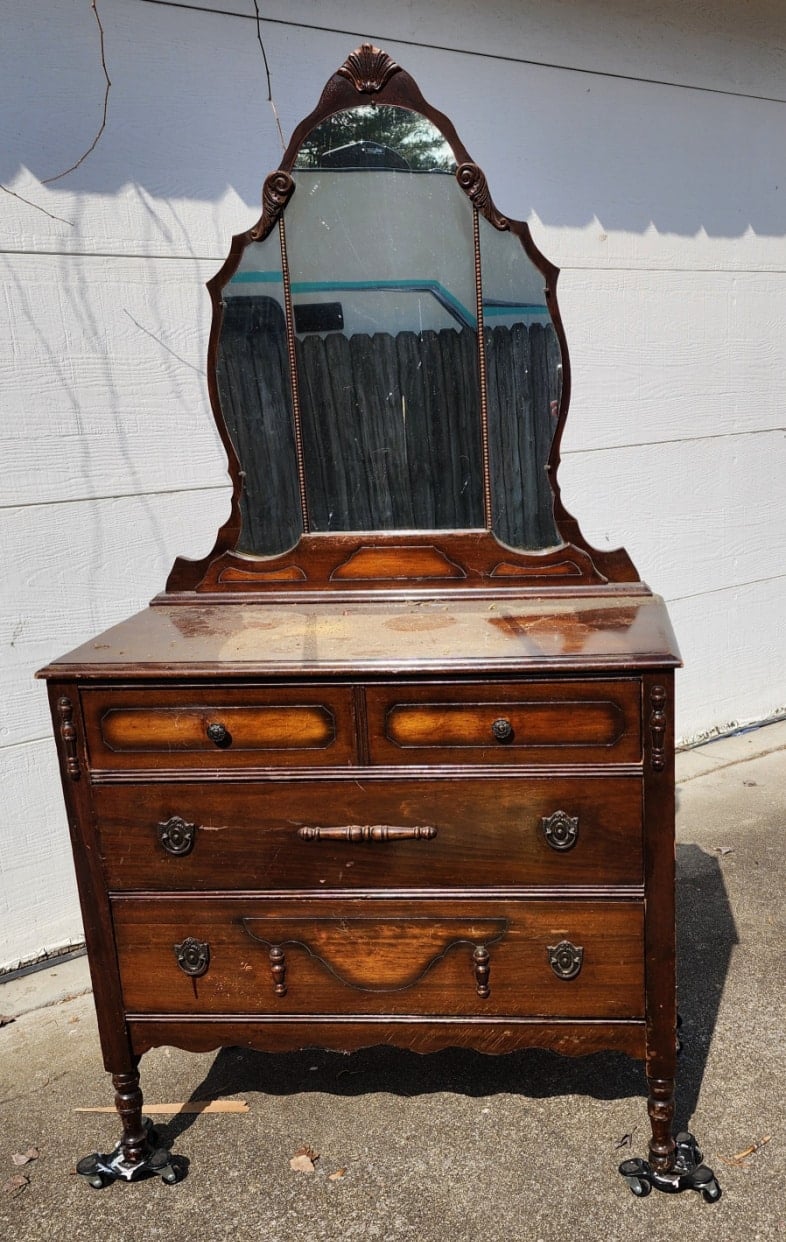
It may be hard to believe, but this antique dresser with a triple mirror was given to me by a friend of a friend. It’s been in the storage garage for several years. I knew it would not be a quick turnaround, so I’ve been grabbing other items instead. Read on about the chaos that ensued during this little gal’s final photo shoot.


It’s Furniture Fixer Upper Tour Day! Be sure to visit my friends’ projects at the bottom of this post.
Make a Plan About the Antique Dresser Mirror
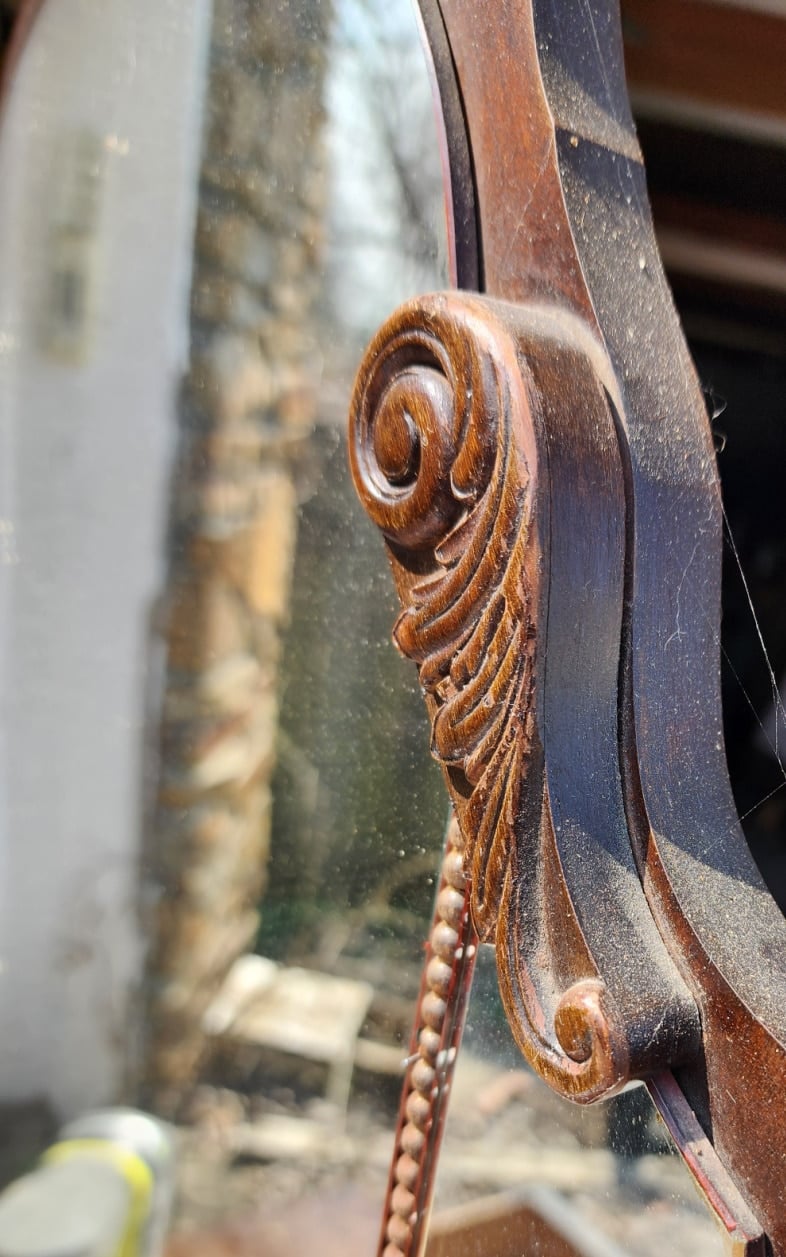
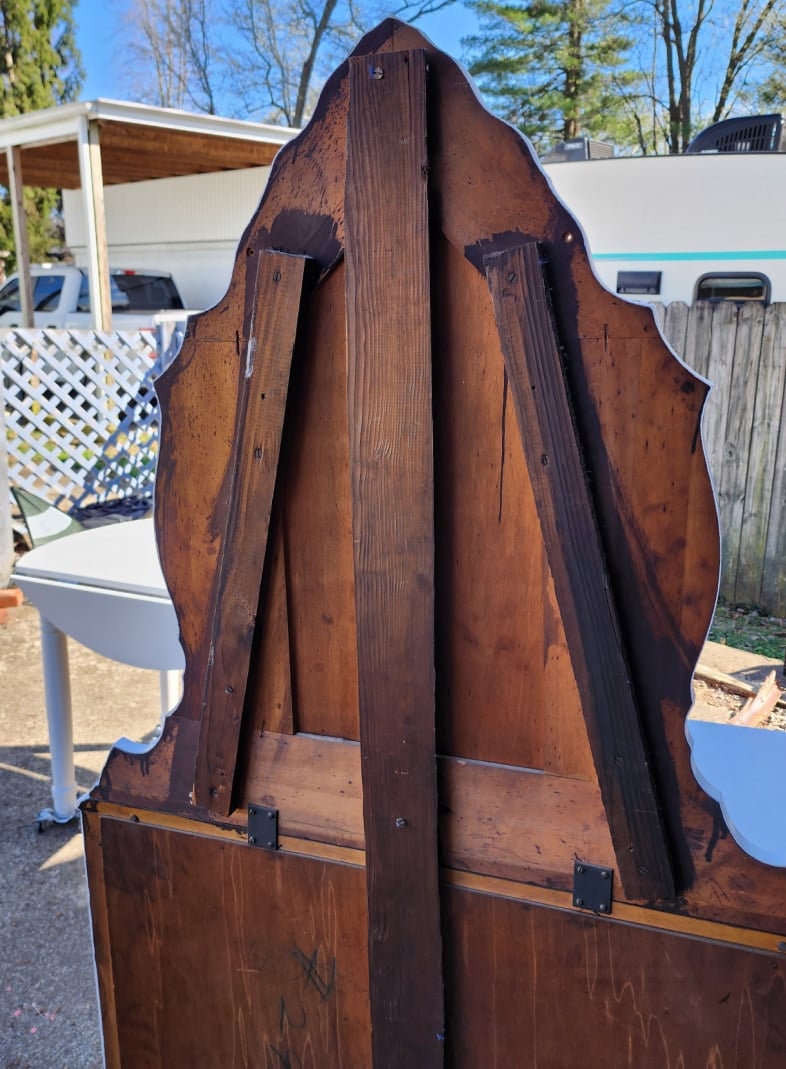
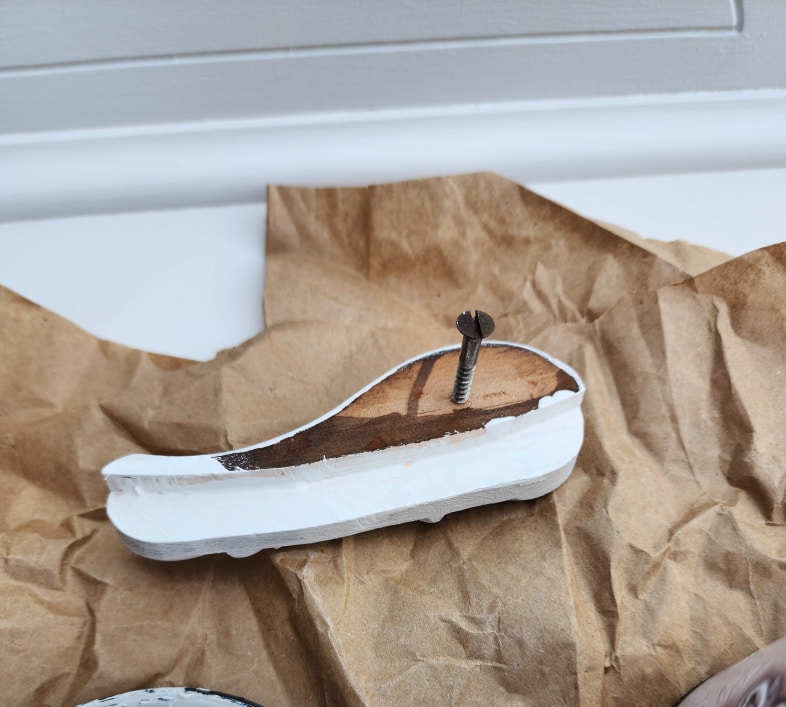
There are two wooden brackets on either side of the mirror. I planned to remove them and gently loosen small brackets to remove the three mirror pieces.
I removed the screw on the back of the mirror, and the large wooden decorative bracket came off quickly.
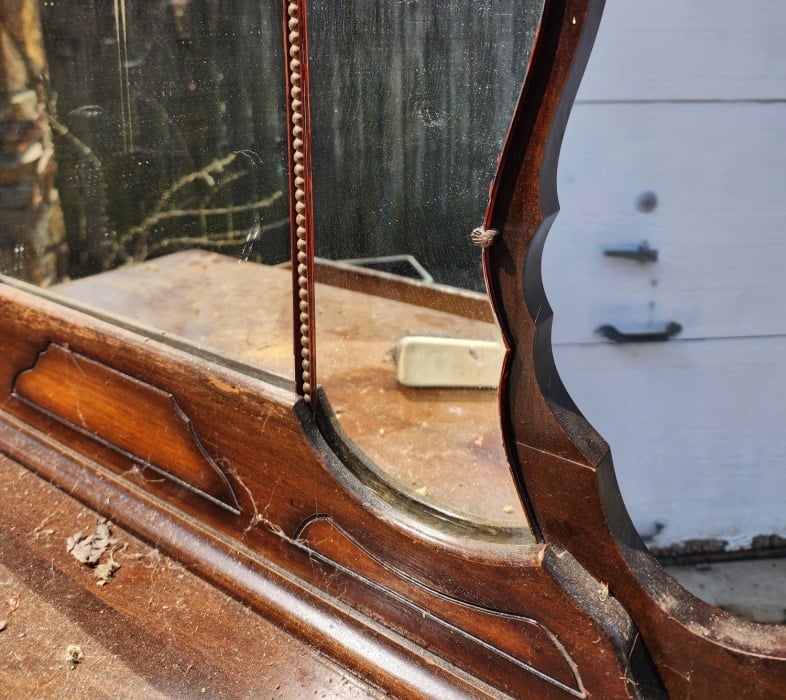
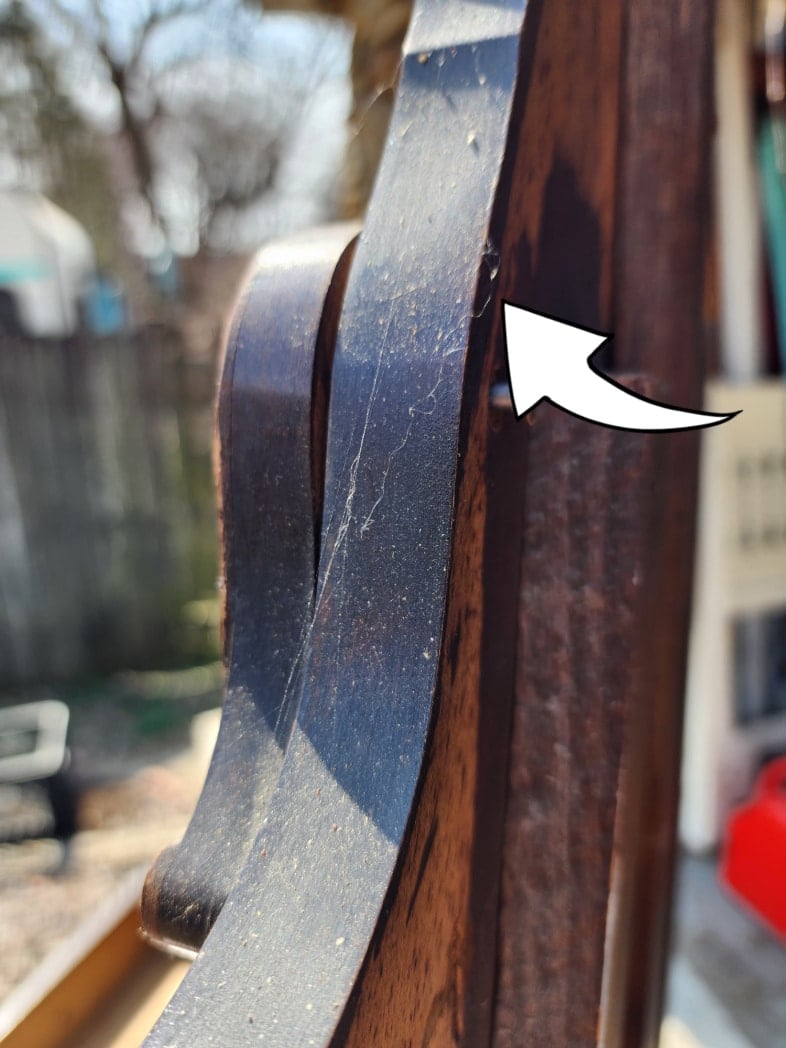
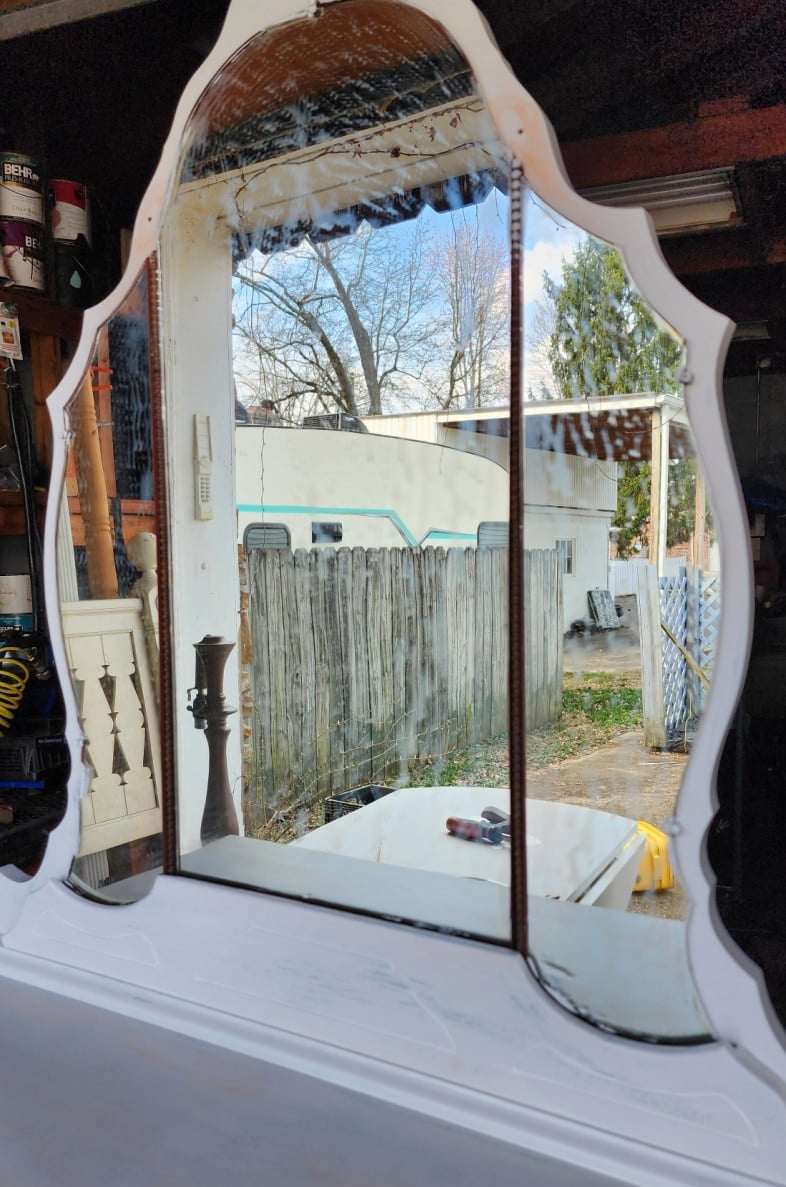
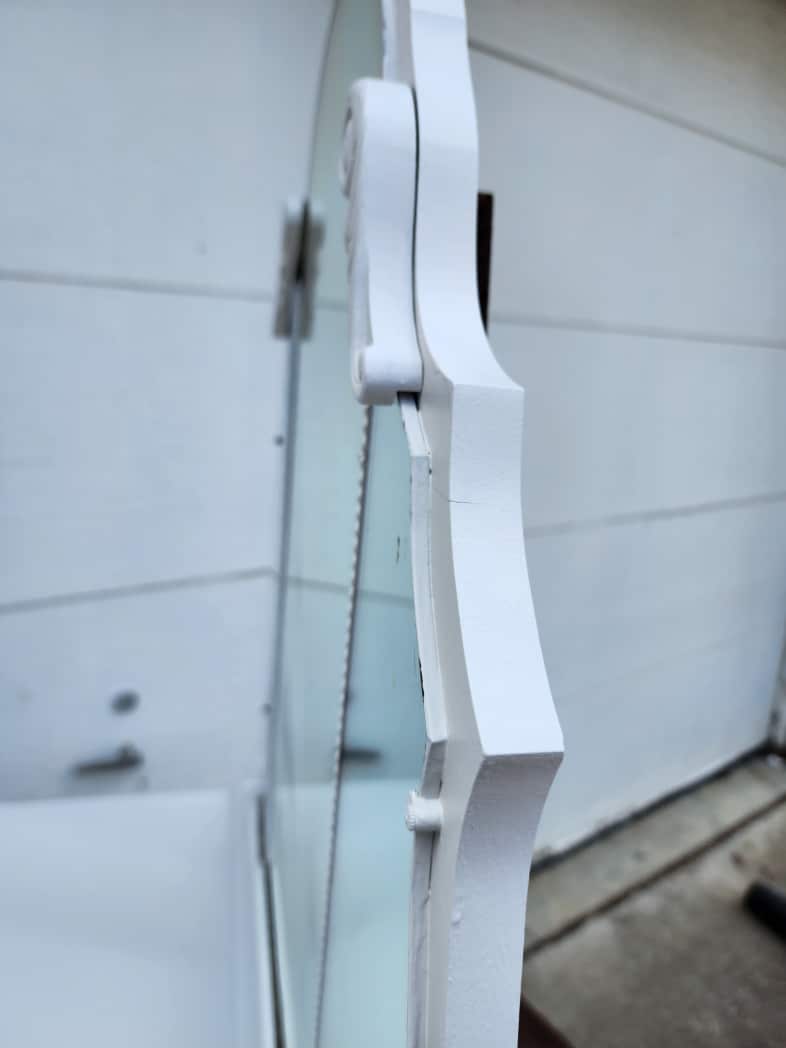
Then, I loosened a few tiny clips holding the mirror in place, but that was a no-go. The three mirror pieces are glued onto the mirror frame! I would have to find a new plan to work around the mirror. Can you see that the mirror’s edge has a color to it? I’m unsure if it is the mirror itself or if the stain was applied to the edge. More on that later.
Prep the Project for Painting
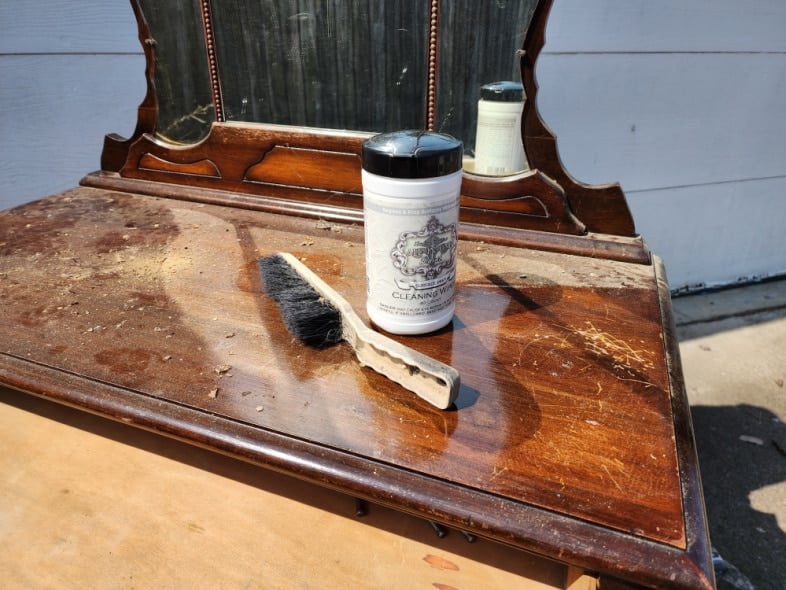
First, I needed to clean up all the debris that built up after years of storage. I used a dust brush and HTP Surface Prep Wipes to do so. I would have preferred to use the liquid surface prep. However, I am out of it at this time.
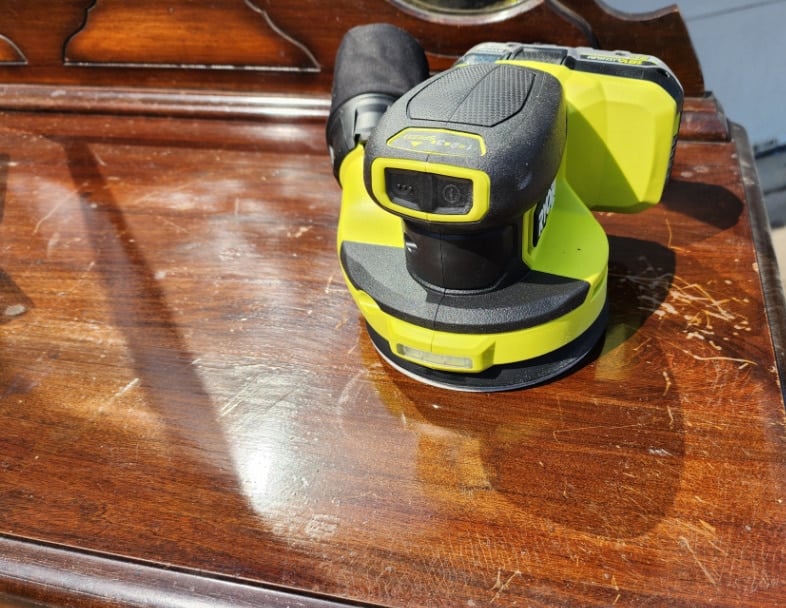
I brought out my new Ryobi orbital sander to deal with the damaged antique dresser top. It’s my favorite of all the sanders I’ve had. On the front, you can see the right power button and another button on the left. The additional button is a speed selector–there are three speeds on this new brushless orbital sander. Bonus! It’s much more quiet. If you’re wondering, I get nothing from Ryobi for saying this.
Bonus Find!
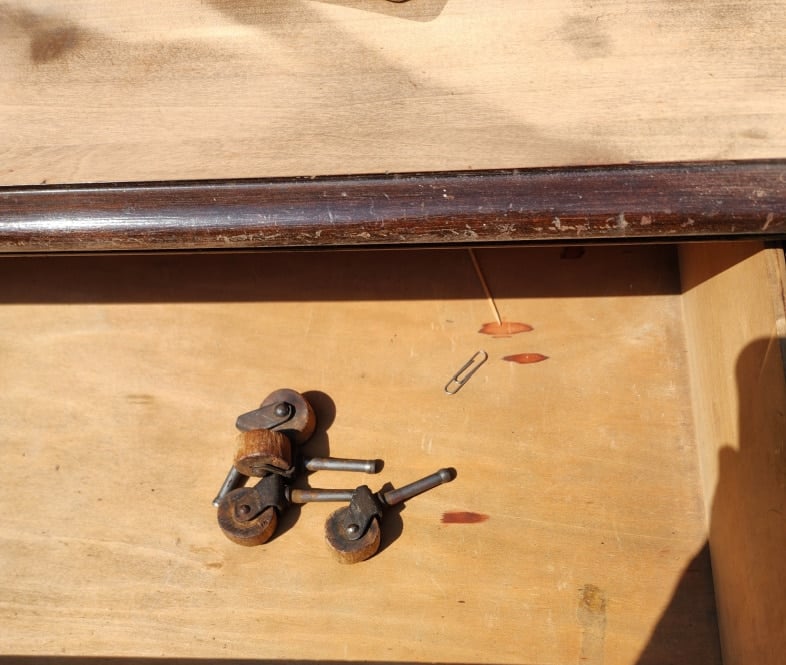
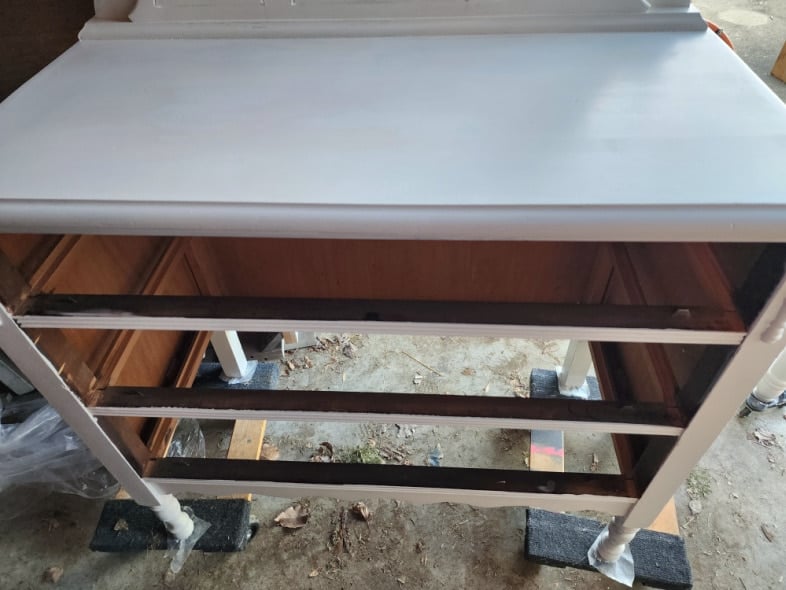
When it was time to remove the drawers for cleaning, I found the original wooden wheels.
The top of the antique dresser got a good sanding to remove the damage and gouges. I started with 80 grit sandpaper, moving on to 150, and finally 220.
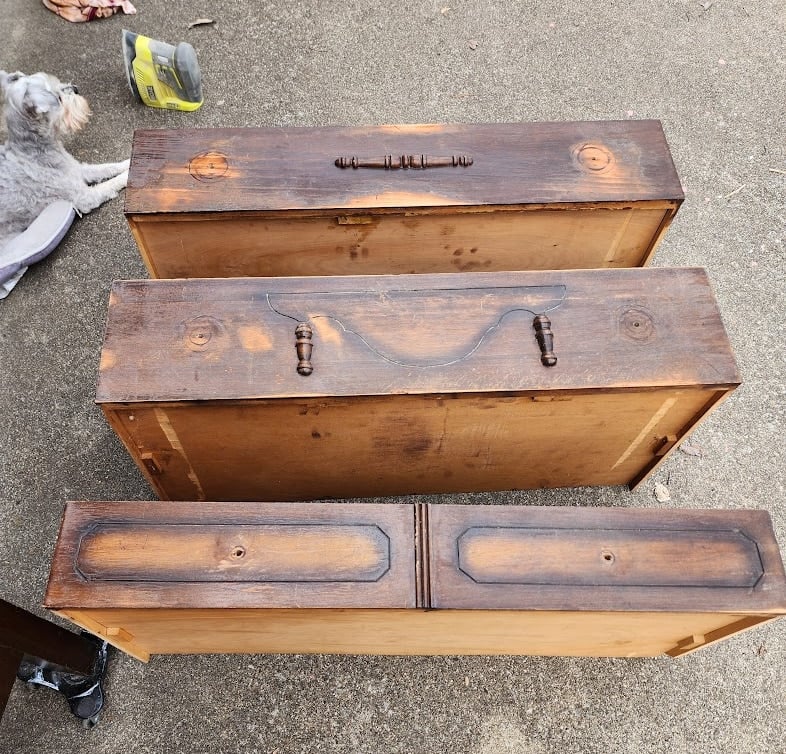
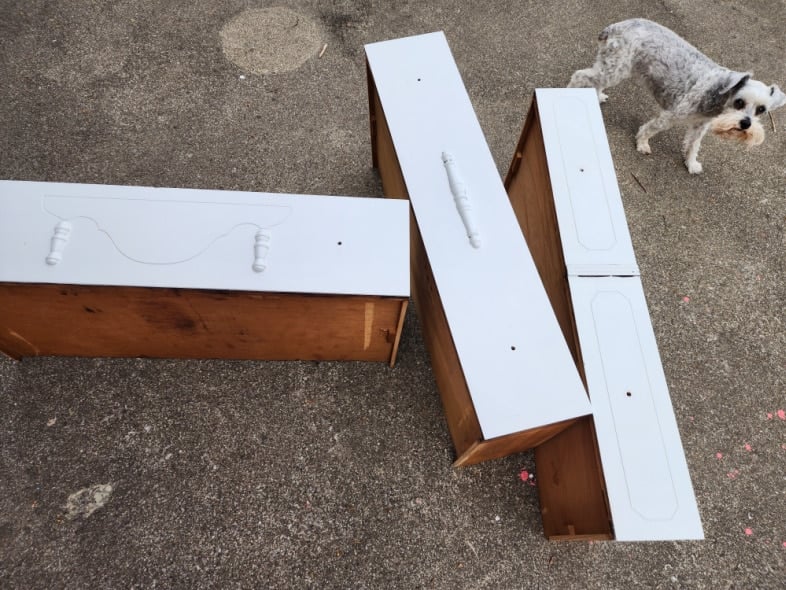
The three drawers were sanded with the new sander and 220-grit sandpaper.
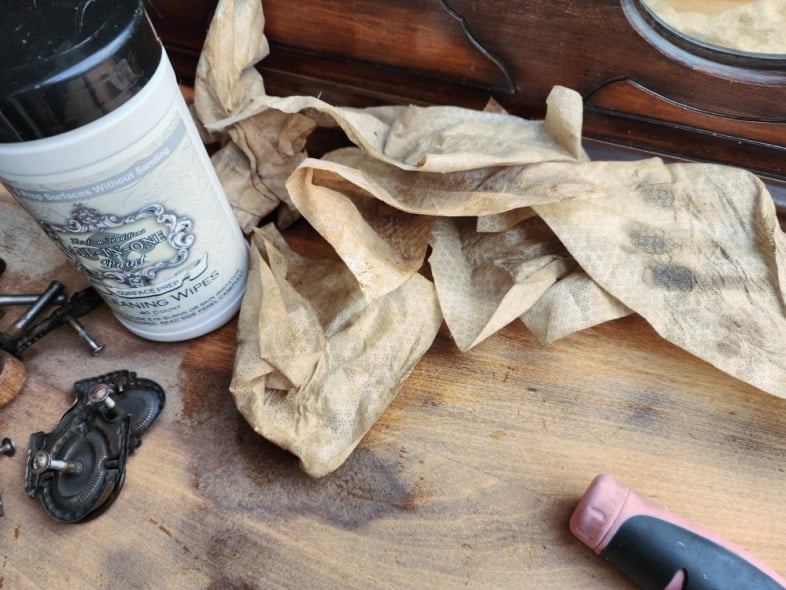
That sanding left quite a mess that was dusted off with the hand brush and then cleaned with the wipes.
Time to Paint the Antique Dresser
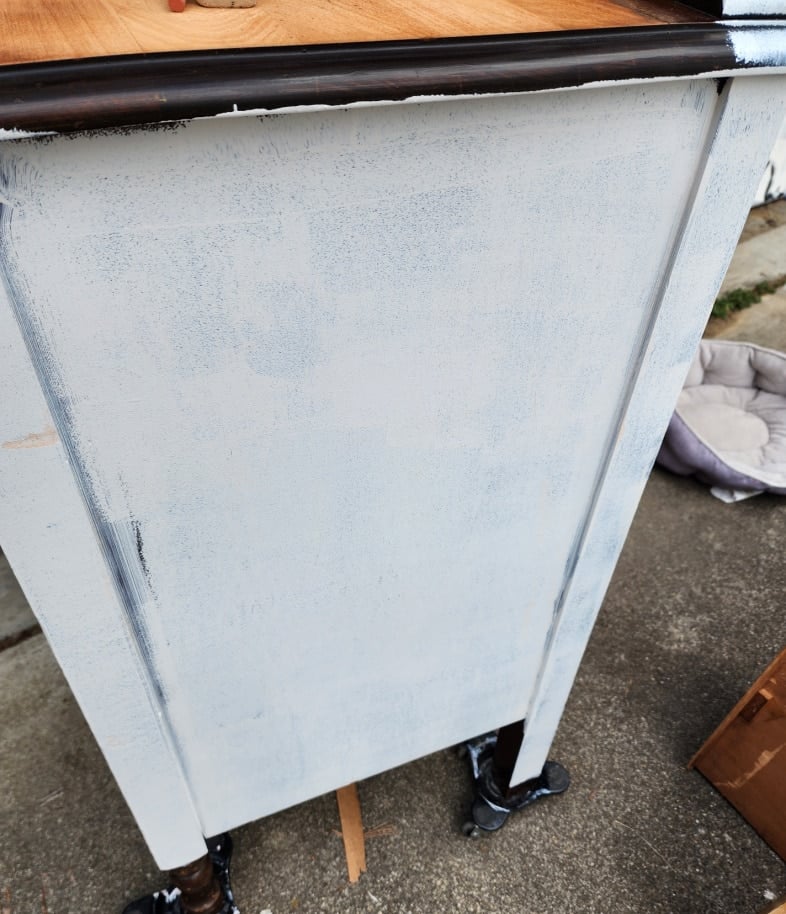
This is known as the ugly first coat. Light coats of paint will leave you with a “fine” finish and are less likely to chip or scratch off.
I love this color from All-in-One Paint. Colosseum is the same color I used on my camper kitchen cabinets. It looks white until you put something white next to it.
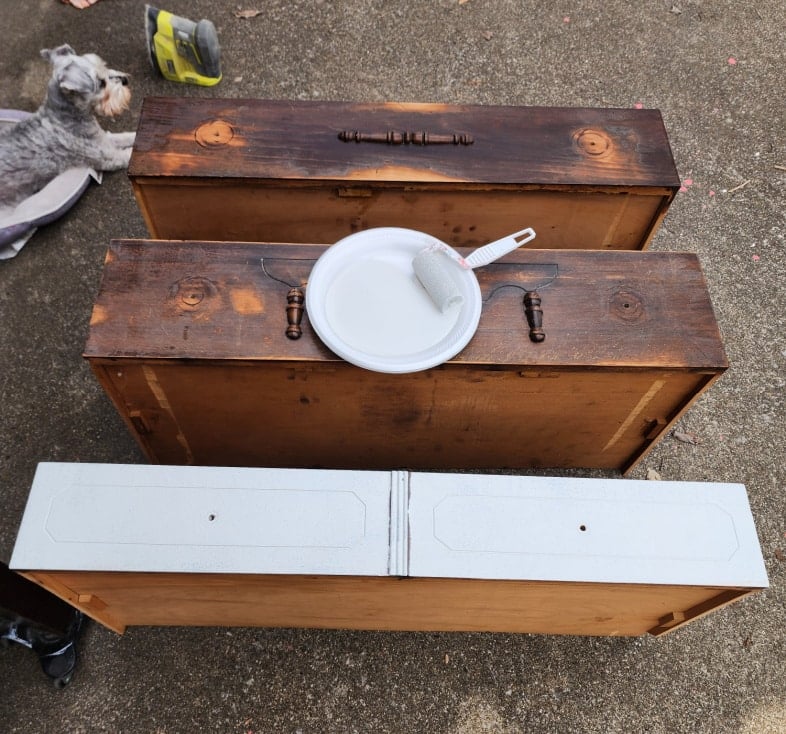
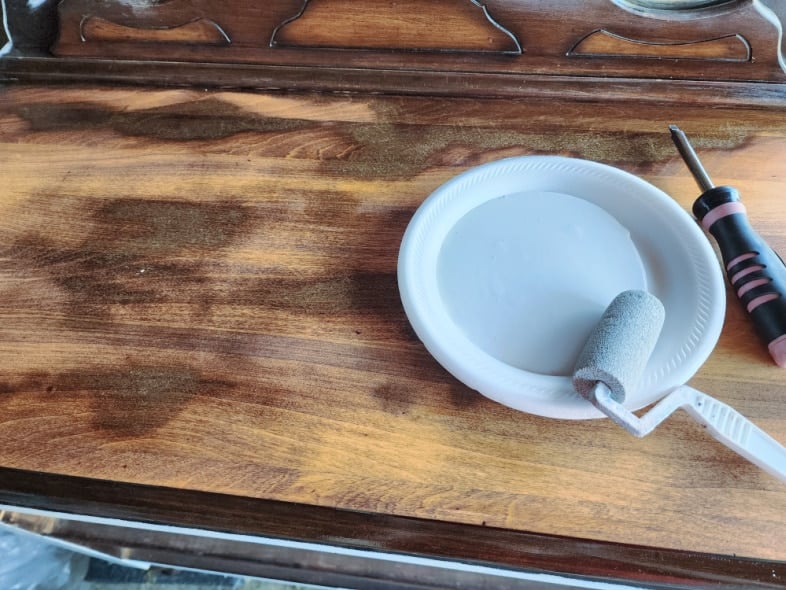
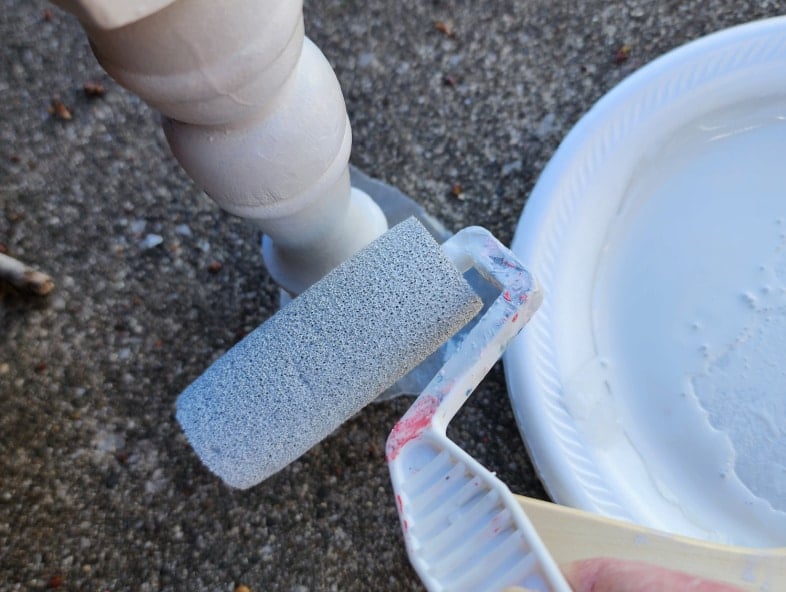
You will recognize this easy painting technique if you’re a regular here. I prefer to use this small foam roller for my furniture projects. It gives an excellent finish and wastes very little paint during cleanup. Pouring the paint onto a styrofoam plate works best for me.
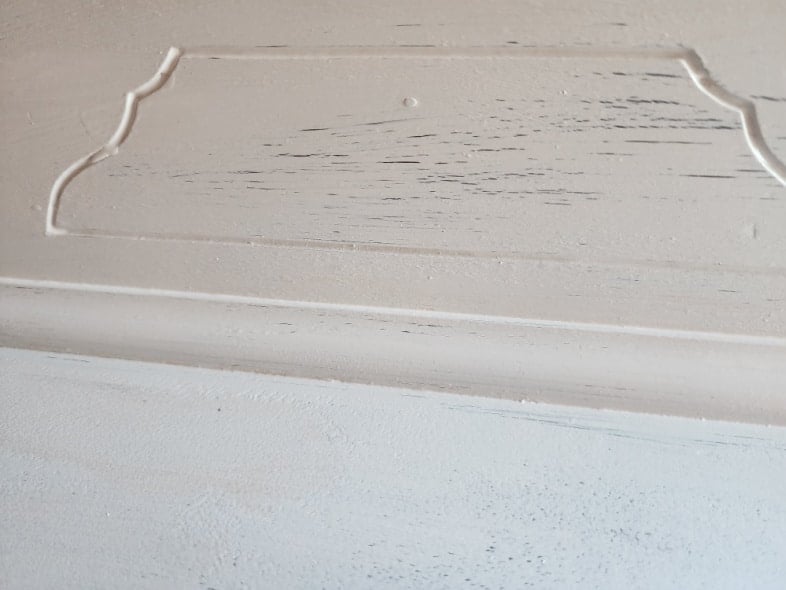
After the first coat of paint, I noticed a problem with bleed-through; tannins were showing through the paint. This only occurred where I had to sand a little heavy; I suppose it allowed the oils to surface. I rarely have had to deal with this.
I applied some Shellac to the places where the issue was on the drawers.
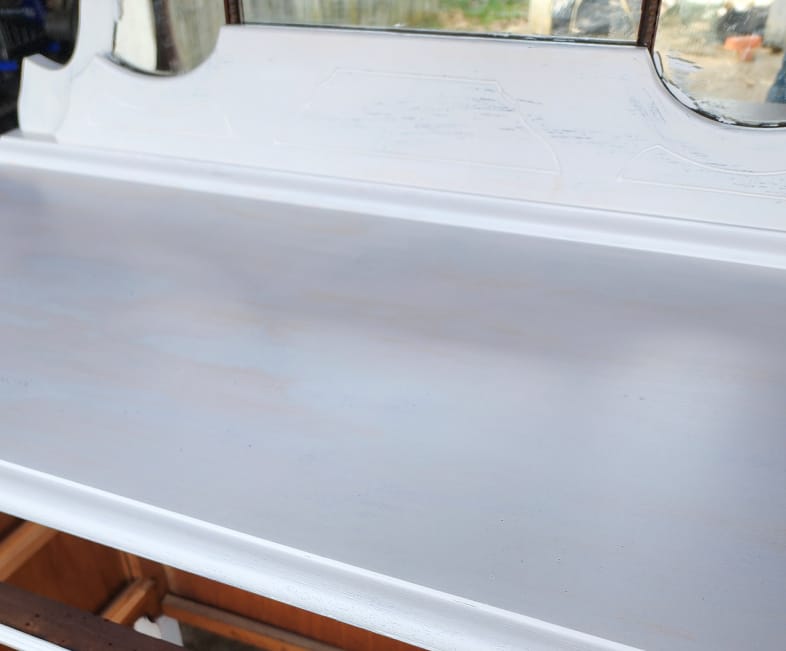
As I was preparing to paint the top of the antique dresser, I knew I would have the same issue there, so I applied a light coat of shellac to the entire top and the lower portion of the mirror frame.
This was a stressful situation, and I didn’t take the time to photograph the process.
After allowing the shellac to dry overnight, I applied a second coat of paint to the drawer fronts.
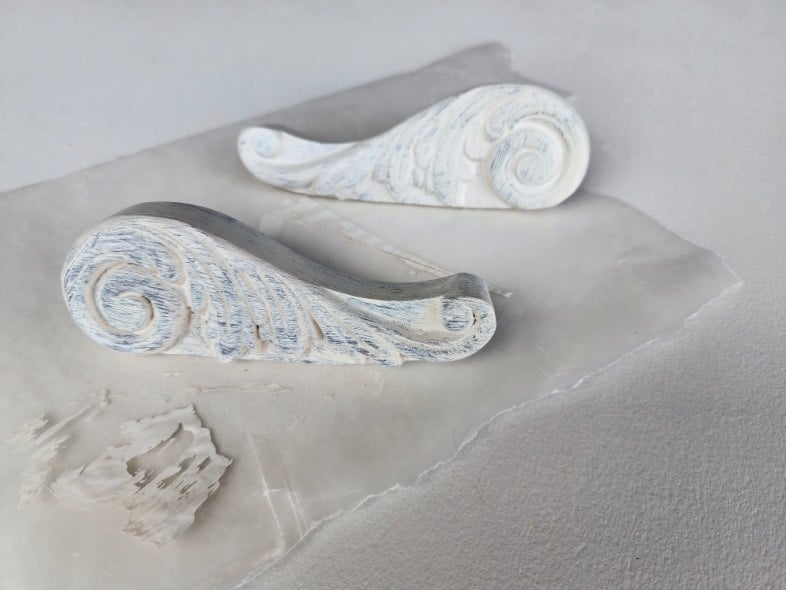
The same thing happened with the wooden mirror brackets but to a lesser extent.
More Paint Issues
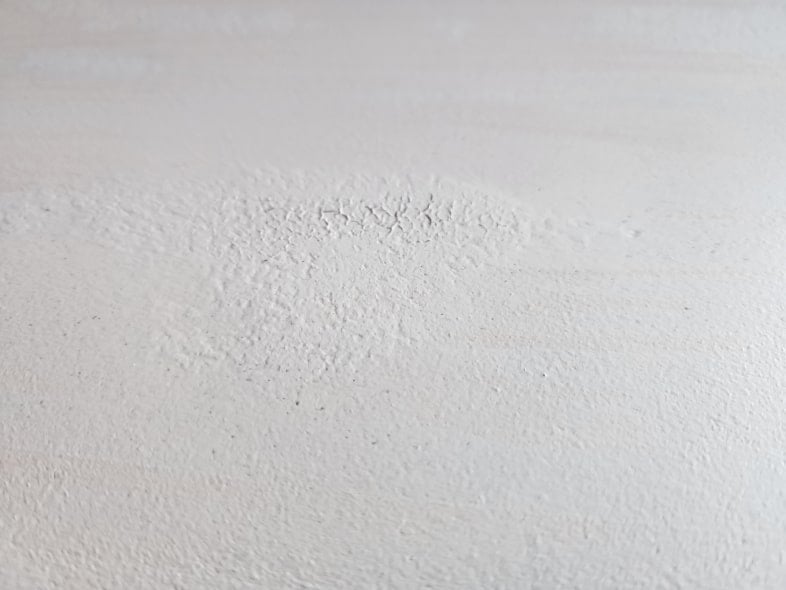
After the first coat of paint on the antique dresser top, there was an issue with paint bubbling. Not shown–I used the Ryobi sander with 220-grit sandpaper to smooth out the dresser top.
The bottom of the mirror frame after a coat of shellac drying overnight and the first coat of Colosseum.
The same goes for the dresser top, a coat of shellac, and one coat of the Colosseum paint. There was bleed-through showing, but I had faith that the next coat of paint would cover it.
There was still more bleed-through where I had removed the wooden mirror brackets.
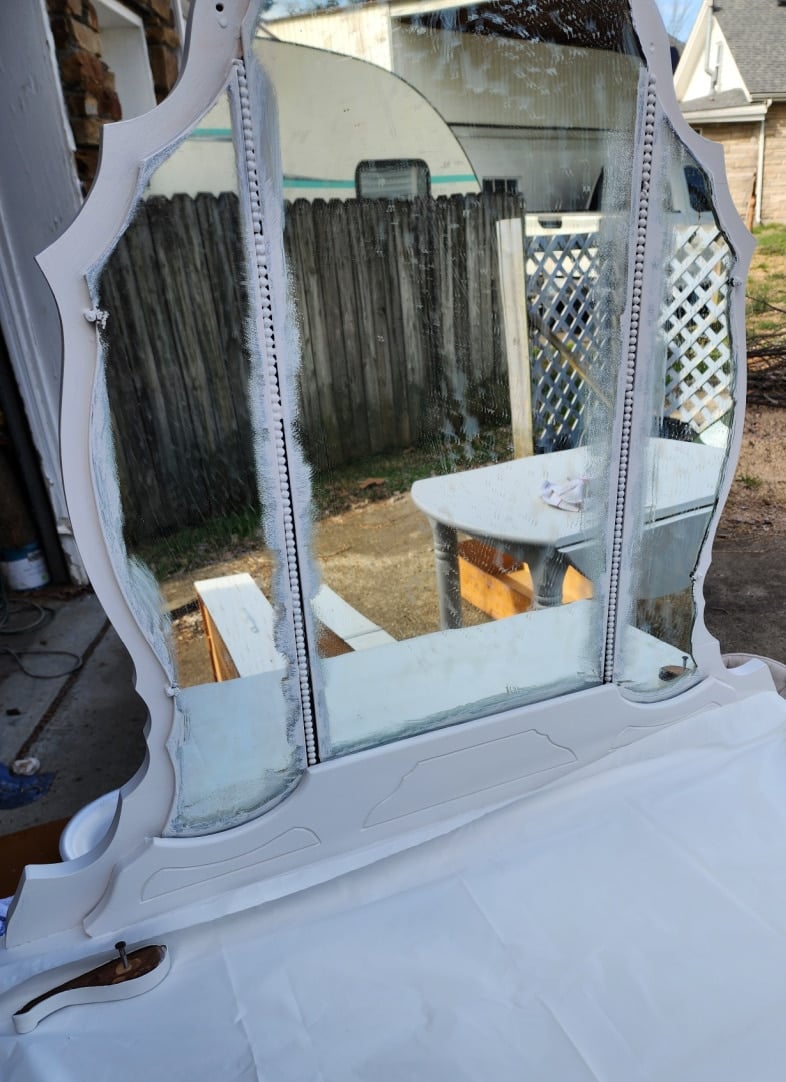
I painted all around the mirror frame, not worrying if I got paint on the mirror itself. Large gaps near the bottom would be noticeably dark if I didn’t get paint applied there.
After one more light coat of paint on the top, I used brown craft paper to “burnish” the paint to make it very smooth before applying the final coat.
The first “ugly coat” of paint was applied to the legs with a small brush, and subsequent coats were applied with a small foam roller.
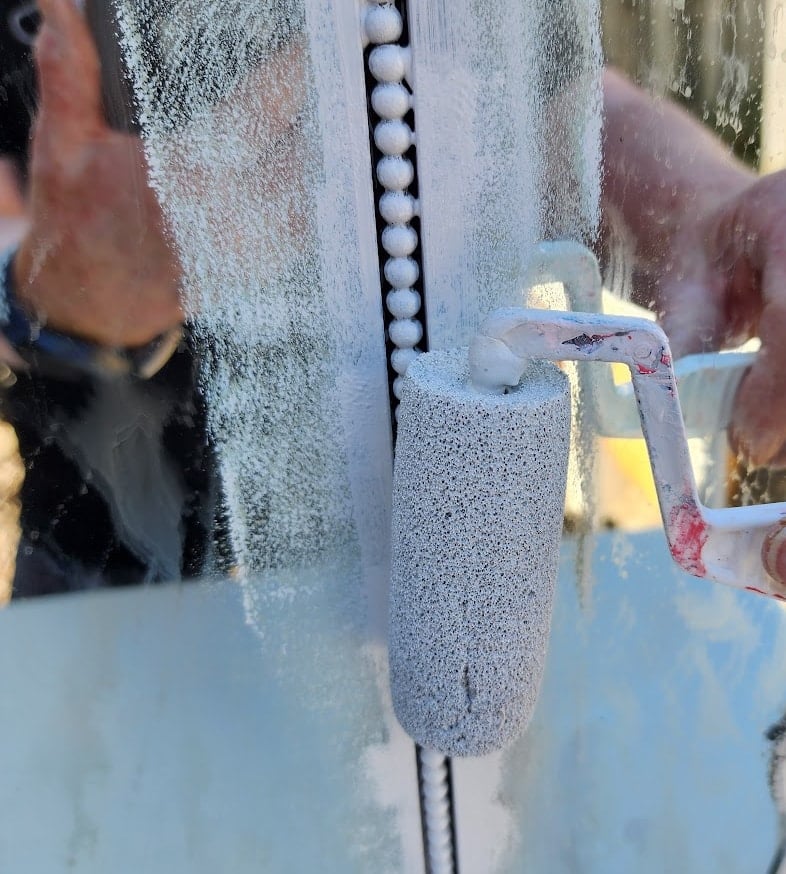
The beaded trim separating the three mirror pieces was also glued in place, so I had to paint it where it was. The first coat was done with a paintbrush, but I got impatient and switched to the foam roller.
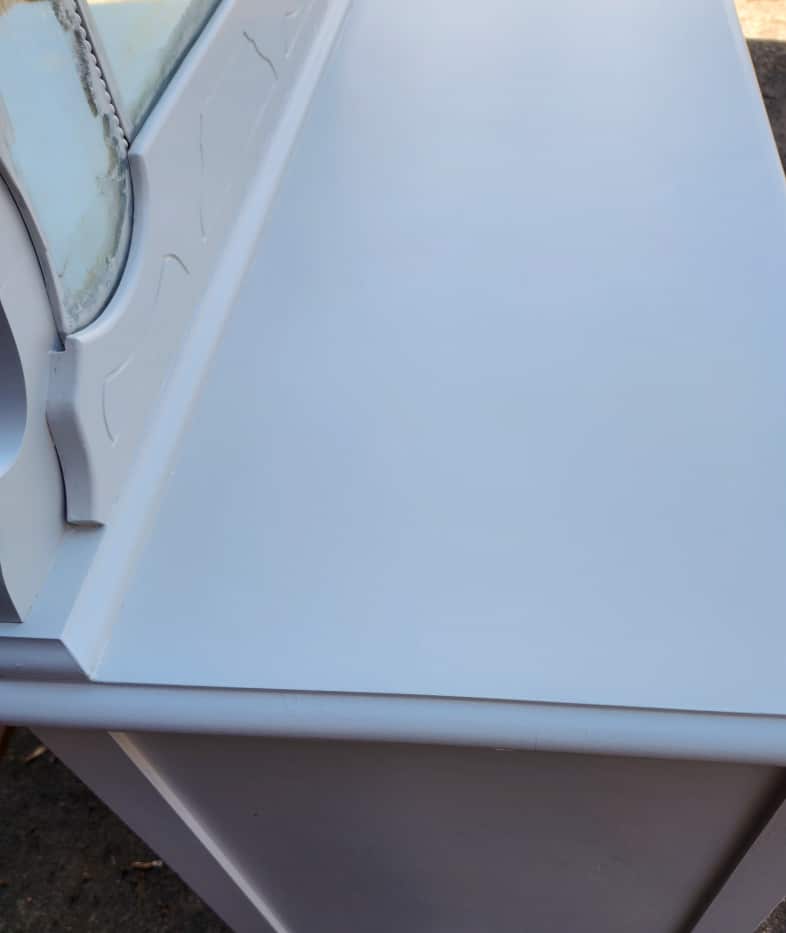
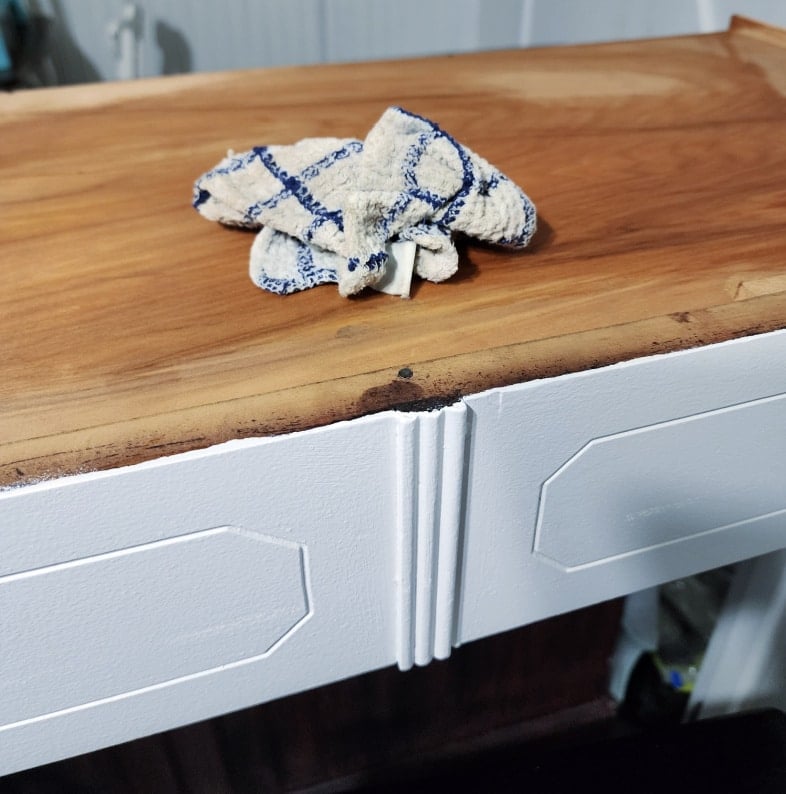
After the final coat of paint, the top of the dresser is perfect! It did get an extra coat of paint due to a few raindrops that fell while I was on a break.
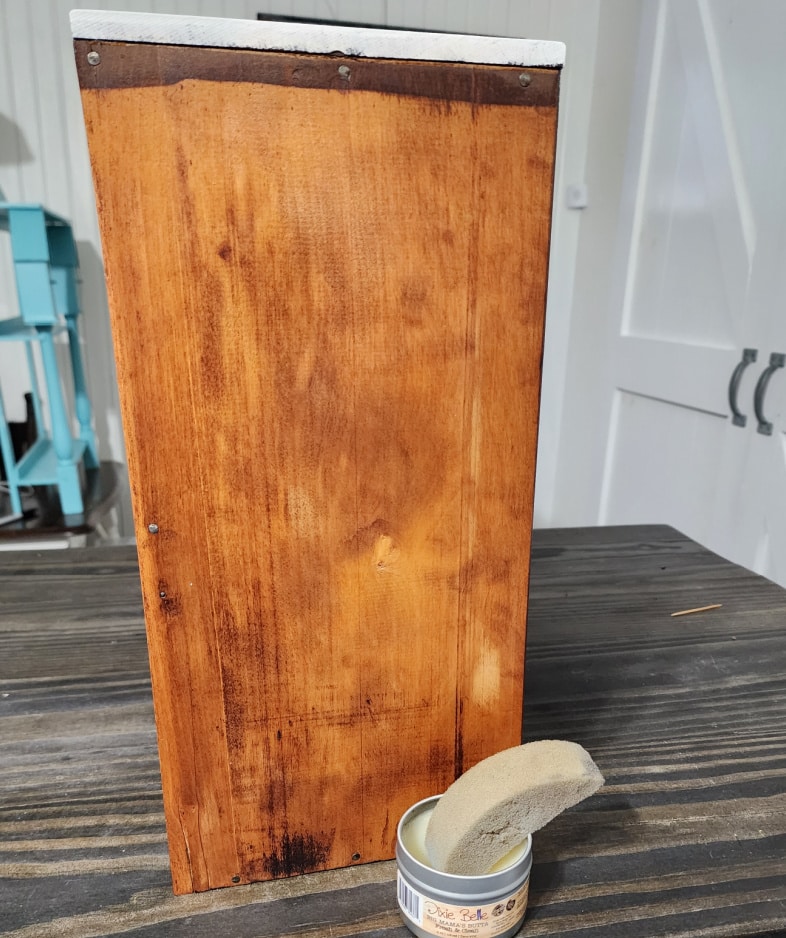
For this project, I decided not to paint the back of the antique dresser. I felt like it would be a waste of paint.
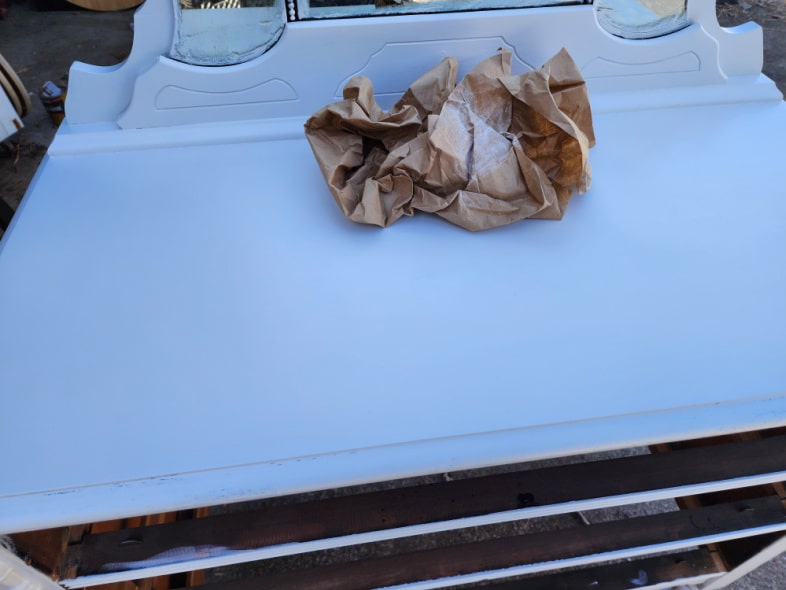
Cleaning/Scraping the Paint off of the Mirror
Because the paint hadn’t cured thoroughly, I placed a piece of plastic shower curtain on top of the dresser to collect the paint scrapings and crumbs.
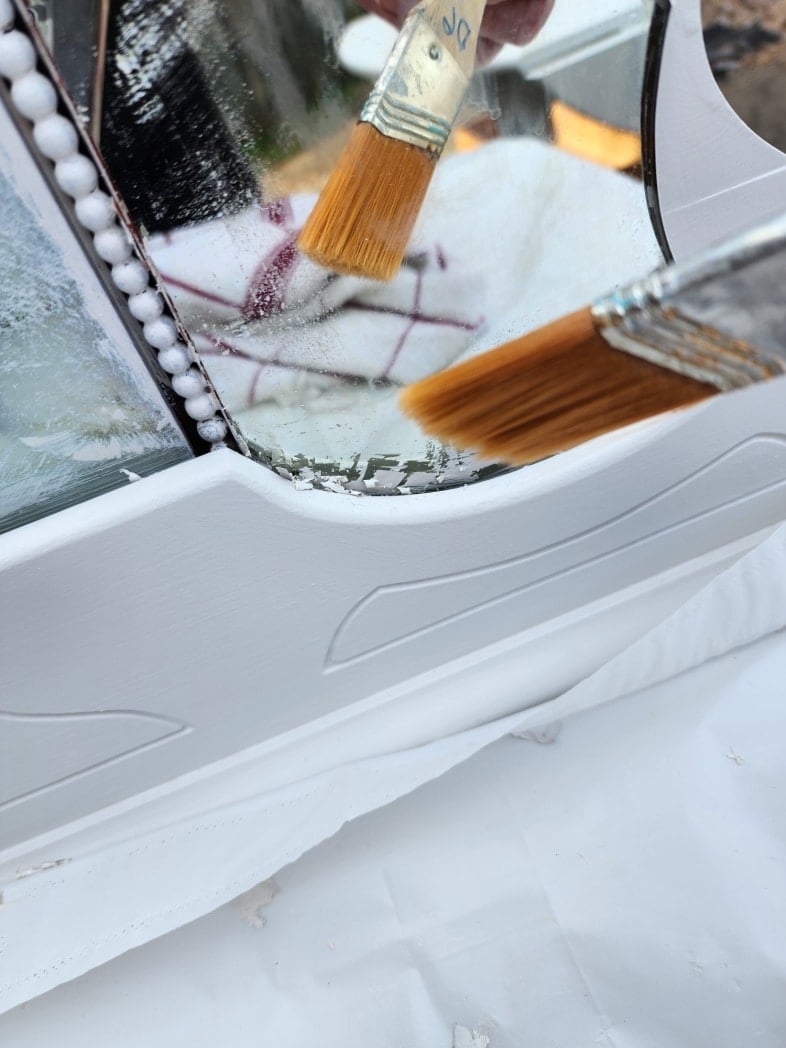
A small paintbrush was perfect for cleaning off the paint bits removed with the scraper. It easily fits into the crevice where the mirror meets the bottom of the frame.
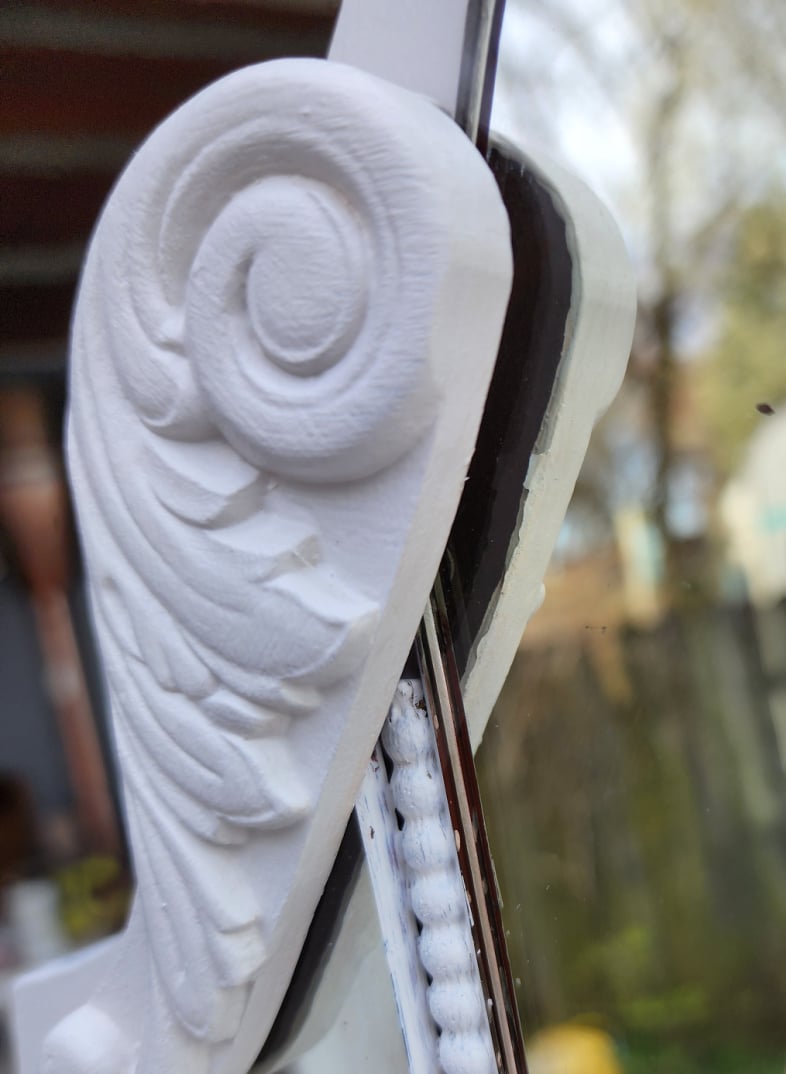
While testing the fit of the wooden mirror brackets, I noticed that their reflection was revealing the dark wood on the backside.
More touchup painting was needed. While I had the small brush out, I quickly inspected the entire antique dresser and covered any tiny spot that needed a little more paint.
Wipe Down Drawers
The drawers had been dusted, so it was time to wipe them down inside and out with a damp cloth. I brought them inside due to inclement weather conditions.
Make Necessary Repairs
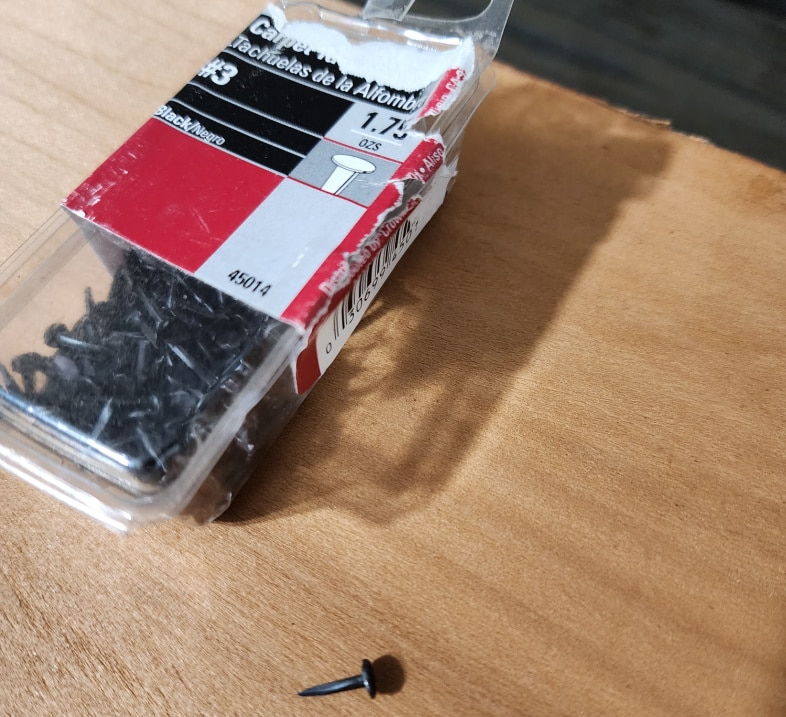
The bottom of a couple of drawers was loose, so I used small tacks to secure them.
Wax the Sides and Edges of the Drawers
When I had the drawers in the dresser, I noticed they were sticking a bit. Big Mama’s Butta will help with that and make the drawers smell better.
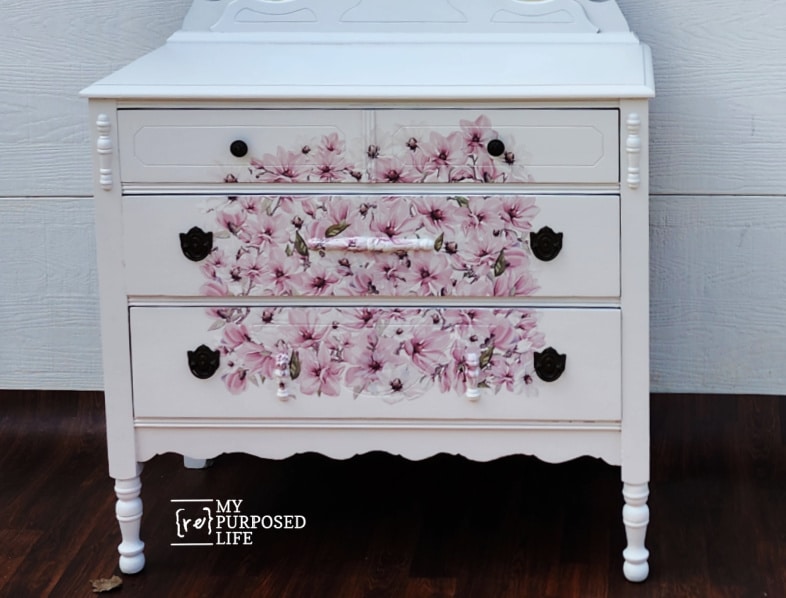
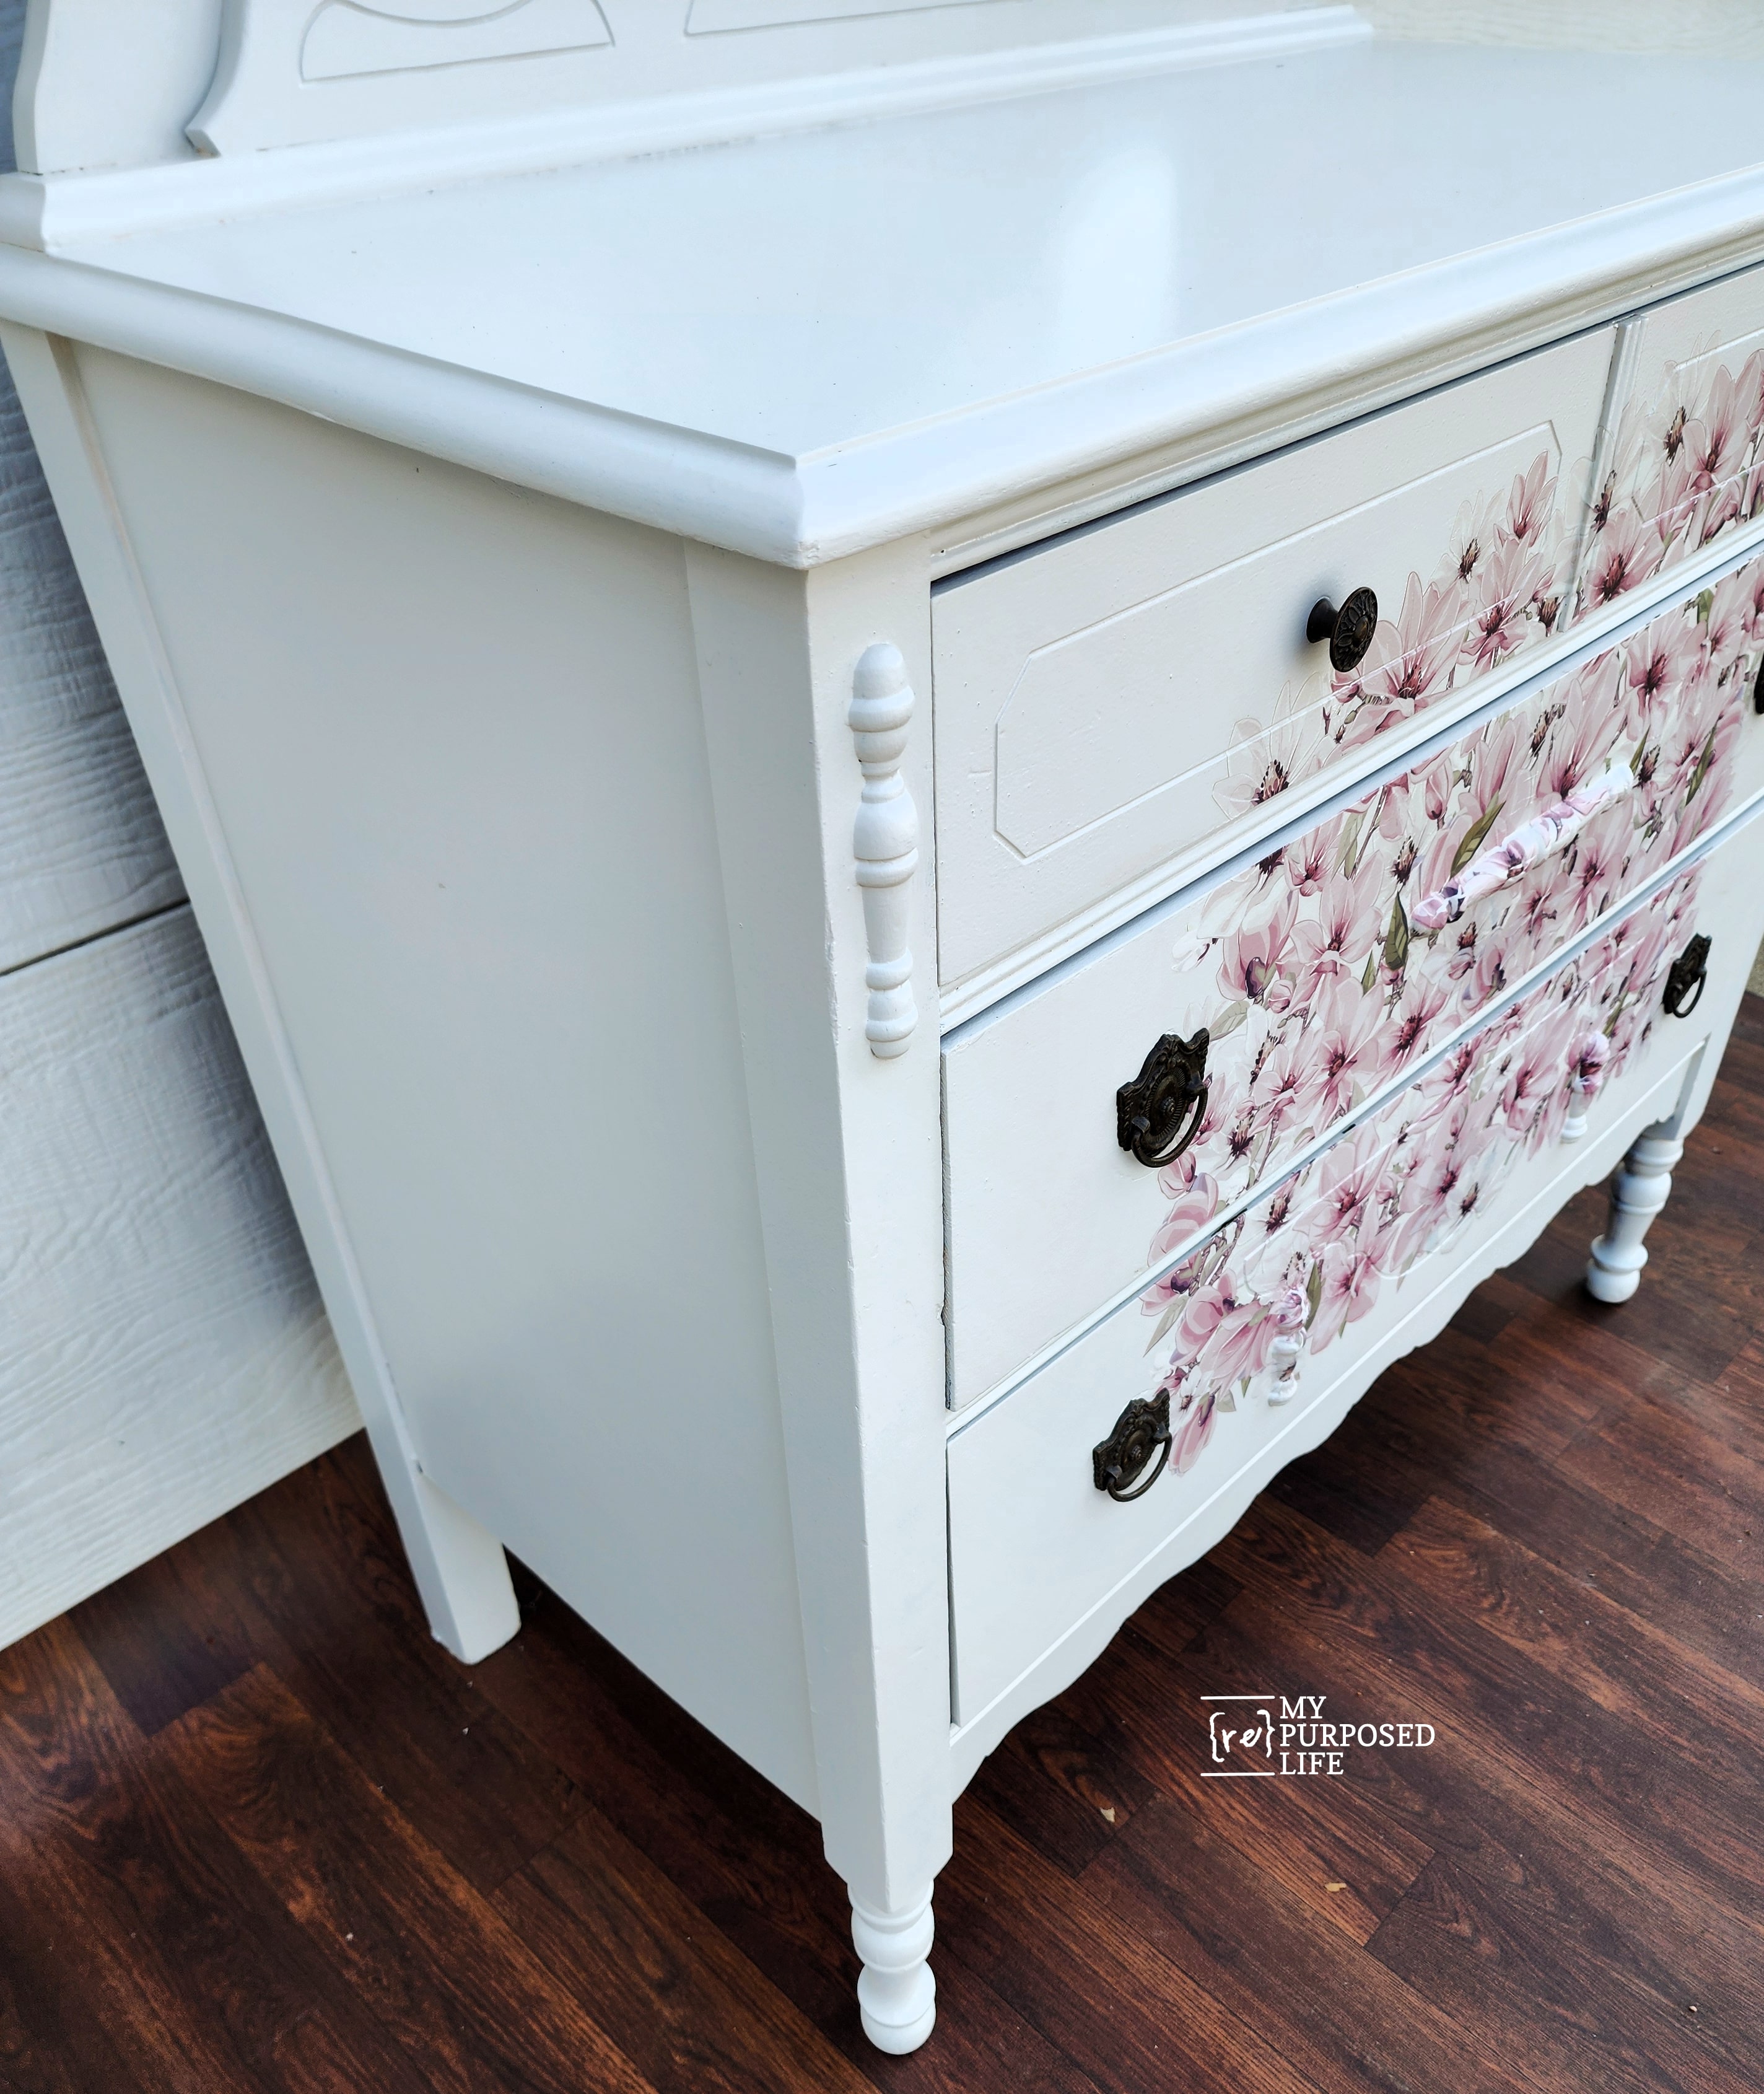
Adding Furniture Transfers to Antique Dresser Drawers
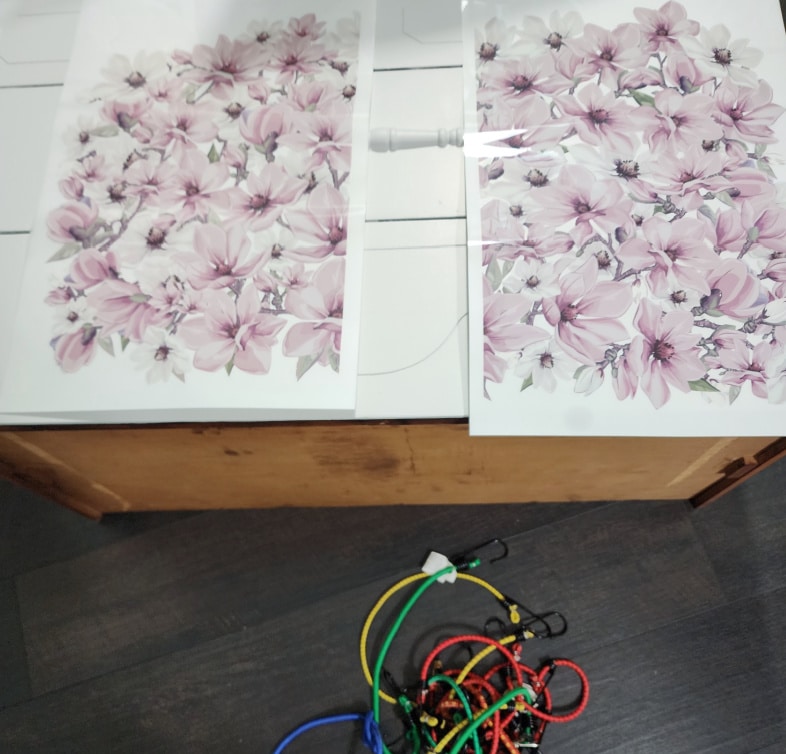
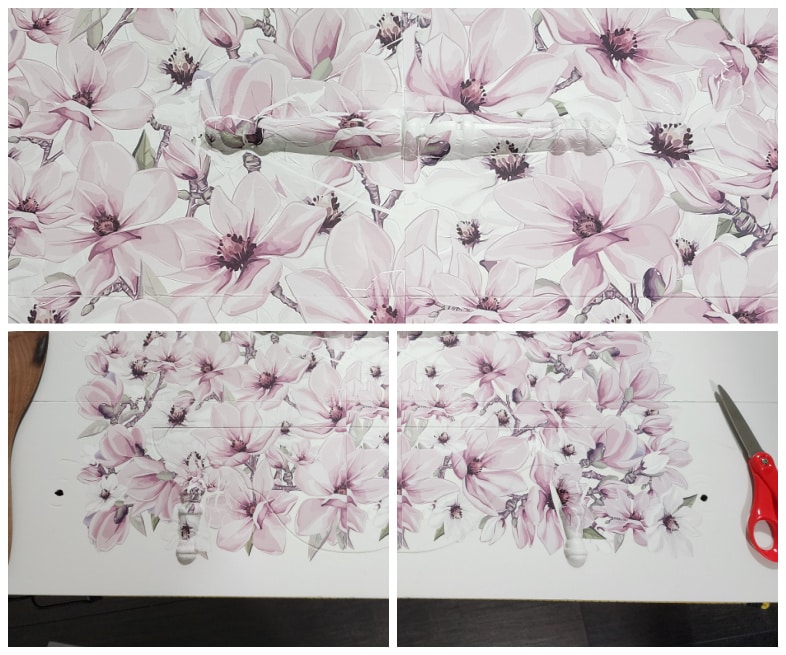
I chose the same Magnificent Magnolia furniture transfers that I used on the Pink Art Deco Vanity Makeover. Instead of embellishing the drawers while in the dresser, I wrangled the three drawers with bungee cords and added the transfer across the drawer fronts.
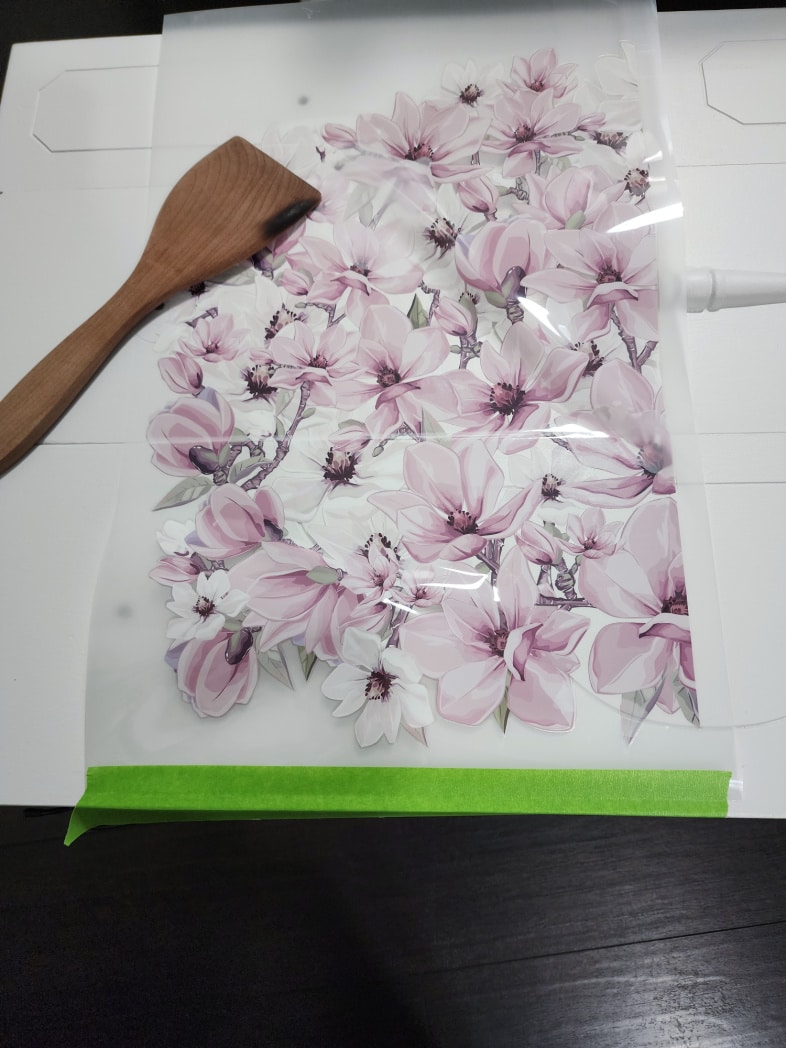
A piece of green painter’s tape holds the transfer onto the drawers. I prefer a wooden spurtle of the included tongue depressor. However, it was being used on the stove to make stew, so the wooden spatula worked well for this project.
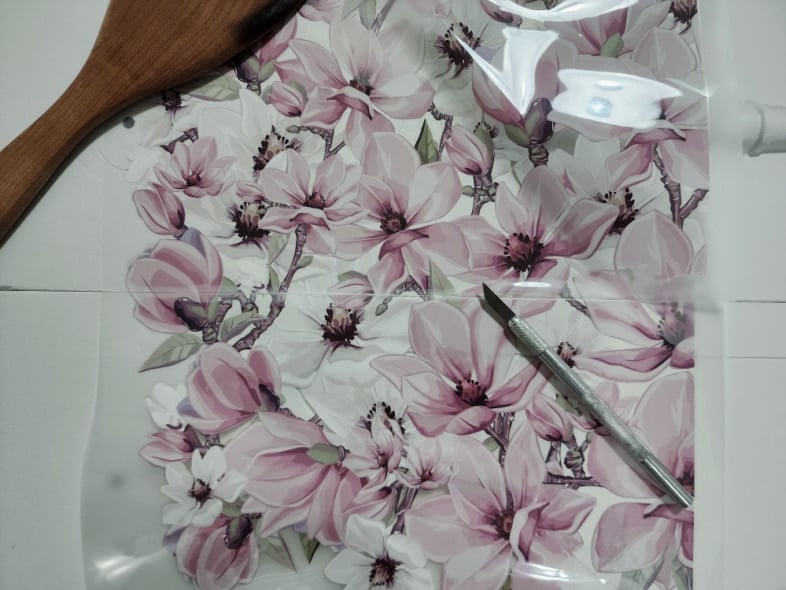
As I work my way up the set of drawers, I use an Exacto knife to separate the floral transfer between the drawers.
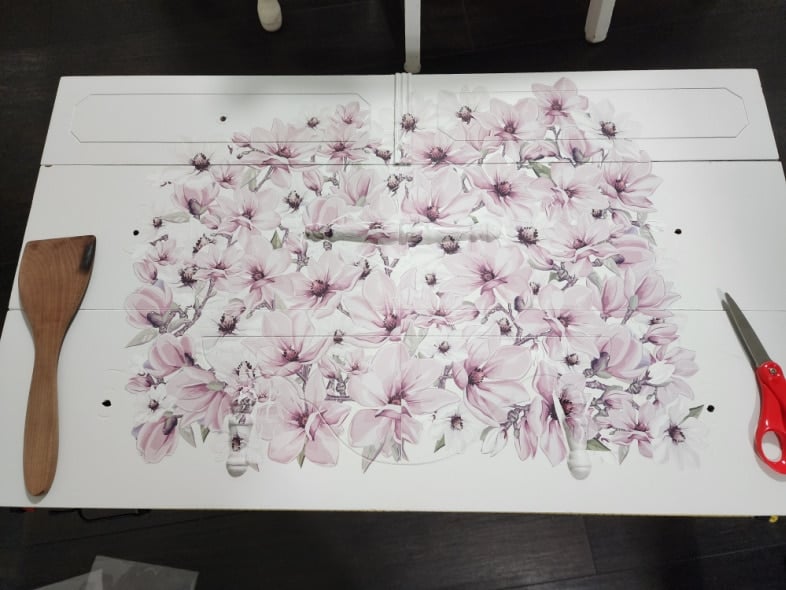
While applying the floral transfer, I burnished it into the grooves of the drawer design. The three spindle pieces were definitely a challenge.
Less Than Perfect Furniture Transfer Application
Can I be brutally honest? I am not an expert when it comes to furniture transfers. Had I known I would use a transfer on the front of the drawers, I may have attempted to remove the half spindles. The top photo shows the middle drawer; the picture on the left is of the left drawer, while the one on the right is of the right drawer.

I had a few random pieces left over from when I did the Art Deco Vanity. I used these bits and pieces to improve the less-than-perfect furniture transfer.
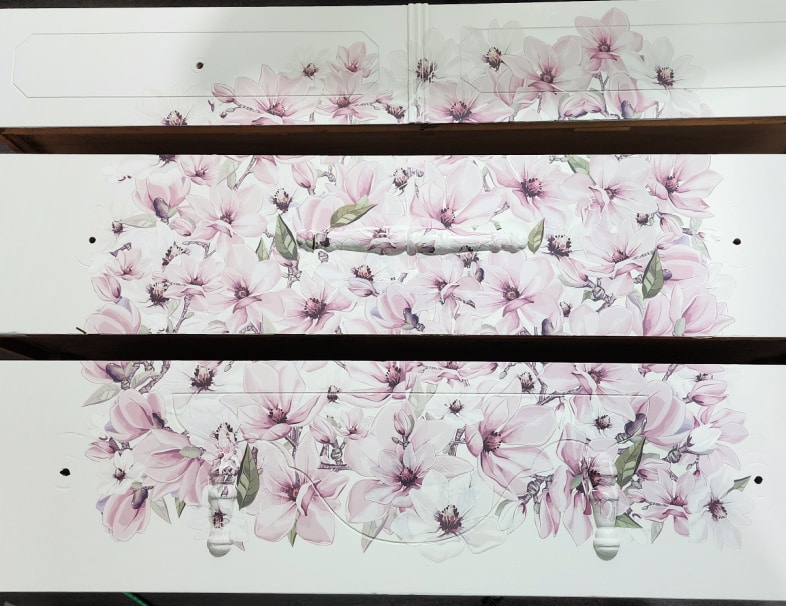
Can you spot the “band-aids”? I hope they won’t be visible to the new owner. There is one place I wasn’t happy with, but it isn’t visible in the collage above. It is the center of the bottom drawer, right inside that little “swoop” design. While placing the second transfer, there was a slight gap. I used part of the larger scrap flower to layer over that line (gap). Poof! Like magic, it’s gone!
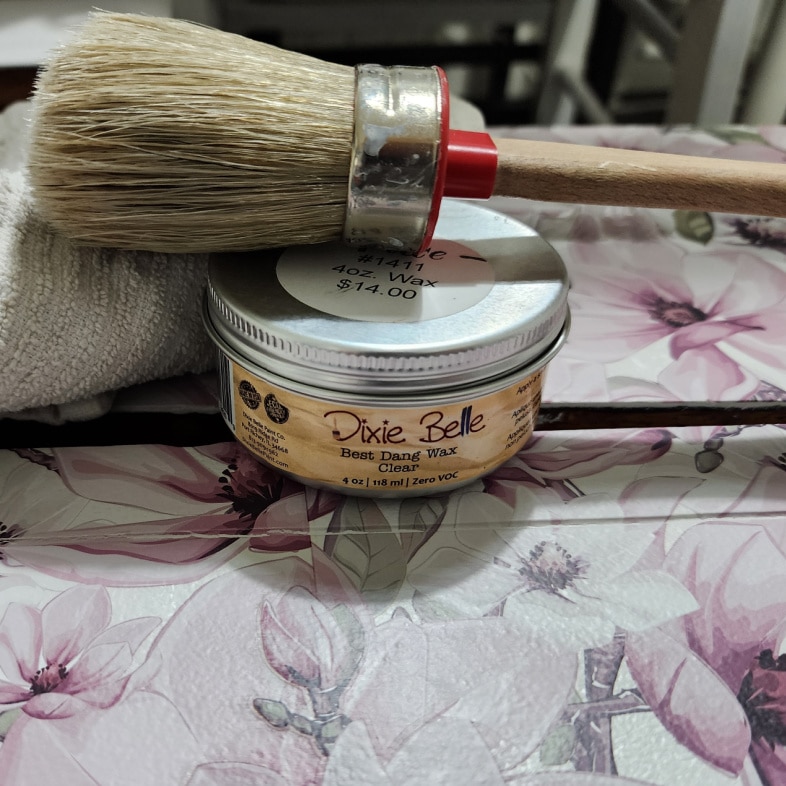
I sealed the furniture transfer with Dixie Belle Best Dang Wax using a brush and a soft cloth. I’m not a fan of waxing, but this product is easy to use.
Clean Hardware
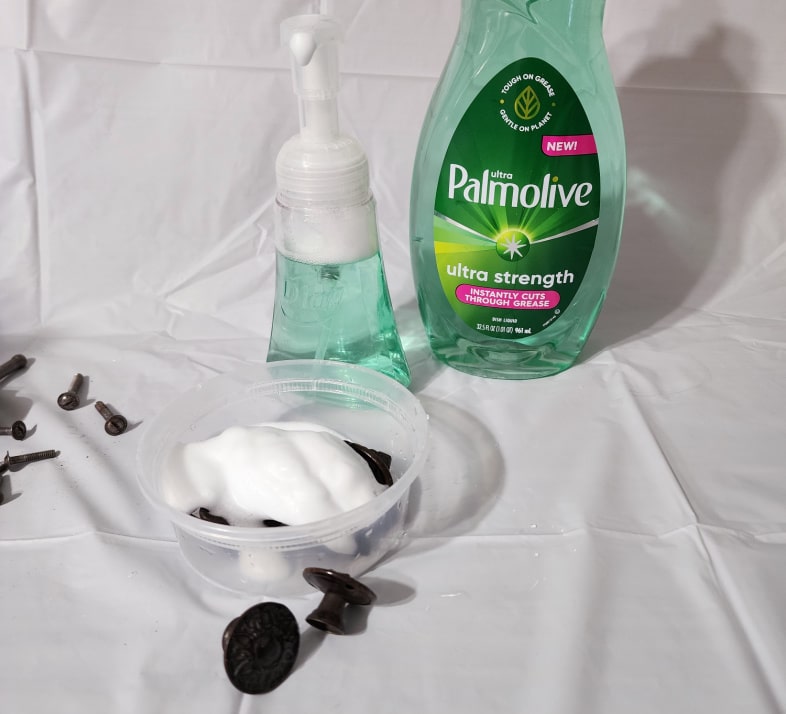
I wanted to clean the hardware gently instead of using a harsh option like Krud Kutter. This is the perfect time to share my handy tip for making foam dish detergent. When my Palmolive bottle is empty, instead of adding water, shaking it, and squirting it into the dishpan, I fill it with water to make a diluted solution. I then squirt that into an empty hand soap bottle. It squirts the loveliest foam for handwashing just a few dishes!
You may be thinking, “Dawn already has that”! But I can’t use Dawn; it breaks my hands out.
After rubbing the foam soap over the hardware pieces, I rinsed them under cool water and dried them.
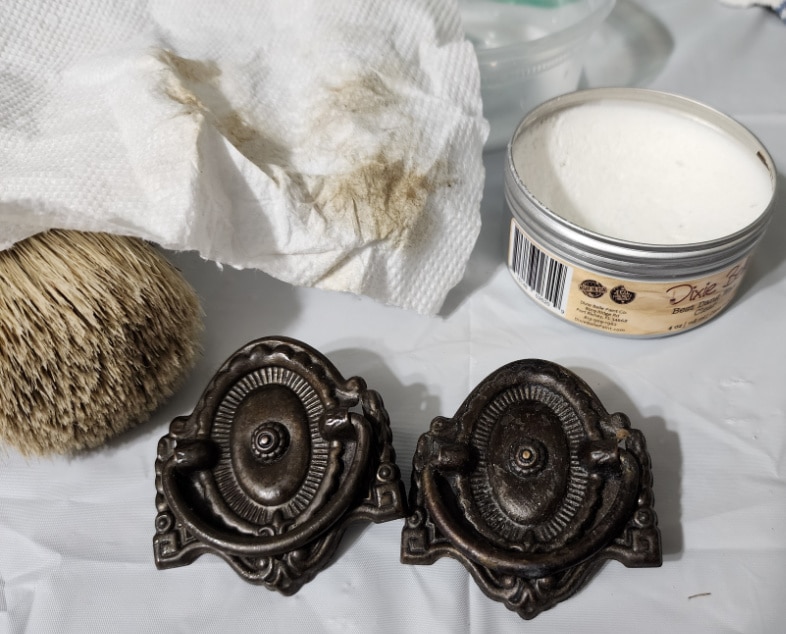
It looked dull after allowing the hardware to dry, so I gave it a coat of wax and buffed it.

The antique dresser wheels didn’t clean up as well as the hardware did.
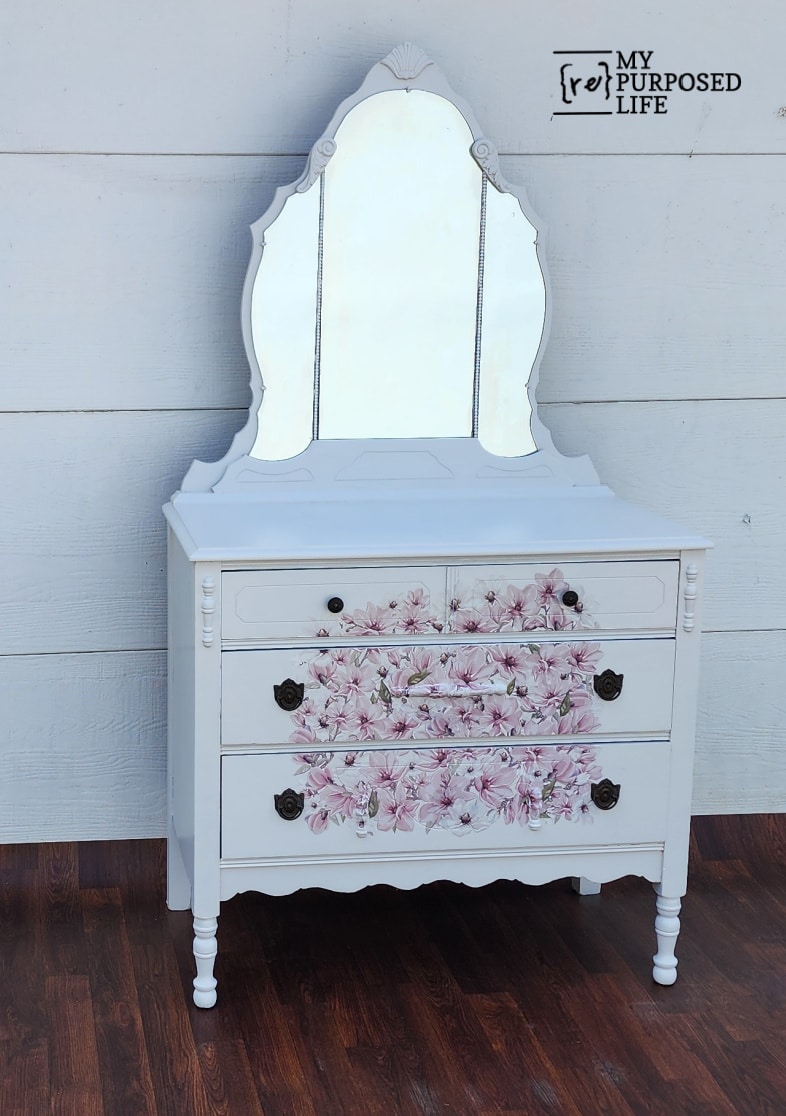
Triple Mirror Antique Dresser Makeover
Photographing a mirror is a challenge, and this was more difficult than usual because of an unwanted visitor in the storage garage.
Staging a Piece of Furniture
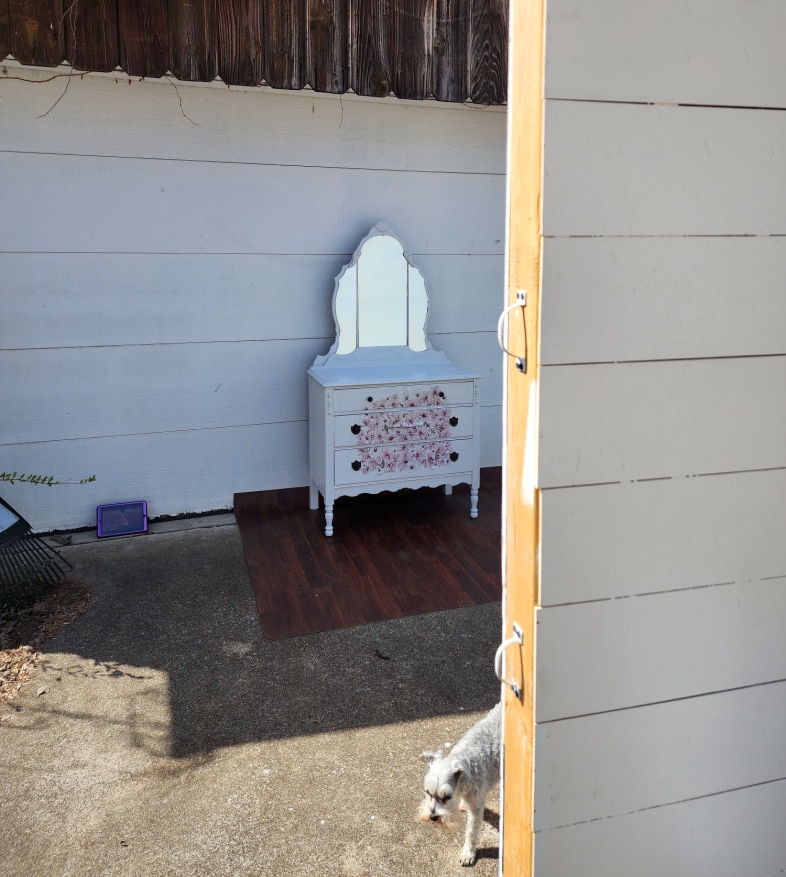
Here is the setup, including a fake floor and fake wall to prevent an outdoor reflection in the mirror. No, Lulu isn’t the unwanted visitor.
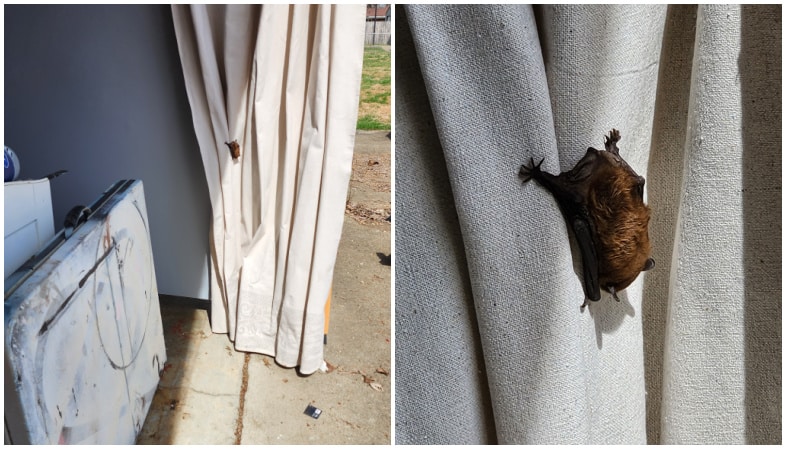
I had already moved the portable photo backdrop wall all over the garage before I noticed this little guy!
This was a very long drawn-out process. No humans, canines, or bats were injured. Because of all the chaos, the pretty antique dresser is not adorned with accessories.
Earlier, I mentioned that the mirror edge was a funny color. I painted the edge all the way around with the same light gras as the dresser.
I decided not to put the wooden casters on the antique dresser. What do you think about the original hardware? Would you have done something different?
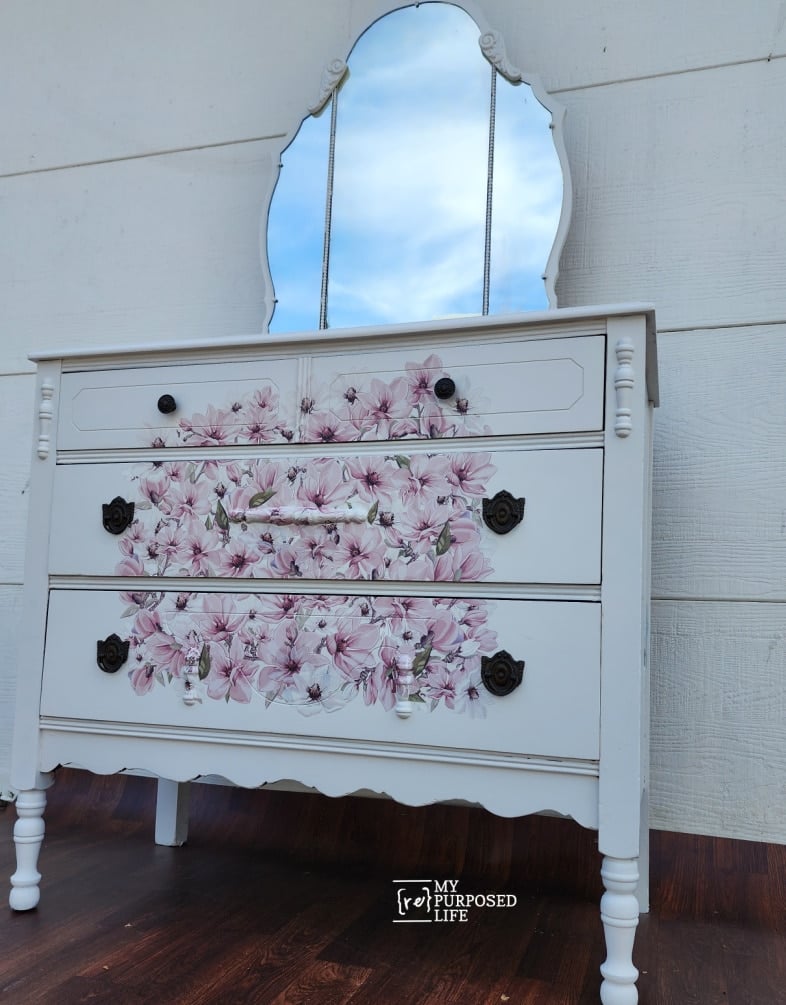
Crouching low, I could catch pretty clouds and sky in the mirror reflection. It’s hard to tell, but painting the back of the wooden mirror brackets did the trick. They look much better now that they reflect white instead of dark wood.
Let’s see what my friends have been working on:
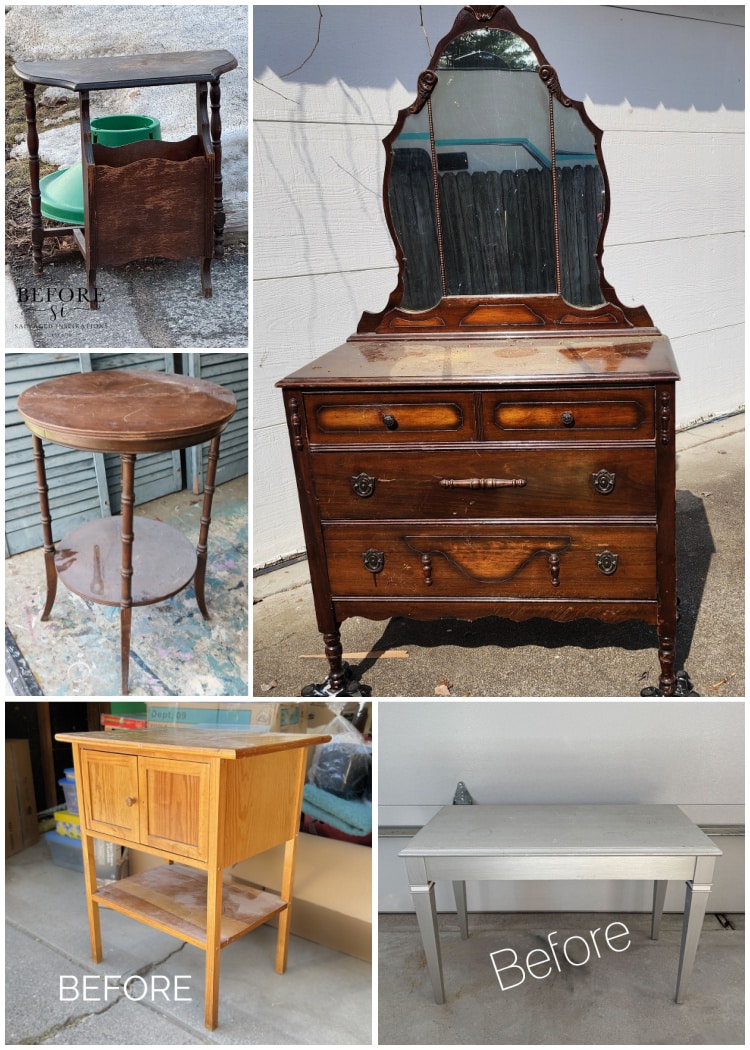
- Magazine Table Makeover
- Nautical Stenciled Coastal Style Table
- Antique Dresser Makeover (You’re here, thank you)
- Paint Furniture Without Sanding
- Piano Bench Makeover: Take Two
Related Content: More Chest and Dresser Projects
Furniture Fixer Upper Tour Projects
If you love seeing old furniture get a second chance, be sure to visit more Furniture Fixer Upper Tour makeovers. Each project starts with good bones and ends with a fresh new story.
See more Furniture Fixer Upper makeovers here
You will find everything from small side tables to large statement pieces, all transformed by talented DIY bloggers who believe in saving furniture rather than replacing it.
Such a lovely transformation, well done!
You did an amazing job and turned that heavy looking dresser into something a girl or woman could enjoy for years. I’m really impressed by how you tackled those little problems including the wee bat! I like the original pulls as they refer to the dresser’s history.
Marion
Your comment put a big smile on my face. Thank you so much for stopping by and reading my article. I appreciate your 2 cents about the hardward. No one else has mentioned anything about them.
Thanks!
gail
So much work but you brought her back to life Gail, she’s light and lively now! And your Lulu is adorable… I can’t say the same for the bat tho. Bats SCARE me! 😆 Pinned XOXO
Denise!
That bat scared me for sure. I was happy to see that he was gone the next day. Lulu always has her nose in mama’s business. 🙂
Thanks for pinning!
gail
Wow! You put a lot of work into this one and it is lovely now! Great work!!
Thank you for recognizing how much work went into this antique dresser. I appreciate you stopping by Amanda.
gail
The before was so heavy…now, it is soft and feminine! Just lovely! XOXO
Thanks Christy!
It was so much more work than I anticipated! I hope she finds a new home right away. 🙂
gail