Antique Wardrobe Makeover
As an Amazon Associate, I earn from qualifying purchases.
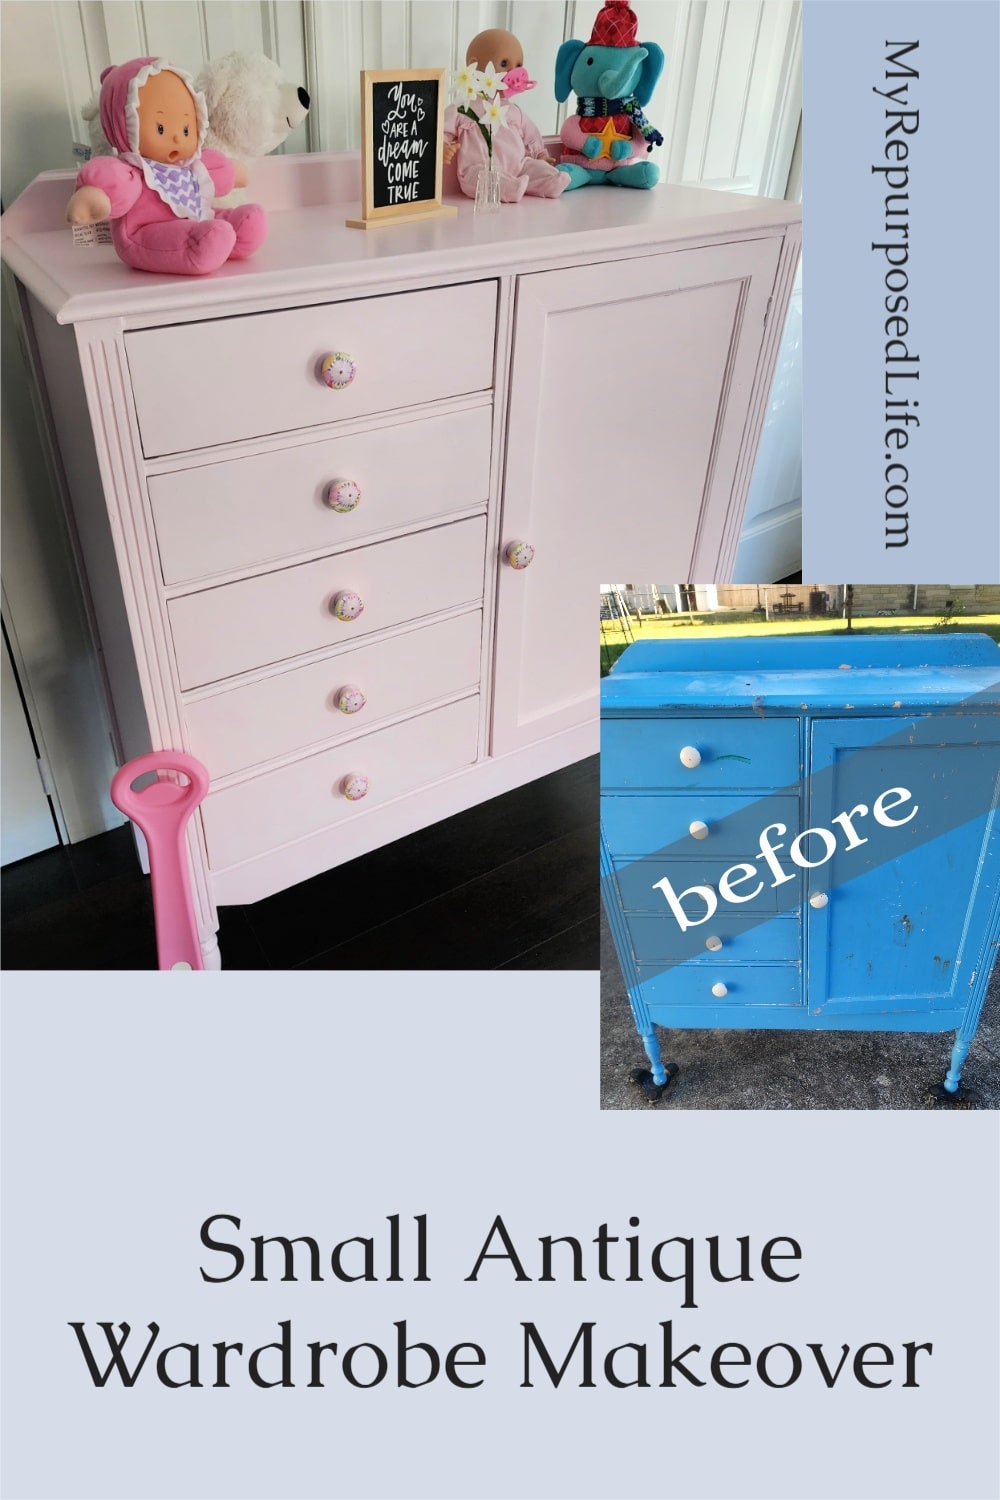
Giving new life to old furniture is one of my favorite kinds of DIY projects—especially when the piece has as much charm and character as this antique wardrobe. With its classic lines and sturdy build, it just needed a little TLC (and a lot of paint!) to shine again. If you love transforming thrifted treasures or family heirlooms, this makeover will inspire you to look at vintage furniture with fresh eyes.
How To Paint An Old Wardrobe: A Quick And Easy Guide
Sometimes, the old and worn-out pieces of furniture need a new look. You don’t have to spend much money to change them. Follow these tips and learn how to give an antique wardrobe a makeover.
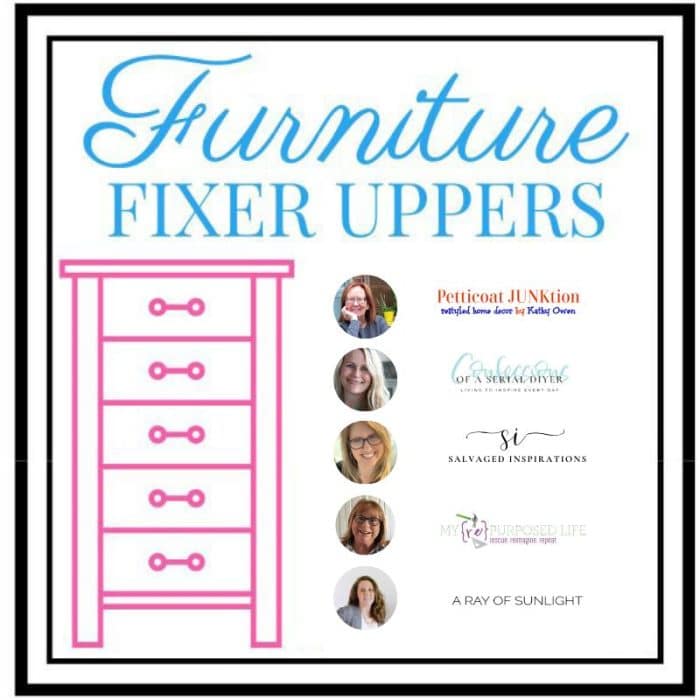
It’s Furniture Fixer Upper Tour Day! Be sure to visit my friends’ projects at the bottom of this post.
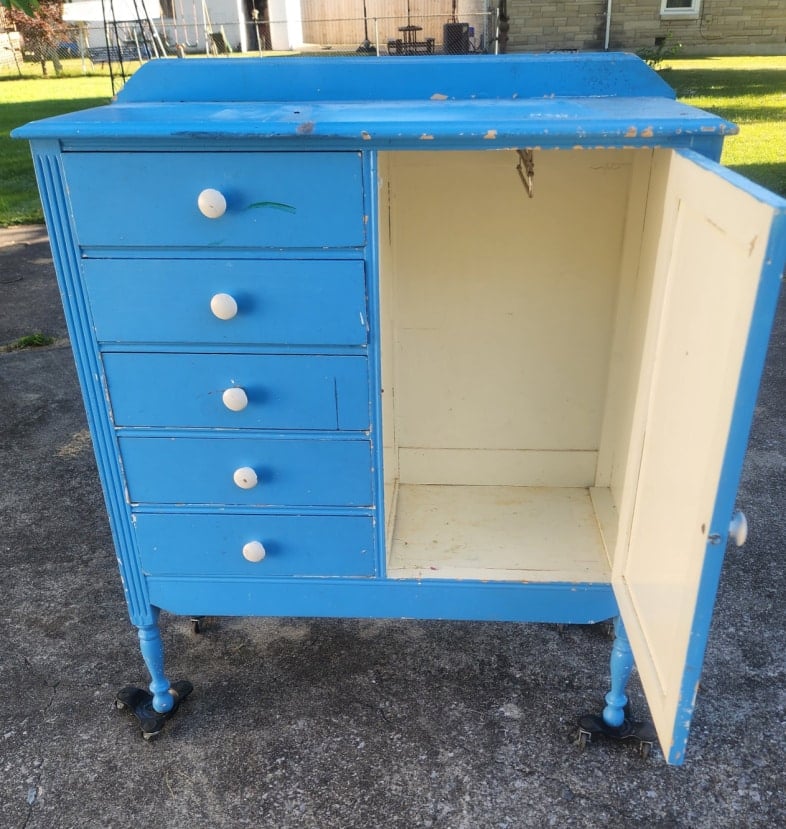
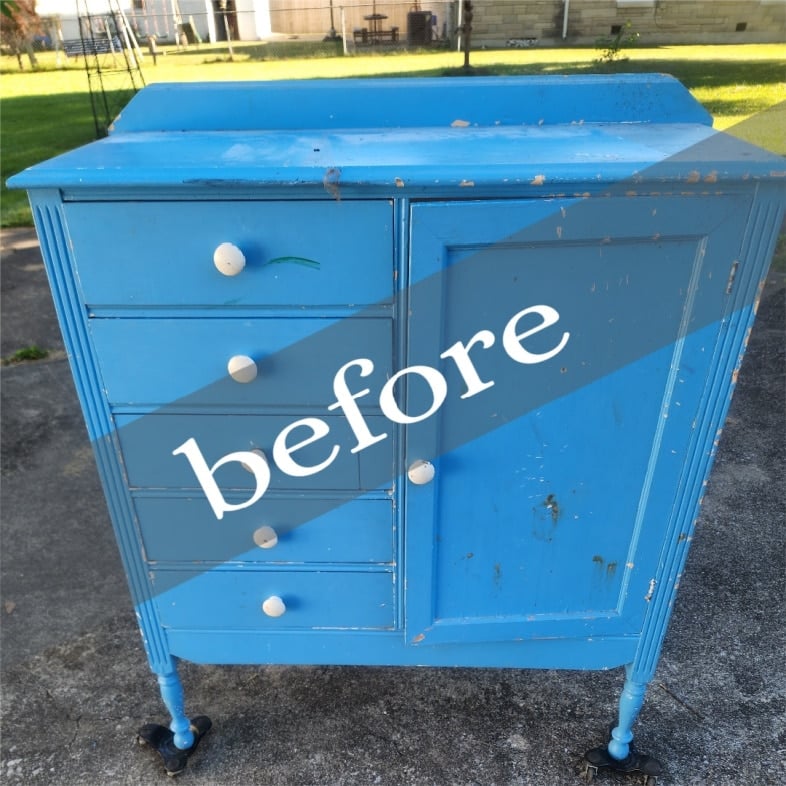
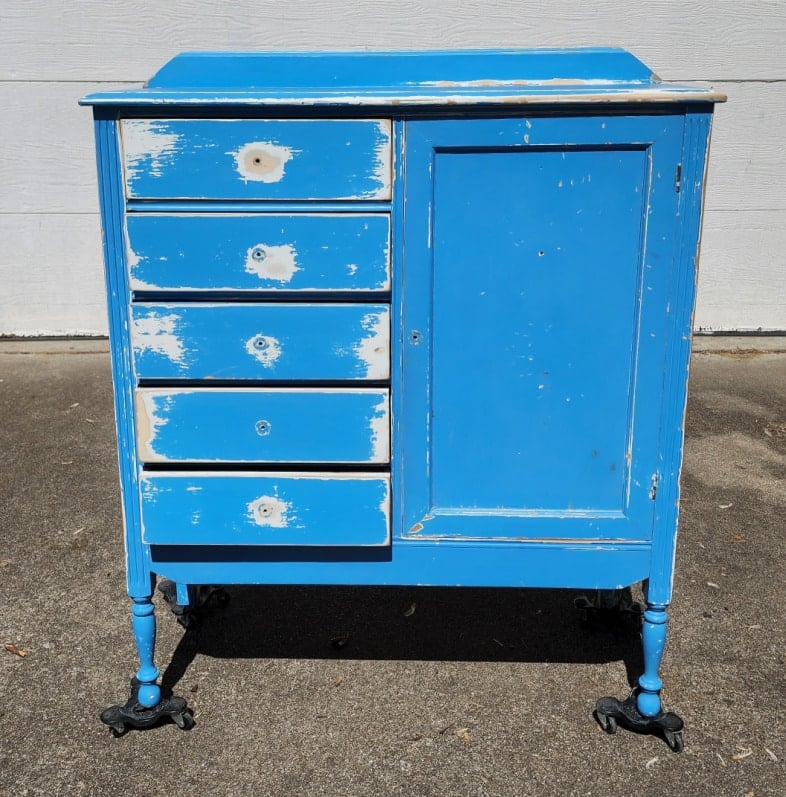
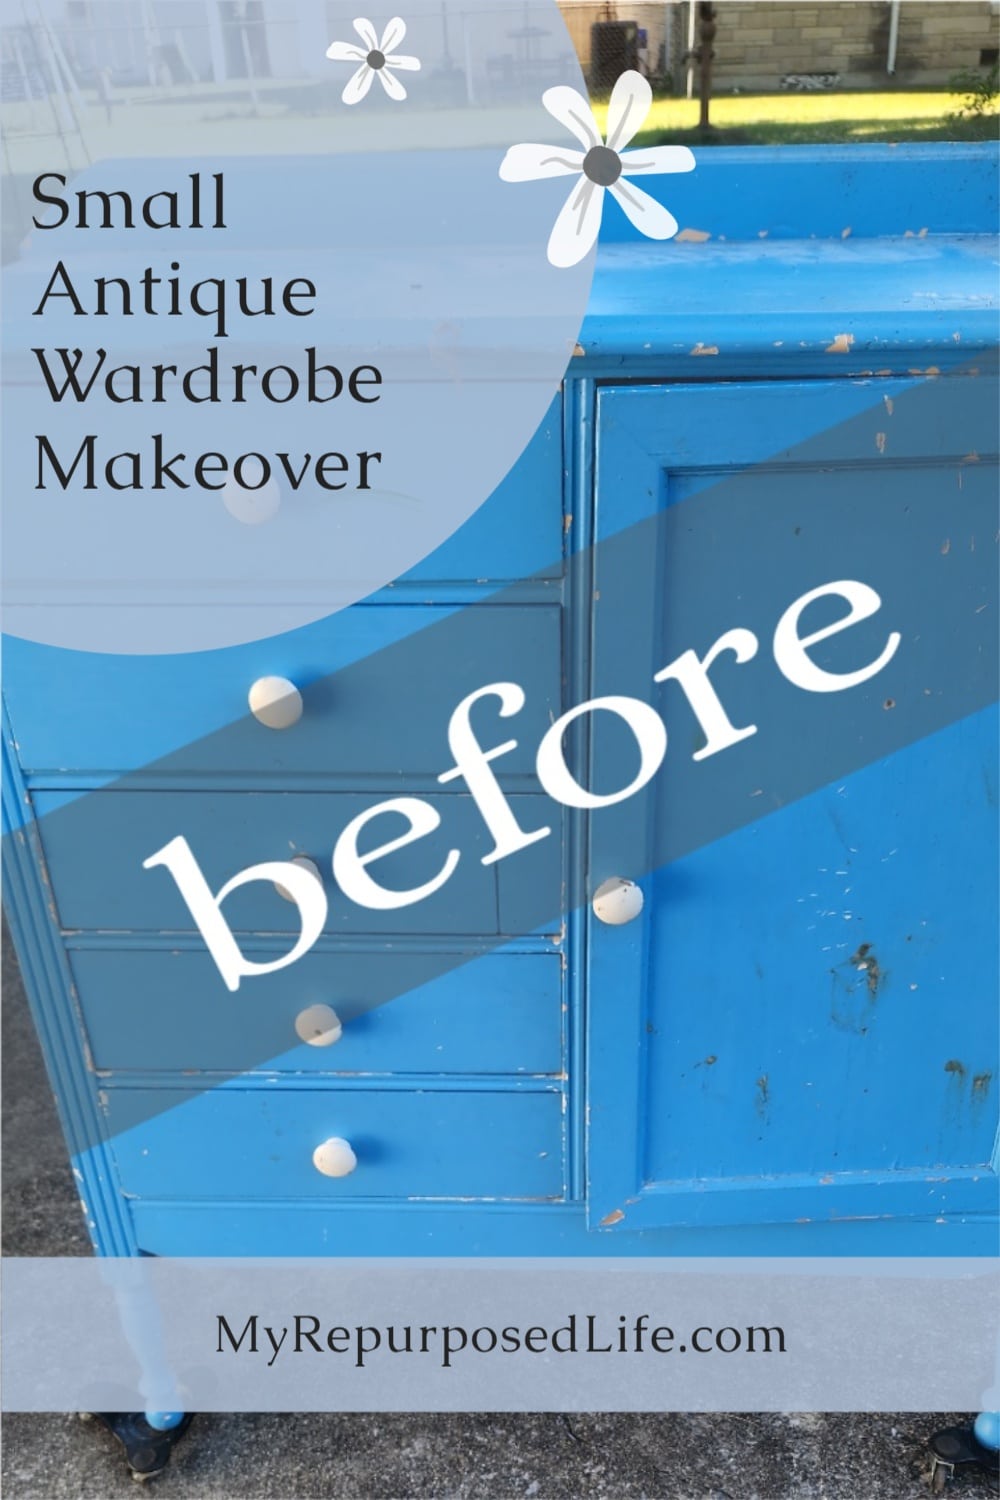
This wardrobe features five drawers and a large door. I had never seen this extraordinary pull-out hanging rod inside a cabinet before. Isn’t it genius for its time? If you’re short on closet space for your kiddo, this is perfect! I’m guessing this might be from the late 40s or early 50s. What do you think? Some kids had beaten up this poor little antique wardrobe for sure.
You will notice that most images feature the kids’ wardrobe on those handy furniture wheel dollies. When the drawers are out of the armoire, it’s not very heavy, but it is awkward to move around.
Visit the My Repurposed Life Amazon Store to shop my favorite items.
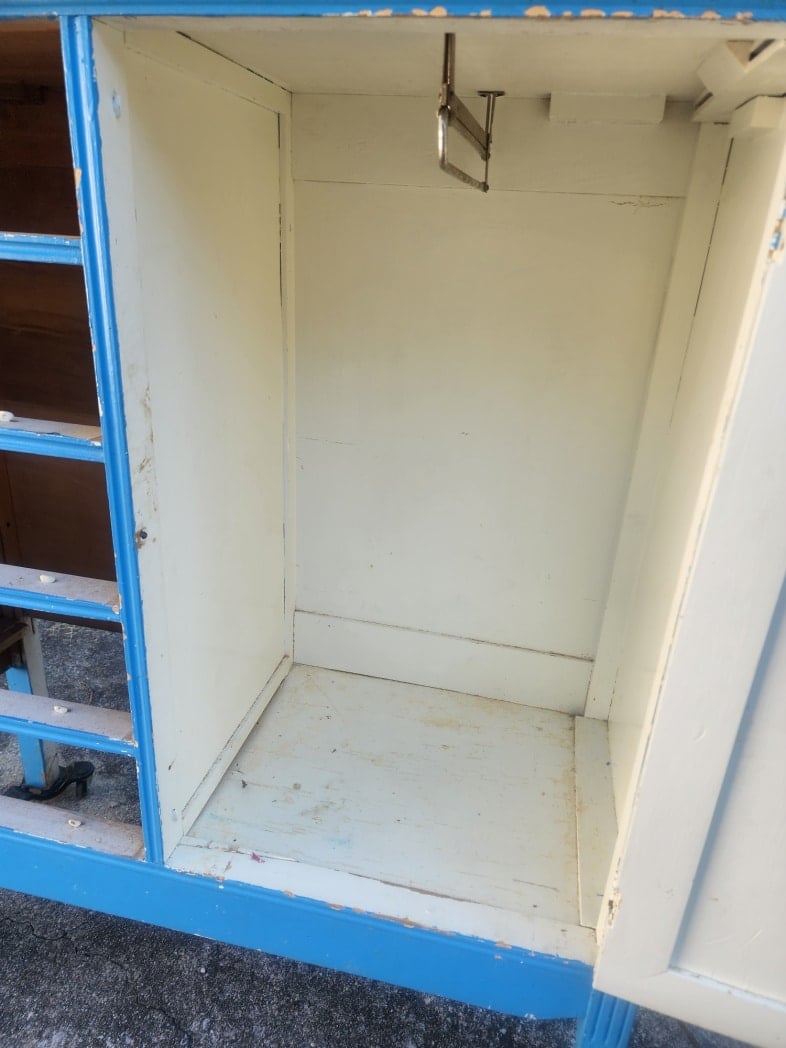
Here’s a close-up of the sliding hanging rod. You could remove the hanging rod and add shelves, similar to what I did with the camper closet shelves.
Remove Drawers & Hardware
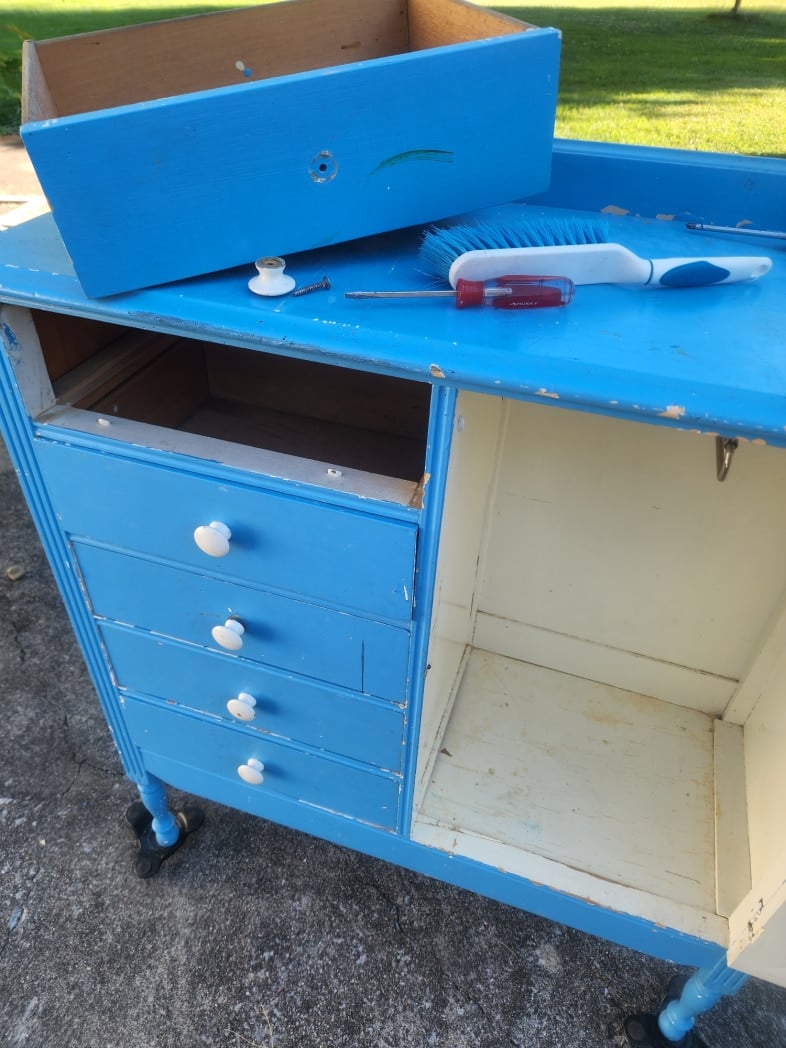
To begin the makeover on the sad-looking antique armoire, I removed the drawers and their knobs. Did I mention this antique was a curb find? So, yeah, it was free. Would you have dragged it home for FREE?
Sand Furniture to Smooth out Old Paint

Not only was it beaten up by some kid, but I think the same person may have painted it. My goal was to remove all hints of the old color so that the new owner wouldn’t know the shape it had been in. I may or may not have succeeded.
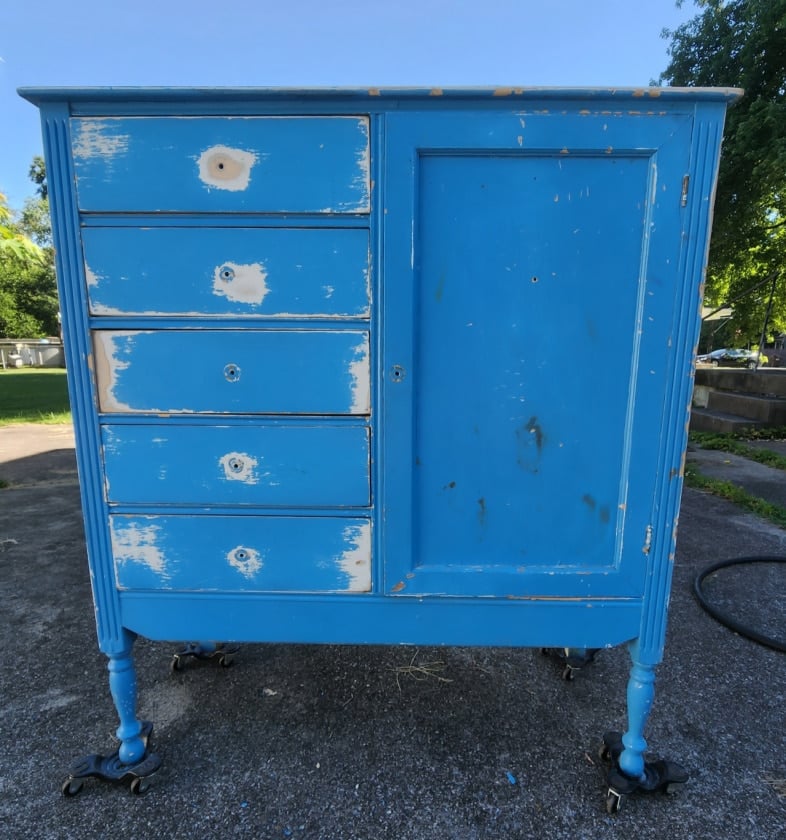
Additionally, I needed to smooth out the layers of paint where it was chipping. I used sandpaper, sanding sponges, and an orbital sander. You could strip the paint if you want to give the antique furniture new life.
More Chippy Old Paint
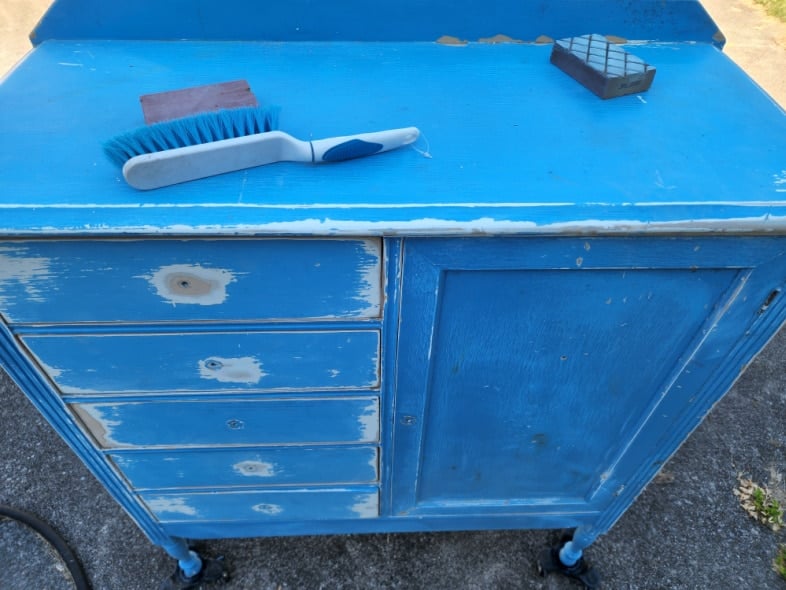
The top of the antique wardrobe was a challenge, especially the header in the back. Do you call this type of furniture wardrobes, armoires, or chifforobes?
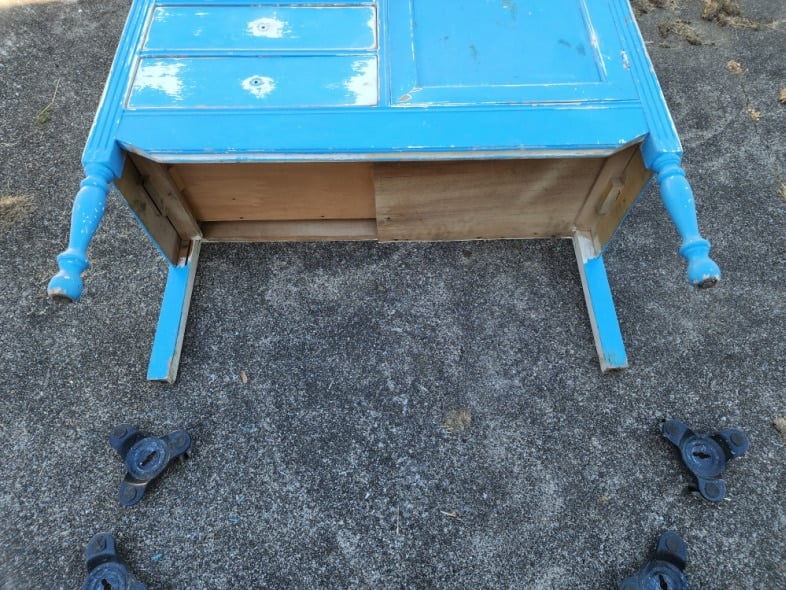
The bottom of the cabinet needed a few repairs. Maybe it was a hideout for the kids?
How Do You Clean an Old Wooden Wardrobe
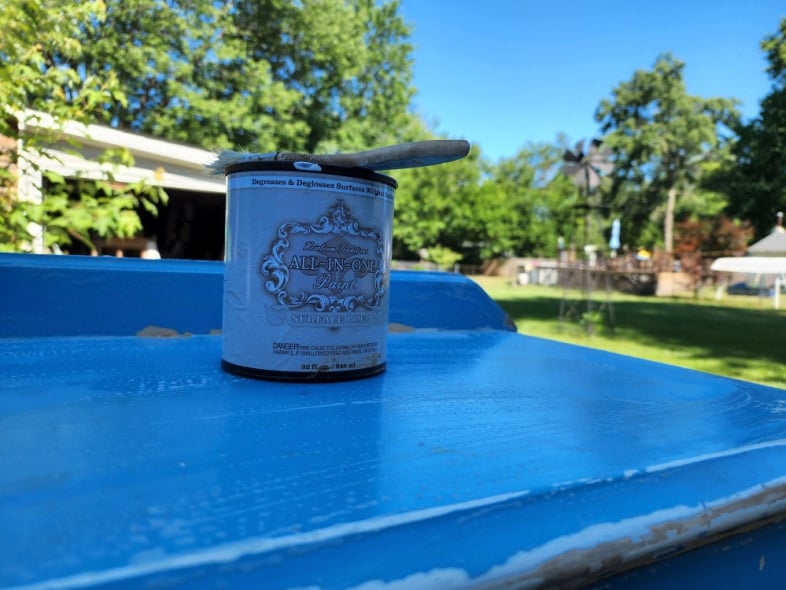
Of course, the kid’s wardrobe was a little “grimy.” So, I used HTP surface prep, applying it with a chip brush and removing it with an old cloth.
We’re getting closer to painting the wardrobe!
Painting a Kid’s Antique Dresser
Although the paint may look white, it’s actually All In One Paint (Peony), a very light pink. I prefer using these small rollers for the flat surfaces. It gives the perfect finish. Using the rollers helps keep the paint only on the drawer fronts.

After doing a light first coat with the roller, you can see it doesn’t cover everywhere. But I’m okay with that because rolling is so much faster.
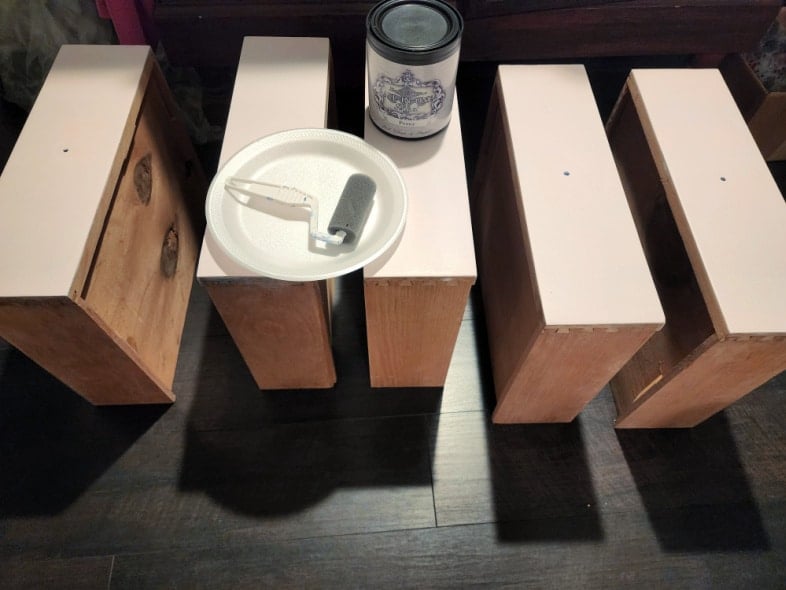
Due to weather conditions, I had to bring the drawers in to do their final coats of paint. Aren’t they pretty? Hardly any hint of blue left. More about that later.
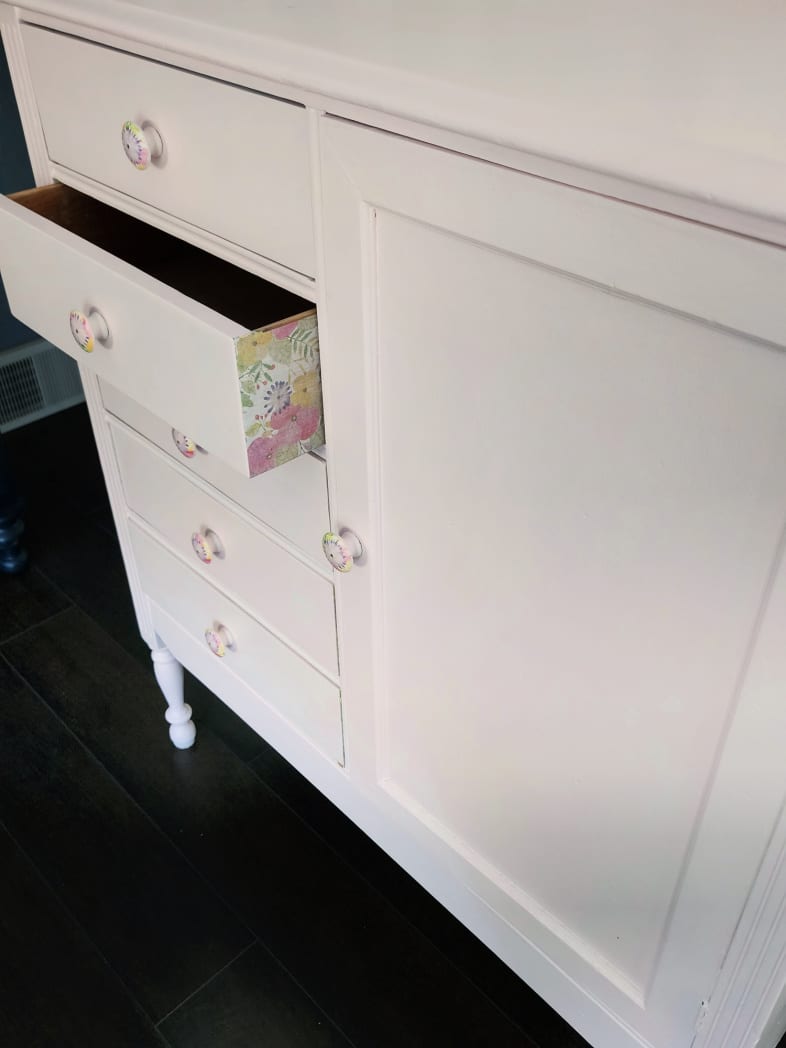
Peek-A-Boo Drawer Sides
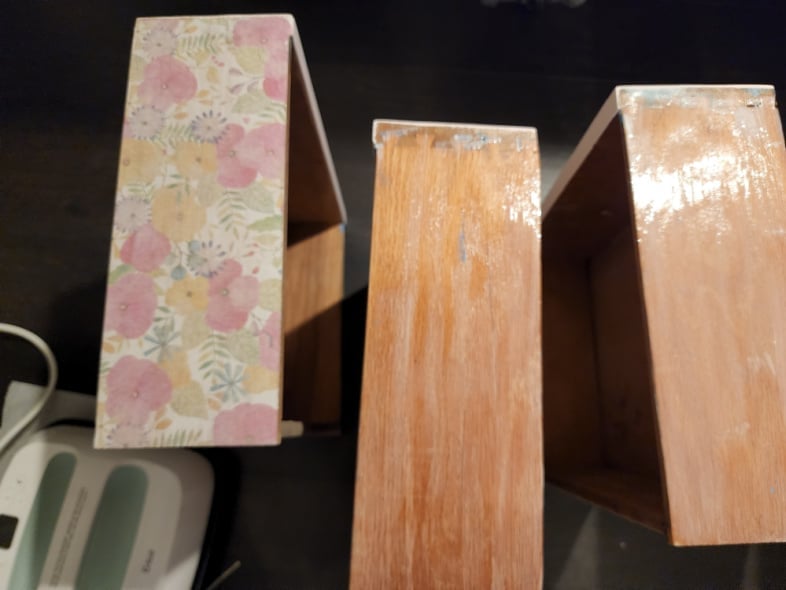
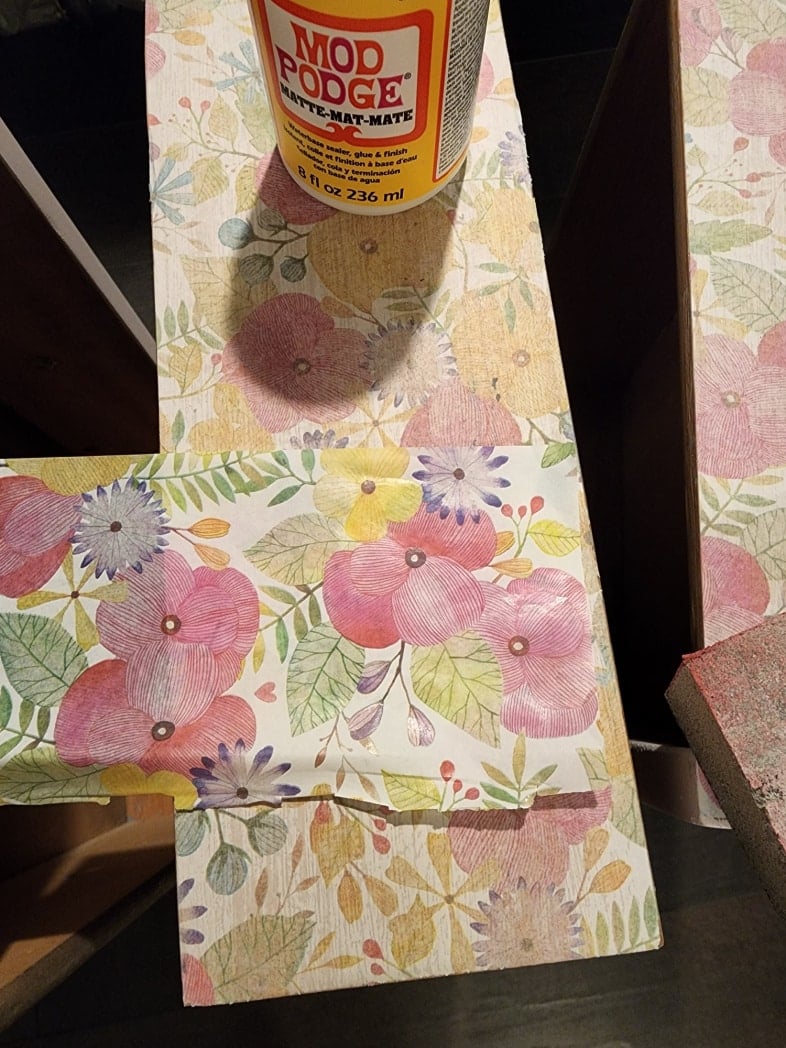
I apologize for the poor image quality. Do you remember when I did the peek-a-boo drawers on the gray desk? I did those with paint. I decided to use tissue paper for the kids’ antique wardrobe drawers. The drawer on the left is finished. The ones on the right are getting two coats of Mod Podge.
I let the Mod Podge dry thoroughly between coats.
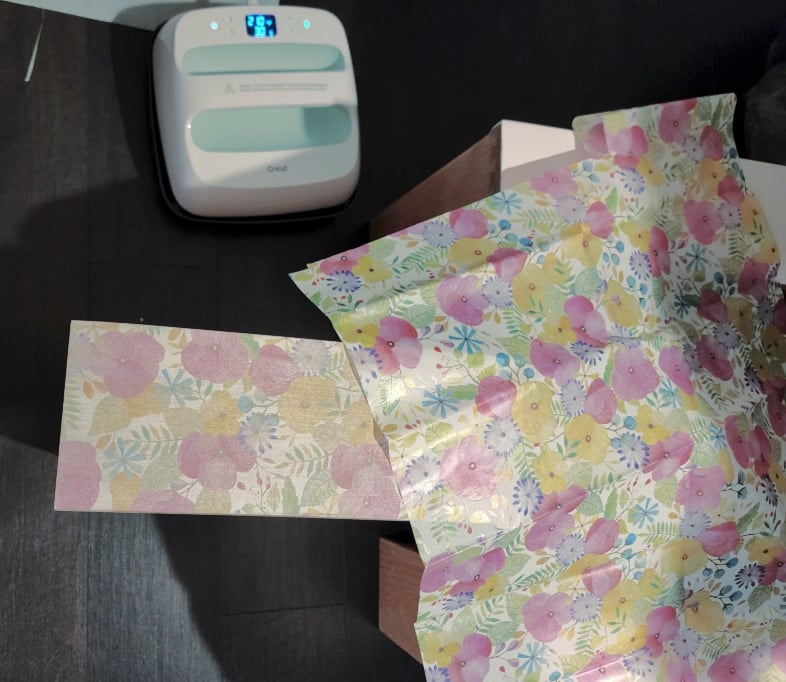
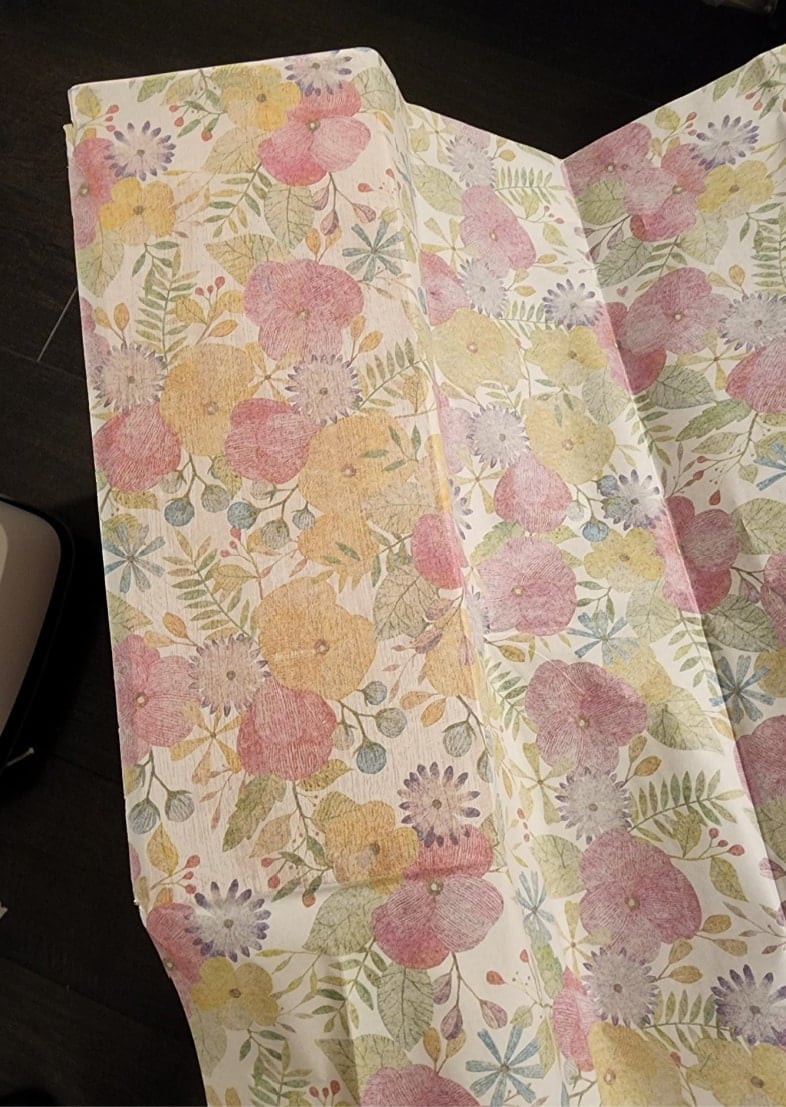
I bought a variety pack of tissue paper on Amazon. This is Watercolor Petal.
After the Mod Podge was dry, I placed a large sheet of tissue paper on the side of the drawer and “ironed” it in place with my Easy Press. Next, I used a sanding sponge to break off the edge of the tissue paper.
Cricut Easy Press
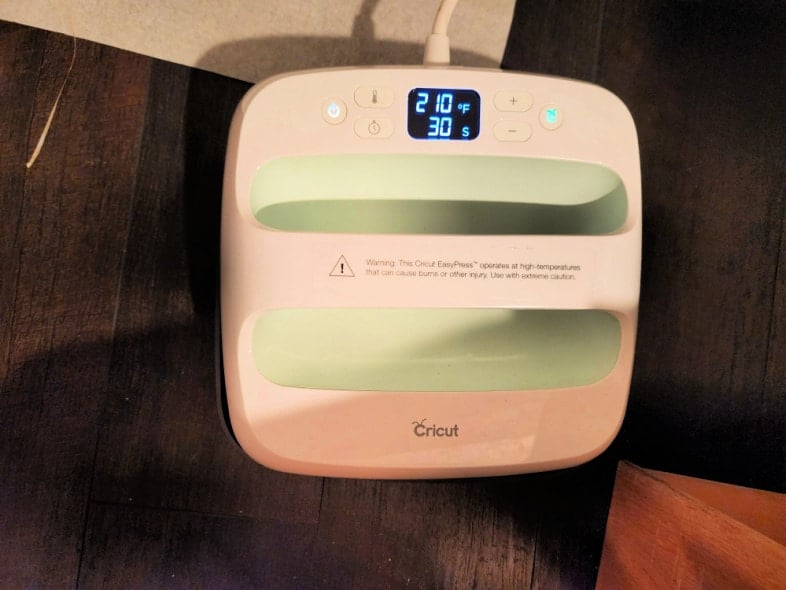
The easy press was set at 210° for 30 seconds. You could use your clothes iron for this as well.
Why Did I Use the Iron-on Method for Mod Podge?
I used the iron-on method of Mod Podge to get a smoother finish. Because the tissue paper was on the side, I needed to ensure it was smooth enough not to interfere with opening and shutting the drawers.
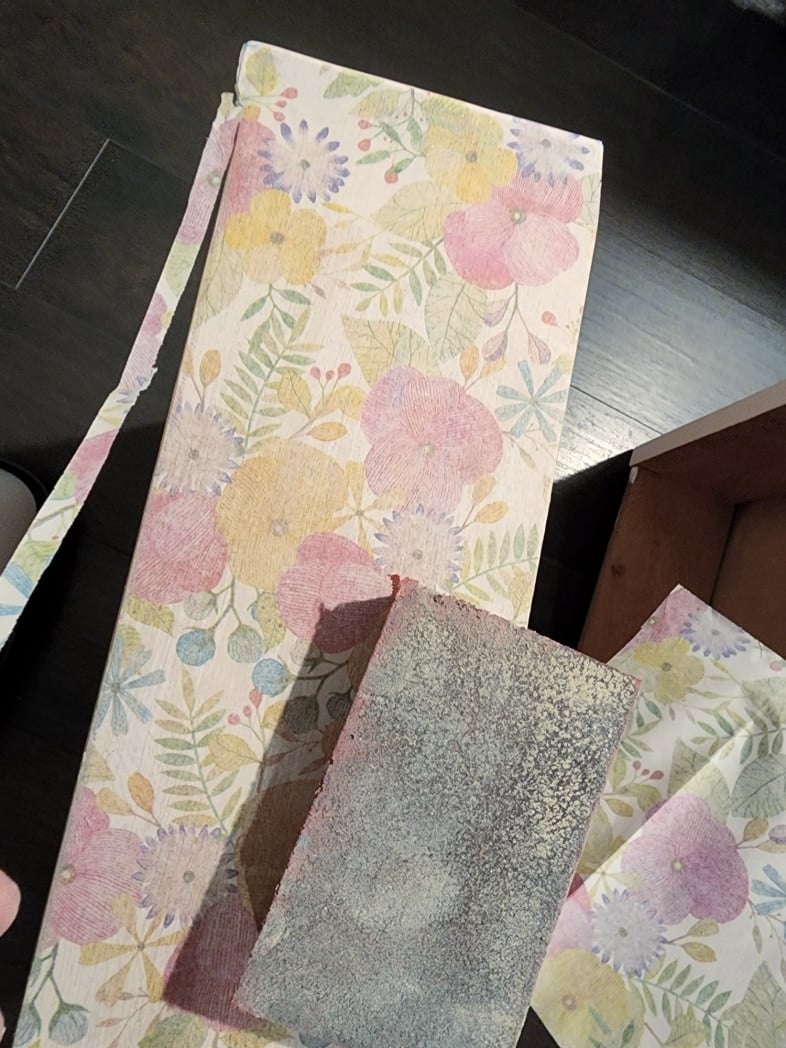
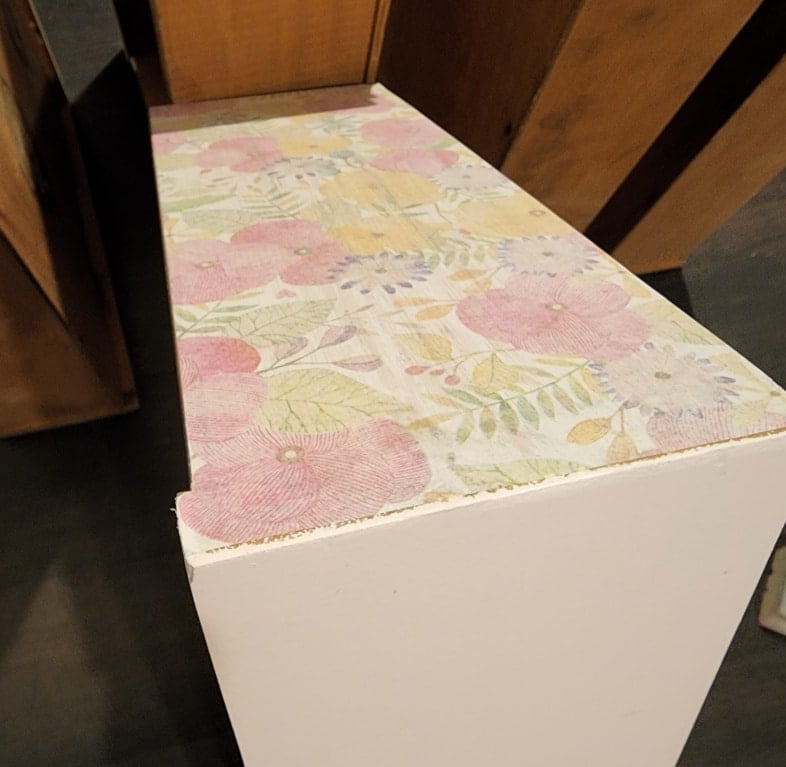
In this image, you can see what I was talking about using the large sheet and then sanding off the edges to make it fit. If you were to try to cut it first, it would be nearly impossible to apply it straight.
Because I wanted the color to be muted, I used the back side of the tissue paper. It’s duller in color and less shiny. I think it’s cool to have double-sided tissue paper in extra-large sheets!
Decoupage Antique Wardrobe Knobs
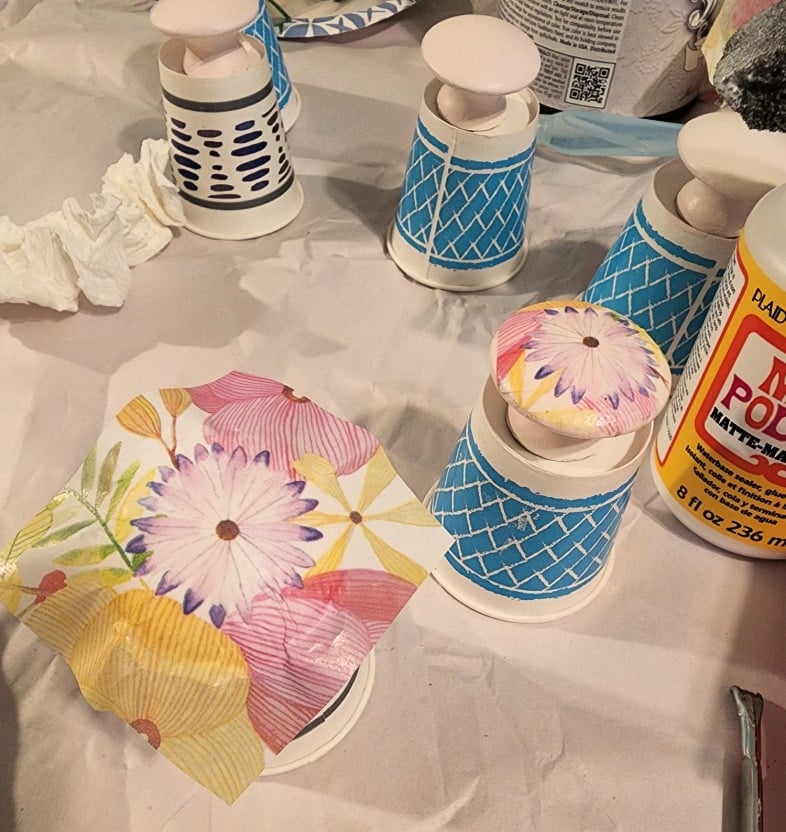
After painting the wooden wardrobe knobs, I cut the same pattern out of the tissue paper for each knob. Use a dab of Mod Podge to hold the tissue paper. Allow to dry. “Sand” off extra tissue and apply a couple of topcoats.

Tip:
Use small paper cups to hold the knobs for painting and decoupaging. The screw is in a small hole in the cup. Hold screw. Set the cup down. No MESS!
Finish Painting the Antique Wardrobe
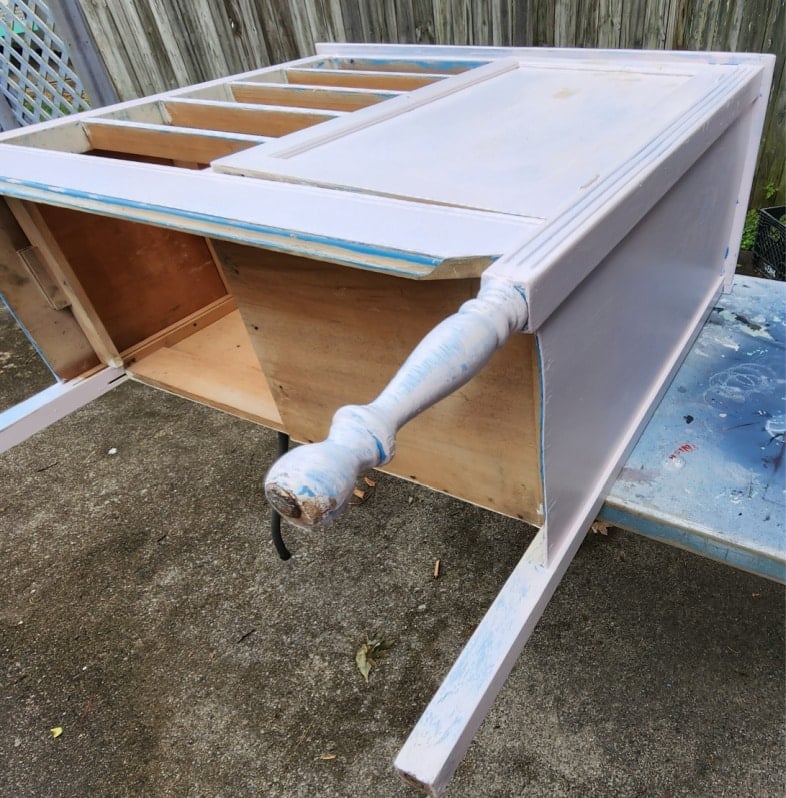
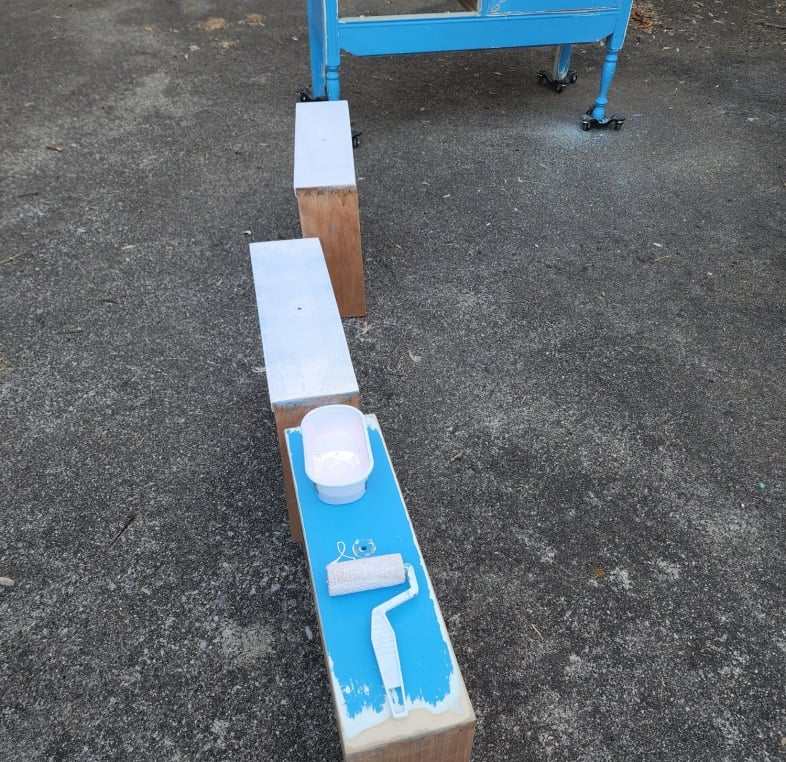
Better weather conditions allowed me to finish painting the antique wardrobe outside. Laying it out on a worktable made it easier to see all the places I missed on the first coat. Luckily, I didn’t have to repair the veneers. I used the roller and my favorite small paintbrush for the final coats. There is a lot of heavy lifting when doing a furniture makeover.
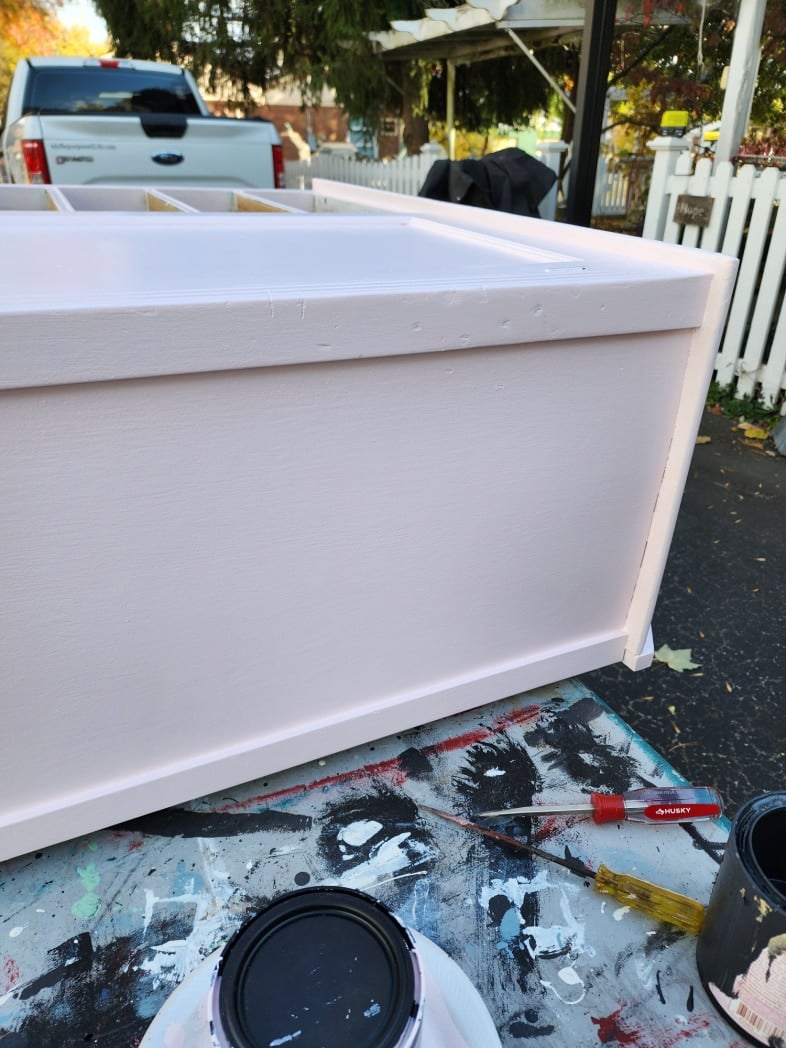
Sadly, there are still some dents left from its previous home. With more layers of paint, it lessened. Sometimes you need to embrace an antique’s charm and history.
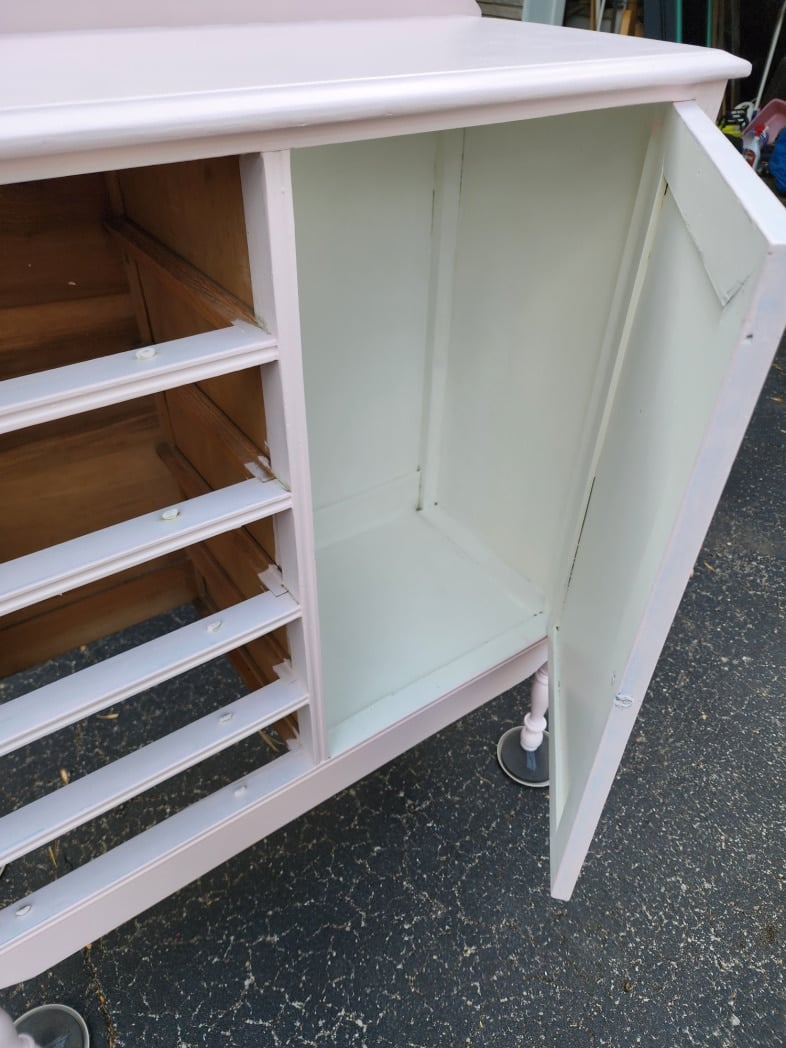
To make the interior brighter, it was painted a white color. Please note that the wheel dollies are not in use today. They were needed for another awkward, heavy project. These furniture sliders allowed me to scoot the antique wardrobe on the driveway, down the sidewalk, and into the house.
After years of moving furniture by myself, I’ve got it down pat. The legs have felt pads on them. So, I scooted it to the porch, lifted it, replaced furniture movers, and scooted it more–into the kitchen. Then, I could easily slide it on the hardwood floors without damage. BUT don’t attempt this with the drawers in it.
Little Girl’s Antique Dresser with Hanging Storage
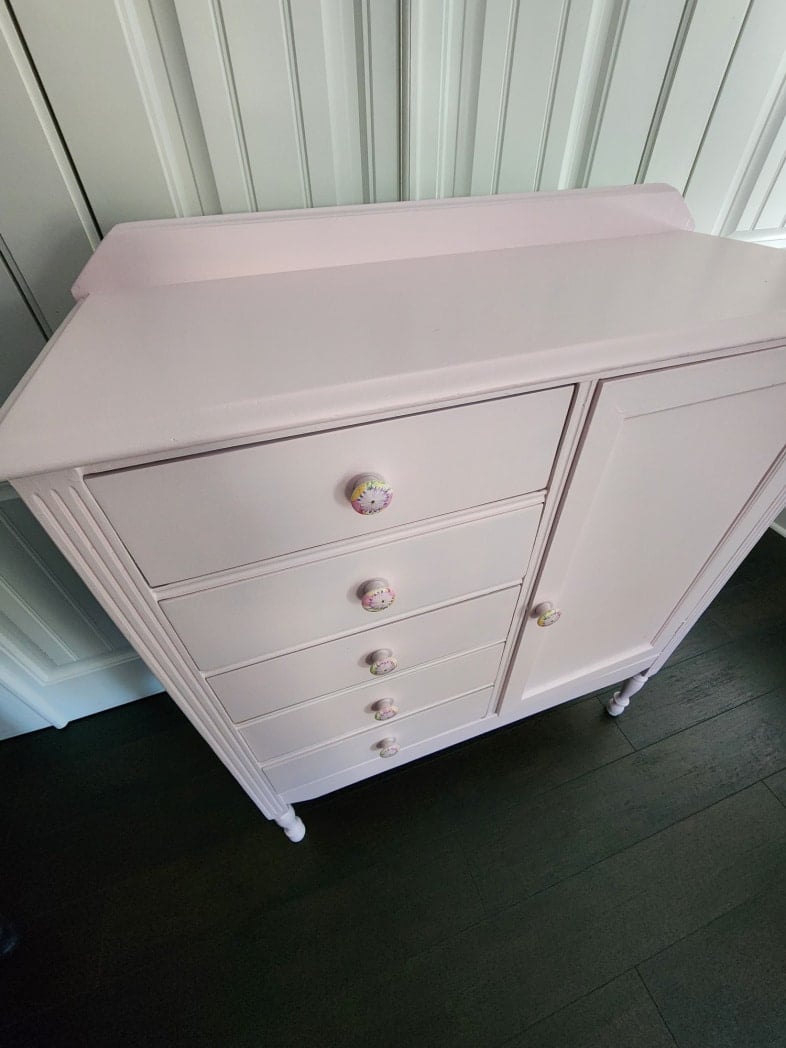
Isn’t the pink antique wardrobe so much better than the blue one it was before?
Do you love the decoupage drawers and knobs as much as I do?
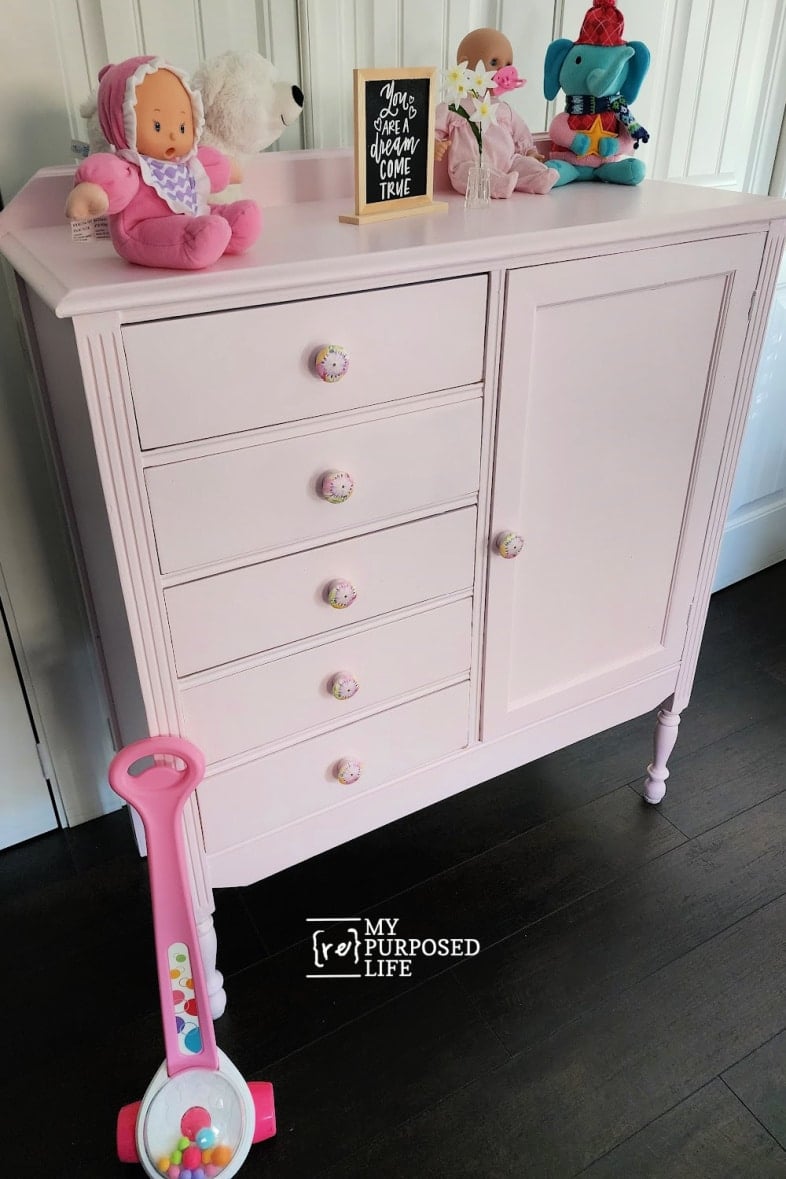
The amount of storage this little girl’s dresser offers is fantastic!
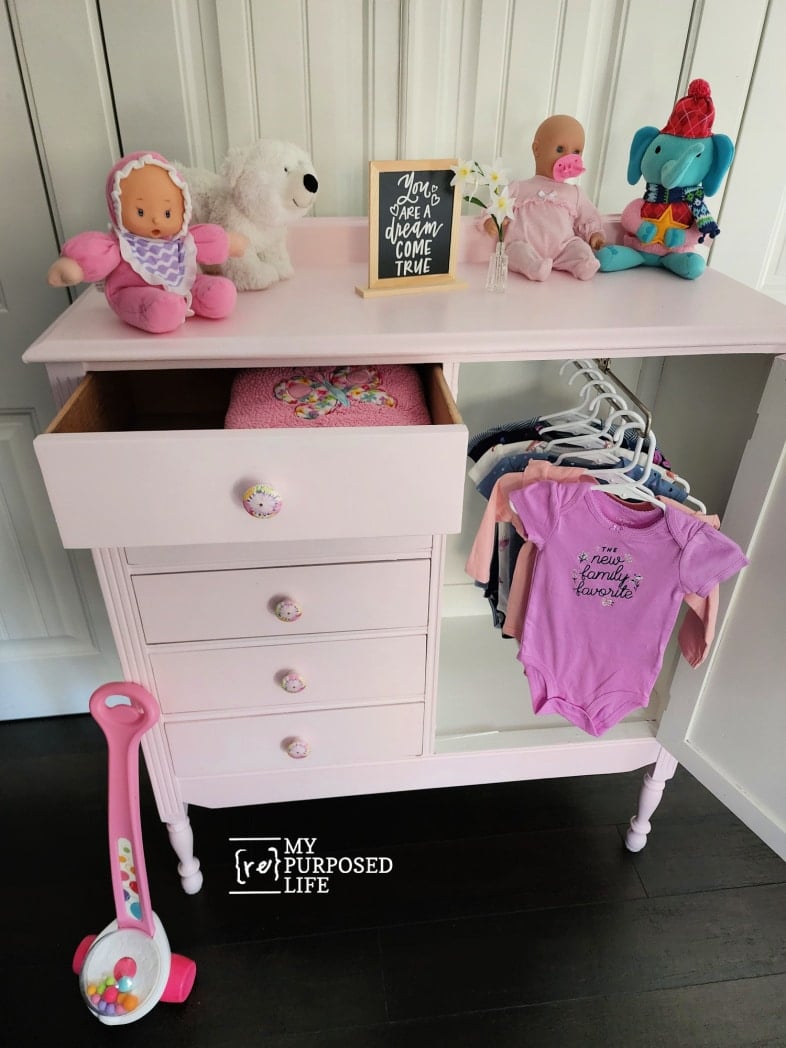
I can also see this used for an adult; what would you use the ample storage for? I think it would be great for quilts, blankets, and more!

Before you dash off to see the fabulous makeovers below, won’t you take a moment to let me know what you think of this Blue to Pink wardrobe makeover? Even better, share this project with your friends on Pinterest.
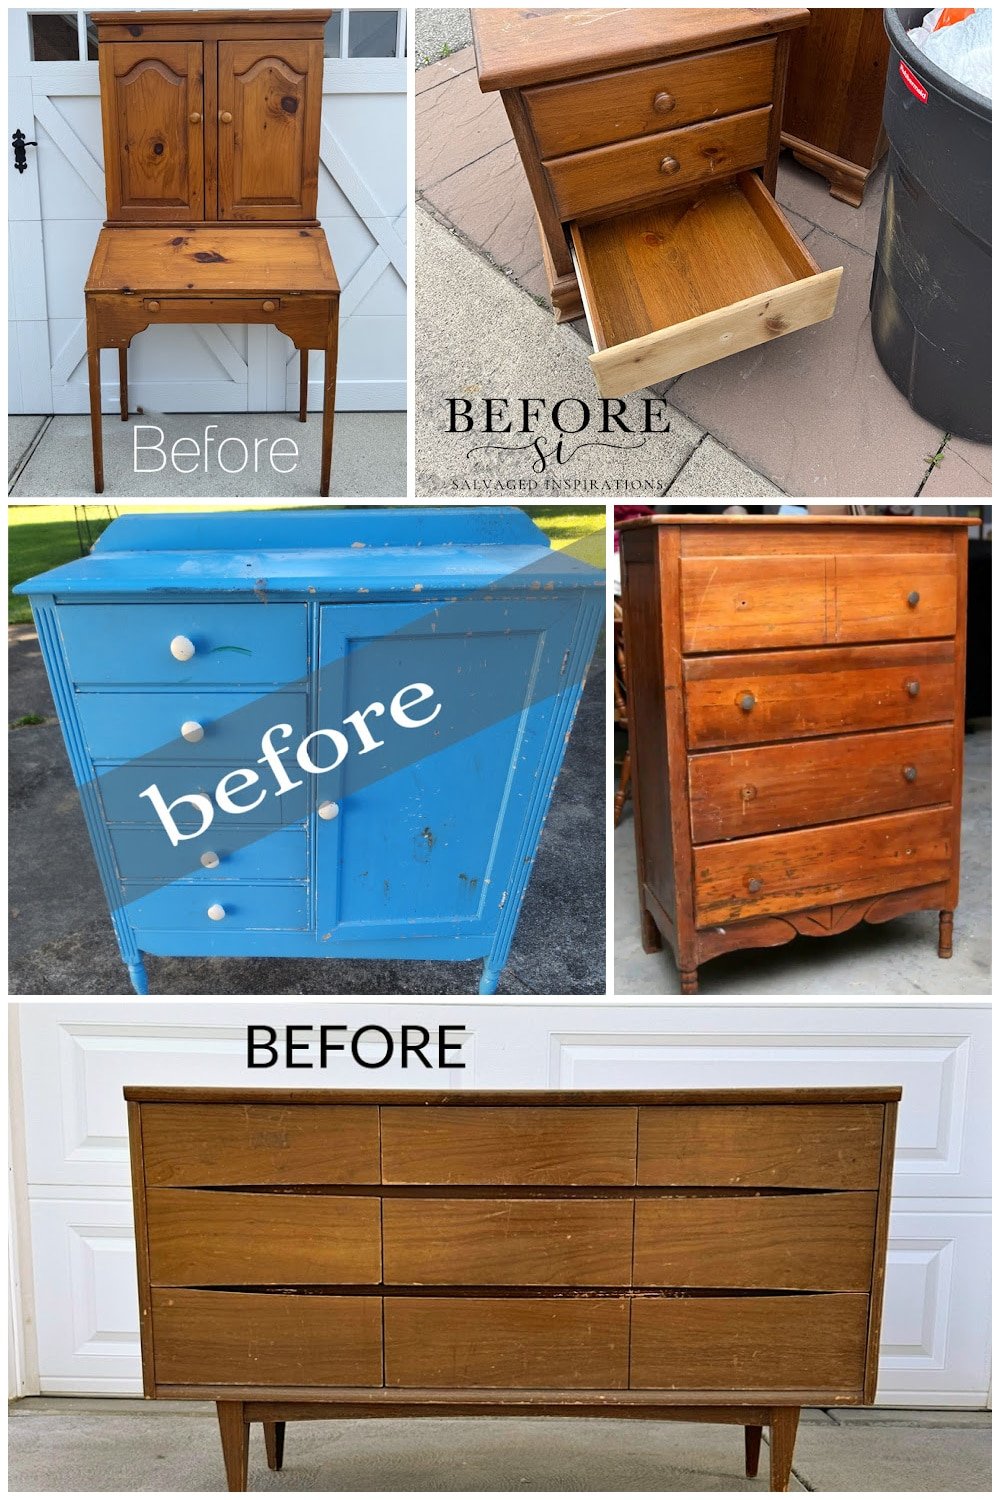
- Vintage Secretary Makeover
- How to Gel Stain-Light Over Dark
- Old Blue Wardrobe Makeover (You are here, thank you)
- Shabby Chic Coastal Furniture Makeover
- Yes, You Can Fix a Broken Dresser
Furniture Fixer Upper Tour Projects
If you love seeing old furniture get a second chance, be sure to visit more Furniture Fixer Upper Tour makeovers. Each project starts with good bones and ends with a fresh new story.
See more Furniture Fixer Upper makeovers here
You will find everything from small side tables to large statement pieces, all transformed by talented DIY bloggers who believe in saving furniture rather than replacing it.
I loved it the 1st time you posted – and Still Love it !!
I can see sooo many uses for this type of cabinet.
My daughter would have loved this version !!
Thanks friend!
My Repurposed Life has a lot of new fans, so I like to give them a sample of some of the items they may have missed.
gail
I am so excited to have come across this article today because a friend just gifted me with a near-identical wardrobe which she had bought when her daughter was a newborn. Her daughter has now grown, gone to college and gotten married, so mom is downsizing and knew I was looking for something in which to store all my jewelry and jewelry boxes. She thought this was the perfect piece. I agreed and now it is here waiting for me to decide how to style it. Thanks so much for the ideas. I just have to decide whether I want to leave the hanger in place to hang necklaces or add shelves for more storage as you mentioned – great idea. I just hope mine will turn out as lovely as yours! Thanks for the inspiration!
Elgie,
You’re so blessed to have gotten such a useful piece of furniture for your needs. If you would like to add temporary shelves without damaging the original furniture, you should check out my no-drill closet shelf tutorial. https://www.myrepurposedlife.com/no-drill-closet-shelves-renters-campers/
Good luck and have fun organizing your jewelry and jewelry boxes.
gail
The wardrobe is so cute now! The pulls decoupaged with tissue paper turned out amazing.
Thank you! I’m happy you like what I did with the decoupage on the drawer pull/knobs. I was so pleased that the flowers fit so perfectly.
gail
Beautiful transition!
Thank you so much Mary. I appreciate you visiting My Repurposed Life to see the transformation.
gail
Such a sweet makover ! Adorable for a childs things.
Perfect for many things as well. I love the soft color and the knobs are a special touch. 🙂
Thanks for sharing your amazing carpentry skill – with so much detail !!
You could sooo teach carpentry / furniture repairs – And redesign.
thanks friend! I do teach carpentry/furniture repairs and more, right here on My Repurposed Life. I’m a retired teacher, so teaching comes naturally to me. 🙂
I appreciate you taking the time to stop by and leave a comment. It makes my day to hear from you.
gail
This turned out great! While I’m not a fan of pink, I could get into this shade. Subtle but not girly! Your tips doing the decoupage were good for me. Gave me the courage to try it. Thanks Gail for this ‘repurpose’.
Fran,
I hear you, I’m not a fan of pink, but this is definitely my favorite shade of pink. I recently painted a desk the same color and used rub-on transfers. You can see it here: https://www.myrepurposedlife.com/art-deco-vanity-sweet-new-desk/
gail
oh my gosh, Gail, this is adorable – from your color choice to the peekaboo sides to the personalized knobs! And I love your tip about the knobs in the paper cups!
Thank you Becky so much for stopping by and taking the time to leave a comment. It’s greatly appreciated. Happy you found my tips helpful, it’s the teacher in me…..
gail
This turned out absolutely darling, Gail! I love it so much, especially the peekaboo sides! XOXO
You’re so sweet Christy! I know you love little surprises on drawers.
gail
Love how you fixed it up and gave it a fresh new look! It’s ready for a new home.
Thanks for stopping by Natalie!
gail
Its adorable Gail, I love the color and the florals! Pinned XOXO
Thank you for pinning Denise! This was a fun makeover.
gail
Awesome makeover. Love the tip to paint knobs – will definitely put that to use!!
Yay! I’m so happy that you find my tips helpful, especially the how to paint knobs tip! I wish I had known this years ago. 🙂
gail
Just beautiful! Definitely a step up from the blue and more. You are very skilled and have a great design eye.
You’re so kind Laura. I appreciate your kind words. This is one of my favorite pieces I’ve done.
gail