Repurposed Door Coffee Station
As an Amazon Associate, I earn from qualifying purchases.
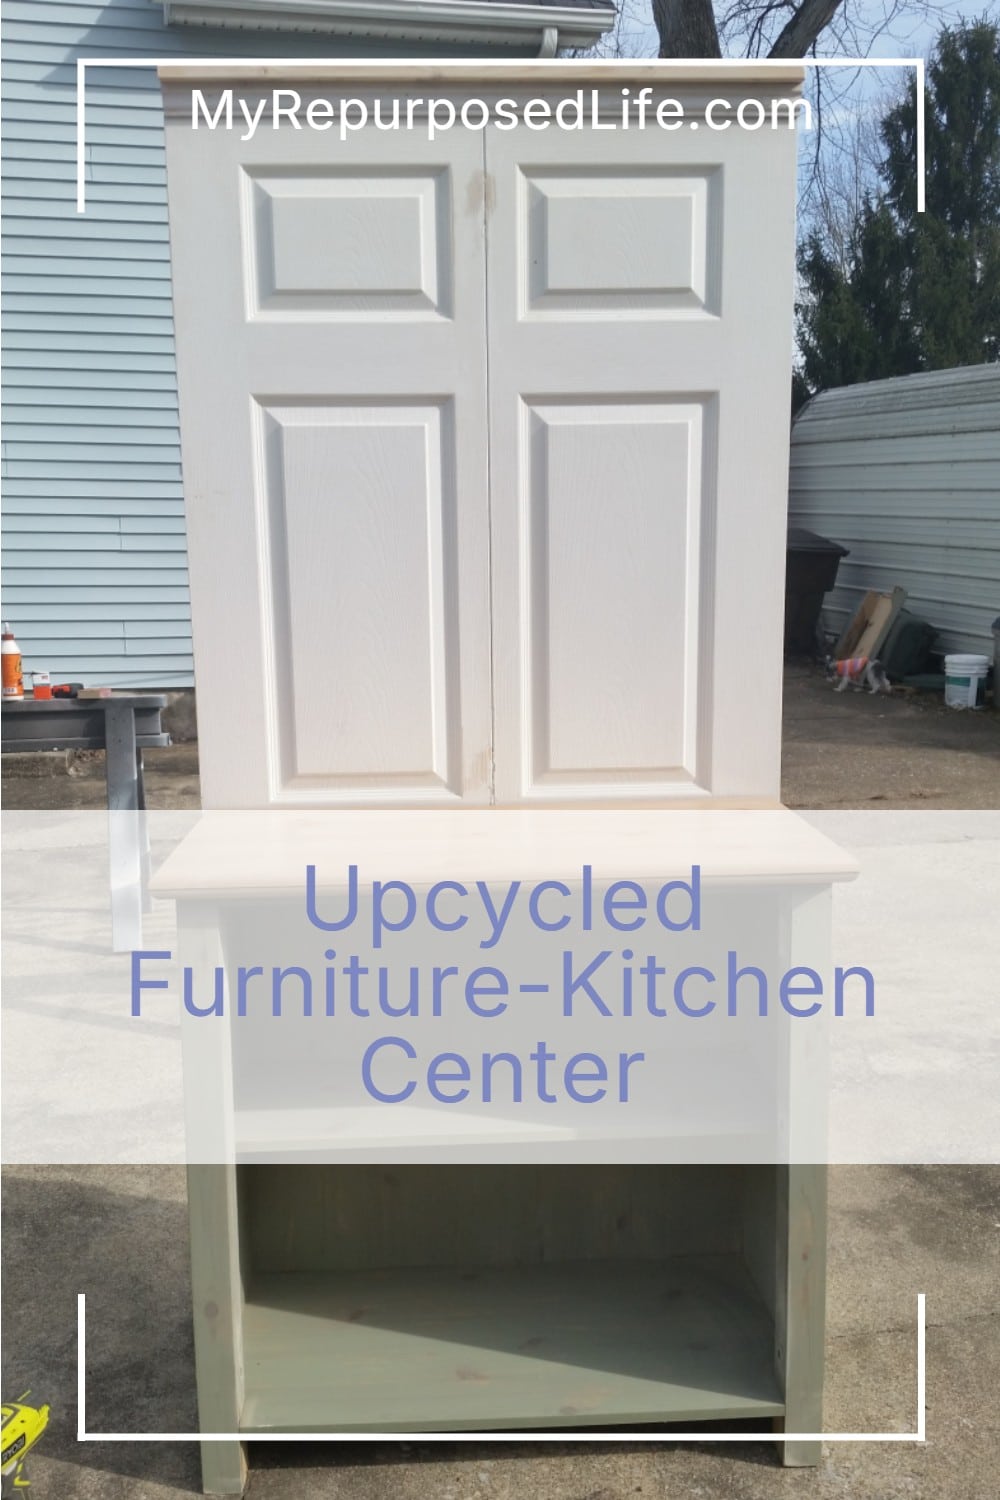
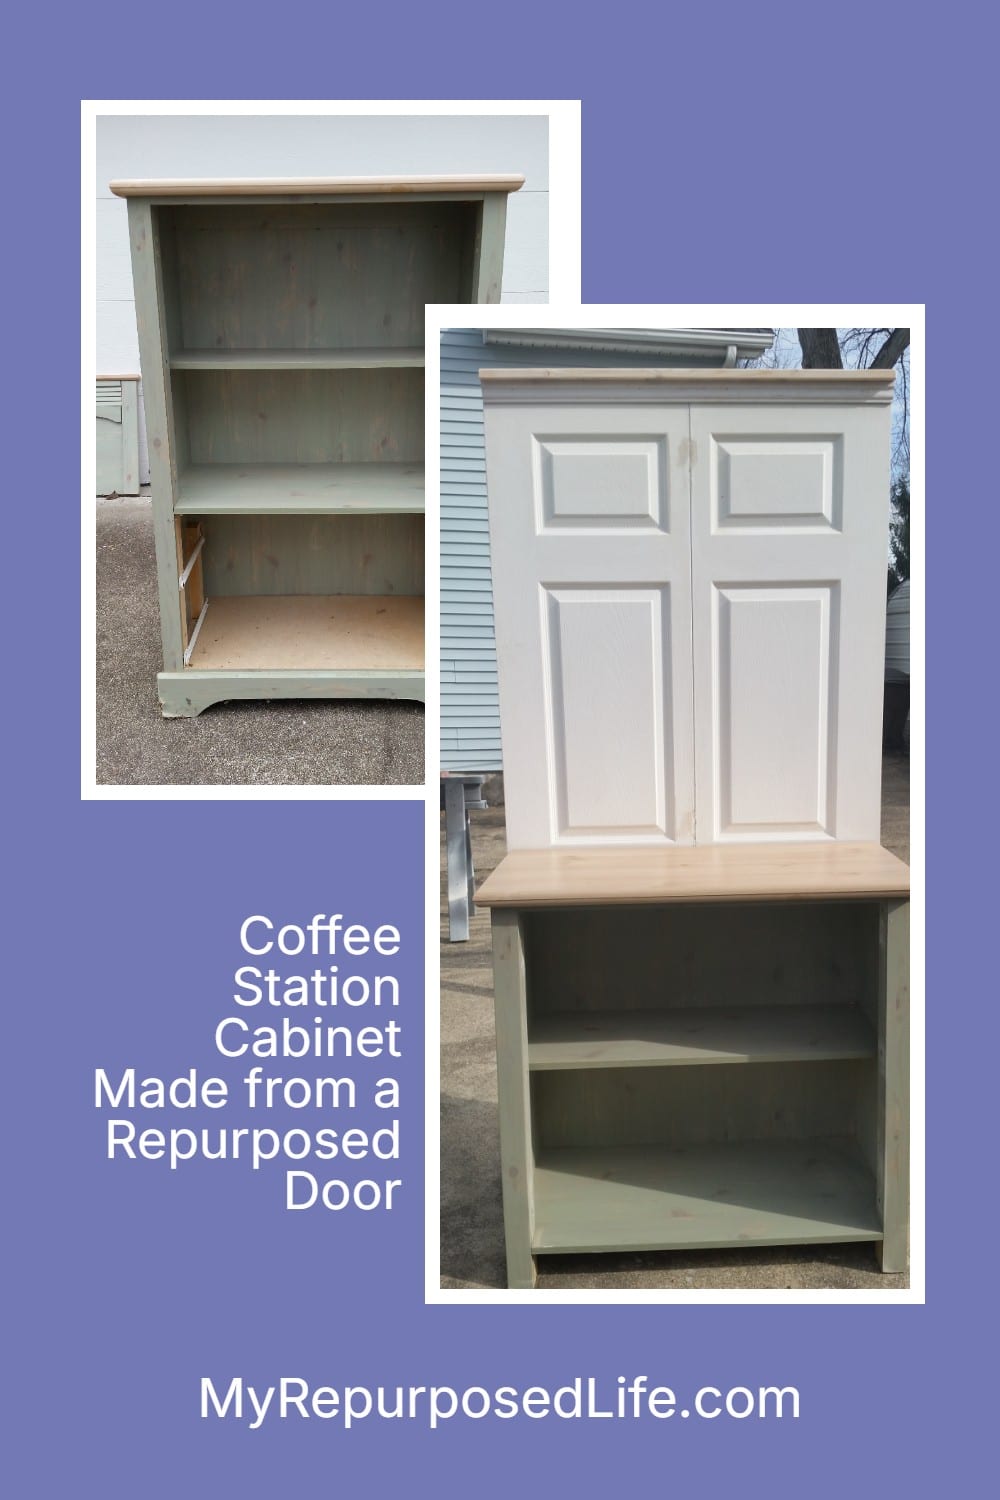
This door coffee station cabinet is one of those projects that proves almost anything can be repurposed. An old dresser and a set of bi-fold doors came together to create a functional coffee bar with tons of character. I’m refreshing this post with better tips, clearer details, and updated photos so you can see exactly how this unique cabinet was built from pieces most people would pass right by.
Midway into this repurposed furniture project, it suddenly hit me that these bi-fold doors and dresser would make a perfect door coffee station cabinet. Originally, I thought since it was a door project, that it should naturally be a hall tree. In any case, it’s going to be a very functional piece for someone.
How to Turn a Dresser into a Door Coffee Station
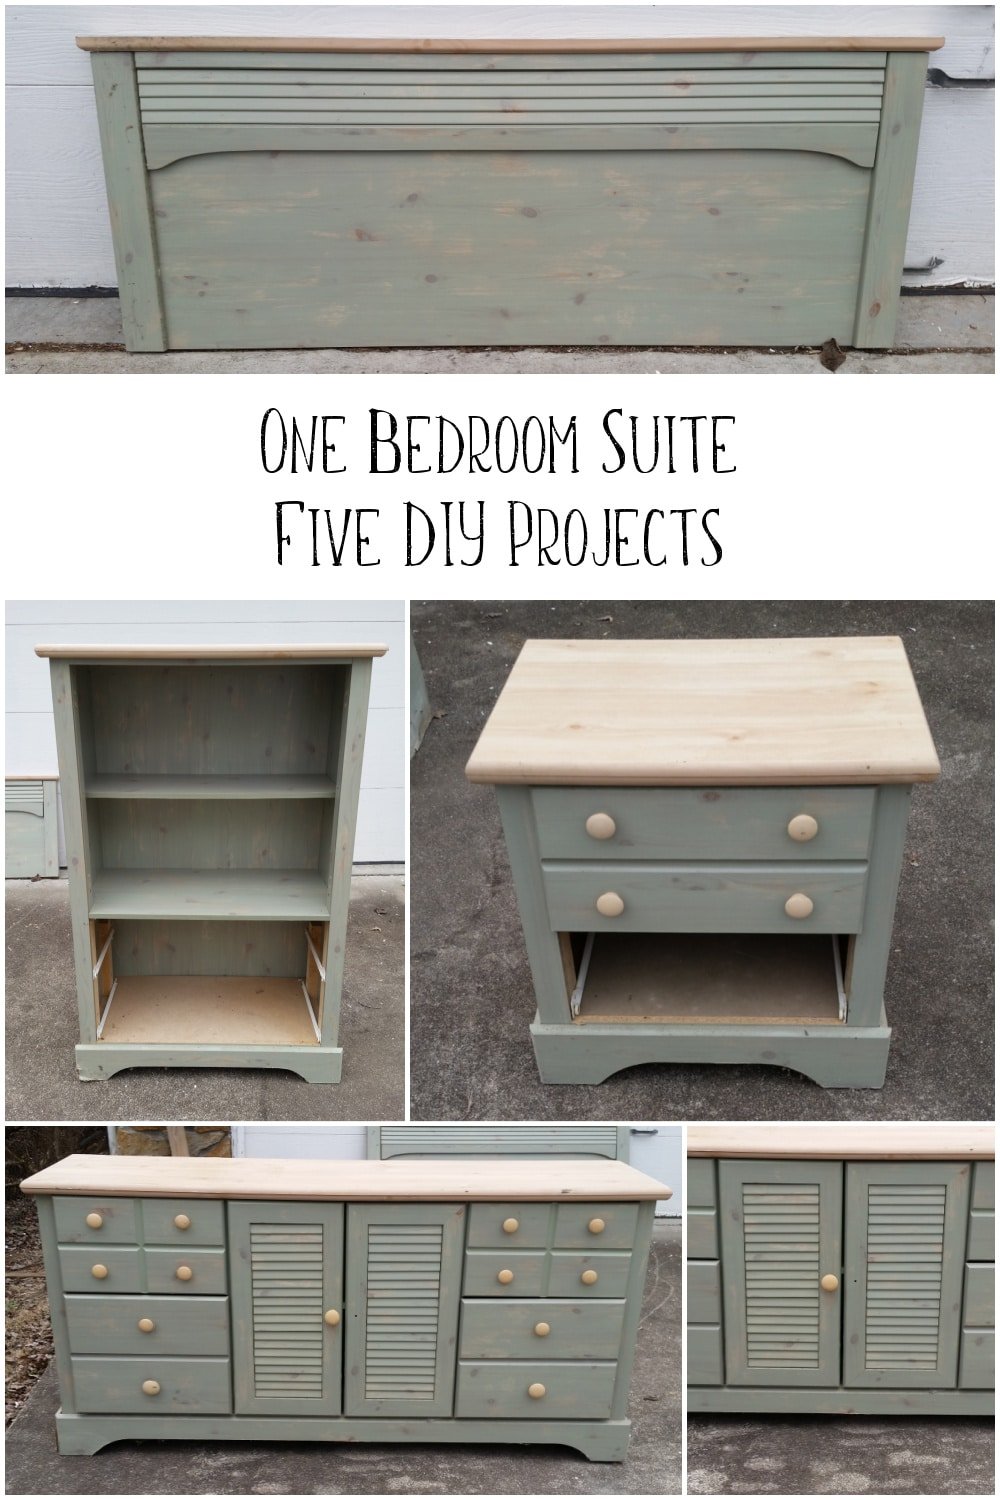
At first glance, the dresser (chest of drawers) doesn’t look so bad. It even looks like real wood until you take a closer look at the side. . .
Cheap Dresser
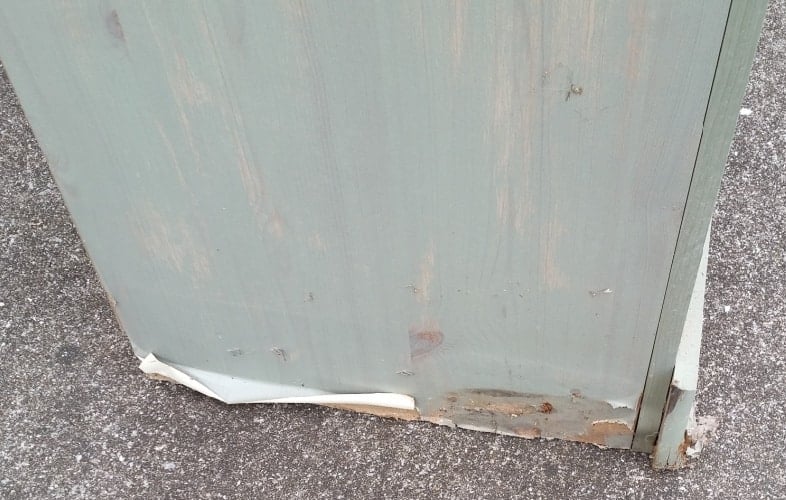
Look! It’s just paper. The dry-brushed green and the gorgeous knots in the wood? PAPER!
Cut the Dresser Down to Size
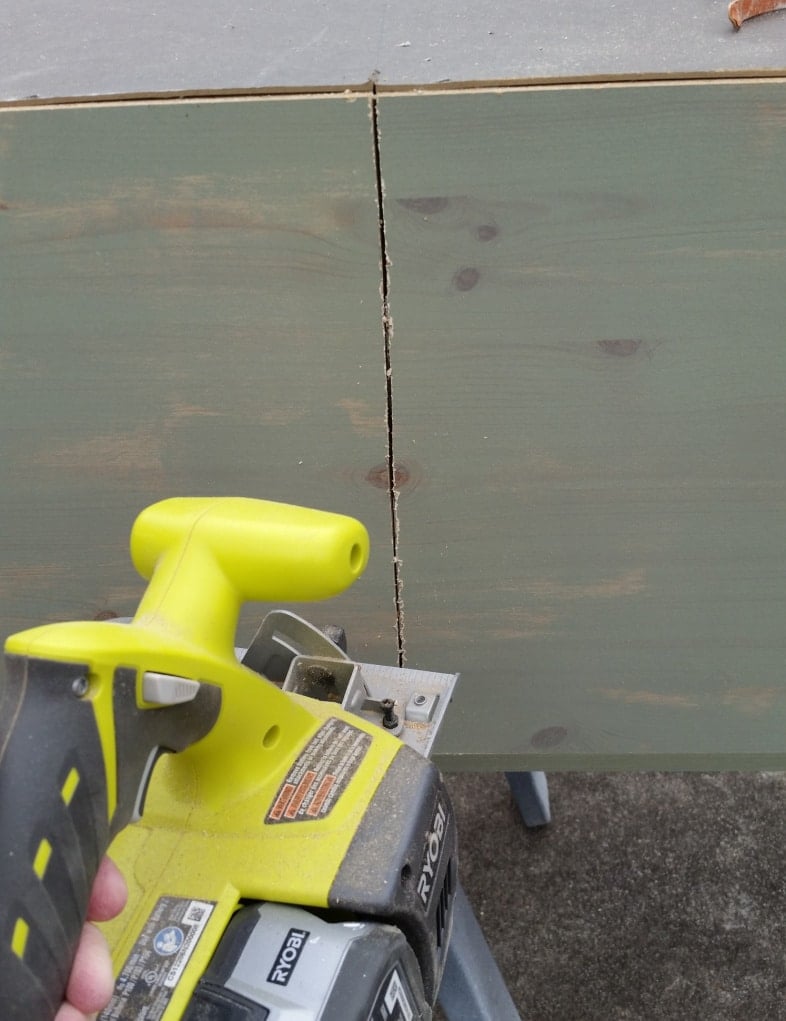
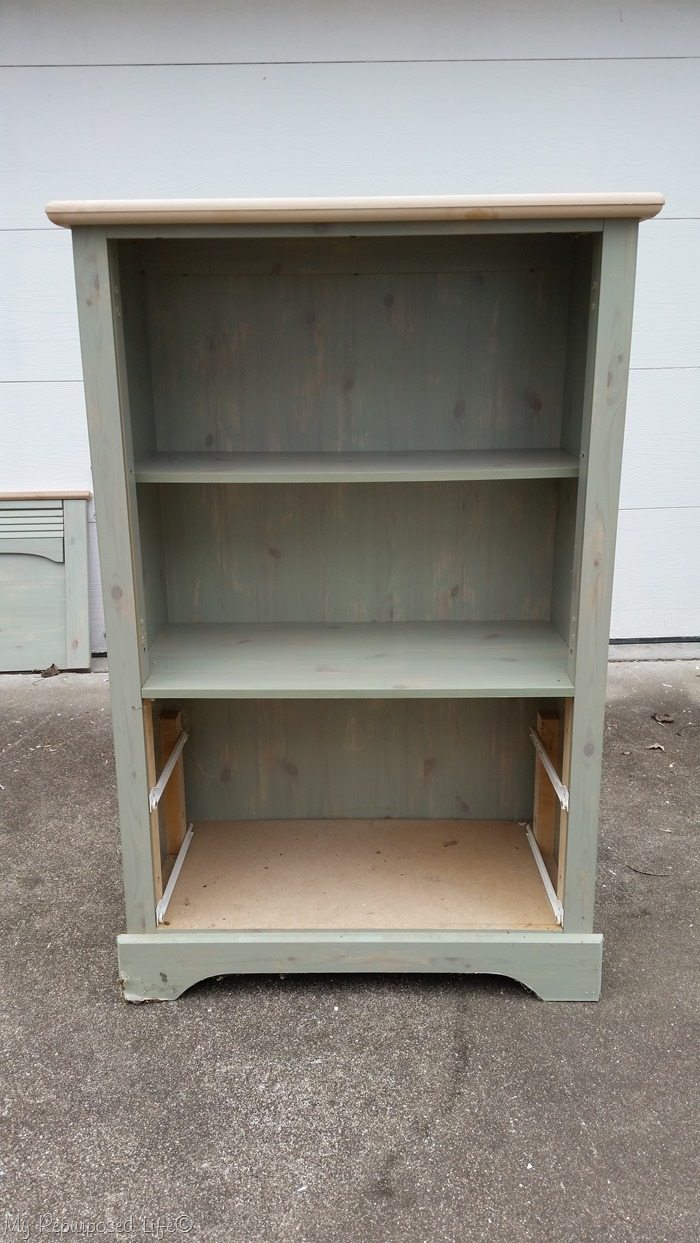
The first order of business was to cut off the damaged portion on the bottom of the dresser. NOTE: Whenever sawing furniture pieces, make sure you’re not going to run into any screws or hardware. Because of some well-placed screws, I had to change up where I made my cut with this circular saw.
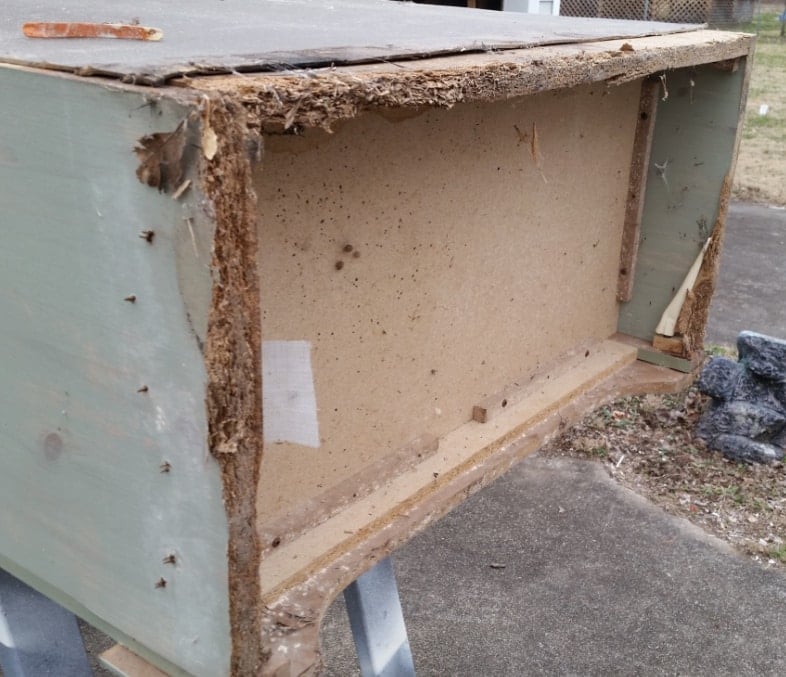
See? The bottom is in really rough shape, so some would probably have passed on this piece of furniture.
Making a Door Coffee Station
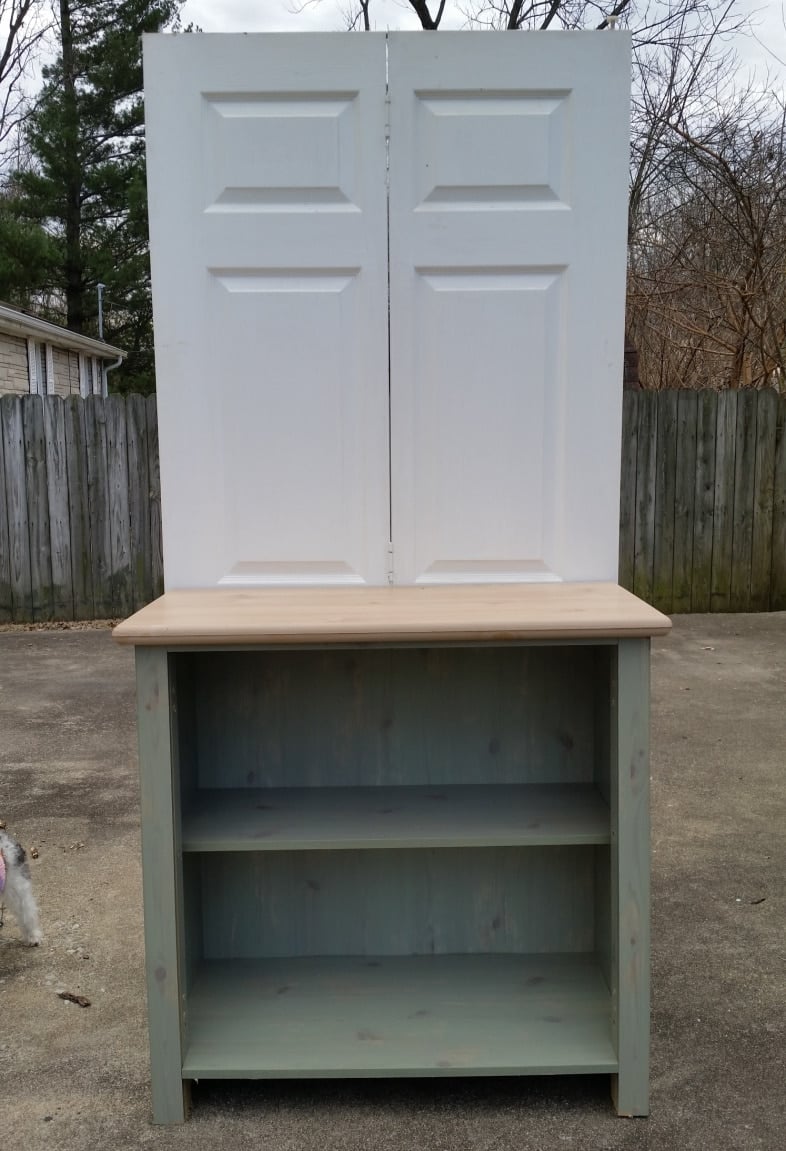
I grabbed a set of bi-fold doors out of my stash to see how they would look with the new dresser.
Attach 2 Bi-fold Doors Together
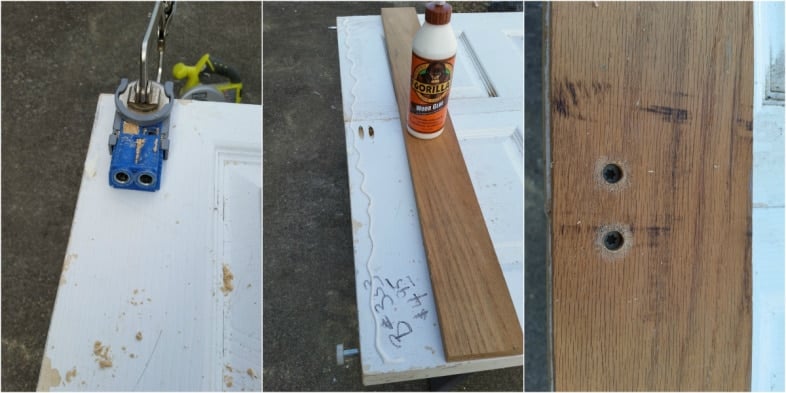
I decided to remove the hinges and provide a more permanent solution to hold the doors together. I used my Kreg Jig to drill pocket holes in several places down the door. These are hollow-core doors, but there was enough on the edges to allow the pocket-hole screws to engage. After securing the screws, I cut a board to length and used Gorilla Wood Glue and wood screws to hold the board(s) in place. One on the top, middle, and bottom (back) of the bi-fold doors.
If you don’t have a pocket hole jig, you can use mending brackets (plates). However, if you do many projects, I highly recommend investing in one of these jigs. For more details, see my post How To Use A Kreg Jig.
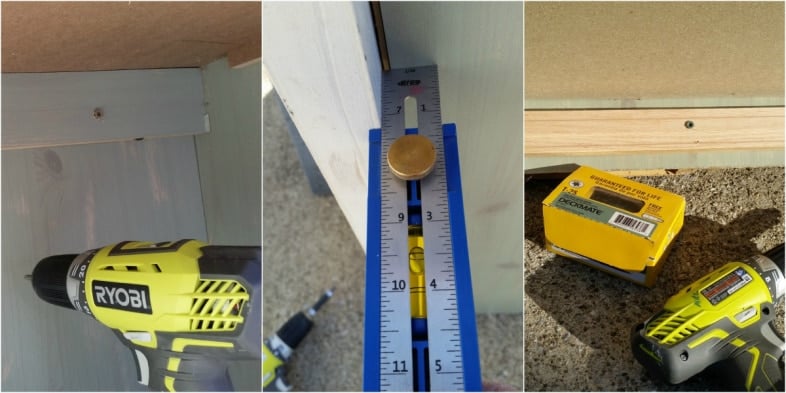
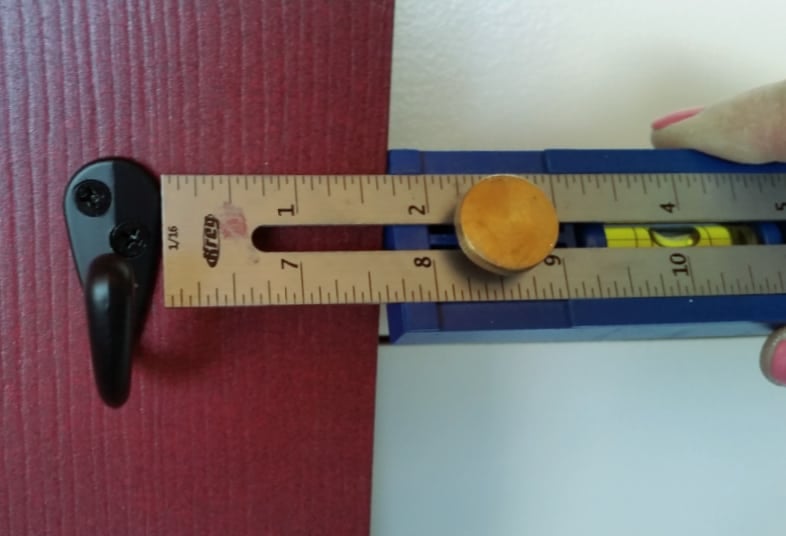
Now that the doors were permanently attached to each other, I needed to attach them to the dresser (chest of drawers). There was a cleat on the inside top of the dresser. I secured wood screws from the cleat, through the door, and into the back board (brace I added in the middle of the doors). In addition, I added wood screws through the door into the back of the dresser using my Kreg multi-mark tool, so I “hit my mark” with the screws. One last board was added on the underneath side of the dresser, securing it through the dresser door and into the bottom board (brace) I added.
For added security, I also used wood screws through the back boards, doors, and into the cleat, and the bottom brace (under the shelf). So, basically, the screws go from front to back AND from back to front.
Add Trim to Make a Door Coffee Station
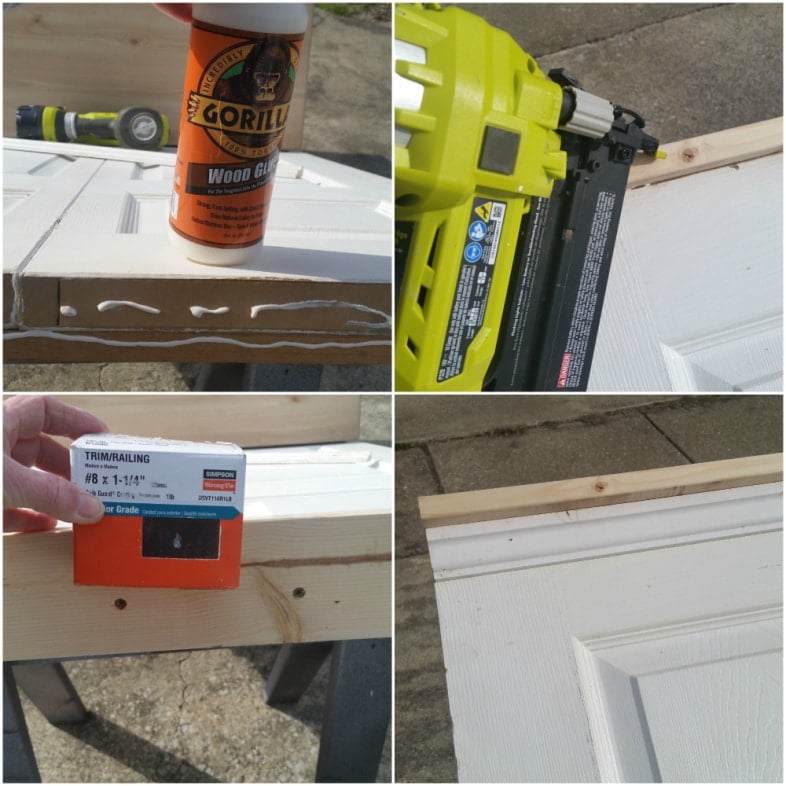
I typically add crown molding to the tops of my hall trees, but I’m running a little low, so I chose to add a 1x for a top ledge, then some other simple molding underneath it. I glued the shelf, and “tacked” it with my nail gun, and then used the wood screws for a better hold. The small white trim was glued and attached with finish nails.
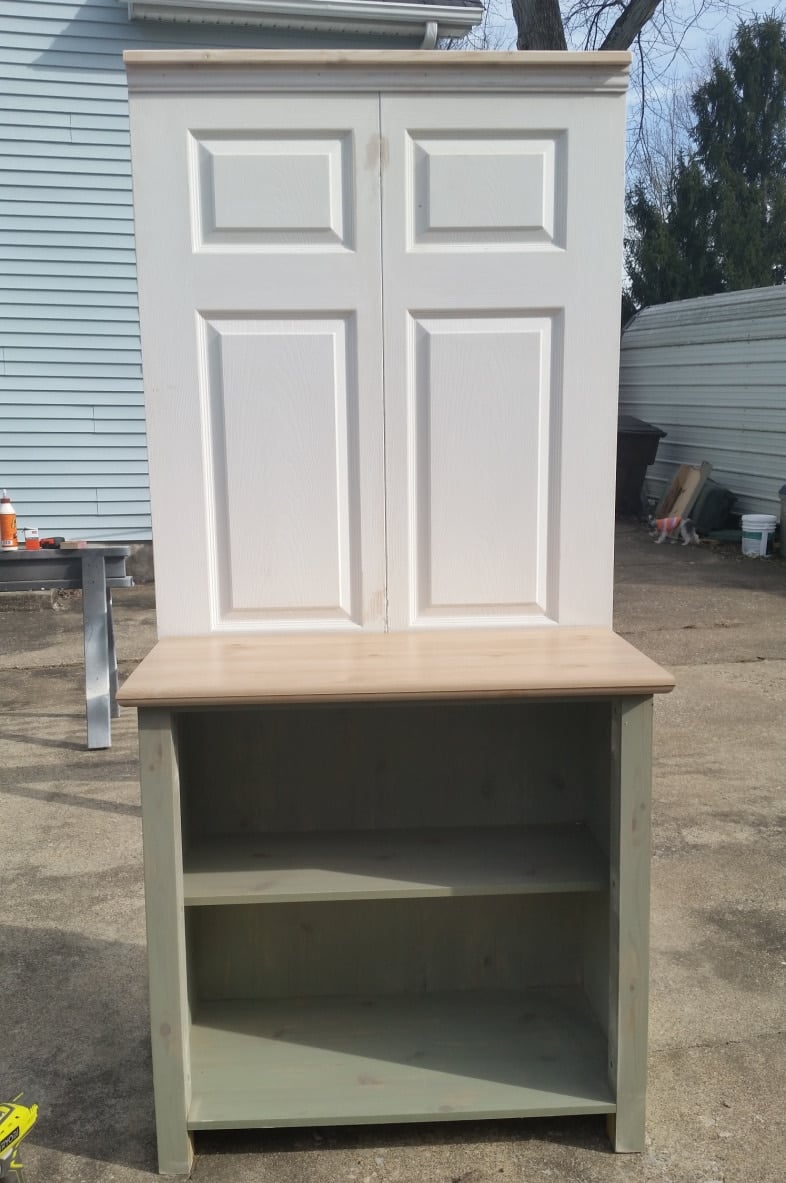
I’m glad I removed the hinges. I like it a lot better. Can you see how nice this is going to be as a coffee station? So much room on the surface, and lots of storage room. Originally, this furniture had some fake louvered doors covering the shelves, but my neighbor Rodney used them on a hutch he made for his wife.
Time to Paint

It was time to paint! I used my diy chalky paint primer made with plaster of Paris and latex wall paint.
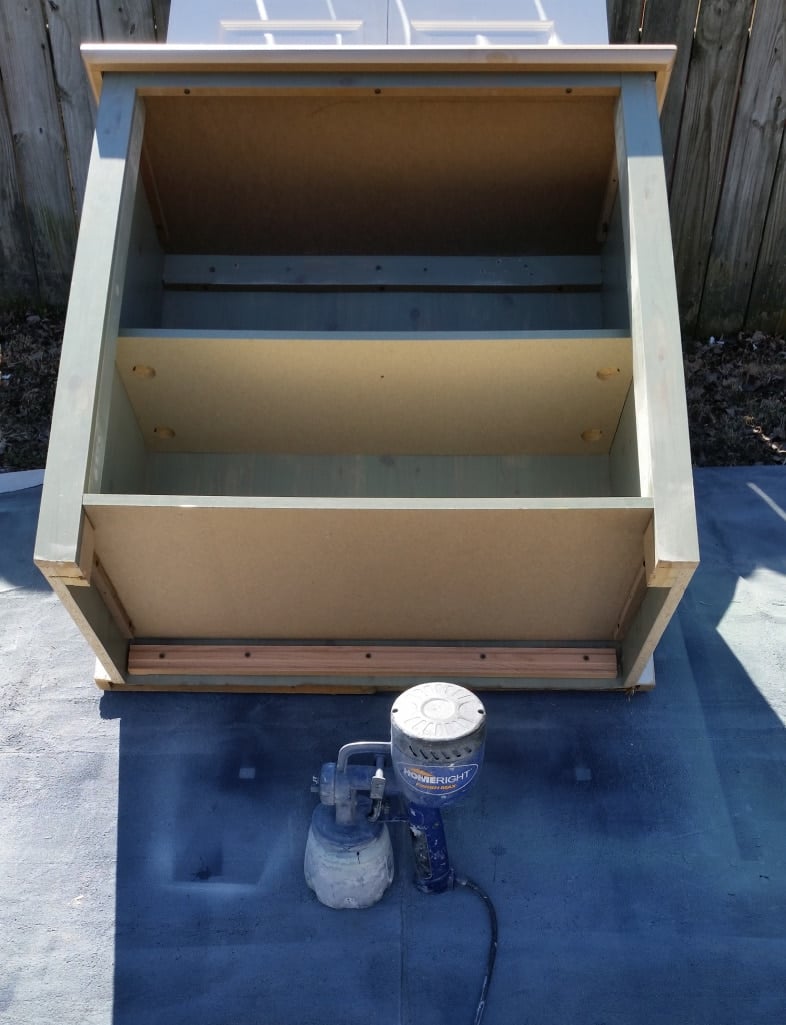
The Homeright Finish Max makes this job go quickly. As always, I tip my piece back so that I can paint the underside of the coffee station first.
Paint a Base Coat | Black
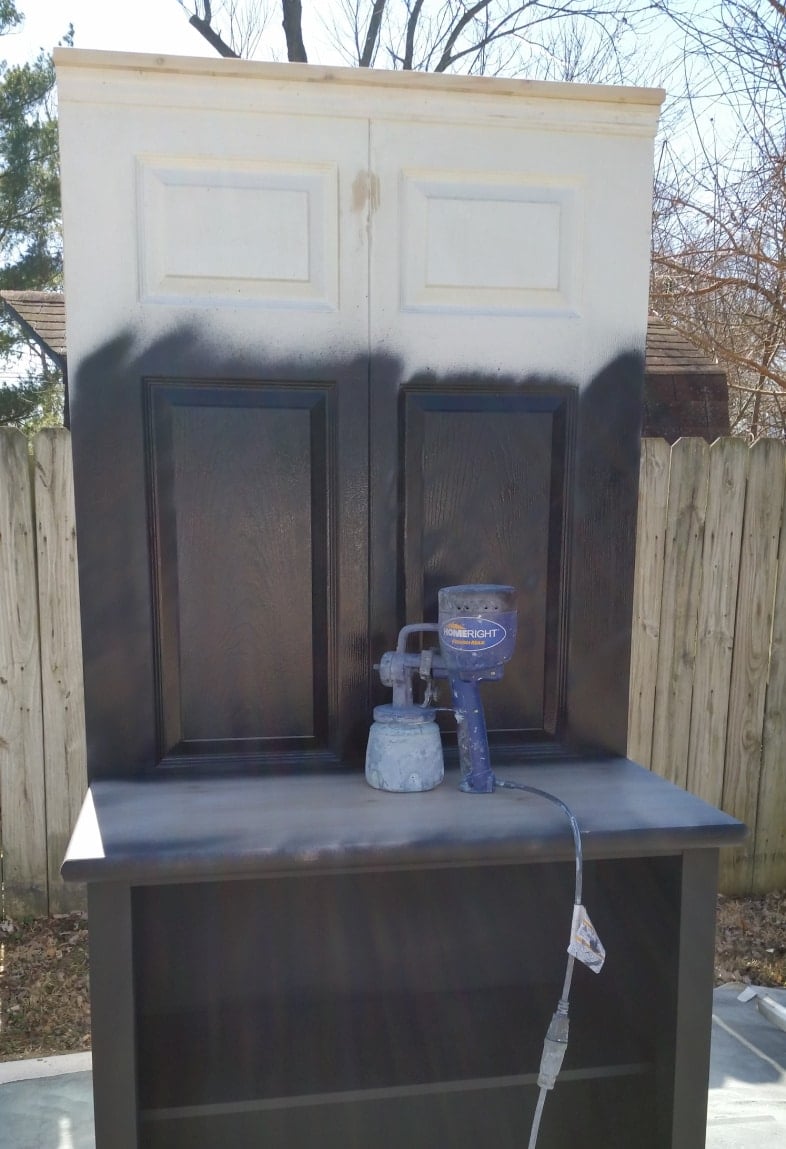
If you have any paneled doors, using a Finish Max is the perfect way to paint them. None of that go this way, then that, paint the panels, then the outside, then the inside . . .
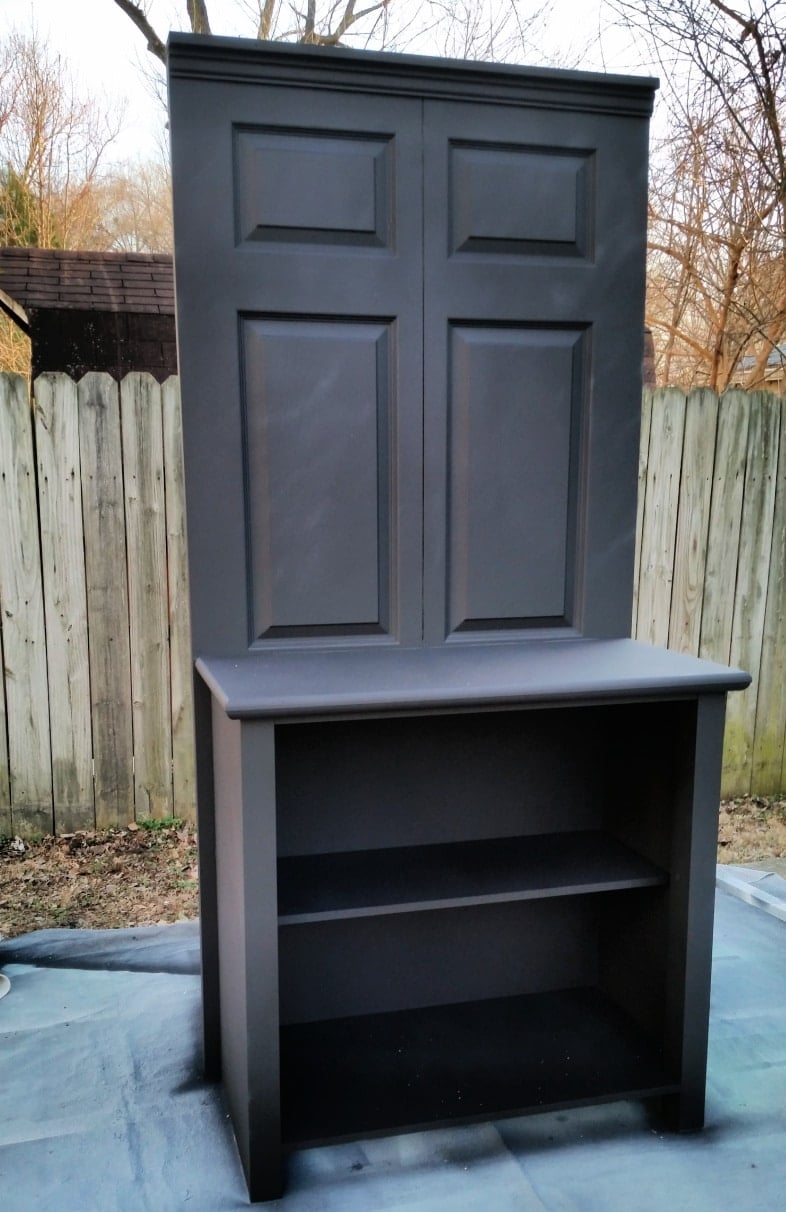
Doesn’t it look amazing after 2 light coats of the chalky paint primer? I always do a primer so the frankenfurniture is all the same color. Until everything matches, it’s difficult for me to see what color it should be. I’m really liking the Beluga (black), and remember, this is to be sold, so I need to find a color that will appeal to the new owners.
How to Get a Dry Brush Look with a Paint Sprayer

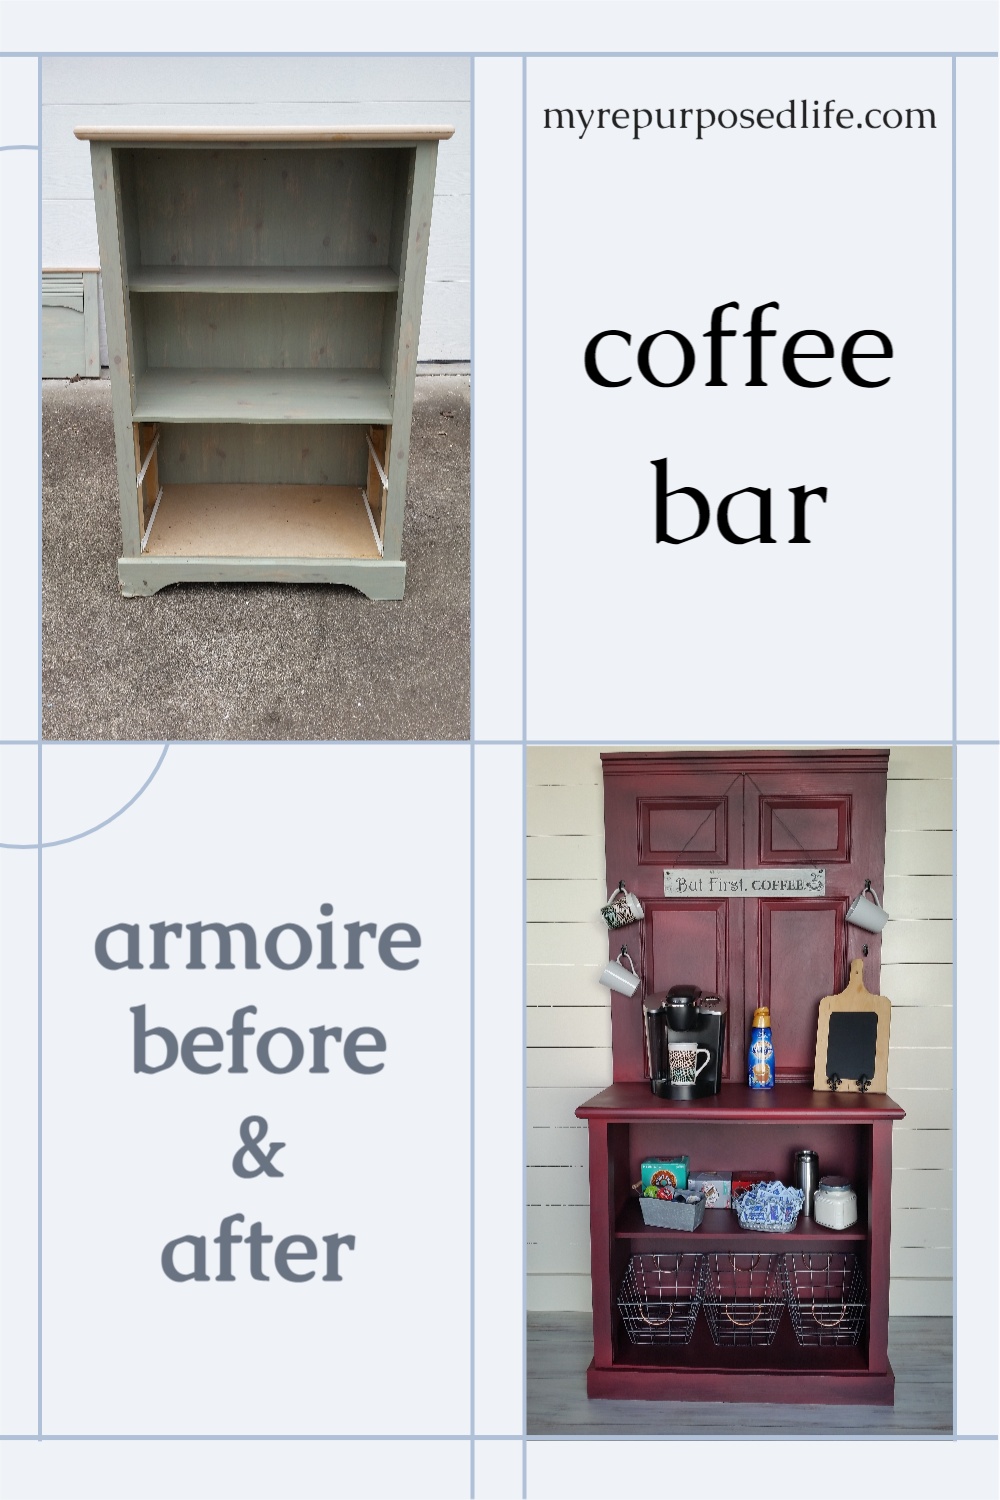
BUT! I decided to add some RED! I’ve only done this technique a couple of times with red paint, but I wanted this repurposed bi-fold door project to be unique. It was stressful, and I didn’t take any “in progress” pictures. I used a custom red (made with some off-color red and a little GREEN) and lightly sprayed it into my Finish Max. I did this with a light spray to mimic a dry-brush effect. I didn’t want heavy coverage.
Seal with Wipe-on Poly
To protect, seal, and deepen the color, I simply used some wipe-on poly on a rag.

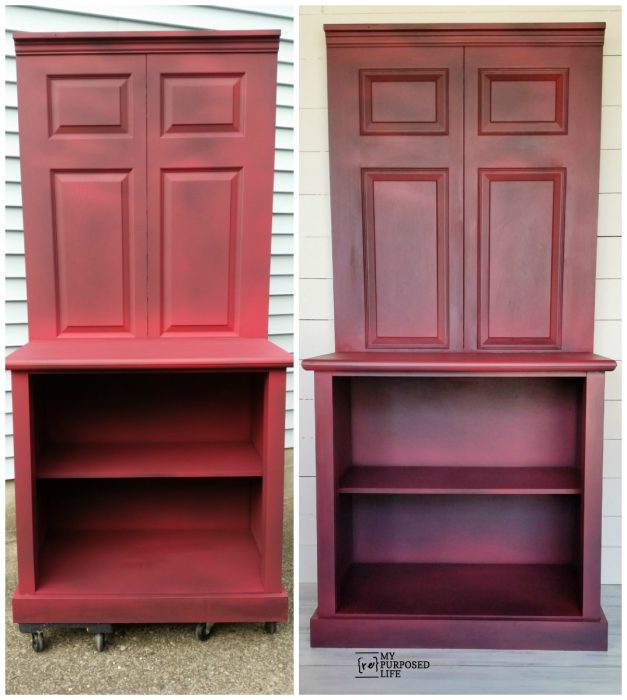
This is the before and after. I imagine you could get the same look with wax, but my shoulder said NO to that! ![]()
Now for some finishing touches—single hooks from D. Lawless Hardware and a But First. Coffee sign, it’s now ready for its debut!
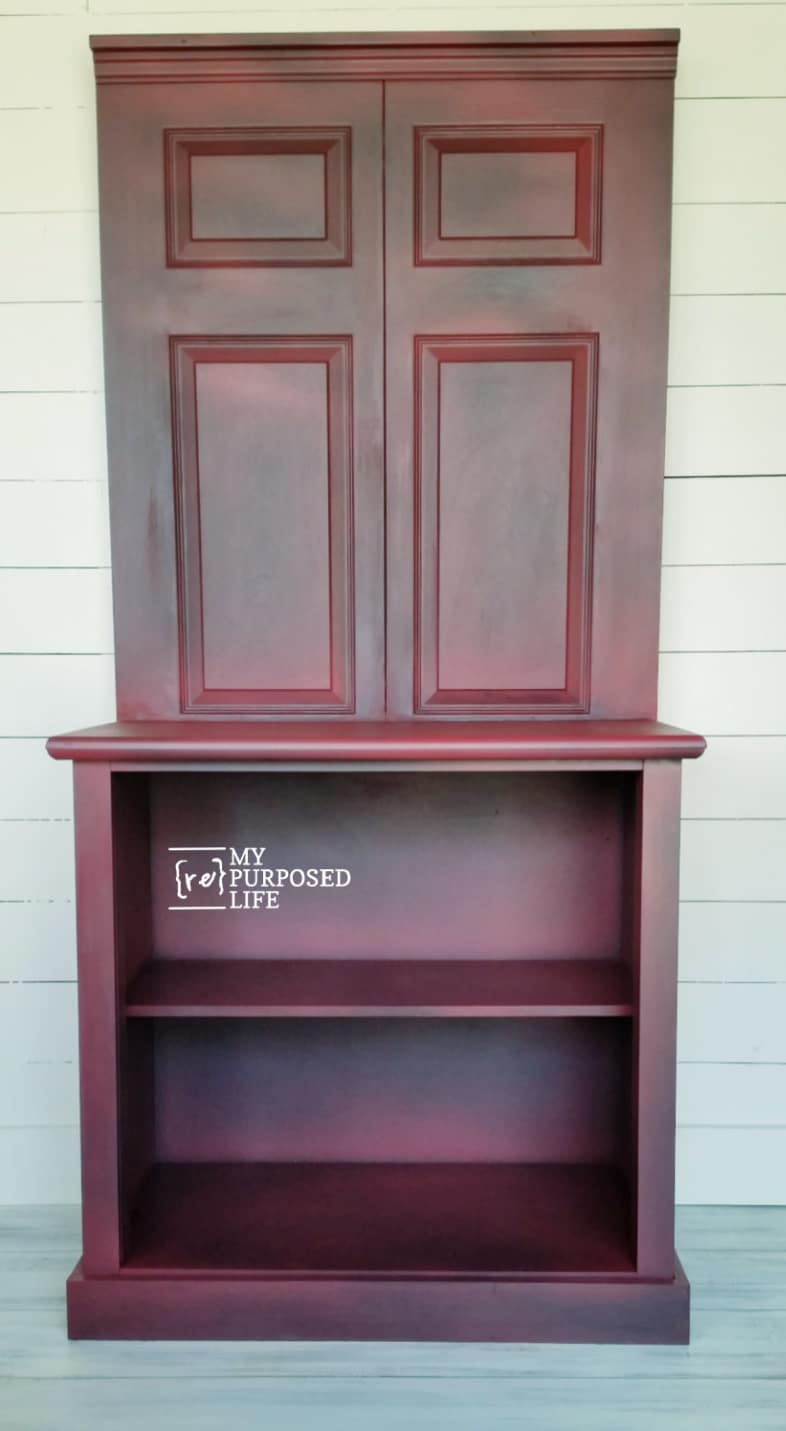
Red Door Coffee Station
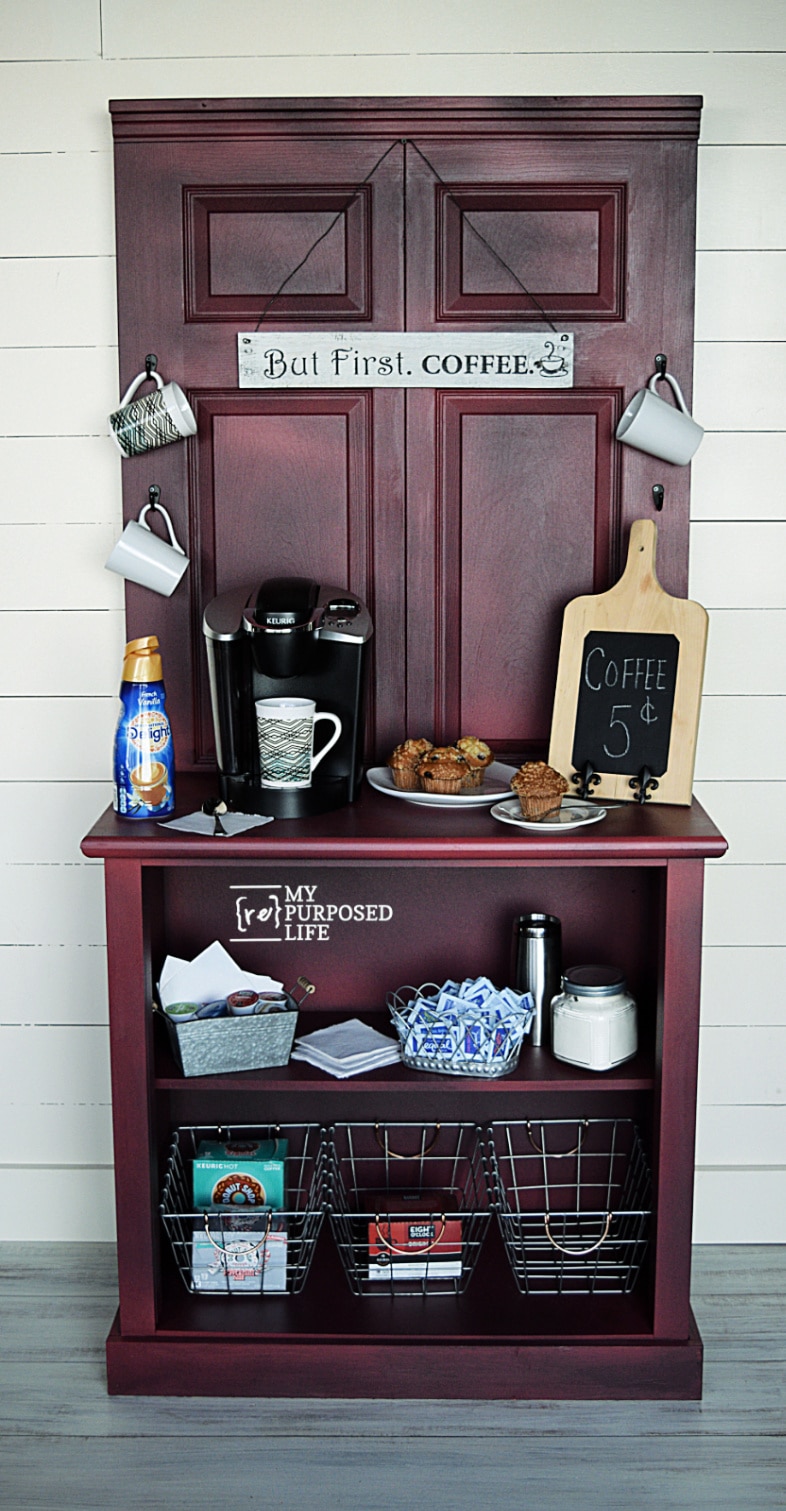
Doesn’t it make the perfect coffee station cabinet? I suppose it would also be great for a baking center too.
Guess what?! I don’t drink coffee or BAKE! ![]()
If you’ve ever spotted an old door or a tired dresser at a thrift store or curbside, this is your reminder to look at it differently. With a little vision and some basic tools, you can build a custom coffee station that fits your space and your style. This one still makes me smile because it started as leftovers and turned into something useful.
You may not have these exact components, but I hope this project inspires you to think outside the box when you reimagine pieces of furniture and reclaimed doors.

Pin It!
It really offers a LOT of storage. I hope it finds a new home soon! This was a fun project and came together pretty easily.
gail
See More Hall Tree Project Ideas Here
Love your ability to save and create furniture!
Would you tell me more about the Minwax poly rub on? I’ve never noticed that product and was wondering if it is durable enough to use as a clear finish on a table?
My client butchered her table top and after 9 hours of sanding and mud and paint( Dixie Belle cavier(black) I’m ready to clear coat but don’t need to much light to reflect on it from whatever I use to protect it. Thanks, Tanya E.
Tanya,
Yikes, 9 hours! you deserve to get this gal finished!
The rub-on poly is easy to apply, but it won’t protect the top as much as a polycrylic. I like to use it because it gives it a nice finished “sheen”. You may want to research Dixie Belle and Wipe-on Poly to see what others may have to say.
Good luck!
Wow, this is fabulous! I love what you did here. I want a coffee station so bad, but I don’t have the space. How can I make a hang on the wall coffee station, when wall space, or furniture piece space is lacking?
Using a door like I did is a great base for a coffee station. You could even consider a tall shutter on the wall with a shelf. If you don’t have a shutter, you might consider a louvered door. Your local Habitat for Humanity ReStore should have a great selection of items to mix and match for your new project.
good luck!
gail
I am just getting into repurposing things since we are moving into a place after being in a camper for 3 long year!! Yess!! Finally! I have a few questions. I recently made my own chalk paint using flat paint and calcium carbonate I sprayed it on with a sprayer but I am wanting to distress and add some antiquing wax made by valspar. So my question is would you distress then add the antiquing wax before applying the wipe on poly?! I’m so confused and want my tv stand to come to life, it’s red btw ????????????
Rayne,
Sometimes it’s easier to distress after waxing. But the Valspar wax might be more of a sealer, making sanding and distressing more difficult. You know I love red, don’t you? 🙂
Poly would be last, but I’m thinking you may not need it after the valspar. I think you’ll know when you’re getting there.
gail
This is soooooo awesome!! It came out great =0) Love your inspirational work and can-do spirit!! Can’t wait to get back in the garage and get to work once the temps are over freezing. Maybe I’ll bring out a portable heater and get started sooner ;0)
I’m anxious for warmer weather too Linda! I’ll work as long as it’s sunny and about 48-50. The garage is cold, but I work on the driveway where it’s sunny. Hoping to get a couple of projects done this weekend.
Thanks for your very kind comment about the coffee station cabinet!
gail
You have such great vision! One look at that particle board and I would have put it to the curb. I love that color.
I’m sure a lot of people would have tossed it to the curb. I suppose that’s why my neighbor gave it to me. 😉
gail
so cute. love the color. I would love to make one , going to pin it . thanks
Thanks for pinning Debbie!
Love how this turned out and that color is fantastic. I tend to welcome dark colors because they’re calming. Now when I see cupboards like this I’ll have to stretch my imagination, get out the skill saw and build fun. Awesome tips!
I rarely say no to any furniture but even I was wondering what I was thinking when I said yes to this! 🙂
Sawing furniture is my favorite.
gail
Love your work. Look forward to reading your blogs, posts anything you do. So very creative.
That was genius and the coffee station is gorgeous! I love the color you chose Gail. Nice work as usual, you are such an inspiration 🙂
Thank you Susan, and I appreciate you pinning! 🙂
gail
You did a beautiful job !!!!!!! Really looks nice,