• Skip to primary navigation
  • Skip to main content
  • Skip to primary sidebar
  • Start Here
  • Shop Favorites
  • About
    • Welcome To My Repurposed Life Home of Repurposed Furniture
    • More About Gail
    • Disclosure
    • Privacy Information
  • Gallery
    • Repurposed Furniture
  • Repurposed Items
    • Building Supplies
    • Miscellaneous Household Items
    • Picture Frame/Chalk Board
  • DIY
    • Home Reno
    • outdoor living
    • Painting
    • Shop Talk
    • Tips for Around the House
    • Build It
      • Furniture
      • Home Decor
      • Storage
    • Crafts
      • Dollar Store
      • Easy
      • Holidays Seasonal
  • Furniture
    • Chair
    • Desk
    • Dresser/Chest
    • Headboard | Bed Parts | Cribs
    • Kids Furniture
    • Table
    • Kids Furniture
My Repurposed Life® Rescue Re-imagine Repeat
menu icon
go to homepage
subscribe
search icon
Homepage link
  • About
  • Start Here
  • Project Index
  • Furniture
  • Subscribe
    • Email
    • Facebook
    • Instagram
    • Pinterest
    • RSS
    • Twitter
  • ×

    Home » Repurposed Items » Building Supplies » craft paper dispenser Repurposed Cabinet Door

    craft paper dispenser Repurposed Cabinet Door

    Published by Gail | Published January 25, 2019 | Updated June 23, 2021
    As an Amazon Associate I earn from qualifying purchases.

    Pin
    Share
    Tweet
    This Diy craft paper dispenser can be used in the playroom, office or the kitchen. Made from a repurposed cabinet door, move it from room to room as needed. #MyRepurposedLife #repurposed #cabinet #door #craft #paper #dispenser via @repurposedlife

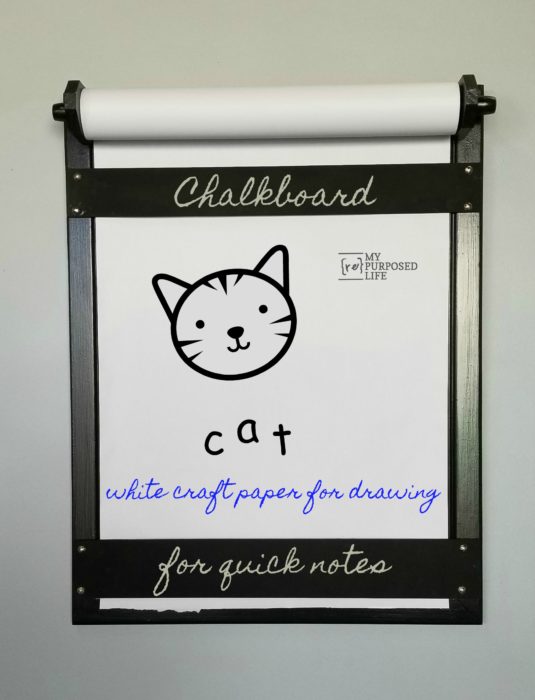
    This Diy craft paper dispenser can be used in the playroom, office or the kitchen. This handy roll of paper is attached to a repurposed cabinet door making it easy to move from room to room.

    diy craft paper dispenser for home office MyRepurposedLife

    The fun and unique aspects of this hanging craft paper dispenser are the paper holders! The top and bottom paper guides are chalkboard surfaces—perfect for quick notes!

    *this post contains affiliate links, read more here*

    How to make a craft paper dispenser

    Materials

    • Cabinet door
    • Scraps of 1x3’s
    • Spindle (or dowel)
    • Scraps of thin plywood
    • Paint
    • White Craft Paper Roll

    roll of paper for dispenser

    How do I come up with these ideas? It depends, this time it all revolved around this roll of paper.


    How to make brackets to hold paper roll

    scrap 1x3's make paper roll brackets

    I had these small scraps that were actually part of a former baseboard. I cut a few rectangles. Then on the miter saw I cut the corners off of one end.


    drill hole in roll paper bracket

    Stacking the two rolled paper brackets, I drilled a hole in the center to hold the spindle. You can see I used a 1” spade bit. Placing a scrap piece of wood on the bottom will aid in having less splintered wood.

    How to use a Kreg Jig

    Attach brackets to cabinet door

    kreg jig drill pocket holes in bracket

    In order to secure the brackets to the craft paper dispenser, I drilled pocket holes with my Kreg Jig .


    does the spindle fit the bracket

    The brackets were attached to the cabinet door using pocket hole screws on either side. Be sure to test the spindle to make sure it fits.

    Patch pocket holes on brackets

    patch pocket holes

    How I patch pocket holes. I usually patch, let it set up, and add more putty or spackling. After it all sets up it gets a light sanding. Yes, it is possible to make pocket holes invisible in finished projects!

    Paint craft paper dispenser

    paint craft paper dispenser

    Semi-gloss paint makes the paper dispenser more durable.

    Make paper guides for dispenser

    scrap chalkboard plywood pieces

    When I made small chalkboard tags from scrap plywood, I had these pieces leftover in my scrap pile. I chose a couple of pieces to use for the paper guides.


    cut thin plywood chalkboard on miter saw

    I carefully cut the thin plywood on the miter saw. Then I ended up ripping them on the table saw so the paper guides wouldn’t be so wide.


    spray chalkboard paint on plywood strips

    After I trimmed the thin boards, I decided they needed a little more chalkboard spray paint.

    Attach guides for paper dispenser with thumb tacks

    thumbtacks attach guides for craft paper disenser

    To make things easy, the upper and lower chalkboard paper guides were attached using thumbtacks.

    use d rings for hanging craft paper dispenser

    I always use these d rings for hanging my diy projects. They are a great deal on Amazon, much cheaper than at the big box store.

    DIY craft paper dispenser made from a cabinet door

    how to use a cabinet door to make a diy craft paper dispenser MyRepurposedLifeSo, there you have it! An easy diy craft paper dispenser made from a cabinet door.


    It’s perfect for the kids and/or the adults! To change out the roll of craft paper, simply slide out the dowel made out of a spindle.

    gail

    Pin
    Share
    Tweet

    Related Content:

    • chalkboard ideas
      chalkboard ideas
    • DIY Chalkboard Speech Bubbles
      DIY Chalkboard Speech Bubbles
    • Faux Dresser Harp Chalkboard
      Faux Dresser Harp Chalkboard
    • Repurposed Hollow Core Door Chalkboard
      Repurposed Hollow Core Door Chalkboard
    • wooden spindle project ideas
      wooden spindle project ideas
    • Craft Show Chalkboard Display
      Craft Show Chalkboard Display

    Reader Interactions

    Comments

      See comments Cancel reply

      Your email address will not be published. Required fields are marked *

      This site uses Akismet to reduce spam. Learn how your comment data is processed.

    1. Steve

      January 31, 2019 at 8:32 am

      I like it. ? something to hold a marker etc.

      Reply
      • Gail Wilson

        February 01, 2019 at 9:57 am

        Ohhh, yeah! duh! You're very perceptive. 🙂

        I'll have to fix that before it goes to it's new home. Thanks Steve!

        gail

    2. Gilmer Gal

      January 30, 2019 at 12:53 pm

      I love this! I have a plan that, instead of using the ripped plywood, uses roof flashing! It's very thin and easy to cut - and cheap! Also gives that 'galvanized' look to the piece.

      Reply
      • Gail Wilson

        January 30, 2019 at 8:52 pm

        Awesome idea Gilmer! If you do this project, I'd love to see it!

        gail

    3. Doris Styles

      January 25, 2019 at 9:26 pm

      I love this....wish I could make this!! I’ve always loved everything you make!!!

      Reply
      • Gail Wilson

        January 26, 2019 at 3:17 pm

        You're so kind Doris! This was a fun and fairly easy project. I had fun making it, although it wasn't what I had planned. I rarely plan things out and I guess that's why. It doesn't usually work out. heheheh
        gail

    4. girlfromwva

      January 25, 2019 at 2:01 pm

      really cool!
      thanks for the instructions.

      Reply
      • Gail Wilson

        January 25, 2019 at 7:04 pm

        Thank you Nova! I really love how it turned out, though it wasn't at all what I started designing. 🙂 It was going to be an easel that could rest on the floor, or close to hang on the wall. LOL Then, there was plan B

        gail

    Primary Sidebar

    Hi, there! I’m Gail Wilson, the author and mastermind behind My Repurposed Life. I’m obsessed with finding potential in unexpected places and believe that with a little hard work and imagination, any old thing can be made useful again—myself included! I hope you’ll enjoy the journey and pick up a few tools along the way… literally!

    More about me →

    Join Our Mailing List

    ​

      Click the topics you're interested in below:

      Subscribing above means you agree to our Privacy Policy​

      Footer

      ↑ back to top

      SEEN ON

      Might I Suggest

      • Start Here
      • Furniture Makeovers

      Newsletter

      • Sign Up! for emails and updates

      About

      • Gail's Favorites on Amazon
      • About

      As an Amazon Associate I earn from qualifying purchases.

      Copyright © 2023 My Repurposed Life · Privacy Policy · Disclosure