Craft Show Display Rack
As an Amazon Associate, I earn from qualifying purchases.
Today will be a busy day! I’ll be packing a uhaul for my annual show at Glendale. I hope I’m ready. I guess I have to be ready. yikes! It’s suppose to be a cool weekend. I’ll have two booths again this year. My Cousin Terry is helping me—so thankful for that. I’ve come to realize I just can’t do this by myself anymore.
Today’s project isn’t really pretty to look at, but it’s a necessity for my hanging projects.
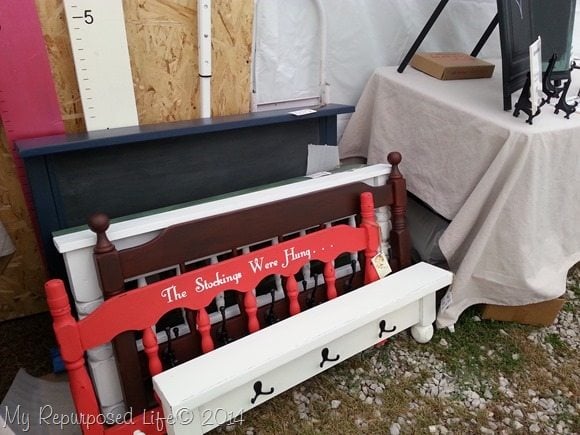 Last year I had stuff resting on the ground as seen in this picture. I’ve spent the last year trying to figure out how to build a display that would be easy to transport.
 While googling and searching, I found this craft show display idea from Cheltenham Road. I made mine a little different.


As I said at the top of this post, it’s not much to look at, but it’s going to serve my purpose, AND wait till you see how little room it takes up for storage and hauling. here’s how it all came together . . . .
 I bought a long concrete tube form 8” in diameter. I used my reciprocating saw to cut the cardboard. I bought 1 bag of concrete to fill the cut off tubes, and inserted a 5’ 2×4 into the concrete.
 I used nuts and bolts to attach 4’ firring strips horizontally.
 I placed the firring strips about 7” apart.
While I was shopping at The Home Depot for the nuts and bolts, I was trying to figure out how I was going to suspend my hanging coat racks from the firring strips. At first I thought “S” hooks would work, but they are soooo darn expensive. While walking the aisles I was quizzing myself about what I have a lot of—suddenly it hit me! I have a TON of peg board hooks left over from when I had a booth at a local store. So I picked up a half sheet of peg board.
 After painting all the firring strips, 2×4’s and concrete, I ripped the peg board into strips that would fit the firring strips. Because you can’t attach the peg board directly onto the wood, I used some scrap pieces of wood to separate the peg board from the firring strips.
 I secured a screw through one of the holes of the pegboard, through the little scrap piece of wood which allows the pegboard hook to rest in the holes.
After I got it all done, I realized that I could add pegboard to the BACK of the display as well.
 I had to cut the pegboard to a shorter length so it would fit in between the upright 2×4’s. Because I ran out of the small scrap wood pieces, I used the ends of the pegboard I cut off to make the spacers.


This is the BACK! I have double the space that I expected to have. I have already planned it out how to set it up in my booths so that it will be most valuable real estate (floor space)
Now, are you ready for the BEST part?
 It breaks down and takes up very little room!
 I bungeed 3 of the horizontal pegboard pieces to each of the vertical poles. Easy to store and transport.
Not only that, but it will be easy to put up when we get to Glendale!
ps I numbered the boards to make them easier to assemble on site.
I sure hope this works as well as I think it will, because I have a LOT of hanging items. I sort of think it will be like solving a puzzle to figure out the best way to display the items. ![]()
Here’s hoping Glendale 2015 is successful!
gail
Related Content: Another use for concrete: Hammer Door Stop
This is perfect for you and that you can use both sides is awesome! Best of luck at Glendale! I hope you have a great show and stay warm!
Great display, Gail. I’m sure you will get a lot of use out of it! Good luck at the show.
what a great display rack Gail!!! hope you sell out by the end of the day. see you there!
Gail that is a wonderful project, But I was just wondering why use just one side, when you could use both, then you could set it at an angle, so that they could look on both sides…..more shelves or picture frames or coat racks or spice racks…..just thinking, I would use all the space allowed then you would have more sells would you not……
Yvonne,
I am using both sides. 🙂 The peg board is longer on the front side, and shorter on the back side (because it fits between the vertical poles)
gail
Sorry Gail, I missed one picture…….You have got it together…….GOOD LUCK on your sells and trip……Hope you enjoy it all……Take Care of Yourself…….
You are so clever!!!! Best wishes on your sales at Glendale. ROCK IT GIRL!!!
gail you have worked your arse off for this show and you always put your heart and soul into everything so i am sure it will be a huge success and you will be coming back with an empty truck xx
That was a really smart idea! Wish I lived closer because I would love to go to this sale.
What a marvelous way to showcase your beautiful projects. Hope you have great success at Glendale!
Val
Good Luck at Glendale!!!
Such a great idea!!! Good luck! 🙂
Great idea! And I love how it comes apart. I need this for Clarinda this weekend! Good luck at Glendale!
good luck! i hope glendale is a huge success for you!