Decorative Finials from Bed Parts
As an Amazon Associate, I earn from qualifying purchases.
How do you make decorative finials? Well, stay tuned friends, I’ll show you exactly what to do!
Do you remember the bench I put together from bits and pieces of 3 beds 2 cribs and a chair?
Bed Posts for Decorative Finials
") For that project, I cut the pointy piece off and used the larger piece for the front leg.
For that project, I cut the pointy piece off and used the larger piece for the front leg.
Cutting Bed Parts on a Miter Saw
 Then, I had to cut the bottom of this bed off in order to raise up the foot board on that bench project.
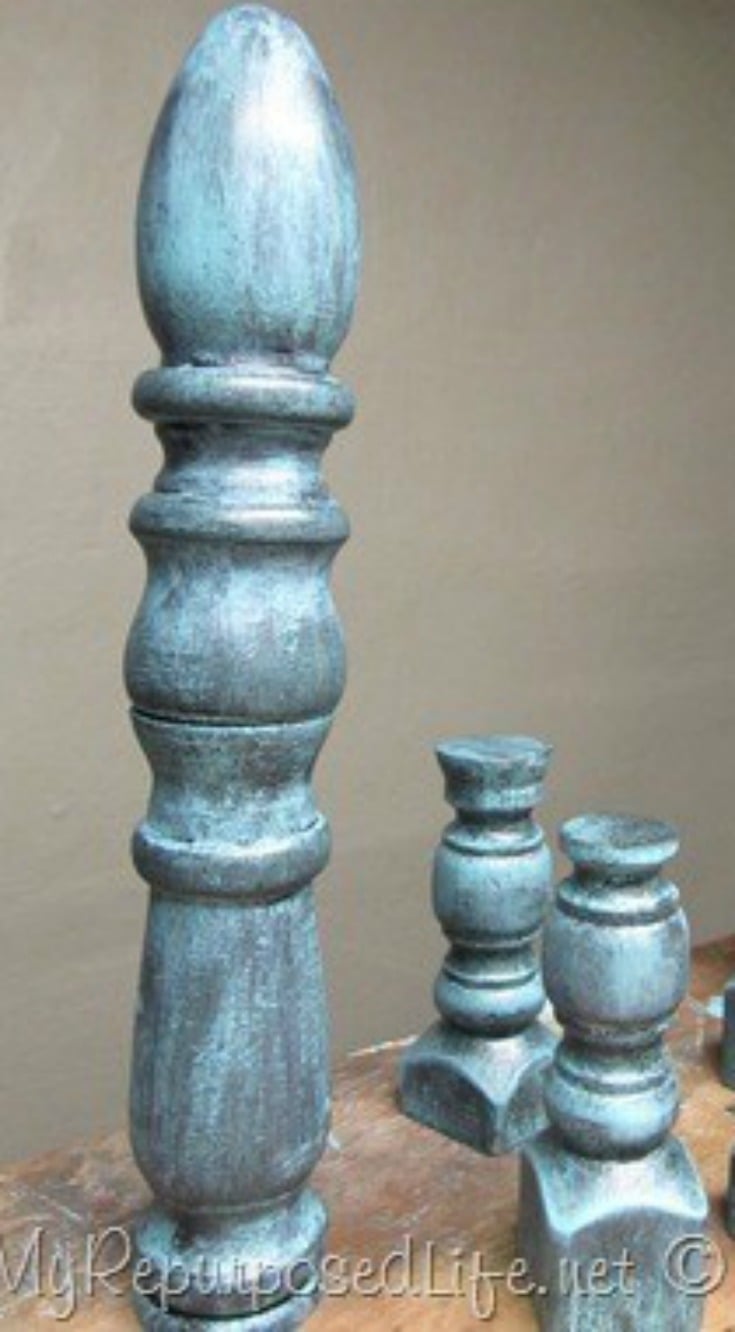
Do you See Decorative Finials?
")
So, I took the end piece (pointy one).

Plus the leg piece I cut off to make these decorative finials!!!

The decorative finials on the left and the right are the end result of those other pieces.

The smaller pieces are from some porch spindles I cut off. Using bits and pieces to make pretty home decor items is so much fun.

You’ll have to use your imagination on how pretty these would look on a mantel or in a pretty vignette with some other décor.
That’s not what this blog is.  But you already knew that, right? No pretty pictures and fancy décor shots from me. I’ve been busy with other things and haven’t had time to stage these decorative finials.
How to Get an Aged Paint Look

To get the color, I painted them black and then did a wash with the turquoise I used on the bench.

I love how my workbench is going to become a collage of my latest projects with all the paint splatters!
No need for fancy pictures, we get the idea. Love the way you keep it real! Another great example of repurposing all the bits and pieces!
I love that you can impress us with your talent without staging a “pretty” photo! Your repurposing mind never ceases to amaze me!
This is really, really neat. I just love how you put things together out of odds and ends and then it looks perfect!
My garage floor is turning into my collage. Sad.
I love these! I can see some of them used as candlesticks.