Wooden Caddy Box
As an Amazon Associate, I earn from qualifying purchases.

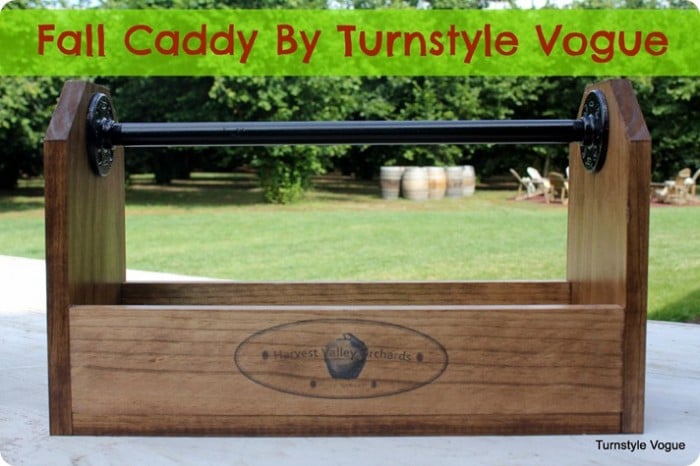
Hi everybody! I’m Shari from Turnstyle Vogue. I’m here to show you a fun DIY of mine that I enjoy putting together: a wooden caddy box, otherwise known as totes. Last week, I showed my readers my summer farmhouse version and today, in honor of the approaching fall season (yes…it is approaching!) I’m going to show you my fall version.
First, I want to thank Gail for inviting me to be her guest. I consider her to be the best of the best. Anything she touches turns to gold! I always wait in anticipation for the reveal of her latest and greatest project!
Okay…let’s get started.
Here is what you need:
1) 1” x 8” board and 1” x 4” board. For this caddy, I used clear pine boards (no knots.) Poplar and Hemlock would be other great choices.
2) 18” galvanized pipe from the plumbing section
3) Two galvanized steel fittings. Make sure they are the right size! I used 3/4 inch pipe and fittings.
4) Electric nail gun. If you don’t have access to one, you can use wood screws.
5) Antique Walnut Stain
6) Black spray paint
7) Graphic of your choice. I created mine on Word. If you don’t want to create your own, check out The Graphics Fairy library of free images.
You will cut the pieces as follows:
ENDS: 1” x 8” x 12”. Dog-ear the ends 1 1/2” from the corner.
SIDES: 1” x 4” x 18”
BASE: 1” x 8” x 18”
The next step is to stain your pieces with 3-4 coats of stain. NOTE: In order for the graphic to show up clearly, I only stain the sides ONE TIME.
Then spray your pipe and fittings. You may want to first give your pipe a good sanding if it has some rough spots from metal shavings.
The next step, before the poly clear coat, is to add your graphic to the side. Many people have their own way of doing this. I’ve done it a few different ways (vinyl, carbon transfer paper, wax paper transfer method, etc..) My preference for this caddy was the waxed paper method. I will do a tutorial on it at a later time, but for now, you can go here to see how it is done. I suggest you practice once or twice before you transfer it to the wood and if you have any lettering, BE SURE TO REVERSE IT IN WORD BEFORE YOU PRINT!
As I mentioned, I created mine in Word using basic clip art, shapes and fonts. It says “Harvest Valley Orchards” “Pacific Northwest”
You may have a result in which the transfer lighter in some areas. If you don’t like it, you should be able to quickly wipe it off with a wet rag (quickly being the operative word) but I personally like the uneven look. It makes it look aged – worn over time.
The last step before putting it together is to poly your pieces – including the pipe and fittings. It is easier to do it now rather than after it is put together. I always put 3 coats, minimum. Also, I used outdoor poly since this is something I use on the porch off and on. Whether you use indoor or outdoor is up to you.
To construct the tote, you can follow these steps that I showed in my summer caddy tutorial:
1. First, attach the end pieces to the base.2. Attach the side pieces to the ends.3. Since you are not using a spindle for the fall caddy, you will first attach the fittings to the pipe, then center the fittings and screw them into the ends. 4. Stand back and admire what you have done so far!Your finished piece should look like this:
Thanks again Gail for inviting me to share my project with your readers today. I’d love for all of you stop by Turnstyle Vogue and look around – perhaps view my gallery of furniture and projects as well.Have a great day!!
Be inspired,
![]()
Shari—I LOVE your caddy—the handle gives it an industrial look that is fabulous! It’s amazing how different a caddy can look, just by changing the handle. Thanks so much for your kind words about what I do, love YOUR stuff too! It was great to have you as a guest. Stop by anytime!
I appreciate you reading my blog in your reader and/or via email.
You can reach me at gail@MyRepurposedLife.net

LOVE, LOVE… I will be making this caddy with the pipe… Thank u…