Tips from DIY Bloggers
As an Amazon Associate, I earn from qualifying purchases.
I have gathered some great DIY tips from some of my friends. I hope you learn something new from these wonderful ladies.
From The North End Loft
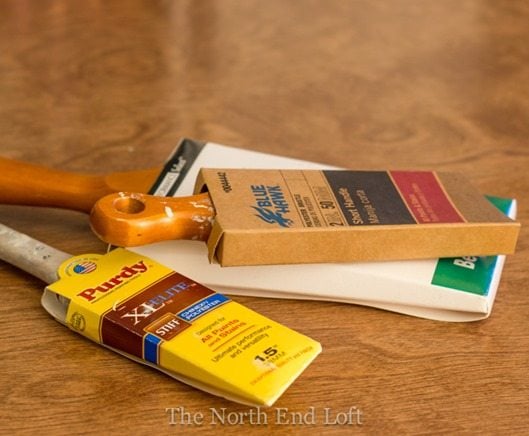 Always store your good paint brushes in the cardboard sleeves in which they came. Put the brushes carefully back in the sleeves right after cleaning while they’re still damp, and the ends will stay nice and sharp. I’ve stored some of my well-used Purdy paint brushes in their original sleeves for over twenty years, and they’re still good as new.
From Elizabeth & Company
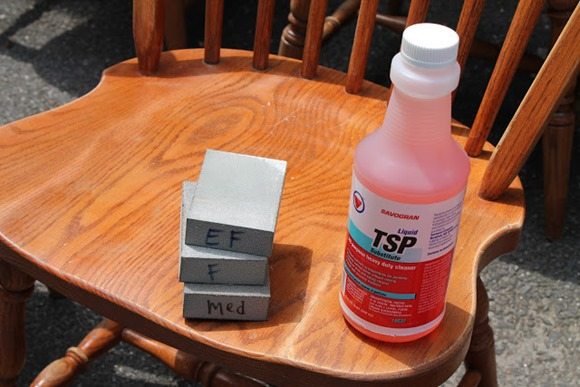 Don’t skip the prep work! When painting furniture, that means a good cleaning, sanding and making all the necessary repairs. With all the paint options today, we’re often tempted to skip the prep and get right to the fun stuff. But paint needs a proper surface to adhere properly. And even a flawless paint finish can’t make up for drawers that won’t open or wobbly legs.
From Daisies and Crazies:
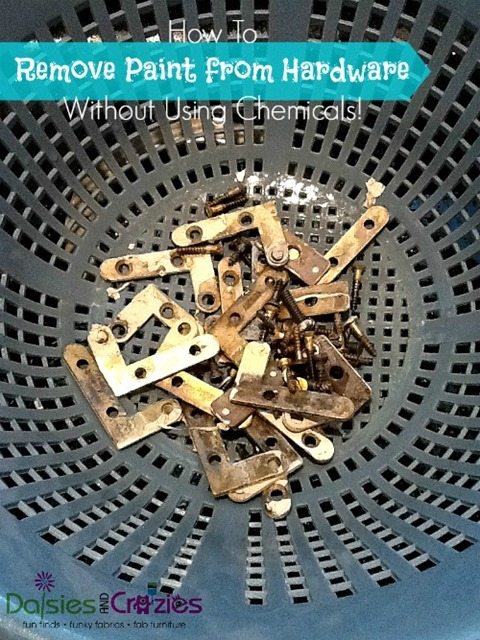
Remove Paint from Hardware Without Using Chemicals
Are you taking an old piece of furniture and making it fabulous again? Does it have a lot of paint and gunk stuck to the knobs and hinges? The good news is, if you prefer to limit your exposure to harsh chemicals, you can remove that paint with something you have right in your kitchen pantry!
1. Add 1/4 cup of baking soda to 1 quart of water in a pan.
2. Put the pan on the stove and after the water starts to simmer, add the offending hardware.
3. Let boil for 15–20 minutes and then pour into a strainer to cool.
4. Remove paint, using some gentle peeling and picking.
Easy, inexpensive, and chemical-free!
From Living Rich On Less:
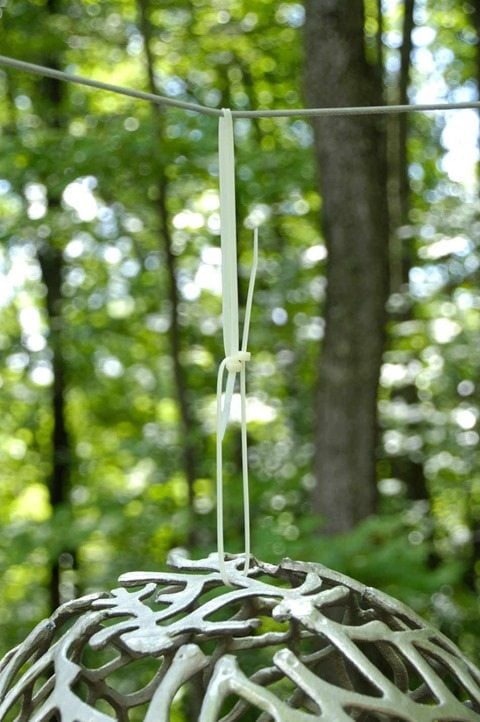 One of my favorite quick and easy spray-painting tips for small objects is to use nylon zip ties to hang the objects on my clothesline before painting. This keeps both of my hands free while working and ensures I get even coverage on all sides.
I used this technique when I DIYed my “Once Upon A Time” knockoff twig bowl
From Beyond The Picket Fence
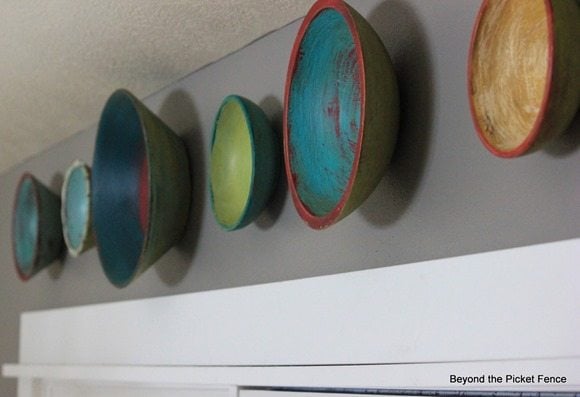 My number one tip is about my paint technique because it is my most asked question. To get a great looking, old paint finish SLAP paint on, willy nilly without completely covering the piece. Use different colors, don’t always wait for the under layer of paint to be dry before adding another color. When dry, sand and then finish with stain or dark wax to achieve a fun, aged paint look. Have fun, don’t worry about making it perfect.
From Kirb Appeal:
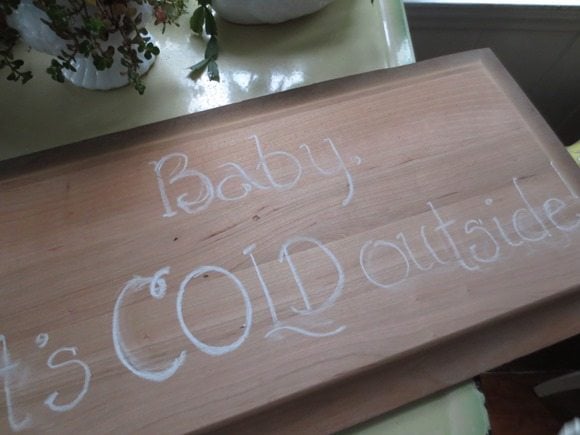 Write things out in chalk first, when you’re hand lettering.
How to do hand lettering
From Debbiedoos:
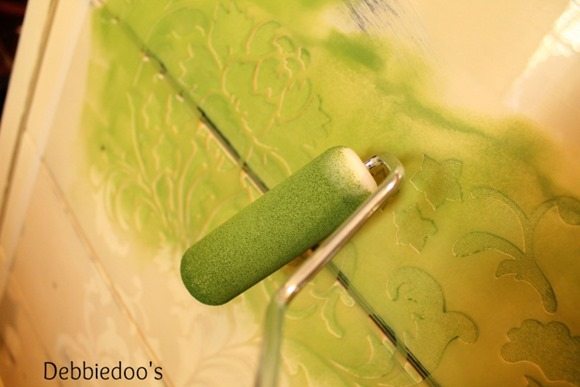 When stenciling furniture or walls, always best to use a foam roller and never over saturate it, less is more and you can always go back and make the color darker as desired.
Get the details here: How to stencil on furniture
From Infarrantly Creative:
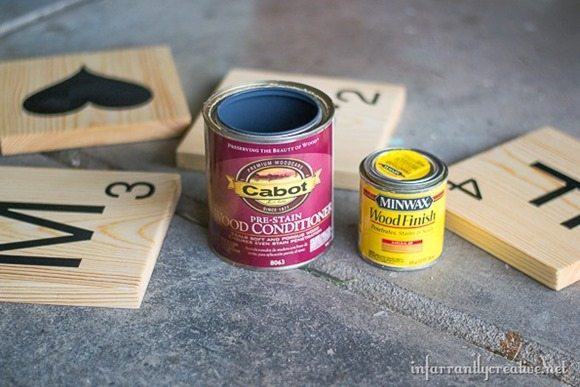 When finishing bare wood always use a pre-wood conditioner on soft wood. Don’t know if it is soft wood? Dig your fingernails into it. If you see a mark it is soft.
From Homeroad:
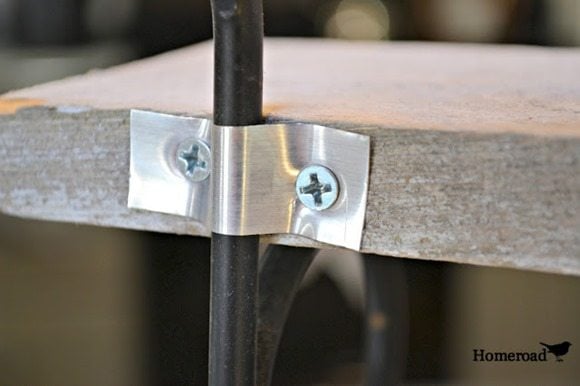 “I use metal roof flashing in place of hardware brackets in many of my projects. It is inexpensive, easy to drill through, and works!”
How to make your own hardware brackets
From Follow Your Heart Woodworking
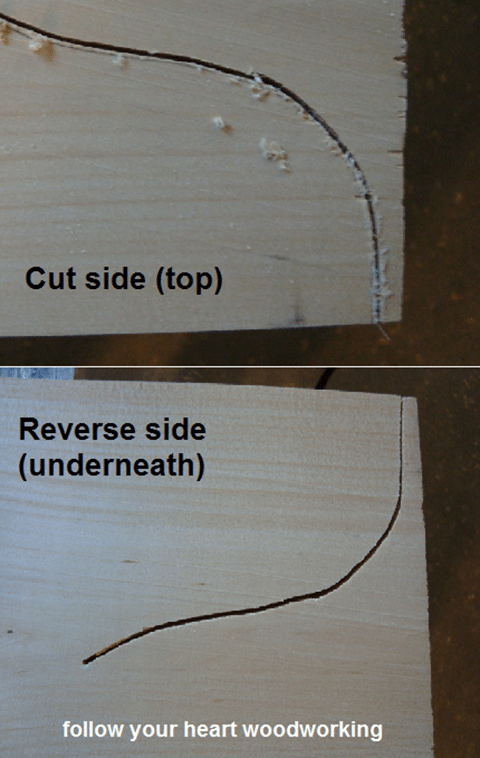 When making jigsaw cuts, cut on the WRONG side of the wood.
Most jigsaw blades cut on the upstroke, meaning that the blade cuts as it pulls up from the bottom. This leaves the underneath side of the wood with a neater looking cut.
So, when cutting, flip your wood over and draw your pencil line on the wrong side of the wood and cut from there where possible.
From Corn In My Coffee Pot:
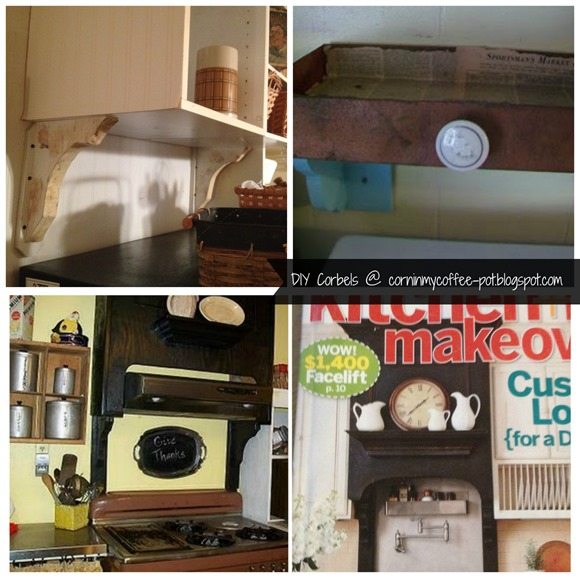 When doing DIY projects around the house and home sometimes we may need a corbel or two; they work better in pairs, for support in building a shelf or mounting cabinetry. Corbels can be pretty and functional; but they can also get pretty pricey.
I first discovered the impact corbels can make on a project when I was building a COPY CAT Mantel in my kitchen over my Vintage Range.
I’ve since created more to use around my home over the fridge and in the mud room over the washer and dryer.
From My Love 2 Create:
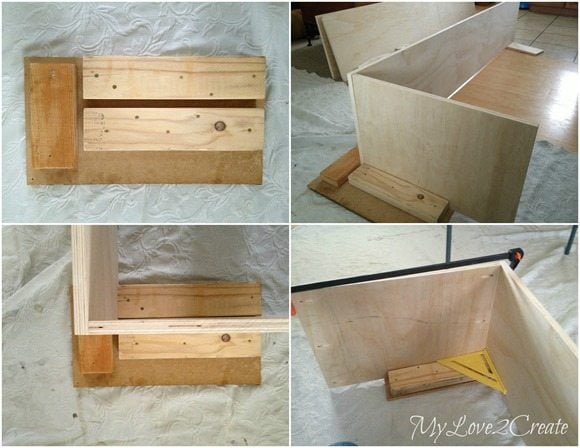 One of the hardest things about building large projects by yourself is sometimes you need more than two hands! I decided that I needed a helping hand in building my closet towers. So, I built one, a “helping hand.” Using four pieces of scrap wood I created a jig that will hold my materials for me, while I screw them together. When building my little jig I made sure everything was square, so when I place in my project boards all I have to do is clamp the top and I am good to start drilling in my screws! Helping Hand Jig
From Freddy and Petunia
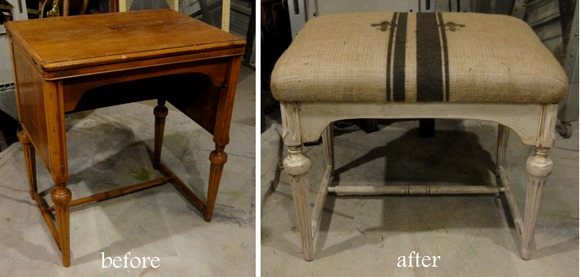 The EASIEST big transformation to an old cast-off sewing machine cabinet!
Cutting down a piece of furniture can be easily accomplished using a variety of saws, it really just depends on your confidence and what saws you have!
Just create a fence to guide you in a straight line and make the job safer!
From RedouxInteriors:
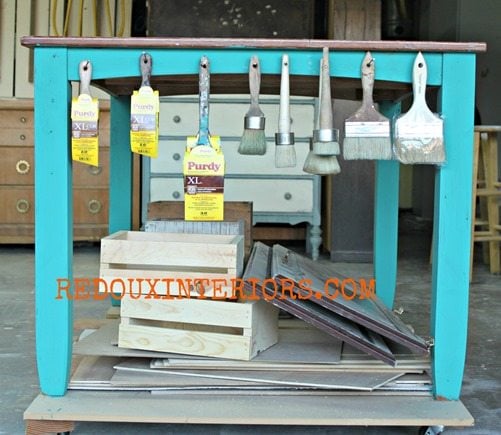 Repurpose a table to make a workstation by adding a platform, wheels and hooks.
From My Repurposed Life
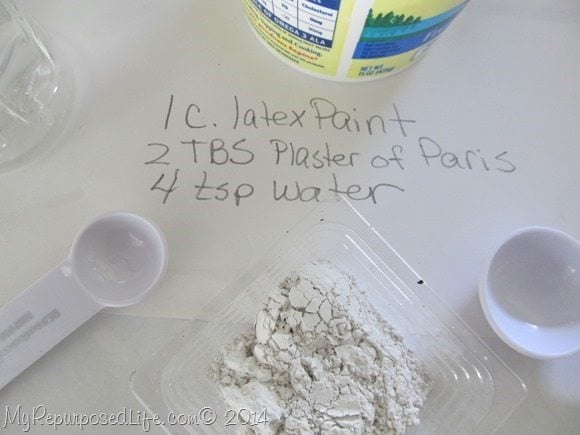 How to make your own primer:
My favorite paint these days is Behr paint with Plaster of Paris in it as a DIY Chalky Paint Primer. Using this mixture as a primer, and then the Behr paint as a topcoat gives great results, and no bothersome waxing and buffing. Because adding the POP to the paint makes it very flat, there is very little prep work to most pieces of furniture.
From Bliss Ranch:
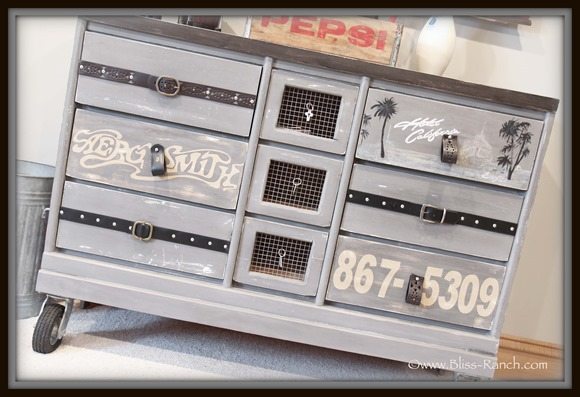
“My DIY tip is simple…. take an idea or something you have seen and make it your own. Subway art and lettered items are popular, so why not customize and personalize a project rather than copy it. I used what I had and painted a dresser unique to the interests of my teenage son. He loves it, and it’s just plain cool!”
From The Real Thing with the Coake Family:
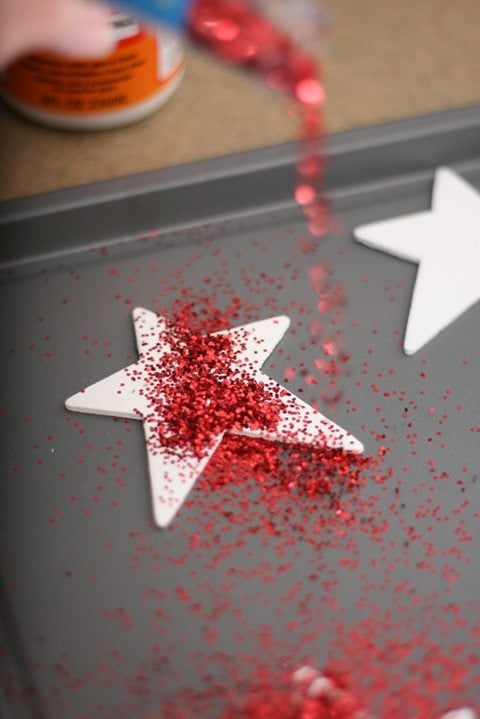 My tip is to use an old cookie sheet when working with glitter. Put the item you are adding litter to on the tray and glitter away. When you are done the tray contains all (or at least most) of the mess. Much easier to clean up and have fun with glitter this way!
From My Love 2 Create
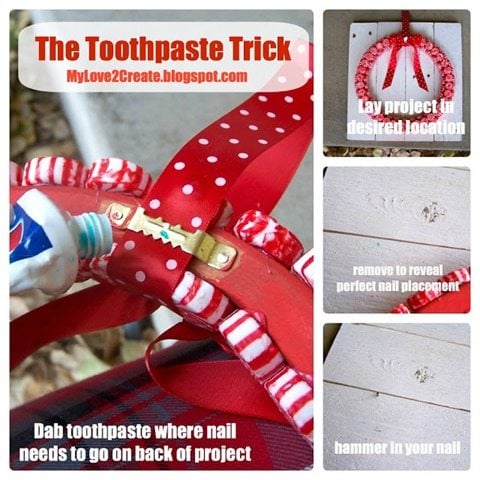 The Toothpaste Trick: This is a great tip when you need perfect nail placement to hang something. For example if you are hanging a picture frame, place a small amount of toothpaste in the center of the hanger on the back of the frame. When you put the frame up to the wall where you want it, the toothpaste will transfer to the wall right were you need to put your nail. Hammer your nail where the toothpaste is, wipe away any excess, and you are done!
From Our Southern Home
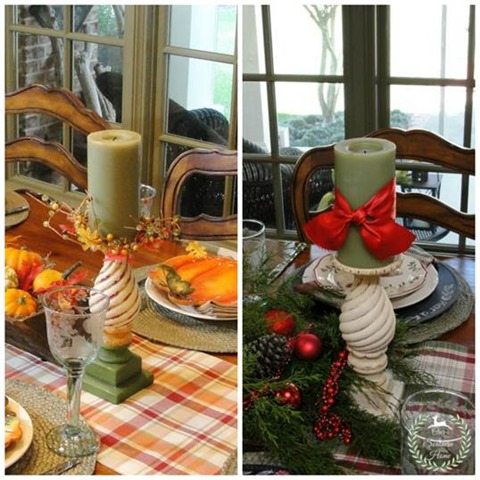 We all get tired of things we’ve owned for years. We get bored and are sometimes too hasty in giving away! Before you give away…really think! Could I repurpose this item and love it again? I had really grown tired of these candlesticks in the photo on the left. They have graced my kitchen table for almost 9 years! Yikes! The colors really limited me. In December, I decided to take my paint brush to them (photo on right). Two coats of Annie Sloan Chalk paint in Old White, a little distressing and clear wax was all it took! Now, I’m in love all over again with them! I’ve done this to lamps, accessories and picture frames. Also, keep this in mind when thrift store shopping!
Aren’t those great ideas? I have the smartest friends!
If you have a great tip, leave it in the comment. Maybe YOU will be in my next DIY tips blog post.
gail



Hey there! I could have sworn I’ve been to this website before but after reading through some
of the post I realized it’s new to me. Anyhow, I’m definitely happy I found it and I’ll be book-marking and checking back frequently!
The toothpaste tip is great……..I will have to reposition all my crooked picture now
I love all of these projects! Thanks for including our dresser!
ok just happened on your site by clicking away on FB, the toothpaste tip for placing pictures on the wall… mind blown!!!! Now as long as I can remember for next time!
Purdy Brushes are the best!!
YIKES!
How in the world did I almost miss this post?!
Thanks for including me in the line up…
There are a great many tips here.
You’re a jewel for putting this post together. 😉
Patricia
Thanks for sharing my tip, Gail! They are all great!
This is awesome Gail!! I love all the great tips, and I am totally pinning so I won’t forget! Thanks so much for including my tips!! I hope your week is starting off great! Hugs!
I’m so glad I’m an old dog who can still learn new tricks because this post is full of great tips! Thank you, Gail!
All great tips, but I have to say the toothpaste trick is genius!
Thanks for stopping by and taking the time to leave a comment Deborah. 🙂
I have some smart friends!
gail
Thanks you Gail for all these great tips in one place (and for including me 🙂 … pinning it1
Susan
Pinned all the tips! Thanks for the post!
these are all great tips! i am so sorry i didn’t come through. 🙁 i honestly couldn’t think of one that was earth shatteringly helpful.
Great post Gail–thanks for including me in it!
This should be a regular thing in the blogging world—
Catherine
That was fun, great tips!
Love it Gail! Thanks for including my tip:)
Great assortment of tips. Thanks for including me.
Great tips, Gail. And thanks for sharing mine.
What a spectacular list of tips! Some fantastic ideas and tips. Thanks for compiling them.
KC
love all these great tips from DIYers!!! thanks for sharing!
Wow, now I know where to go for a tip on just about anything. And telling my husband about the paint brush back in the sleeve, his brushes always look like hellll!
I need a really good stripper. I have 2 old chairs with
Lots of layers of paint can you suggest one that works well.
I have tried a couple . With little or no success. Thank you !
Lori Rife
ohhh, don’t we all Lori!
Back in the day, they worked a lot better than they do now. I wish I had some great advice to offer you, but I’m still looking for the best. 🙂
gail
Try CITRI-STRIP, I really like it and always keep it on hand!
http://www.amazon.com/Citri-Strip-QCG73801T-Varnish-Stripping-1-Quart/dp/B000QFCP1G
Catherine
Try Zip Strip, its a light blue gel paint remover, I’ve been using it for over 40 years. Does not require water to clean it off – water ruins wood. Just wipe down with denatured alcohol and steel wool 000 or 0000 grade.
Thank you for your recommendation Susan! I think I use to use that years ago…. but it seems like they have changed all the formulas due to regulations (better for our mother earth) and they don’t work as well as they use to.
gail
Great tips! Sorry I couldn’t get you one this time…I’ll make sure to have one for next time! 🙂
wow…these are some great tips! I always start out putting my brushes back in the sleeve…until I get in a hurry and forget 🙁
TFS…I learned something new today!