Dollar Store Garland Christmas Tree
As an Amazon Associate, I earn from qualifying purchases.

Hi friends! I made a Dollar Store Garland Christmas Tree for the very first Dollar Store Design Squad party!
I’ve put together a great group of bloggers to bring you awesome Dollar Store projects six times a year. I’ve tried to make it easy to remember. New projects will be on the first Friday of EVEN months.

We have excellent holiday projects to share with you today.
Visit the My Repurposed Life Amazon Store to shop my favorite items.
First, let’s see what I did . . . .

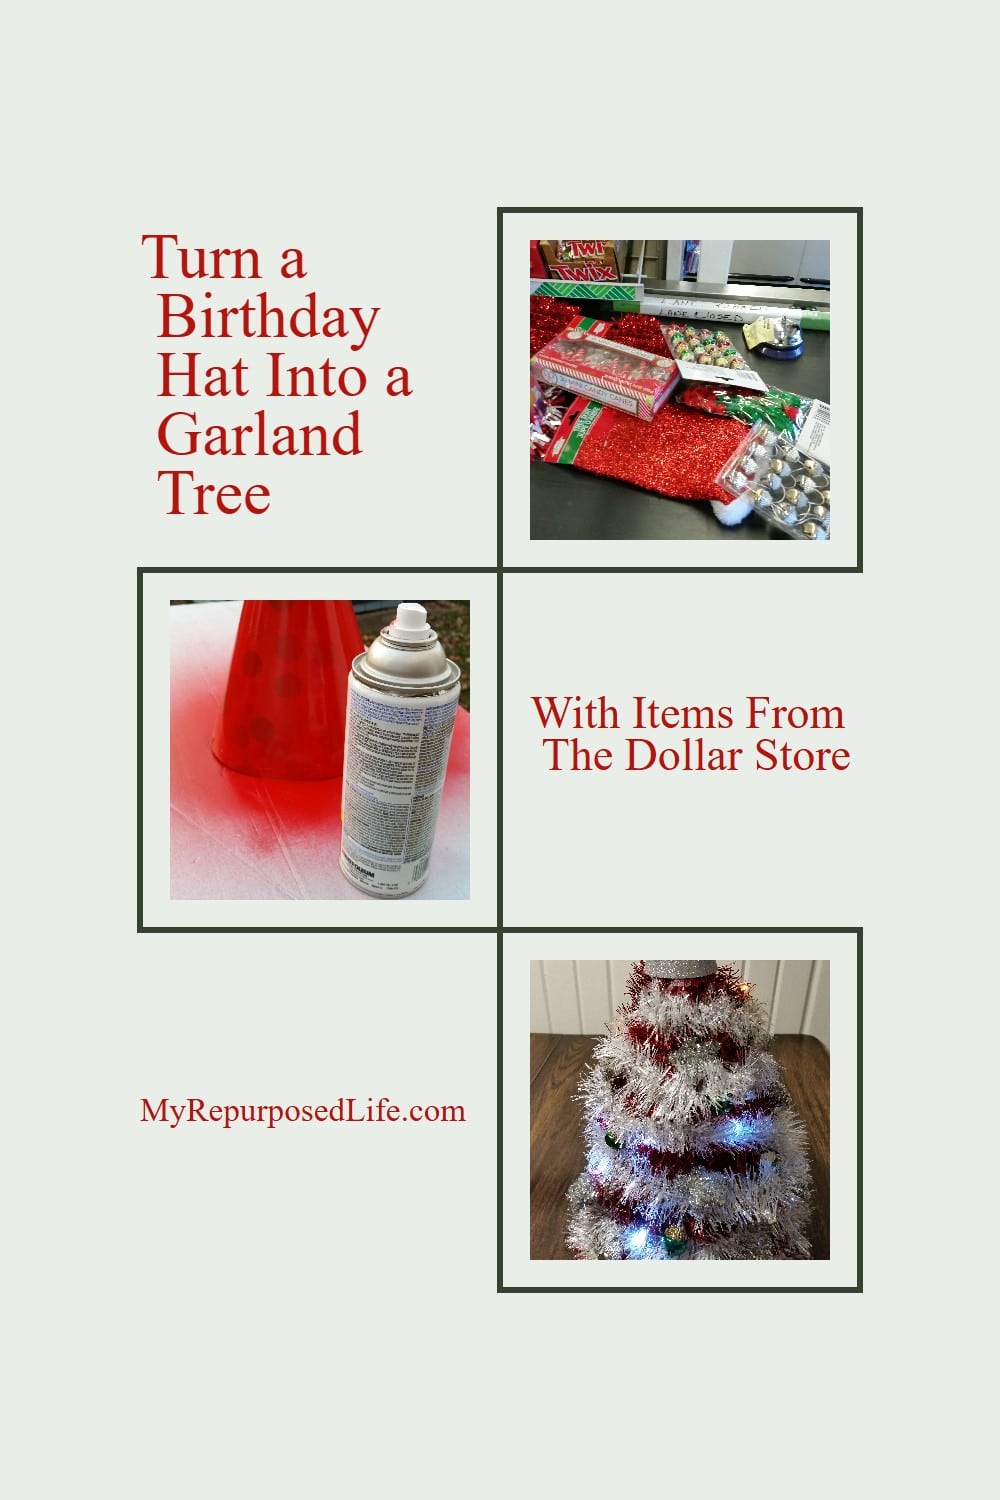
I shopped for Christmas Items at the Dollar Tree. The main piece of my project is a birthday hat!
Here’s what I purchased for my Garland Tree
- XL Birthday Hat
- Red Garland (50 ft)
- Jingle Bell Garland
- Glitter Star Ornaments
- Glitter Angel Ornament
- Silver Garland
- Battery LED Lights (2 sets of 10)
- Small Tree Skirt
What I had on hand
- Red Spray Paint
- Drill
- Hot Glue Gun
- Painter’s Tape
Step 1
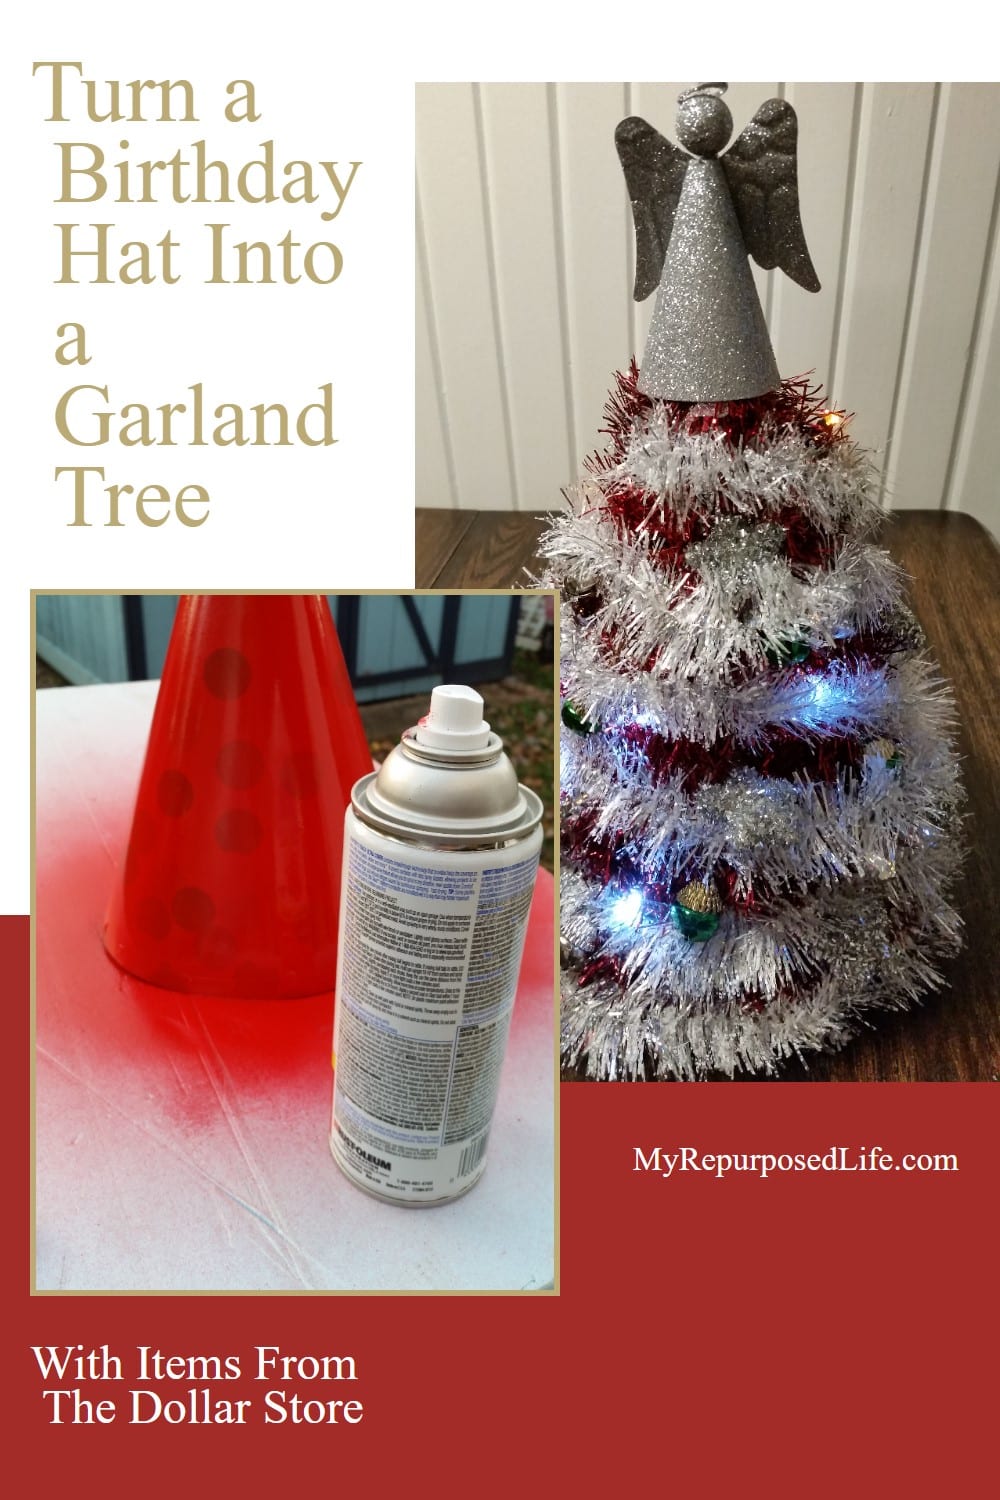
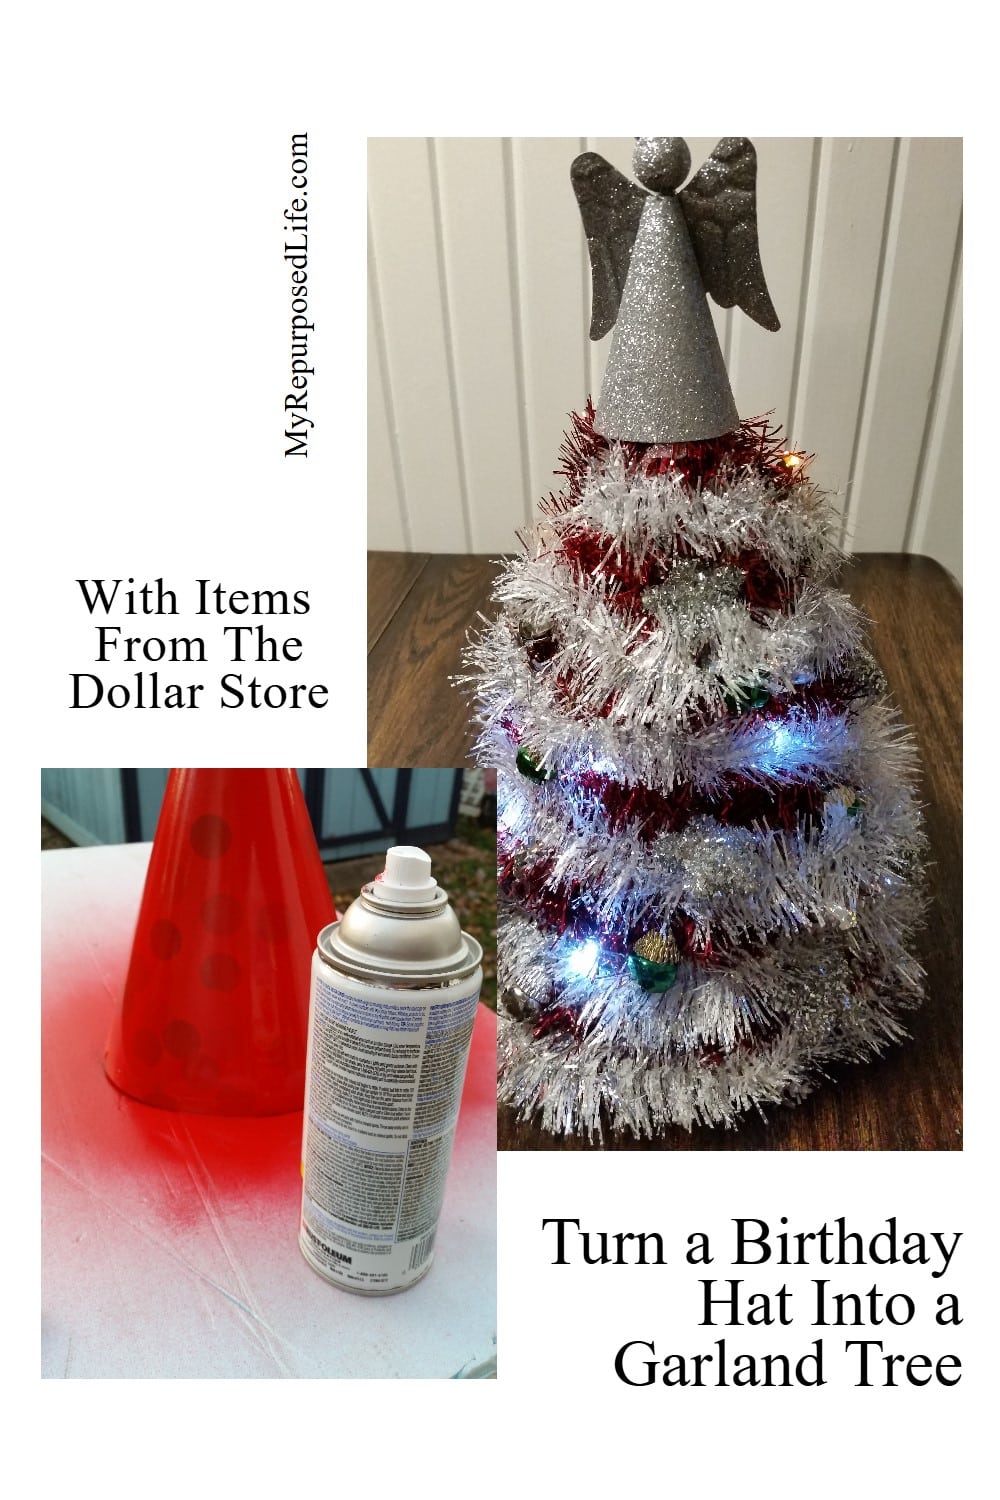
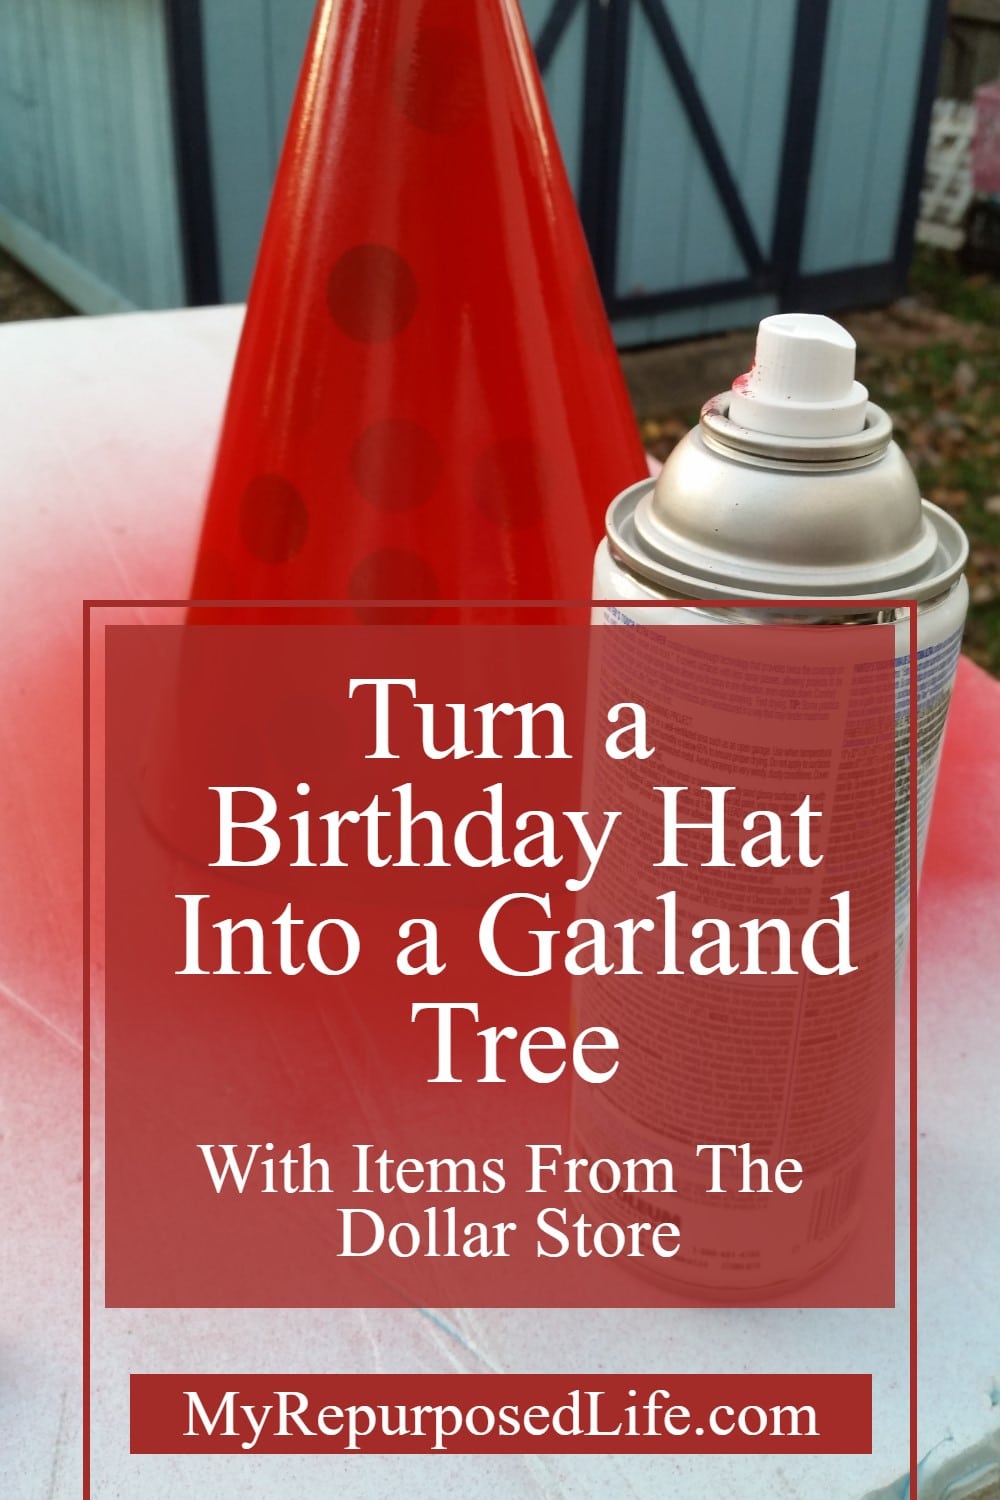
Use Spray Paint to Paint the Birthday Hat Red

I spray-painted the birthday hat with two light coats to prevent the design from showing through the garland.
Related Content: More Crafty Christmas Ideas
Step 2
Put Holes in the Birthday Hat

I used my drill and a tiny bit to poke holes in the birthday hat to insert the LED lights.
Step 3
Wrap Birthday Hat with Red Garland

The 50 feet of garland quickly filled the birthday hat’s space. This is about halfway through. I wrapped from the top down, then worked my way up again. No glue was used for this step. I wanted to use spray adhesive, but I couldn’t find it. I sprayed another light coat of paint and attached the garland while the paint was still tacky.
Step 4
Install Battery Operated LED Lights

I used painter’s tape to help hold the hat in place as I installed the battery-operated LED light sets.
Step 5
Decorate Garland Christmas Tree

Now, the fun begins! Decorate your garland Christmas tree. I used white and silver snowflake garland but snipped the snowflakes off. When I picked up the jingle bells, I thought they were small ornaments, but they were a garland. I cut them apart and hot-glued the strings onto the red garland of the tree. As a tree topper, I placed the silver glitter angel ornament on top of the garland tree. It had a bell inside of it—I just took it out.
Step 6
Add embellishments

I added these cute tinsel stars using hot glue.
Step 7
Admire your Garland Tree-Tweak

Make adjustments to get everything looking just so/so.

I dabbed hot glue on each light to secure it inside the birthday hat. NOTE: I accidentally picked up one set of white lights and one set of yellow lights. I didn’t realize it until I inserted the batteries and turned them on. ![]()

- Dollar Store New Year Eve’s Decorations Mad In Crafts
- Dollar Store Bathroom Tray The DIY Bungalow
- Hot Chocolate In a Jar Gift Idea The Country Chic Cottage
- Dollar Store Nutcracker Makeover The DIY Village
- Christmas Tree Made with Dollar Store Items My Repurposed Life
- Dollar Store Christmas Tree Base Idea Create and Babble
- Pie Plate and Pizza Pan Snowman The Kim Six Fix
- Gingerbread House Snow Globe Refresh Restyle
I hope you love these projects as much as I do! The Dollar Store Design Squad is off to a fabulous start. I appreciate them coming through with such short notice. 🙂
gail
What a great way to think outside of the box. I never would have guessed it was a hat!
Fun and cute. I love the dollar store.
I love the idea of a dollar store challenge. We have a really nice dollar store near our new house. I’m not sure about where you are, but here the dollar store now means $1, $3, and $5 items so you really have to shop. The day after every holiday is when you can get really great buys. This makes me want to go to the dollars store.
Jennie,
We still have Dollar Tree, where everything is a dollar. We also have Deals and Dollar General. It amazes me what I can buy for a buck at Dollar Tree!
I love shopping there.
gail
That’s really cute, Gail! This is something my kids would enjoy doing with me. I’ll keep this in mind next time we head there. Very creative and can easily be done in an hour. 🙂
That is too cute! I love this idea! Would be great for a table top or mantel! Pinning!
Party hat! I would have never thought of that! You are so clever to come up with this cute idea Gail! Pinning!
Super cute – I would never have thought to use a party hat like that – great job!