• Skip to primary navigation
  • Skip to main content
  • Skip to primary sidebar
  • Start Here
  • Shop Favorites
  • About
    • Welcome To My Repurposed Life Home of Repurposed Furniture
    • More About Gail
    • Disclosure
    • Privacy Information
  • Gallery
    • Repurposed Furniture
  • Repurposed Items
    • Building Supplies
    • Miscellaneous Household Items
    • Picture Frame/Chalk Board
  • DIY
    • Home Reno
    • outdoor living
    • Painting
    • Shop Talk
    • Tips for Around the House
    • Build It
      • Furniture
      • Home Decor
      • Storage
    • Crafts
      • Dollar Store
      • Easy
      • Holidays Seasonal
  • Furniture
    • Chair
    • Desk
    • Dresser/Chest
    • Headboard | Bed Parts | Cribs
    • Kids Furniture
    • Table
    • Kids Furniture
My Repurposed Life® Rescue Re-imagine Repeat
menu icon
go to homepage
subscribe
search icon
Homepage link
  • About
  • Start Here
  • Project Index
  • Furniture
  • Subscribe
    • Email
    • Facebook
    • Instagram
    • Pinterest
    • RSS
    • Twitter
  • ×

    Home » Repurposed Furniture » Repurposed Door Bookshelf Tutorial

    Repurposed Door Bookshelf Tutorial

    Published by Gail | Published February 11, 2020 | Updated February 20, 2020
    As an Amazon Associate I earn from qualifying purchases.

    Pin
    Share
    Tweet
    How to use an old door to make a bookshelf. Step by step directions on how to accomplish this project in a weekend. 
#MyRepurposedLife #repurposed #furniture #door #bookshelf #red via @repurposedlife

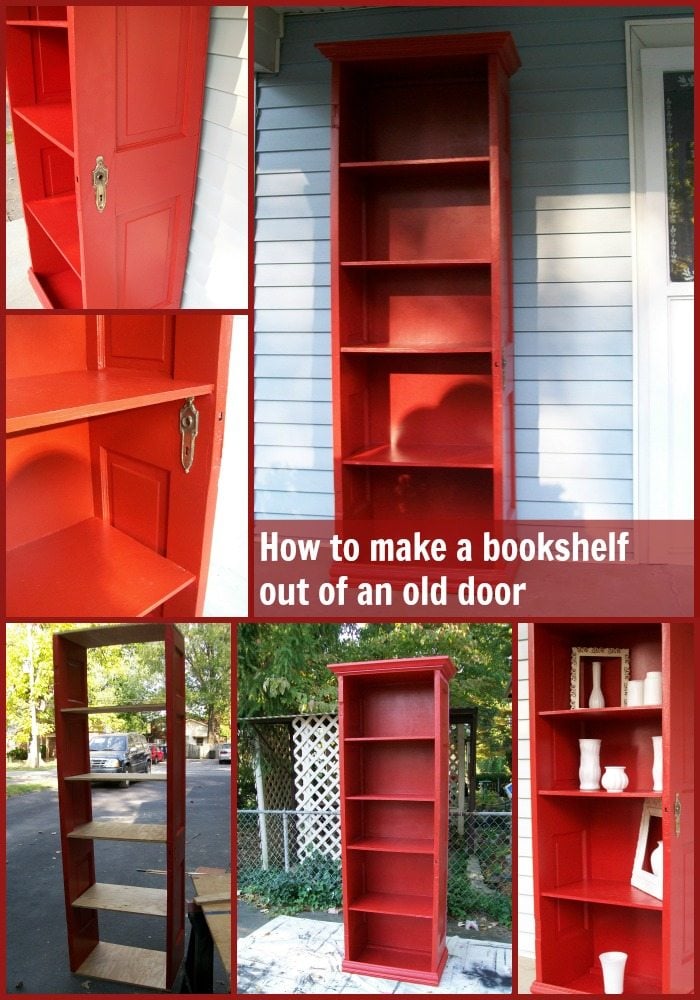
    I am revisiting this older project, a repurposed door bookshelf. I'm updating all the photos, and sharing what I would do differently 10 years later. Look for those thoughts in bold text below.


    How-To-Make-bookshelf-door


    This project was featured on:

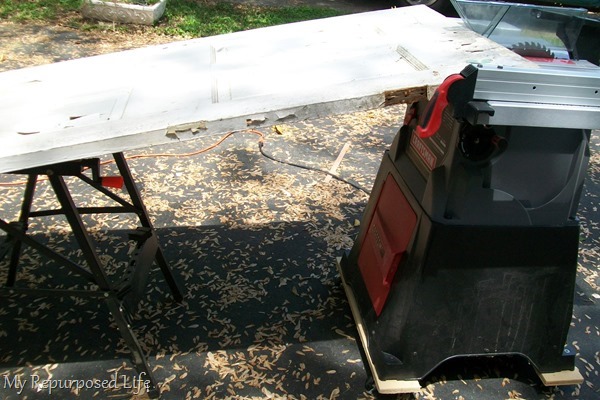
    Cut Door in Half to make Repurposed Door Bookshelf

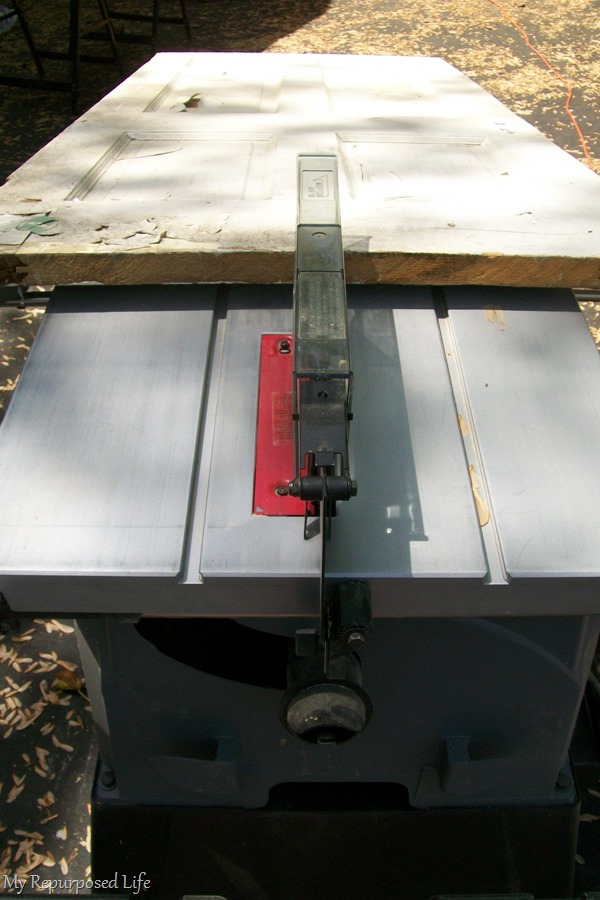
    I ripped this old door on my table saw with the help of a neighbor. This was a solid and very heavy door, impossible to handle by myself. Always trust your gut and ask for help if you feel the project is too much for you to handle.


    When ripping a large project on a table saw, it's a good idea to have those extra hands to receive the project.


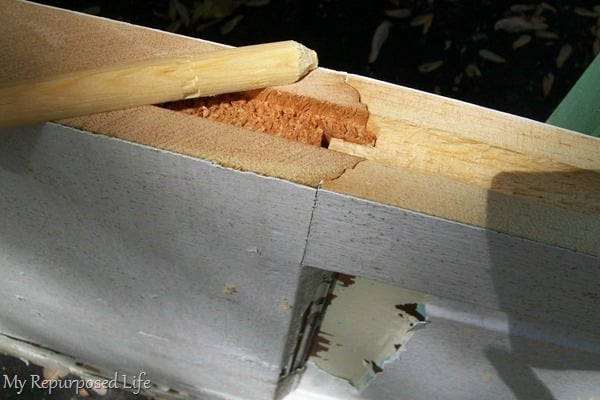
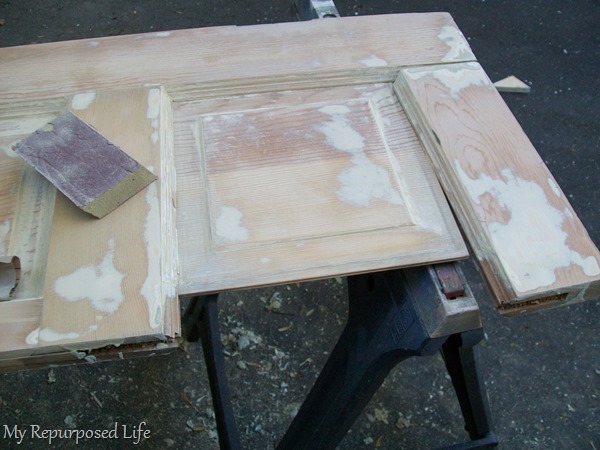
    Make Necessary Repairs


    After I ripped it I needed to do a little repair on it. Some of the dowels were cut in half by the table saw.


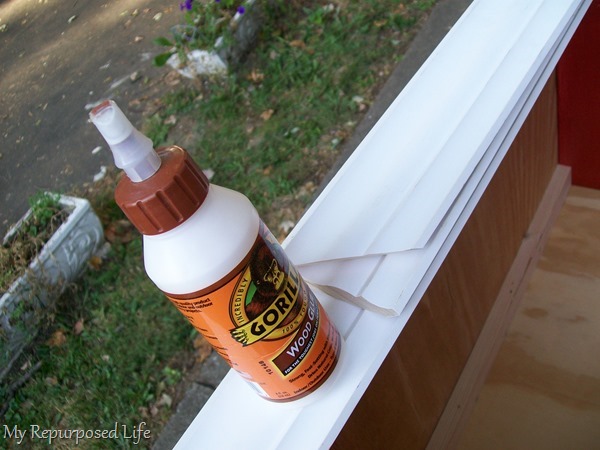
    So, I replaced the dowels, glued  and taped them in place.


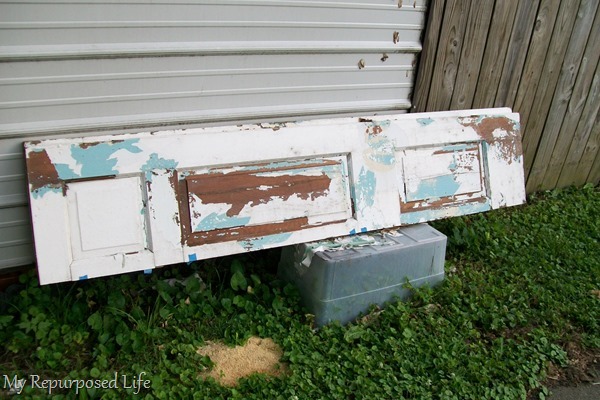
    This door had many layers of paint. I decided to let mother nature help me “weather” the paint off. I actually cut the door months ago. Of course, I wouldn't recommend this technique.


    chippy door makes a great bookshelf

    When it got to this point I used a paint stripper to remove the remnants of paint. Always use caution when dealing with old chippy paint.


    Because it had been out in the weather for so long, I had to make repairs.

    *this post contains affiliate links, read more here*

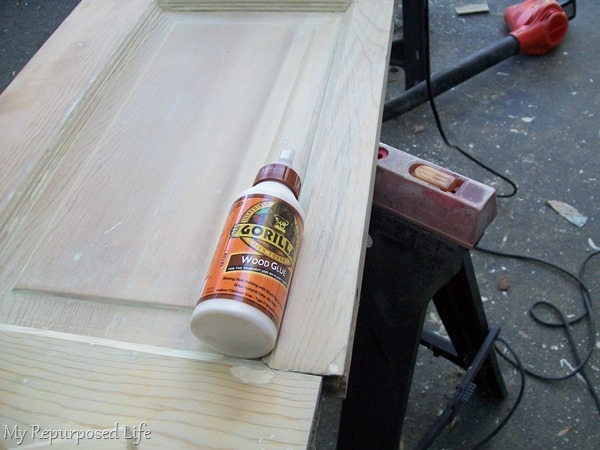
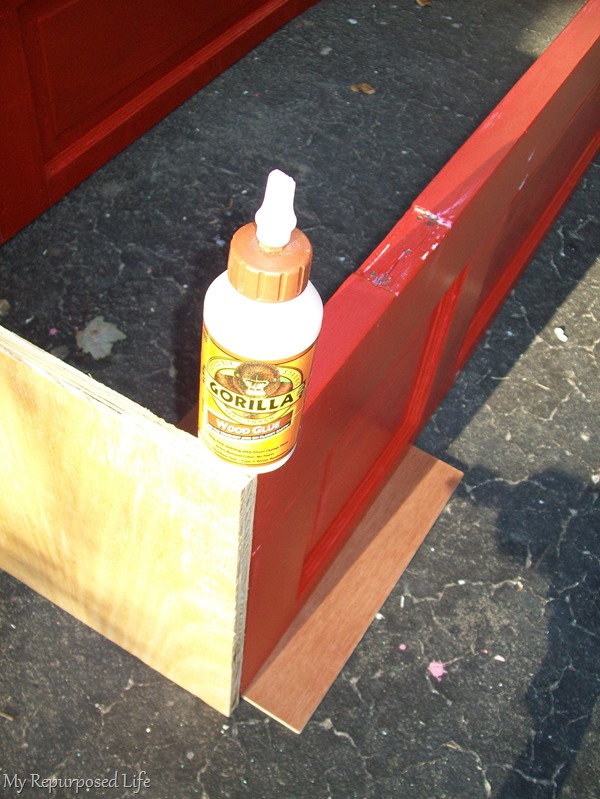
    I glued the loose joints with Gorilla Wood Glue.

    Prepare Door Bookshelf for Painting

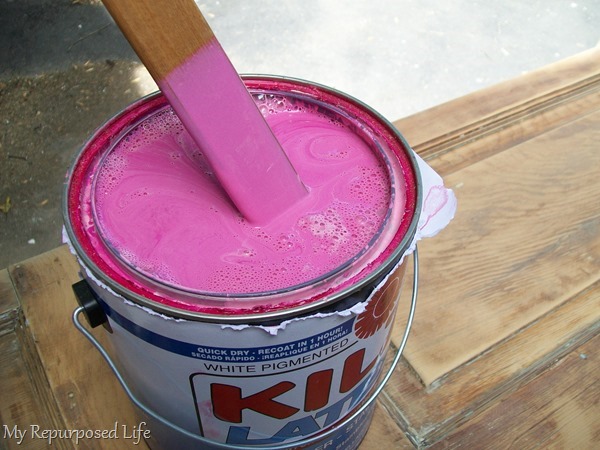
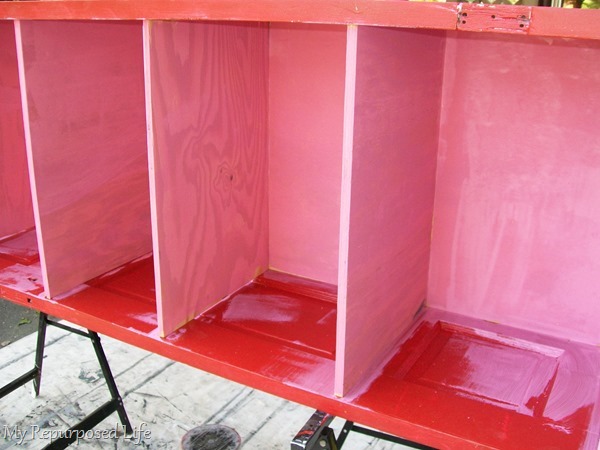
    I was lucky enough to find some pink Kilz in the oops bin at Home Depot. ($5.00) Getting a really good red is hard without primer.
    In recent years, I've learned to make my own diy chalky paint primer out of red paint, then use the red paint out of the can as the topcoat.
    pink primer under red paint
    This is after one coat of primer,  I ended up  putting on  two coats of primer.
    red door makes a bookshelf
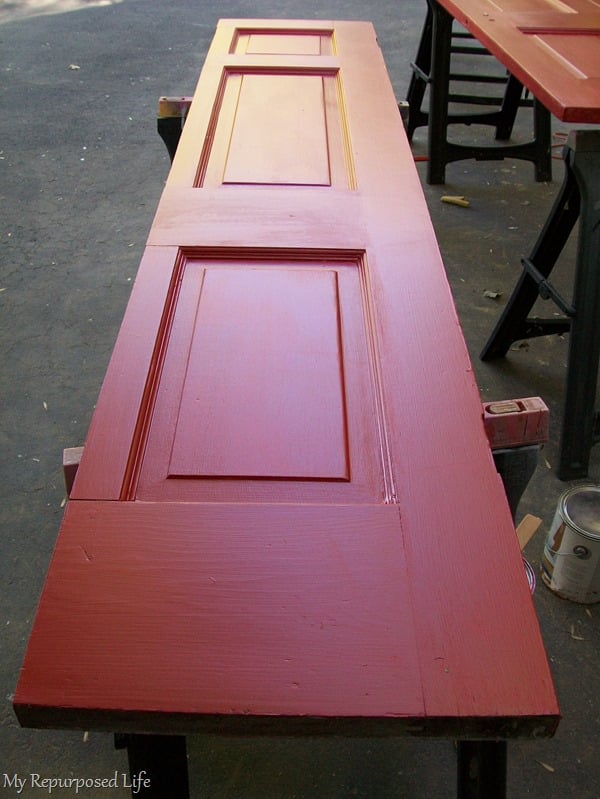
    I also found a really pretty red “oops” paint at Home Depot.

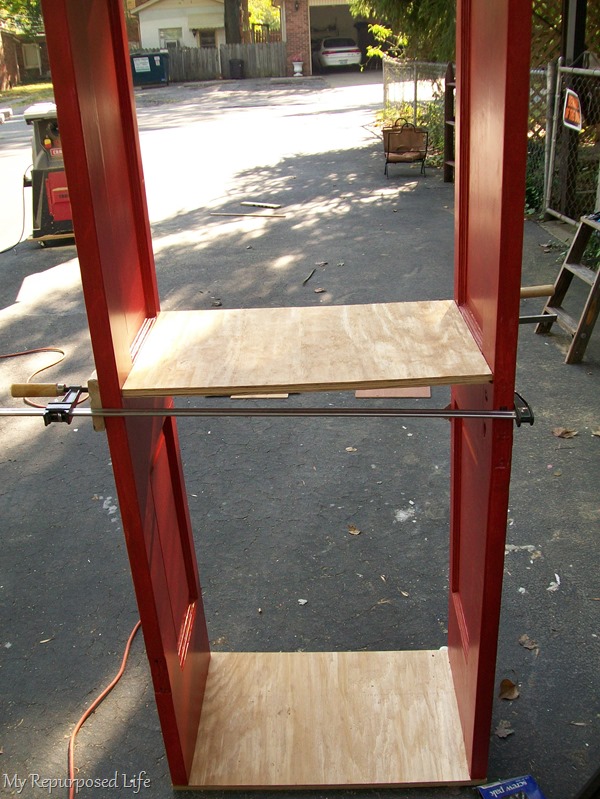
    Add Shelves to Bookshelf

    how to make a repurposed door bookshelf
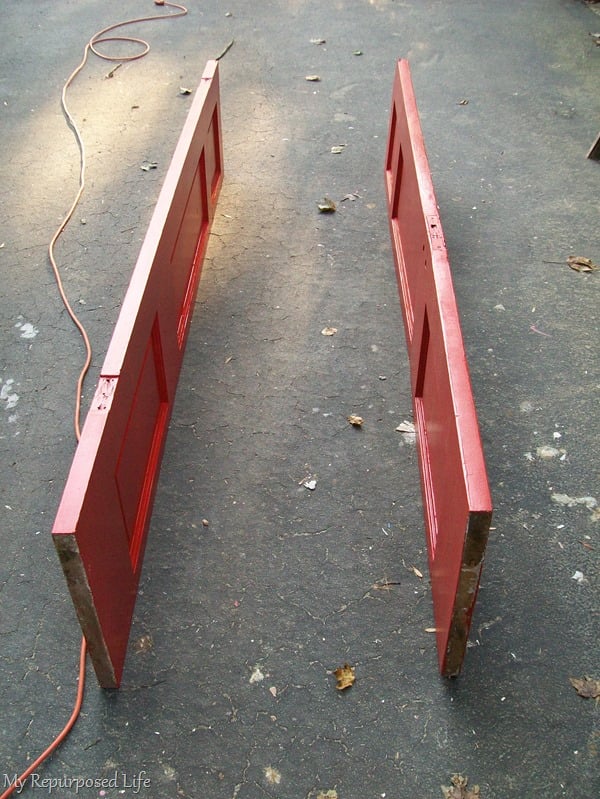
    Laying the two pieces on the driveway, I  began designing the configuration of the shelves.
    The first step was to attach a top and a bottom. I used wood glue and drywall screws for this project.
    However, these days I would definitely use wood screws.
    assembling a repurposed door bookshelf
    The plywood I used for the top, bottom and shelves all came from the cull bin at Home Depot. The cull bin no longer exists at our Home Depot.
    Now, I have options for smaller pieces of nice plywood at my Peddler's Mall.

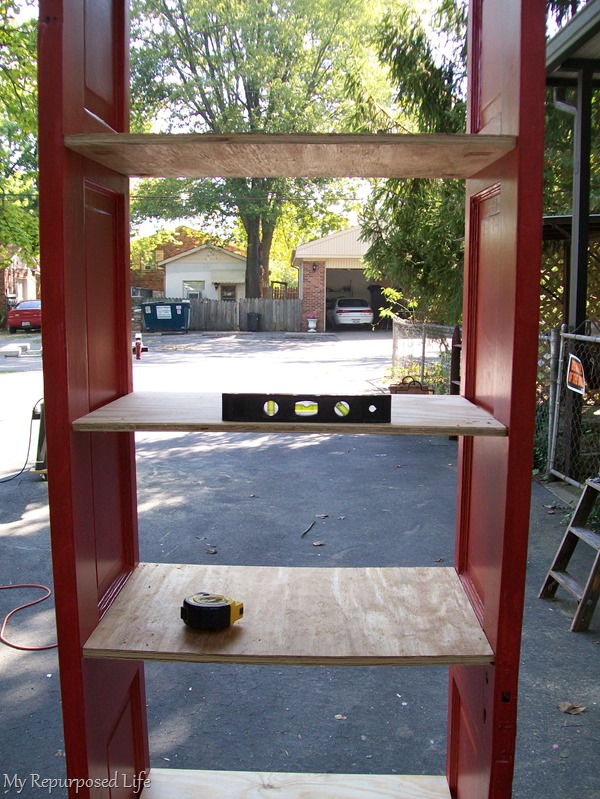
    To attach the shelves I used a  Kreg Jig,  you can see how easy it is to use in my post titled, How To Use a Kreg Jig.

    When you are building something like this you need to make sure your shelves are level. But more important you need to make sure the ground/floor you’re working on is level first!
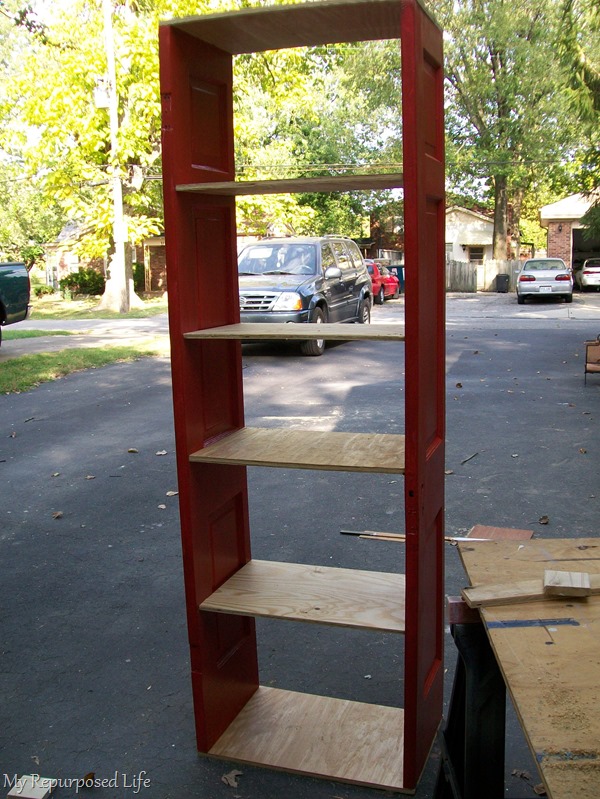
    What would I do different today? I would apply edge banding to hide the raw edge of the plywood like I did on my Tall Window Cabinet project.
    The repurposed door bookshelf is coming together, but it's getting very heavy!

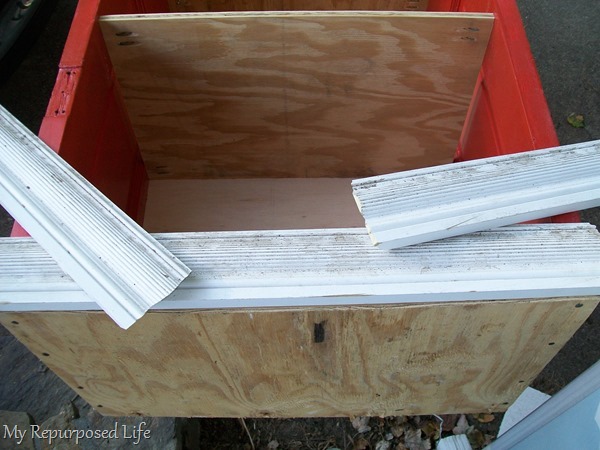
    Embellish Repurposed Door Bookshelf with Wood Trim

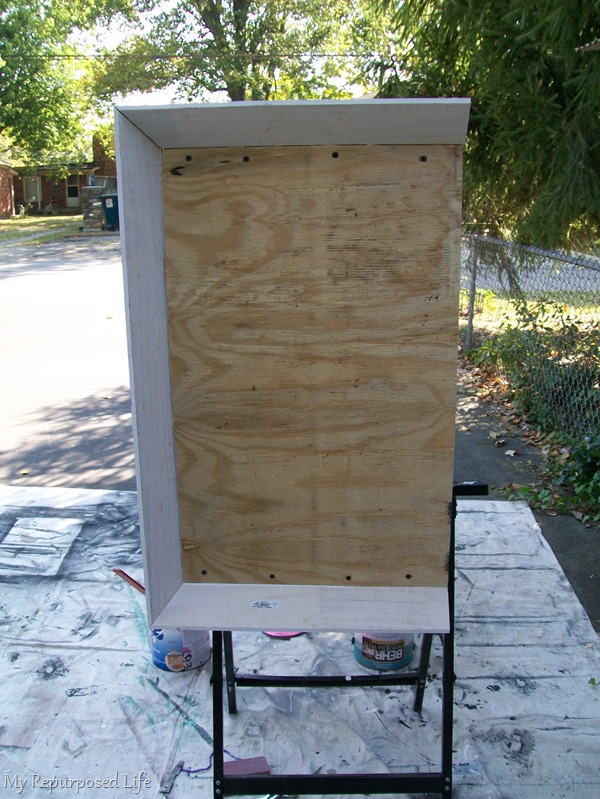
    I used two scrap pieces of cull bin luan (.51 each)  for the back. One piece runs from the top all the way to the last shelf. I joined the other piece of luan in the center of the bottom shelf. From the back you can see that it is pieced, but from the front it is not noticeable. I told you I DIY on the cheap, that means I’m a “use what you have” kind of girl.
    Would I do that differently? Nope! I'm still that girl that uses what she has!
    For the bottom trim I used some scrap molding I bought at one of our local Peddler’s Malls. You can see that the trim is definitely reclaimed wood.
    For the top molding I used crown molding.

    Paint Shelves

    I found that it was easiest to paint this huge repurposed door bookshelf on its side while up on saw horses. I used primer on the new wood. (2 coats)
    If you're a regular around here, you know that I would definitely paint this project with my favorite Super Finish Max if I were to build this today.
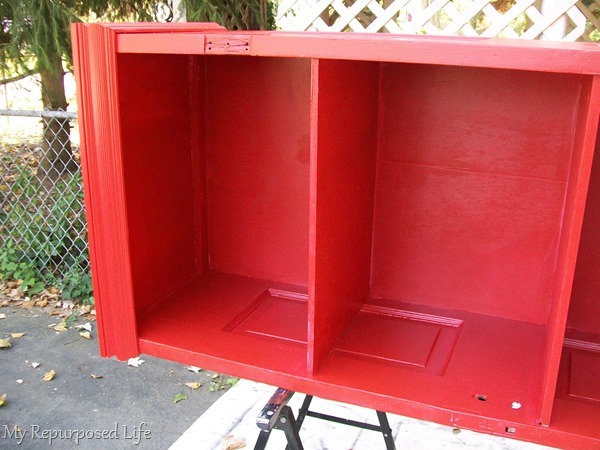
    This is the top. You can see where I attached the top to the door on either side.
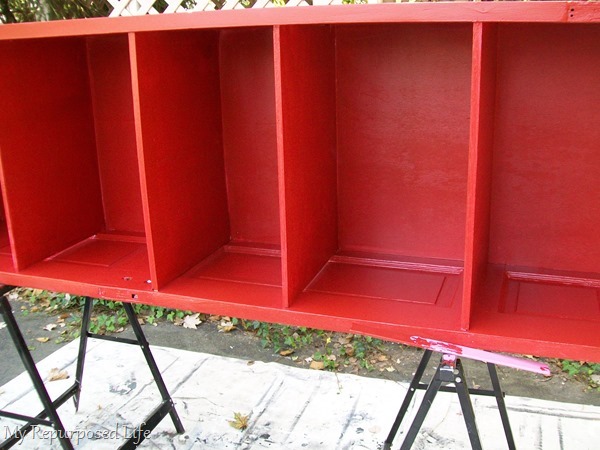
    The bookshelf is looking pretty good after 1 coat of red. You know those drop cloths everyone uses for curtains and upholstery? They make great drop cloths too!
    I chose not to fill in the hinge mortises. After all, this is a repurposed door bookshelf!
    I didn't measure the height of this piece, but it looks like it is taller than a standard door.
    painting a repurposed door bookshelf
    Even back in the day,  I painted the top, bottom and the back of this piece. I put the last coat of paint on it while it was upright.

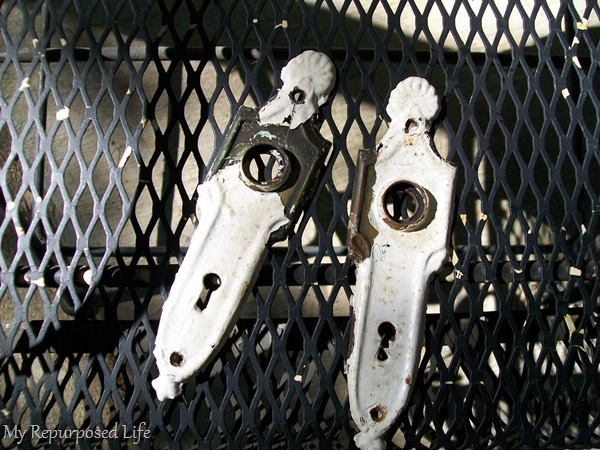
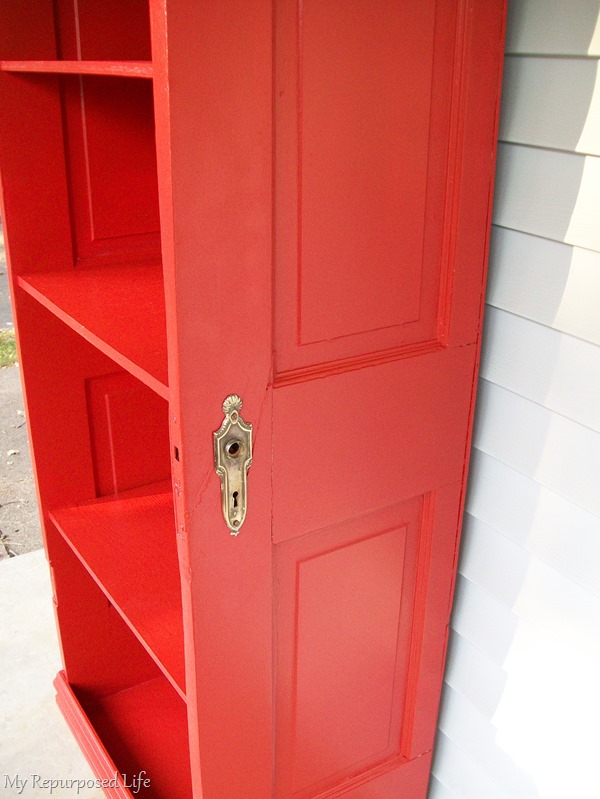
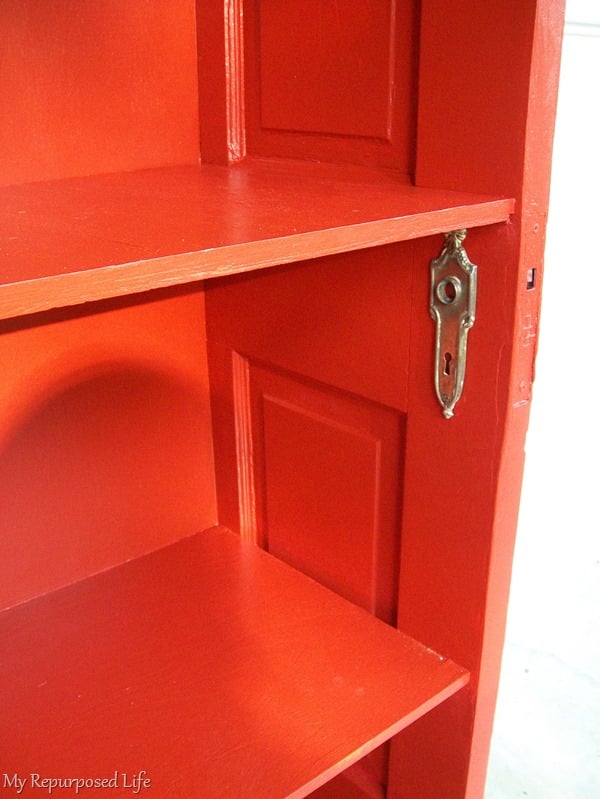
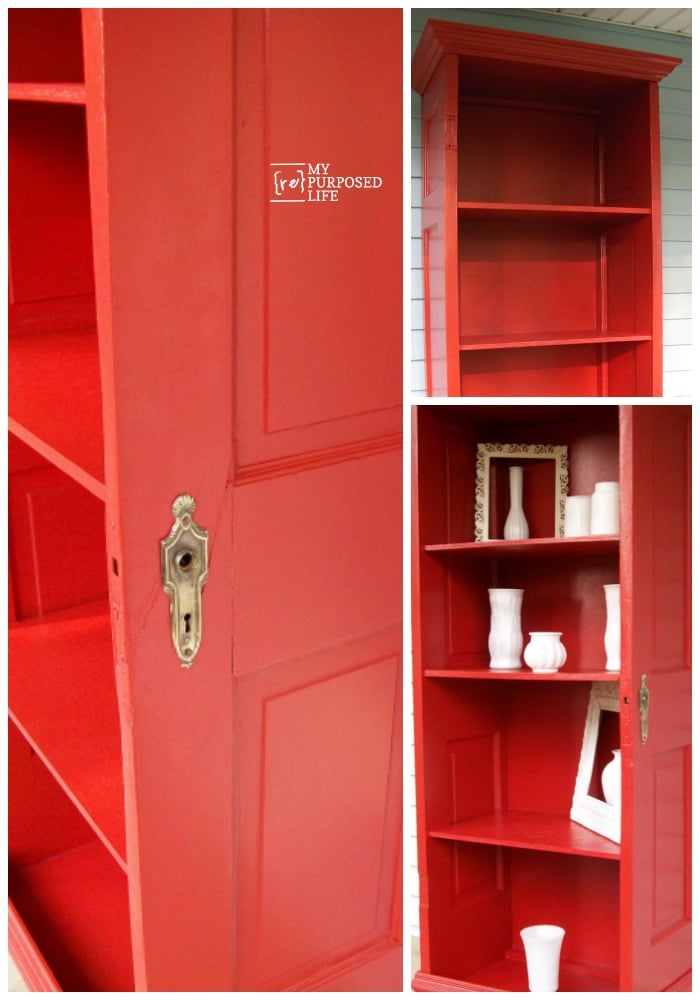
    Clean and Install Door Plates

    Rummaging through my stash, I located two door knob plates. I’m pretty sure they were the original pieces off of this door. I stripped the paint off of them.
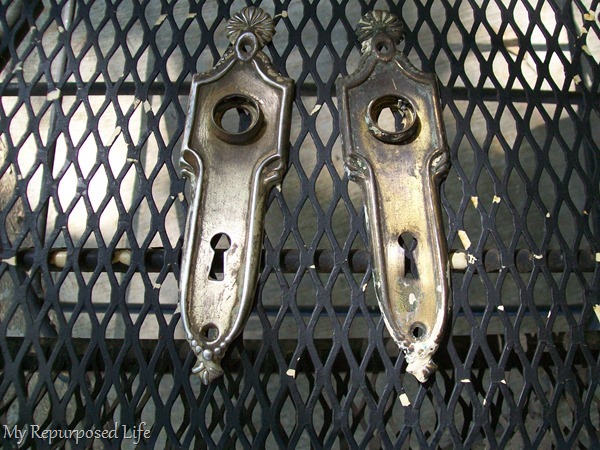
    This is how they looked after I cleaned them up from the paint stripper. Before attaching them to the door I sanded them with a sanding sponge which makes it easier to get into the crevices.

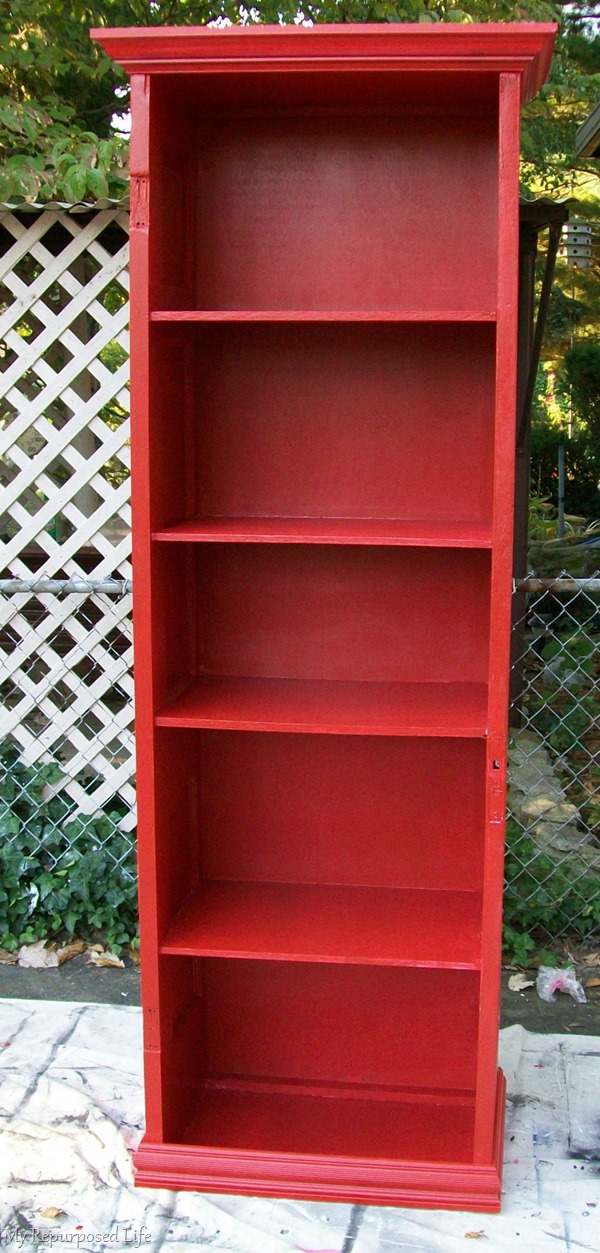
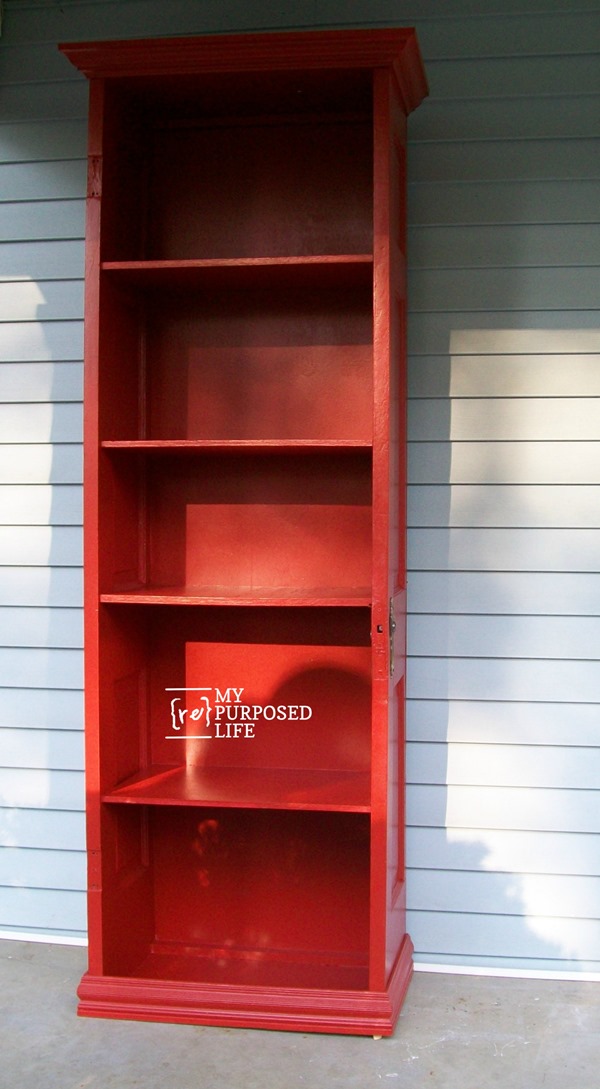
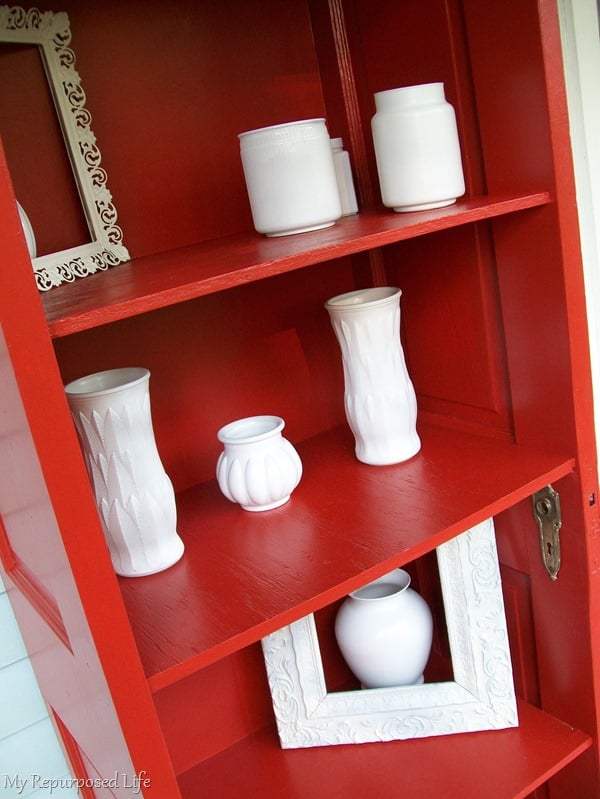
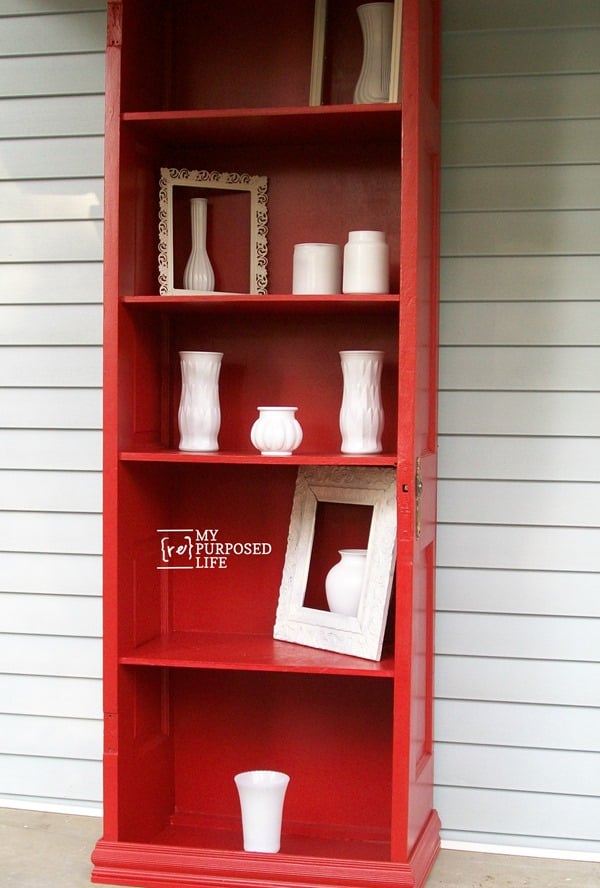
    Red Repurposed Door Bookshelf

    I never really put much thought into how TALL this piece was going to be. It really is big.
    Don't you love how the door knob plates turned out? Chippy is good, but sometimes I don’t want chippy.
    red repurposed door bookshelf
    The door is old and has a few flaws, but I think it’s age adds character. I think about how many times it was slammed by young’ns running in and out. It makes me think about how it may have been adorned for Christmas, and Autumn. The stories this old door could tell!!
    This was the first piece of furniture I ever painted RED, but it was not the last. Have you seen the Red Toddler Bed Made from a Door?
    repurposed door bookshelf with white glassware
    Do you know how easy it is to change up cheap yard sale vases with spray paint?
    What do you think? Do you repurpose found items like  I do? It really is fun to think outside the box. It can be challenging at times, but I love it!
    Know what the best part is? I sold this piece right away. Two young girls came by in a SUV! I was so shocked that it actually FIT in that vehicle.
    gail

    Related Content:

    More Door Projects

    Print Friendly, PDF & Email
    Pin
    Share
    Tweet

    Related Content:

    • Queen Anne Tables Cut in Half
      Queen Anne Tables Cut in Half
    • repurposed table ideas | dining tables | coffee tables
      repurposed table ideas | dining tables | coffee tables
    • Entry Table Made from Reclaimed Lumber
      Entry Table Made from Reclaimed Lumber
    • DIY Console Table made from a Table Leaf and odd Table Legs
      DIY Console Table made from a Table Leaf and odd Table Legs
    • Repurposed Peg Hook Shelf into Fun Book Shelf
      Repurposed Peg Hook Shelf into Fun Book Shelf
    • Storage Bench Made From A Dresser
      Storage Bench Made From A Dresser

    Reader Interactions

    Comments

      See comments Cancel reply

      Your email address will not be published. Required fields are marked *

      This site uses Akismet to reduce spam. Learn how your comment data is processed.

    1. eyeloveknots

      February 13, 2020 at 7:57 pm

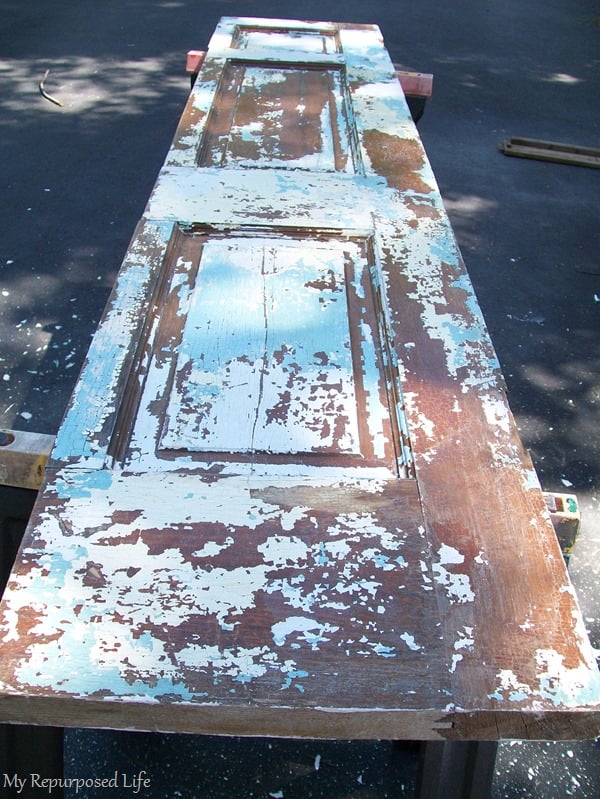
      This is awesome! I love door and shutter projects!

      Alexandra
      EyeLoveKnots.com

      Reply
    2. girlfromwva

      August 01, 2017 at 12:54 pm

      beautiful! love the red!

      Reply
    3. vesna

      March 06, 2015 at 12:08 pm

      fantastic!!! you are amazing woman!!!!

      Reply
    4. Mary

      January 09, 2014 at 6:52 pm

      I absolutely LOVE the red color! It really pops. And, I noticed the door is real wood, not hollow. That makes it extra sturdy. Now, we need lots of small craft ideas on how to fill all those shleves!

      Reply
    5. Jason

      January 09, 2014 at 3:40 pm

      Great job! You put alot of hard work into this piece and it turned out great. If your readers wanted to try to do something similar but lack the table saw to rip a full-size door, there is an alternative. Bi-fold doors can also be found in solid wood. These would allow the builder to have two door panels on each side without cutting and would provide extra materials. They wouldn't be the old door like you used, but they could accomplish a similar look by adding the old hardware. Some hardware stores still carry the old hardware if it can't be found. I know it is carried by most Ace stores, but is only available in a shiny brass. Just wanted to throw out that alternative for those who can't go into a big project due to lack of tools or space (apartment). You did a fantastic job and loved the detailed instructions. Thanks for sharing this.

      Reply
      • gail@myrepurposedlife.net

        January 09, 2014 at 3:48 pm

        Jason,

        I appreciate your input. You make a great point. I wish I had some bifolding doors in my stash right now, I think I need to hit up the Habitat ReStore! 🙂

        gail

    6. Pam @ This House Our Home

      August 18, 2013 at 7:48 pm

      What a creative idea! I would have been nervous to go with such a bold color but it is truly beautiful. Great work

      Reply
      • gail@myrepurposedlife.net

        August 18, 2013 at 7:53 pm

        Thank you Pam, I appreciate your comment.

        gail

    7. Linda

      July 29, 2013 at 12:24 am

      Love the shelf, and your curtious reply to someone who didn't exactly earn a curtious reply, but I have learned that you learn more about someone by what they say about someone else than you do about the person they are talking about. So kudo's to you. I have a suggestion for paint removal. Buy a heat gun and a good scraper. They cost about the same as a gallon of paint striper and last for years ( I've had mine for over 10 years) then you don't have all the mess or smell of bad chemicals and it is amazing how well the paint just bubbles up. I scrape off as much as I want off and then lightly sand the residue. Anyway it has worked well for me. Thanks for sharing.

      Reply
      • gail@myrepurposedlife.net

        July 29, 2013 at 9:41 am

        Linda,

        Thank you for your very kind comment. 🙂 I have recently acquired a paint gun, but I've never used it to remove paint. I look forward to putting it to the test. Stop by the home page this week to enter LOTS of fabulous giveaways! almost $2000.00 as I celebrate four years of blogging.

        gail

    8. erin

      May 23, 2013 at 10:55 pm

      I love what you have done with the doors. I have a few that I am considering turning into a corner shelf, but I am not sure if the old paint on them is lead based...do you have any suggestions?

      Reply
    9. woodNfish

      May 11, 2013 at 10:12 pm

      I like the way this piece looks, but the fact that you only glued it together and did not use any mechanical fasteners proves that beauty is only skin deep. I expect the girls who bought it to discover the poor build quality of your shelf the hard way. Shame on you. Thrifty is one thing, downright cheap is another.

      Reply
      • gail@myrepurposedlife.net

        May 11, 2013 at 10:20 pm

        Apparently you didn't read my entire post. I used screws and wood glue. We all know that wood glue is what really holds a piece together in the long run. I used pocket hole screws for the shelves, this piece was built to last.
        gail

    10. Anonymous

      February 19, 2013 at 1:10 am

      how much did it sell for?

      Reply
      • Gail Wilson

        February 19, 2013 at 1:49 am

        $75
        how sad is that! ALL that work!

    11. Laura @ House Of Joyful Noise

      October 16, 2012 at 1:35 pm

      And here I thought our door shelves were an original idea! I had never seen it done before. Huh. Our shelves were actually an after-thought, to the shoe storage bench we made. ( http://houseofjoyfulnoise.com/doors-to-storage-literally/ )
      I love the bold red color! I thought you were going to distress it down to reveal some pink. How funky that would have been. lol. No surprise this sold right away.

      Reply
    12. 2chance

      October 16, 2012 at 11:15 am

      Really a great way to reuse a piece that would otherwise be wasted! Very inspiring, thanks for sharing 🙂

      Lucia

      Reply
    13. Anonymous

      July 28, 2012 at 2:26 am

      Thank you Gail for the Inspiration you are giving me. Today especially has been a hard day so I sat down to browse your site and read some past Blogs and I am already feeling better. I want to and will do an old door piece like this one day. Thanks so much for the step by step pics. Got my feel good on now thanks to you:) Have a GREAT weekend. barbhearts@aol.com

      Reply
    14. Jeff & Kristin McClure

      March 14, 2012 at 4:06 pm

      Great project! We have a couple of doors sitting around and trying to decide what to do with them, so this might be the project we go with!

      Jeff

      Reply
    15. Erin

      September 06, 2011 at 12:05 am

      It is absolutely gorgeous!! I love the red! I never think outside the box like this...I wish I were more original.

      Reply
    16. Carron

      June 24, 2011 at 1:36 am

      GAH! I love this. I want one now 😉

      Reply
    17. Em

      October 18, 2010 at 6:12 pm

      great work!!! I love old doors!

      Reply
    18. ★All Thingz Related★

      October 07, 2010 at 11:29 pm

      It's absolutely terrific! Amazing job! Thanks for stopping by and linking to Anything Related!
      {Rebekah}

      Reply
    19. Home Hinges

      October 06, 2010 at 9:20 pm

      This is such a beautiful use of old junk that might have otherwise been taking up space in a landfill somewhere. I always love the post where someone has reused something rather than just buying new. Beautiful and good for the environment. Love it.
      April @ HomeHinges.com

      Reply
    20. Mardell

      October 06, 2010 at 4:49 pm

      Oh Gail ~ that turned out awesome!! There is an old door in the dumpster next door & I've been begging my husband to go get it. I wish we had to the tools to do what you did. So cool! Great job & love the color, too. And yes, the doorknob plates really put the icing on the piece. :o)

      Reply
    21. Ruth Yoder

      October 06, 2010 at 4:03 pm

      Wow, great job! I wish I had that much initiative today.

      Reply
    22. Nicole@CraftySisters-nc

      October 06, 2010 at 3:10 pm

      You never cease to amaze me! I'm so impressed with this and the toddler bed! How great! Keep up the good work!:)

      Reply
    23. Julie

      October 06, 2010 at 12:26 pm

      I love this! So unique. I just painted a headboard & bookshelf red this week & it really is a great color.

      Reply
    24. Katie

      October 06, 2010 at 3:42 am

      Beautiful!! I LOVE tall shelves ~ it's always hard to find super tall ones. And I just love the hardware too!

      Reply
    25. kathie

      October 06, 2010 at 1:45 am

      You're amazing ~ what a fun piece you created! I love the color, too. You continue to inspire me to "see" the new piece that every old piece can become 🙂

      Reply
    26. Lucy Designs

      October 06, 2010 at 1:25 am

      this piece is fabulous on so many different levels! I love it!

      Reply
    27. Becky@Beyond The Picket Fence

      October 06, 2010 at 12:04 am

      Golly Gee Gail--that is gorgeous. I would have had a tough time getting rid of that fun peeling paint, put since you had to use new wood for shelves get you had to do it. The results are beautiful!

      Reply
    28. bernicewood

      October 05, 2010 at 7:25 pm

      I so enjoy seeing your projects! I am not handy with tools, but I can paing and seeing your projects helps me broaden my vision and see things differently and potential where there was none before.
      I have to say I love your blog and I love the name of it. I am sure there is a backstory behind it!
      Bernice
      http://bernicewood.wordpress.com/2010/10/05/trying-so-hard-to-be-myself/

      Reply
    29. Melanie Beth

      October 05, 2010 at 4:02 pm

      WOW! No seriously, WOW! This is gorgeous, no wonder someone stopped and wanted it right away! I would love to do something like this... but how would you do the shelves if you didn't have a Kreg Jig?

      Reply
    30. eye_on_sparrow

      October 05, 2010 at 2:53 pm

      I love your Red Door Bookcase. I love red furniture. I don't think I would be able to give up a piece of furniture for sale after I worked so hard on it.

      Reply
    31. Corinna

      October 05, 2010 at 2:30 pm

      I saw this on Infarrantly Creative and was totally blown away. It made me subscribe to your blog. I think this is absolutely gorgeous and awesome and you are a freaking genius for thinking of it and doing it! 🙂

      Corinna

      Reply
    32. Debilou~Mississippi Mama

      October 05, 2010 at 2:07 pm

      Gail,, you always inspire and amaze me.. You give me hope that O N E day I will finish the dresser-to-tv stand redo that I started last year. I love everything about this shelf. So glad you sold it too. Thats always nice if you can make something($) from something you made.. have a great week.

      Reply
    33. Suzanne

      October 05, 2010 at 1:17 pm

      One more thing... Have you ever considered getting into politics? I'd like someone like you running our country. Someone with imagination and the ability to get things done. Someone who can refurbish, redo at very little cost. Yes, you are just the kind of person we need. ;o) Please consider it.

      Reply
    34. Suzanne

      October 05, 2010 at 1:14 pm

      Goodness me. I love it just as much the second time as I did the first. Maybe more.

      Reply
    35. Amanda@The Hand Me Down House

      October 05, 2010 at 12:47 pm

      Absolutely GORGEOUS (as always!!) Thanks so much for showing us how to do the trim/crown molding -- it really adds to the shelf! And I love the hardware you added too! Great job, Gail!

      Reply
    36. Marla @ Always Nesting

      October 05, 2010 at 12:35 pm

      Never in a million years could my imagination take me from beginning to end with a project like that. I wish I had half your vision. I love that shelf. It's amazing!!!

      Reply
    37. Coleen's Corner

      October 05, 2010 at 11:01 am

      You never cease to amaze me! That is one beautiful piece you created there. Love the red and I'm with you - the cleaned up door knob plates really added some class to the piece. It would have been hard for me to part with it!

      Reply
    38. Proper Prim

      October 05, 2010 at 9:50 am

      Bonus it sold... that was a gorgeous piece Gail. You totally rocked that. I loved the red also. I am with Rose too bad you didn't get a chance to enjoy it a little longer. I knew I should have stole some doors from Rose...lol

      Have a great day Gail...

      Hugs, Deb

      Reply
    39. Rose @ Confessions of a Curbshopaholic

      October 05, 2010 at 9:46 am

      I know I should be happy you sold it, but it makes me sad that it's gone already...I love that piece! Gonna have to try my hand at one of these soon!
      Congrats on your sale.

      Reply

    Primary Sidebar

    Hi, there! I’m Gail Wilson, the author and mastermind behind My Repurposed Life. I’m obsessed with finding potential in unexpected places and believe that with a little hard work and imagination, any old thing can be made useful again—myself included! I hope you’ll enjoy the journey and pick up a few tools along the way… literally!

    More about me →

    Join Our Mailing List

    ​

      Click the topics you're interested in below:

      Subscribing above means you agree to our Privacy Policy​

      Footer

      ↑ back to top

      SEEN ON

      Might I Suggest

      • Start Here
      • Furniture Makeovers

      Newsletter

      • Sign Up! for emails and updates

      About

      • Gail's Favorites on Amazon
      • About

      As an Amazon Associate I earn from qualifying purchases.

      Copyright © 2023 My Repurposed Life · Privacy Policy · Disclosure