Repurposed Door blanket chest
As an Amazon Associate, I earn from qualifying purchases.
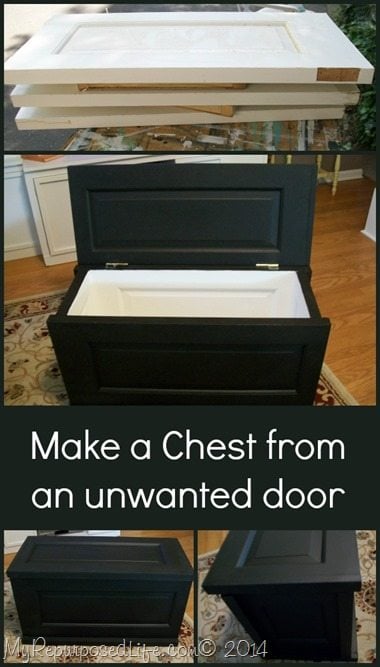
Repurposed Door Blanket Chest
PIN IT!
Last year I promised to make my niece Missy a small chest to keep her purses in. I had a set of 3 panel bi-folding (hollow cored) doors. I cut each door into three sections. Not ever having cut a hollow core door, I had no idea that it was totally hollow on the inside. I used some scraps to fill in the hollow part. I glued and clamped them. I then proceeded to try to make a box. The size configuration of the two small squares did not match up with the rectangle sections. I gave up and decided not to make it.
For over a year I have been shuffling these 6 pieces around my garage.
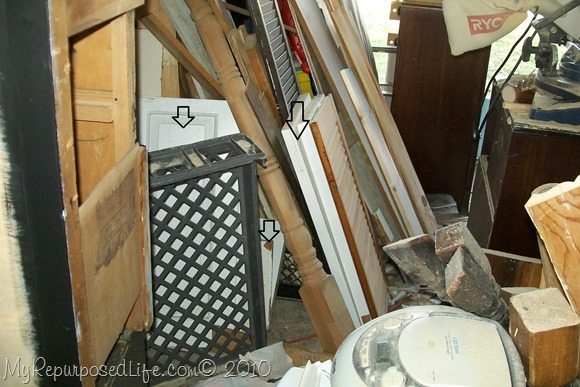 This picture is from early Spring before I cleaned the garage. There are the pieces of door with the black arrows. I recently dug them out and decided to make something with them. At first, I could only find 3 of the large pieces. Somehow one of them had gotten separated.
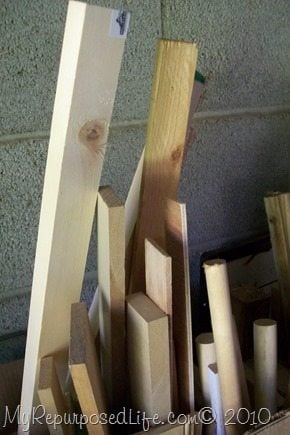
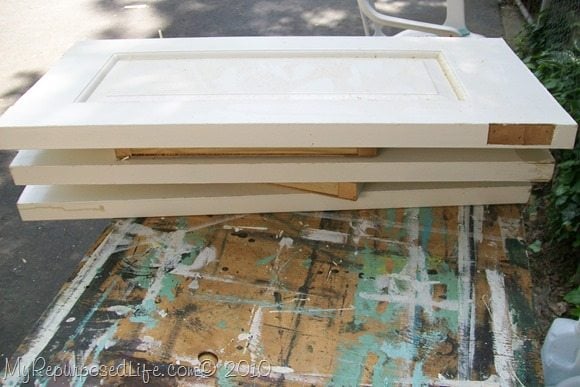 Here are all the pieces. If you look closely at the small pieces you can see how I added the scraps to give the hollow part support.
 At first I thought of making a small shelf, however since I only had 2 smaller pieces, that wasn’t going to work. Can you see the scraps here?
 For some reason I had put primer on one of the squares! I do not remember that at all.
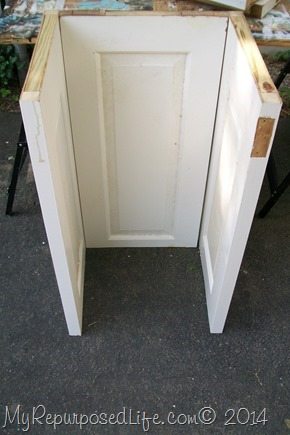
 You know I have this habit of trying things right side up and up-side down. Still trying to figure out what this wants to be. I decide to make it into a box/chest. But then I remember why I never finished it last year. It won’t work! hahaha

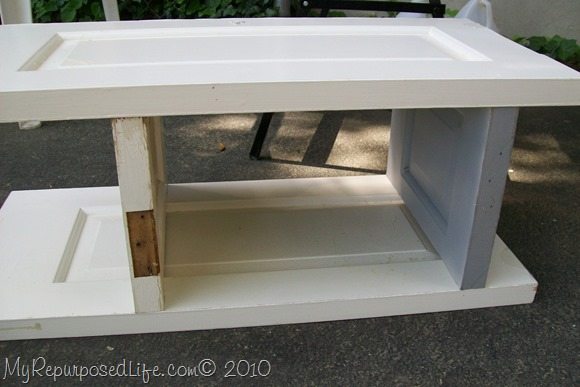
Since I work alone and I only have 2 hands, I decide to use bar clamps to clamp it and see if I can figure out what the problem is. Oh, there it is! The sides are too small to make a box. The box is smaller than the bottom, which means it will also be smaller than the top.
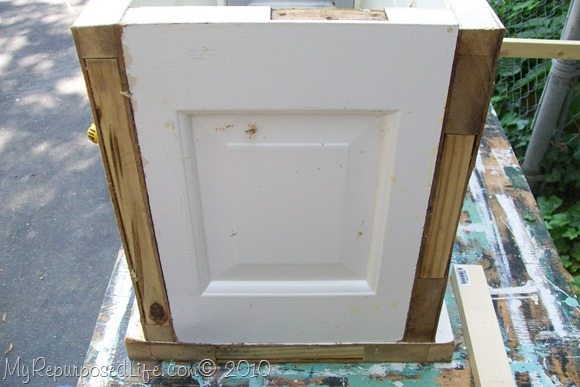
 Yeah, this clearly isn’t working. At this point I pretty much have figured out a way around it. I have learned a lot in the last year. When I built my media center I used something called front facings ???
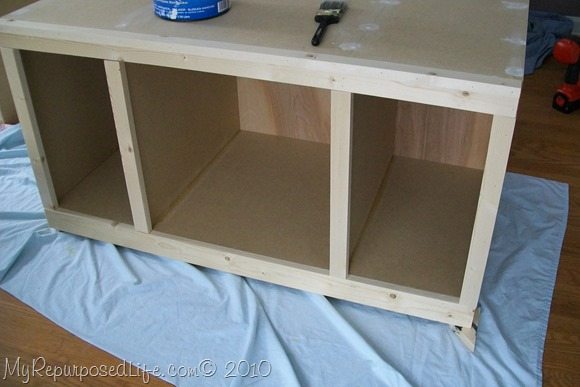 This is the media center, see how the 1x’s finish off the mdf. They encase it, and give it a wood look. Below I’ll show you how this same technique helps me out with this blanket chest.
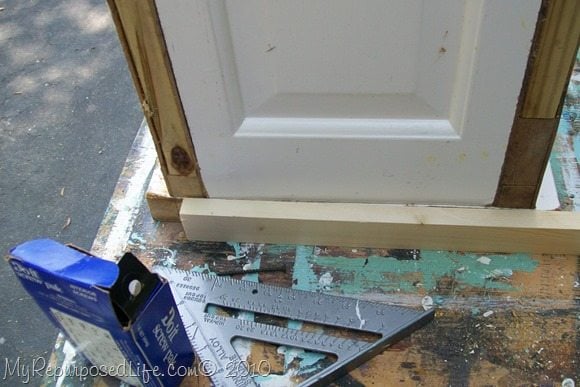
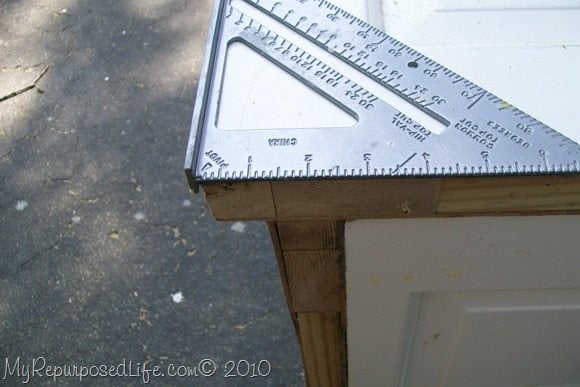 I start putting the box together. Because of the overhang, I want to make sure my screws are in the right place. I used the speed square to see where the side lined up.
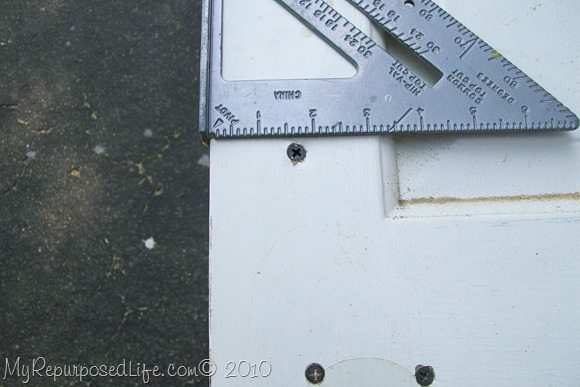
I slid the speed square along the edge to make sure my screws were in the center of the side of my box.
Now the box is right side up and I’m wondering why that hinge cutout is showing! Why didn’t I put it on the bottom? I’ll tell you why, because while I had it clamped the bottom was the top. But I didn’t want to unclamp or try to turn it right side, so I started putting my screws in. It wasn’t until I turned it over that I realized the hinge cutout was showing! I had only been dry fitting it, but it worked, so I started building before I was ready.
 As always I used glue and my nail gun.
 Here is the finished box. The top also had a hinge cut out that I had to patch.
 Here you see my handy dandy caulk gun and my spackling. There were some cracks that needed filling in with the caulk. I used the spackling to fill in the mortises.
 So, you can see there is overhang around all the edges now. It makes it more cohesive.
 I painted this with Behr premium plus paint. It is Black Suede, Sarah’s favorite (Thrifty Decor Chick) It was included in my swag bag from the Hop & Shop in Indy.

I hope you can see here that the lid and the bottom extend past the “box”.


 I chose to paint the inside white, for a cleaner, crisper look.


 I am NOT a fan of hinges. Those of you who follow my tweets and Facebook fan page, this is the piece I was talking about last week when I was complaining about hinges!
 I am NOT a fan of hinges. Those of you who follow my tweets and Facebook fan page, this is the piece I was talking about last week when I was complaining about hinges!

HERE
gail
Check out other door projects here


I would suggest using the bi-fold louvered doors in an upright cabinet like one of the ones in this collection of shutter projects.
https://www.myrepurposedlife.com/shutter-projects
I would suggest using the bi-fold louvered doors in an upright cabinet like one of the ones in this collection of shutter projects.
https://www.myrepurposedlife.com/shutter-projects
I would suggest using the bi-fold louvered doors in an upright cabinet like one of the ones in this collection of shutter projects.
https://www.myrepurposedlife.com/shutter-projects
I would suggest using the bi-fold louvered doors in an upright cabinet like one of the ones in this collection of shutter projects.
https://www.myrepurposedlife.com/shutter-projects
I would suggest using the bi-fold louvered doors in an upright cabinet like one of the ones in this collection of shutter projects.
https://www.myrepurposedlife.com/shutter-projects
I would suggest using the bi-fold louvered doors in an upright cabinet like one of the ones in this collection of shutter projects.
https://www.myrepurposedlife.com/shutter-projects
I would suggest using the bi-fold louvered doors in an upright cabinet like one of the ones in this collection of shutter projects.
https://www.myrepurposedlife.com/shutter-projects
I would suggest using the bi-fold louvered doors in an upright cabinet like one of the ones in this collection of shutter projects.
https://www.myrepurposedlife.com/shutter-projects
I would suggest using the bi-fold louvered doors in an upright cabinet like one of the ones in this collection of shutter projects.
https://www.myrepurposedlife.com/shutter-projects
I would suggest using the bi-fold louvered doors in an upright cabinet like one of the ones in this collection of shutter projects.
https://www.myrepurposedlife.com/shutter-projects
I would suggest using the bi-fold louvered doors in an upright cabinet like one of the ones in this collection of shutter projects.
https://www.myrepurposedlife.com/shutter-projects
I would suggest using the bi-fold louvered doors in an upright cabinet like one of the ones in this collection of shutter projects.
https://www.myrepurposedlife.com/shutter-projects
I would suggest using the bi-fold louvered doors in an upright cabinet like one of the ones in this collection of shutter projects.
https://www.myrepurposedlife.com/shutter-projects
I would suggest using the bi-fold louvered doors in an upright cabinet like one of the ones in this collection of shutter projects.
https://www.myrepurposedlife.com/shutter-projects