Drum Table Makeover
As an Amazon Associate, I earn from qualifying purchases.
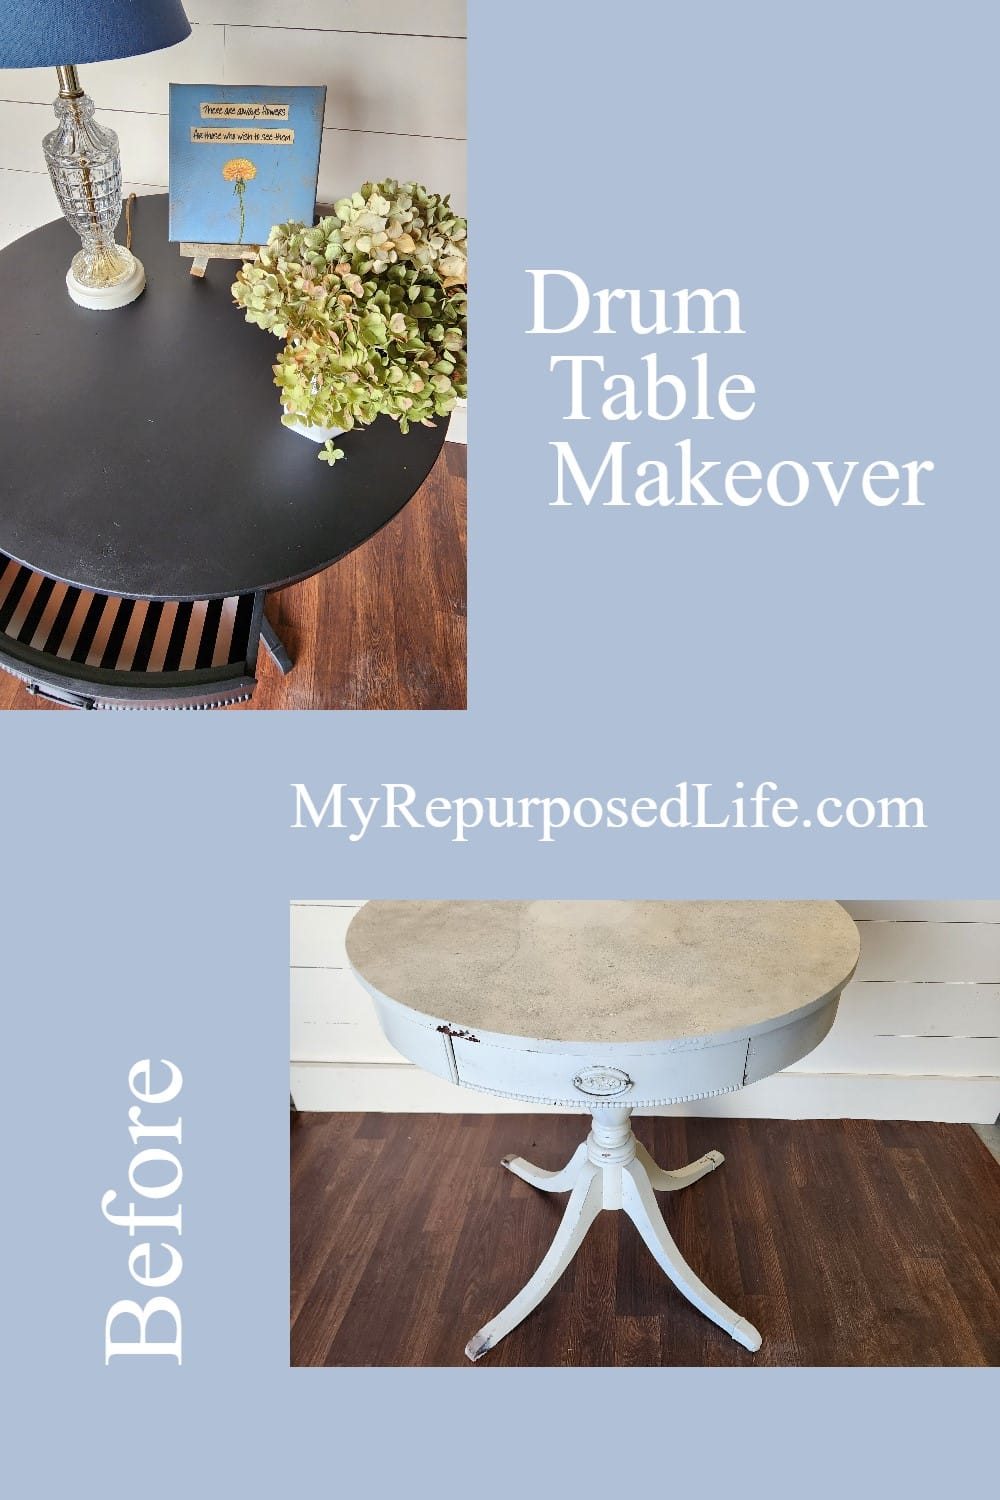
A well-loved drum table can add timeless charm to any space, but when years of wear take their toll, a fresh makeover can bring it back to life. This thrifted drum table had great bones but needed a little creativity and elbow grease to restore its beauty. With some paint, patience, and a few clever updates, I transformed this tired piece into a stunning focal point. If you love budget-friendly furniture flips, you’ll love this simple yet striking makeover!
But first, I’m excited to tell you that I am joining a fun group of bloggers known as the “furniture fixer-upper” blog group! I admire all the work these ladies do, and I’m honored to join them. Be sure to check out their projects at the end of this post. I’m hoping my simple drum table makeover is worthy.
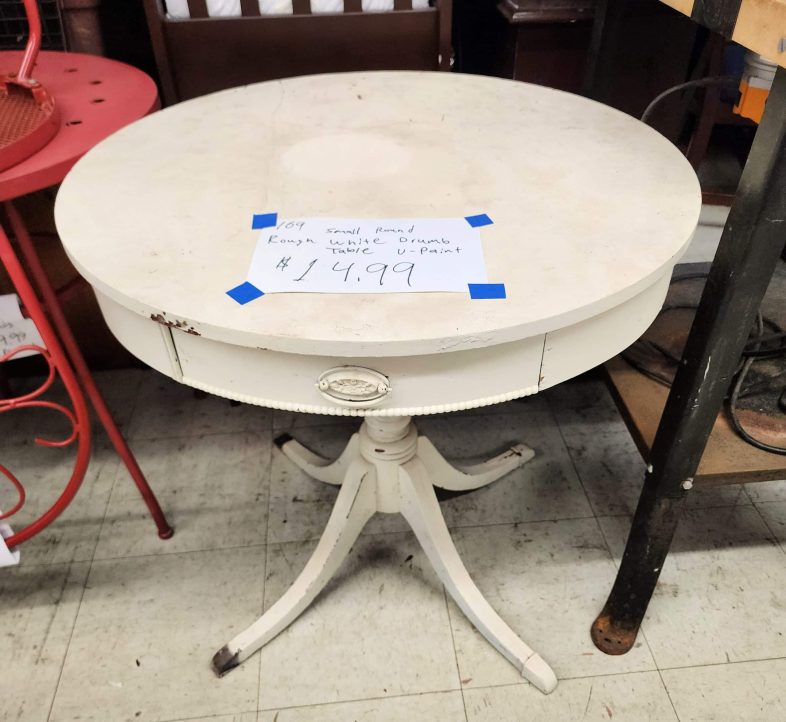
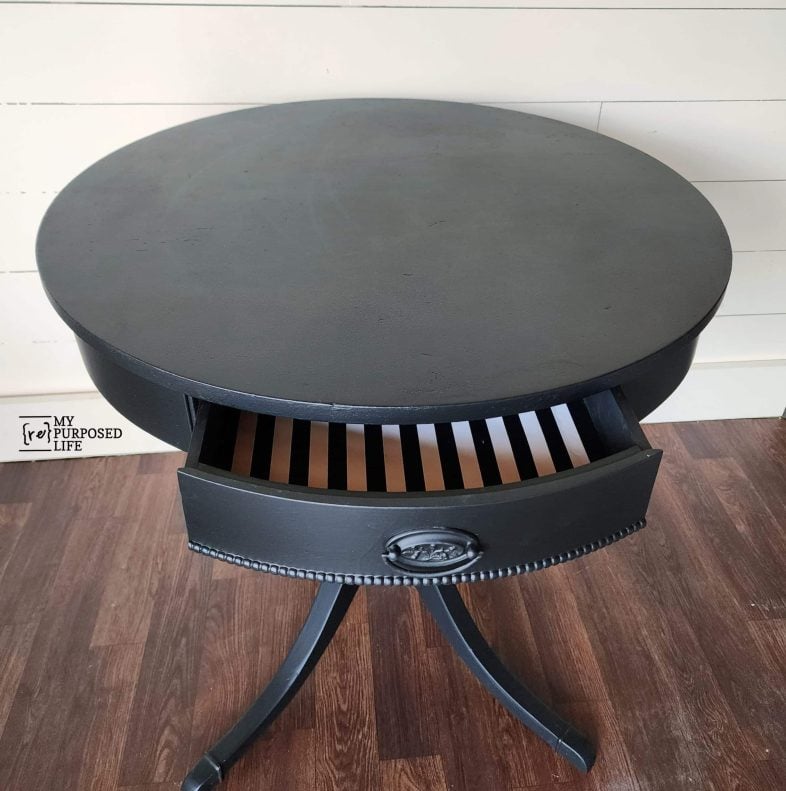
Let’s get on with how I fixed up this sad white drum table I picked up for $15. Yes, it’s well over my $5 limit, but times have changed, my friend. Thrift store prices are also rising- a sign of the times. This little gal has seen better days, but I hope you love the simplicity of this easy tutorial. Did you notice the little lady is missing a couple of her “slippers”? Never fear, the other two were taped inside the drawer!!!
Prep: Clean and Sand the Table
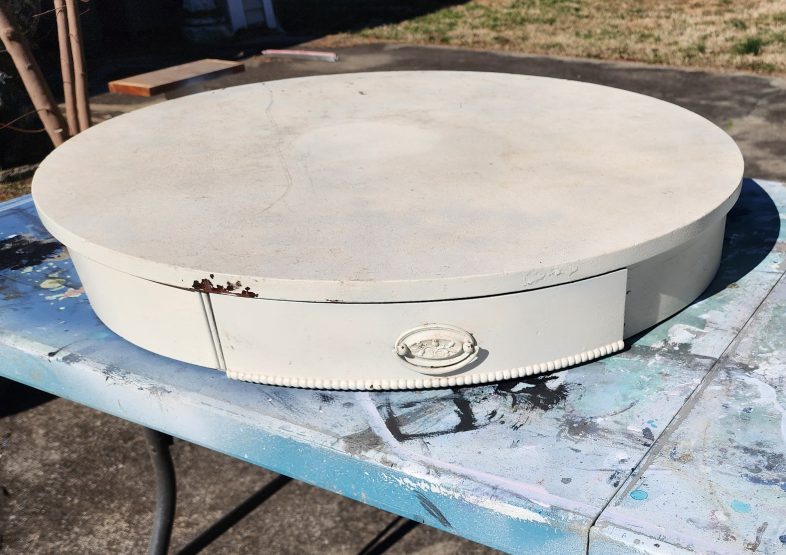
Dismantle the table by removing the screws that secure the table top to the base of the table. This is also a good time to remove any hardware, such as the handle on the drawer and the toe caps on the legs.
Inspect your project, looking for loose veneer or places that may need to be filled in with plastic wood or wood filler of your choice.
The top of this table was rough, as you can see. Luckily, the base and the drawer were in really good shape.
Visit the My Repurposed Life Amazon Store to shop my favorite items.
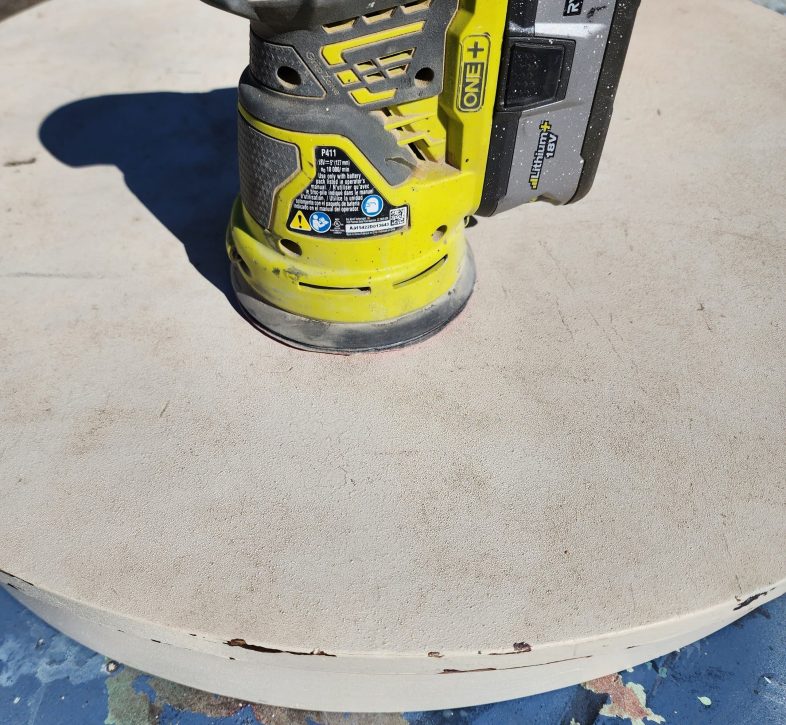
The orbital sander was definitely the way to go to try to smooth out the roughness.
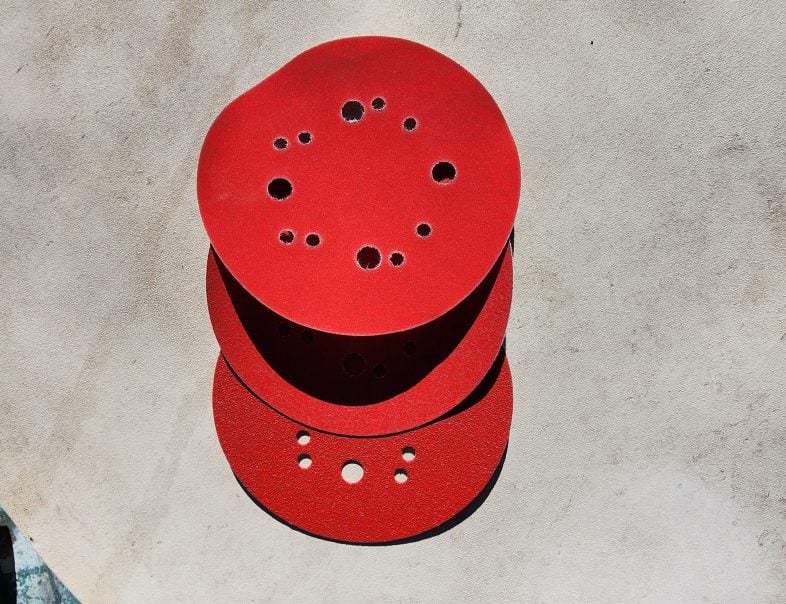
I started with 60 grit, then 150 grit, and finally 220 grit to smooth out the table top.
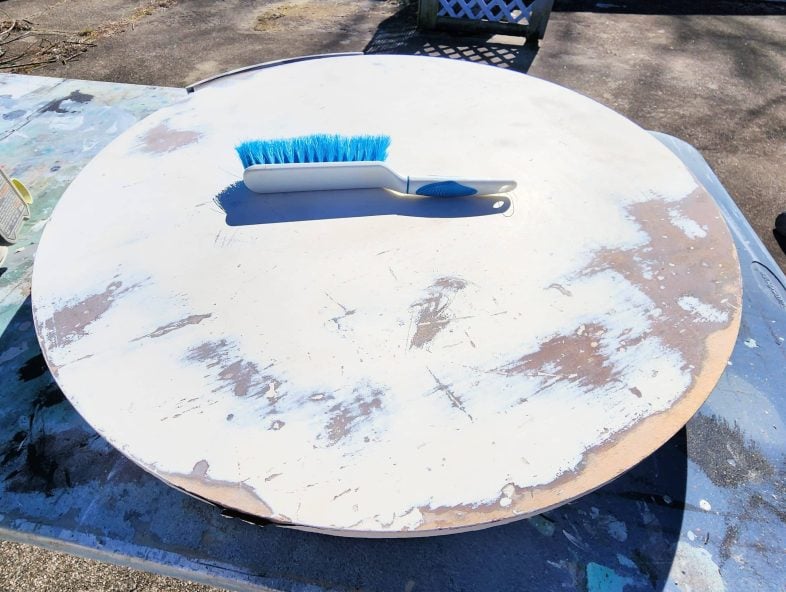
This small dust brush is so handy to keep on hand. It allows me to quickly clean off the table to see where I may need to hit it with the sander. For some reason, I’m not a real fan of the “tack cloth”.
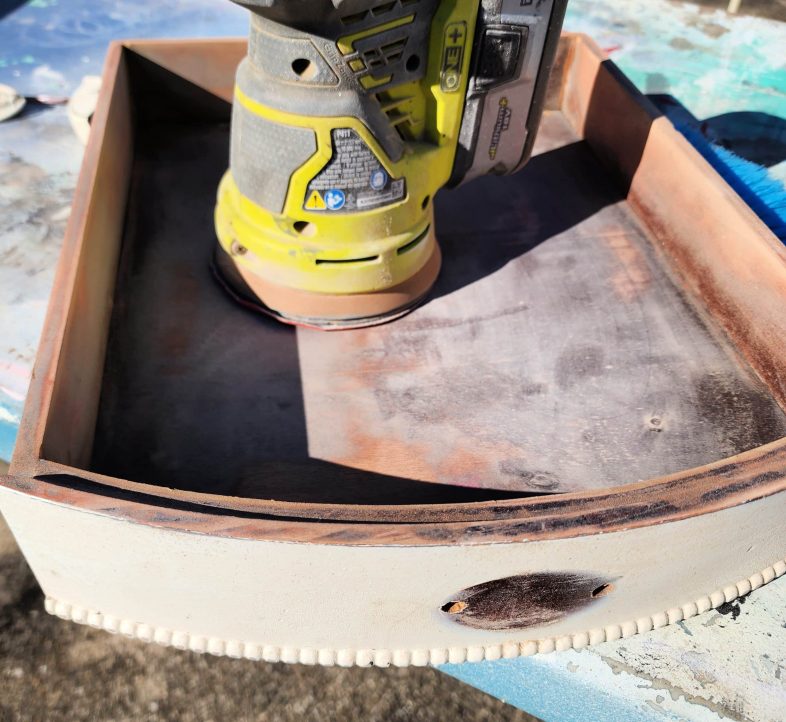
The inside of the drawer wasn’t very pretty, so a quick sanding was necessary to prepare it for its makeover. I also like to sand away any roughness or buildup of paint when I remove hardware/handles. See the image below.
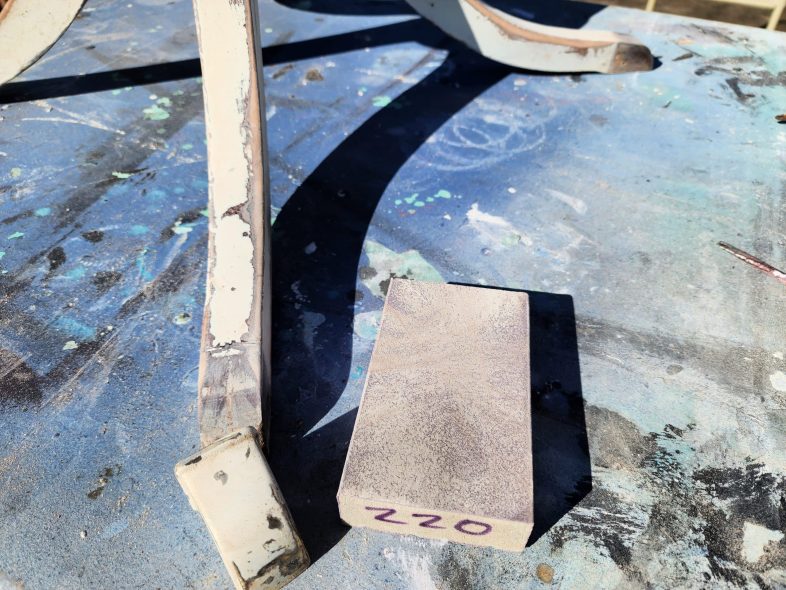
As you can see, I used a 220-grit sanding sponge to smooth out the table legs and the toe caps.
Can You Use General Finishes Milk Paint in a Paint Sprayer?

Yes! You can use nearly all paints with a Finish Max Paint Sprayer!
For this drum table makeover, I really wanted a clean look of black paint. I used General Finishes Lamp Black Milk Paint on a pair of nightstands years ago, and I loved how they turned out. I have been using HTP All in One Paint, painting by hand on my recent thrift store projects. So, I figured it was time to change things up. You could use chalk paint, if that’s what you prefer for your diy projects. It also works well in the the Finish Max paint sprayer.
How many Coats of Paint on this Drum Table Makeover?
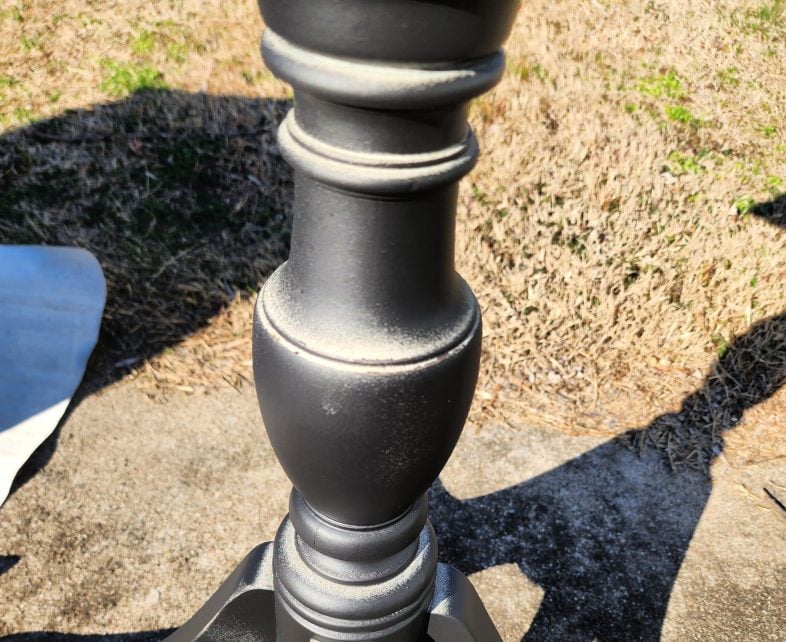
Did you notice that the table base was upside down when I painted it? Starting a paint job with your project upside down ensures you won’t miss any crevices, especially with a spindle-like table base.
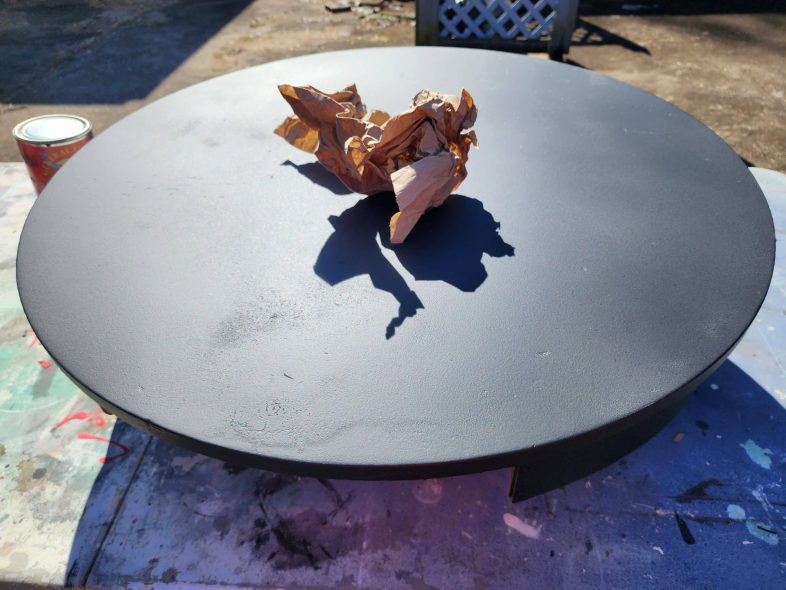
I like to do very light coats of paint, no matter how I am applying the paint. After the first coat of paint dried, I used some brown craft paper to sand the table top lightly. It’s a great way to get a smooth finish in the end.
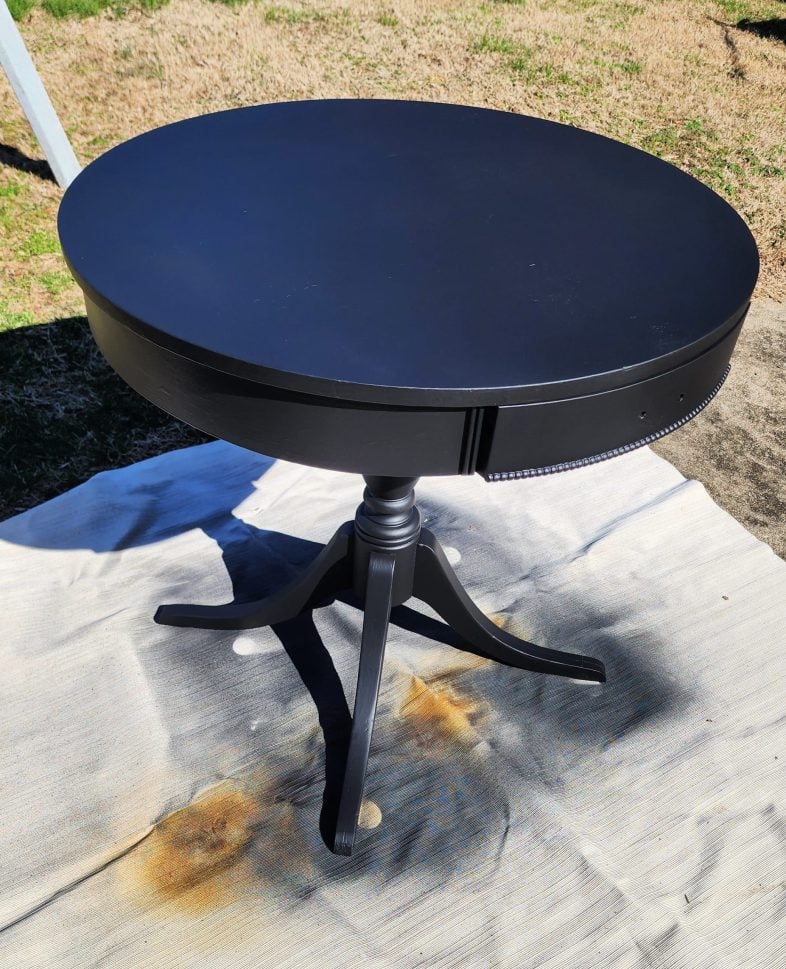
Then, I reassembled the table and did a second coat to see how things were going. Isn’t it beautiful??? Note how little overspray there is from the Finish Max.
Here’s a little tip about using expensive paint on projects. First, if it’s your project you may not mind dropping the money on a quart of high dollar paint. As a furniture flipper, you do need to get your money back.
The Finish Max gets nearly every last drop out of the paint cup. However, before cleaning it out, I used a chip brush to do very light touchups where needed, making sure no paint was wasted at all.
Buff Table
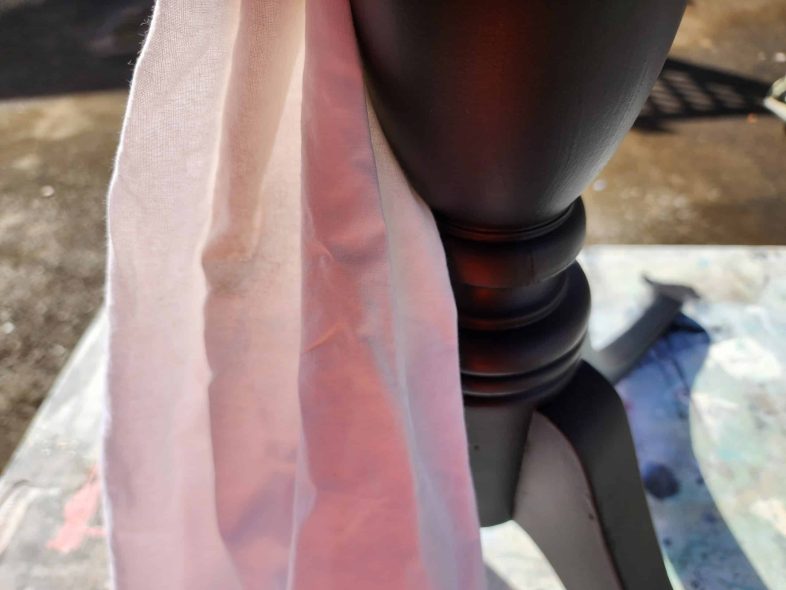
Using a soft cloth, actually a flour sack towel, I buffed the entire table. Here, I’m using a shoe shine method on the base of the table. The milk paint tends to show handprints, where you’ve touched or carried the table. You, of course have the option of waxing or sealing the table. I prefer gently buffing the painted drum table and base. If you want to use your table right away, I recommend putting small pieces of wax paper under any decor you place on the table until the paint has time to fully cure.
Spray Paint Hardware
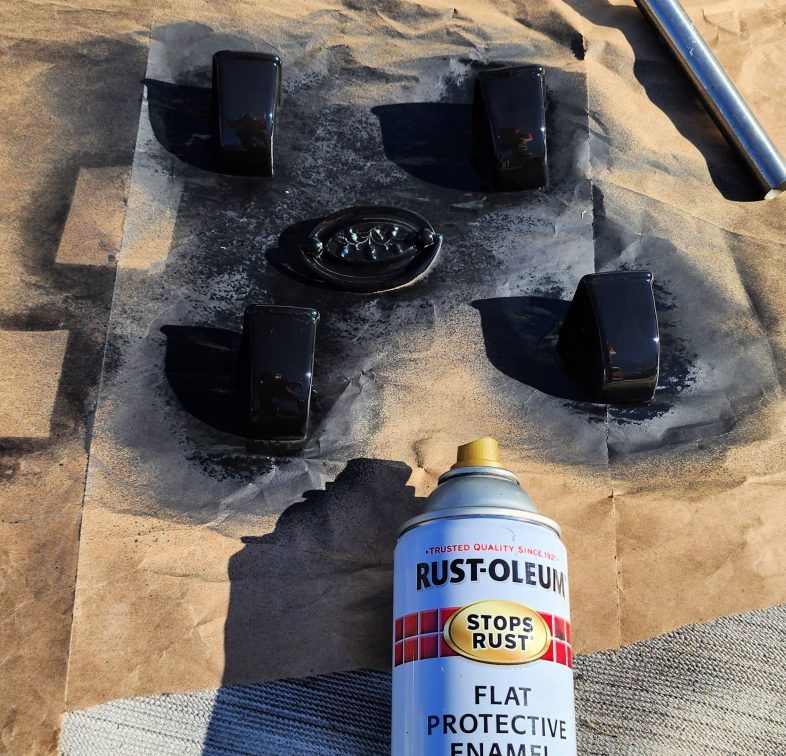
All of the hardware got several light coats of spray paint.
Drum Table Drawer
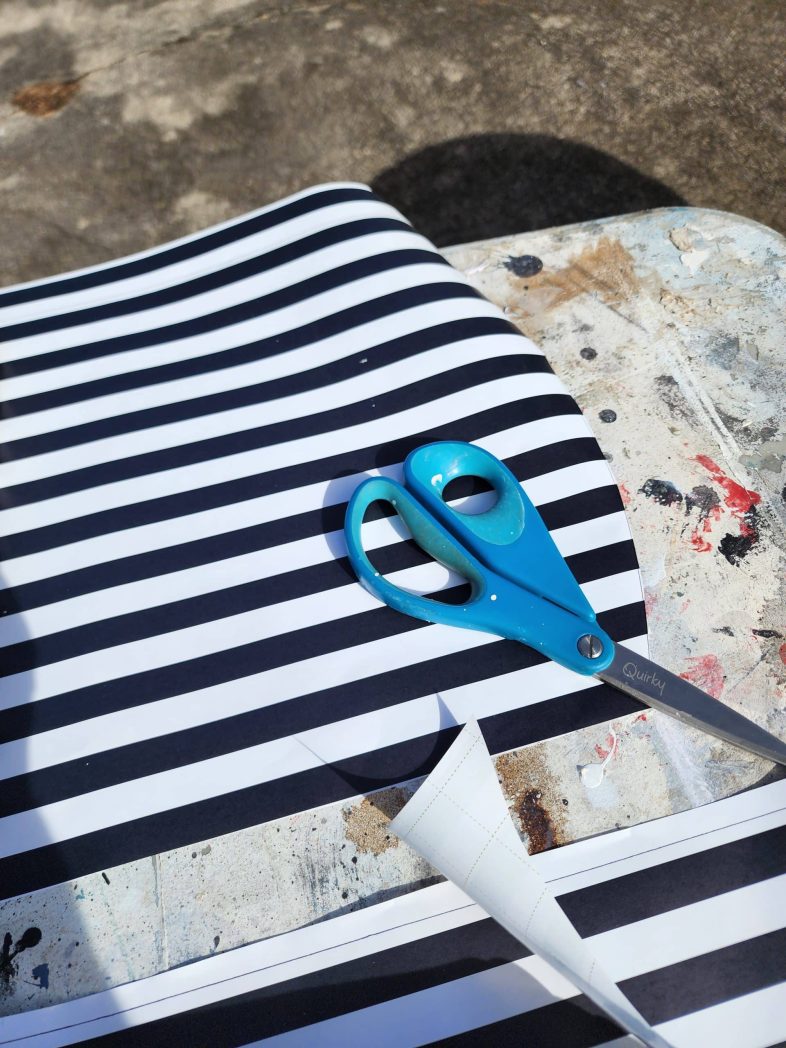
For a drawer liner, I used heavy-duty wrapping paper. I turned the drawer upside down and traced the shape onto the paper. Then, I made an educated guess about how thick the drawer was and cut the paper to size.
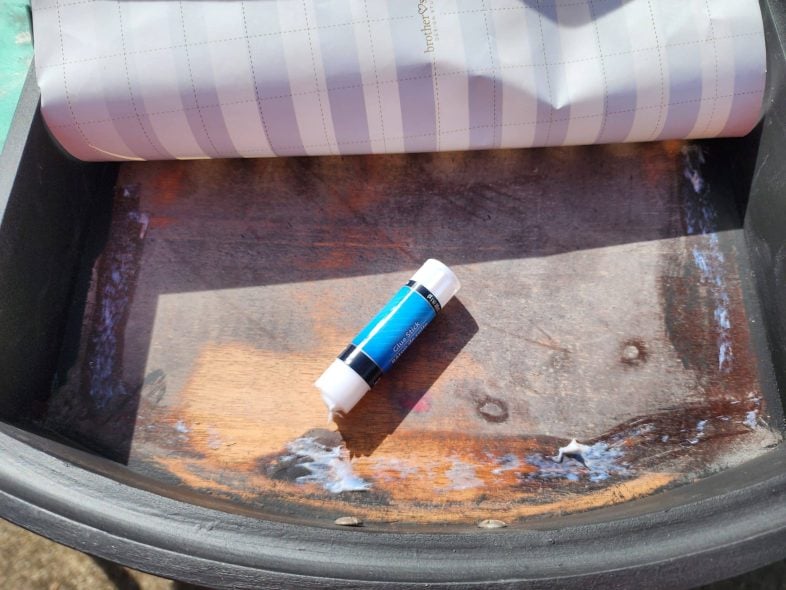
Because I’m flipping this table, I didn’t want to decoupage the paper on the entire drawer bottom. Instead, I reached for a cheap glue stick to secure the edges all around the drawer.
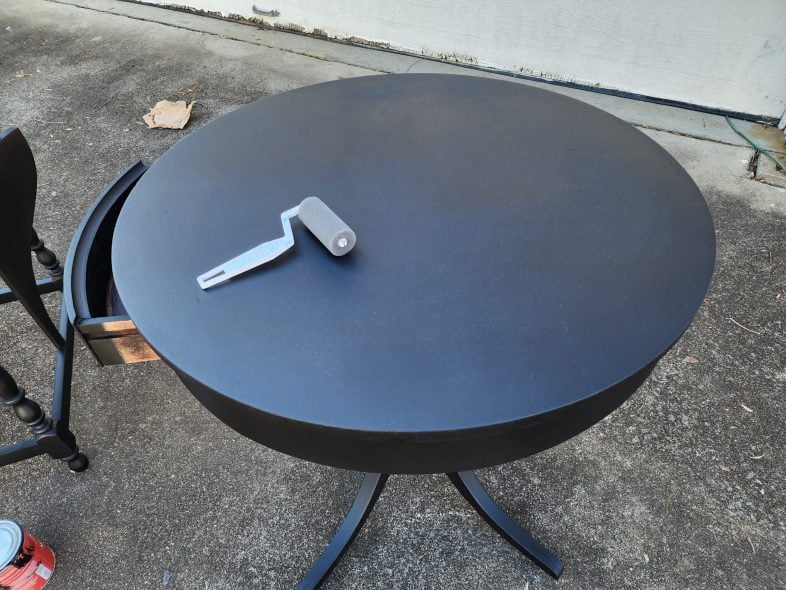
To get the best finish on the old top, I buffed it with a soft cloth, and then I applied one light coat of Lamp Black with this small foam paint roller.
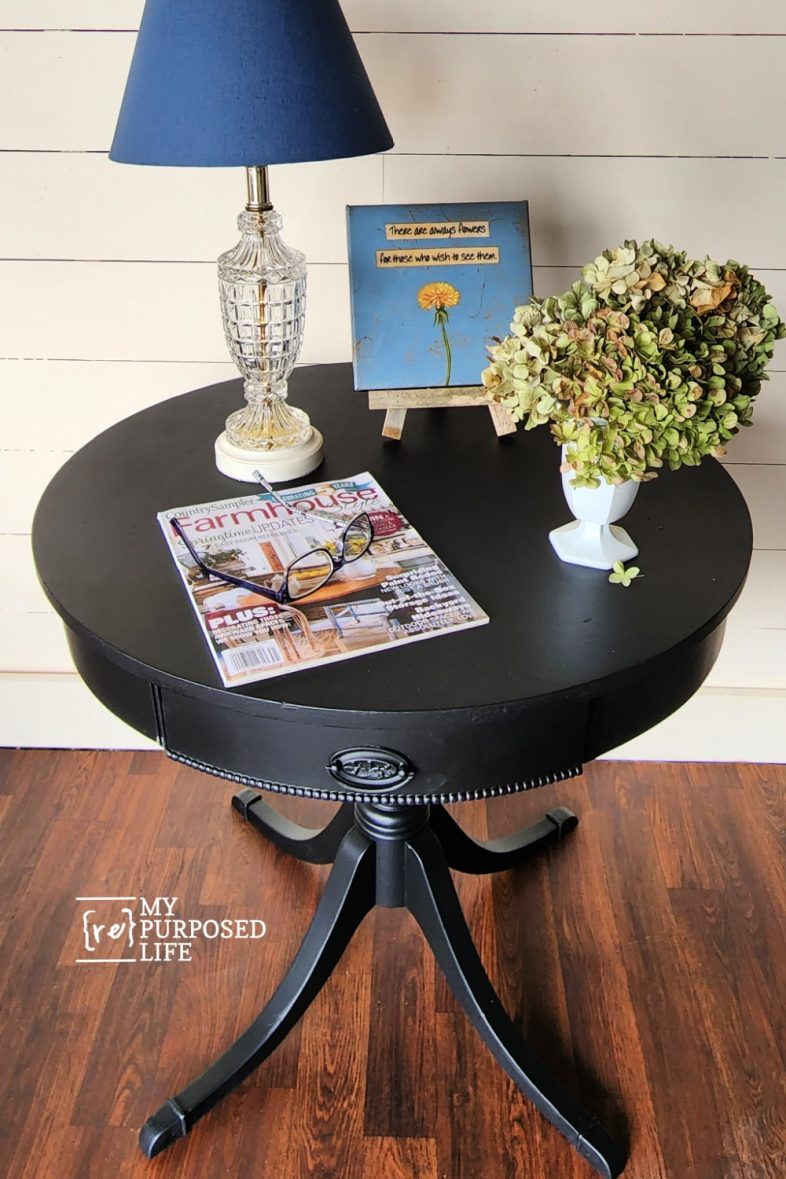
Drum Table Makeover Complete!
I put all the hardware back in place, and did a few touchups. Voila! The drum table makeover is complete!

Optional: Add Decorative Details
Although I only did a simple paint job with this side table makeover, you could give new life to your accent table with a few more steps.
Once the base coat of paint or stain has dried, you can add decorative details to the table. This could include stenciling a pattern or design, using a contrasting paint color to highlight the edges, or using decoupage techniques to add a graphic element. If I were to do anything to embellish this project, I would probably use a transfer similar to the one I used on my navy blue bar stools.
With these simple steps, you can give your drum table a fresh new look that will enhance the overall style and aesthetic of your space.
Now, let’s check out these fabulous projects from the furniture fixer upper team!

Furniture Fixer Upper Tour Projects
If you love seeing old furniture get a second chance, be sure to visit more Furniture Fixer Upper Tour makeovers. Each project starts with good bones and ends with a fresh new story.
See more Furniture Fixer Upper makeovers here
You will find everything from small side tables to large statement pieces, all transformed by talented DIY bloggers who believe in saving furniture rather than replacing it.
Welcome to the group Gail !
I am really liking lamp black. Your makeover is so pretty now ! And your tutorial is really clear and helpful !
Thanks
Thank you so much! I love redoing furniture, it’s a change from sawing and building! 🙂
gail