Window Coat Rack | Easy Project
As an Amazon Associate, I earn from qualifying purchases.
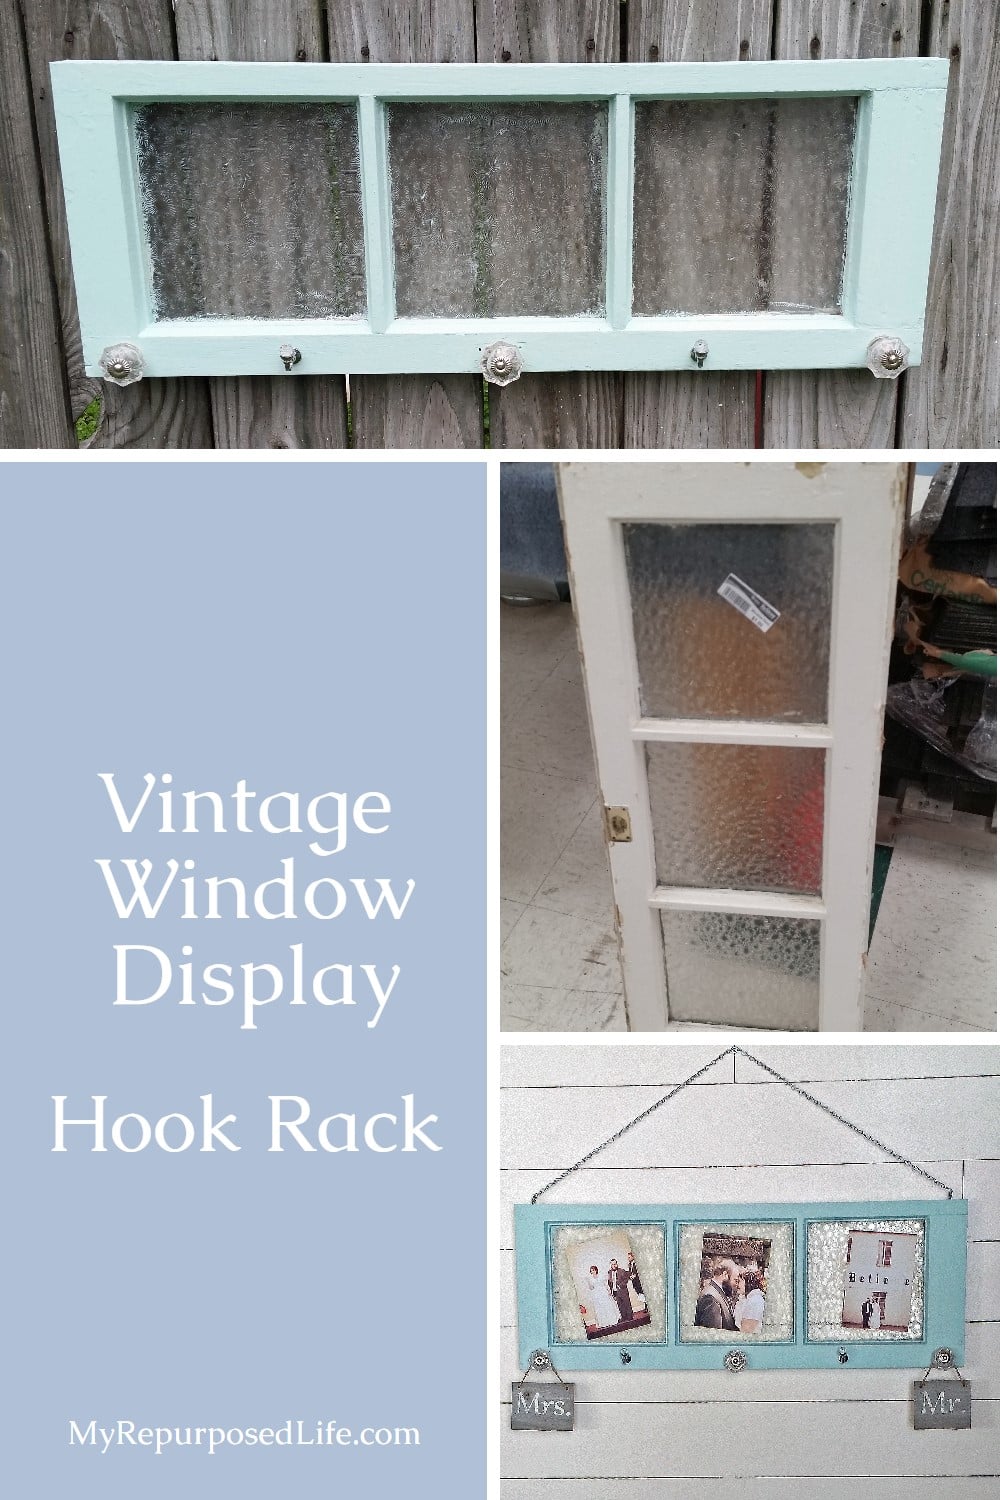
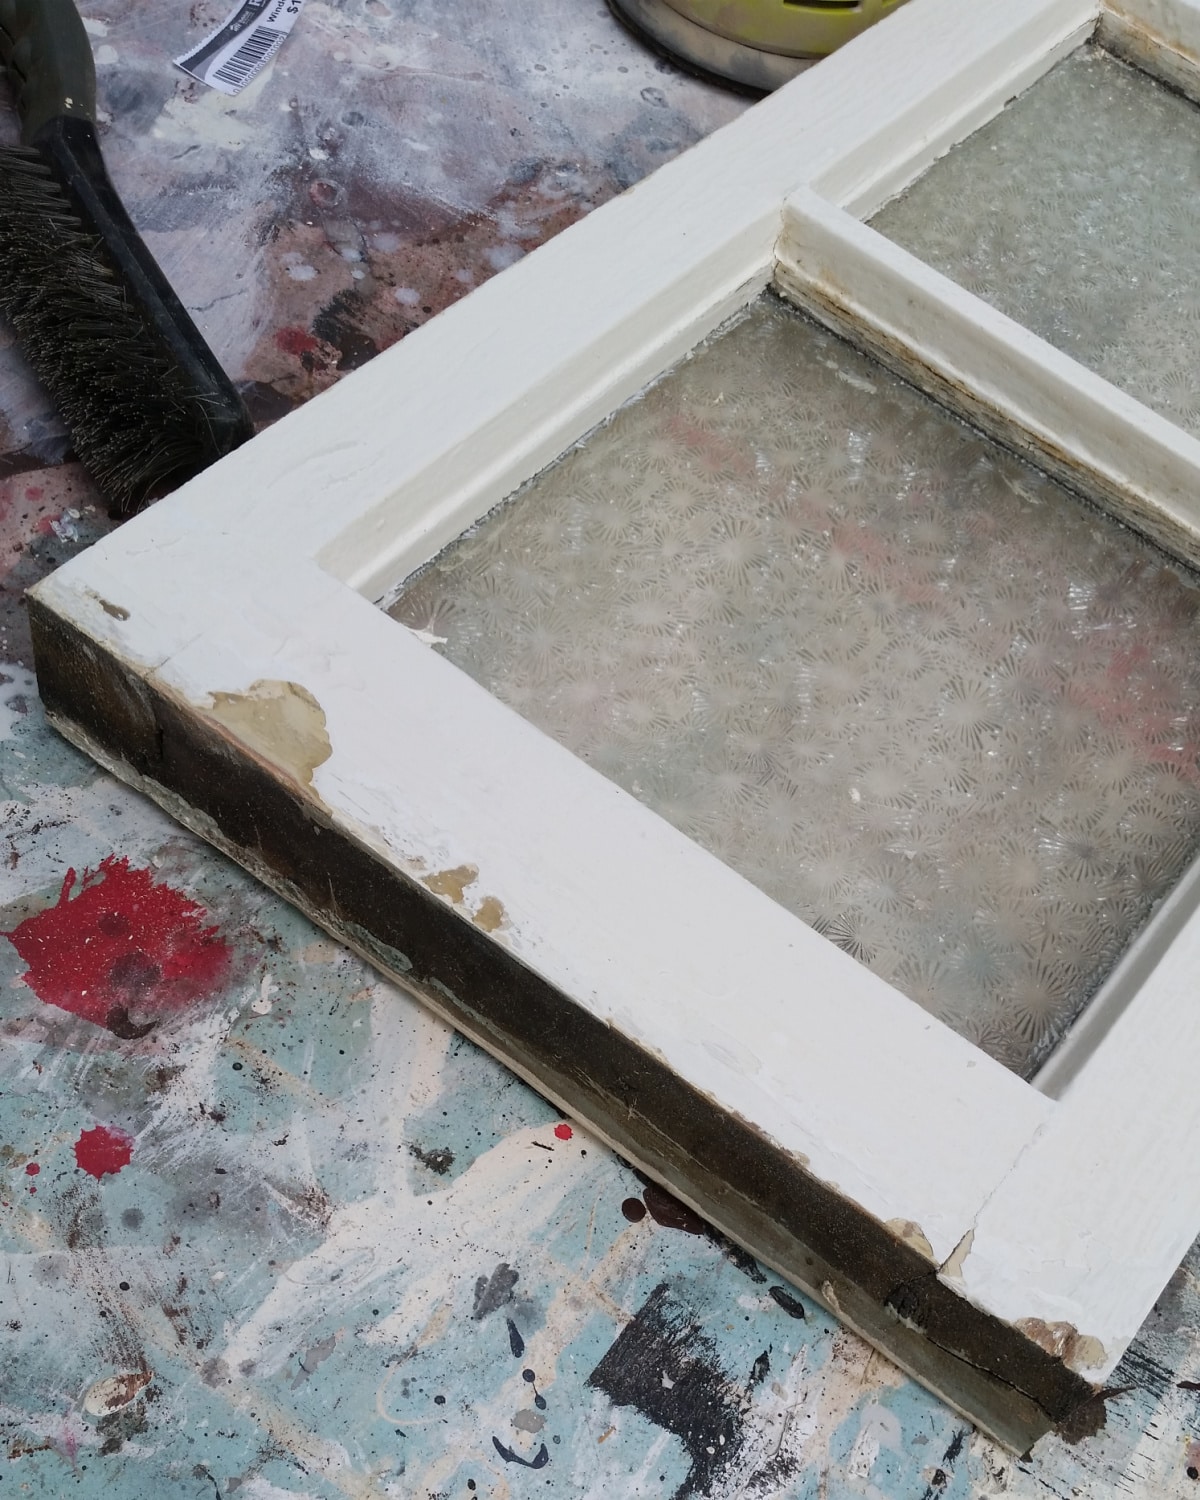
Old windows are one of those things I have a hard time passing up, especially when they’re the right size. This little frosted window had some damage, but that did not scare me away. With a little trimming, paint, glass knobs, and a couple of hooks, it became a sweet window coat rack that can hold scarves, jewelry, keys, or even favorite photos. This easy window coat rack for a wedding photo display came about quickly! Please don’t pass up an old window because it has a few flaws.
Window Coat Rack Inspiration
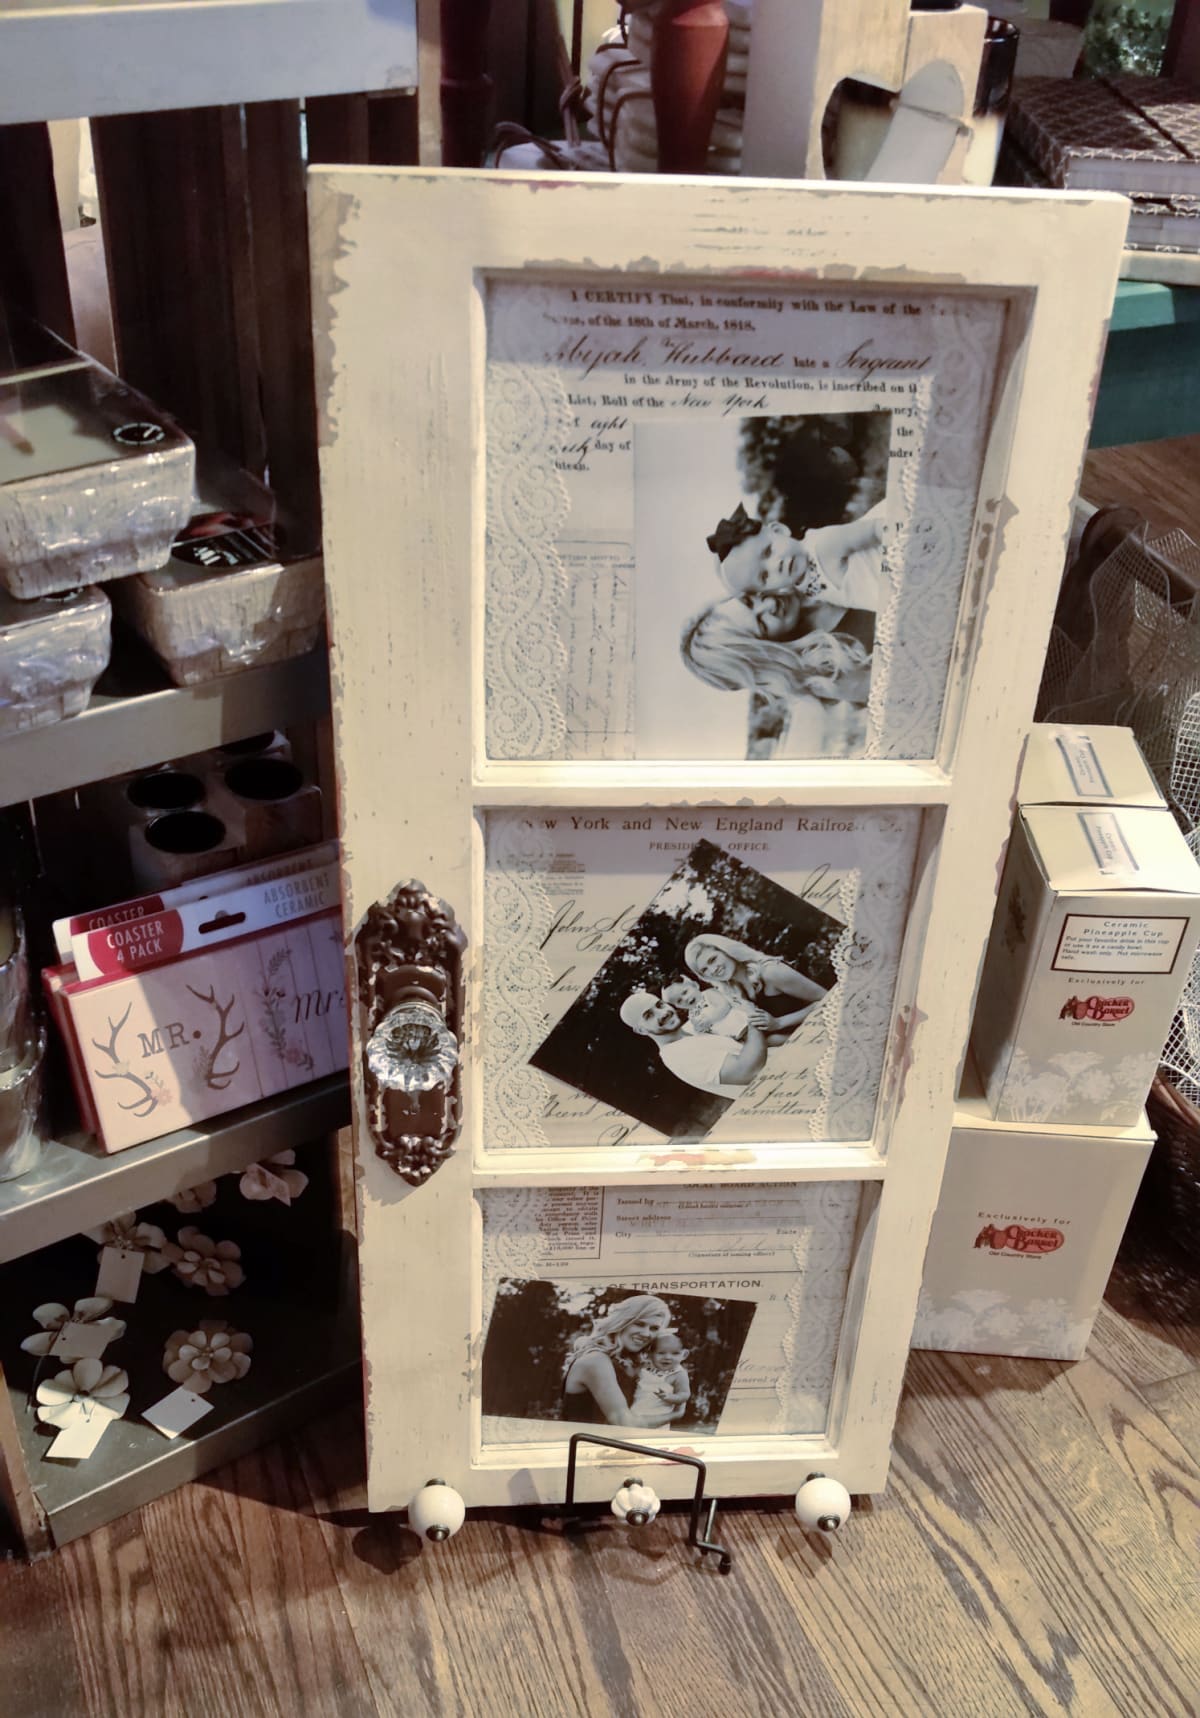
I took this photo at Cracker Barrel, which inspired me.
Could This Window be Used for a Coat Rack?

Two days later, I spied this vintage frosted window at my local ReStore for $1.00! I actually missed it on my first spin around the store. When I returned to look at some ceramic tiles, it caught my eye. I couldn’t scoop it up fast enough.
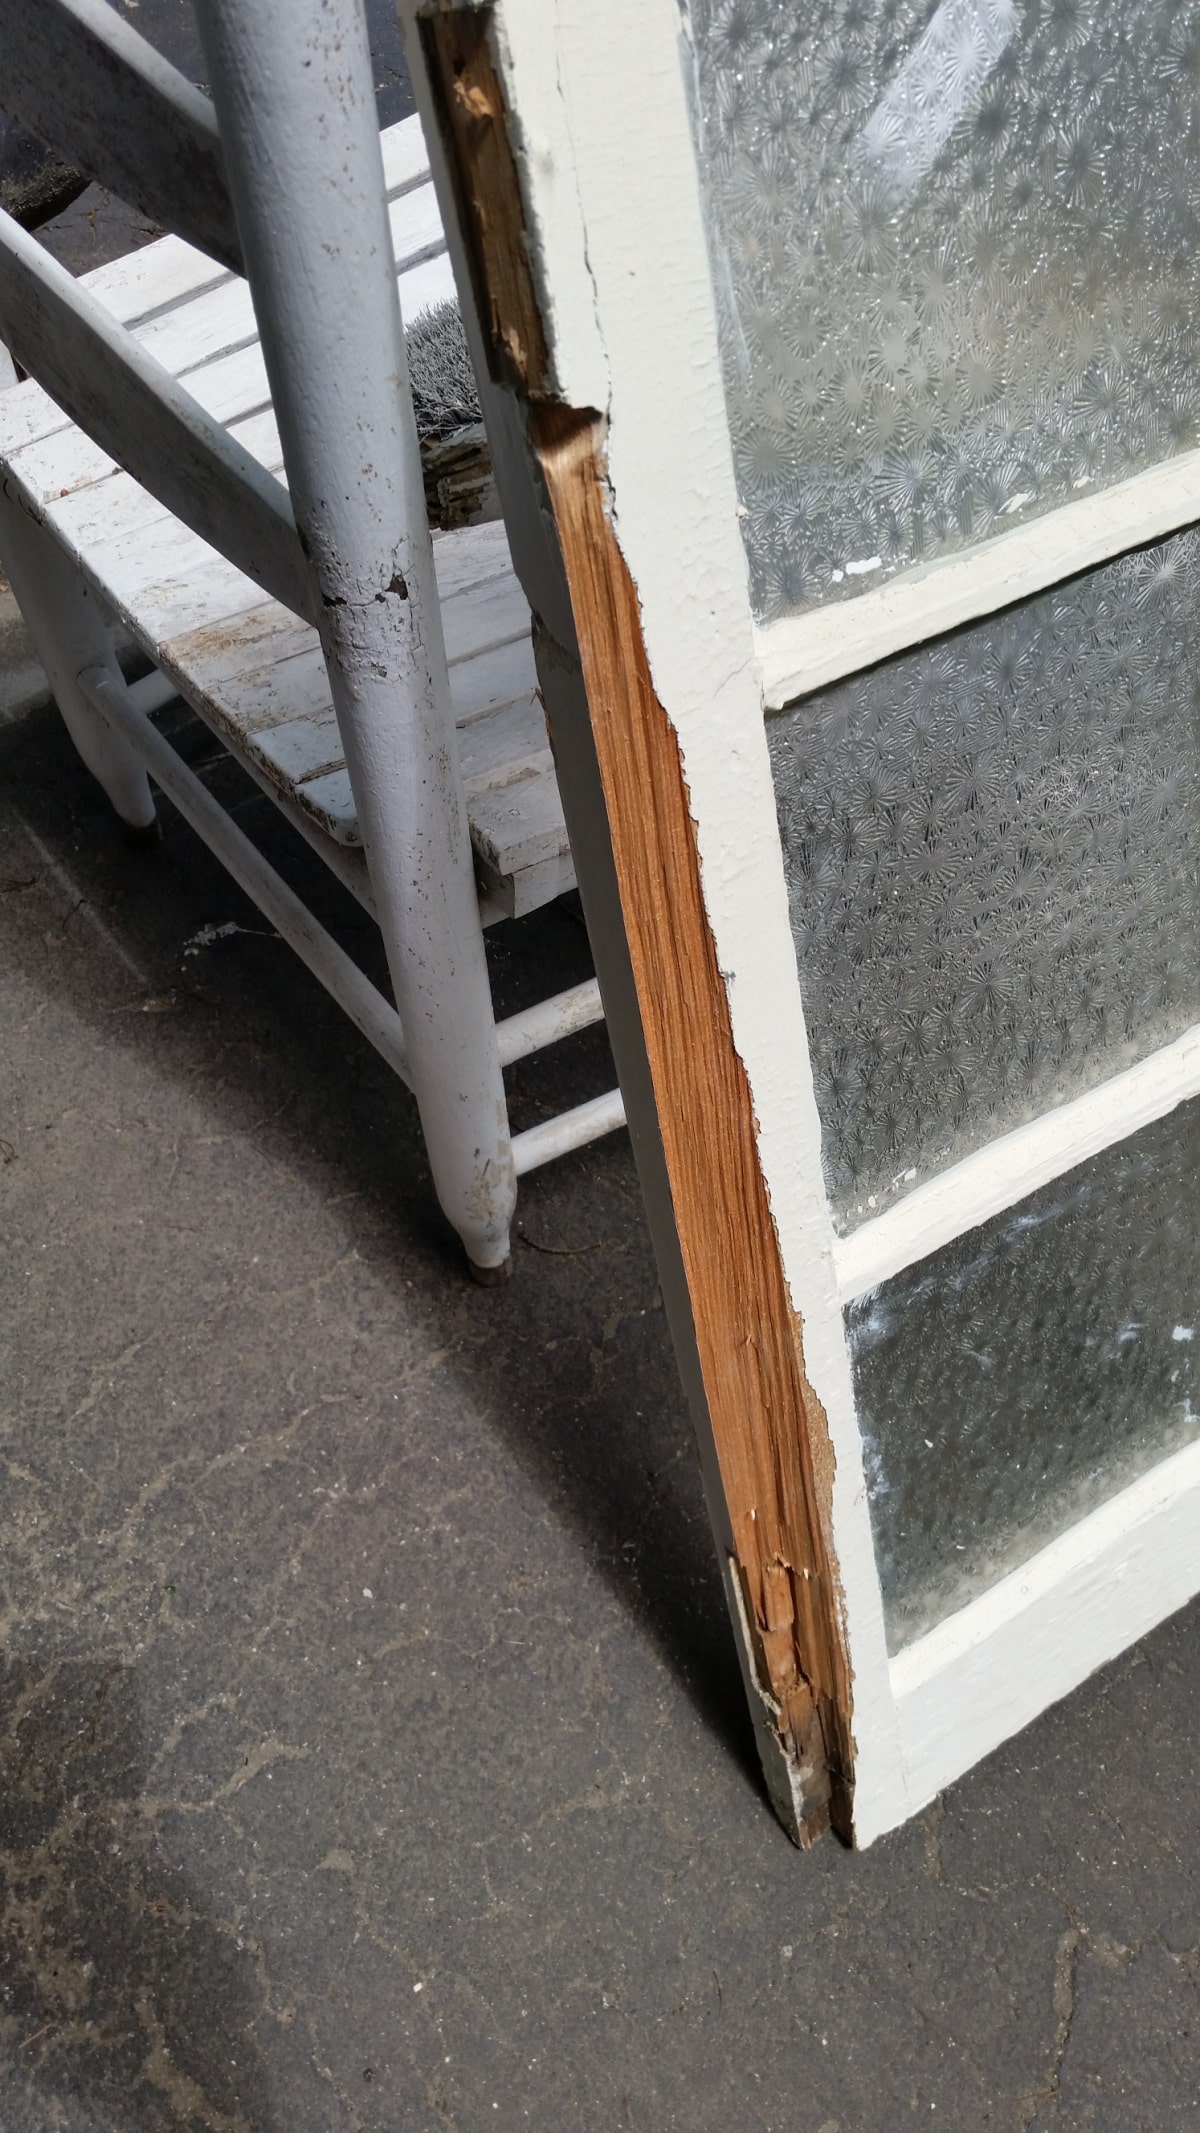
There was significant damage to the wood frame that had to be dealt with.
Carefully Trim the Damaged Wood on the Window Frame.
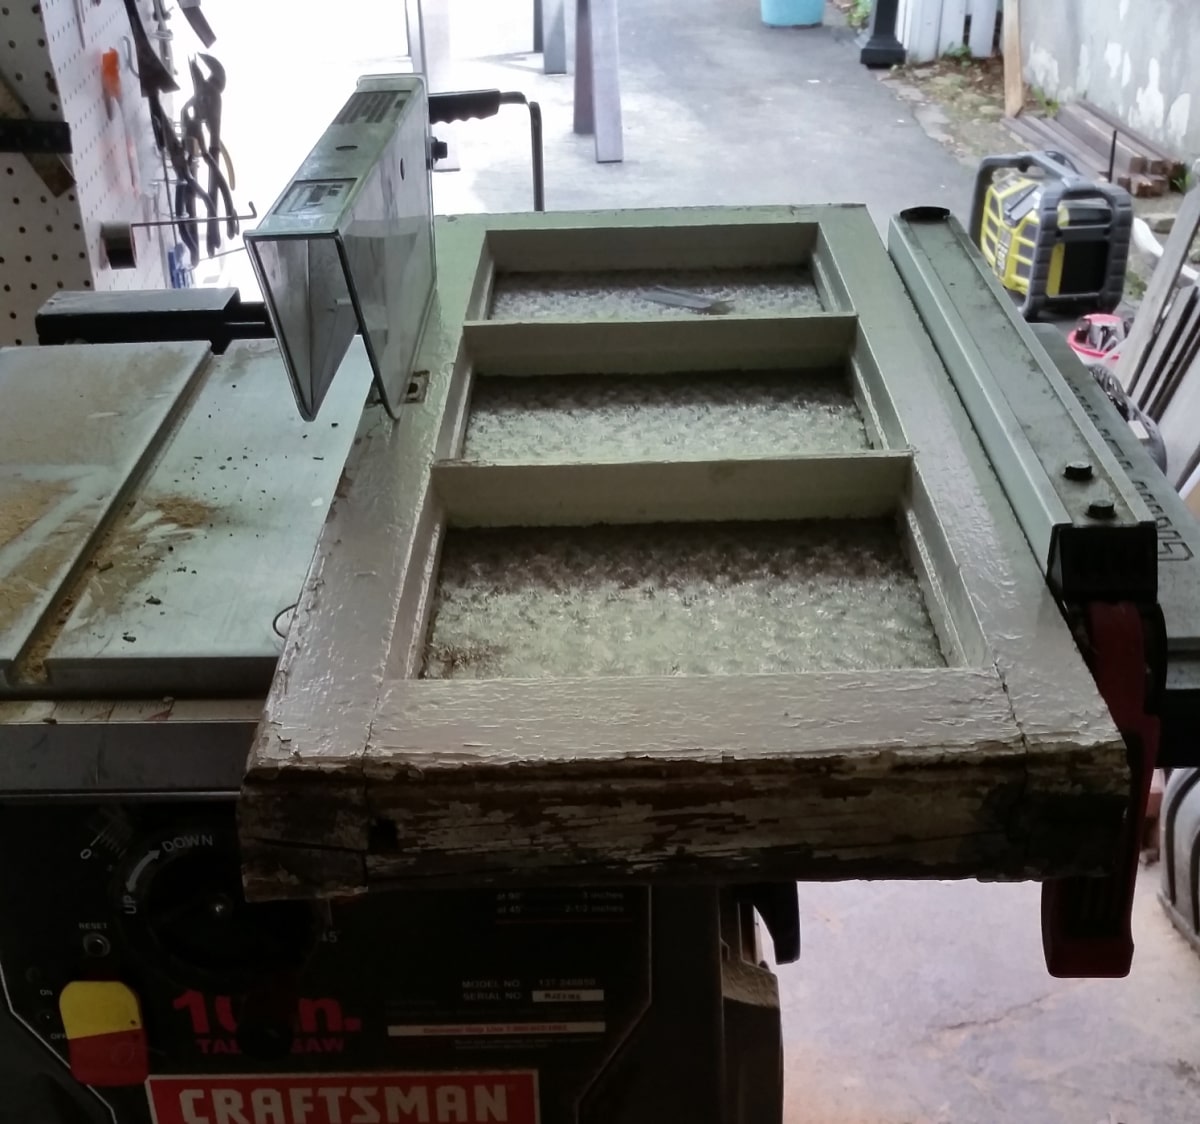
I did a little trimming of the sides of the frame on the table saw.
I did a little sanding and couldn’t look past the roughness still left on the top and bottom of the window.
Visit the My Repurposed Life Amazon Store to shop my favorite items.
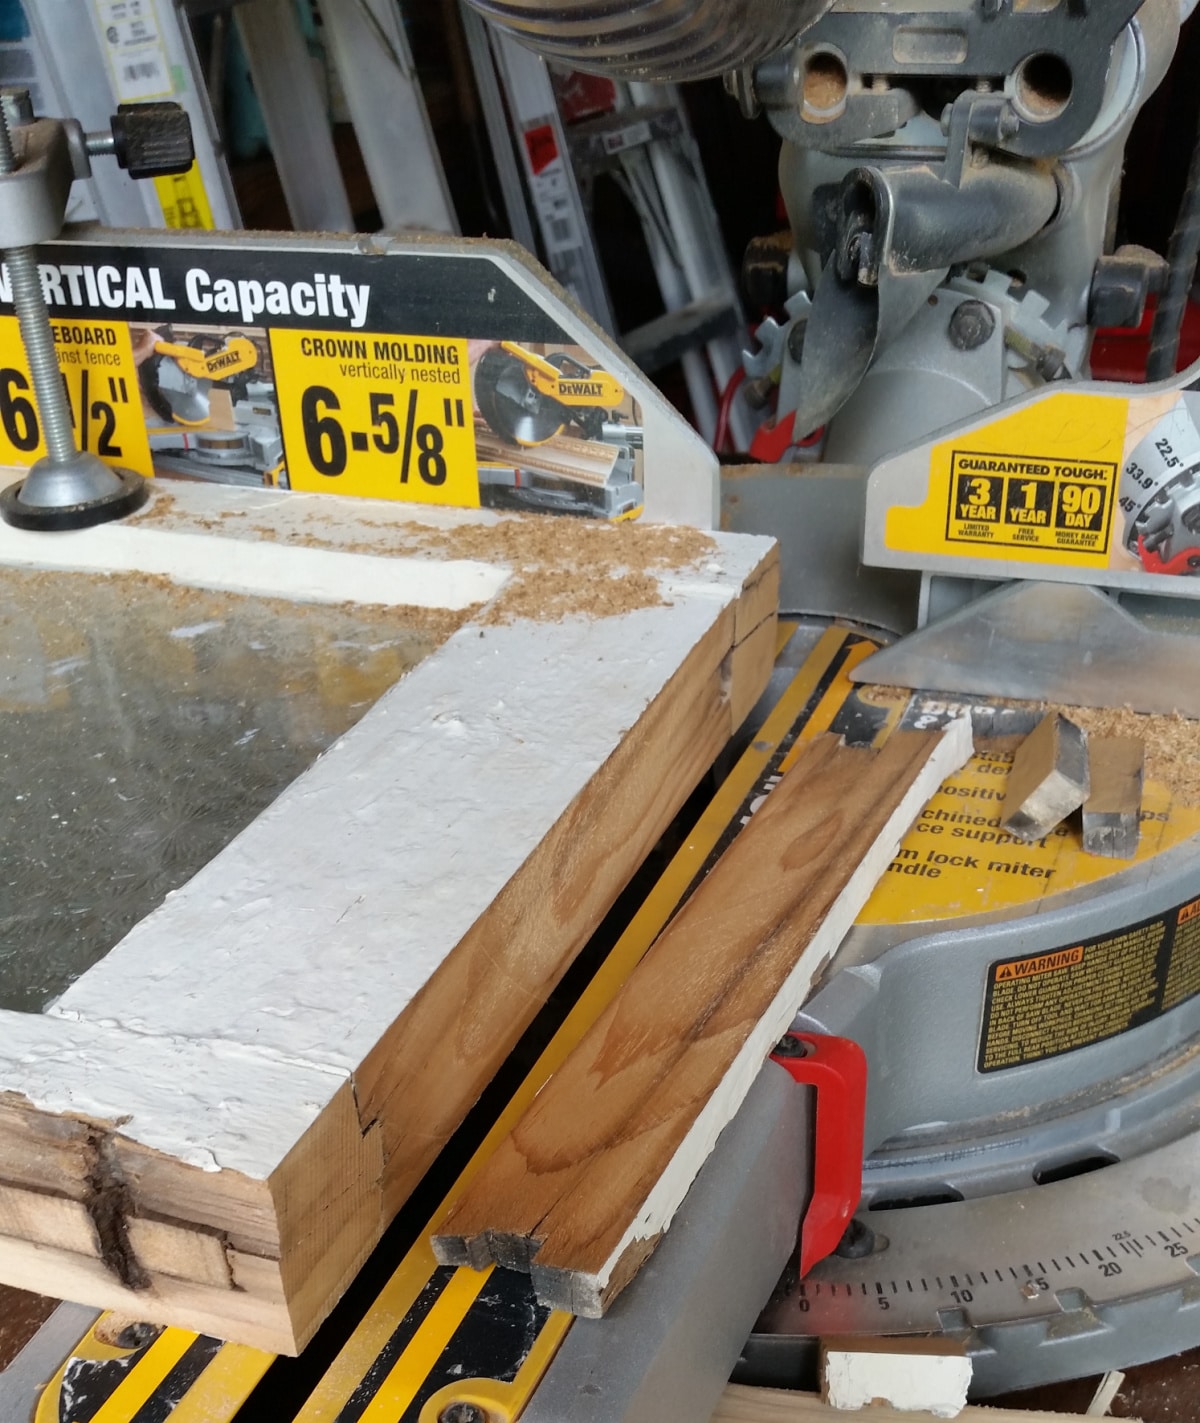
Donning safety glasses, I used my large sliding compound miter saw to trim the top and bottom, giving the vintage window a cleaner look. Don’t you agree, it’s so much better?
The Repurposed Window Coat Rack is Ready to Paint.
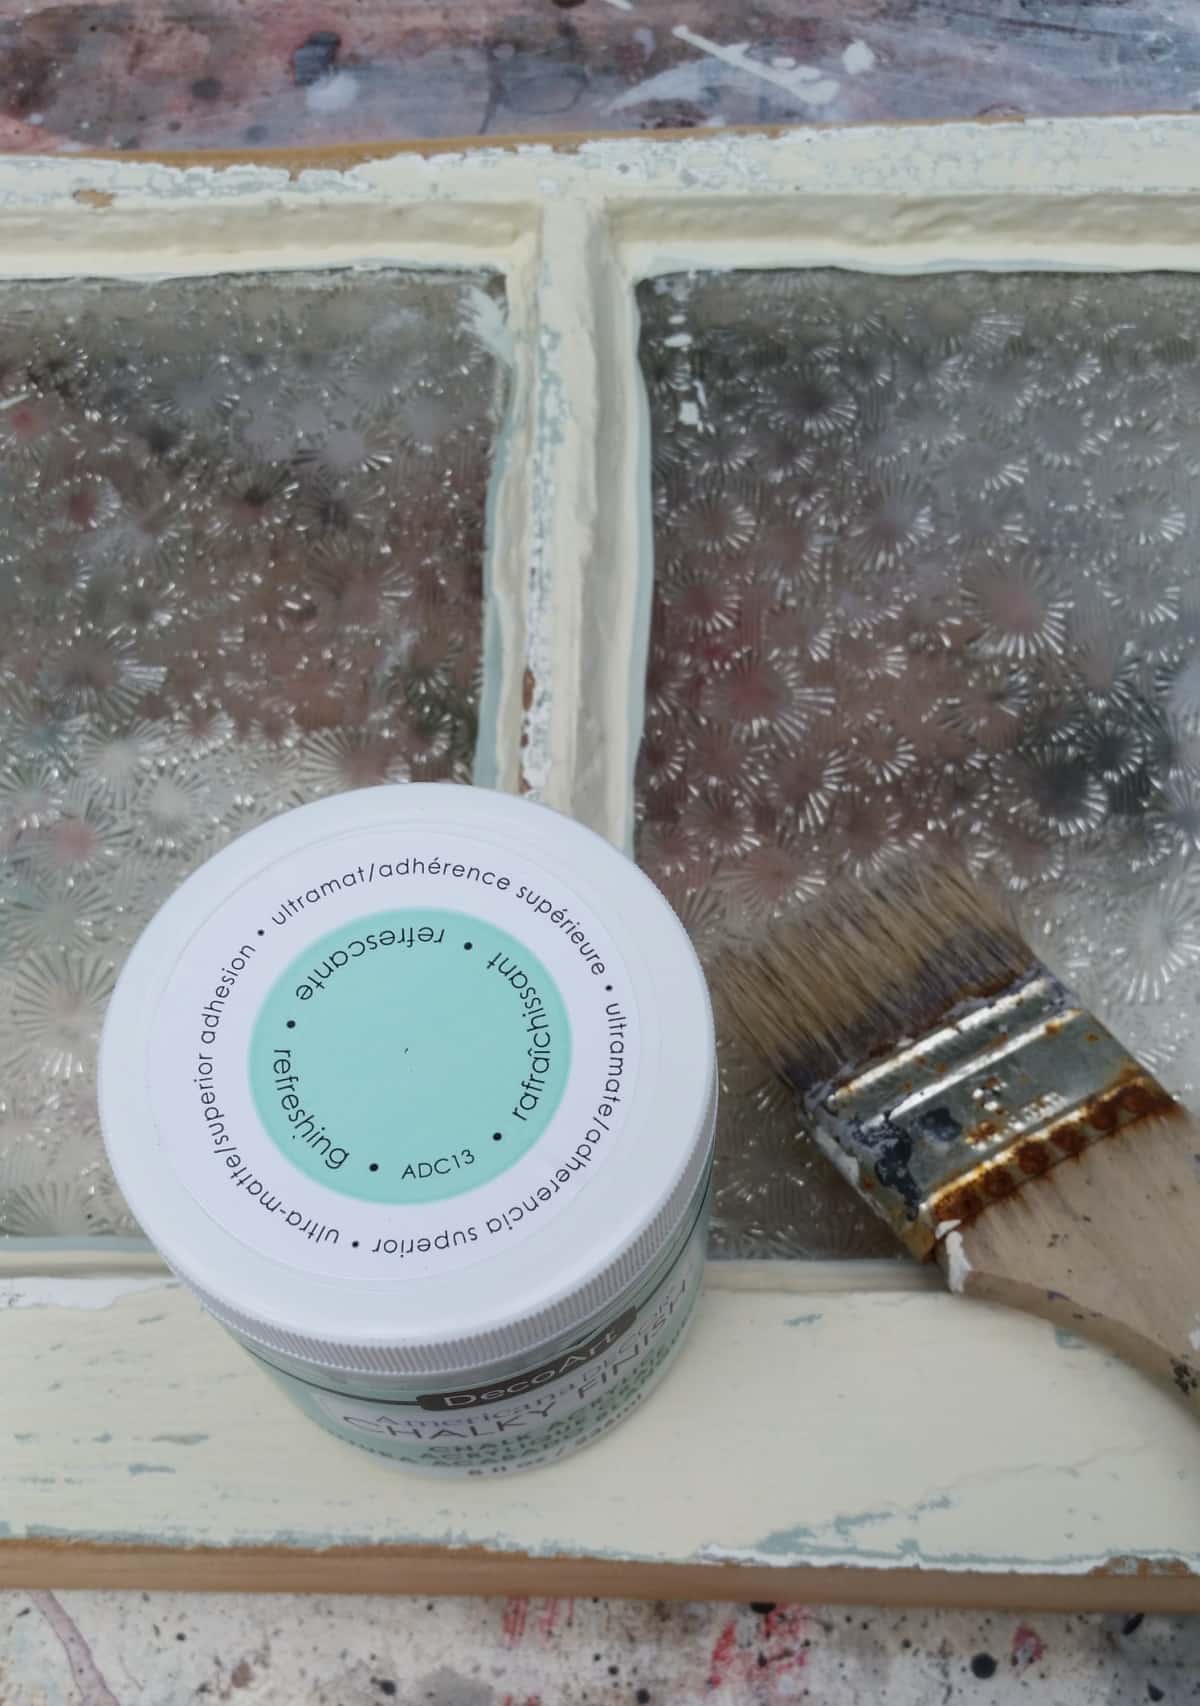
This paint is called Refreshing. It’s a funny color. Sometimes I think it’s green, and other times it looks more blue. I applied it with a cheap chip brush.
You Will Love This Handy Paint Scraper
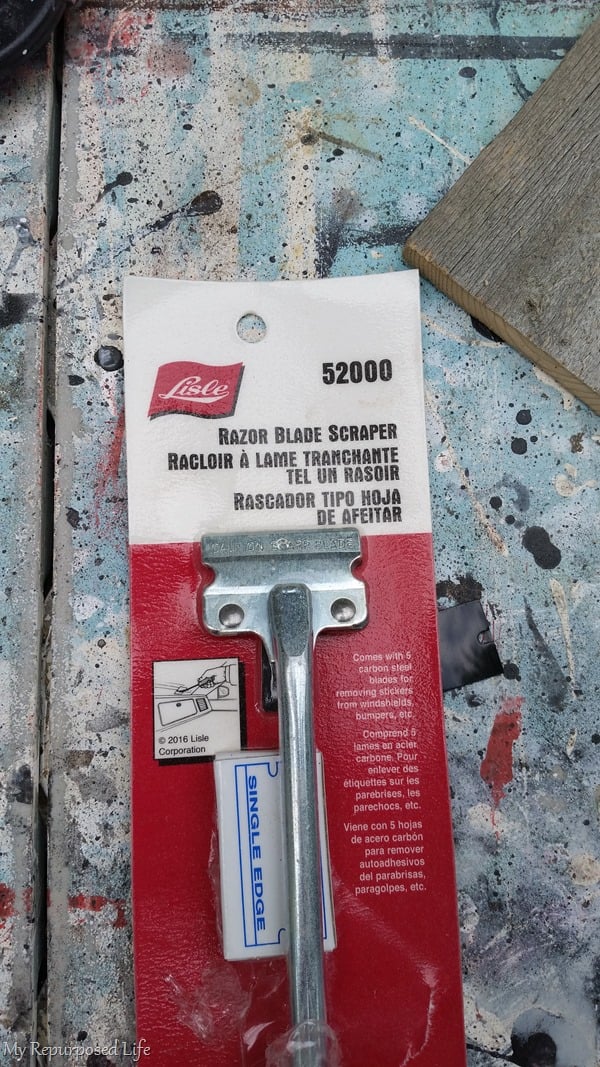
I used this new glass scraper to scrape the back side of the glass. The front side is textured, so the scraper wouldn’t work on it.
Drill Holes to Install Glass Knobs.
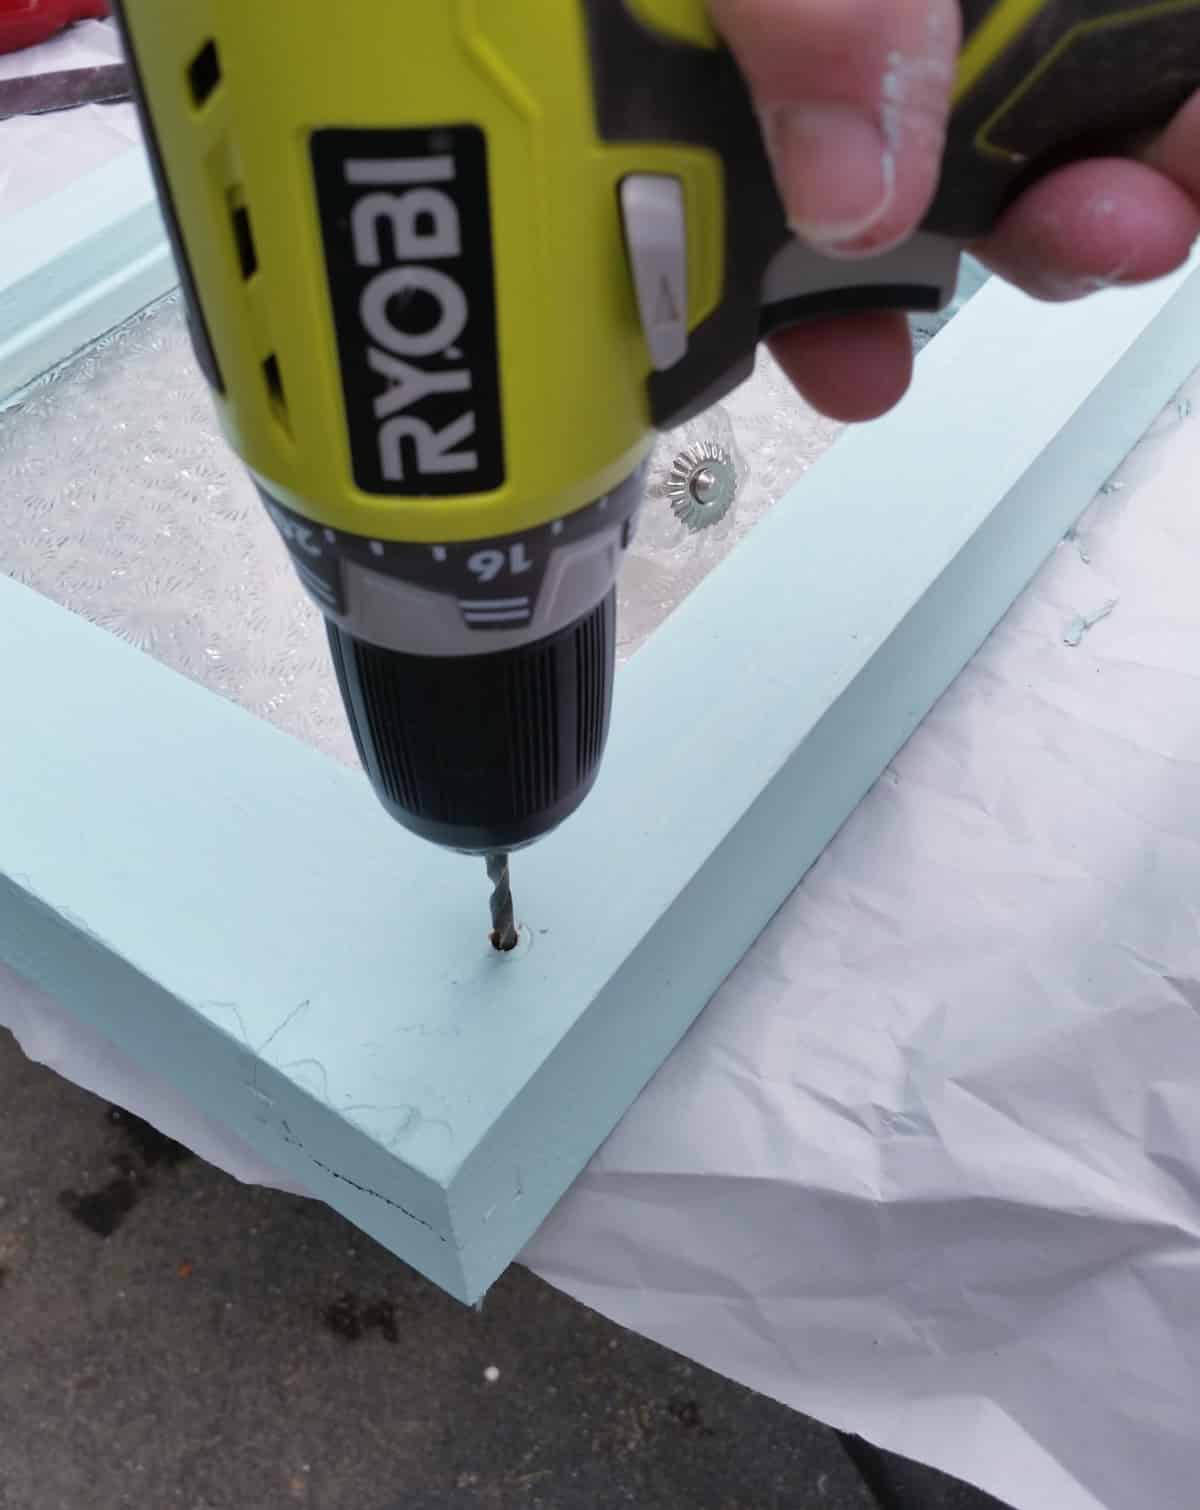
To attach the glass knobs, I drilled pilot holes slightly smaller than the screws that came with the knobs.
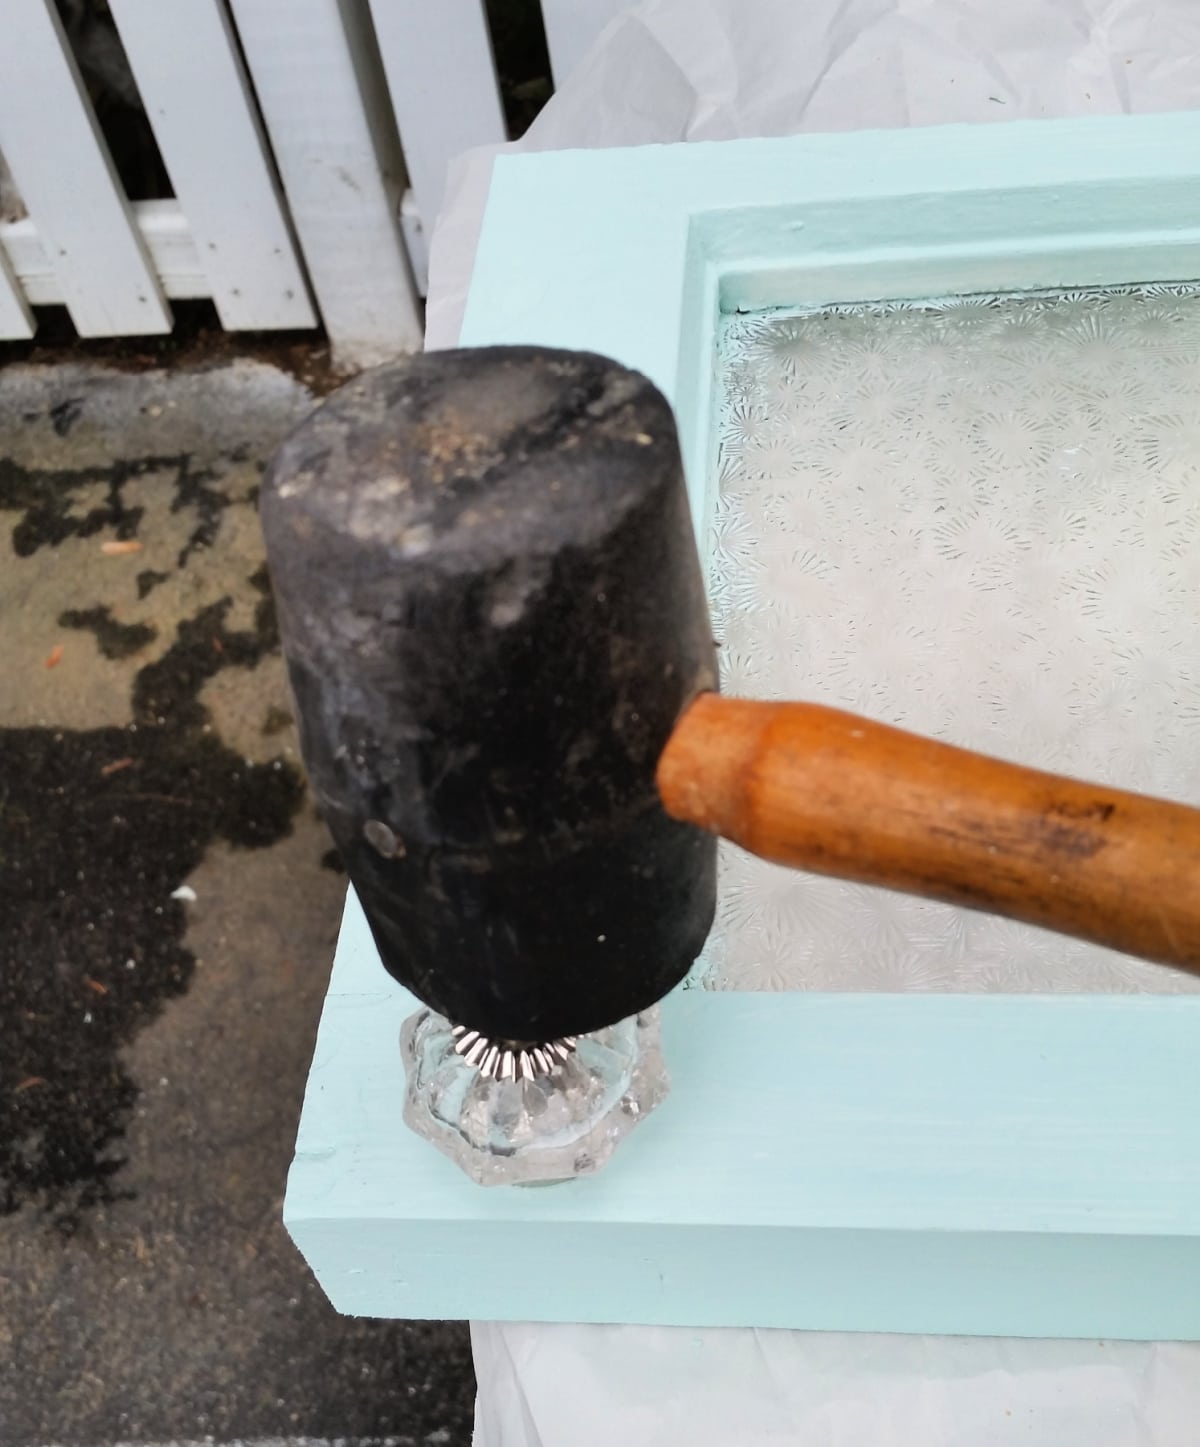
I screwed them in most of the way, but then had to use a rubber mallet to finish the job.
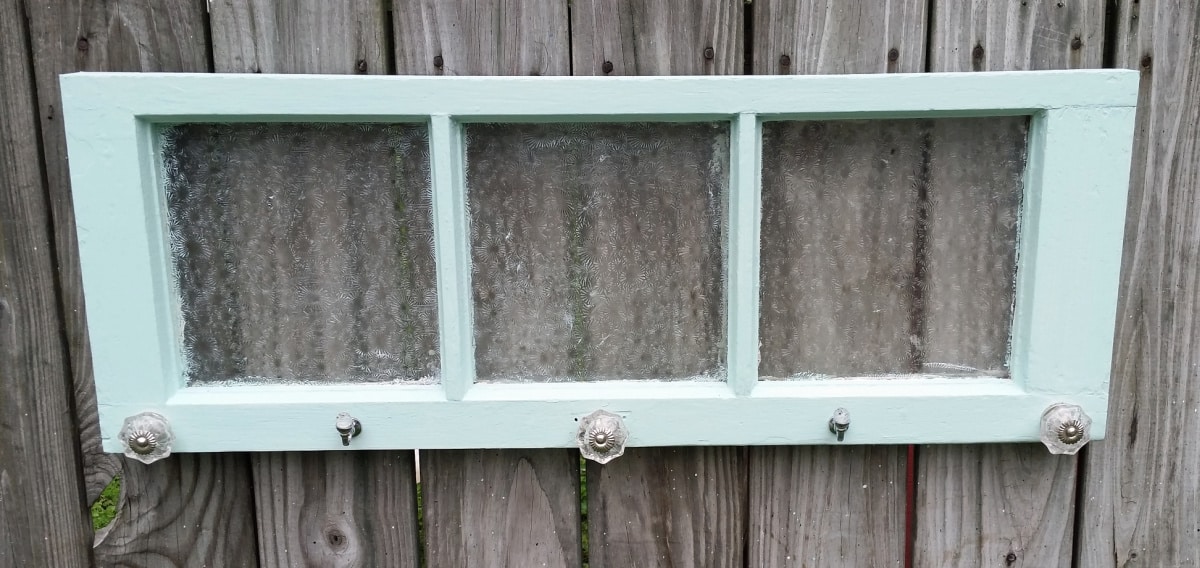
I added two smaller hooks in between the glass knobs. This image shows the window before I scraped off the green paint.
Add a Small Chain to Hang the Window Coat Rack
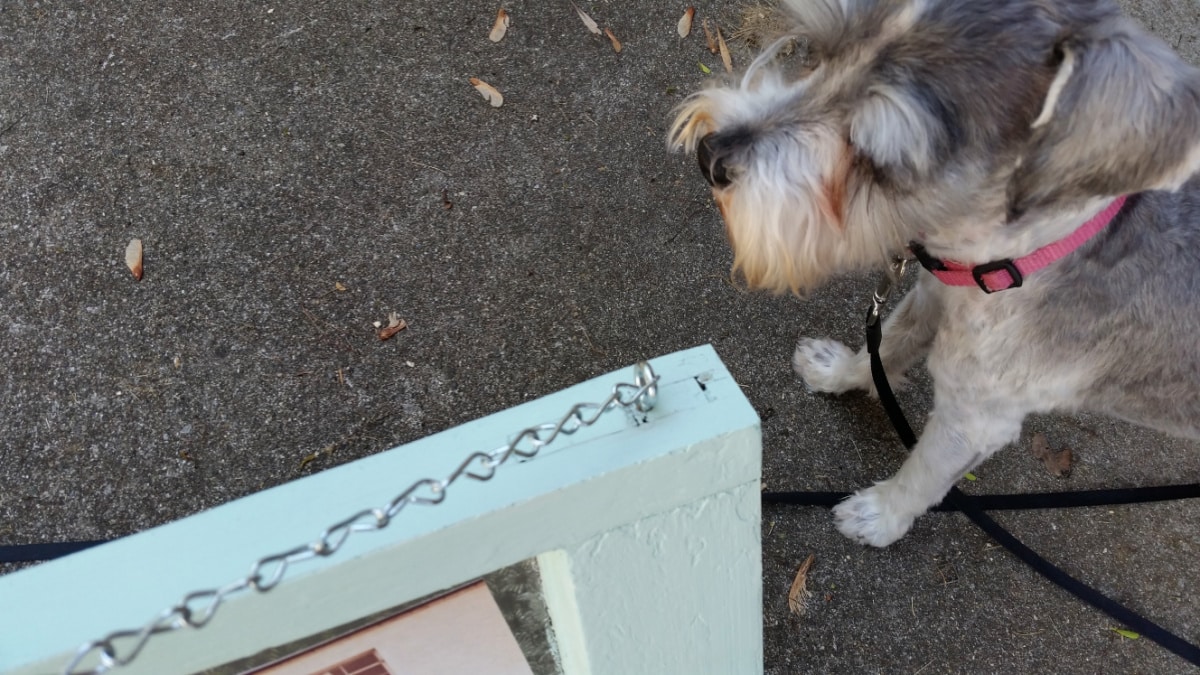
Lulu Mae photo bombed just as I was taking a picture to show how I added a small chain. A new Tractor Supply opened by Vendors’ Village, and I will love shopping there. My first purchase was this chain. I also added d rings on the back of the window. (that’s how it is hanging on the fence in the picture above)
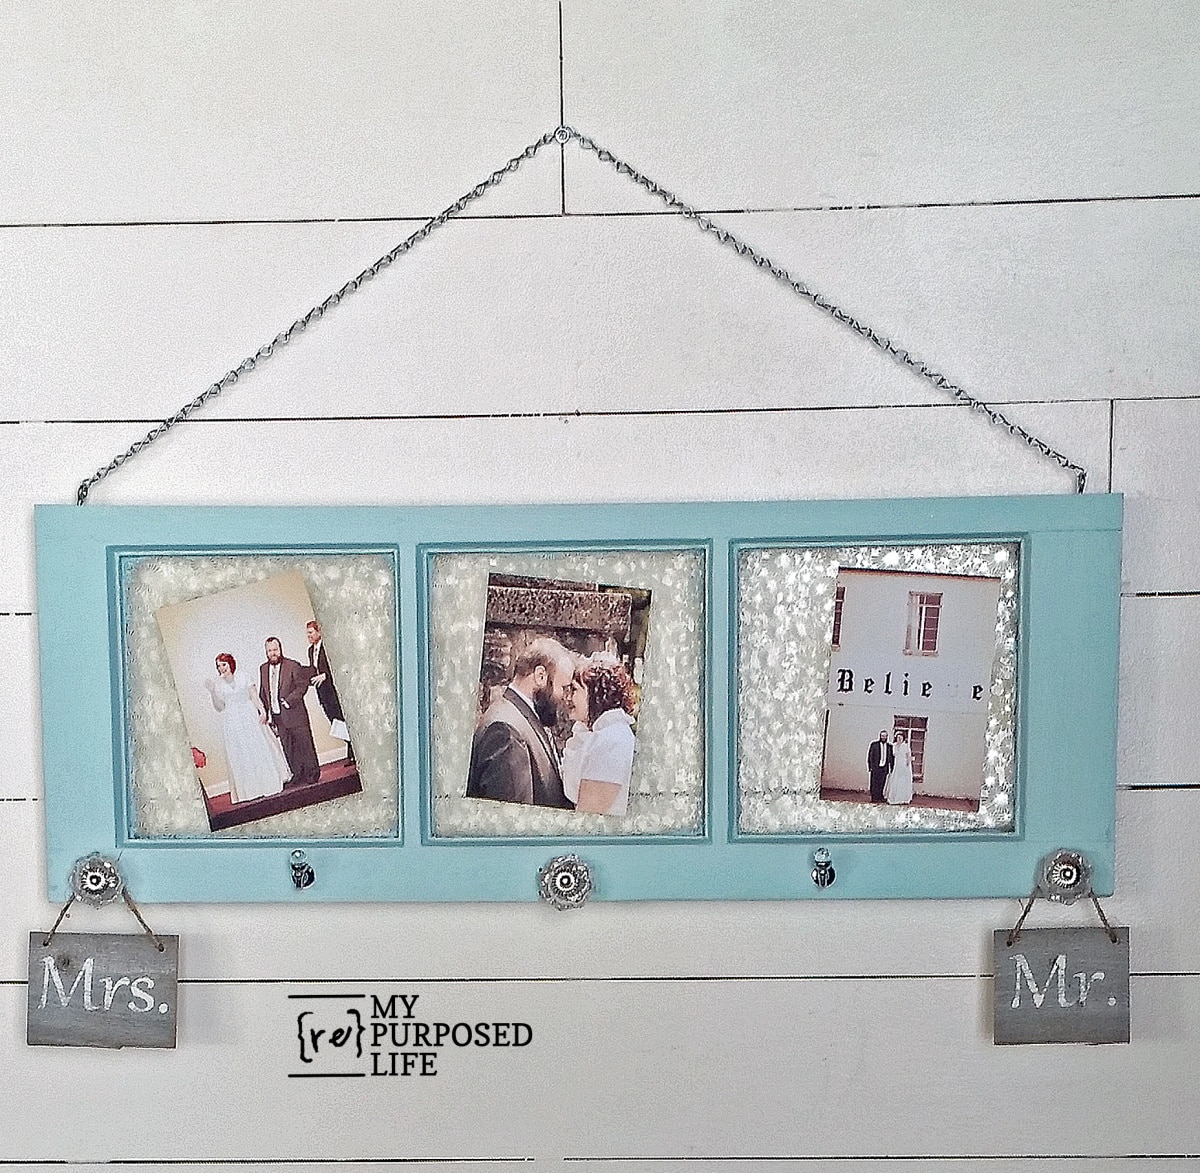
I added some of my favorite photos from Andy and Jamie’s wedding (daughter and son-in-law), along with some cute Mrs. and Mr. signs.
It’s not exactly like the inspiration photo, but I love how it turned out.
I love it when a simple project turns out to be both pretty and practical. This old window may have started with a few flaws, but those flaws made it affordable and gave me a reason to get creative. Add a few hooks, a couple of favorite photos, and suddenly an old window becomes something useful again.
gail
I love making coat racks of all kinds!
I was in a hurry to get through this post because I’m like..now how is she going to make a coat rack out of that, (thinking of a different sort of cost rack) and I was stopped in my tracks when I saw the finished product! So absolutely adorable!!
I’m not a fan of teal in any way but I was pleasantly surprised at how nice the color was with the way each window panel looks. Kudos to you for a job very well done!
Gail, you did an awesome job and I love your’s more because it is repurposed!!! BEAUTIFUL!!!
Thank you Tammy!
I love, love, love repurposing junk that most people wouldn’t even bother dragging home!
gail
It’s pretty. I especially love the color. I must learn how to use power tools — I’m jealous!
We all had to learn sometime. I was nearly 50 when I started doing his full time. I’m self taught along the way, watching YouTube videos and such. 🙂
It’s never too late to learn. 🙂
gail
Your version looks much nicer than the inspiration piece! Great job.
Hi Gail, did you happen to notice how the photos in the inspiration piece were held in. I have a big window door from an unfinished built in hutch. I’ll never put a finish on it. It has a beautiful patina from being handled all these years. It’s from the late 30s. I want to pick some favorite photos, maybe photo shop them sepia or black and white. I also should maybe put a mat so they don’t stick to the glass. That glass scraping tool is awesome. I’ve used it for everything from paint, to tape residue, to the tar like gunk from a mirror that had been in a fire. Oh and if you have a mirror that’s just to bad to use, and you already have 3 chalk boards, you can scrape it. Be careful to wear safety equipment, and clean up all of the flakes. Most have lead, silver and mercury to make them reflect. Check with your sanitation department how to dispose of it.
Jennie,
It appears that the photos are just “tucked” into the edges. I think I need to do another project and apply some decoupaged pieces like this one. 🙂
Of course I couldn’t do that with the frosted glass.
I’m thinking some kind of scrap booking dots might work to hold the photos?
Thanks for the wonderful tips about scraping paint, mirrors, etc.
gail
Hello Gail, I am not much of a writer, but I wanted to say thanks for all your wonderful posts. I have so many bookmarks and pins from your site, I feel like I’ve known you a long time!!???? I am always amazed and impressed by your work!
Rita,
Thank you so, so much for your sweet comment. You are why I love doing what I do. I like helping people, inspiring them, and showing them tips and tidbits along the way.
I appreciate you!
gail
How did you attach the pictures? I have an old window from my Grandparent’s home and want to do the same thing. Looking forward to you reply.
Thanks
Martha
Martha,
I used heavy duty double stick tape and some Gorilla tape rolled up. Mine were a temporary staging option. I think mirror mounting squares would work really well.
gail
A dollar? at our Habitat in Grand Junction that window would have been at least $15, stores in GJ are greedy, even our thrift stores.Every time I got to our
goodwill hear people grumbling about prices. I only shop at Goodwill on Wed. senior discount day. Habitat used to give 15% discount on veterans and senior day but now have both days every day and discount is 10% instead of 15.
Love how your textured window display turned out, knobs and hooks look great with photos and little Mr., Mrs. signs.
Do you buy your knobs at Hobby Lobby when they’re 50% off? Being on SS in an expensive area have to make good use of sales, % offs, discount days.
Looks like you are busy crafter/rehabber. I love to redo pieces when can get them.Our problem is storage, no garage or basement. We live on 1/2 acre out in rural area few miles west of Grand Junction.
Hubs does all lumber cutting, putting together as my hands don’t work too well, have arthritis in hands, wrists and nerve damage from accident in right arm, no strength. Rather limits what I get to have made.
Love your wonderful window display, enjoy it. Have great rest of week
Thanks for stopping by and taking the time to leave a comment Jane. I appreciate it. Many items in my area are overpriced as well.Our Goodwill stores rarely have sales, so I don’t usually shop there. I have found the key is to go often to scoop up the good deals before someone else does. I think the window was priced so low because of the damage it had. I imagine they thought someone might buy it just because of the glass. I wanted it because it was small and narrow.
I hope you find something fun to do that keeps you creatively charged. 🙂
gail
Wow, this is such a creative DIY. I love the overall look, especially the color you choose. Mint green looks simply gorgeous. Thank you for sharing the tutorial!
Love it Gail, great find on the window. Alot of people would have passed it by because of the damage, but you just cut it off! Colour is great too!
I knew it was definitely worth a dollar-especially since I had just seen the one at cracker barrel.
gail
Good golly, to have your skills with a saw, screwdriver and putty knife. Adorable project.
So beautiful!!!