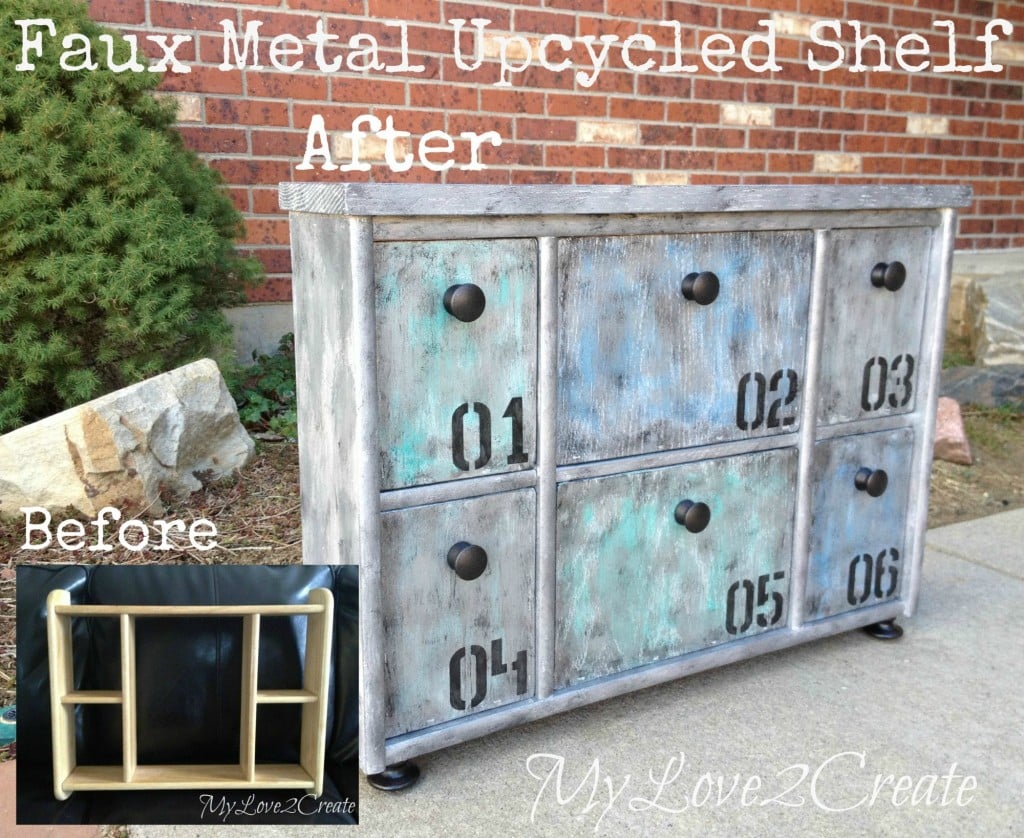
Today I am sharing my new upcycled shelf! My in laws gave us this shelf about four years ago when we moved to Colorado. It started out on the wall in my oldest boys room, but when we moved them into a different room we never hung it back up, it has been collecting dust ever since. Until now…
Faux Metal Upcycled Shelf
Much better! Here is a closer look at the shelf before.
MyLove2Create, upcycled shelf before
I have always loved little drawers and this shelf had good sized cubbies that were perfect for this sort of makeover! Similar shelves are always popping up in thrift stores, so why not make them fun and useful again?! Let me show you how I did it…
MyLove2Create, cutting off ends
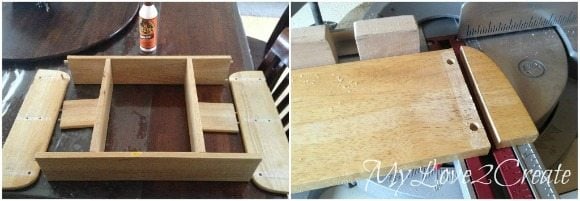
First off, this shelf had been moved around so much that it was falling apart, so I helped it out a little by prying off the side pieces. Then I cut off the curved ends with my miter saw, making them flush with the top and bottom boards.
MyLove2Create, putting back together
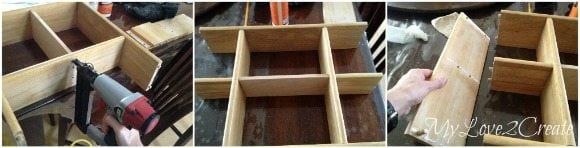
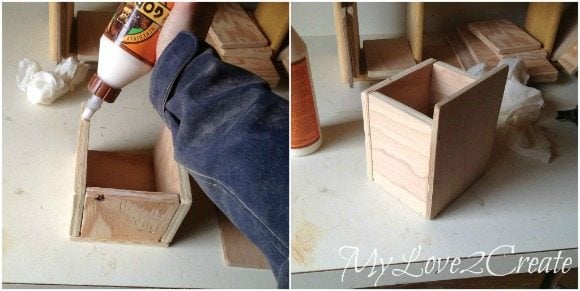
I wanted to make a middle shelf so I could have six drawers. I measured and cut a scrap piece of wood to size, then used my Gorilla Wood glue and nail gun to secure it (top left photo). In the middle photo above you can see I glued in the two side dividers. Then I added more glued to then end pieces and put them back on. I went around with the nail gun to hold everything in place until the glue dried.
modified shelf
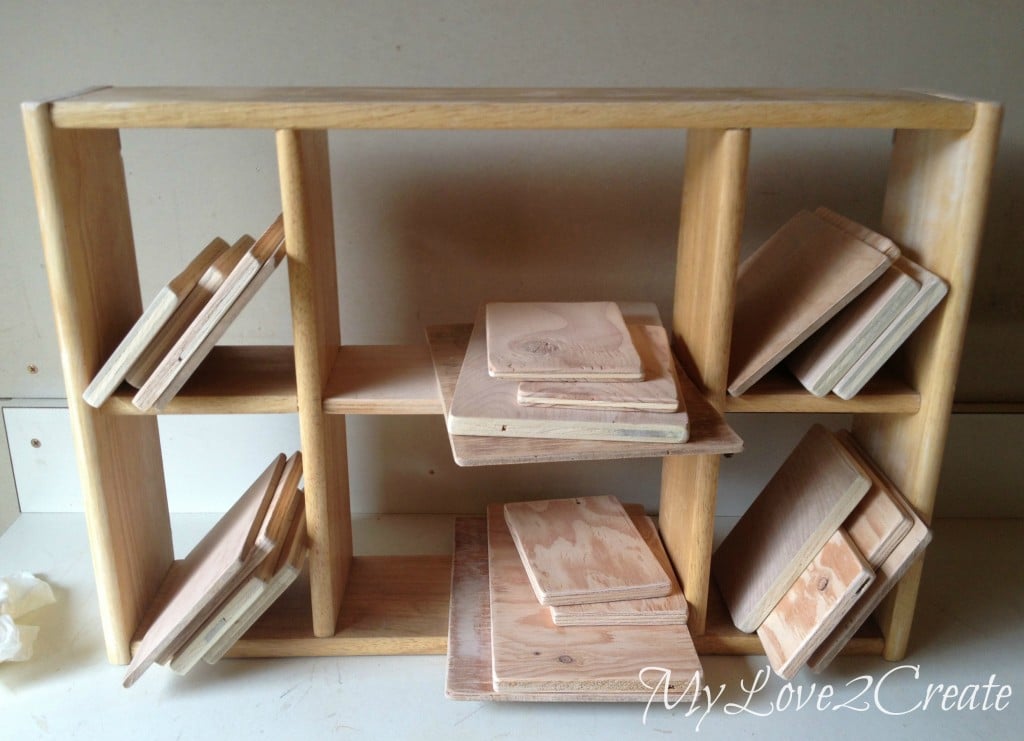
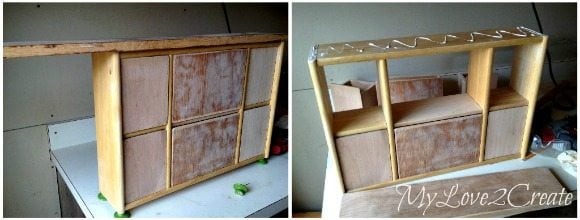
This is what I ended up with. I was ready to make some drawers!
Drawers cut and sanded
Since I have a plethora of scraps left over from my master closet makeover, I was excited to use them for this project. I set to work measuring, cutting, and sanding, then I went to build. Oops! I forgot to make drawer bottoms…dang! More measuring, cutting, and sanding…thank goodness only six this time! I kept the drawer pieces in each cubby that they were measured for, because not all cubbies are created equally.
MyLove2Create, build boxes
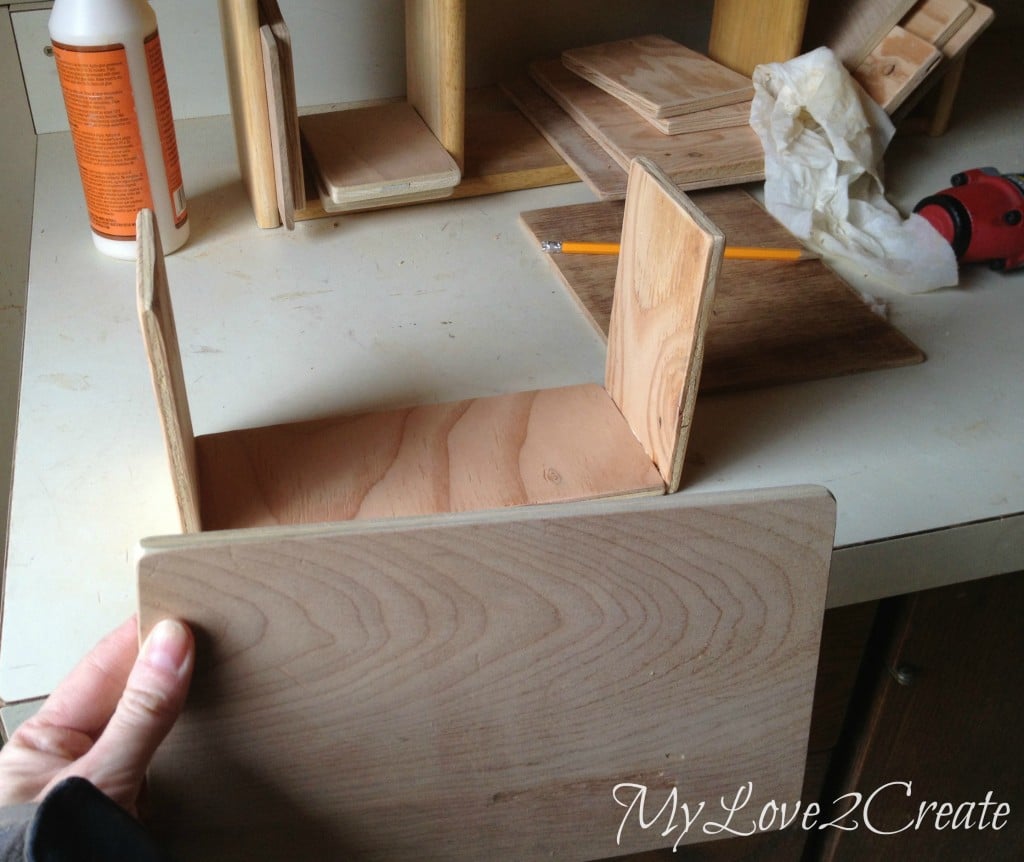
To build, I like to glue and nail the sides to the bottom, then I am ready for the back piece.
MyLove2Create, adding front
Glue is what keeps the boxes strongly held together, the nails are just to hold it while the glue is drying. You can see my drawer or box all built with the front on. I used 1/4 wood for the fronts, these were scraps from my closet drawer bottoms. Gotta love those scraps!
MyLove2Create, adding top piece
I thought it needed a little beefing up on the top, so I grabbed a scrap board. I let it over lap just a little then cut it, glued, and nailed it on. You can see also that I am trying out some old knobs as feet. I also did this on another project recently, my DIY Corner Fruit Tower. It is a great way to repurpose outdated knobs. Plus they make cute little feet!
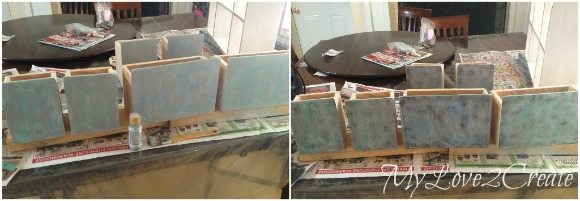
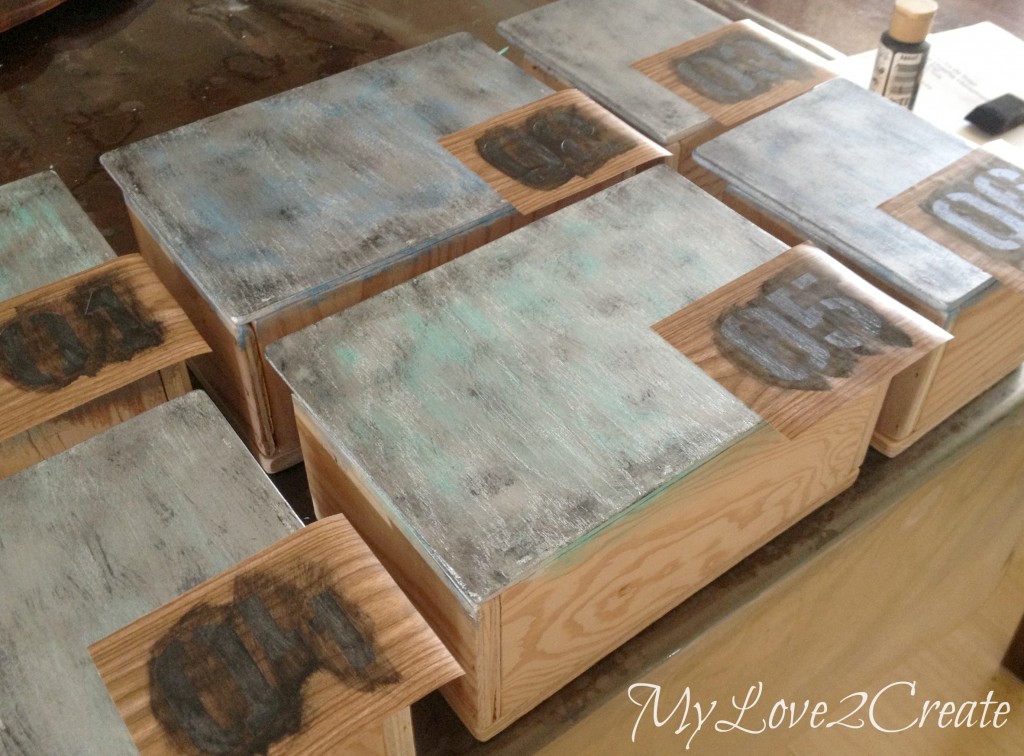
MyLove2Create, white and color coats
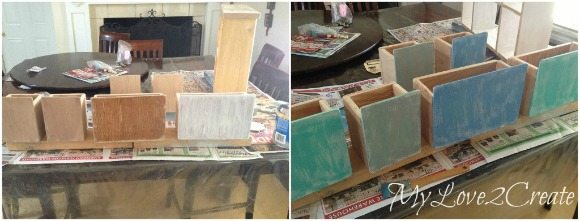
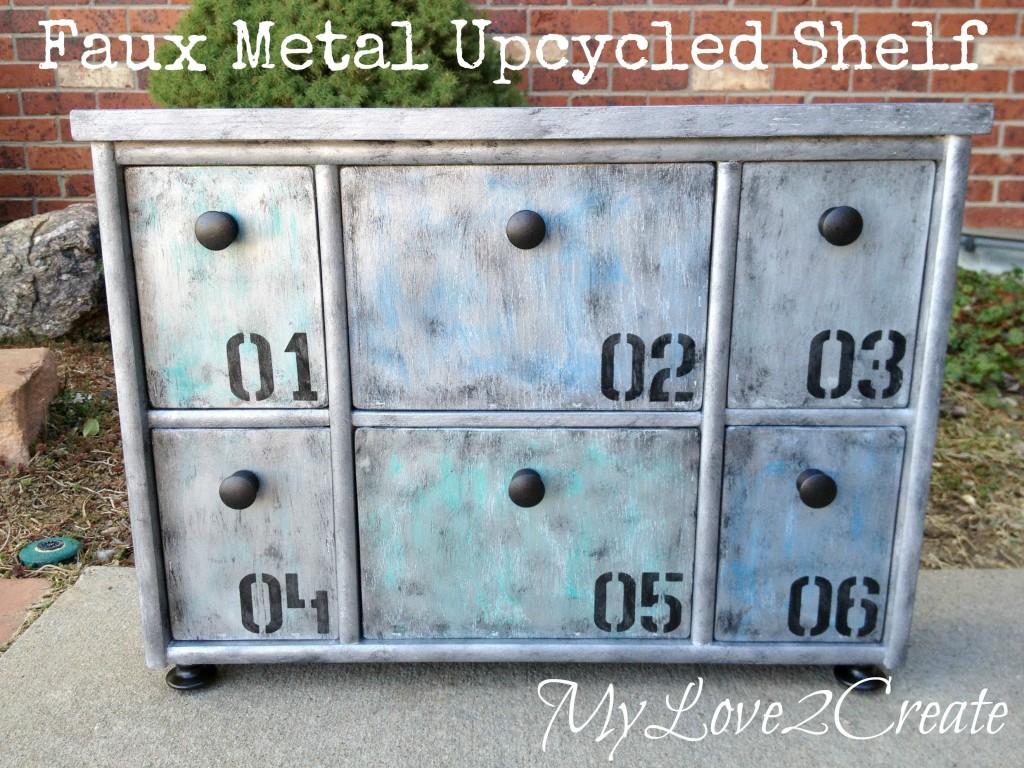
Deciding how to paint a project is always the hardest part for me. I love the look of metal and really went out on a limb to try the faux metal finish. I began with painting the drawer fronts white (top left photo) and I didn’t make it a great paint job either as you can see on my first drawer. Then I slapped on some green, blue, and gray on different drawer fronts.
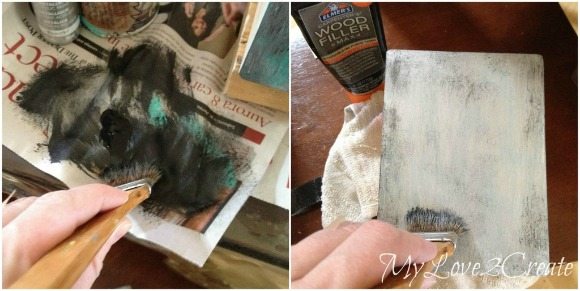
MyLove2Create, silver and black
I used a metallic silver craft paint and painted it on pretty randomly. Then I finished off with some black accents.
MyLove2Create, light black strokes
To do the black, I just got a little on my cheap brush and then rubbed most of it off before painting it on my drawer front. Again I was going for the random, not perfect look.
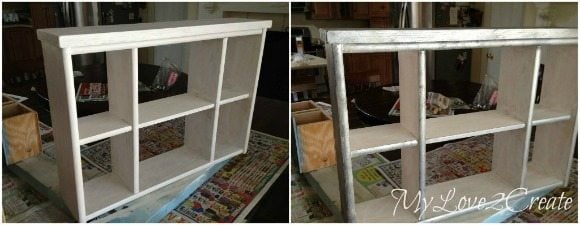
MyLove2Create, painting shelf
For my shelf I did the same, but skipped the color. On the left you can see I brushed on some white, and on the right I did the metallic silver, and started with the black accents. In the photo on the right you can see that only the left side of the shelf has the black , can you see the difference?
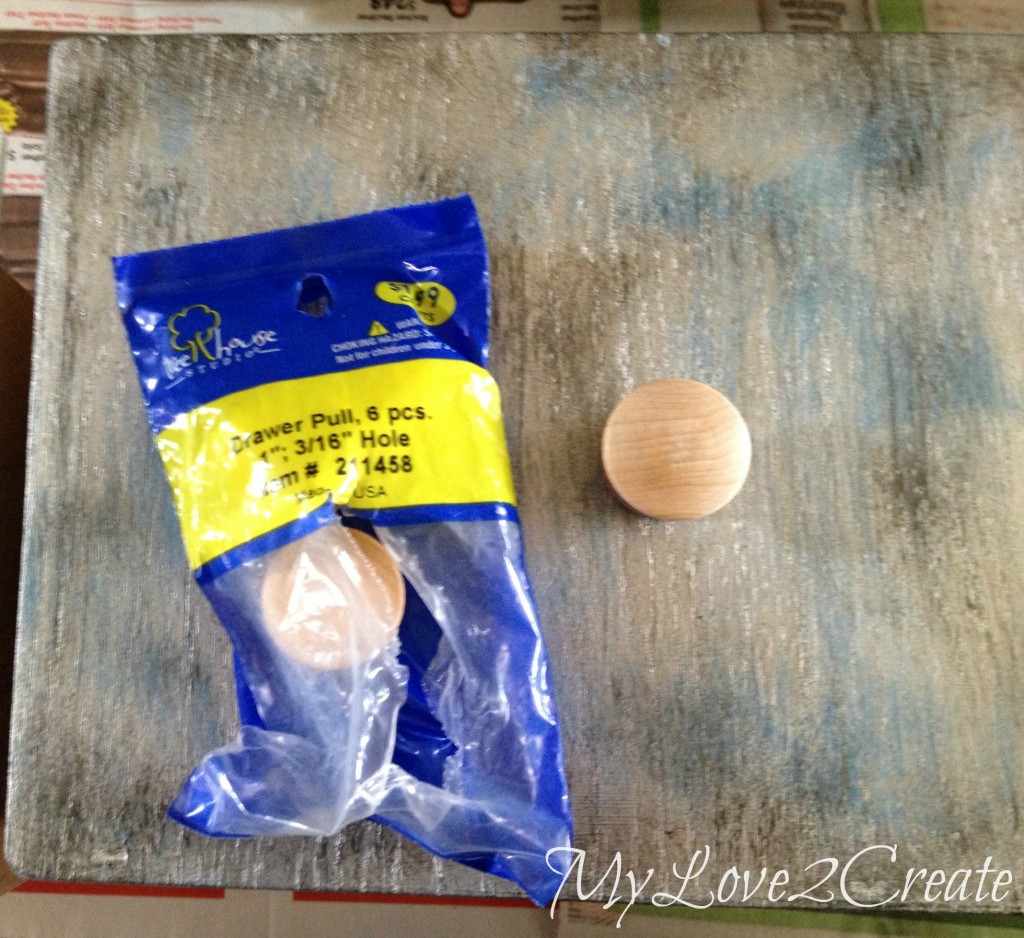
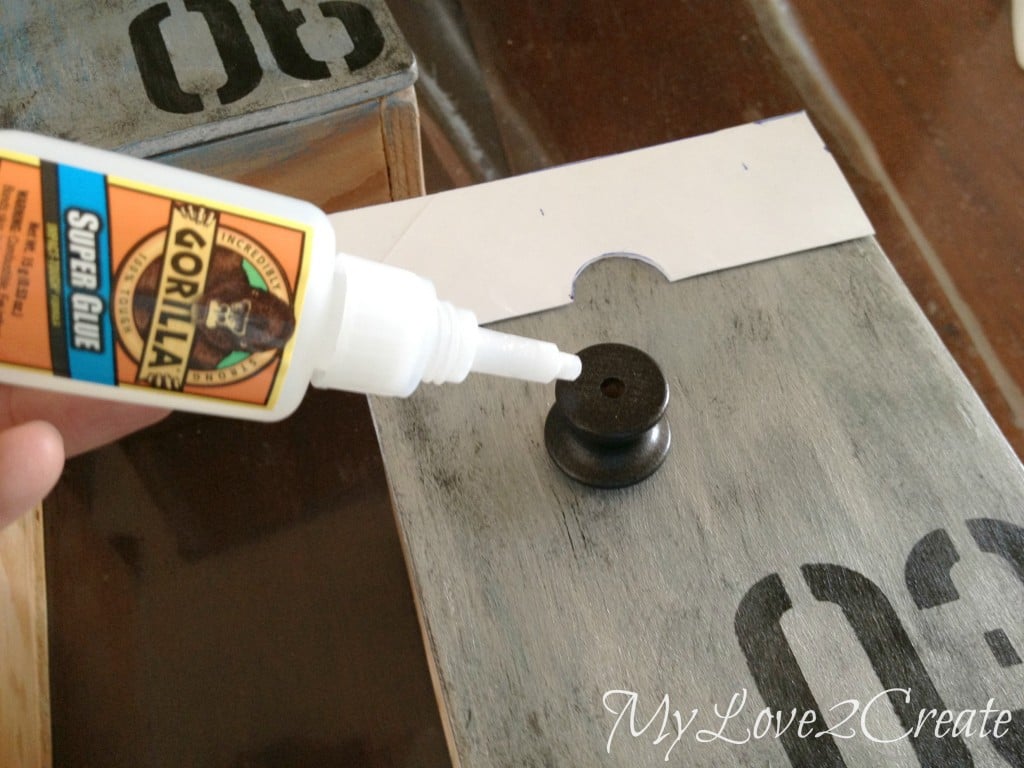
MyLove2Create, drawer pulls
I got these drawer pulls from Hobby Lobby and they are only $1.99, but with a coupon it was $1.20 something. I spray painted them and the “feet” knobs with some oil rubbed bronze.
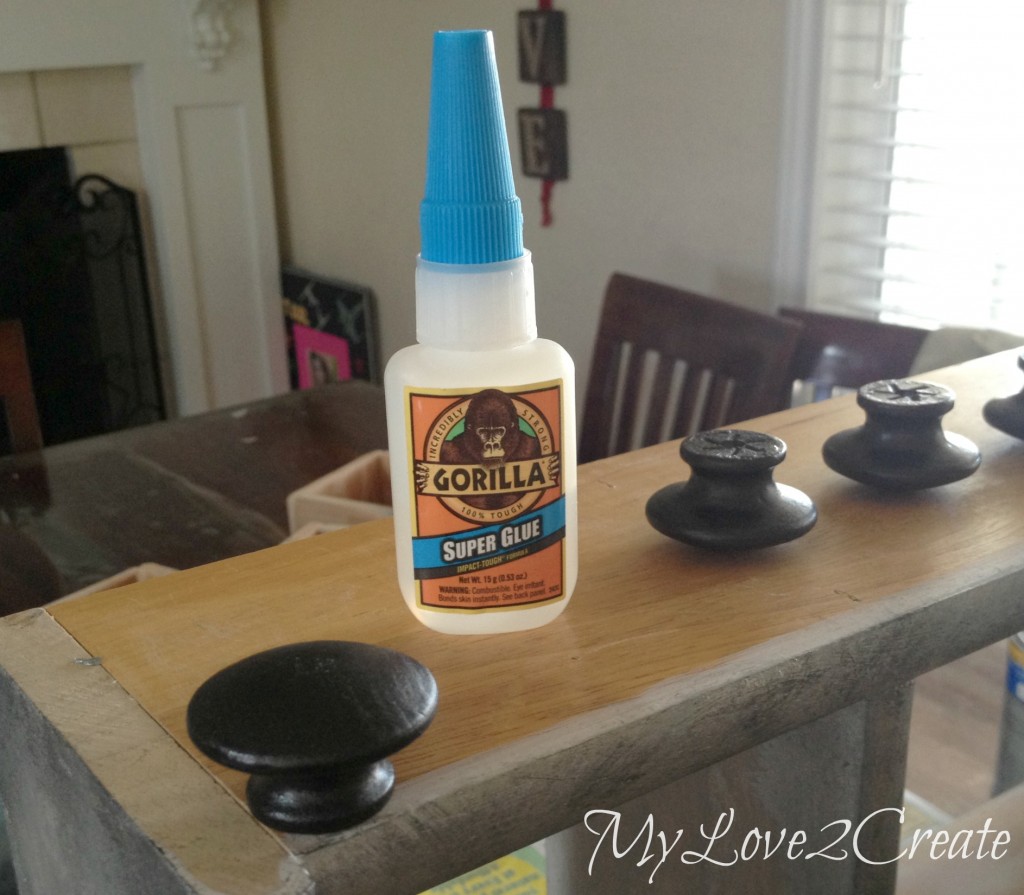
MyLove2Create, glue on feet
So, you know I love the Gorilla wood glue, well I found a new love! Their super glue is AWESOME! Normally I hate superglue. I have only used it from tubes that as soon as you open it the glue comes out too fast and then you have super glue all over, and fingers stuck together. Or those hard bottles, that you can’t even squeeze. That was not the case with the Gorilla super glue! I had full control to squeeze out how much I wanted, and it didn’t get all over! I used the tiniest drop and held it for thirty seconds. DONE, and it was stuck GOOD! I love it!
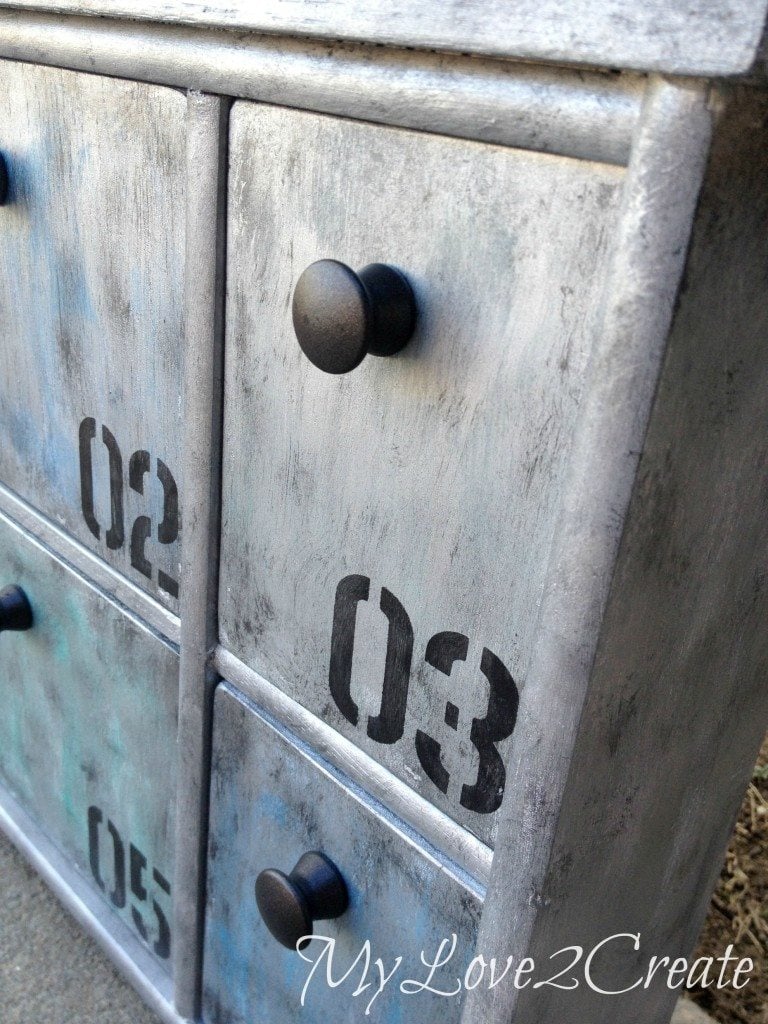
MyLove2Create, stencil numbers
I couldn’t resist making number stencils on some contact paper. I used the same black to paint them on.
MyLove2Create, glue drawer pulls on
If you are doing multiple drawer pulls, I suggest making a simple template. This one made my knobs go on perfectly, and again I was loving the glue!
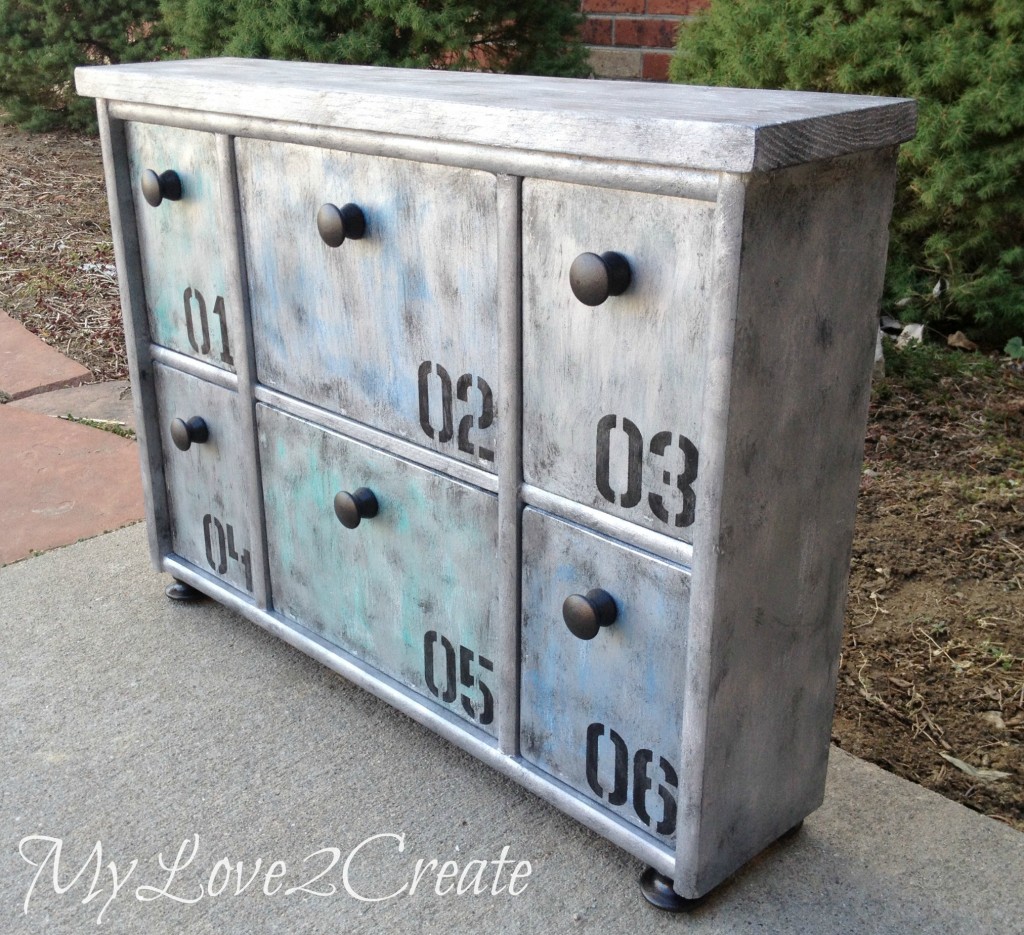
Faux Metal Upcycled Shelf, side view, MyLove2Create
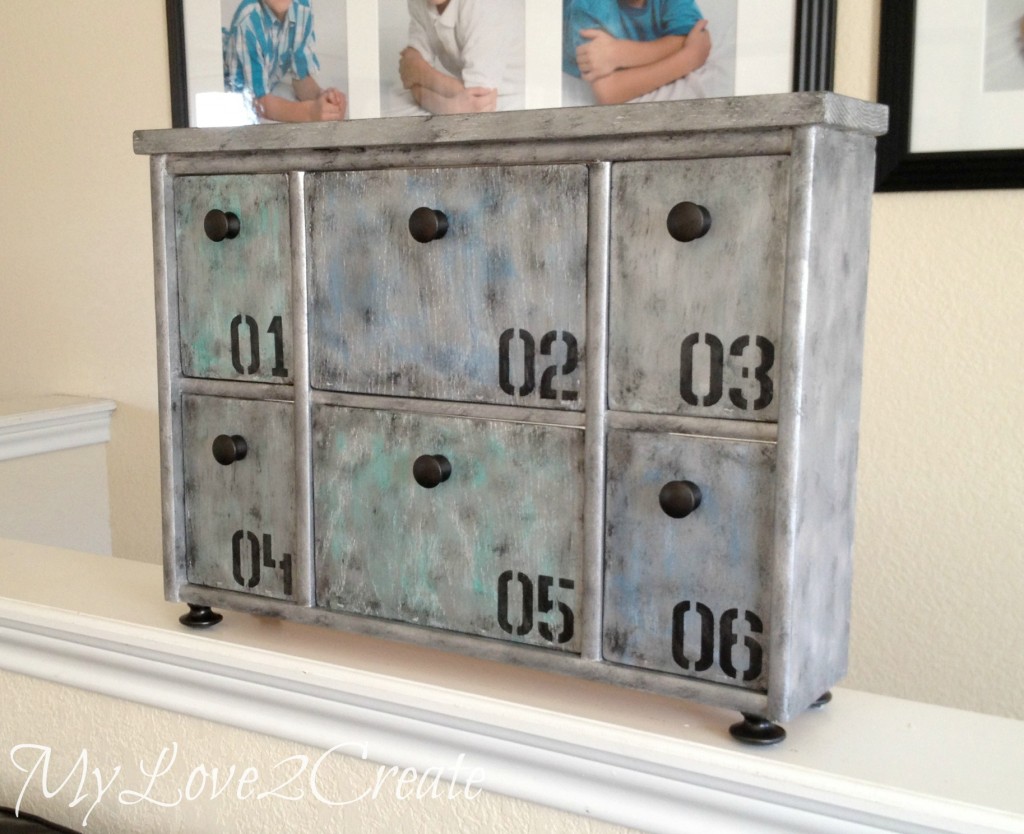
That is it! Now I have a super fun statement piece, that is very useful!
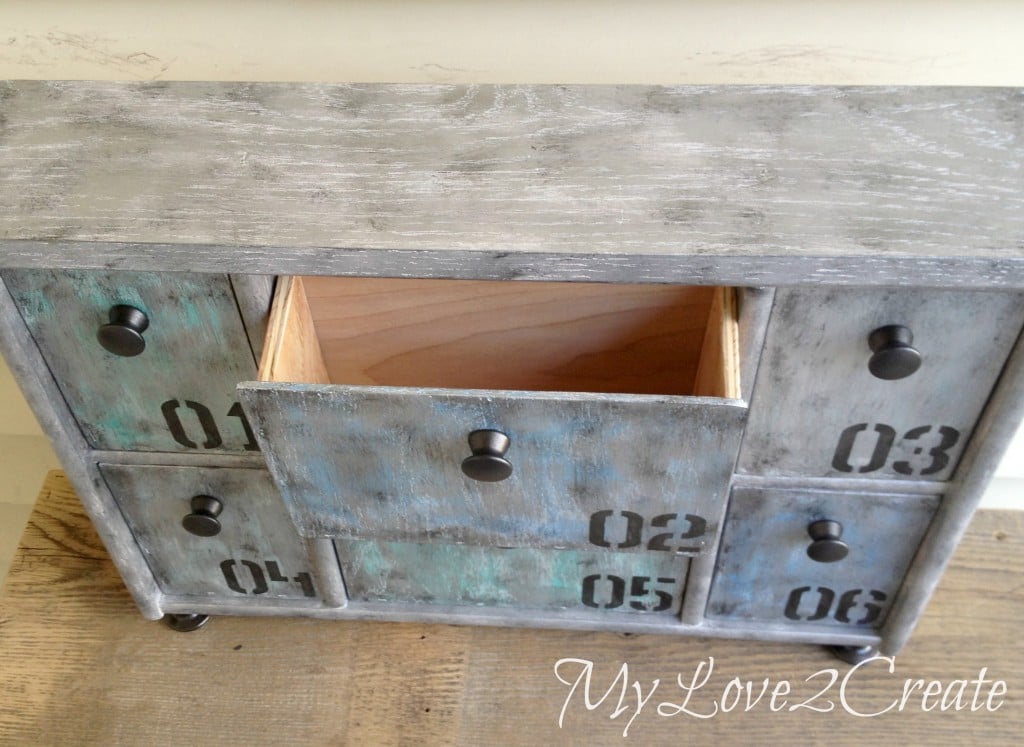
MyLove2Create, inside view, Faux Metal Upcycled Shelf
I haven’t quite decided where it is going to go, but my kids all have dibs on it…
MyLove2Create, top middle drawer open
I mean come on! Six drawers to hide treasures in…that is kid heaven!
MyLove2Create, close up faux metal upcycled shelf
I am really liking the faux metal finish, even if it isn’t perfect it adds a fun touch of industrial.
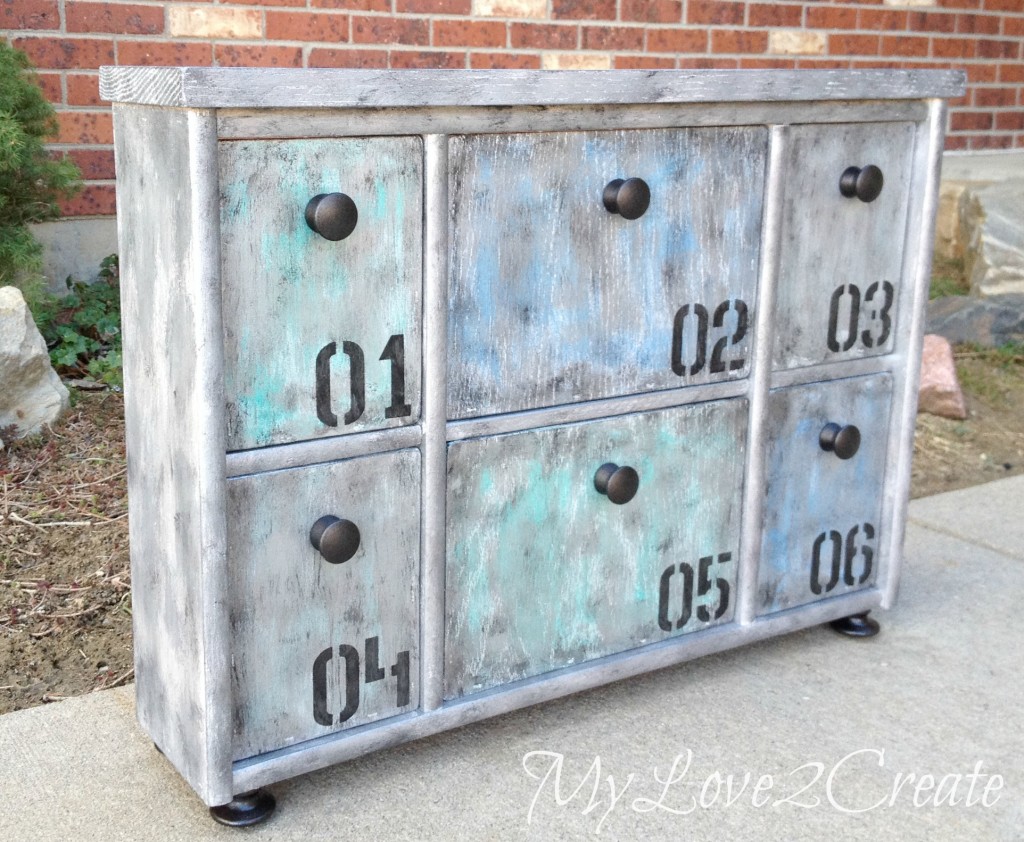
MyLove2Create, other side faux metal upcycled shelf
It is fun to have the hints of color too. I am so glad I tried it!
So… would you have guessed this…
MyLove2Create, upcycled shelf before
Could be as cool as this…?
MyLove2Create, Faux Metal Upcycled Shelf
Makes you think twice about passing up those old shelves! Do you have an old shelf you would like to make “new” again?
Mindi is a wife, mother, runner, dancer, and a lover of all things fun and DIY.
A few years ago she discovered blogs and fell in love with the idea that she could do things she had always dreamed of doing. Like build furniture from pallets, and make cool projects for her home.... Mindi was inspired by other bloggers that empowered her to create.
Mindi decided to give back and possibly reach someone out there that has a desire to create like herself. She believes we all have that desire in some form or another, and we all DO create in our own way, every day. Whether it be crafty or not, even creating happiness in others is a gift that many share.
Mindi loves to learn and use that knowledge to make beautiful and useful things for her home.
9 Comments
I stumbled by your page and I love your ideas. You are very inspiring!
Because of you I can hardly pass up a board! I would have never thought of any thing as cool as what you made. The paint finish is great and does look like metal. You’re fantastic!


I stumbled by your page and I love your ideas. You are very inspiring!
Welcome to My Repurposed Life Kim! I hope you find something here to inspire you to pick up some tools and create something from nothing!
gail
You just keep on amazing me Mindi! Awesome transformation!
Val
I love this. Very Inspiring!
Because of you I can hardly pass up a board! I would have never thought of any thing as cool as what you made. The paint finish is great and does look like metal. You’re fantastic!
This is REALLY cool! Love it!
Great job, Mindi. The paint affect you got is really cool.
She did a great job on that didn’t she.
Mindi–I LOVE this cabinet…. adding the drawers was pure genius! 6 drawers, 6 kiddos…. one drawer for each. 🙂
thanks for another super project!
gail