Old Mantel New Faux Wood Mantel
As an Amazon Associate, I earn from qualifying purchases.


How to do a faux wood mantel.
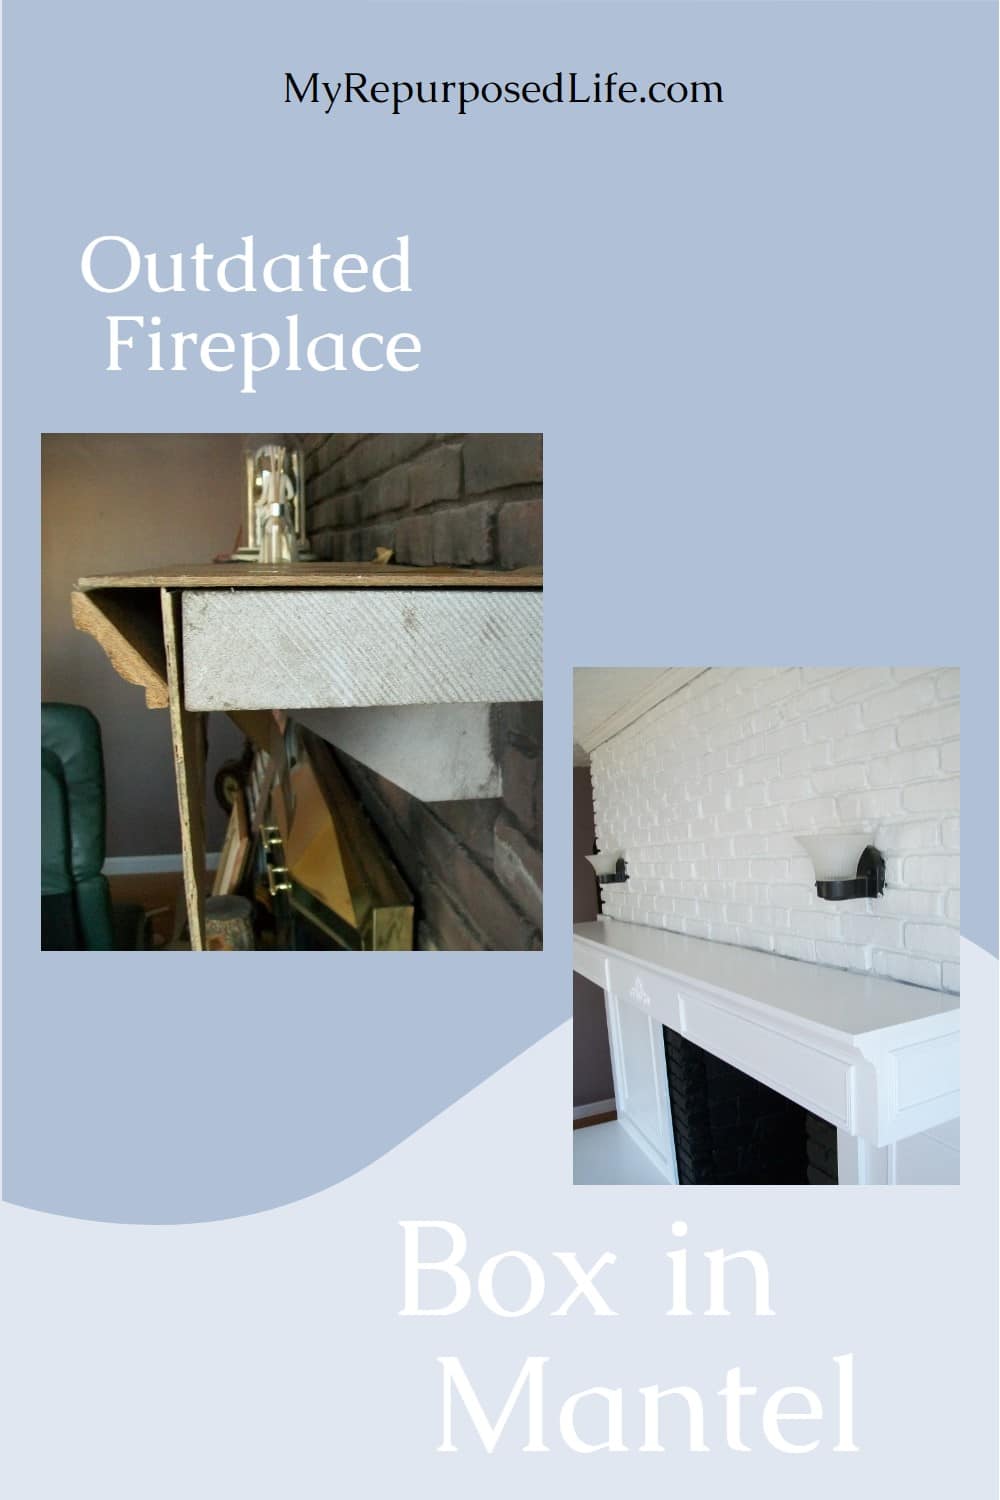
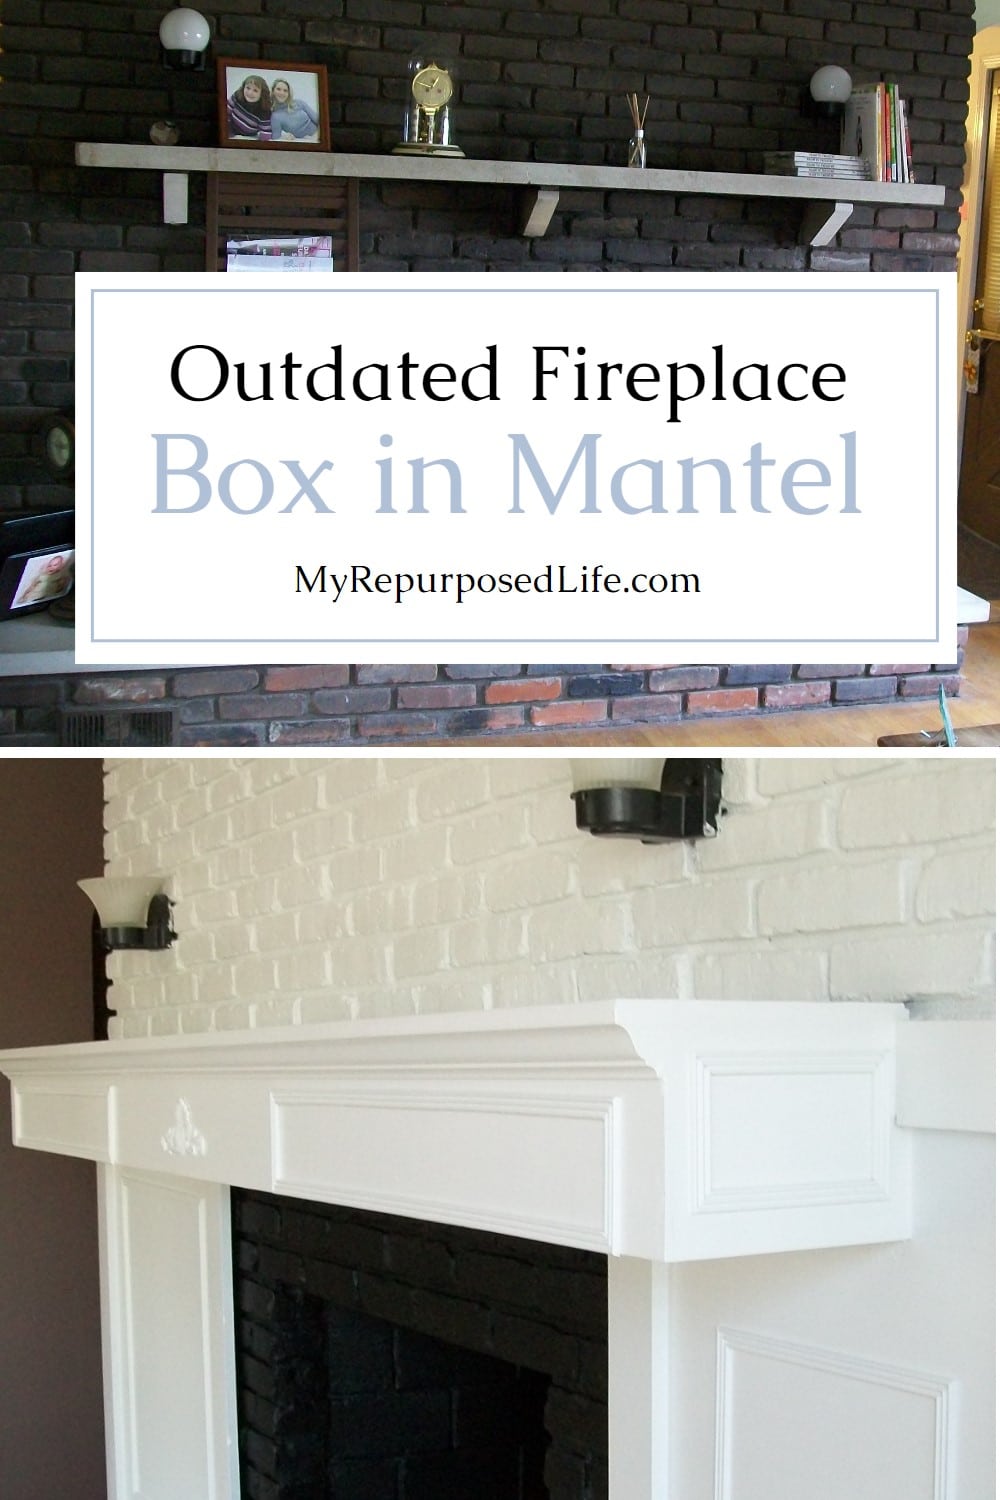
When you have an ugly 1980’s ugly fireplace with a concrete mantel, what can you do? I tackled the project with a new faux wood mantel. Well, the wood is real, but it’s thin plywood encasing the original mantel.

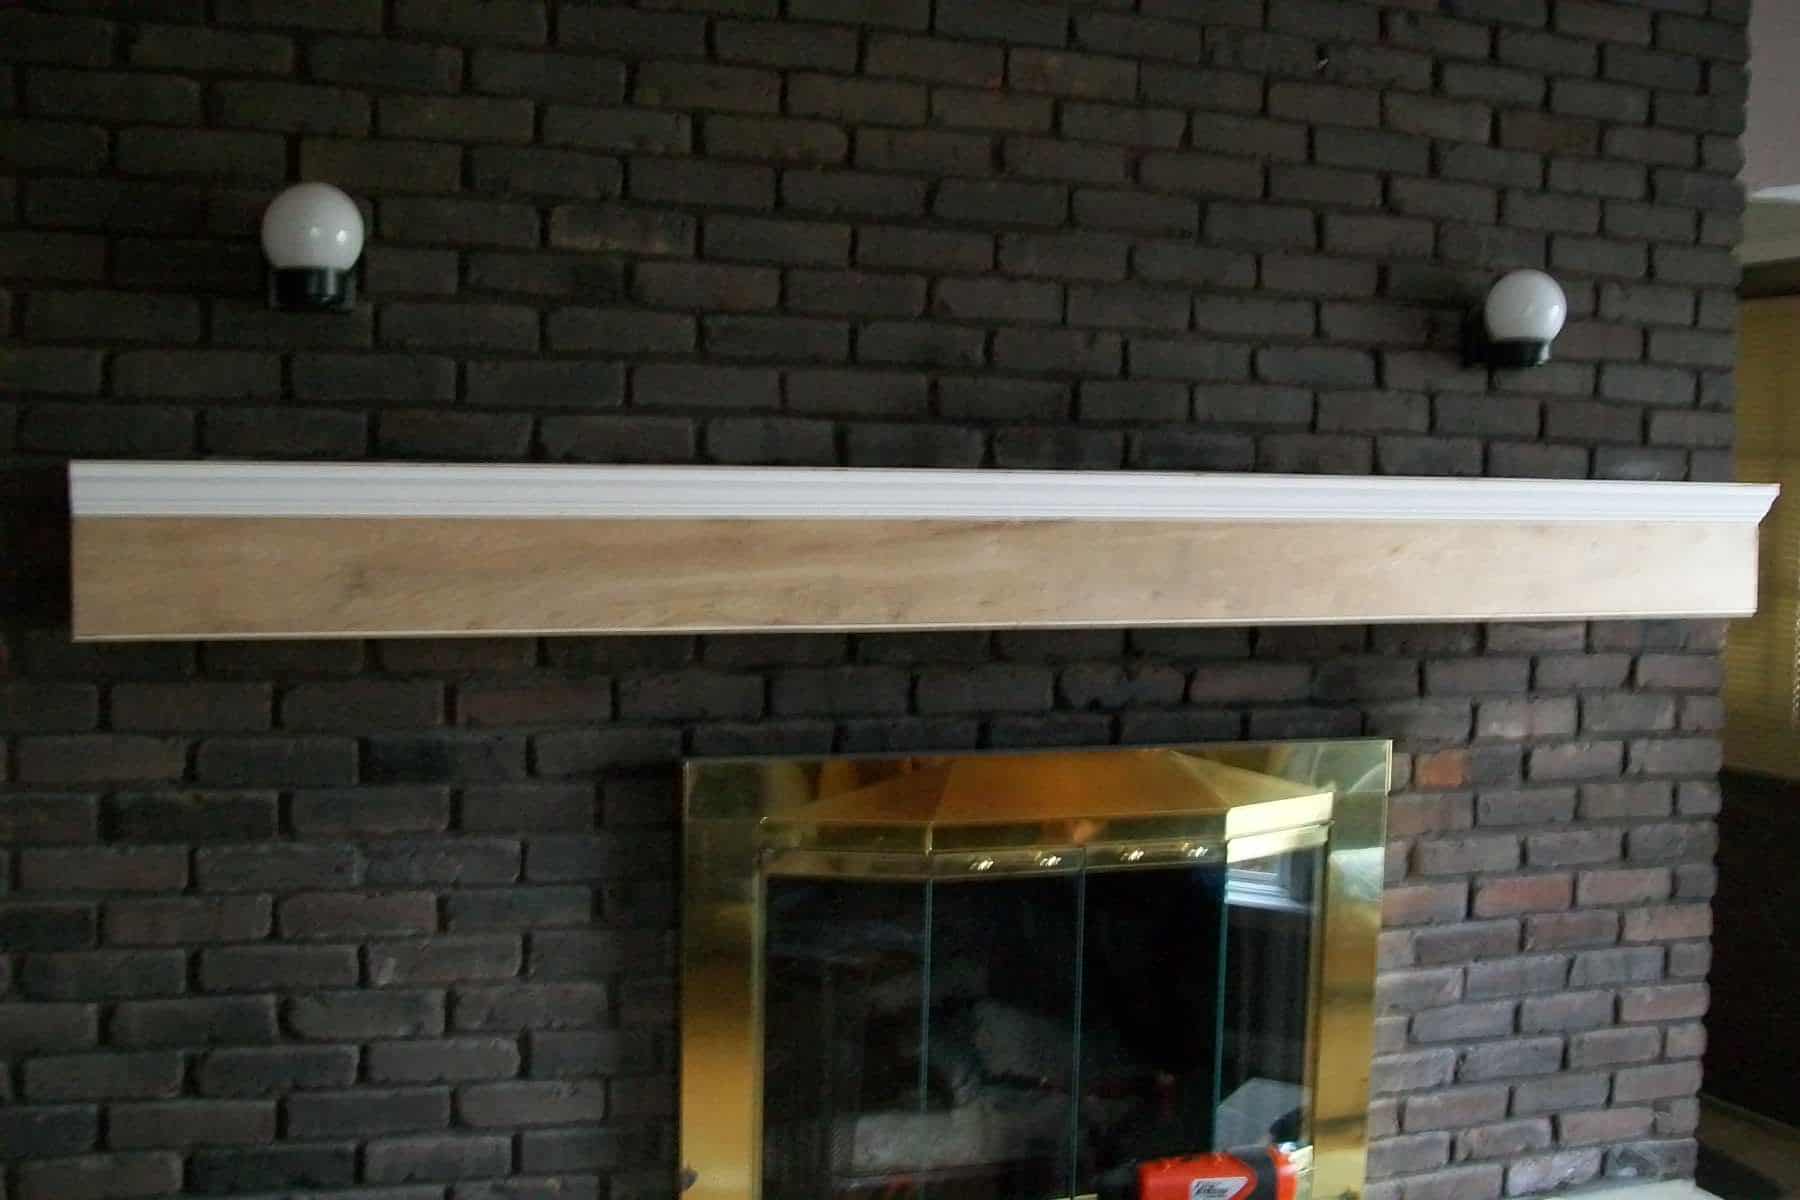
This is what my fireplace looked like last week.

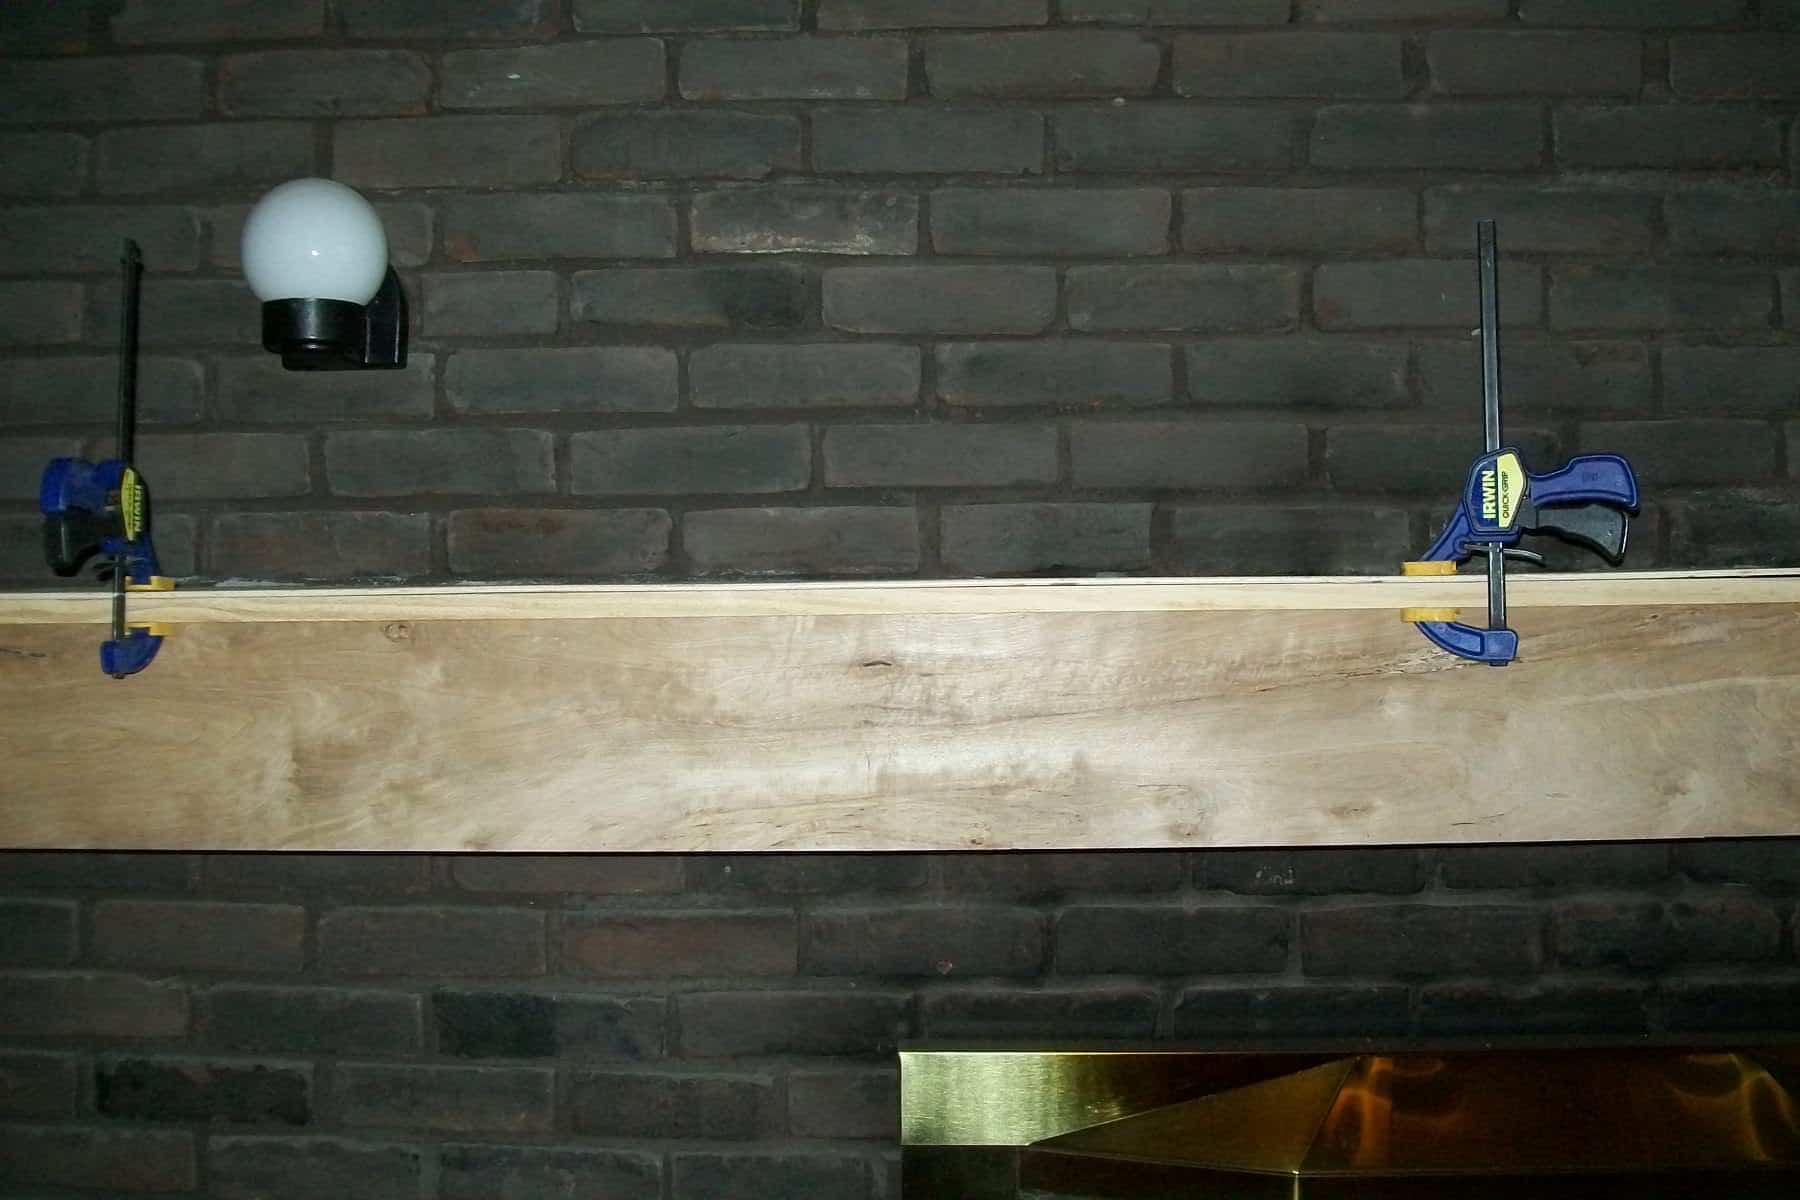
Then I did this mock-up to help me see how I wanted to make a faux wood mantel.
Cut Thin Plywood to Length

I went to Home Depot and bought my lumber. While there I had a 4×8 sheet of luan ripped into 3 pieces, one for the top, one for the front facing and one for the bottom cover. I also bought 3 8ft pieces of 1/2 by 3/4 molding.
Attach Molding in order to Secure Thin Plywood Pieces

First, I glued and nailed a piece of molding to the top front of the facing, and to the bottom rear of the facing.
Test Fit Faux Wood Mantel
Then, I placed the entire piece onto the mantel to get the right fit. (for the crown molding)
Continue to Build out the Mantel

Next, I glued and nailed the mantel top to the molding on the facing.

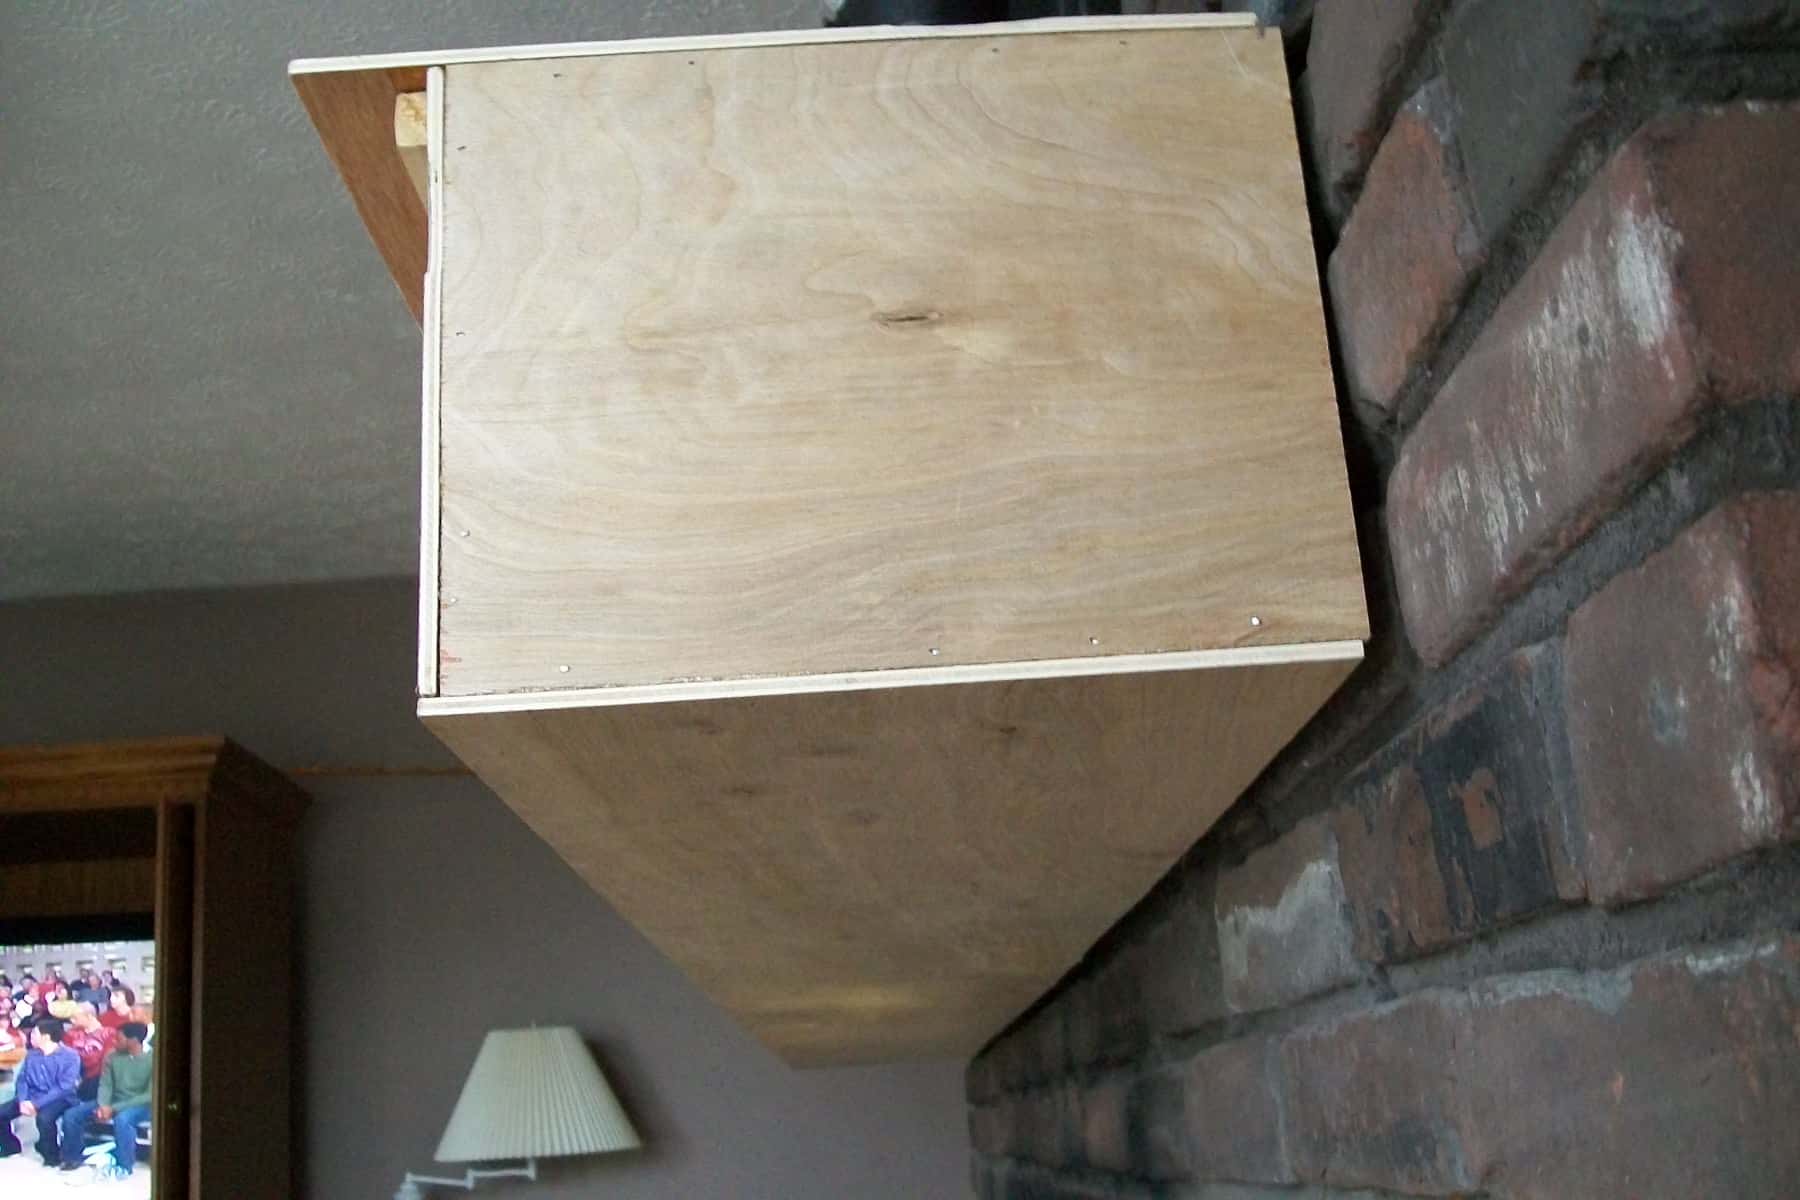
Faux wood mantel, almost there. I need to attach the bottom piece to enclose the entire original ugly mantel.

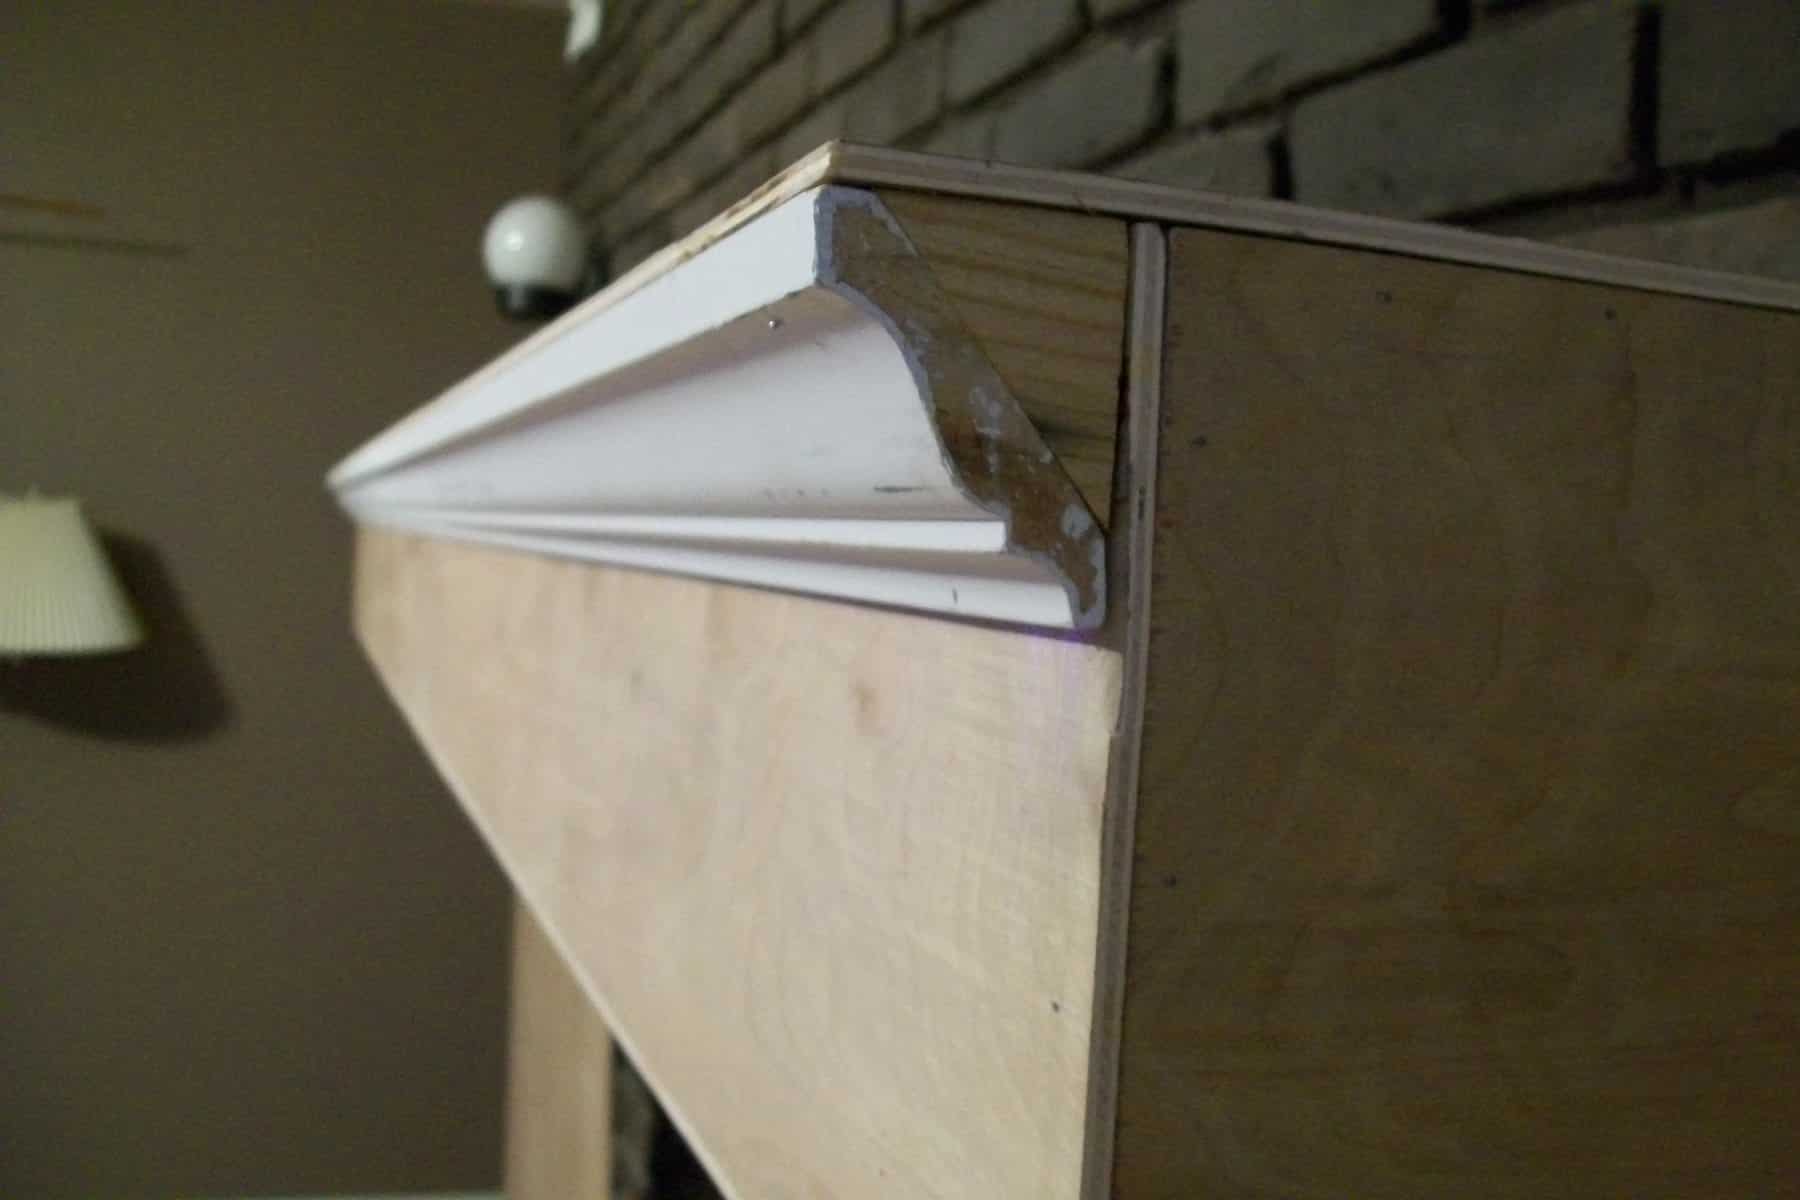
Here, you can see the other piece of molding. It is at the bottom of the front facing (rear). This will allow me to nail/glue the bottom piece of luan to the front facing.

A closeup.
Small Molding Pieces will Allow You to Nail and Glue Thin Plywood

I used the third piece of molding to make braces for the end pieces. (I’m sure all of these have technical names, but I’m doing the best I can to explain it)

These small pieces of molding are recessed to allow the end piece to set “inside” of the top and front. It’s like putting together a giant puzzle, trying to figure out which piece of the faux wood mantel would connect to the next piece!

All squared up and enclosed.
Faux Wood Mantel is Shaping Up

The view from the front/end.

Looking up, inside the corner of the faux wood mantel where the end meets the front. I attached another molding brace at the bottom so that I can attach the bottom cover with more nails and glue.
Remove Encasement in Order to add Bottom

Finally, I carefully removed the entire surround and laid it on the floor.
I glued and nailed the bottom cover to the surround. This was all much easier to do while the new faux wood mantel was on the floor.

I placed the entire surround back onto the mantel. As of now it is not fastened onto the original mantel. But, it is snug as a bug in a rug.

The view from the bottom.
The bottom and the end. It’s already looking so much better!
Faux Wood Mantel with Crown Molding
With the crown molding attached. (glued and nailed of course)
After attaching the crown molding, there was a little triangle hole that needed to be filled.

Since I never throw anything away, I was able to find a small piece of a window I had shimmed off. It was the perfect size/thickness! I made a little pattern out of a piece of paper. I used my compound miter saw to cut off a triangle on each end of the thin piece of wood.

Closeup.
You can see that I put the triangle in place. I glued it.

A closeup of the mantel. Ta da! It’s built! I still need to putty and paint, but I have more plans for the fireplace.
FYI I would have loved to “wrap” the crown molding around the corner onto the “end” of the mantel. My original mantel was almost 8 ft. To extend the new mantel top over the end on each side, I would have needed a piece of luan about 8 ft 2 inches. I did not want to piece each of the three long pieces I had ripped. I’m sure some of you (had you actually been here) could have helped me around it. However you were not here, and I was working alone, trying to hold, clamp, and nail all by my little lonesome!
Please let me know if I need to clarify anything. Stayed tuned for more updates tomorrow! If you check out my twitter or facebook you will receive more updates. I frequently have to go to the computer to google or find a reference for whatever I’m working on. So, while I am at the computer, I have to check e-mail, google reader, etc.
I also bought new baseboard and quarter round for the hallway. I didn’t even touch that yet.
gail
Check out updates here:
fireplace pt 2 (paint brick fireplace)
I just came onto your site, 3 hours ago! Have a huge to-do list now, love it, thank you for sharing!
You are good! I am impressed with what you did to that mantle. You go girl
wowza! that turned out phenomenal! can’t wait to see the finished product…
Great! I’m so impressed with what you do all by your lonesome…
But not surprised!
It’s looking fabulous! I can’t wait to see what you do next.