
Sewing Table Makeover
As an Amazon Associate, I earn from qualifying purchases.
Thanks to Deanna for sharing her Sewing Table Makeover with us!!

Hiya guys …
I’m so excited to be guest blogging here at My Repurposed Life. Thank you Gail for giving me the opportunity to share my lil’ blog with your readers.
My name is Deanna, nice to meet ya : ) I’m a mom of 2 girls, a grandma to 1 lil’ 3 month old grandson (who is possibly the best baby in the world) and a wife to a man who patiently puts up with my ongoing craziness creativity. I started It’s Just Me almost 2 years ago after reading so many other blogs that were doing what I do and said “Hey, I can do that”. I know that I’m not a writer, I tend to write like I talk, but I’m honest, I love what I do and I LOVE junk!
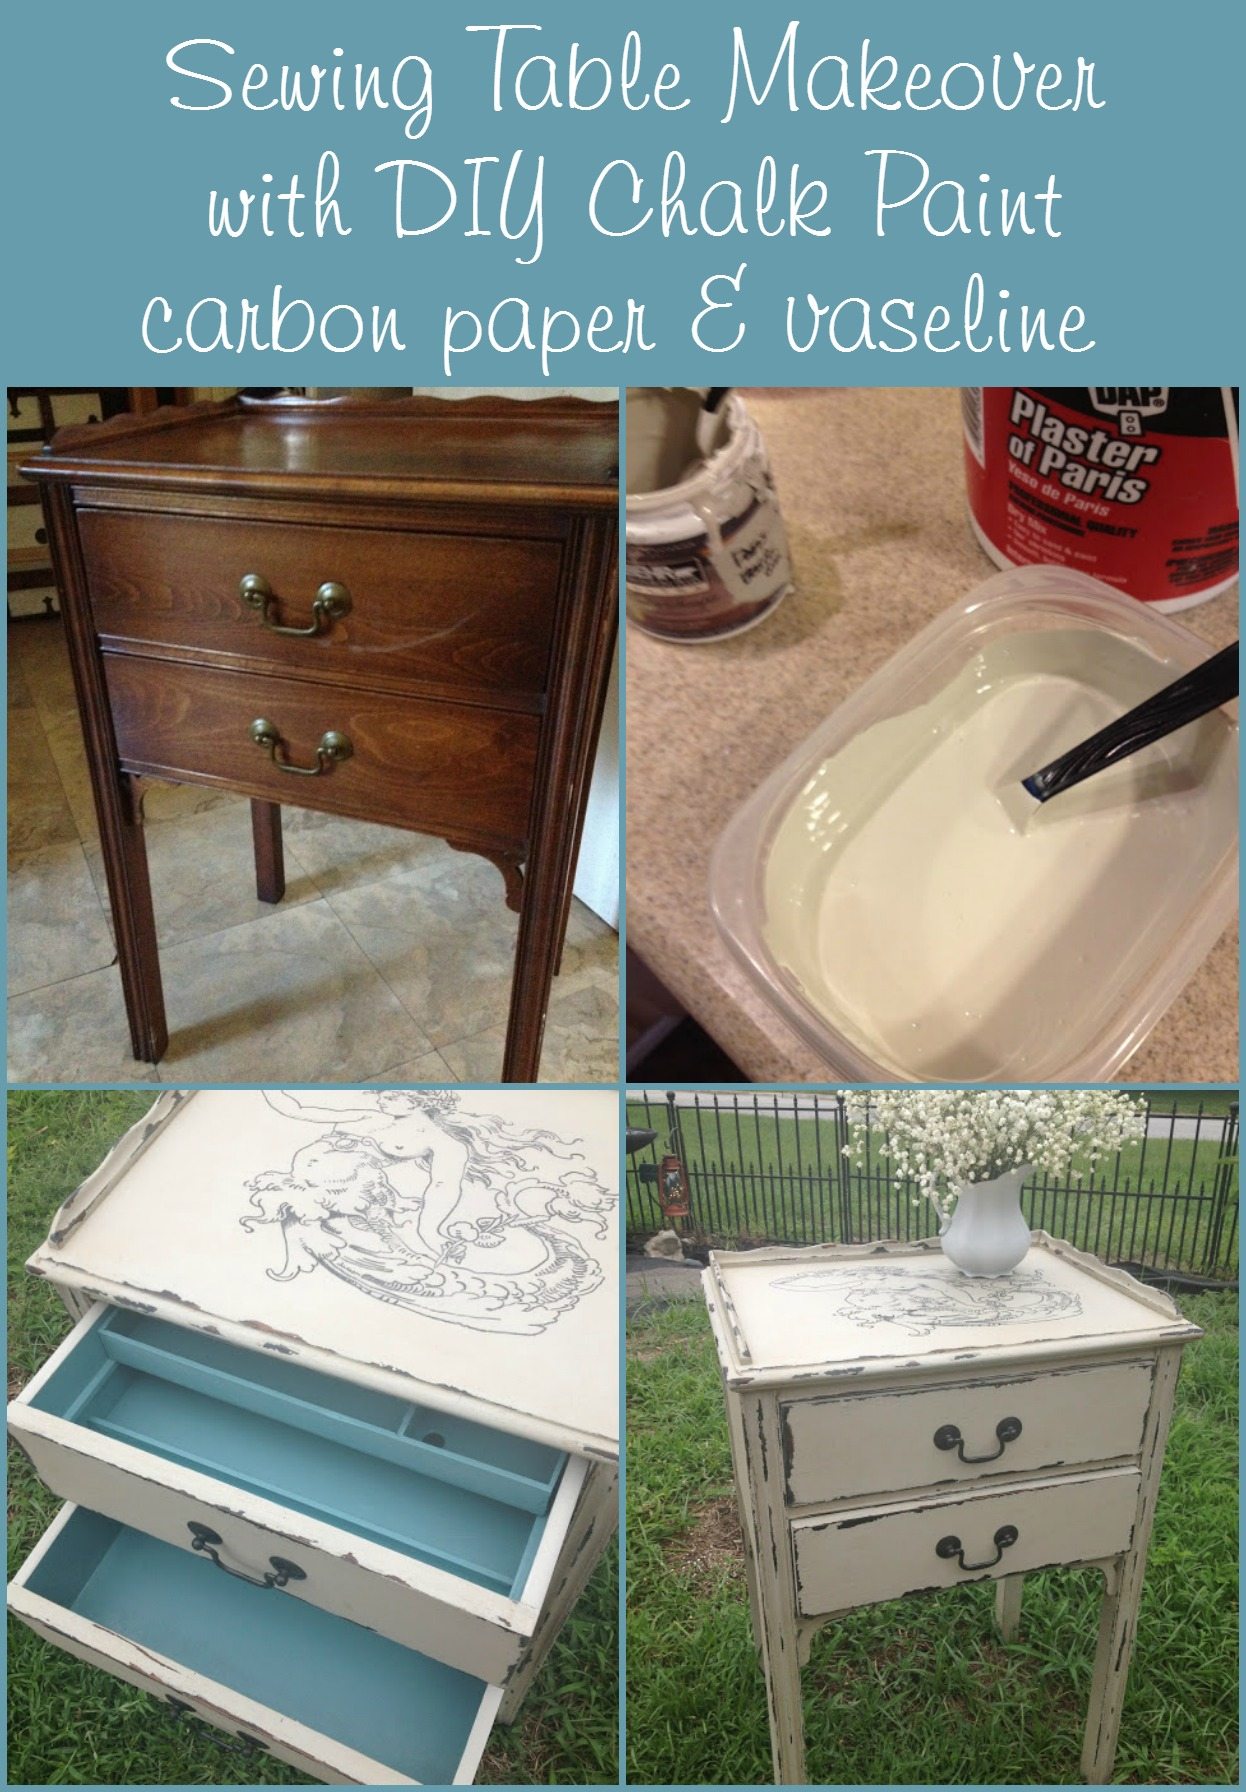
Anyhoo, today I wanted to show ya a cute lil’ sewing table I picked up at a garage sale for $10. Yeah, I know, it looks good just as it is but there’s just something in me that makes me wanna put my “touch” on it. You know, I always say, “Let’s see what THIS can become”
How to do a Sewing Table Makeover

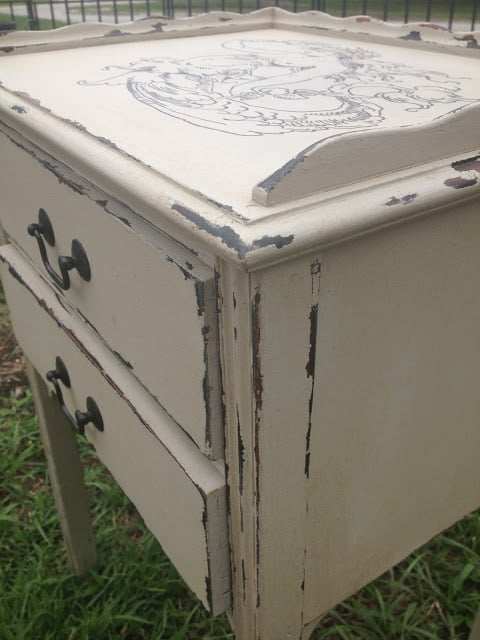
So, I decided that I wanted a light gray homemade chalk paint with distressing showing black under it. But, I also thought a great graphic on top would finish it off.
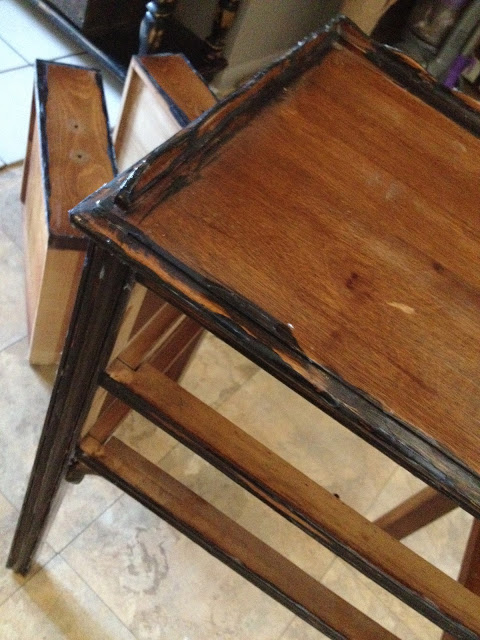
I started by lightly sanding all the edges. Since I was using chalk paint, I knew that I wouldn’t have to do much sanding or priming on the rest of the piece so I concentrated where I would be using the black paint. After I sanded I used basic black craft paint. I didn’t worry if it looked good because it will be painted over.
Add Black Paint on Edges
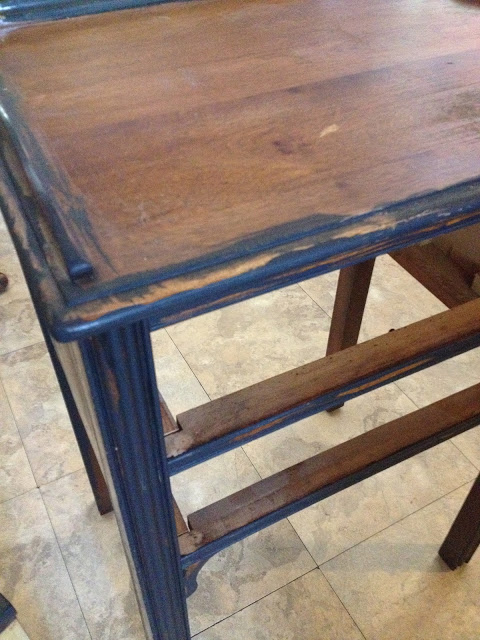
I had been wanting to try the Vaseline distressing method and thought this would be an easy piece to try it on. If you’ve never tried this method, it’s where you put Vaseline where you want the bottom paint color to show through then after you paint your final coat of paint you sand it off to reveal the color underneath. Make sense? You wanna make sure that you don’t put it on thick. Actually it works best in thin layers so I just applied in lightly on all the edges.
Apply Vaseline for Paint Resist Technique
Now onto mixing my chalk paint. I got my supplies together … sample flat paint, Plaster of Paris, water, and a plastic bowl.
I mixed about 5TBL. of Plaster of Paris with about 1 1/2TBL. water till everything was smooth
Chalk Paint for Sewing Table Makeover

Then poured in about 1/2 a container of flat paint and stirred well.

After mixing it thoroughly I applied 1 coat of paint.
 look with Vaseline")
Let it dry for about 2 hours then applied another coat.
Again, I let it dry about another 2 hours then got to distressing. This was the easiest distressing job I’ve ever done. I just used a piece of 120 sand paper. You could kinda tell where the Vaseline was because the paint was all crackly. I really like how the black shows through. It has a real “peeling paint” effect.
Wipe Paint Back to Reveal Black Base Coat
")
Now for the top. Like I said, I knew I wanted a graphic. Something feminine. I didn’t really want anything French since I tend to do that a lot like on my French Beachy Table or my Postale Box. So while cruising around Graphics Fairy I found the perfect picture.
How To Image Transfer
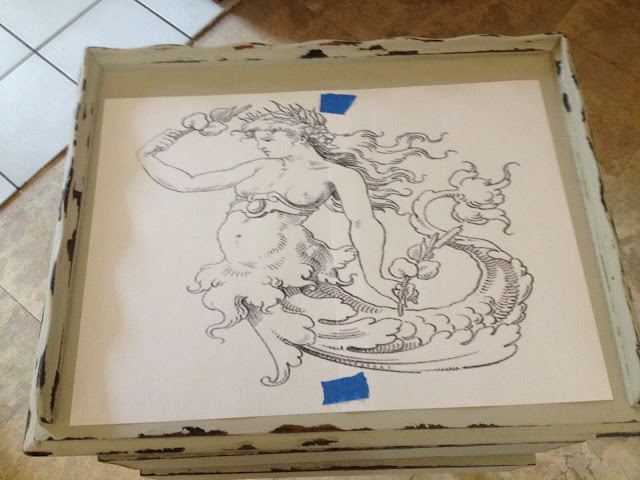
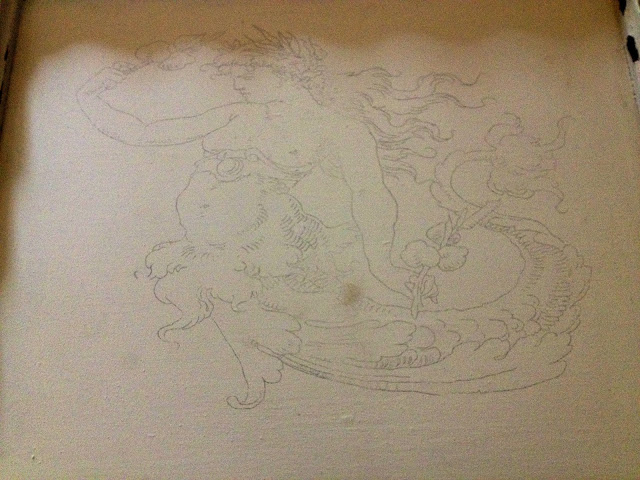
Traced it out using carbon paper. Painted it with a Elmer’s Black Paint Pen and presto, prettiness!
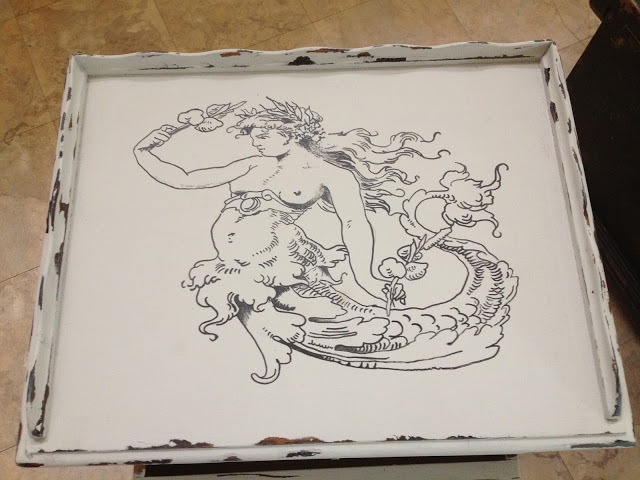
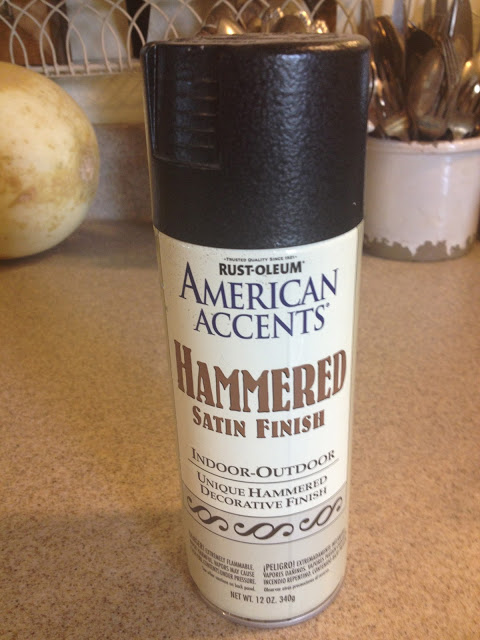
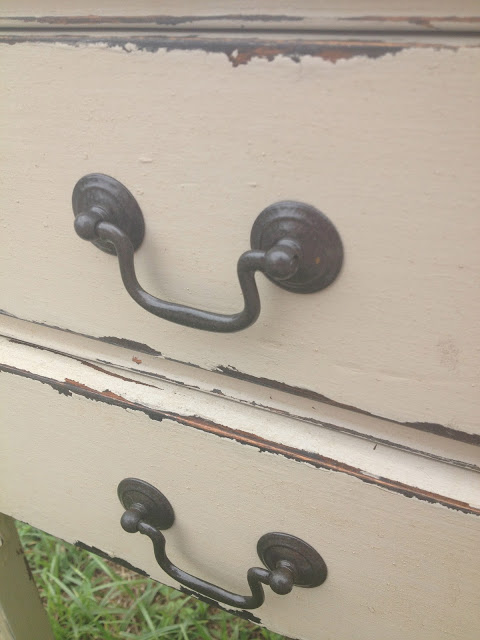
I lightly sanded the graphic then waxed the whole piece with Minwax’s Dark Wax. The hardware was sprayed with Rust-oleum’s Hammered Satin Finish. I just had a can of it in the garage. Don’t cha’ love when that happens?
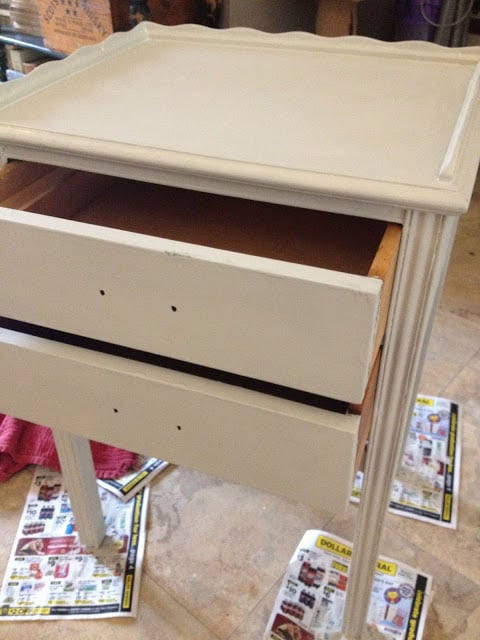
Sewing Table Makeover | Paint the Drawers
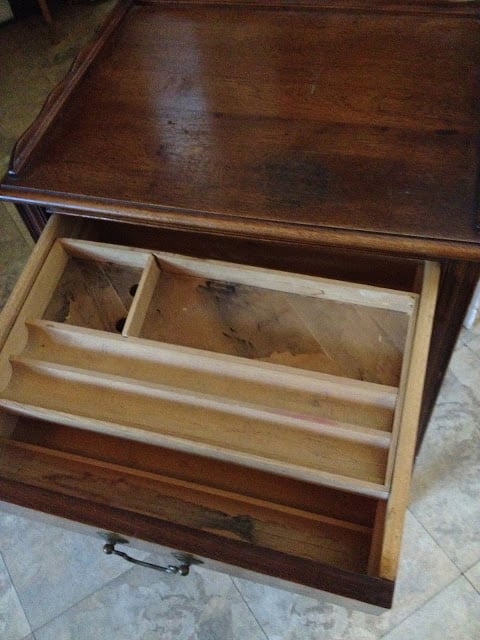
I decided to paint the inside of the drawers to finish it off so I went with Hosta from Martha Stewart.


I love taking an old dated piece of furniture and bringing it current.

She sure doesn’t look her age now. She has some serious character and I think she’s ready to hold some wonderful goodies.
Thanks Gail for having me : )
See More Sewing Cabinet Project Ideas
/div>
Deanna—I’ve done a lot of sewing table makeovers. BUT, I LOVE the look of your table. It reminds me a lot of a $7 nightstand I did for my bedroom. My most distressed piece. I love the look but I have a hard time achieving it. I must try this technique! Oh, and I love the blue drawers! Thank you for sharing this post with my friends!
Now, y’all hop on over to give Deanna a visit, k?
gail
Paula,
I apologize for that. This is not my recipe, but from a blog friend of mine. You can see my recipe for diy chalk paint here: https://www.myrepurposedlife.com/2013/08/diy-chalky-paint-recipe-makes-a-great-primer.html which uses 2 TBS of Plaster of paris with 4 tsp of water mixed into 1 cup of latex paint.
I personally use this diy chalk paint recipe on almost everything I paint.
Let me know if you have any further questions.
gail