Tomato Cage Christmas Tree
As an Amazon Associate, I earn from qualifying purchases.

Looking for a simple way to turn garden leftovers into Christmas sparkle? This tomato cage Christmas tree is a smart little project that fits almost anywhere. A basic wire cage, some pretty ribbon, and a handful of ornaments come together in a slim, space-saving tree that works on a porch, in an entry, or tucked in a corner. Guest contributor Kelly from My Soulful Home walks you through each step so you can dress up your home without buying a bulky tree.
Repurposing comes naturally to me. When I was little, shoe boxes became the Barbie dream house. In college, last year’s textbooks became my bedside table. As a homeowner and blogger, I have transformed many old things, useless things, and things destined for the landfill into something new and useful.
My biggest transformation thus far is my old indoor sectional couch, which I repurposed into a “new” couch for my patio. Click here for that transformation. Today, let’s repurpose a tomato cage into a lovely Christmas tree.
Tomato Cage Christmas Tree Directions
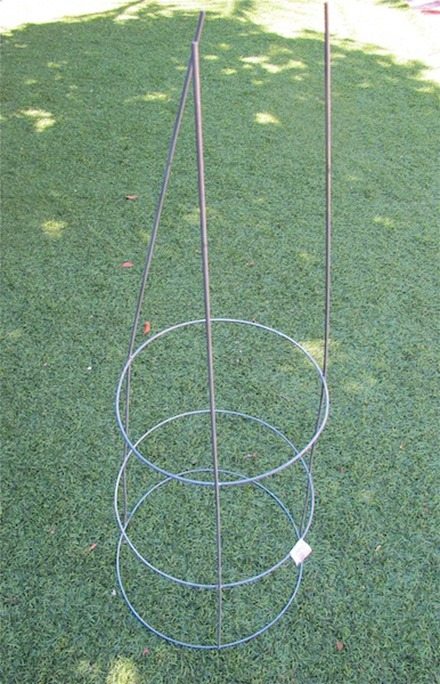
People like Christmas in July. I’m trying to ‘live in the moment’, but tomato cages will not be available everywhere come December. So, let me plant the seed of this project in your mind now. You can buy and save a cage, or get swept up in the fun and make a tomato cage Christmas tree immediately!
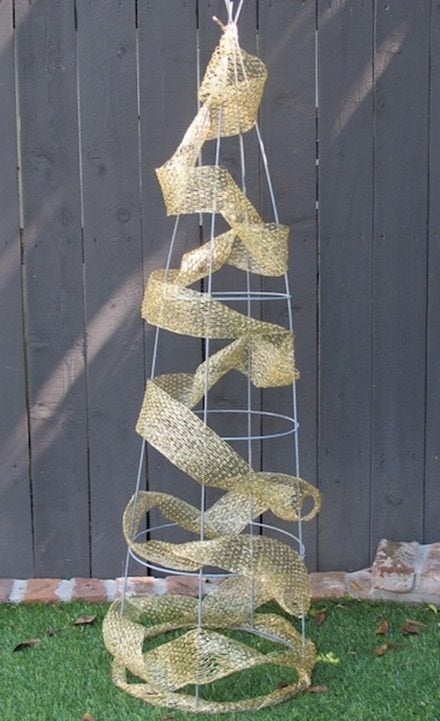
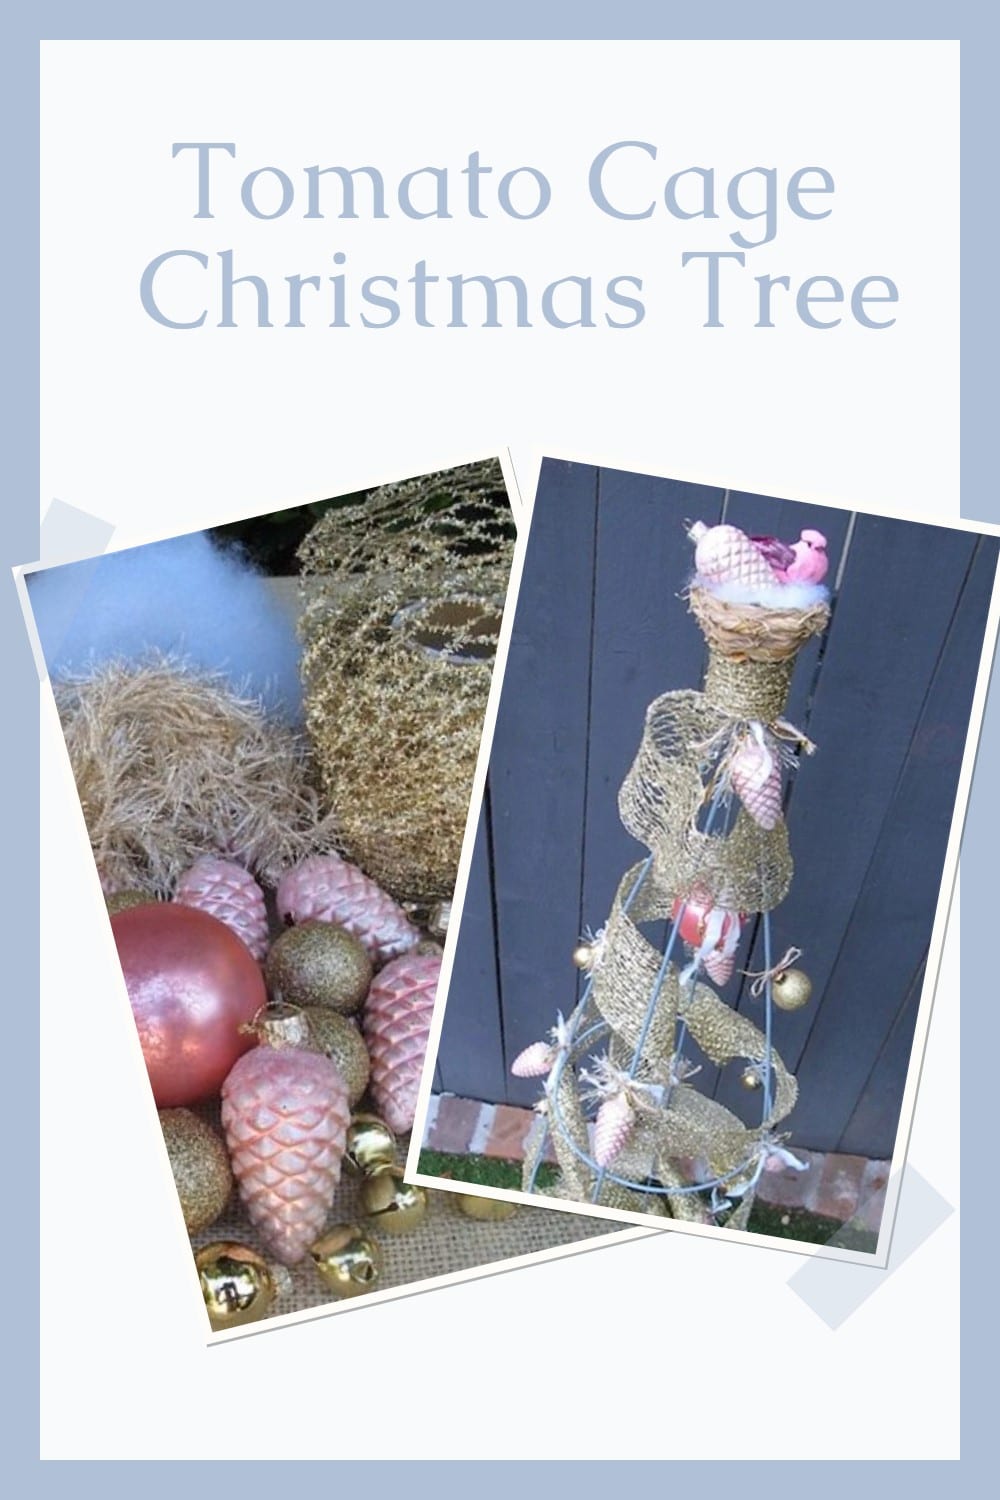
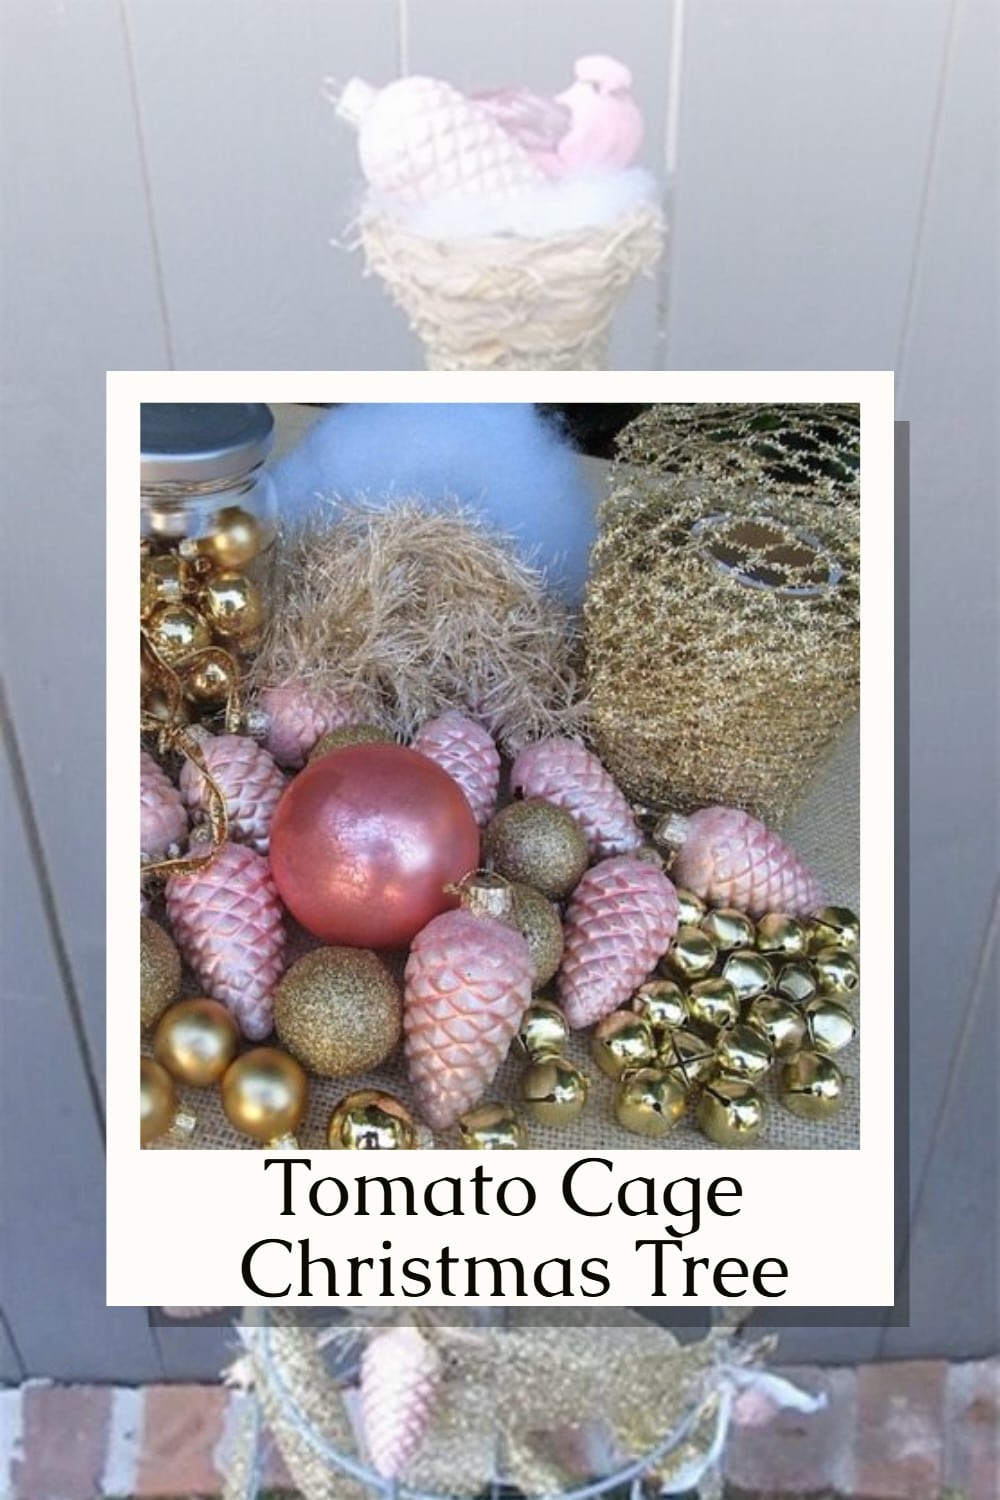
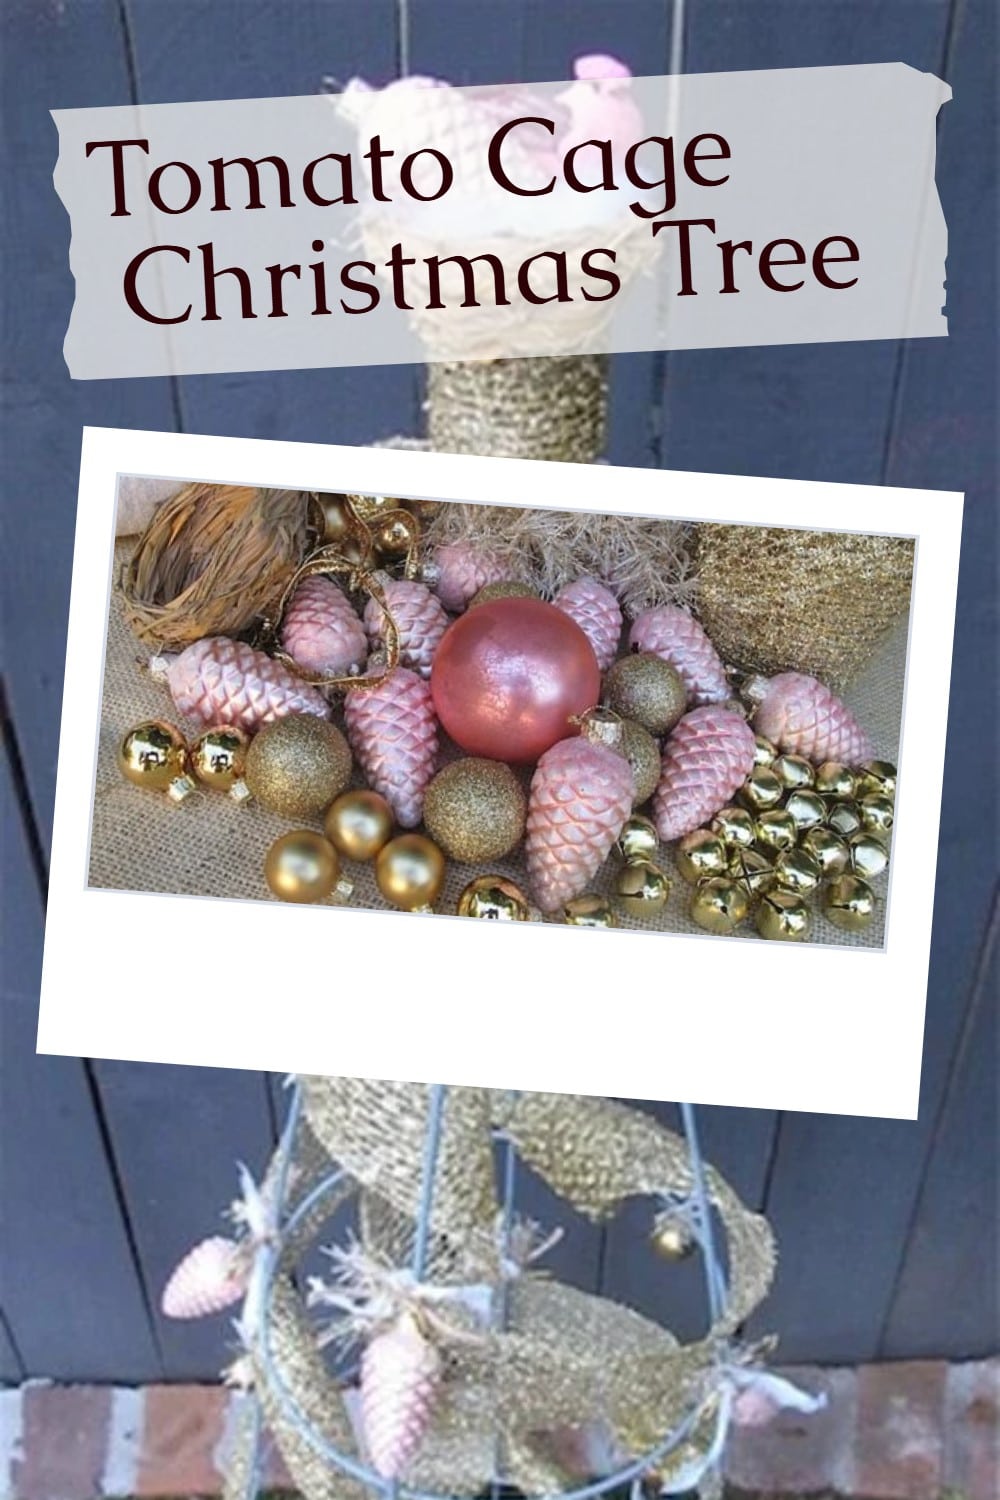
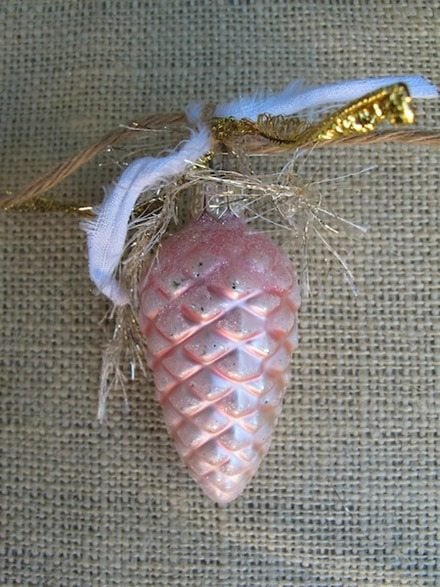
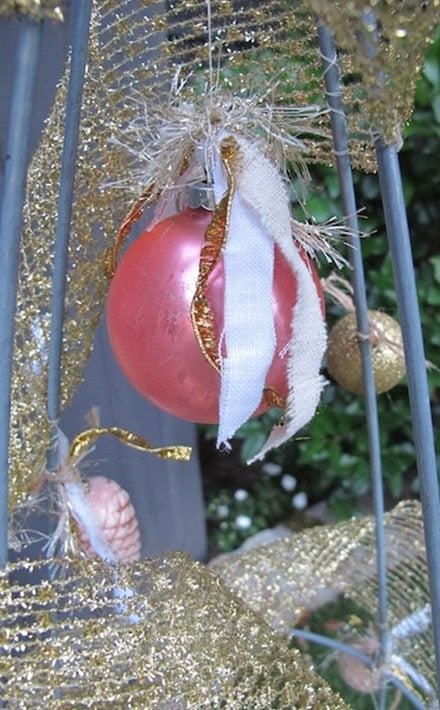
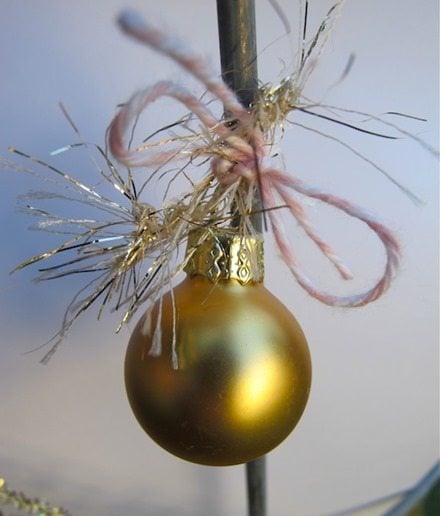
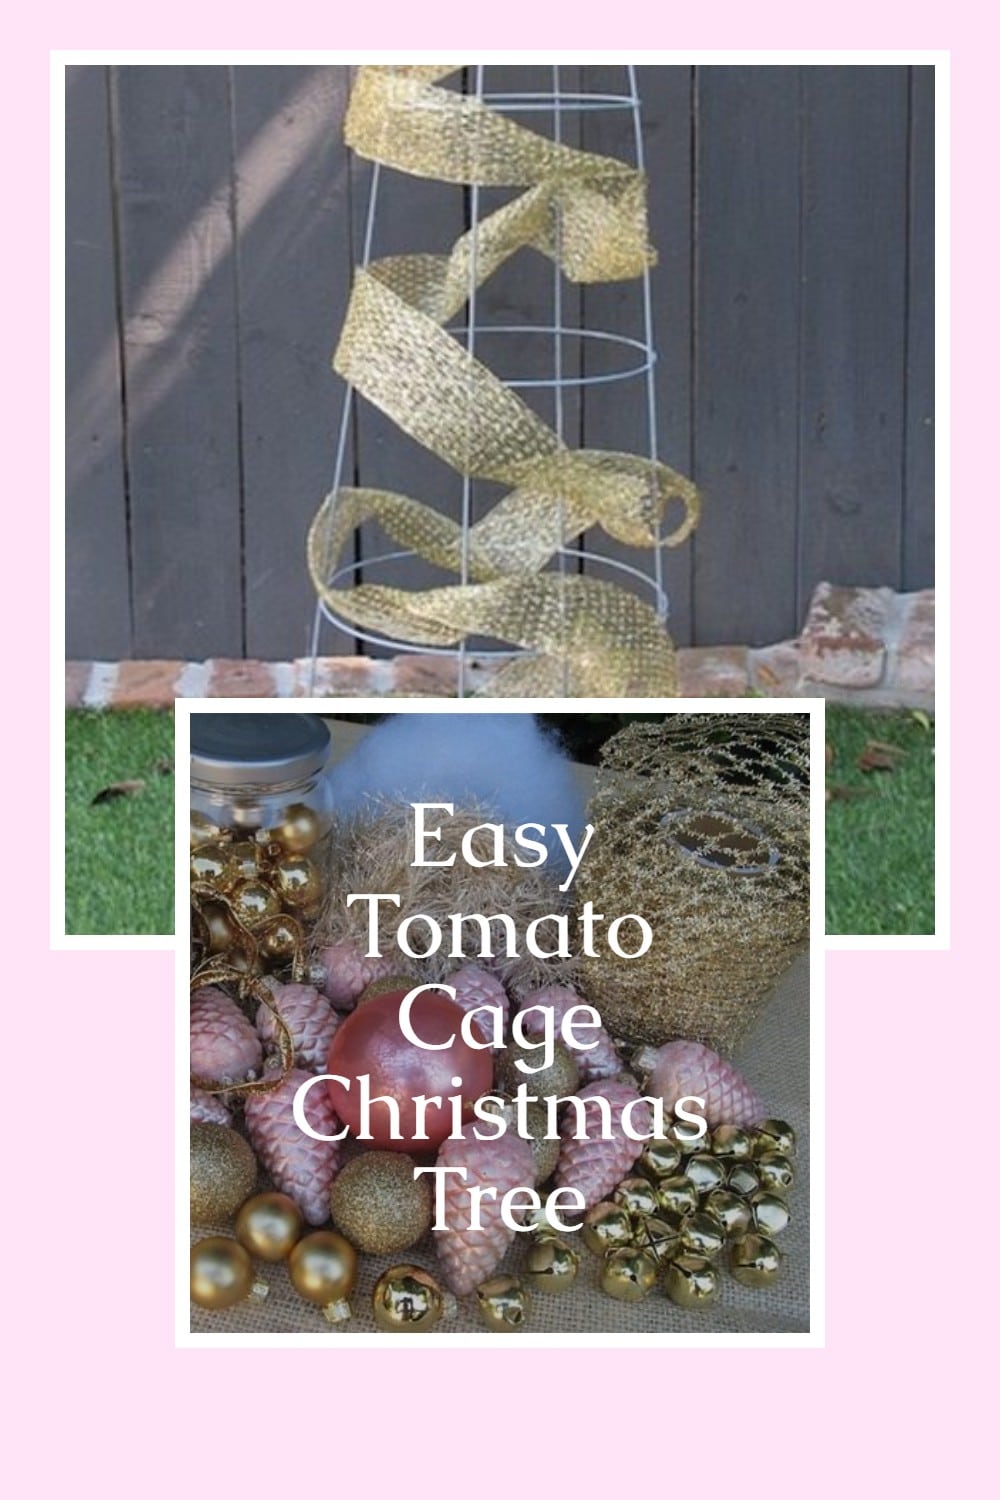
The really fun part about this tomato cage Christmas tree repurpose is that once you have the basic idea, you can create an infinite number of trees using different decorations. For this one, I decided on a palette of pink and gold, as I had these fabulous vintage pinecone ornaments on hand.
Supplies to Make a Tomato Cage Christmas Tree

This is what you will need to re-purpose a tomato cage into a Christmas tree:
Supplies:
- One tomato cage;
- Twine or durable string;
- Glue;
- Needle & thread ( optional );
- Ribbon ( wired is best );
- Decorations (including something special for the top).
That’s all you need! Oh, and your imagination, of course…
Let’s get started! Steps:
Step 1
Tie together the prongs of the tomato cage with twine/strong string;

Step 2
Reinforce the top knots with glue. If you are a girl who likes packin’ heat, a hot glue gun is excellent. If not, regular craft glue works fine.
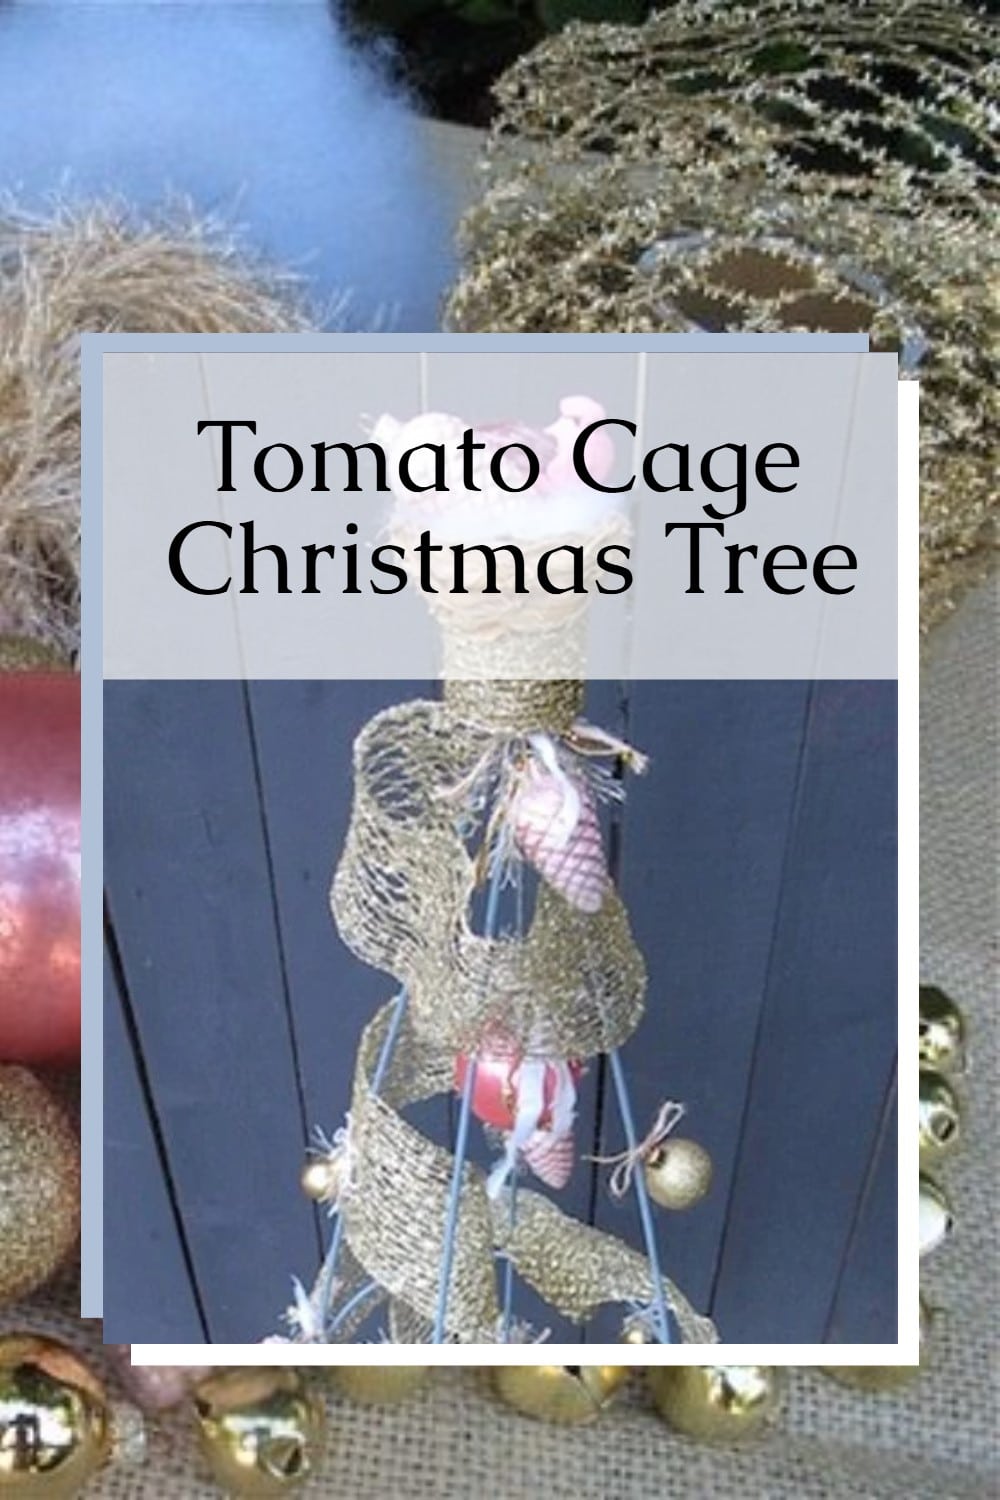
Tie your ribbon around the prongs ~ secure with glue and/or a stitch or two;

Work the ribbon around the cage as you like it, just as you might garland on a real tree;

Depending on your ribbon & how you want it to lie on the tree, you may need to sew a few stitches here & there.

Play with the ribbon until you achieve the desired effect, then stitch it if necessary and/or glue it in place.
Dab a bit of glue over the stitches to secure the ribbon.

Wrap ribbon around the top prongs to cover & secure with stitches and/or glue;
Top the tree with a decoration that will sit securely on the prongs. Covered styrofoam balls are great. I used a nest purchased at Michael’s
Add Decor

Decorate the rest of your tree.
Which is your favorite component?
Stand back & admire your tomato cage Christmas tree!
Tomata Cage Christmas Tree

If you have a tomato cage leaning in the shed, this is a good reason to dust it off and give it new life for the holidays. Change the ribbon, colors, and ornaments to match your style, or keep it simple for a quiet corner that still feels festive. Once you see how easy it is to wrap and decorate the frame, you might even make a pair to flank your front door. Save this idea so you are ready when tomato cages show up in the garden aisle again.
I hope you enjoyed repurposing a humble wire cage into a sparkly Christmas tree. Thank you again to Gail for allowing me to share this project with you. You are always welcome at My Soulful Home. Come over for a visit, and follow My Soulful Home on Facebook, Pinterest, and Instagram.
Thanks so much,
** Kelly **
Thank you, Kelly, for sharing this great repurposed tomato cage Christmas tree. I love the color scheme you chose! I’m such a procrastinator that I’d be scurrying around in November looking for a tomato cage at the hardware store. So, if you want to make one of these, be sure to save a cage from your garden, and you’ll be ready come the holidays!
gail

Cool idea
love this and the color scheme! will have to be on the look out for one!!! even if i have to wait until next year to do it!
love the tomato cage!!!
Great job Kelly! The color scheme is perfect!
Cute!
What a neat idea…would be wonderful on a porch or steps… 🙂
Patricia
Will keep my eyes open for one next time i am out and about; really cute idea!
Oh yes do! Thanks for your comment…
Kelly
Such a nice and easy project. Next time I go to fleamarket, I will look for a tomato-cage or something similar.
Tanks and many regards
Gitta
Hi Gitta, It is easy and you can keep it simple or make it as ornate as you like. Last year I put two on top of my urns by my front door at Christmas time. Thanks for your comment!
Kelly
Thanks Gail…I had so much fun guest posting at My Re-Purposed Life.
Kelly