hall tree made from a table and a door
As an Amazon Associate, I earn from qualifying purchases.
I love today’s project, and I’m happy to share with you how I made a hall tree or entryway table using a small side table and an antique door.
It was exciting to be invited to host an Artisan Workshop with Habitat for Humanity ReStore in Madison Indiana. I blogged about the workshop in my post Artisan Workshop At Madison Indiana ReStore. While there I started two projects.
I apologize for the grainy, out of focus cell phone pictures.
Use one nightstand
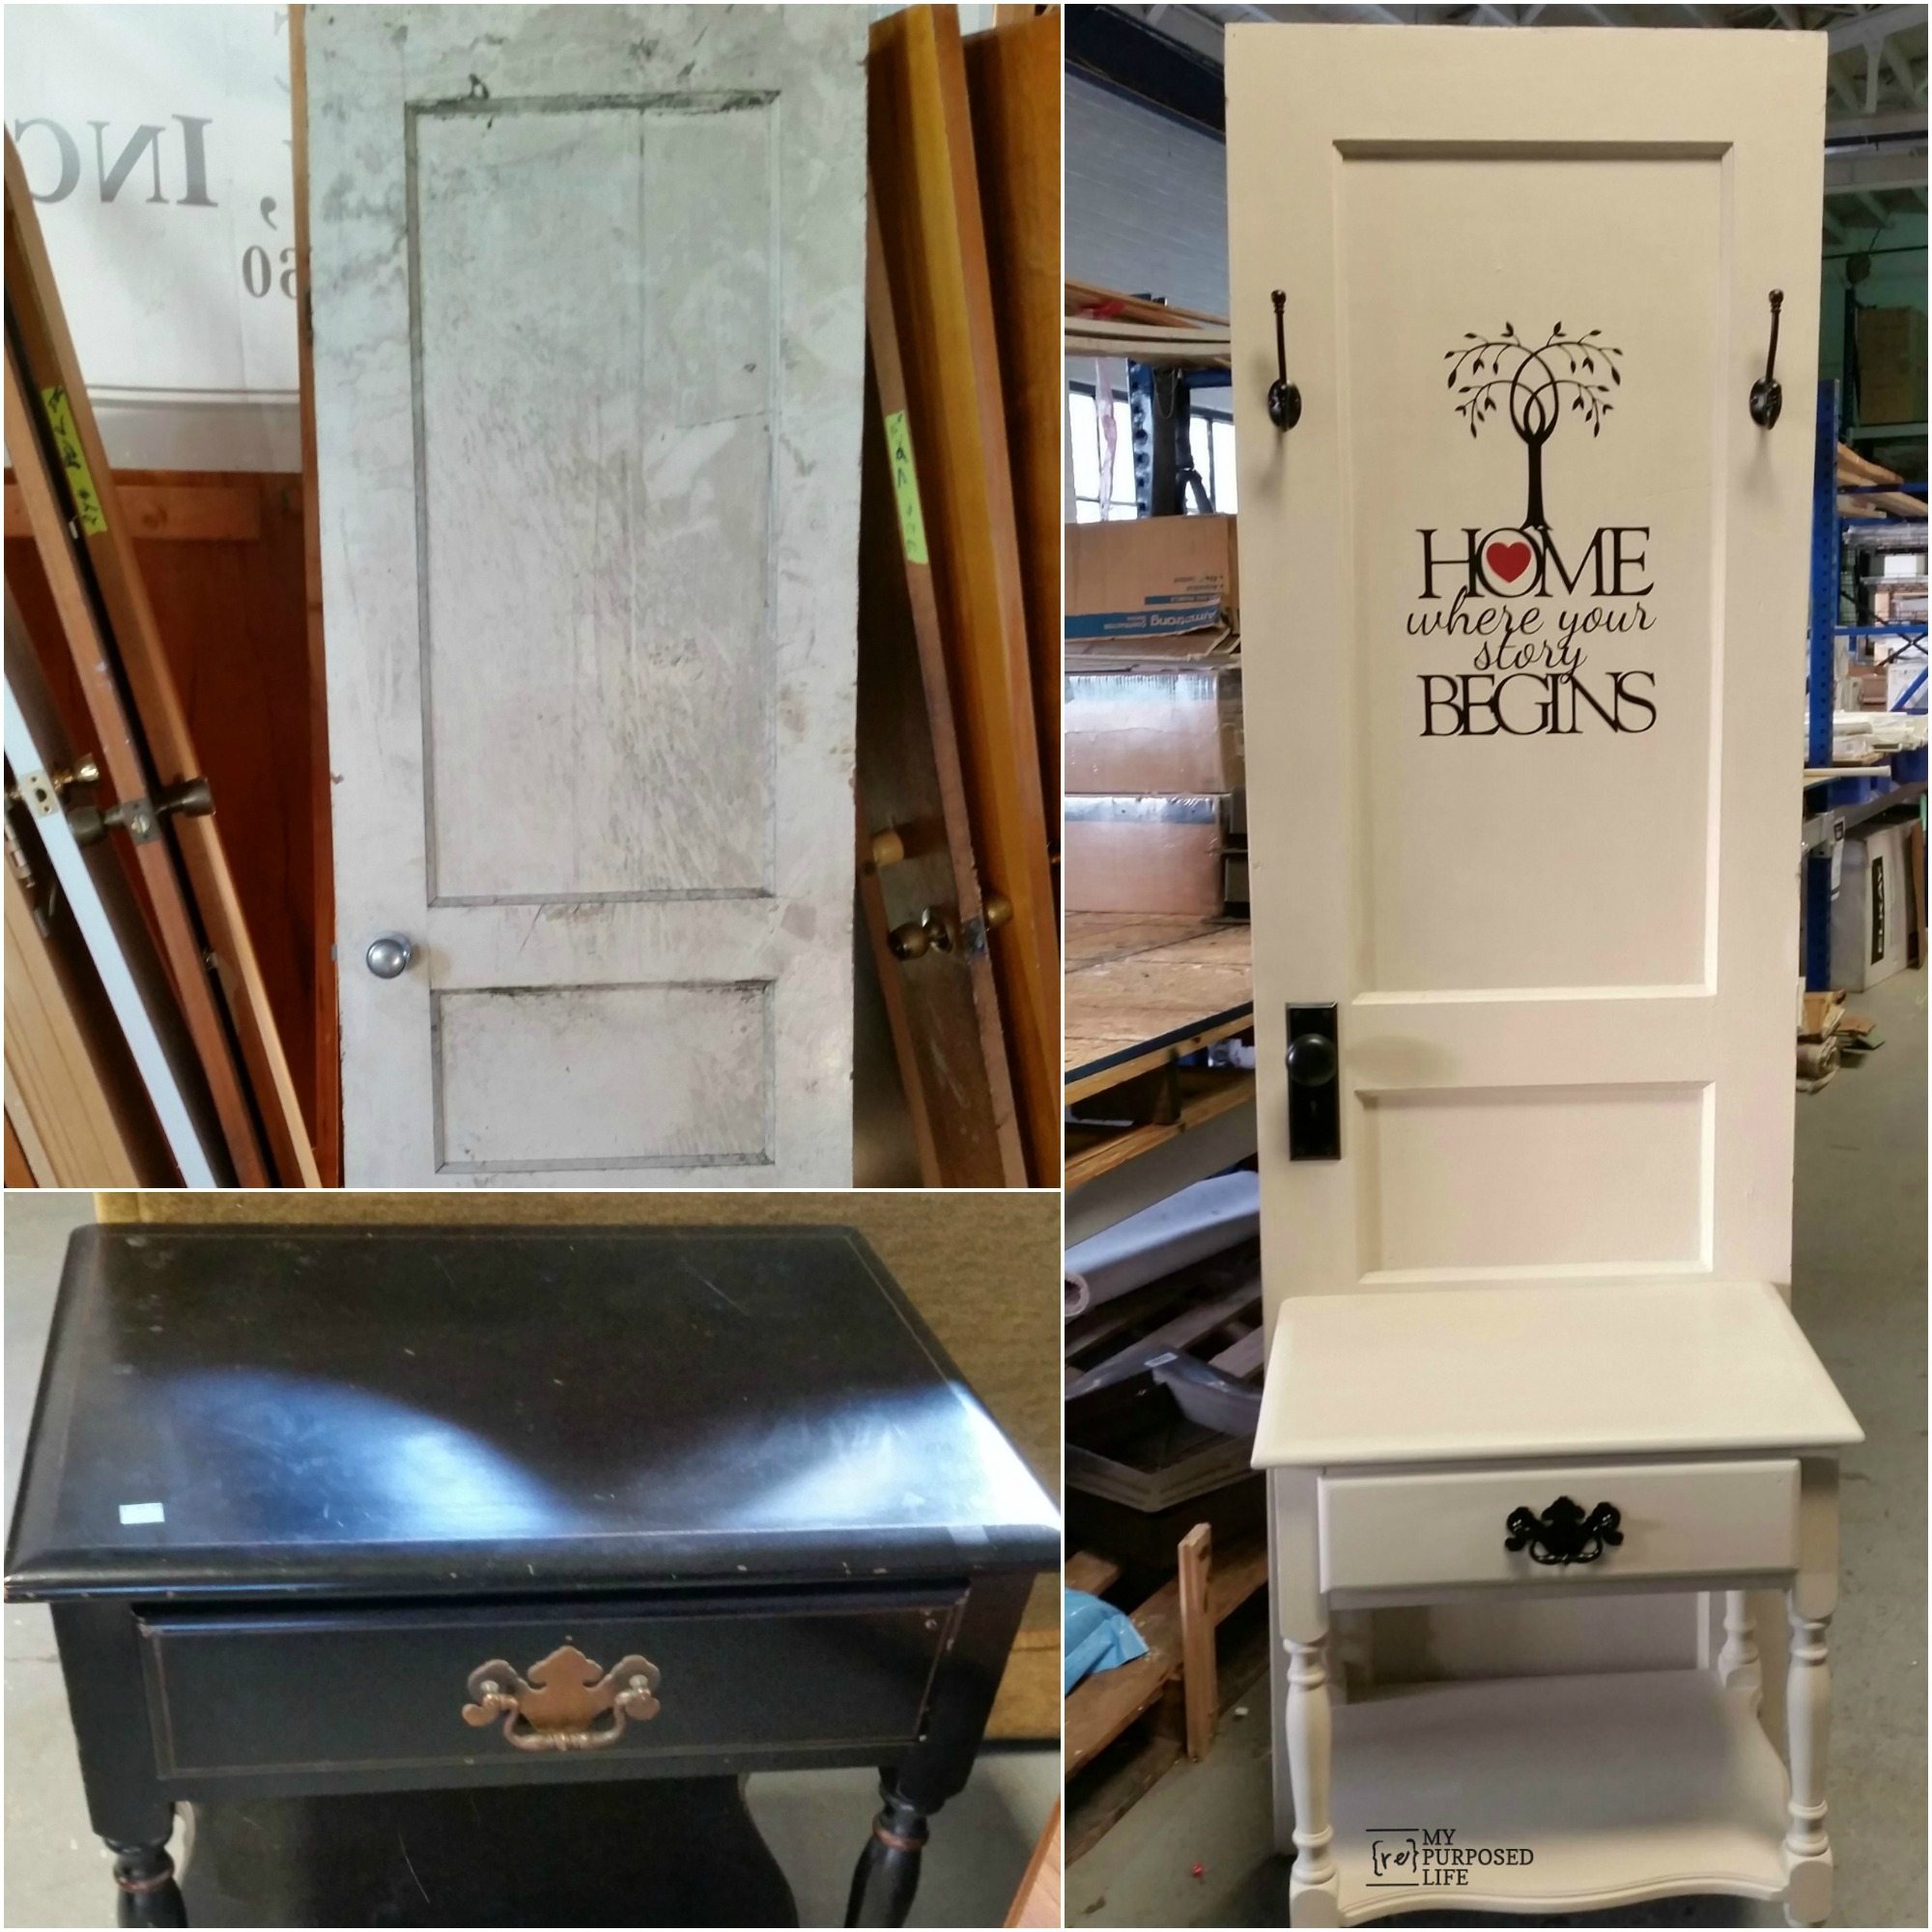
 While walking around the store I spotted this sweet little side table.
Add an antique door
 This sweet (but very dirty) door was in the historical section of the outbuildings.
And you have an easy Hall Tree project
 When I put them together, it was a perfect match!
 I cleaned up the very dirty door and got busy painting the pieces with some Heirloom Traditions Chalk Type paint.
 Silly Terry poked her head out as I was snapping some pics. The day was winding down, and we had to leave.
 It was fun to see my “name in lights” so to speak.
 ![]() We went back a couple of weeks later to complete the projects we started, including the Hall Tree.
We went back a couple of weeks later to complete the projects we started, including the Hall Tree.
Clean the door
 After putting another coat on the door and table, we took a lunch break, then came back to wax the door and table.
Apply vinyl artwork
 I had cut a vinyl saying with my CAMEO. Here I am using a hem guide to center the vinyl on the door.
Secure the door to the nightstand

This is an awful picture, but I wanted to share how I attached the door to the small side table to make this hall tree.
Before painting the door, I marked the area where I would be attaching screws—then I pre-drilled some pilot holes. After painting and waxing the door, I used some Simpson Strong-Tie wood screws to secure the door to the table.
Adding a few finishing touches
EDITED TO ADD:
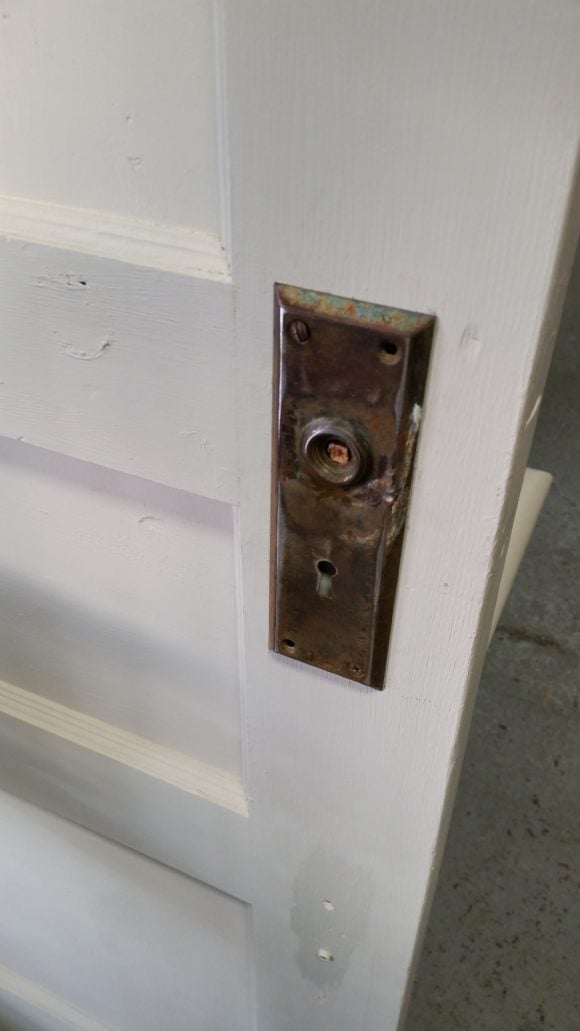
Suzy left a comment asking about the doorknob. I hadn’t mentioned that when I originally wrote up these details. I remember that Terry and I struggled with figuring it out. At home, I would have had more options because I’m such a collector of “junk”. It’s a little foggy on exactly what we did, but a dowel secured in place with a screw or glue is a good option to hold only one doorknob in place much like I did when I used doorknobs to make a coat rack on a drawer front and an old bed.
White hall tree made from a door and a nightstand
 On this visit to the Madsion ReStore, Cousin Terry’s (left) sister Sandy (right) joined us for a fun day.


Another bad cell phone picture, how sad! The entryway hall tree really turned out so sweet. I left it behind so that it can be auctioned off at their annual dinner/fundraiser. Soooo I didn’t get a chance to get a better picture.

gail
See More Hall Tree Project Ideas Here
sharing at Elizabeth & Co Be Inspired and Inspiration Monday
I love this hall tree! I do have a quick question. I love how you changed out the door hardware. Did you install the entire door knob or install just the front piece? If so, how do you install half of a door knob?
Suzy,
Great question!
I have located a photo and updated the blog post to show the back of the door. I hope the image and the explanation are helpful to you.
gail
Just picked up a brown shutter for $5 and have a 1 shelf cube that is the perfect size. I am inspired by your creation and it may not turn out as nice as yours but for $5 and what I have on hand, awesome addition to non-existent mud room. Hope the kids will use it. Keep those ideas coming!!
Awesome! I am so happy to inspire you to put your own spin on it Connie! I’d love to see it when you’re done. You can share it on my facebook page. http://www.facebook.com/myrepurposedlife/
gail
Hi Gail. The Cameo is new to me. Was the sign on your door done with a stencil or is that vinyl that was left on the door. Thank you for putting up with a newbee!!
Debbie,
Good question! The CAMEO is a vinyl cutting machine. I cut out the vinyl, and placed it onto the door. I cut it out in two different colors. Silhouette sells designs, so I purchased the design for .99 and it is now in my library of designs to use again. I hope that makes some sense.
gail
A perfect marriage! Love this, Gail.
What a neat project. I would like to try this and have the necessary pieces. Did you have to cut the “lip” from the stand in order for it to fit flush against the door? TIA
Kaye,
Great question Kaye!
For this particular project, there was no cutting (saws) involved. The table set flush against the door perfectly.
Thanks for stopping by, and taking the time to ask!