Hanging Cedar Wall Planter
As an Amazon Associate, I earn from qualifying purchases.
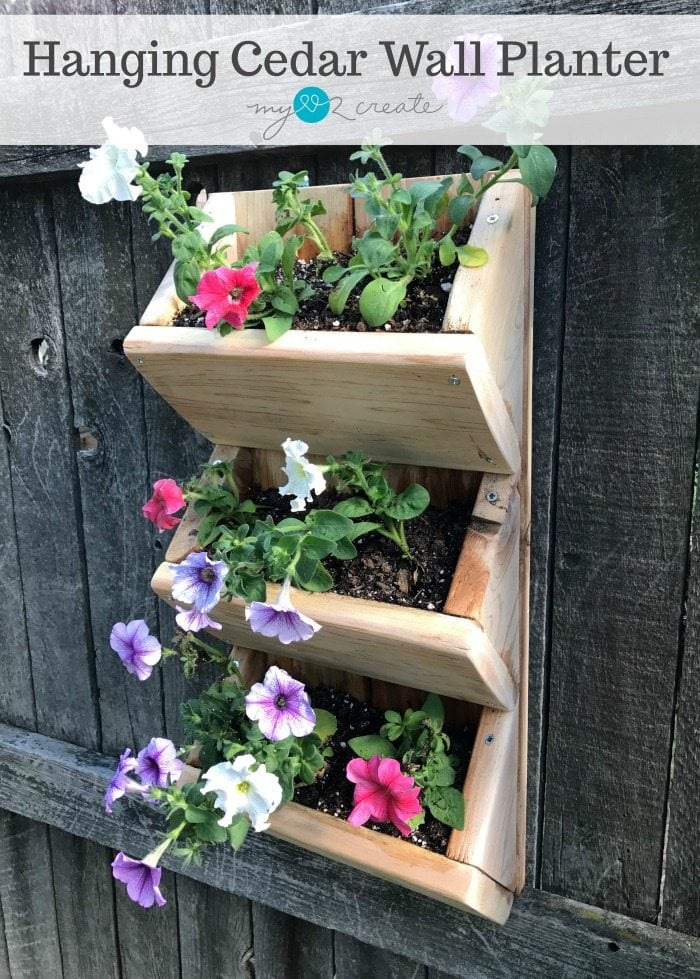
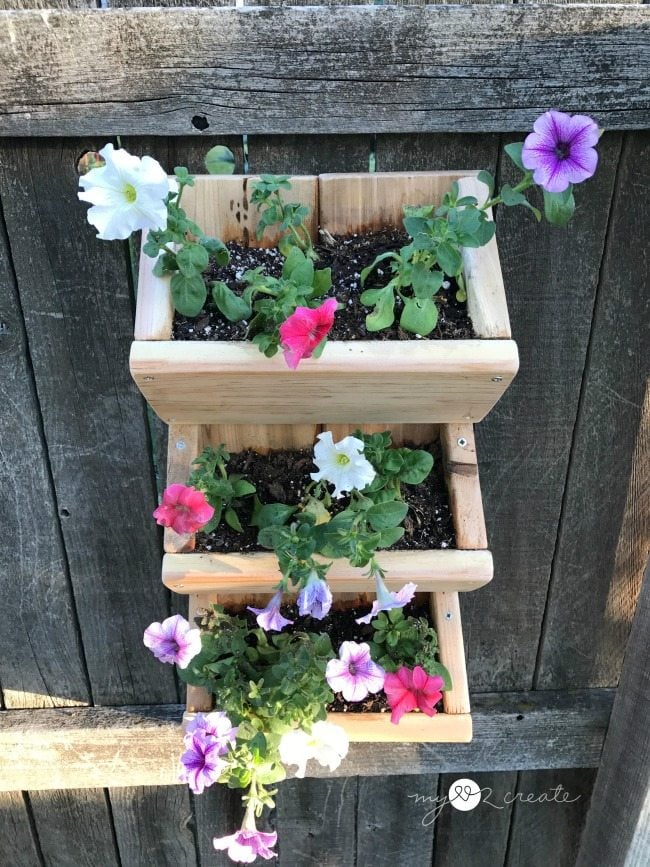
Isn’t is so cute!?! I think I need to make another one…
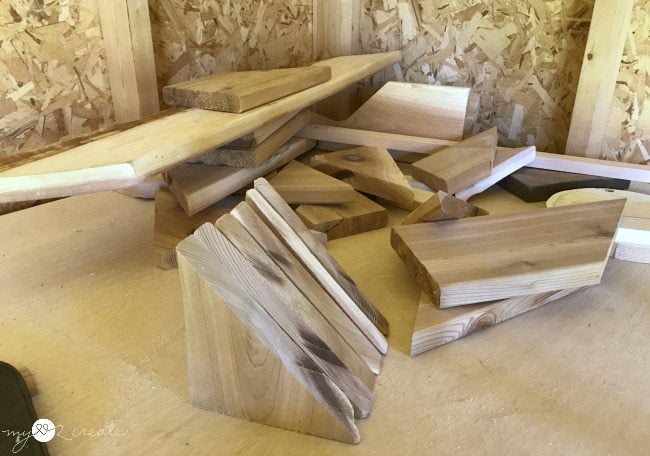
A few months ago I made a new bench for my front porch. The neighbor down the road gave me some cedar wood that he didn’t want and I made the seat of the bench with it. (I still haven’t posted it yet)
I set the seat boards at an angle and so I cut the ends of the boards at a 45 degree angle, which left me with a lot of scrap triangles.
The triangles got me thinking, and I have been aching to make a new planter. So I grabbed two of the long planks and started experimenting with the scrap triangles. I came up with the above…and I was liking it, so I set to work.
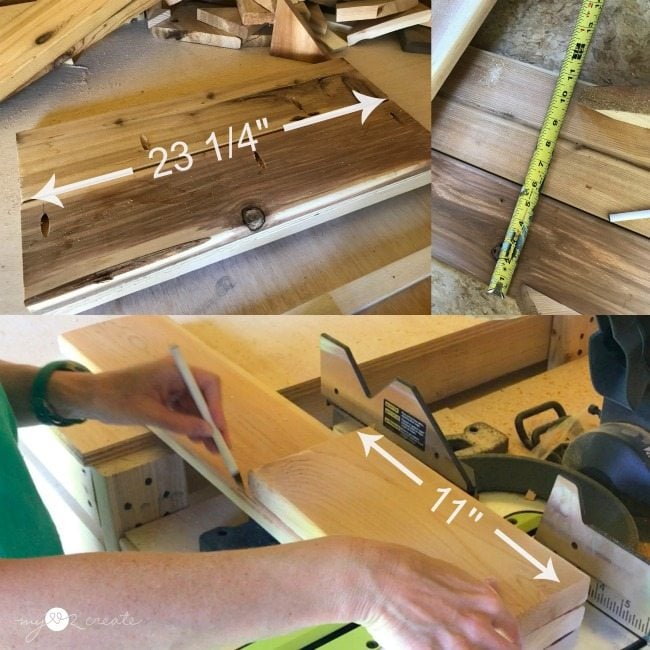
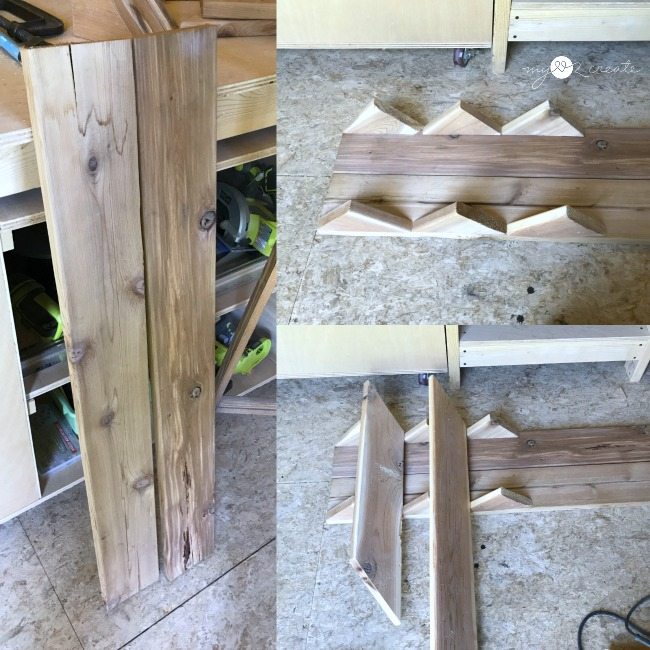
The cedar wood I used was 5 1/2” wide and 1” thick. I cut the two back boards at 23 1/4” (top left). Then after getting the width of both boards together (top right) I cut my three front planter boards at that length, 11”.
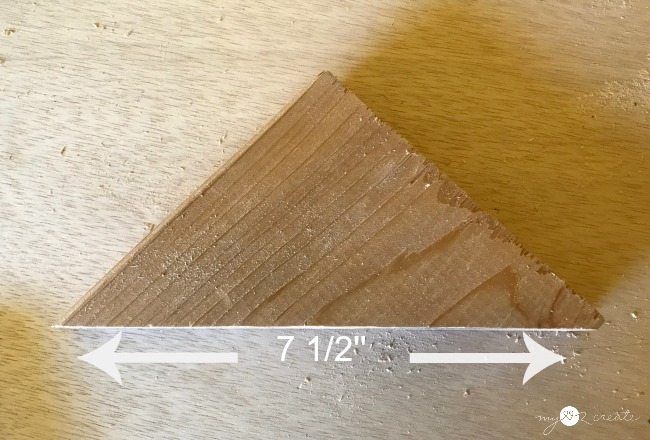
My triangles were not all exactly equal, but they were all pretty close to 7 1/2” on the long side. Three of those put on top of each other made 22 1/2” which is why I cut the back boards at 23 1/4” to give about 3/4” left at the bottom for the front board to cover.
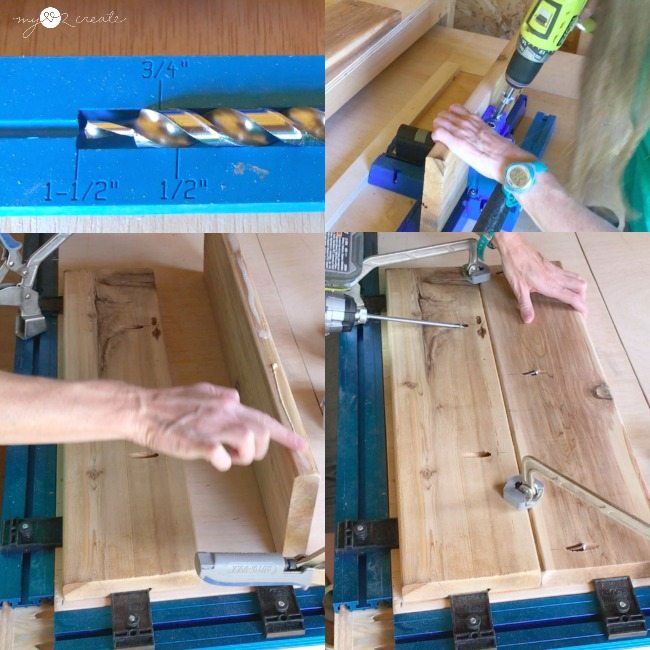
In order to connect the back two boards I drilled pocket holes with my Kreg K5 Pocket-Hole Jig. With 1” thick wood I made sure to set the depth collar correctly (top left), as well as my kreg jig, then I drilled my pocket holes (top right).
Need more details on using a Kreg Jig? See my article How to use a Kreg Jig Pocket Hole System
I used wood glue and 1 1/2” pocket hole screws to attach the boards together. I love using my Kreg Clamp Trak Kit to help hold my wood in place while I drill. 🙂
With the back boards attached I was ready to add the triangles. I used wood glue on the long sides (7 1/2″) of the triangles and set the points flush with the top of the back boards. Then I nailed them into the back piece with one 1 1/4” nail on each side going in at an angle.
In the bottom right photo you can see about 3/4” left over at the end, the bottom front board will cover that.
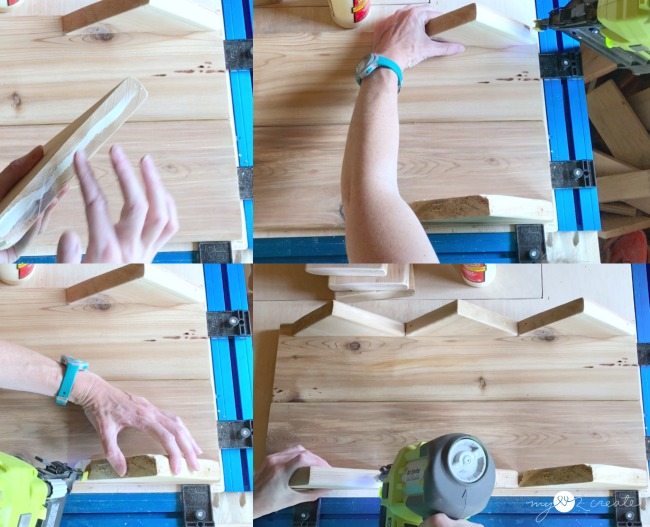
I added the three front boards to the triangles with wood glue and finish nails.
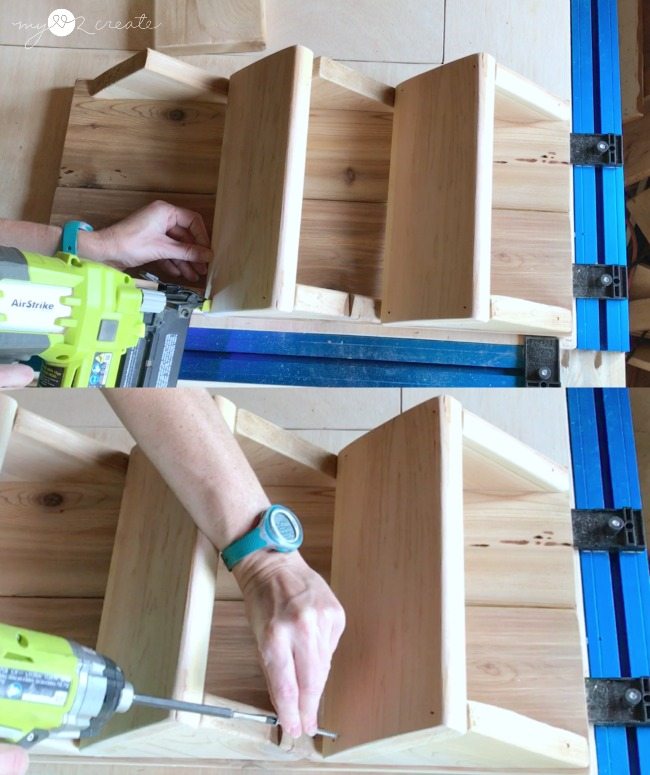
Then for extra strength I used Spax 2 1/2” self drilling screws to secure the boards. I made sure to go through the front piece, triangle piece into the back on the bottom. I also secured the top of each triangle piece to the back as well. These boards are thick and with water and soil I want to make sure they will hold.
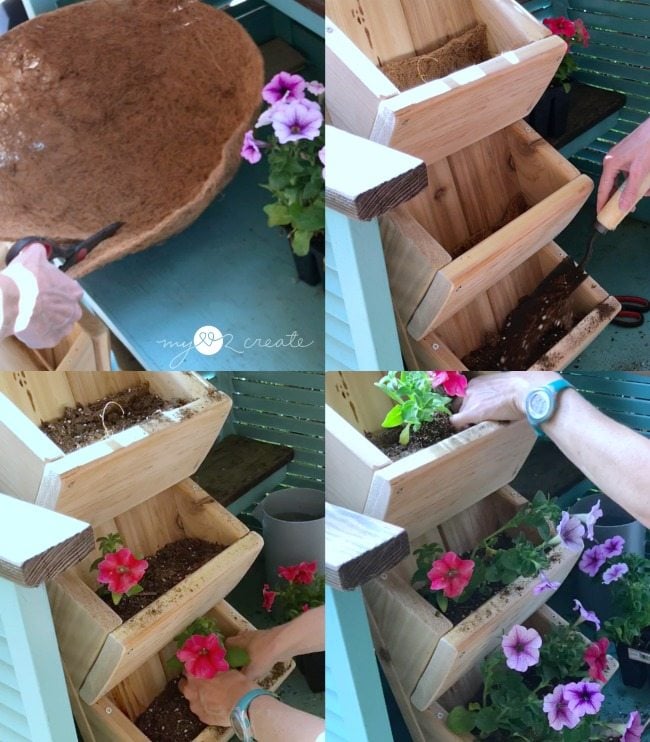
I bought a Coco liner to help hold in the water, and cut a piece for the bottom of each planter (top left). Then I added some potting soil and then the plants!
Do you recognized my Potting Bench From Repurposed Shutters and Desk I made a while back? I LOVE it!
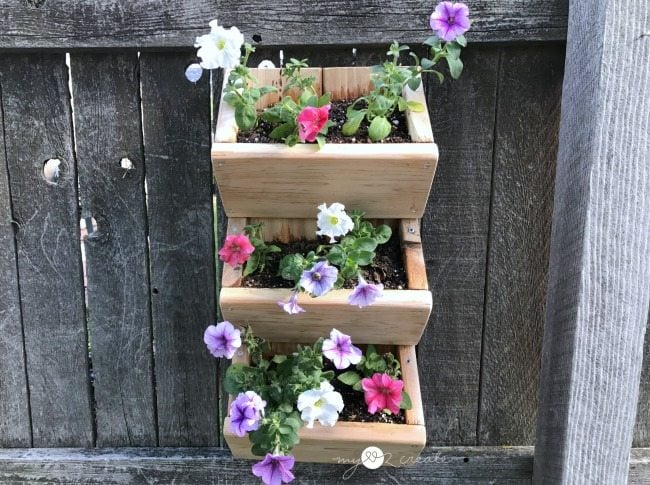
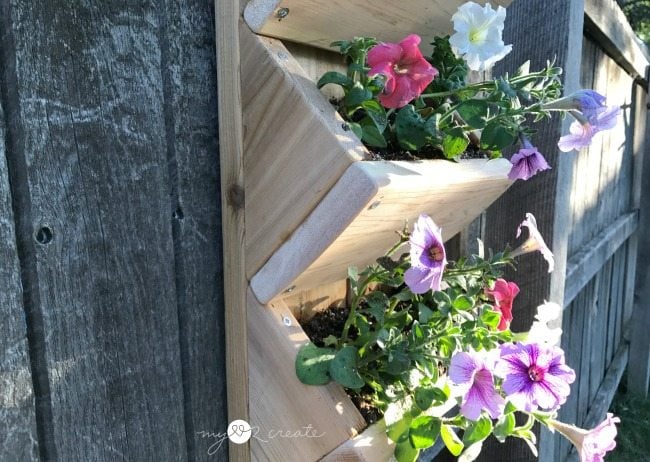
After adding some D Ring Hangers for the back, I nailed in two nails on my fence and hung it up. It looks so pretty!
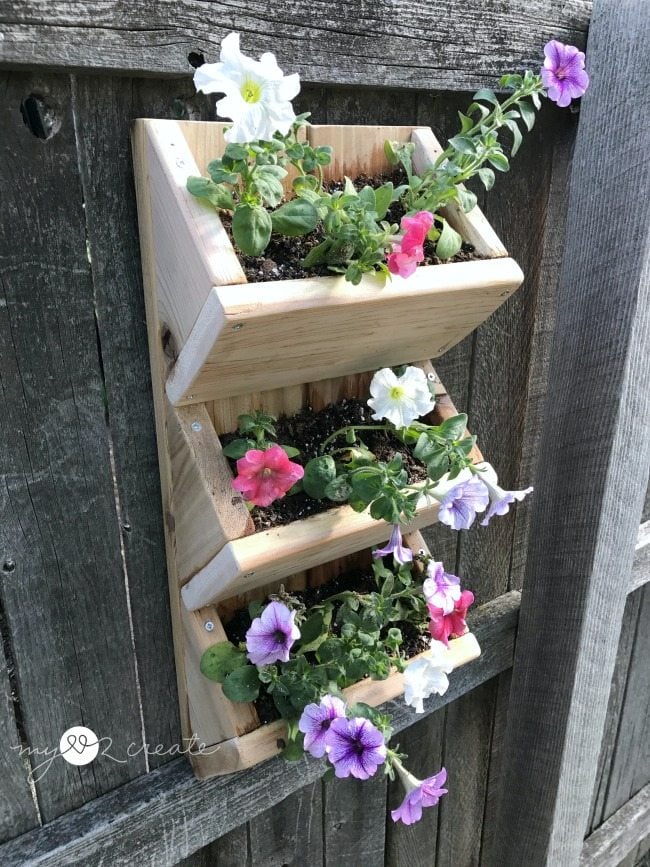
It is always nice to add some color to my yard!
In fact I have been so busy I haven’t had time to put flowers in my Old Drawers into Porch Planters yet! I need to get on that!
Until then these will make me smile!
Have you made a planter lately? Maybe you could try this one!
Hugs,
Mindi
see more of Mindi’s posts on MRL below:
[categorythumbnaillist 274]
so funny Mindi-I did a similar project (fail) recently and ended up scrapping it because I couldn’t get the angles right. No surprise here, because you are a math genius compared to me. 🙂
I love your cedar hanging wall planter, and it looks so lovely with the flowers on your fence. A hanging wall planter like this would look fabulous on my diy picket fence.
Thanks for sharing a great project with an easy to follow tutorial.
gail
Thank you Gail! Although I am no math genius, I guess I just got lucky! 🙂 I have noticed when I water, it is best to take it off the fence and tilt it back so the soil doesn’t run out, so not perfect, but it has been so fun to have on my fence!