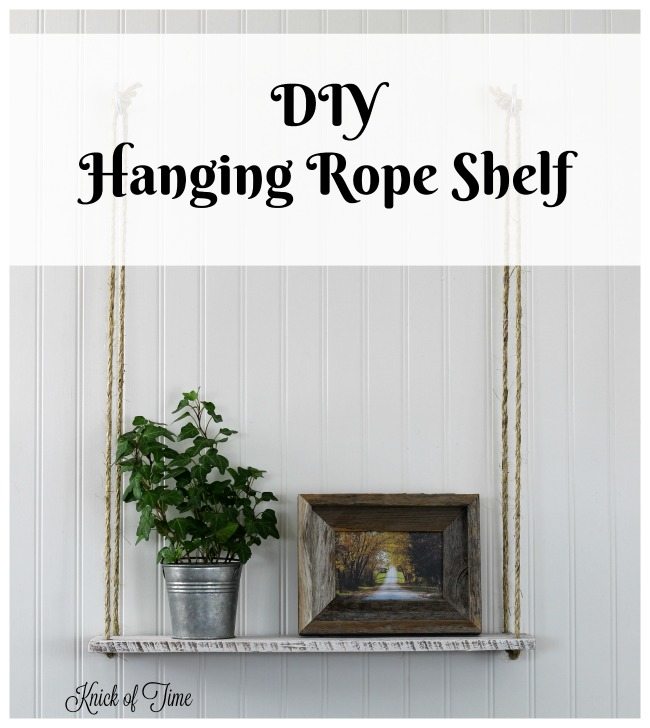
DIY Pallet Wood Hanging Rope Shelf
As an Amazon Associate, I earn from qualifying purchases.
Hi MRL fans. It’s Angie from Knick of Time, back with an easy hanging rope shelf that was inspired by an old-fashioned wooden swing that I made several years ago [seen HERE].
My kids are all too old to play on swings, but I have such fond memories of spending the summer on the swing in my yard at my childhood home, I wanted to make one for myself to enjoy.
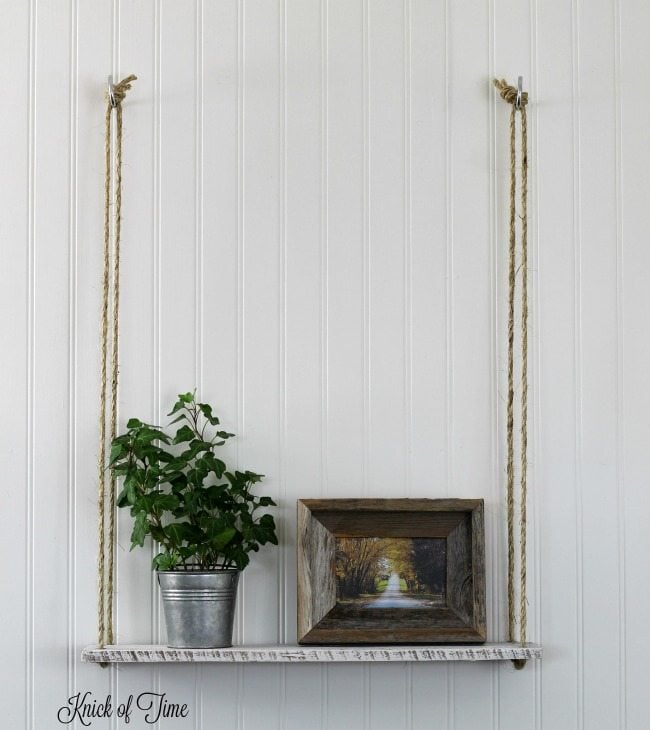
This hanging rope shelf has the same nostalgic charm as my wooden swing – it’s just a smaller version you can make in less than an hour.
Learn how to safely dismantle pallets and get inspired with easy pallet project ideas! 👉 Pallet Projects + Tips for Dismantling
How to Make a Simple Pallet Wood Hanging Rope Shelf
Supplies Needed:
- wood plank
- rope
- ceiling hooks
- anchor bolt insert (if installing into drywall)
- drill
- paint (optional)
- sandpaper (optional)
Directions:
1. Cut wood plank to desired length.
You can use new wood to make the shelf, but I wanted my rope shelf to have the same rustic look that my swing has, so I used a pallet plank. It looks ugly now, but that’s fixed in the next step

2. Paint and distress plank.
I loved the rough cut texture on the pallet plank and didn’t want to hide that, so I dry-brushed just enough paint to cover the splotches that were on it.

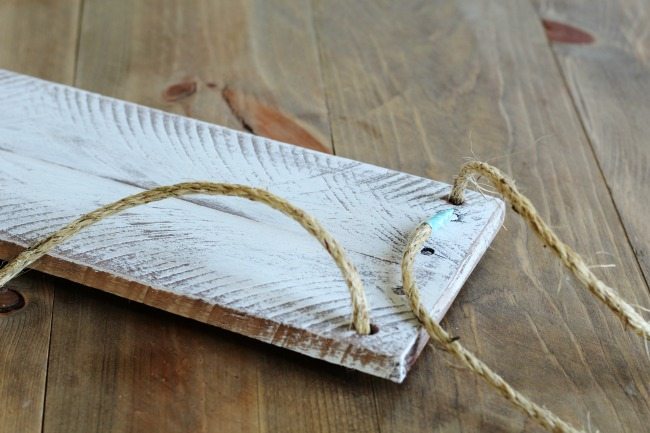
3. Drill holes on short edge of the plank.
Make sure you select a drill bit just a bit larger than your rope.

4. Insert rope through plank.
To keep the rope from fraying, wrap tape around the ends before threading through the holes.
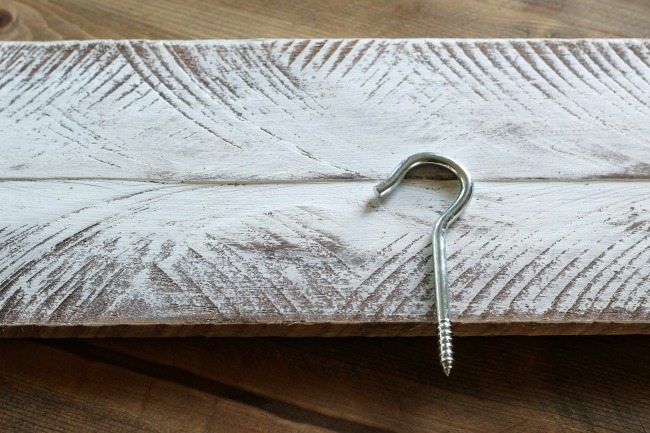
5. Install ceiling hooks into wall.
To select the correct size ceiling hooks, set the rounded end at about the halfway point on the plank. The threaded end is how far the hook will screw into your wall.
** If your walls are sheet rock, you’ll need to install anchor bolts that the ceiling hooks will screw into.
6. Tie knots in ends of rope and hang on the ceiling hooks.
Finished!
This is seriously the easiest project for a beginner. It’s quick, easy and free if you use free pallet wood.
It’s the perfect kind of shelf for my farmhouse style home.
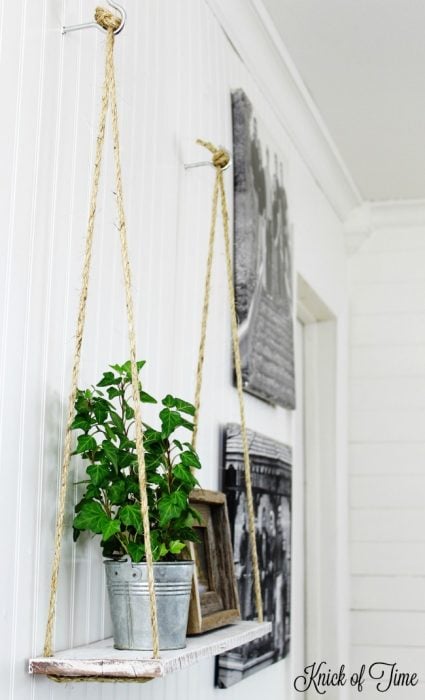
This shelf is similar to the floating pallet shelf I made a few years ago, but is a bit more stable, because it has wall behind it, and what’s on the shelf can’t get bumped off as easily.
PIN IT!
I hope you enjoyed it!
Be sure to come visit me at Knick of Time to see another pallet wood project I just finished!
Click Here for more information about dismantling pallets.

I love this! So simple. So easy. And looks great
Love it, I have wanted to make one of these!
Thanks Debbie they are SO easy to make!
I LOVE it Angie! I love the reminder of the swing too, so sweet!
Thanks Mindi. I adore my old-fashioned swing. I’m a kid at heart and love swing on it – especially on a beautiful summer morning when the birds are all chirping.
Beautiful job on this rope shelf made out of a pallet Angie! I love how clean and simple it looks hanging on the wall. Wouldn’t this even be great for a wedding?
Thanks for a great tutorial.
gail
Thanks so much, Gail – I’m loving it on my living room wall, but I think I’ll make more of them when we get further on our bedroom remodel.