• Skip to primary navigation
  • Skip to main content
  • Skip to primary sidebar
  • Start Here
  • Shop Favorites
  • About
    • Welcome To My Repurposed Life Home of Repurposed Furniture
    • More About Gail
    • Disclosure
    • Privacy Information
  • Gallery
    • Repurposed Furniture
  • Repurposed Items
    • Building Supplies
    • Miscellaneous Household Items
    • Picture Frame/Chalk Board
  • DIY
    • Home Reno
    • outdoor living
    • Painting
    • Shop Talk
    • Tips for Around the House
    • Build It
      • Furniture
      • Home Decor
      • Storage
    • Crafts
      • Dollar Store
      • Easy
      • Holidays Seasonal
  • Furniture
    • Chair
    • Desk
    • Dresser/Chest
    • Headboard | Bed Parts | Cribs
    • Kids Furniture
    • Table
    • Kids Furniture
My Repurposed Life® Rescue Re-imagine Repeat
menu icon
go to homepage
subscribe
search icon
Homepage link
  • About
  • Start Here
  • Project Index
  • Furniture
  • Subscribe
    • Email
    • Facebook
    • Instagram
    • Pinterest
    • RSS
    • Twitter
  • ×

    Home » Repurposed Furniture » Headboard | Bed Parts | Cribs » headboard shelf coat rack

    headboard shelf coat rack

    Published by Gail | Published September 18, 2018 | Updated August 9, 2020
    As an Amazon Associate I earn from qualifying purchases.

    Pin
    Share
    Tweet
    This repurposed headboard shelf coat rack is easy to make following the step by step directions included here. Tips on adding the shelf and how to add coat hooks. #MyRepurposedLife #repurposed #headboard #coatrack #shelf via @repurposedlife

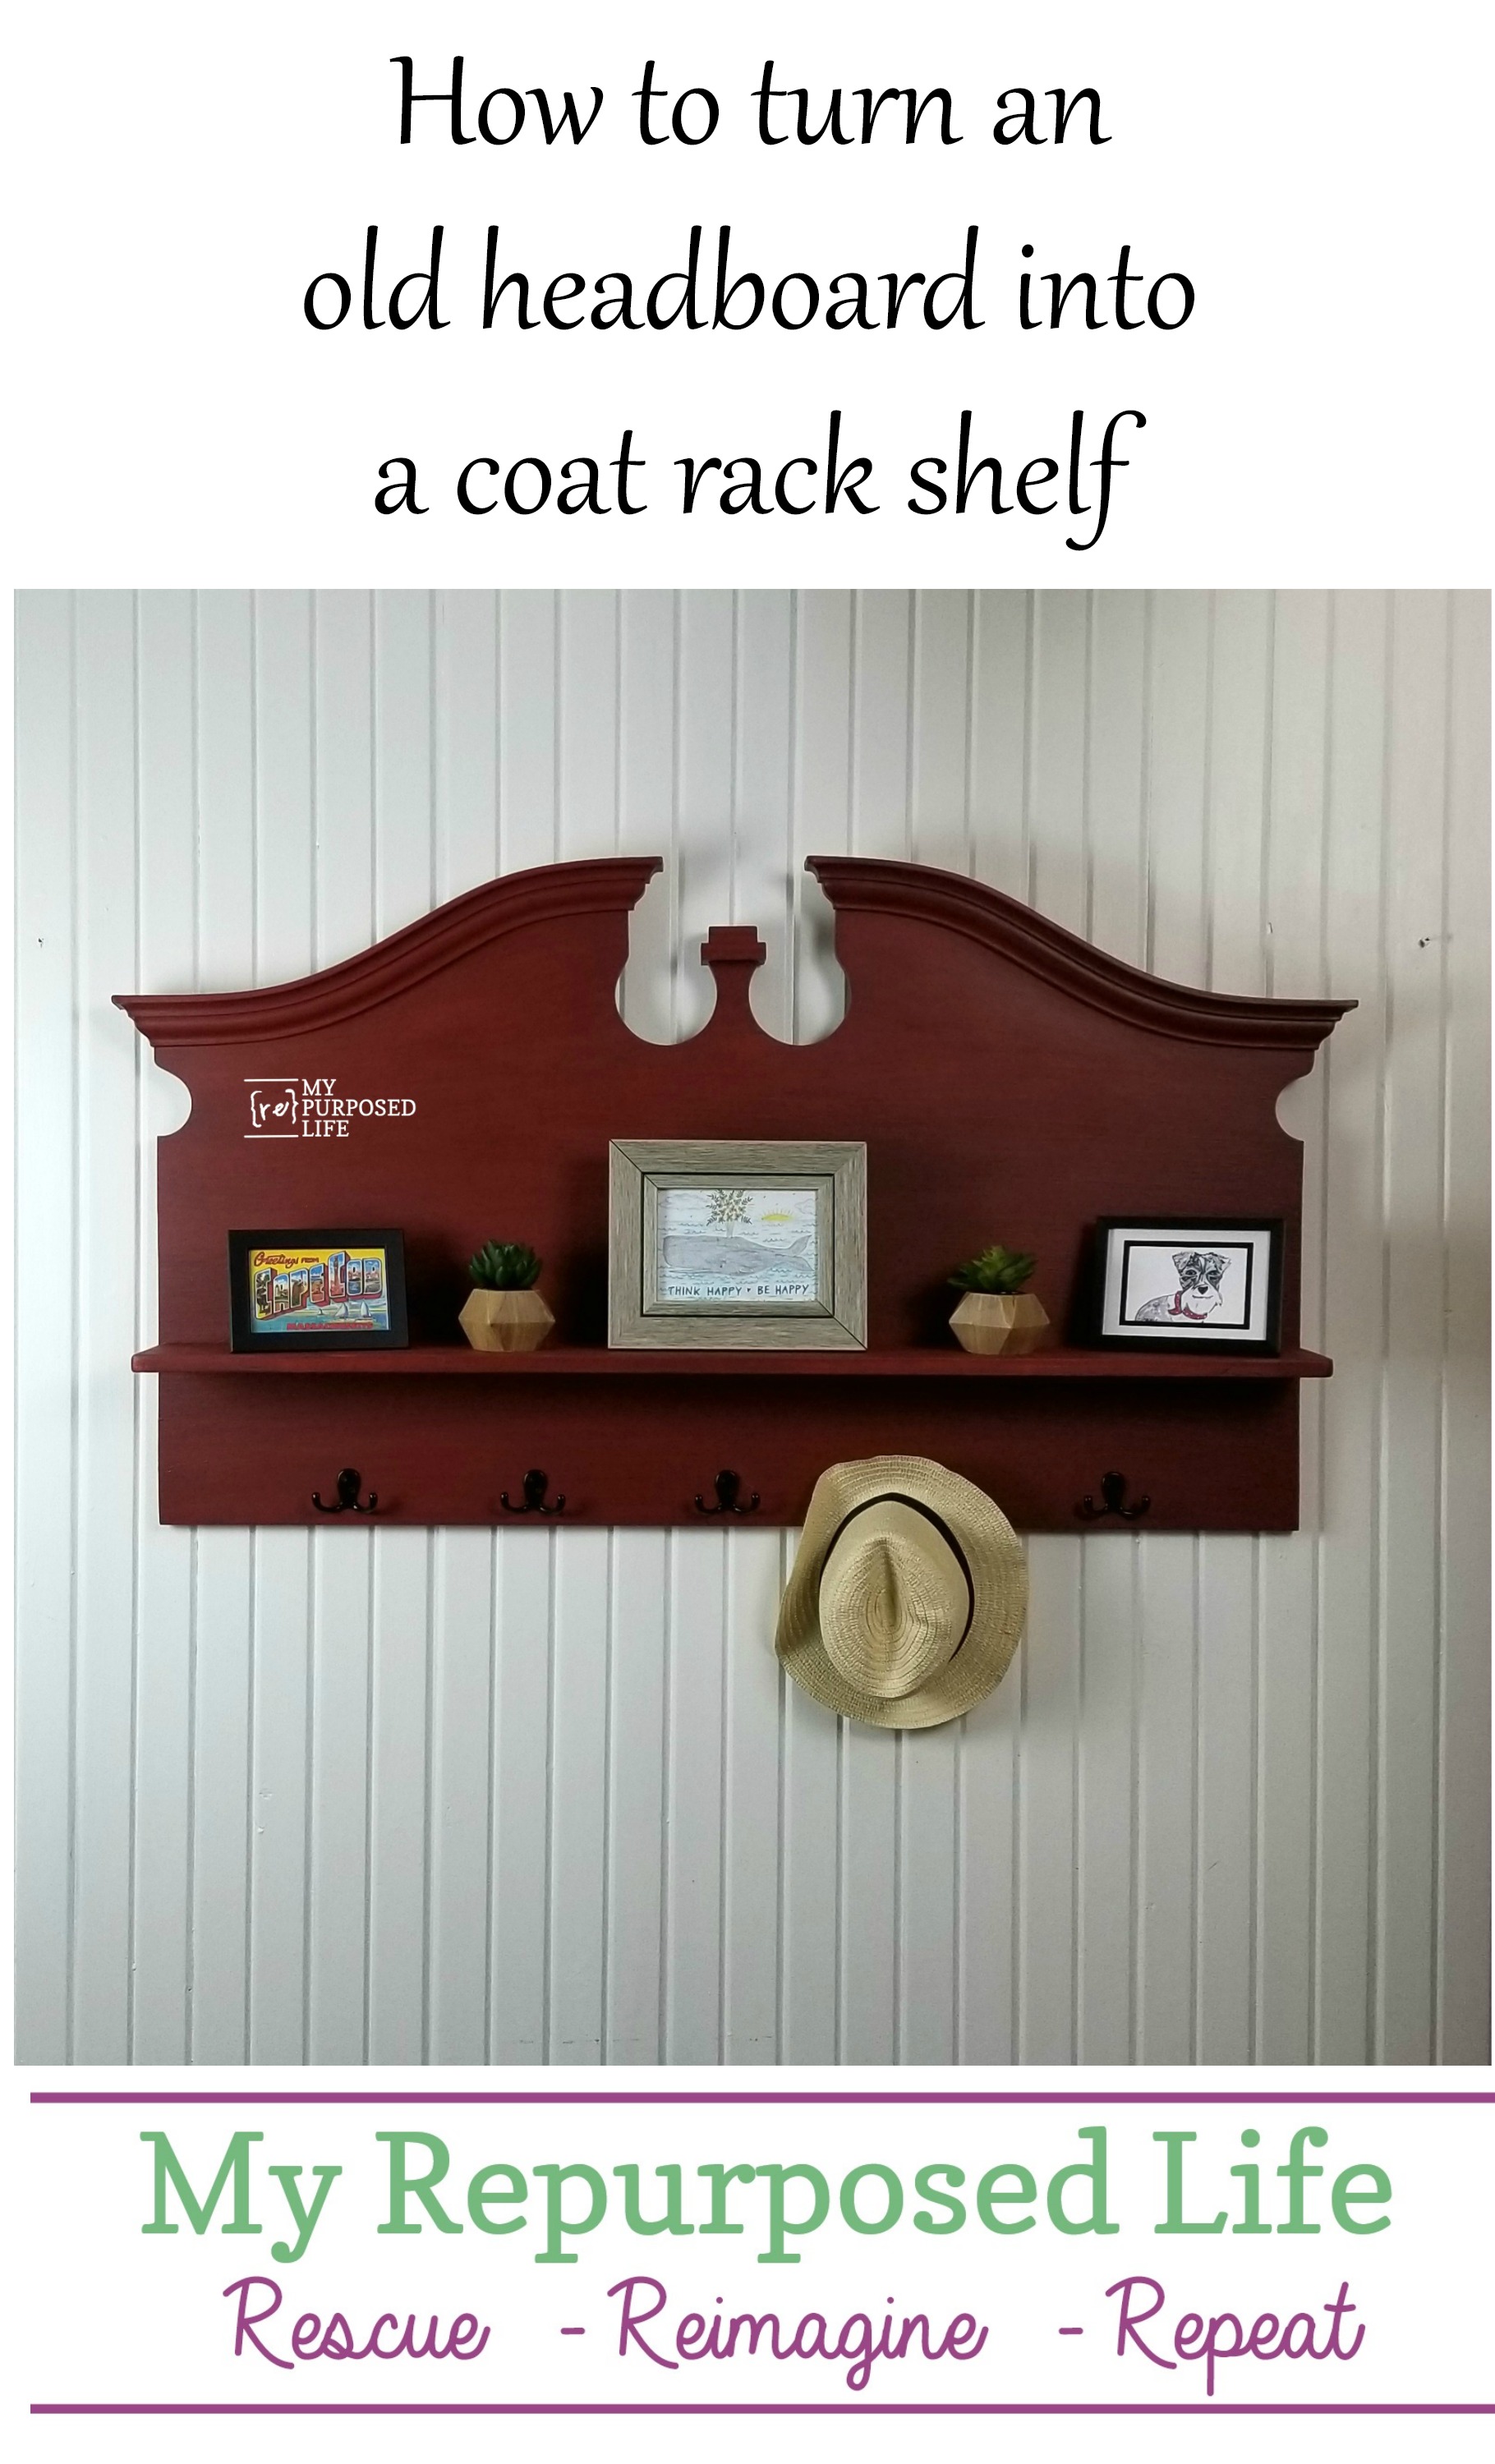
    I had this décor transfer headboard project that never sold at my booth at Vendors’ Village. The large headboard seemed like the perfect item for a headboard shelf coat rack.

    *this post contains affiliate links, read more here*headboard project

    Although the décor transfer laid pretty flush on the headboard, I was afraid it would show through the paint. I felt it was best to sand it smooth. I even did a facebook live sharing tips about using an orbital sander.


    Sand Headboard Smooth

    paint sanded headboard

    When sanding furniture pieces like this large headboard, it’s best to feel for smoothness instead of trusting your eye. Your hand will give you more insight to what imperfections may show through the new paint job.


    Paint Headboard Shelf

    red headboard

    Although the color is antique red, it does appear to have an orange tint in the photos.


    Add Glaze to Tone color and Seal

    smoked glaze

    Time to bring in the smoked glaze and a cheap chip brush to tone down the red paint on the headboard coat rack.


    shelf for headboard coat rack

    After cutting a 1x6 to length and sanding the edges, it was time to paint and glaze the shelf board to match the headboard.


    Attach Shelf to Headboard Coat Rack

    drill pocket holes with kreg jig

    I used my drill and the Kreg jig to make pocket holes on the shelf to attach it to the headboard.


    Install Coat Hooks

    easy add coat hooks

    It’s easy to add coat hooks if you follow these simple steps. Mark for screws, drill pilot holes, secure screws with screwdriver. Using a power drill may cause the screws to break off. Many headboards are made of hardwoods—making it difficult to secure the screws.


    use pencil as guide for coat hook placement

    To get the hook even/level I placed a pencil at the edge of the headboard and rested the hook on the pencil. Then I marked and drilled etc. The color looks really off in this photo.


    Attach D Rings

    d-rings

    I like to use these heavy duty d rings on my hanging projects.

    Hang Headboard Shelf Coat Rack

    red headboard shelf coat rack MyRepurposedLife

    This is a better representation of the real color.


    postcards as artwork headboard shelf coat rack

    The whale artwork “Think Happy Be Happy” was purchased in Cape Cod while on vacation with my daughter Jamie . It’s my goal in life to just “be happy”. Smile


    large red headboard coat rack shelf MyRepurposedLife

    I really love how pretty it looks on the white plank wall, don’t you? I hope it sells quickly at Glendale (Kentucky)  in the Fall.

    repurposed headboard coat rack shelf

    Old headboards make great coat racks, see more coat rack ideas here.

    gail

    Pin
    Share
    Tweet

    Related Content:

    • Wall Shelf with Hooks | DIY
      Wall Shelf with Hooks | DIY
    • Large Coat Rack Shelf
      Large Coat Rack Shelf
    • Luggage Rack Side Table using a Cabinet Door
      Luggage Rack Side Table using a Cabinet Door
    • Queen Anne Tables Cut in Half
      Queen Anne Tables Cut in Half
    • Porch Post Coat Rack made from a Newel Post
      Porch Post Coat Rack made from a Newel Post
    • Storage Bench Made From A Dresser
      Storage Bench Made From A Dresser

    Reader Interactions

    Comments

      See comments Cancel reply

      Your email address will not be published. Required fields are marked *

      This site uses Akismet to reduce spam. Learn how your comment data is processed.

    1. Cat

      September 26, 2018 at 12:21 pm

      Hi Gail, What Kreg Jig did you use to make the holes in the shelf? I'm new to actually building my own stuff. I can use a drill and sanders and have access to basically any tool my Hubby or brothers-in-law or Dad have, but I'd like to have the right tools for the projects I'm about to tackle...I have a collection of head and footboards and even a crib that I'd love repurpose into benches and I love this shelf you did. What tools would you say have really made a difference in making your projects easier and faster to complete. I don't think my Husband has anything like the jigs you mentioned in his tool collection...Thank so much for posting your projects they really are inspiring to me.

      Reply
      • Gail Wilson

        September 26, 2018 at 11:25 pm

        Cat,

        I'm soooo happy to read your comment. YOU are why I do what I do, to inspire women to DIY their own projects. I have many Kreg jigs, but for years I only had the small R3 that clamps onto your project. I generally use the K4 in all my projects, unless I have 1/2 stock, then I use the black micro jig. If budget is an issue, just get the R3.
        As for tools, definitely a miter saw and table saw. You're lucky to have tools at your disposal. I've had to build up my collection over the last 9 years.
        I made headboard benches the hard way before I got a Kreg Jig, but for joints, it really makes a big difference. If you get a Kreg jig, make sure you dry fit your pieces and mark your pocket holes. I've been known to drill the wrong board more than once. 🙂

        I'm here if you have any questions or need any tips.

        gail

    2. Jennie

      September 20, 2018 at 1:04 pm

      That’s beautiful, I love the color and it so much more useful.

      Reply
    3. Linda Morgan

      September 19, 2018 at 9:35 pm

      Love your projects.

      Reply
    4. Derry Gleason

      September 19, 2018 at 4:35 pm

      Thanks so much for showing me where to buy D-rings in bulk! I don't know why they never came up when I searched! Love your projects!

      Reply
      • Gail Wilson

        September 19, 2018 at 8:50 pm

        You're so welcome for the link to the d rings! They are so expensive in a small package at the hardware store. I use a lot of 'em and buying by the bulk is the best deal.

        Thanks for stopping by!

        gail

    5. Debbie

      September 19, 2018 at 2:08 pm

      Love it Gail! I loved the first idea too! I really need something like this near my front door!

      Reply
      • Gail Wilson

        September 19, 2018 at 8:51 pm

        Thanks Debbie! I appreciate you stopping by!

        gail

    6. Terri HUghes

      September 18, 2018 at 11:38 pm

      WOW......much better. Love it!!!!

      Reply
      • Gail Wilson

        September 19, 2018 at 8:51 pm

        Thank you Terri! You're definitely a "top fan" of MRL and it's greatly appreciated!

        gail

    7. Lisa Ellerhorst

      September 18, 2018 at 3:46 pm

      Do you have to seal after using the rustoleum glaze?

      Reply
      • Gail Wilson

        September 18, 2018 at 3:49 pm

        Lisa,

        No, you don't have to seal after using the glaze. It protects the chalky paint really well. No waxing!!!

        gail

    Primary Sidebar

    Hi, there! I’m Gail Wilson, the author and mastermind behind My Repurposed Life. I’m obsessed with finding potential in unexpected places and believe that with a little hard work and imagination, any old thing can be made useful again—myself included! I hope you’ll enjoy the journey and pick up a few tools along the way… literally!

    More about me →

    Join Our Mailing List

    ​

      Click the topics you're interested in below:

      Subscribing above means you agree to our Privacy Policy​

      Footer

      ↑ back to top

      SEEN ON

      Might I Suggest

      • Start Here
      • Furniture Makeovers

      Newsletter

      • Sign Up! for emails and updates

      About

      • Gail's Favorites on Amazon
      • About

      As an Amazon Associate I earn from qualifying purchases.

      Copyright © 2023 My Repurposed Life · Privacy Policy · Disclosure