How to paint mini blinds
As an Amazon Associate, I earn from qualifying purchases.
I have been wanting to try to paint mini blinds yep, mini blinds that were 30+ years old. Yes, you heard right. That may be a slight exaggeration, but not by much. When mini blinds first came out, we decided to have them custom made through Sears. We have 11 windows, and 3 doors. Of the 11 windows 2 are huge picture windows. They came out and measured, and delivered brownish aluminum mini blinds. For the most part, they have held up really well over the years. I couple of slats have gotten bent here and there, but being aluminum, I’ve been able to bend them back. I am gradually making some changes in my living room. A few months ago I removed the carpet to expose my original hardwood floor. I plan to paint, change up the dreaded fireplace, and yes, change the mini blinds. Because the picture windows are so large, I do not have the $$$$ to buy new blinds. I decided to start with a blind from the back door that NO one ever uses. I only use the door when I go out to hang clothes on the line. That way if the experiment didn’t work, I could easily purchase a cheap vinyl mini blind to replace it. I put it in the bathtub and washed it really good, hung it up to dry before I started painting. Below are pictures of how I did this.
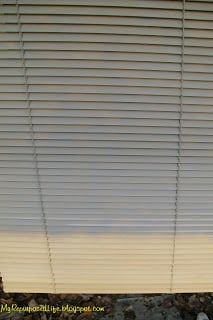
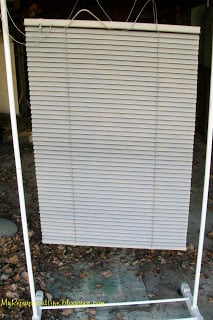
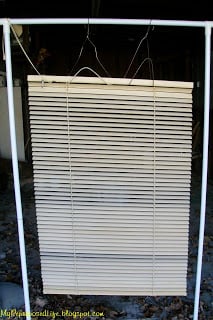 It’s very difficult to see the true color of this blind while it is hanging on my makeshift holder. You can see that I used a clothes hanger (on wheels).
 I bent a couple of wire hangers to hold my blind.
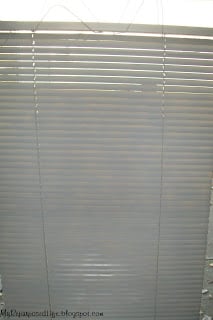
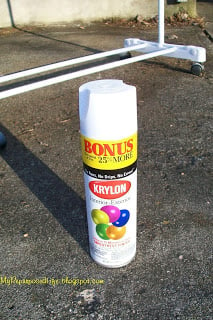
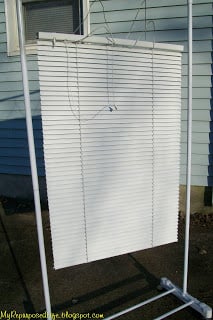
 I turned the slats so that they were mostly closed. I used cheap gray spray primer first.
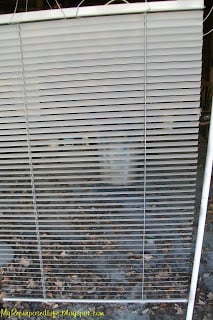
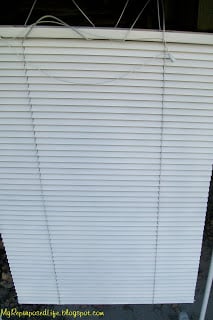
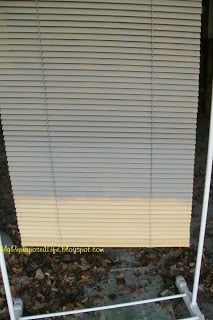 In this picture you get a better idea of the original color. The top portion is the primer, the bottom is the original color.
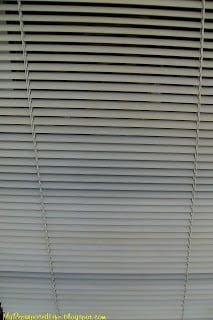
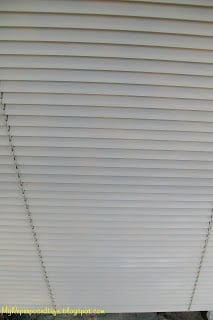
A closer look.
 I sprayed the primer on both sides, in a back and forth motion. I covered the strings, and top and bottom. It took 2 cans of primer for this one small blind.
 I then started spraying them with white spray paint.
 This is the finished product! I was so pleased, I couldn’t stop smiling. I was amazed at how well it turned out.
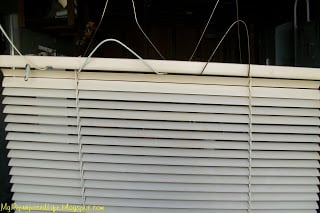
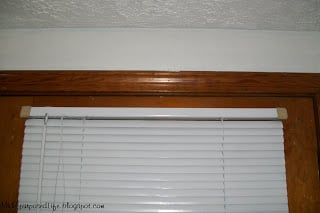 Then I brought it back in and hung it up. ummmm do you see a problem here?
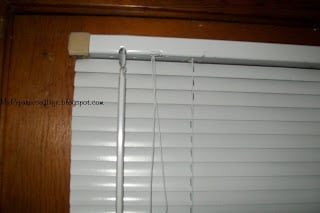 Silly me, got in a big fat hurry and didn’t take the brackets down to paint them. 🙂 BUT, it does give you a good idea of the original color.
I hope that Santa brings me some kind of sprayer so that I can tackle the large blinds in the living room. I would love to do all the blinds, but with the smaller ones, it may make more sense to just replace them a little at a time.

see more easy home improvement projects here
Hello, i am wondering about the strings!! Does the paint not peel off with use? The blinds i am thinking about doing are wood and have brown strings..i fear that with use, the paintwill eventually begin to flake off..??? Any comments?
It didn’t really stick all that much to the strings, no real problem here.
gail
Thanks for your helpful tips!!!
I know this is a very old blog post but I just came across it and wanted to add a suggestion,as far as losing so much paint to over spray, if you were to hang those blinds up right against a wall and paper the wall so you dont have paint all over the wall when you are done I think you would use much less paint. I discovered this when trying to paint a pool fence, had to put cardboard behind. it just changes the whole dynamics of how the paint lays down by not being in mid air. also to those of you who say “just go buy cheap vinyl blinds they are only $10 bucks….ok lets consider why they might be so cheap….I put those junkers throughout my entire house and every one of them has broken now within 3 years, the aluminum blinds cost almost twice the money but they last for decades. the newer aluminum blinds arent as thick as the old ones from 30 years ago but they are still much much better made.People need to understand that its worth paying extra money for quality. I have learned that the hard way and now just would rather hang a sheet in the window than waste money buying junk that will last months or a couple years at best. those vinyl blinds are basically disposable ,I would use them in a rental house or something maybe but not my own home.Dont buy them! Taking the time to rejuvenate something old and of quality is something people rarely do anymore, everyone just throws things away and buys new. very wasteful and lazy if you ask me.
thank you for your comment Richard.
Sadly, I replaced a large blind, and yep, it’s already broken. 🙁 I should have painted it.
gail
Richard, I realize this post is super old… However, I wanted to thank you regardless…. The info / bringing to light the almost “obvious” (after the fact, and only after you saying something about it) tidbit about laying them up against something. I have been frustrated to no end throughout the years with my various spray painting projects and extravaganzas, and couldn’t ever really pinpoint why sometimes I was getting better coverage, or MORE paint coverage from an identical can of paint. I always just chalked it up to the wind, angle I was spraying at, temperature…. Pretty much everything but the actual problem /solution LOL! I Feel rather silly, not realizing myself. Especially after all the various things I’ve spray painted. But, regardless…. THANK YOU RICHARD… YOU DA MAN! (HAHA, but sincerely… Thanks 🙂 )
I guess the spray paint better adheres to aluminum blinds because I tried it with little success on the plastic mini blinds. I removed all the slats and scrubbed and cleaned them well, primed and painted them, primed and painted the header, restrung and put everything back together. On the one window that we don’t use, they look great, on the other one that we use and they are pulled up to open the window and then let down again at night when window is closed, the paint is just flaking off. Everytime you lift or let down, there’s flakes on the floor. So I went to my habitat store and bout some really cheap replacement white blinds and dyed them, using rit dye. I let them soak for a few days, I think it was three, checked on them daily, stirred the dye around, took them out and put back together and love them, no flaking here.
Wow! dye? that’s very clever of you Ellen! I’m sorry the spray paint didn’t work on the plastic, especially after all that work! The aluminum was a little pitted, which I guess gave a good surface for the paint. I’m happy you figured out a solution. I appreciate you stopping by to leave a comment for those who may stop by in the future.
Thanks!!
gail
Hello, I was so happy to see that someone actually did what I have been wanting to do! 🙂 However I do have 1 question before I paint my bedroom blind. The guy at the paint store said if I spray paint I have to take out the cords & restring when done or it will paint them so I cant open or close them. Is this true? Would appreciate your input! Thanks so much, Tammy
Tammy,
I painted it all, and it works okay. Since this post, I’ve been buying blinds because I’ve found that you can buy vinyl blinds cheap. That being said, one of them has already broken (where I pull the blind up) My aluminum blinds were very expensive, and they have lasted for YEARS! It’s all a matter of personal choice.
gail
Pretty good article.I just came across your site and wanted to say that I have really enjoyed reading your blog posts.
Thought you might enjoy knowing when I googled painting mini blinds you came up within the first couple entries!
Thanks… I am redoing my dining room and although my blinds are kind of an off white, I’d like to have them match the other white I’m using for accent.
I felt like I had heard of people painting them before, thanks for showing me it is easy to do.
(I’m a no reply I guess and can’t fix so I’ve had ppl ask me to leave my emails) organizewithsandy(at)yahoo(dot)com
For what you spent on paint and time I believe you could have bought a new blind. They sell for less then $10. I don’t like wasting time on repurposing something that can be bought for a cheaper price. This appeared to be a nonsense kind of project.
You get what you pay for..i guess people have to learn the hard way…..🤦🏻♂️
You won’t be so proud of yourself when your cheap 10 dollar blind breaks in a few months!
Wow…they look brand new! What a great way to save, then put that money towards something you really want! Thanks for linkin’ up to Frugalicious Friday!
Jane @ Finding Fabulous
You are a brave woman for taking on mini-blinds! I’m pretty much convinced that you’re fearless!
Happy Thanksgiving!
Anne
I love the idea of using the clothes rack. I have custom sized aluminum mini blinds that are a lovely shade of peach from the early 80s. I painted the small one and wasn’t sure how to hang the large one (80″wide).
The fact that my windows are odd sized makes it cost prohibitive to just replace them when they can be facelifted.
Wow! I cannot wait to try this! We have aluminum mini blinds on all 4 of our kitchen windows. I want to try to paint them sage green after priming. Thank you for the tutorial!!!
So happy you found my article about painting your blinds!
good luck! The color sounds beautiful.
gail
Nice to know you can do this…but lazy comes into play for me here…they are cheap enough, I go buy new! lol
Pam