• Skip to primary navigation
  • Skip to main content
  • Skip to primary sidebar
  • Start Here
  • Shop Favorites
  • About
    • Welcome To My Repurposed Life Home of Repurposed Furniture
    • More About Gail
    • Disclosure
    • Privacy Information
  • Gallery
    • Repurposed Furniture
  • Repurposed Items
    • Building Supplies
    • Miscellaneous Household Items
    • Picture Frame/Chalk Board
  • DIY
    • Home Reno
    • outdoor living
    • Painting
    • Shop Talk
    • Tips for Around the House
    • Build It
      • Furniture
      • Home Decor
      • Storage
    • Crafts
      • Dollar Store
      • Easy
      • Holidays Seasonal
  • Furniture
    • Chair
    • Desk
    • Dresser/Chest
    • Headboard | Bed Parts | Cribs
    • Kids Furniture
    • Table
    • Kids Furniture
My Repurposed Life® Rescue Re-imagine Repeat
menu icon
go to homepage
subscribe
search icon
Homepage link
  • About
  • Start Here
  • Project Index
  • Furniture
  • Subscribe
    • Email
    • Facebook
    • Instagram
    • Pinterest
    • RSS
    • Twitter
  • ×

    Home » Holidays Seasonal » How to Print Photos {images} on Fabric

    How to Print Photos {images} on Fabric

    Published by Gail | Published December 18, 2013 | Updated October 18, 2021
    As an Amazon Associate I earn from qualifying purchases.

    Pin
    Share
    Tweet
    how to print on fabric using graphics and photos. Step by step directions and tips to make gifts and home decor items for your home. #MyRepurposedLife #repurposed #printonfabric via @repurposedlife

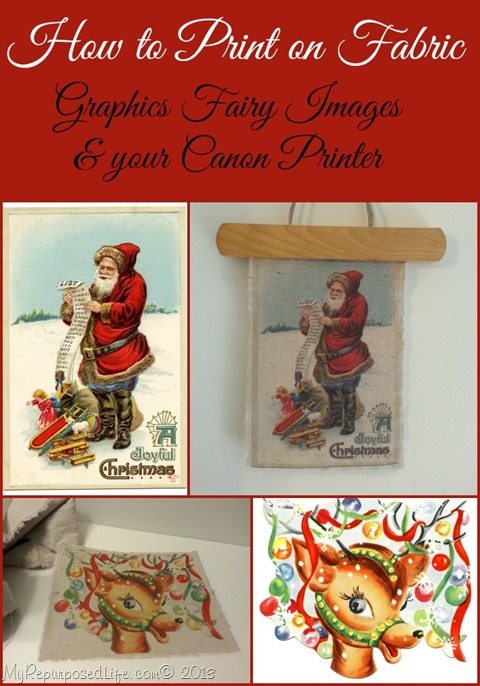
    Years ago I printed on fabric, and I’ve been wanting to do it again. I decided to put my new Canon printer to the test to see how it would do.
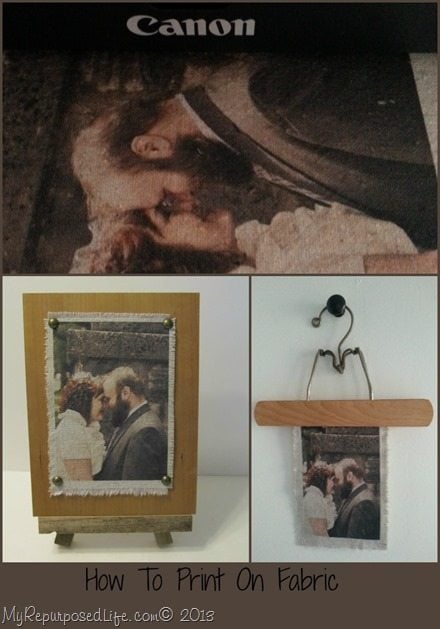
    how to print on fabric
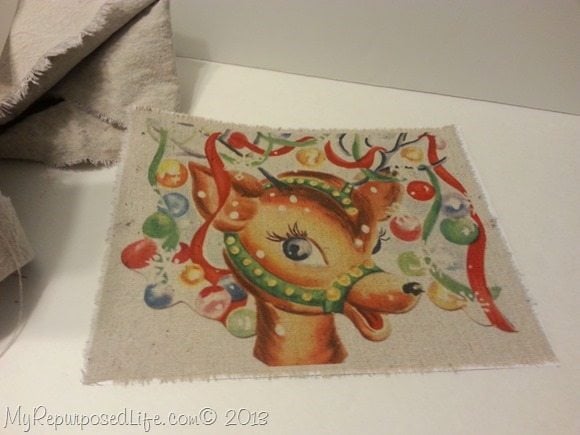
    RetroReindeer-GraphicsFairy1

    Cute Reindeer image

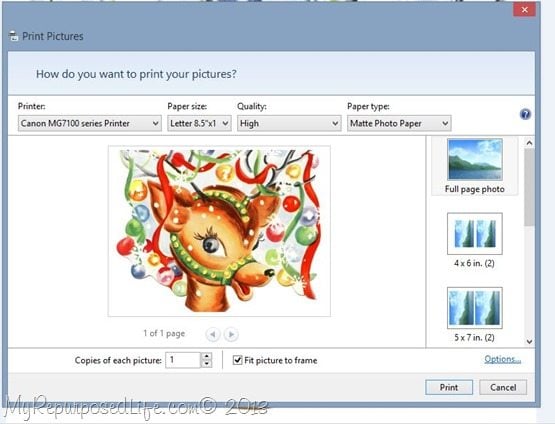
    santalist-clipart-graphicsfairy005I chose a couple of great images from The Graphics Fairy.

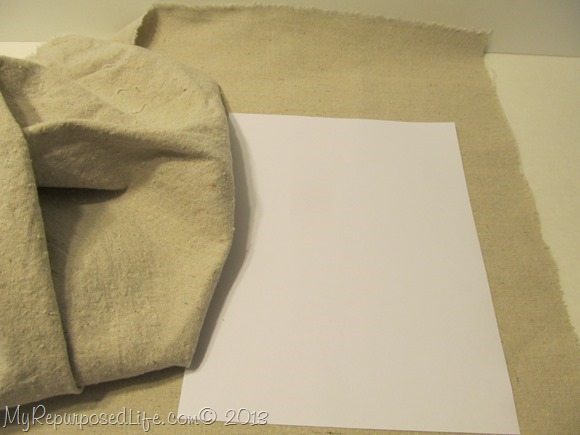
    printing on drop cloth fabricThen, I ironed a piece of scrap drop cloth fabric, and grabbed some of my  full page shipping labels.

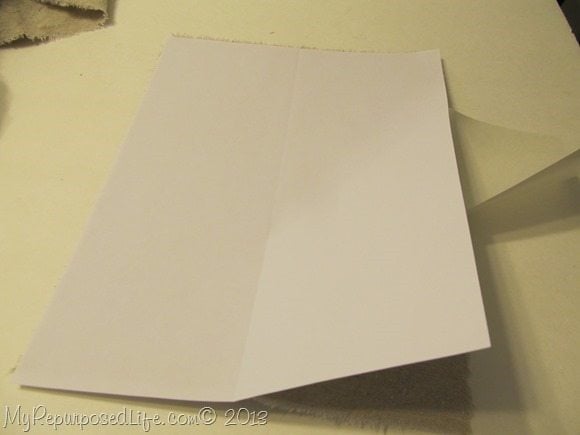
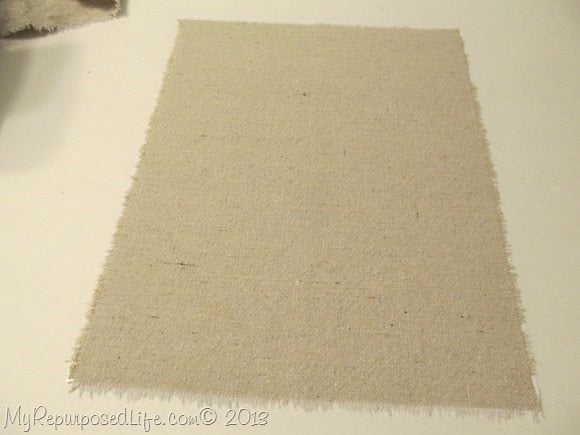
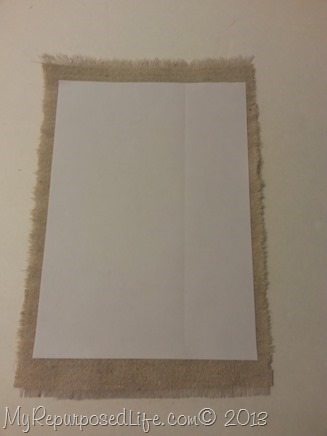
    apply label to fabricI made a small slit in the fabric, and tore it so it would fit  the 8.5x11 label. Then, I peeled off half of the backing and lined it up so it would be evenly spaced on the fabric, then I peeled of the other half of the backing. Tearing the fabric gets a straighter line then trying to cut it.

    print on drop cloth fabricHere is the drop cloth attached to the full page label.

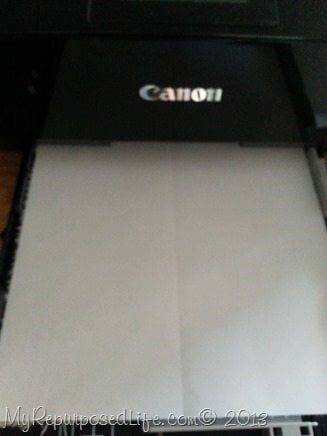
    Canon PIXMA
    Canon PIXMA

    Be sure to put the label in the cassette with the fabric face down.
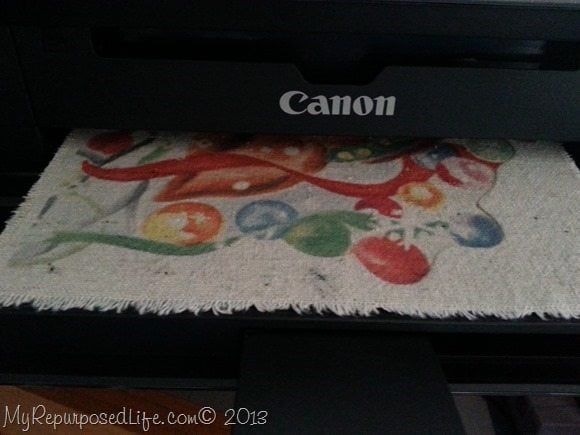
    use your Canon printer to print on fabric

    image printed on fabricLook how cute this vintage reindeer turned out after I printed it on fabric!

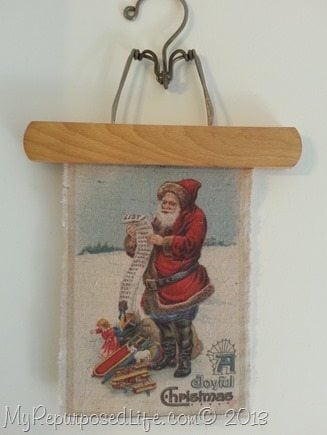
    Santa image printed on fabric

    use-label-to-support-fabricTo give the Santa some support and stiffness, I used another piece of label paper cut smaller on the back.

    graphics fairy Christmas images printed on fabric

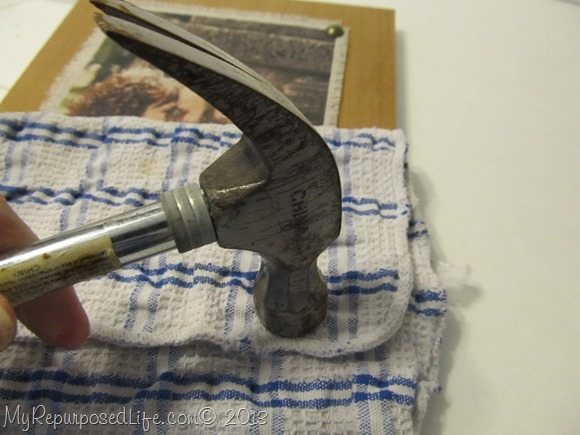
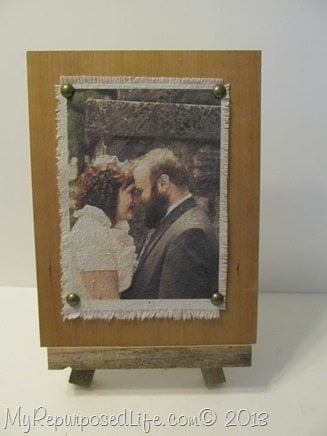
    fabric-photo-mounted-on-woodI printed one of my favorite wedding pictures of Jamie and Andy and mounted it on a scrap piece of wood with nail head tacks. I used a cloth to cushion the blow of the hammer.

    fabric wedding photoHere it is displayed on a rustic easel I made. I like the edges frayed a little.

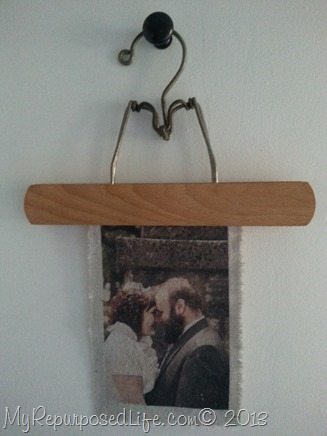
    wedding photo printed on fabric

    The possibilities are endless for printing on fabric. You could print documents such as wedding or birth certificates. If you like to sew, you could use a photo printed on a pillow.

    gail

    Pin
    Share
    Tweet

    Related Content:

    • Printing on fabric using your home printer
      Printing on fabric using your home printer
    • Small Footstool Makeover For Camper
      Small Footstool Makeover For Camper
    • How to make a Drop Cloth Hammock
      How to make a Drop Cloth Hammock
    • Easy Image Transfer
      Easy Image Transfer
    • Packing Tape Image Transfer Stickers
      Packing Tape Image Transfer Stickers
    • IOD roller stamped drop cloth grommet curtains
      IOD roller stamped drop cloth grommet curtains

    Reader Interactions

    Comments

      See comments Cancel reply

      Your email address will not be published. Required fields are marked *

      This site uses Akismet to reduce spam. Learn how your comment data is processed.

    1. Carol

      January 21, 2014 at 4:34 am

      Gail................this is super. I don't know what I liked more? Learning how to print on cloth or the wedding picture. Loved that. I am going to have to try this. Now I just have to convince my husband we need a new printer. LOL. Thanks for all the inspiration.

      Reply
    2. Meari

      January 08, 2014 at 10:06 pm

      Very cool project, Gail. I'm thinking about trying this with my printer. Endless gift ideas!

      Reply
    3. Sue at Blu

      December 28, 2013 at 3:50 pm

      Phenomenal! Oh the things we can do!

      Reply
    4. Dianne

      December 19, 2013 at 4:41 pm

      Please explain, "label paper." I am wanting to try this but don't know the correct materials used to achieve this. I live in a rural community and, other than WalMart, we have no specialty supply stores. Is label paper available @ WalMart? Beautiful graphics and projects as well! Thanks for sharing!!

      Reply
      • gail@myrepurposedlife.net

        December 19, 2013 at 6:12 pm

        Dianne
        Label paper is like address labels, but the sticker covers the entire sheet of paper (8.5x11) It's one very large sticker. They are available at walmart.com, they are called "full sheet labels".
        Thanks so much for stopping by and taking the time to leave a comment.
        gail

    5. Pat

      December 19, 2013 at 1:41 am

      I've had trouble printing on anything but printer paper!
      I tried printing on book pages the one time I tried. But man! If I could print on fabric AND. GET. IT. RIGHT. Whoa! the sky would be the limit... I can think of a bah-jillion things to do with it... (with the help of Pinterest and MRL of course)

      Patricia

      Reply
    6. Shirley

      December 18, 2013 at 11:03 pm

      I would think it would work with two sided interfacing. Put the interfacing on the material and iron, it would make it very smooth to feed through the printer. That way you could just iron it on a pillow or whatever.
      God Bless and have a Merry Christmas..

      Reply
    7. Betsy

      December 18, 2013 at 9:32 pm

      Great idea to use the shipping labels to hold the fabric. Thanks for the tutorial Gail.

      Reply
    8. Becky

      December 18, 2013 at 8:02 pm

      Will this work on an Epson artisan printer?

      Reply
      • gail@myrepurposedlife.net

        December 18, 2013 at 8:18 pm

        I'm sorry Becky--I have no idea if it will work with your printer. Please use caution and good judgement if you're unsure.

        gail

    9. Lynne E.

      December 18, 2013 at 1:28 pm

      They all turned out so great!! Again... you continue to inspire me Gail.

      Reply
    10. Ruth

      December 18, 2013 at 12:47 pm

      They turned out great. I am going to have to try this!

      Reply
    11. Mindi

      December 18, 2013 at 12:08 pm

      This is so cool Gail! My favorite part is that you used the sticky label paper, genius!! Pinned!

      Reply
    12. Adina Johnson

      December 18, 2013 at 9:12 am

      Gail, I recently have done a few projects like this myself, only I ironed freezer paper to my fabric rather than use the labels. I wonder if it would feed easier using the labels? I had some trouble with the fabric not wanting to feed through. I'll try labels! Here's a link to my printing on fabric project if you want to take a peek.
      http://simplycountrylife.blogspot.com/2013/11/handmade-holiday-ticking-pillow-covers.html
      http://simplycountrylife.blogspot.com/2013/11/old-tin-measuring-cups-turned-christmas.html
      I love your santa!
      Adina @ Simply Country Life

      Reply
    13. Katy

      December 18, 2013 at 8:52 am

      How cute is that! I love it!

      I can't believe it's been four years since you posted the other tutorial about printing on fabric. Holy Moly!

      Reply
      • gail@myrepurposedlife.net

        December 18, 2013 at 9:11 am

        oops! my bad! it's only been three years. 🙂

        but my how time flies!

    14. Henrietta

      December 18, 2013 at 8:18 am

      The photos turned out beautifully! I love the wedding photo idea, wha what a great gift! I am definitely going to try printing on fabric using a label now!

      Reply
    15. Holly

      December 18, 2013 at 7:38 am

      Love the way they turned out! I've never tried this but I think I'm going to need too! 🙂

      Reply
    16. Sue Lebron

      December 18, 2013 at 7:00 am

      Wow! This is SO cool! I have to try it!! What kind of fabric is that? Is there a name for it. I love it!
      Thanks!
      Sue

      Reply
      • gail@myrepurposedlife.net

        December 18, 2013 at 8:11 am

        Sue,

        I used drop cloth fabric. It's my favorite! lol

        gail

    17. Susan

      December 18, 2013 at 7:00 am

      This is how I made my santa pillows and I love it! Your pics came out great!
      Susan

      Reply
      • gail@myrepurposedlife.net

        December 18, 2013 at 8:10 am

        I know! I loved your little pillows. I first did this four years ago, and this printer worked so much better than my old one did. It fed through every single time without fail. I struggled with it a lot when I did it in 09. Gotta love modern technology!

        gail

    18. Karen Cudney

      December 18, 2013 at 6:40 am

      You can, also, iron the shiny side of freezer paper to fabric so it can be fed into a printer. Either way, it is a great effect.

      Reply

    Primary Sidebar

    Hi, there! I’m Gail Wilson, the author and mastermind behind My Repurposed Life. I’m obsessed with finding potential in unexpected places and believe that with a little hard work and imagination, any old thing can be made useful again—myself included! I hope you’ll enjoy the journey and pick up a few tools along the way… literally!

    More about me →

    Join Our Mailing List

    ​

      Click the topics you're interested in below:

      Subscribing above means you agree to our Privacy Policy​

      Footer

      ↑ back to top

      SEEN ON

      Might I Suggest

      • Start Here
      • Furniture Makeovers

      Newsletter

      • Sign Up! for emails and updates

      About

      • Gail's Favorites on Amazon
      • About

      As an Amazon Associate I earn from qualifying purchases.

      Copyright © 2023 My Repurposed Life · Privacy Policy · Disclosure