Kids Art Desk Repurposed Armoire
As an Amazon Associate, I earn from qualifying purchases.
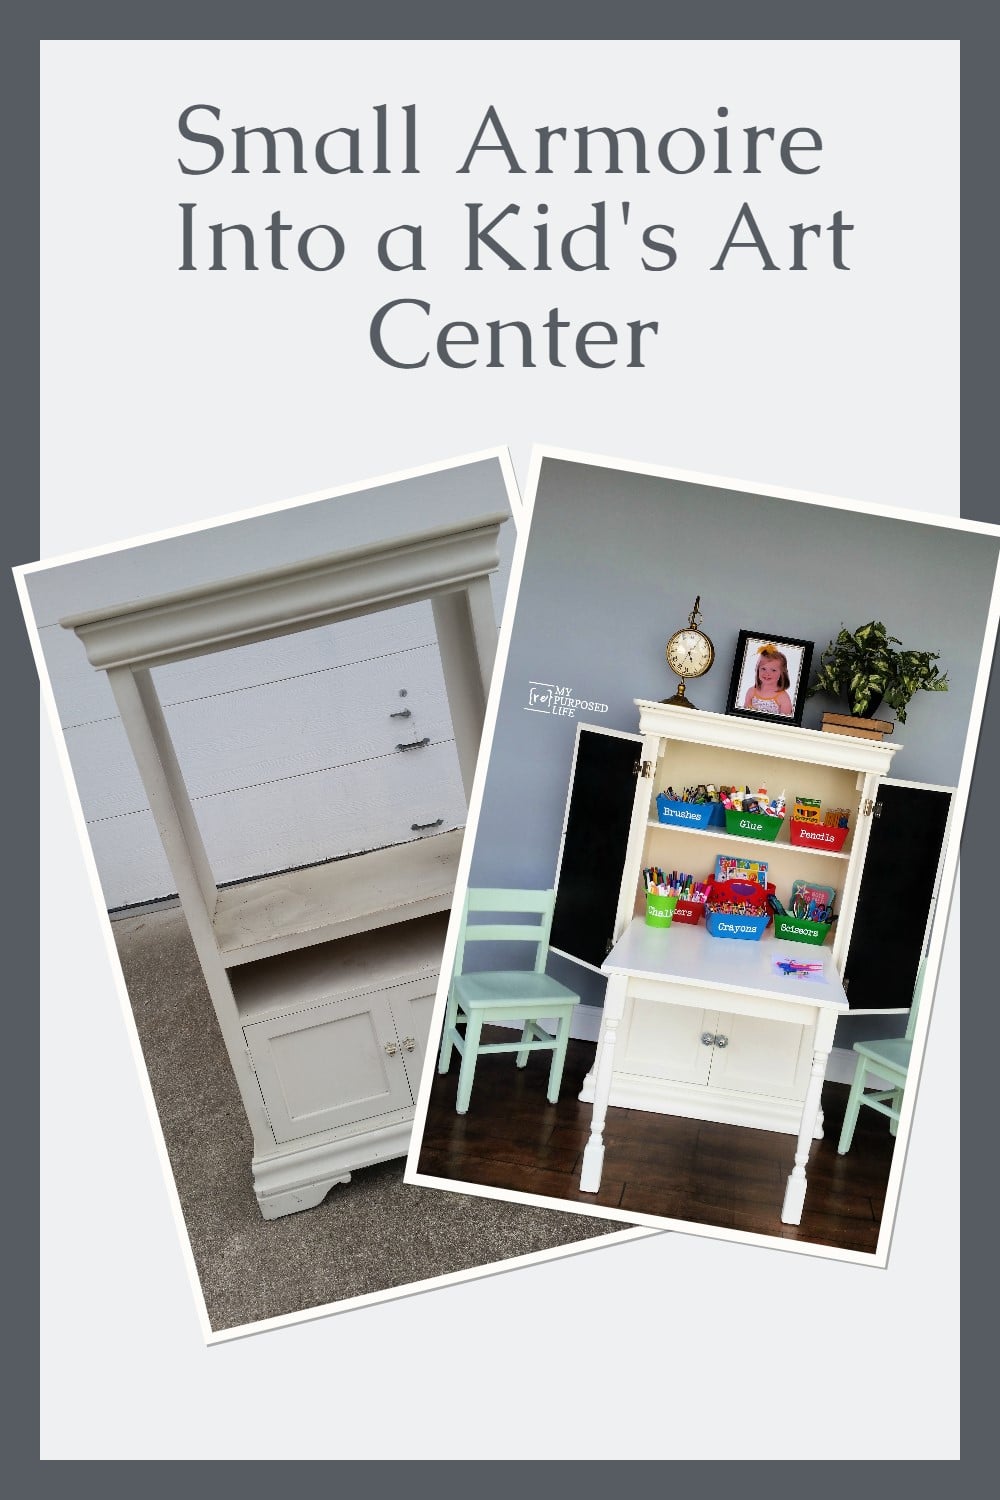

I am so glad this kid’s art desk, made from a repurposed armoire, is done. I hope you can follow along with my crazy tutorial below because this is a pretty in-depth repurposed furniture project.
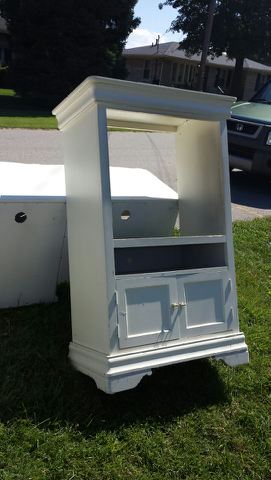
Roadkill Rescue
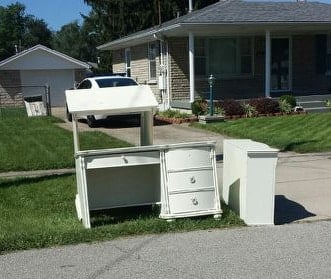
Last fall, Leann picked up some great items from the side of the road for me.
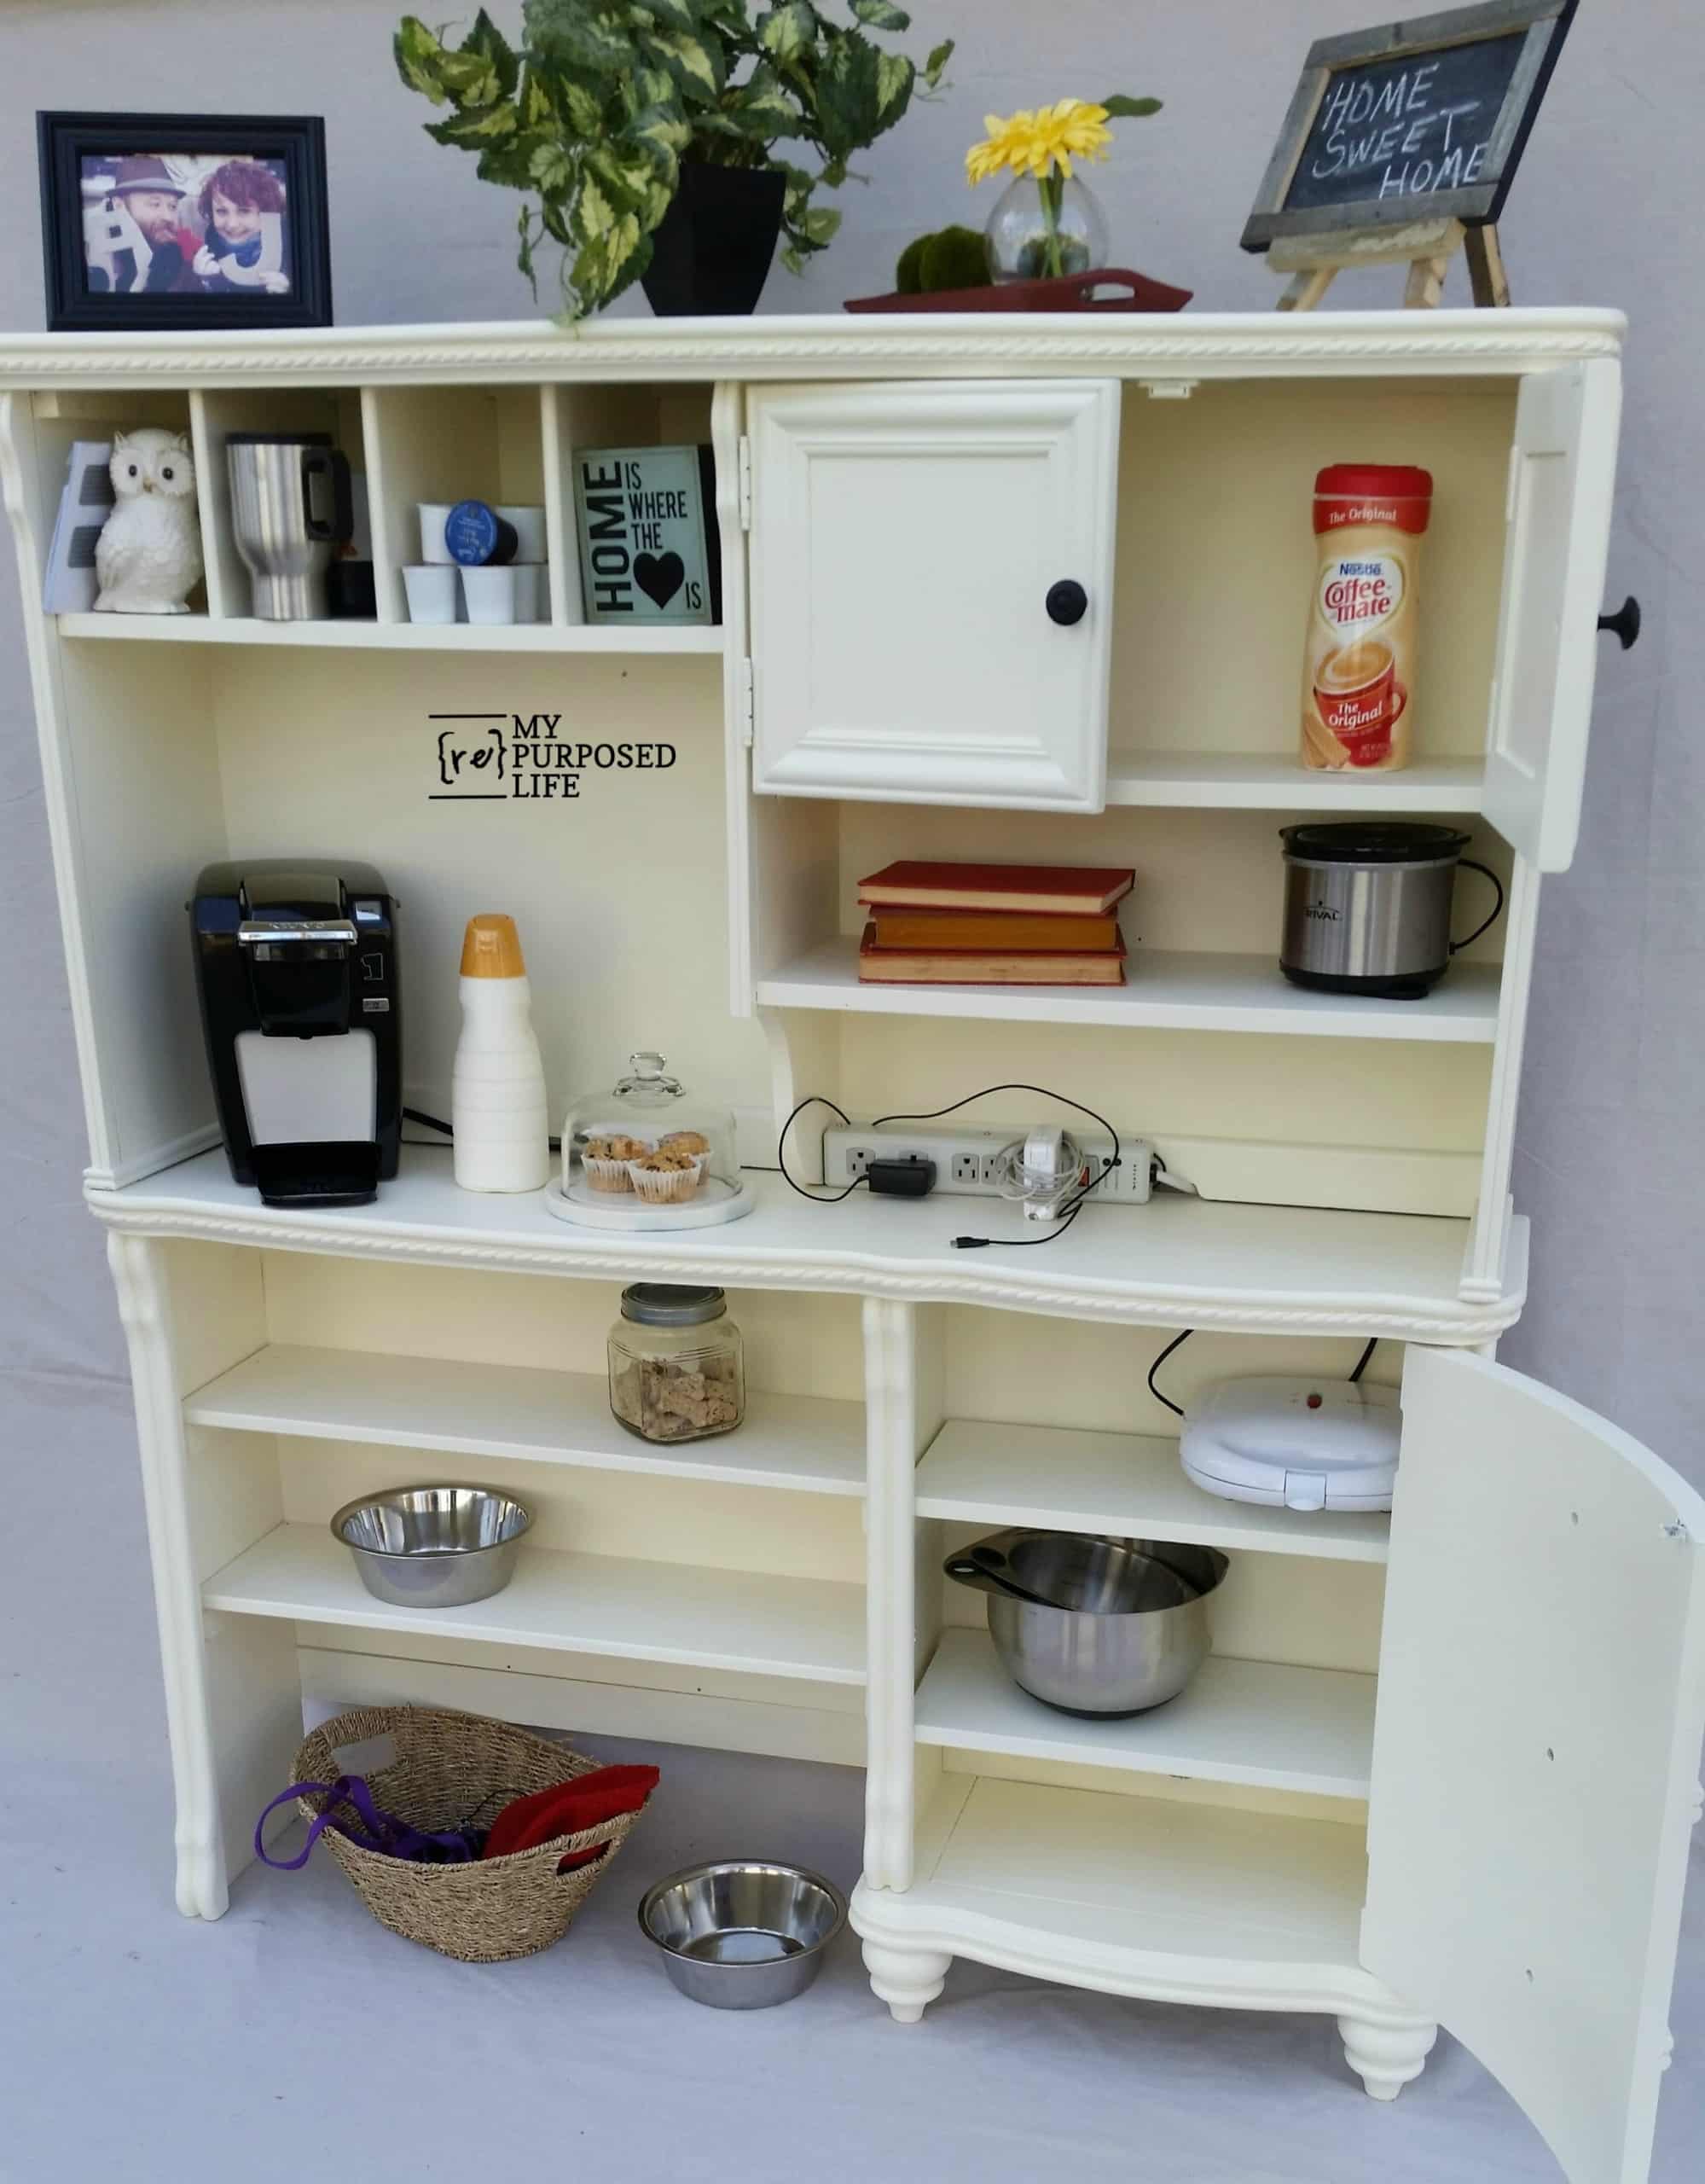
I used the desk and the hutch to make this awesome coffee station/kitchen organizer.
Small Kid’s Armoire Redo | Kids Art Desk
The kid-sized armoire was the third piece, perfect for a kid’s art desk!
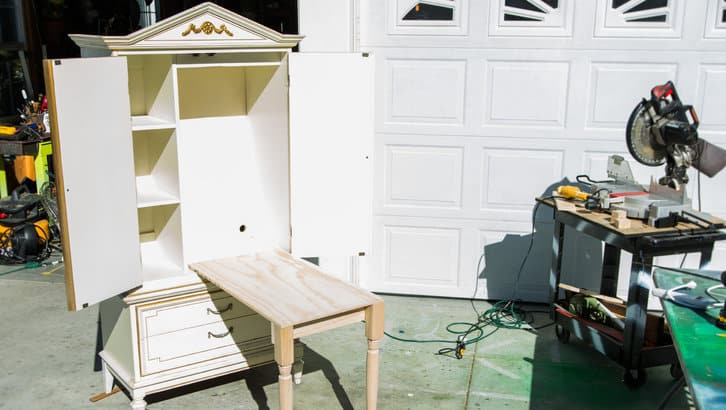
One of my favorite shows is Home and Family on the Hallmark Channel. Ken Wingard transformed a Craigslist find into a craft and sewing cabinet. That inspired me to do something different with that kid-sized armoire above.
Dismantle the Armoire
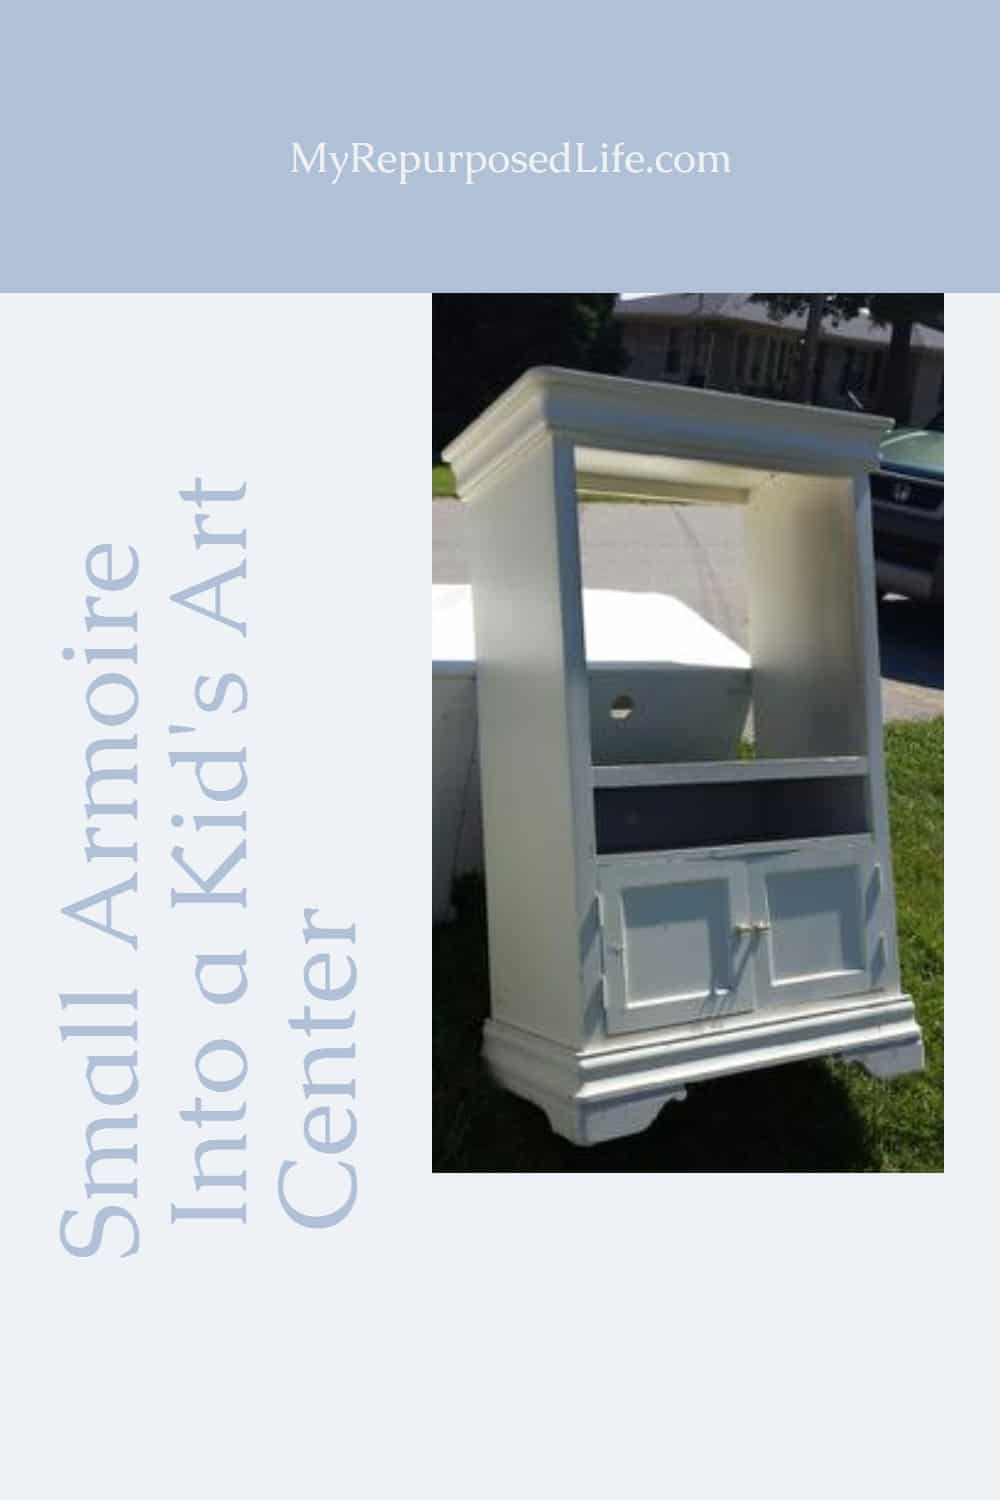
The armoire shown above differs slightly from the one Ken used for his project. This armoire cabinet had no doors and was pint-sized compared to Ken’s.
For the table to fold up, it needed to fit in that space at the top where I’m assuming a TV. was meant to be. However, in the case of this piece, for the table to fold out and reach the ground, the legs needed to be LONGER than would fit in that space. In other words, the cabinet was too tall.
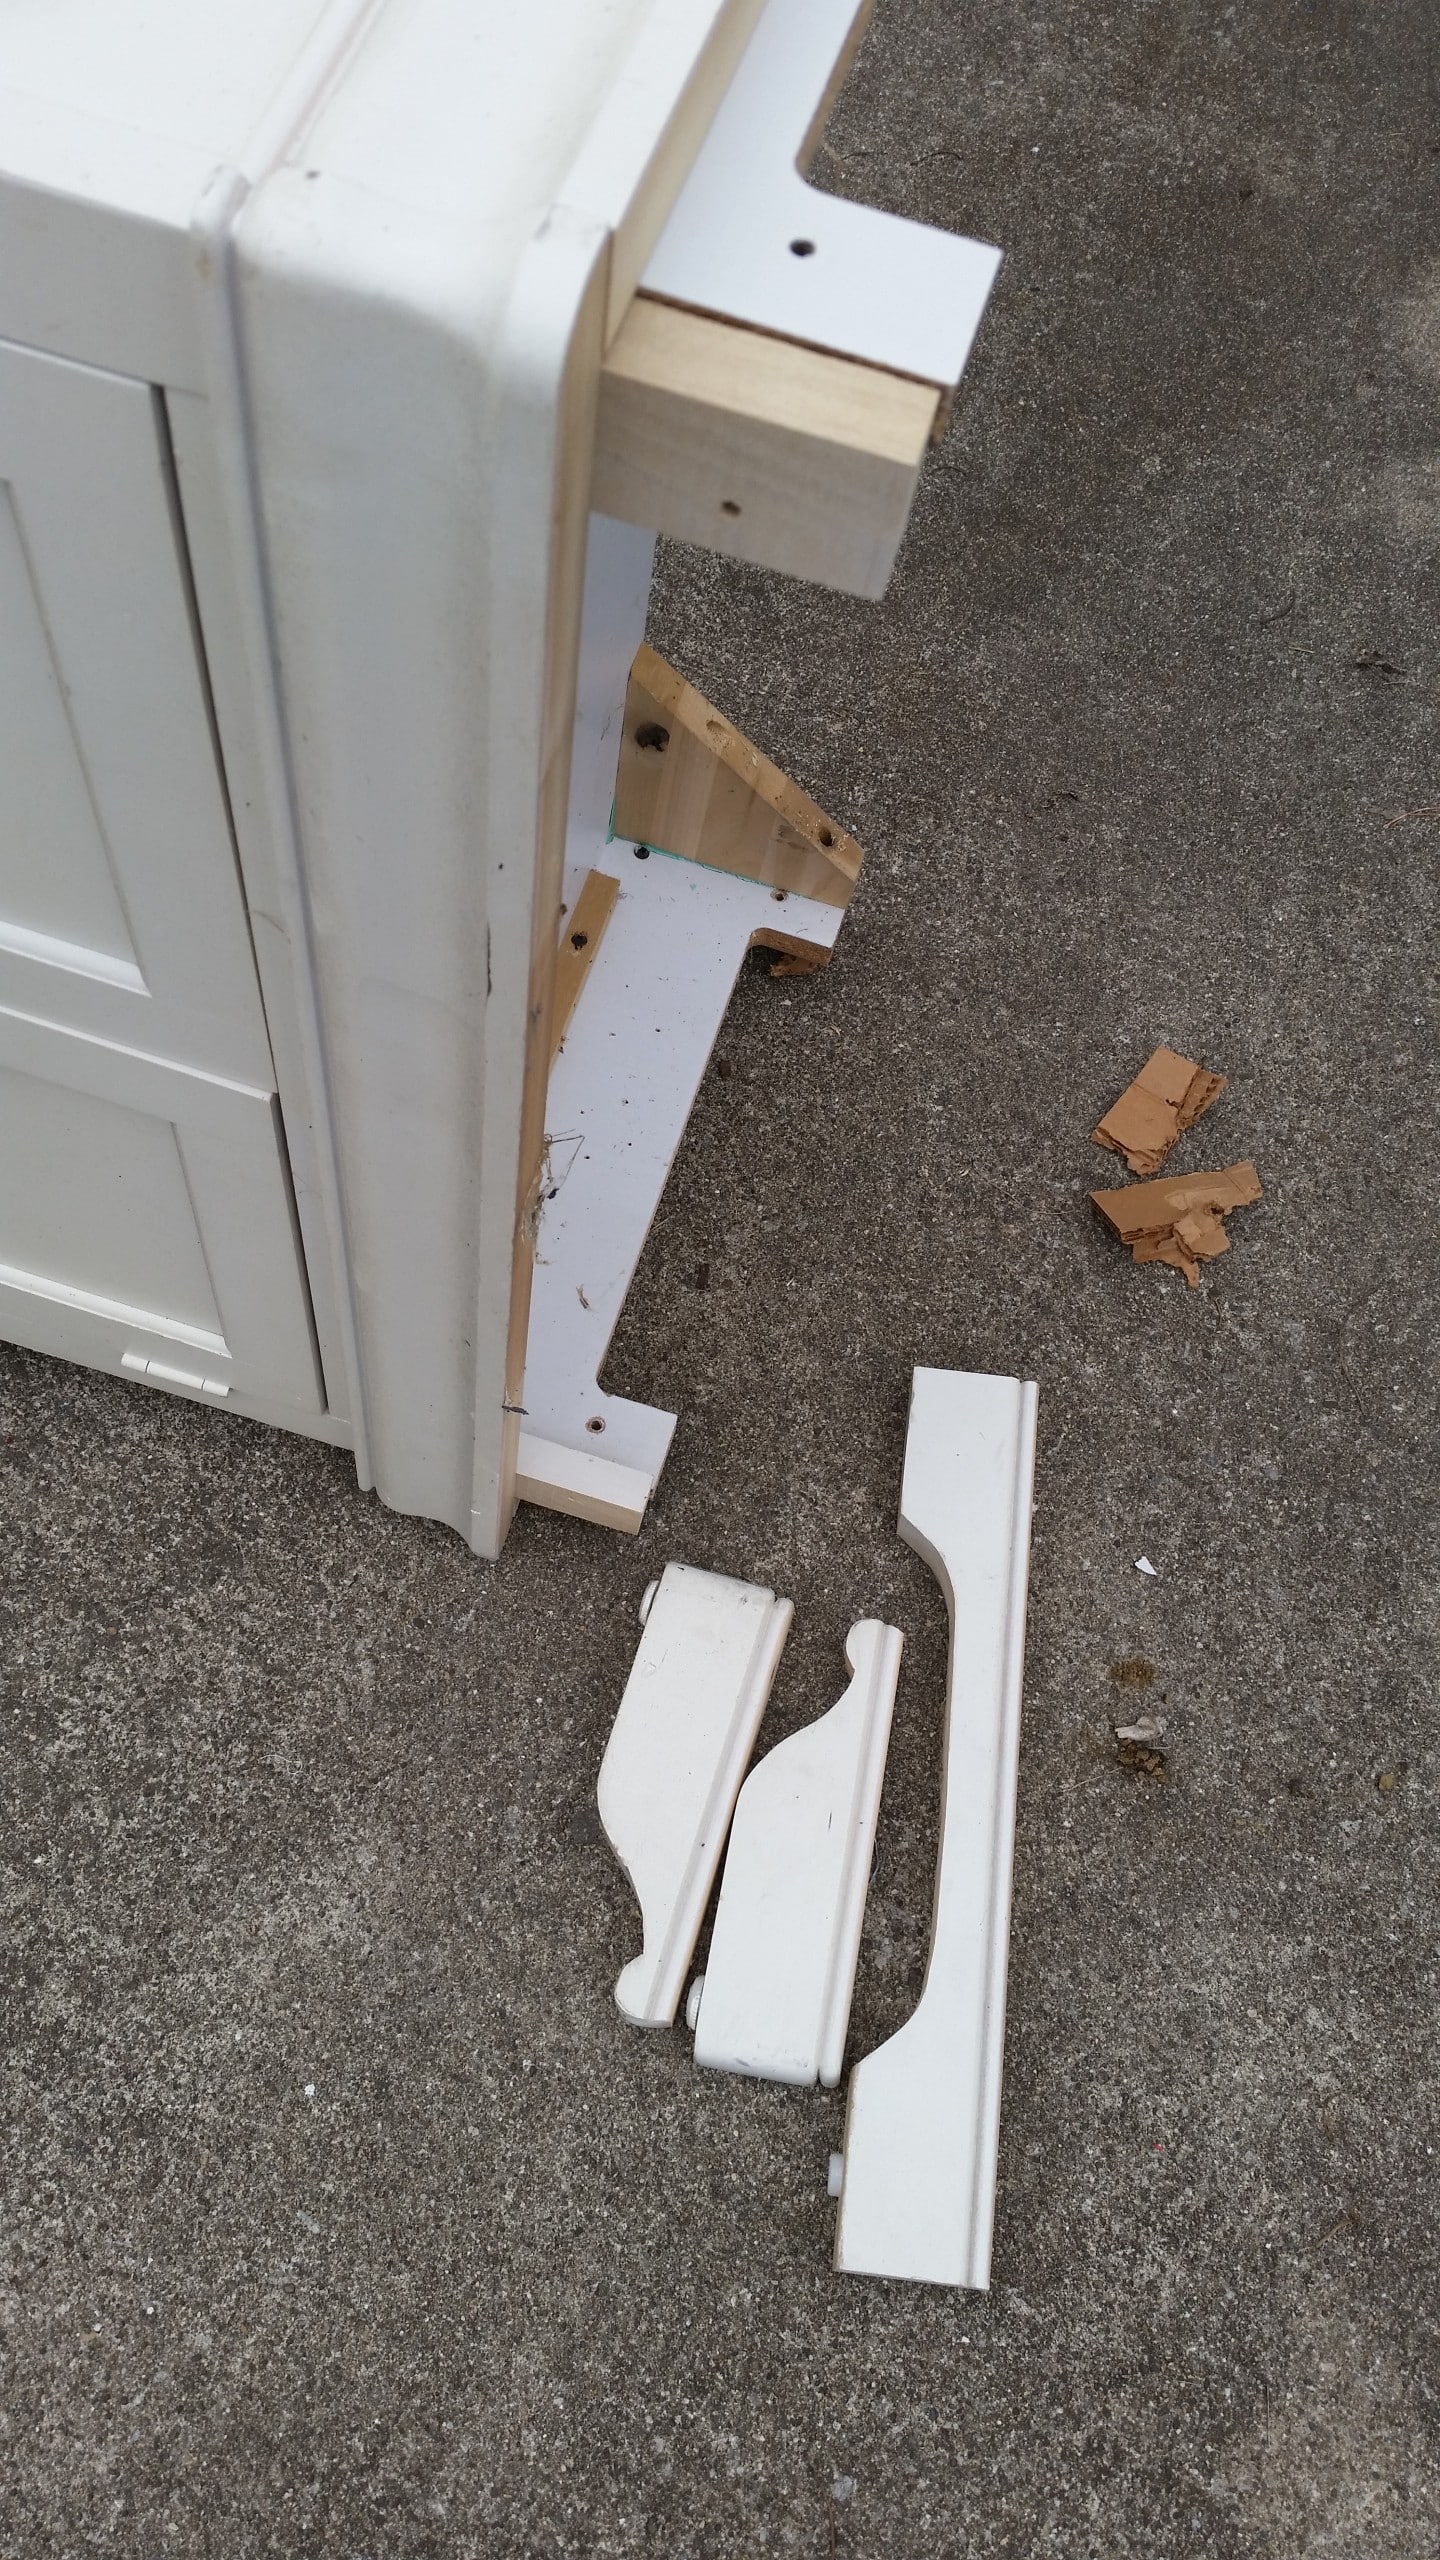
So, I got to do one of my favorite things: cut up some furniture!
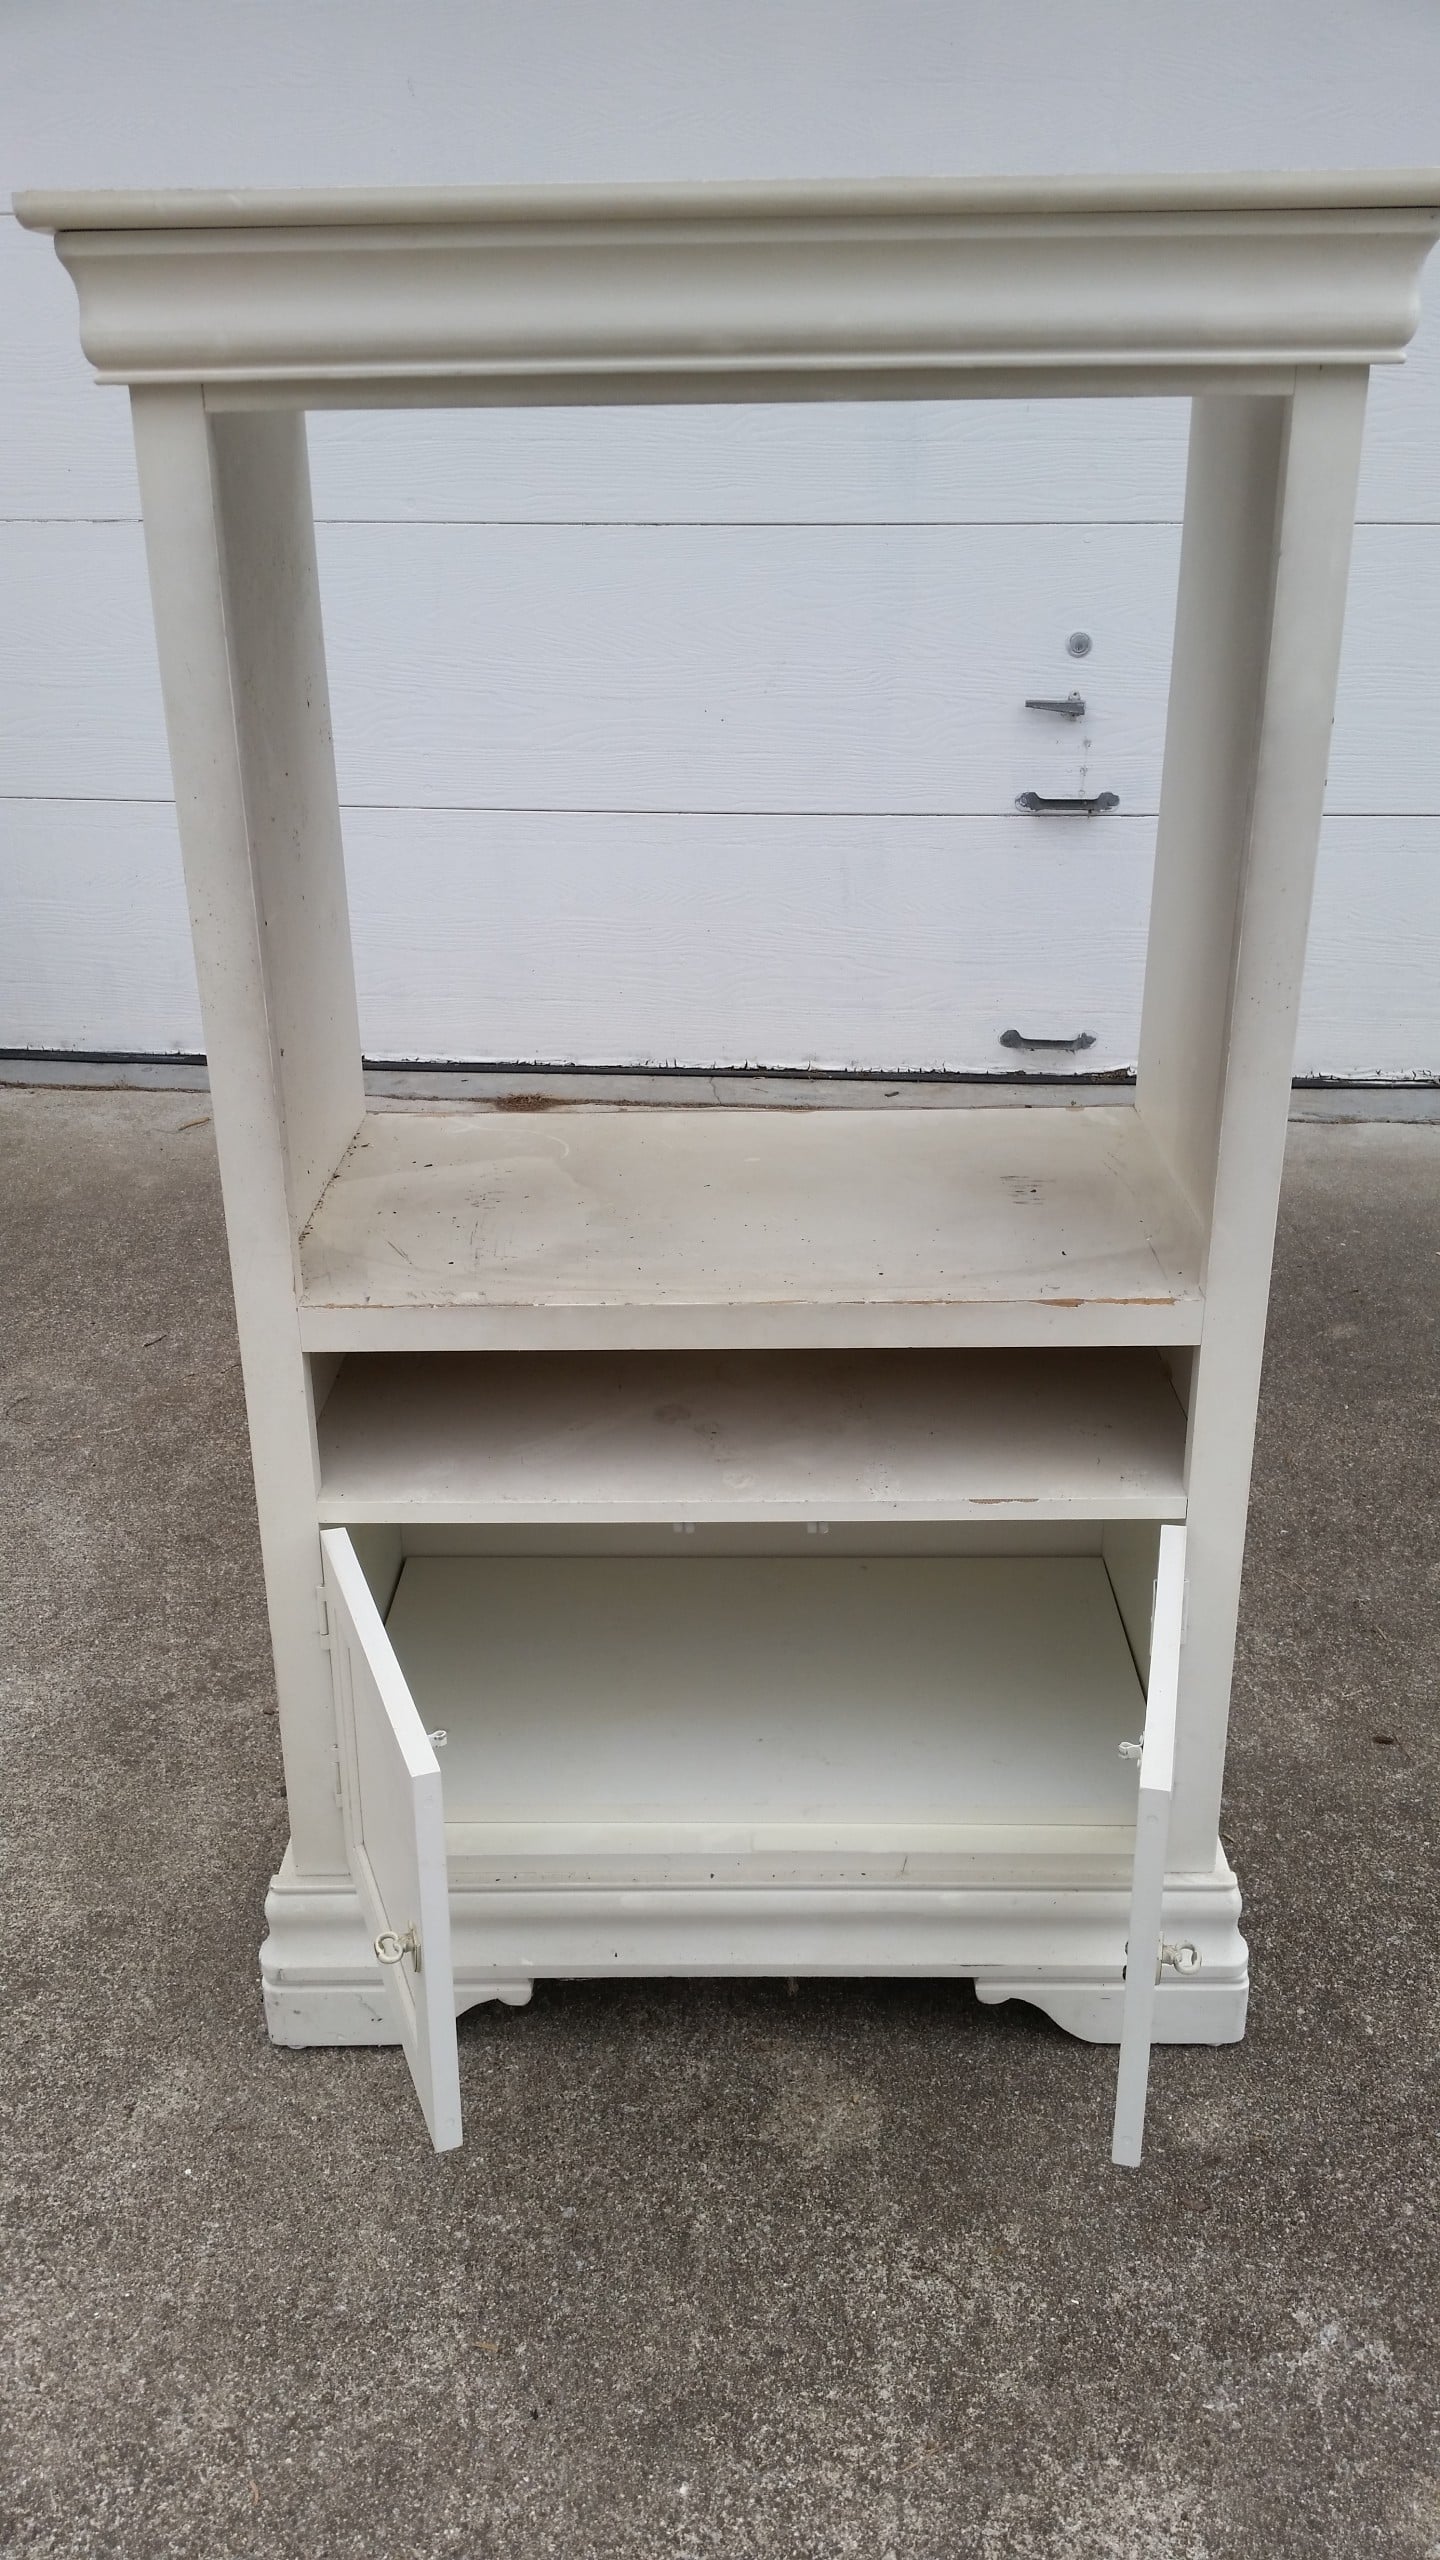
Using a Saw to Reduce the Height
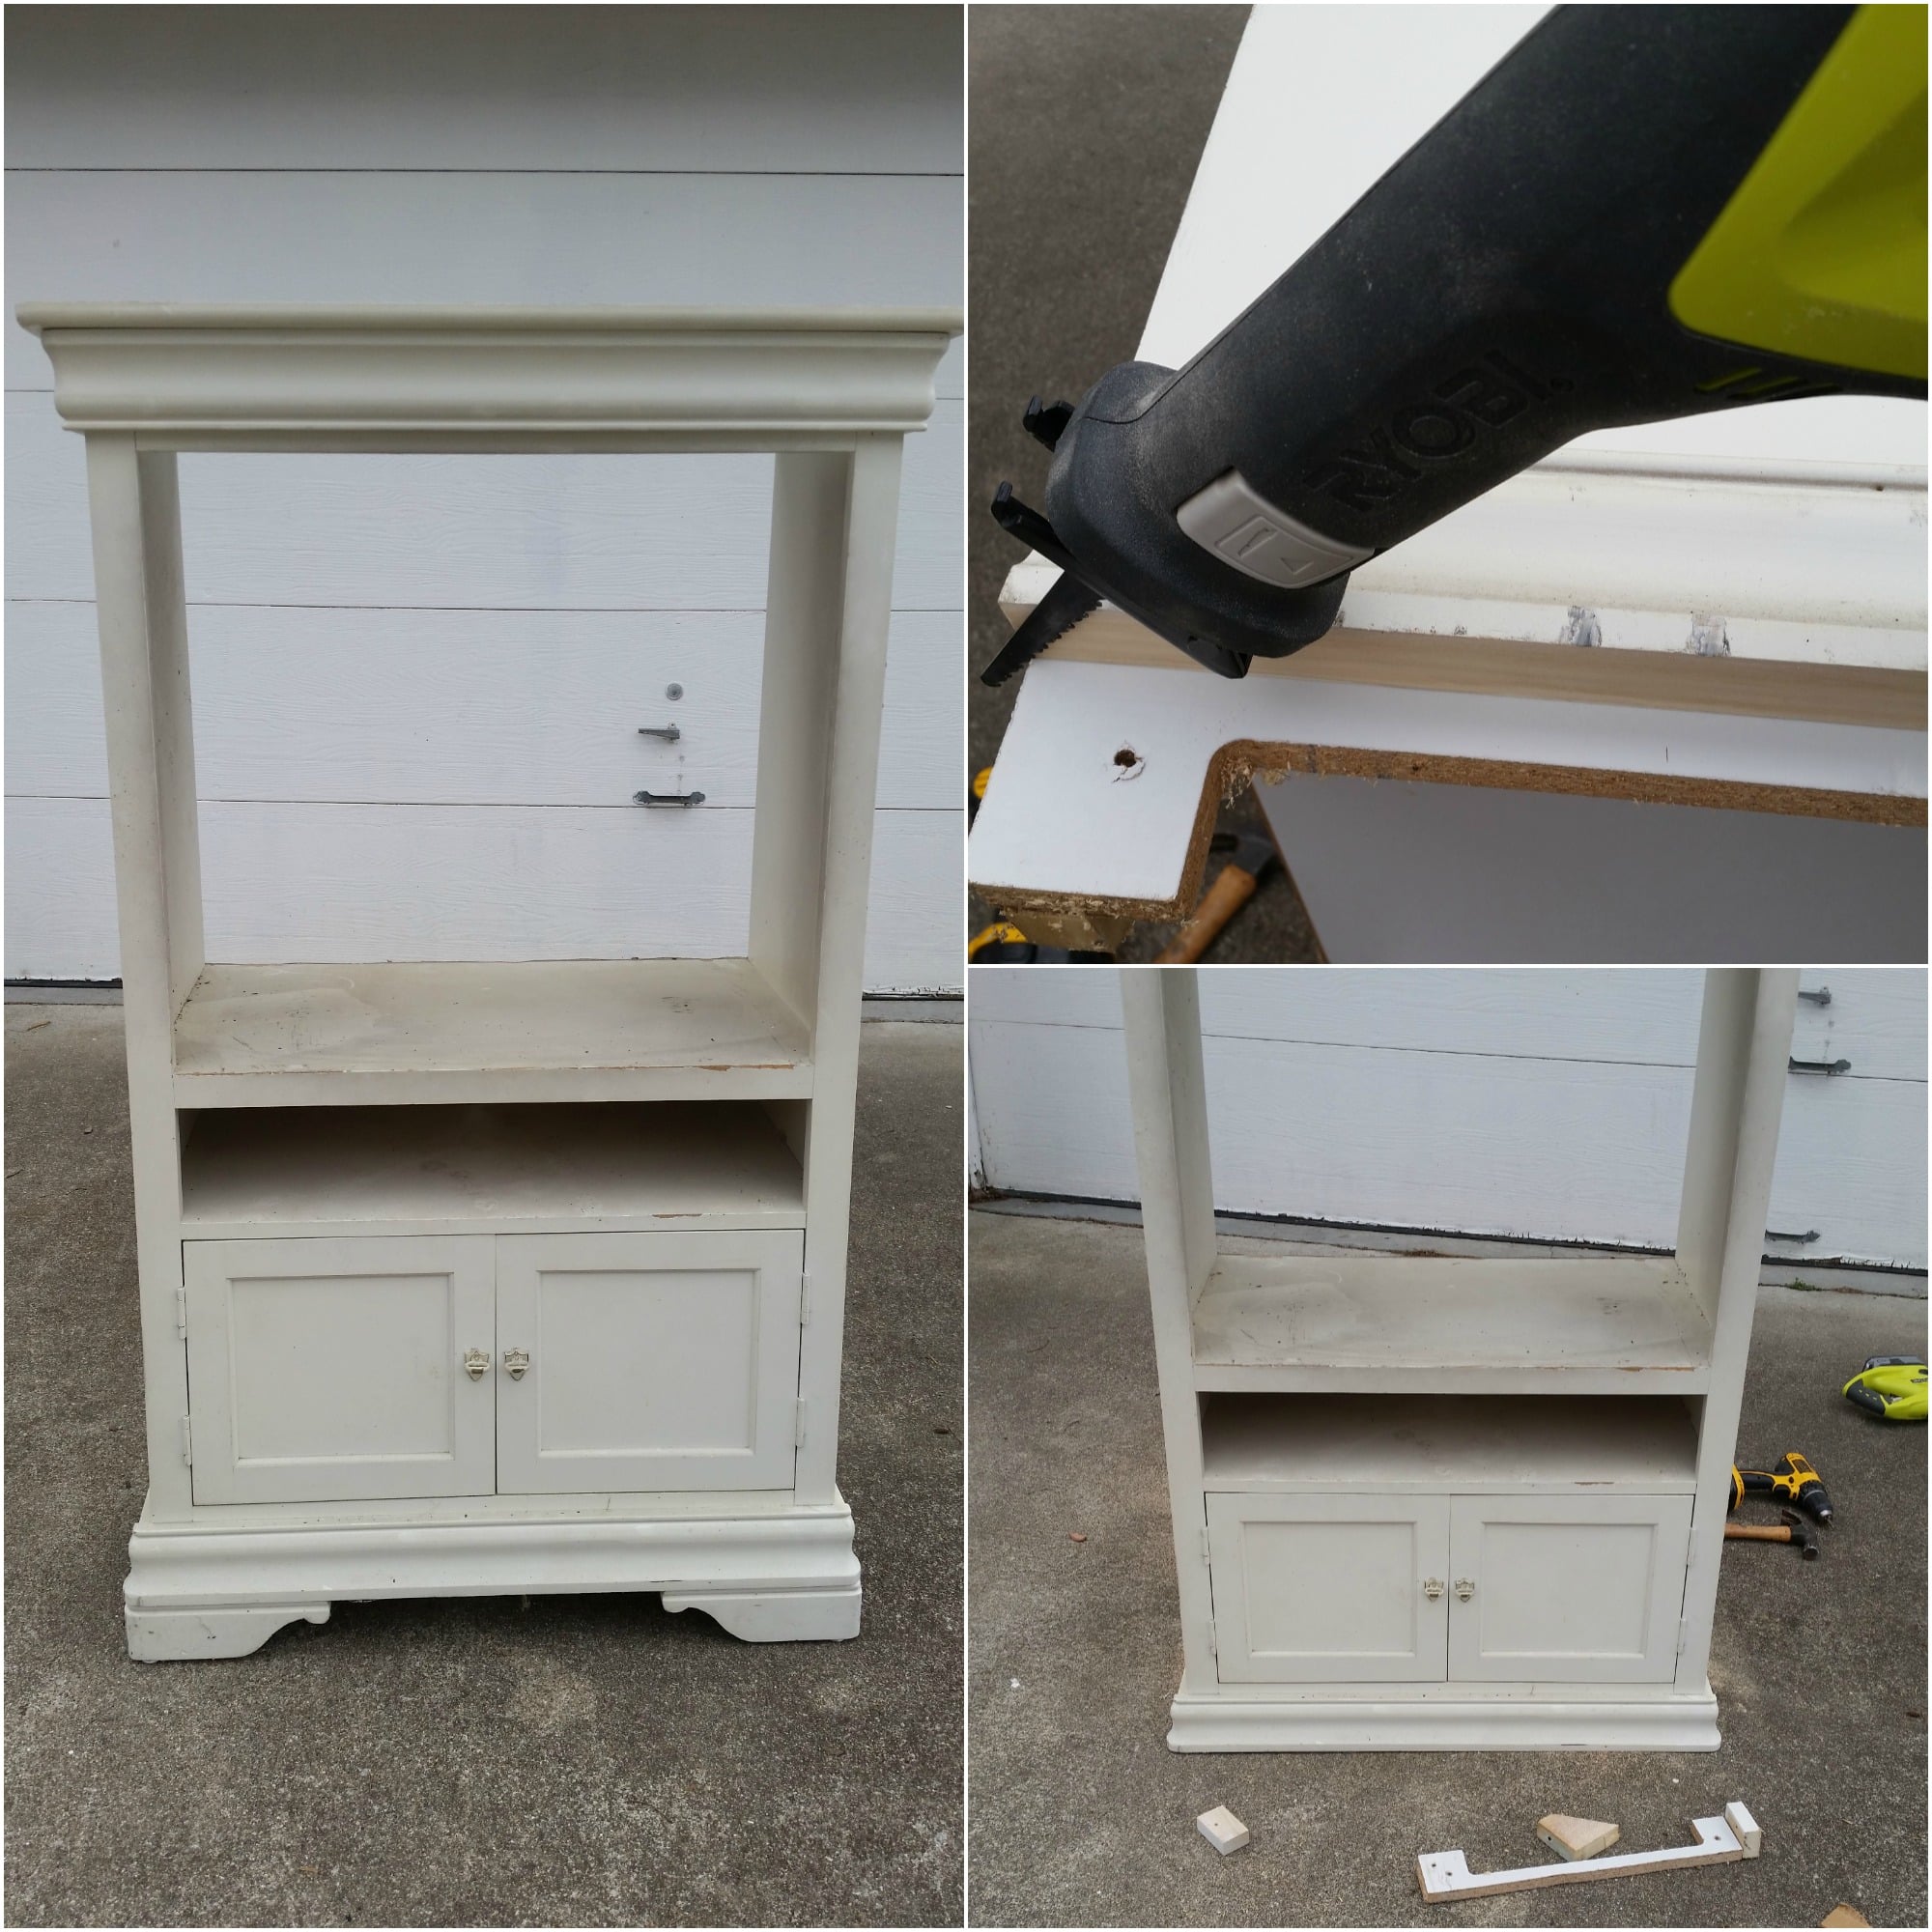
The cabinet was a little too tall to add a table for children. I was able to remove some of the pieces by taking out some screws. The permanent pieces were removed using a Ryobi Reciprocating Saw to shorten the cabinet.
Now, the table that I’m about to build for the space at the top will be able to reach the floor.
Tip: If you want to make this a bill-paying station, you won’t need to cut any of the height off.
Designing a Kids Art Desk
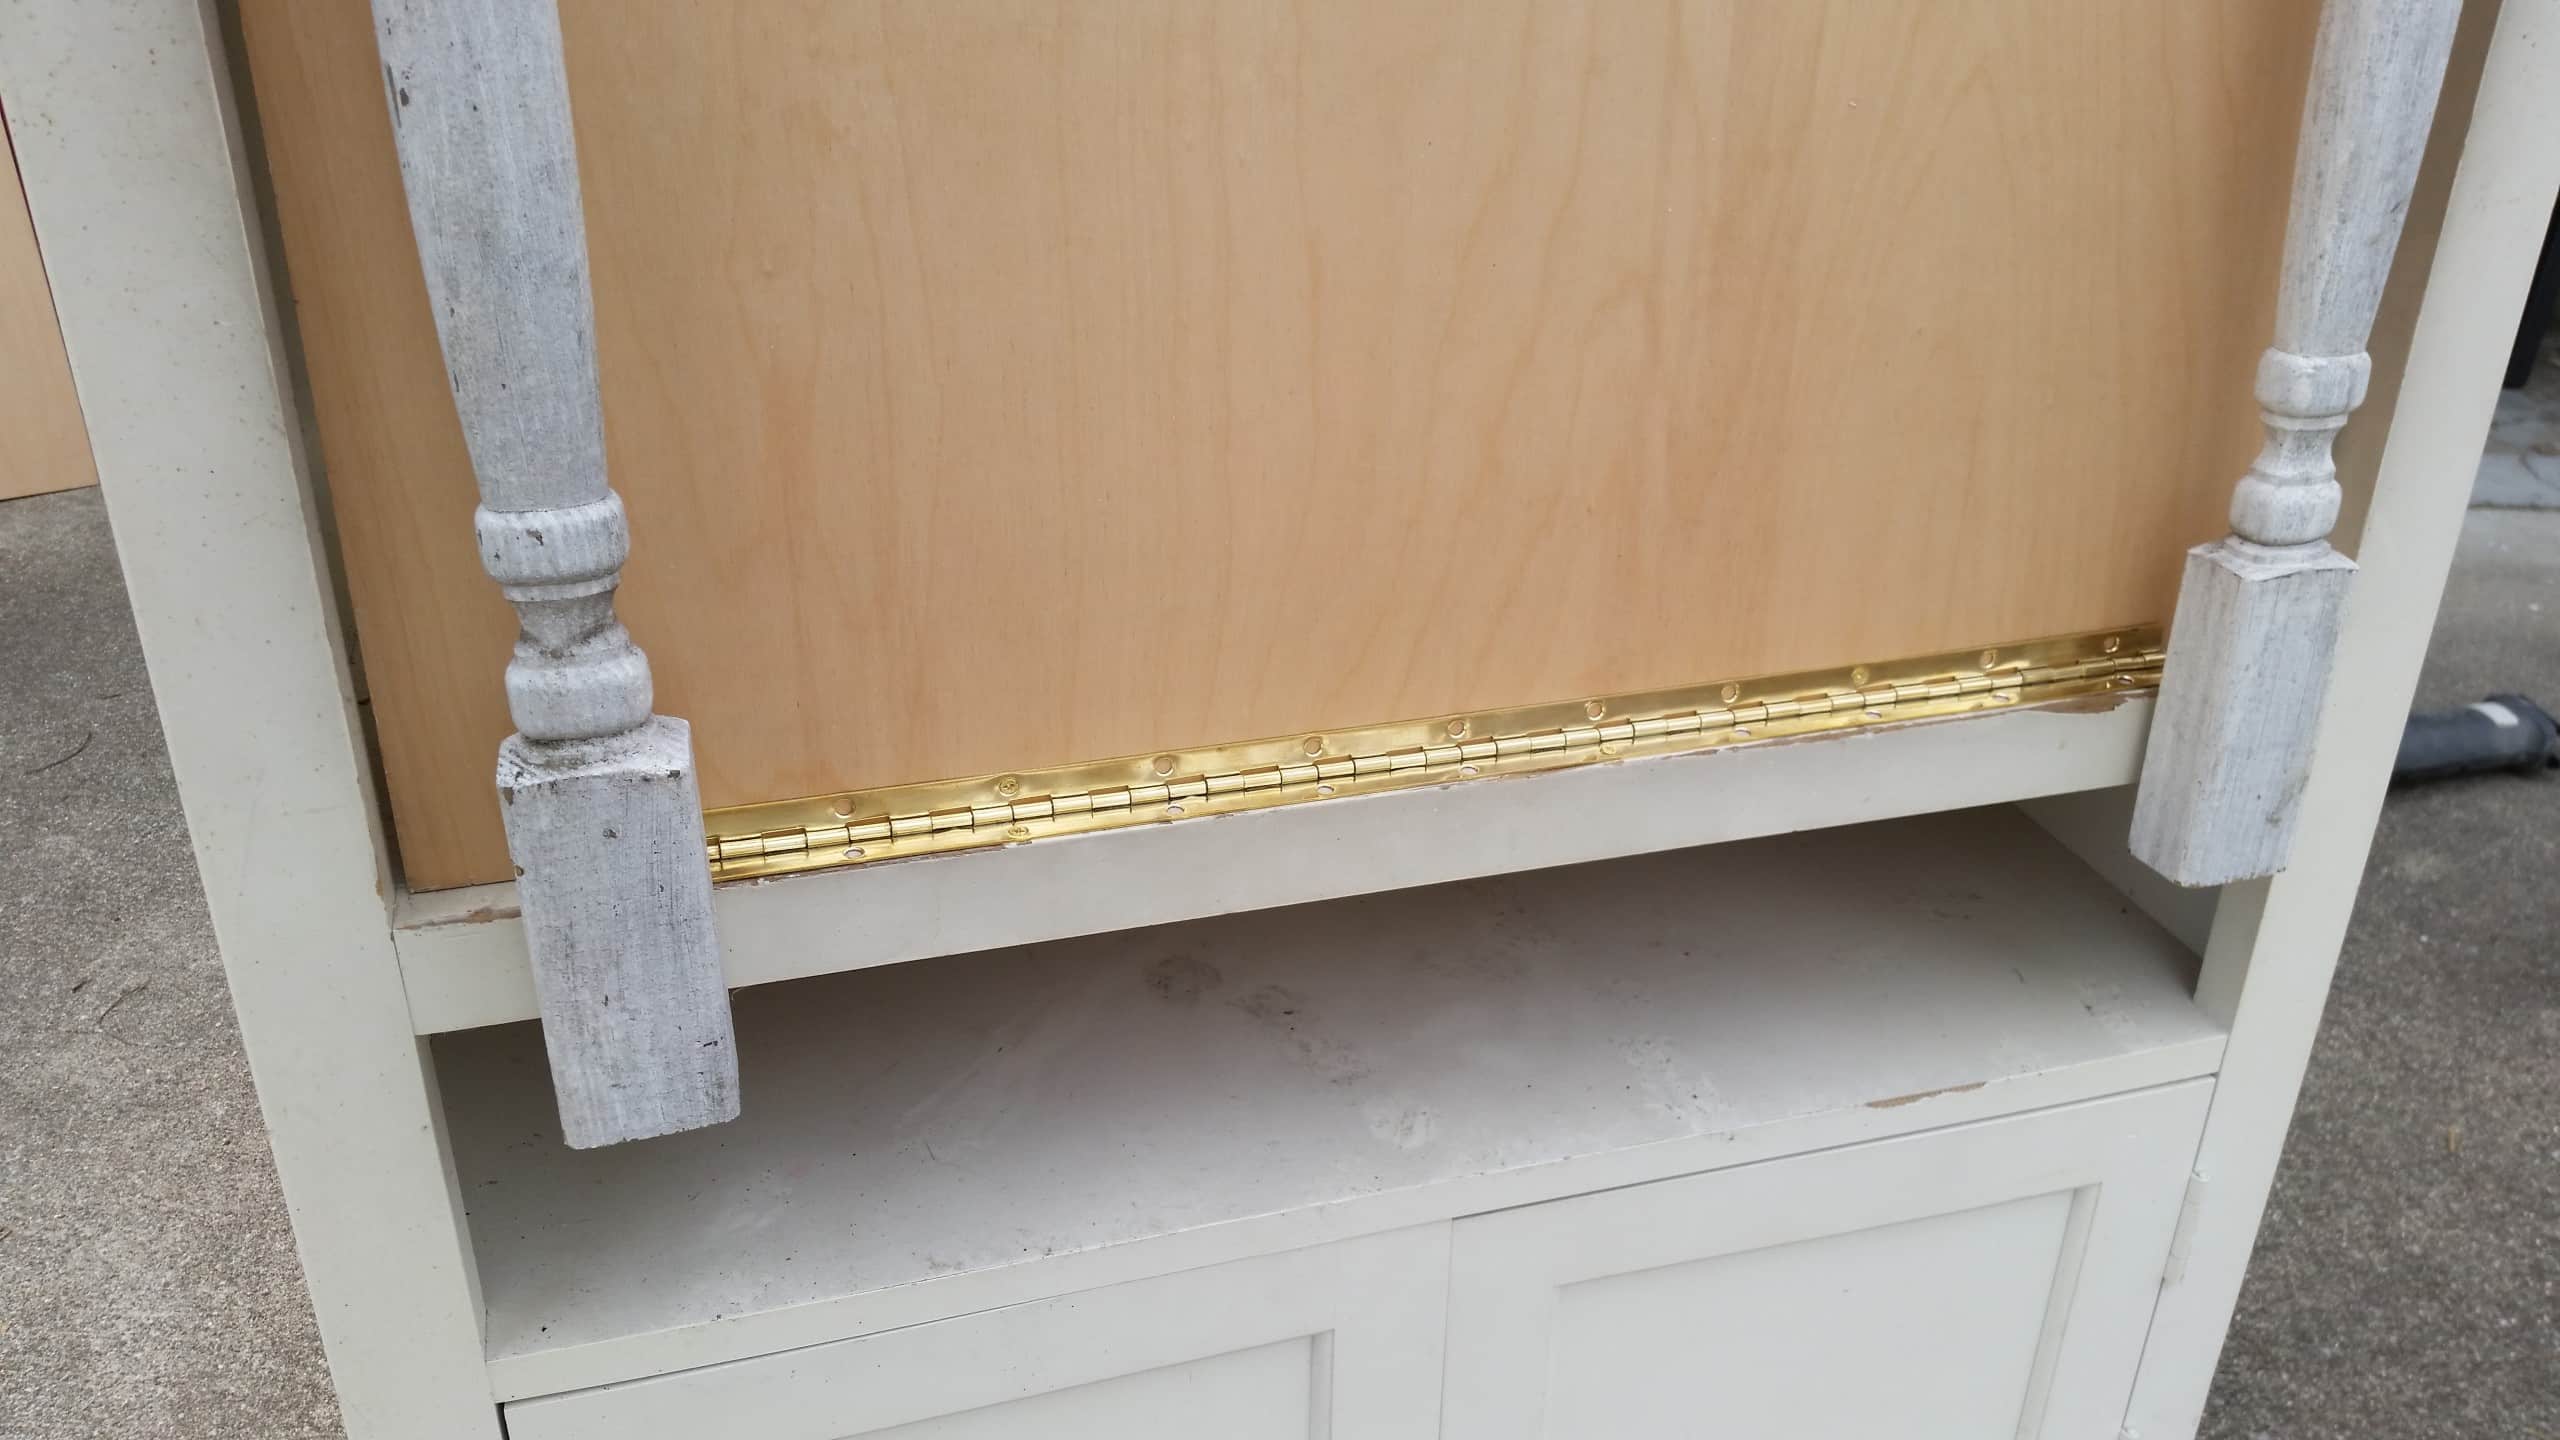
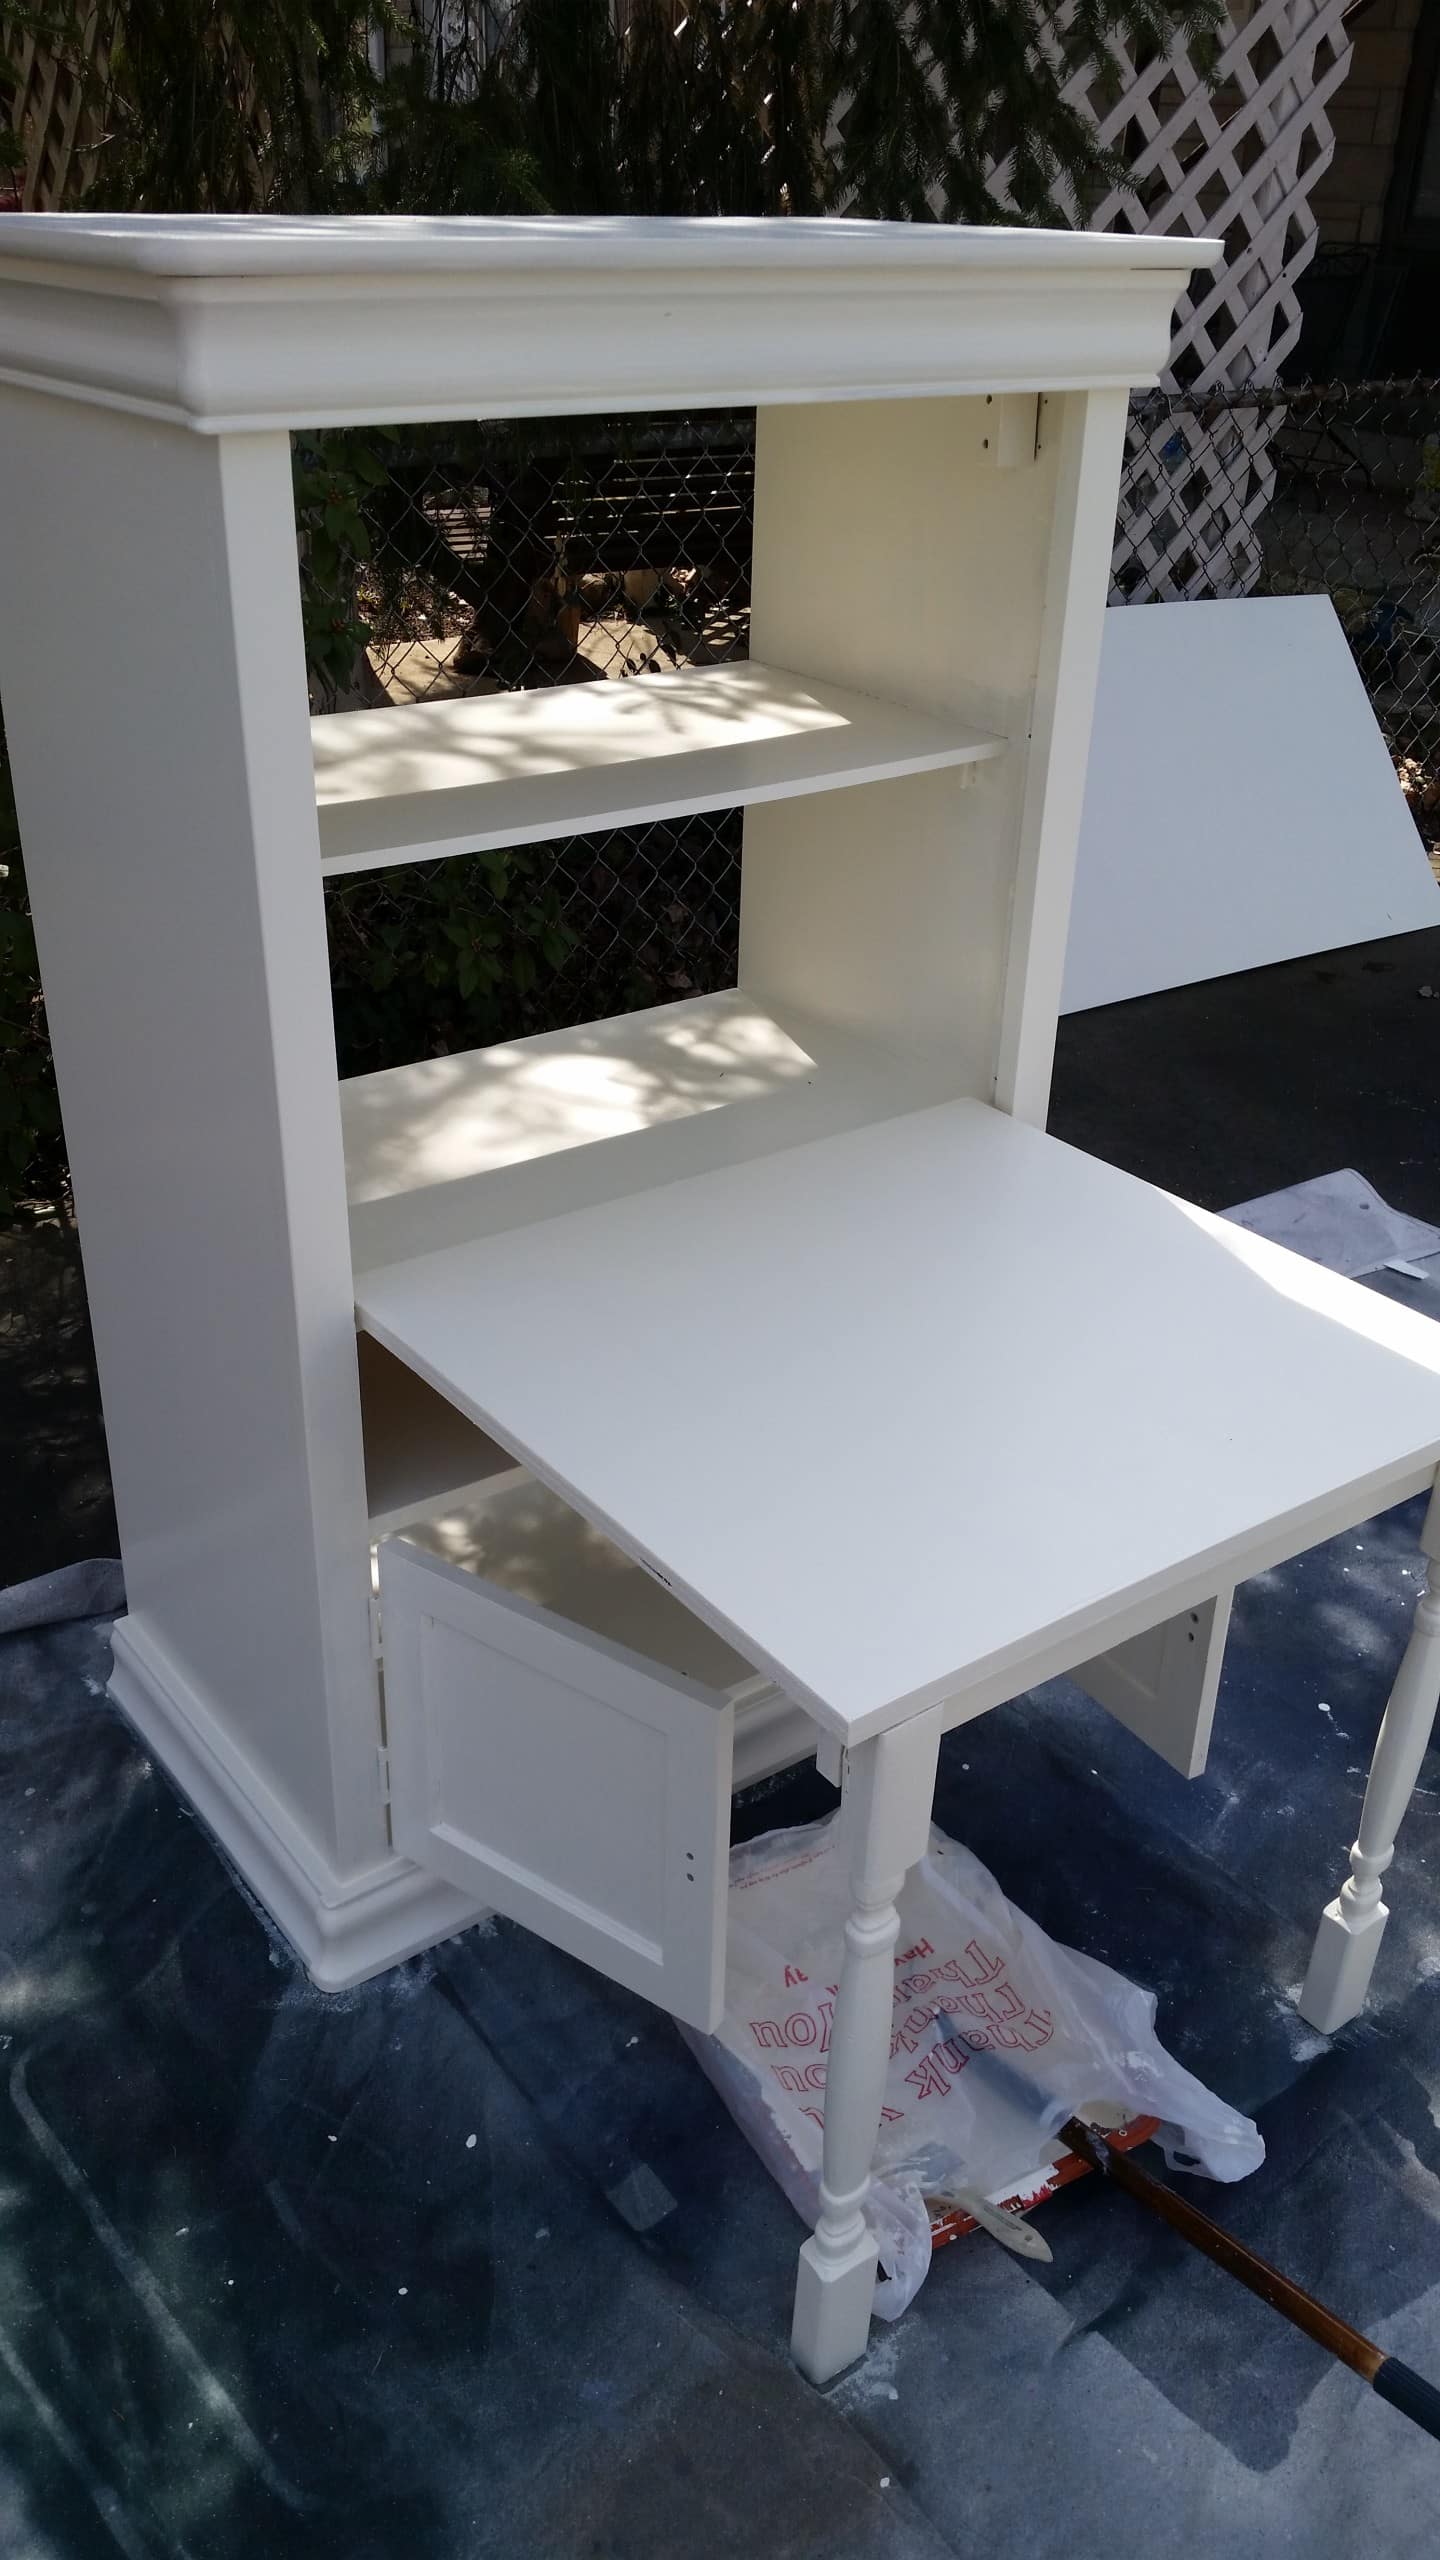
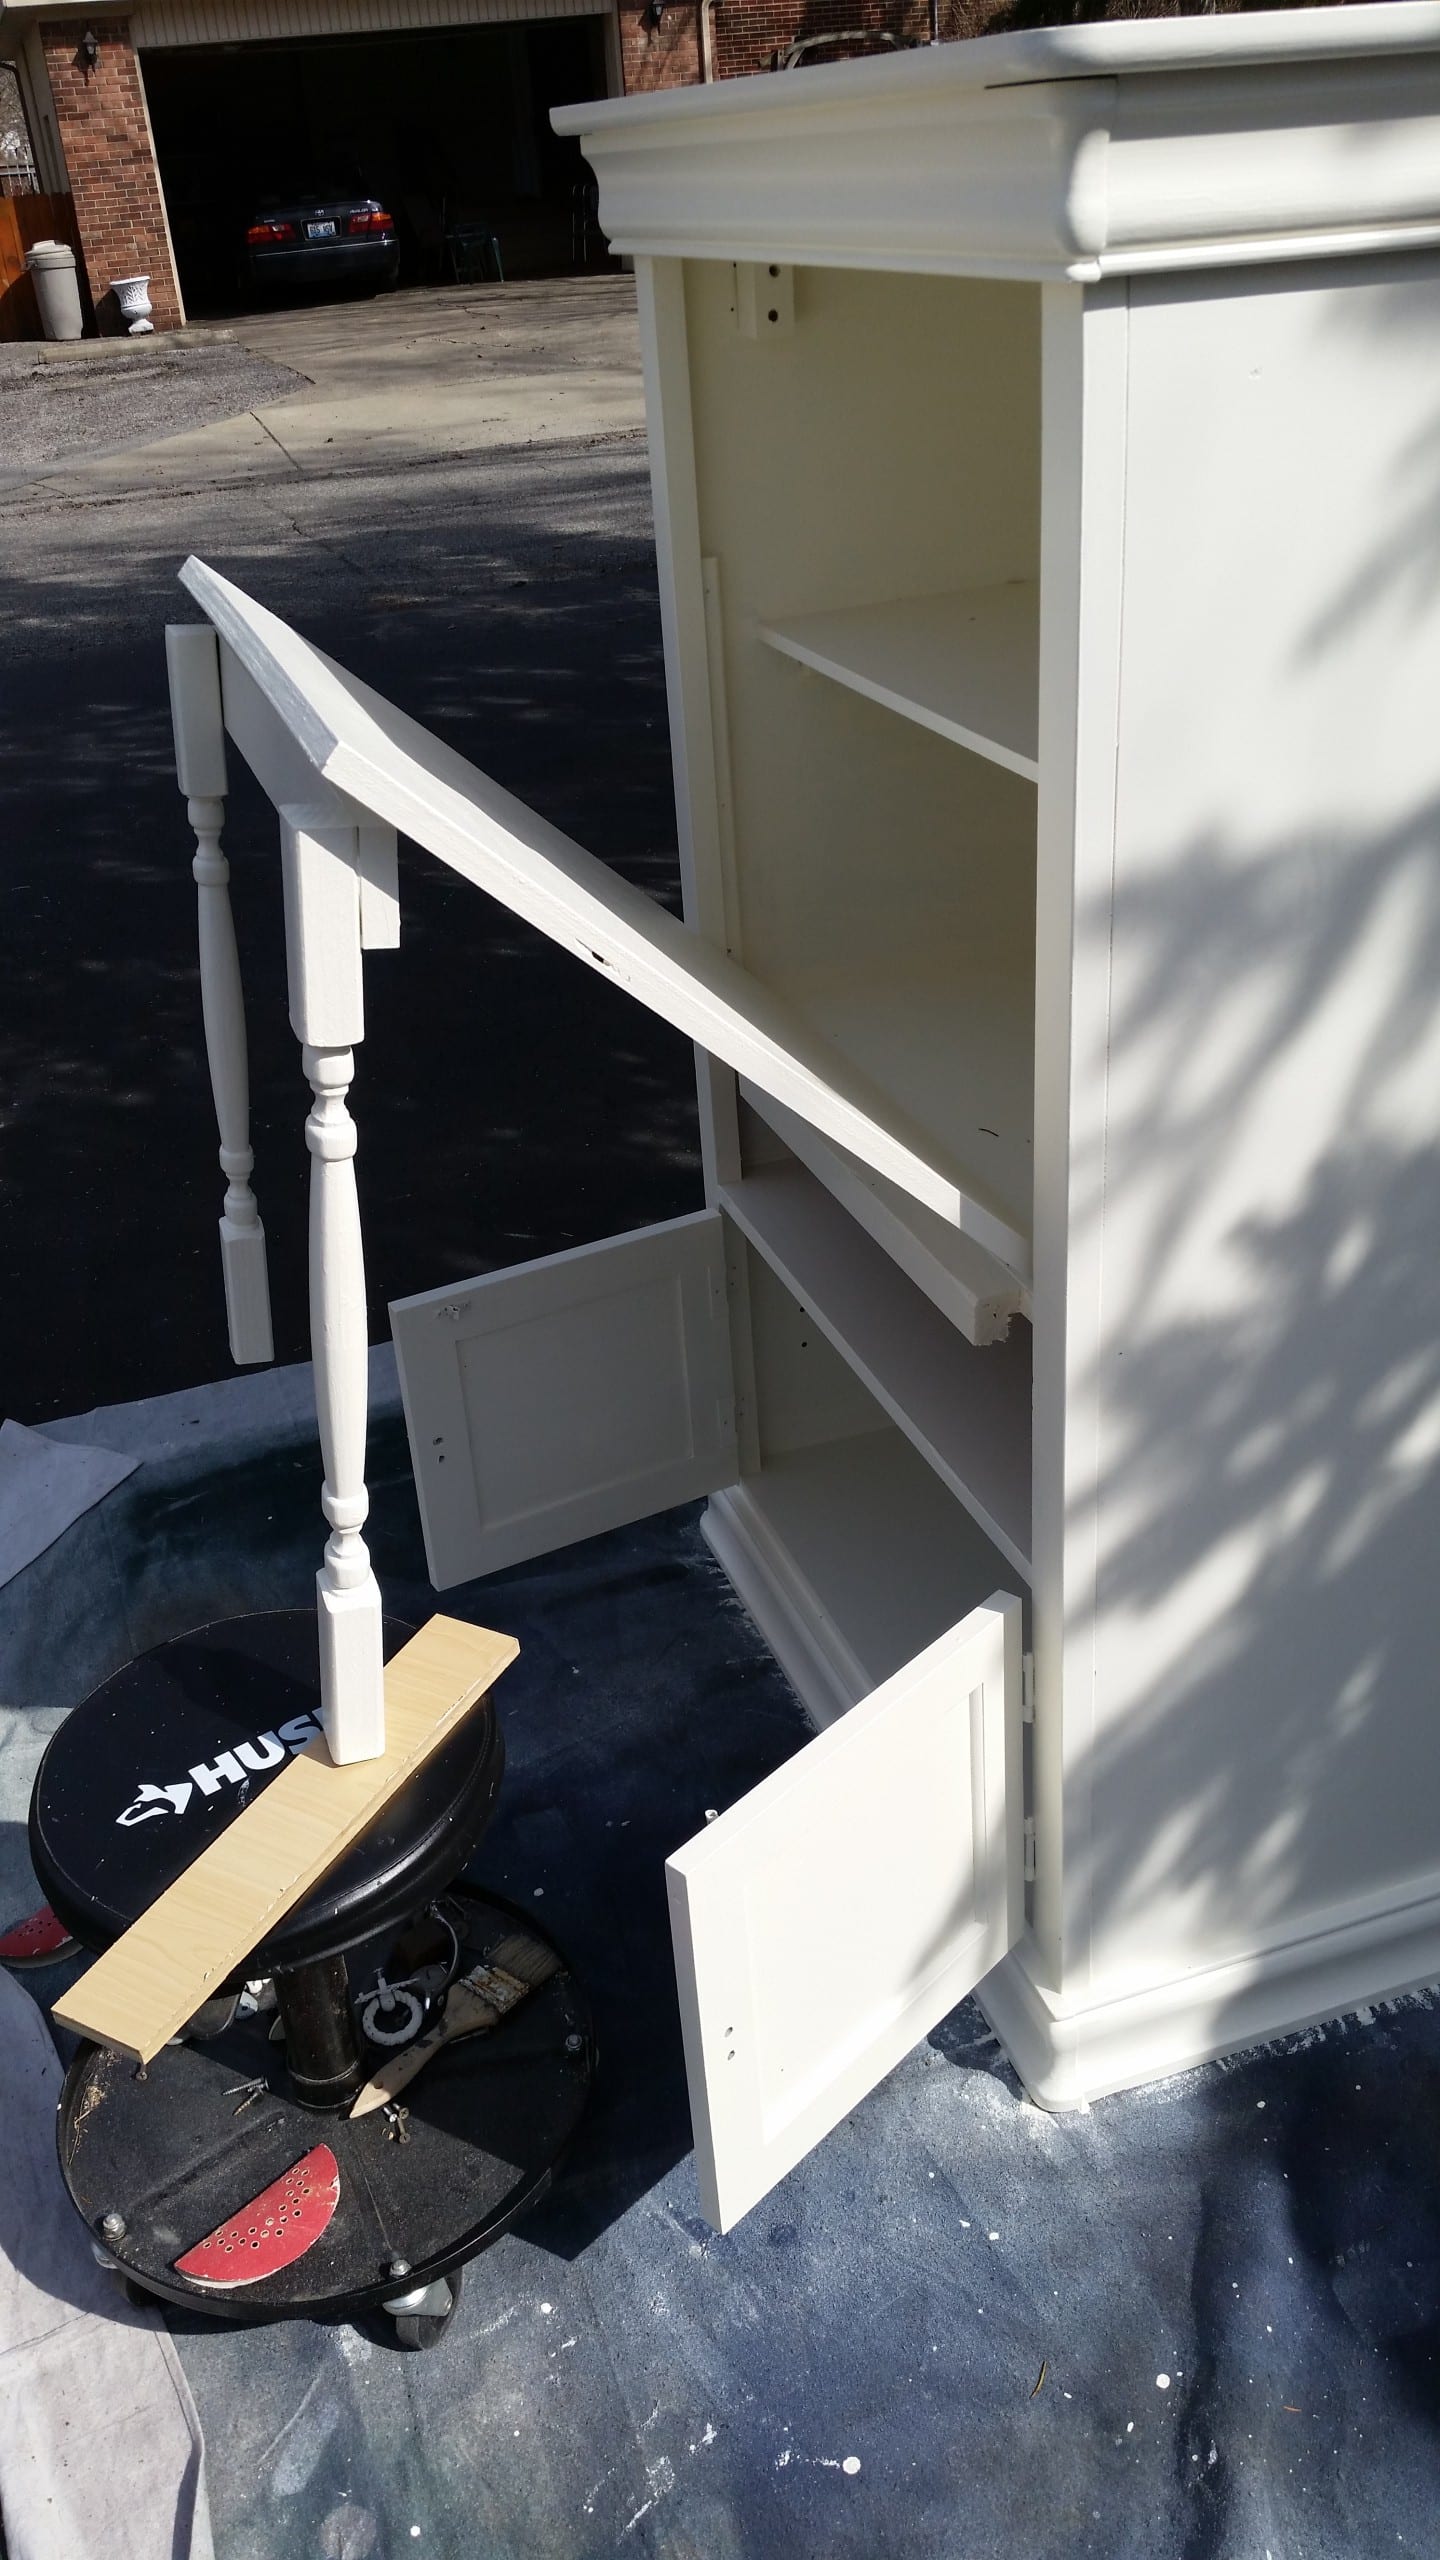
This is still during the design stage. The legs were still too long to fold completely away; however, I needed them to be this long to reach the floor. (note: you will notice in later pictures that the piano hinge changes color. I used a scrap piece while designing the art center and then ended up cutting a long hinge that worked a little better)
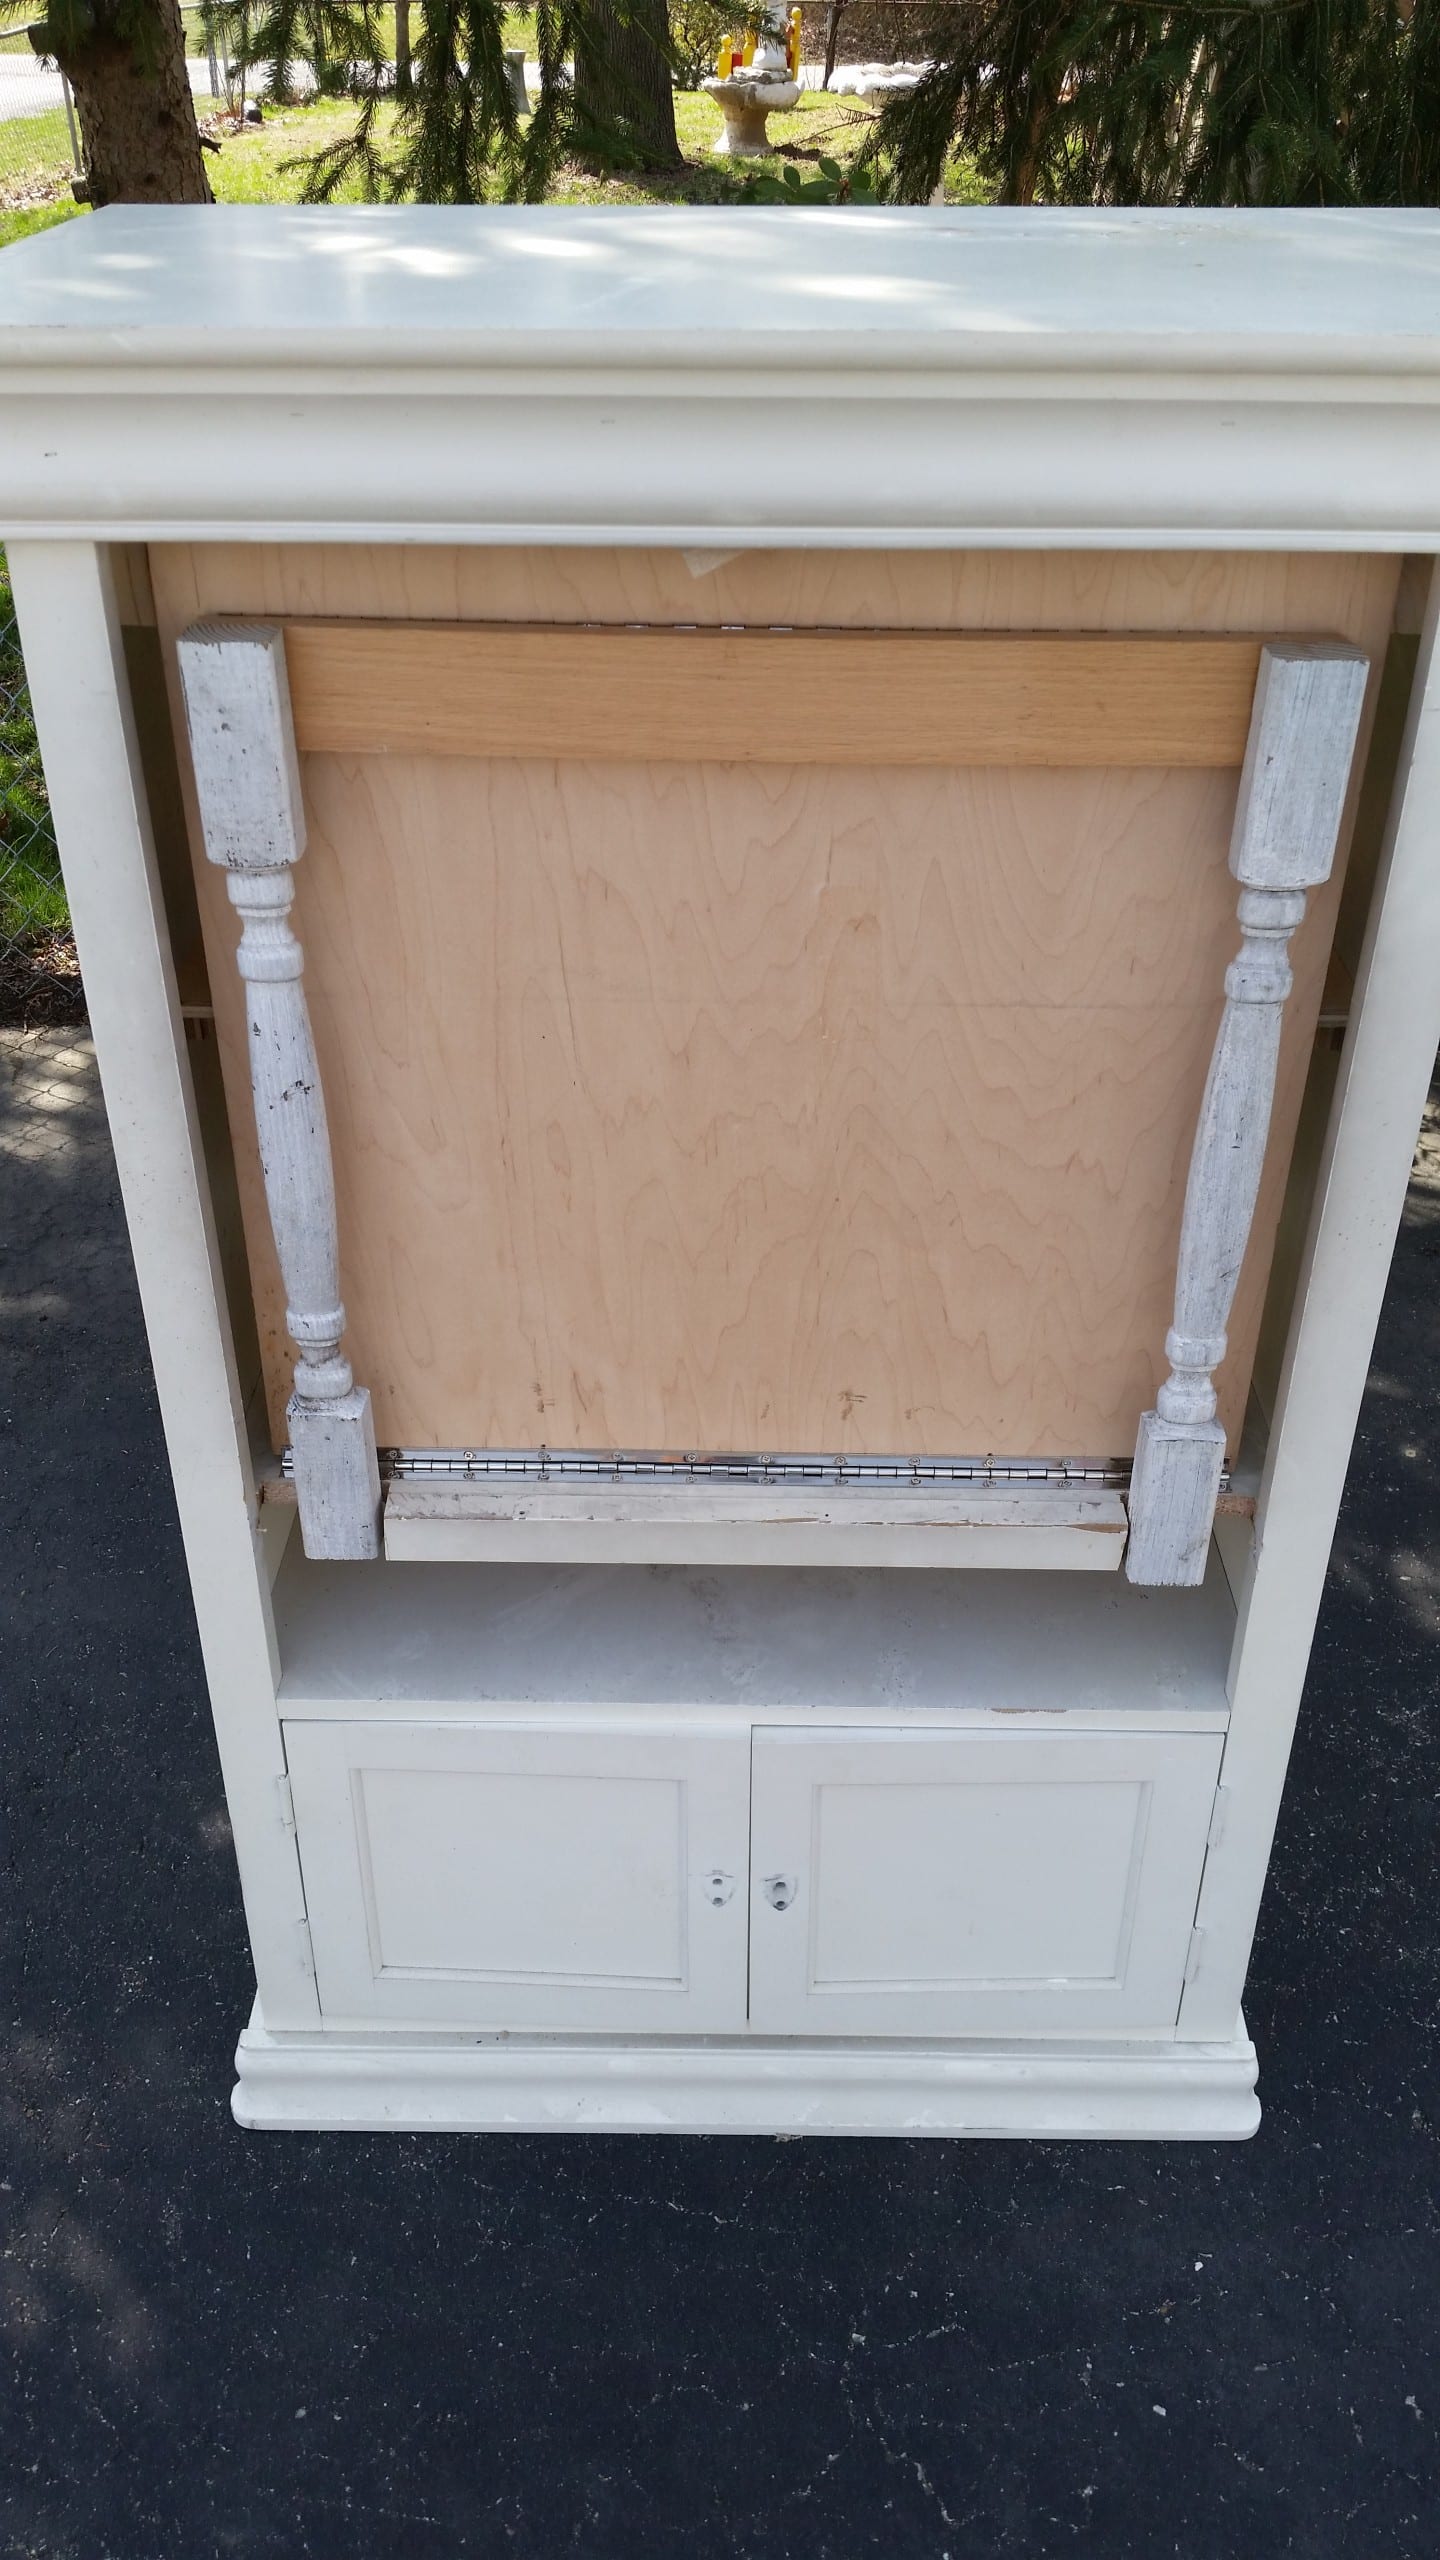
I used my Dremel Multi-Max to cut out the front facing of the shelf area, allowing the legs to recess so that the doors could shut and hide the fold-down table. You will also notice I switched out the hinges.

Look inside the top left and right of the cabinet—you will see I added some “stops” to keep the kid’s art desk from falling too far into the cabinet while it is closed. Then I decided it needed a shelf, which also prevented that from happening. The tabletop and the shelf were recent finds at the peddler’s mall.
Bringing The Project Together With Paint
This is my favorite part of the process—it makes more sense when I paint all the random pieces because it’s easier on the eyes when they match. As usual, I used my DIY chalky paint primer with a brush and roller. I felt it was too cold to break out the Finish Max.
In the background, you can see the back of the cabinet leaning up against the fence.
Sometimes, you have to get creative to allow the paint to dry.
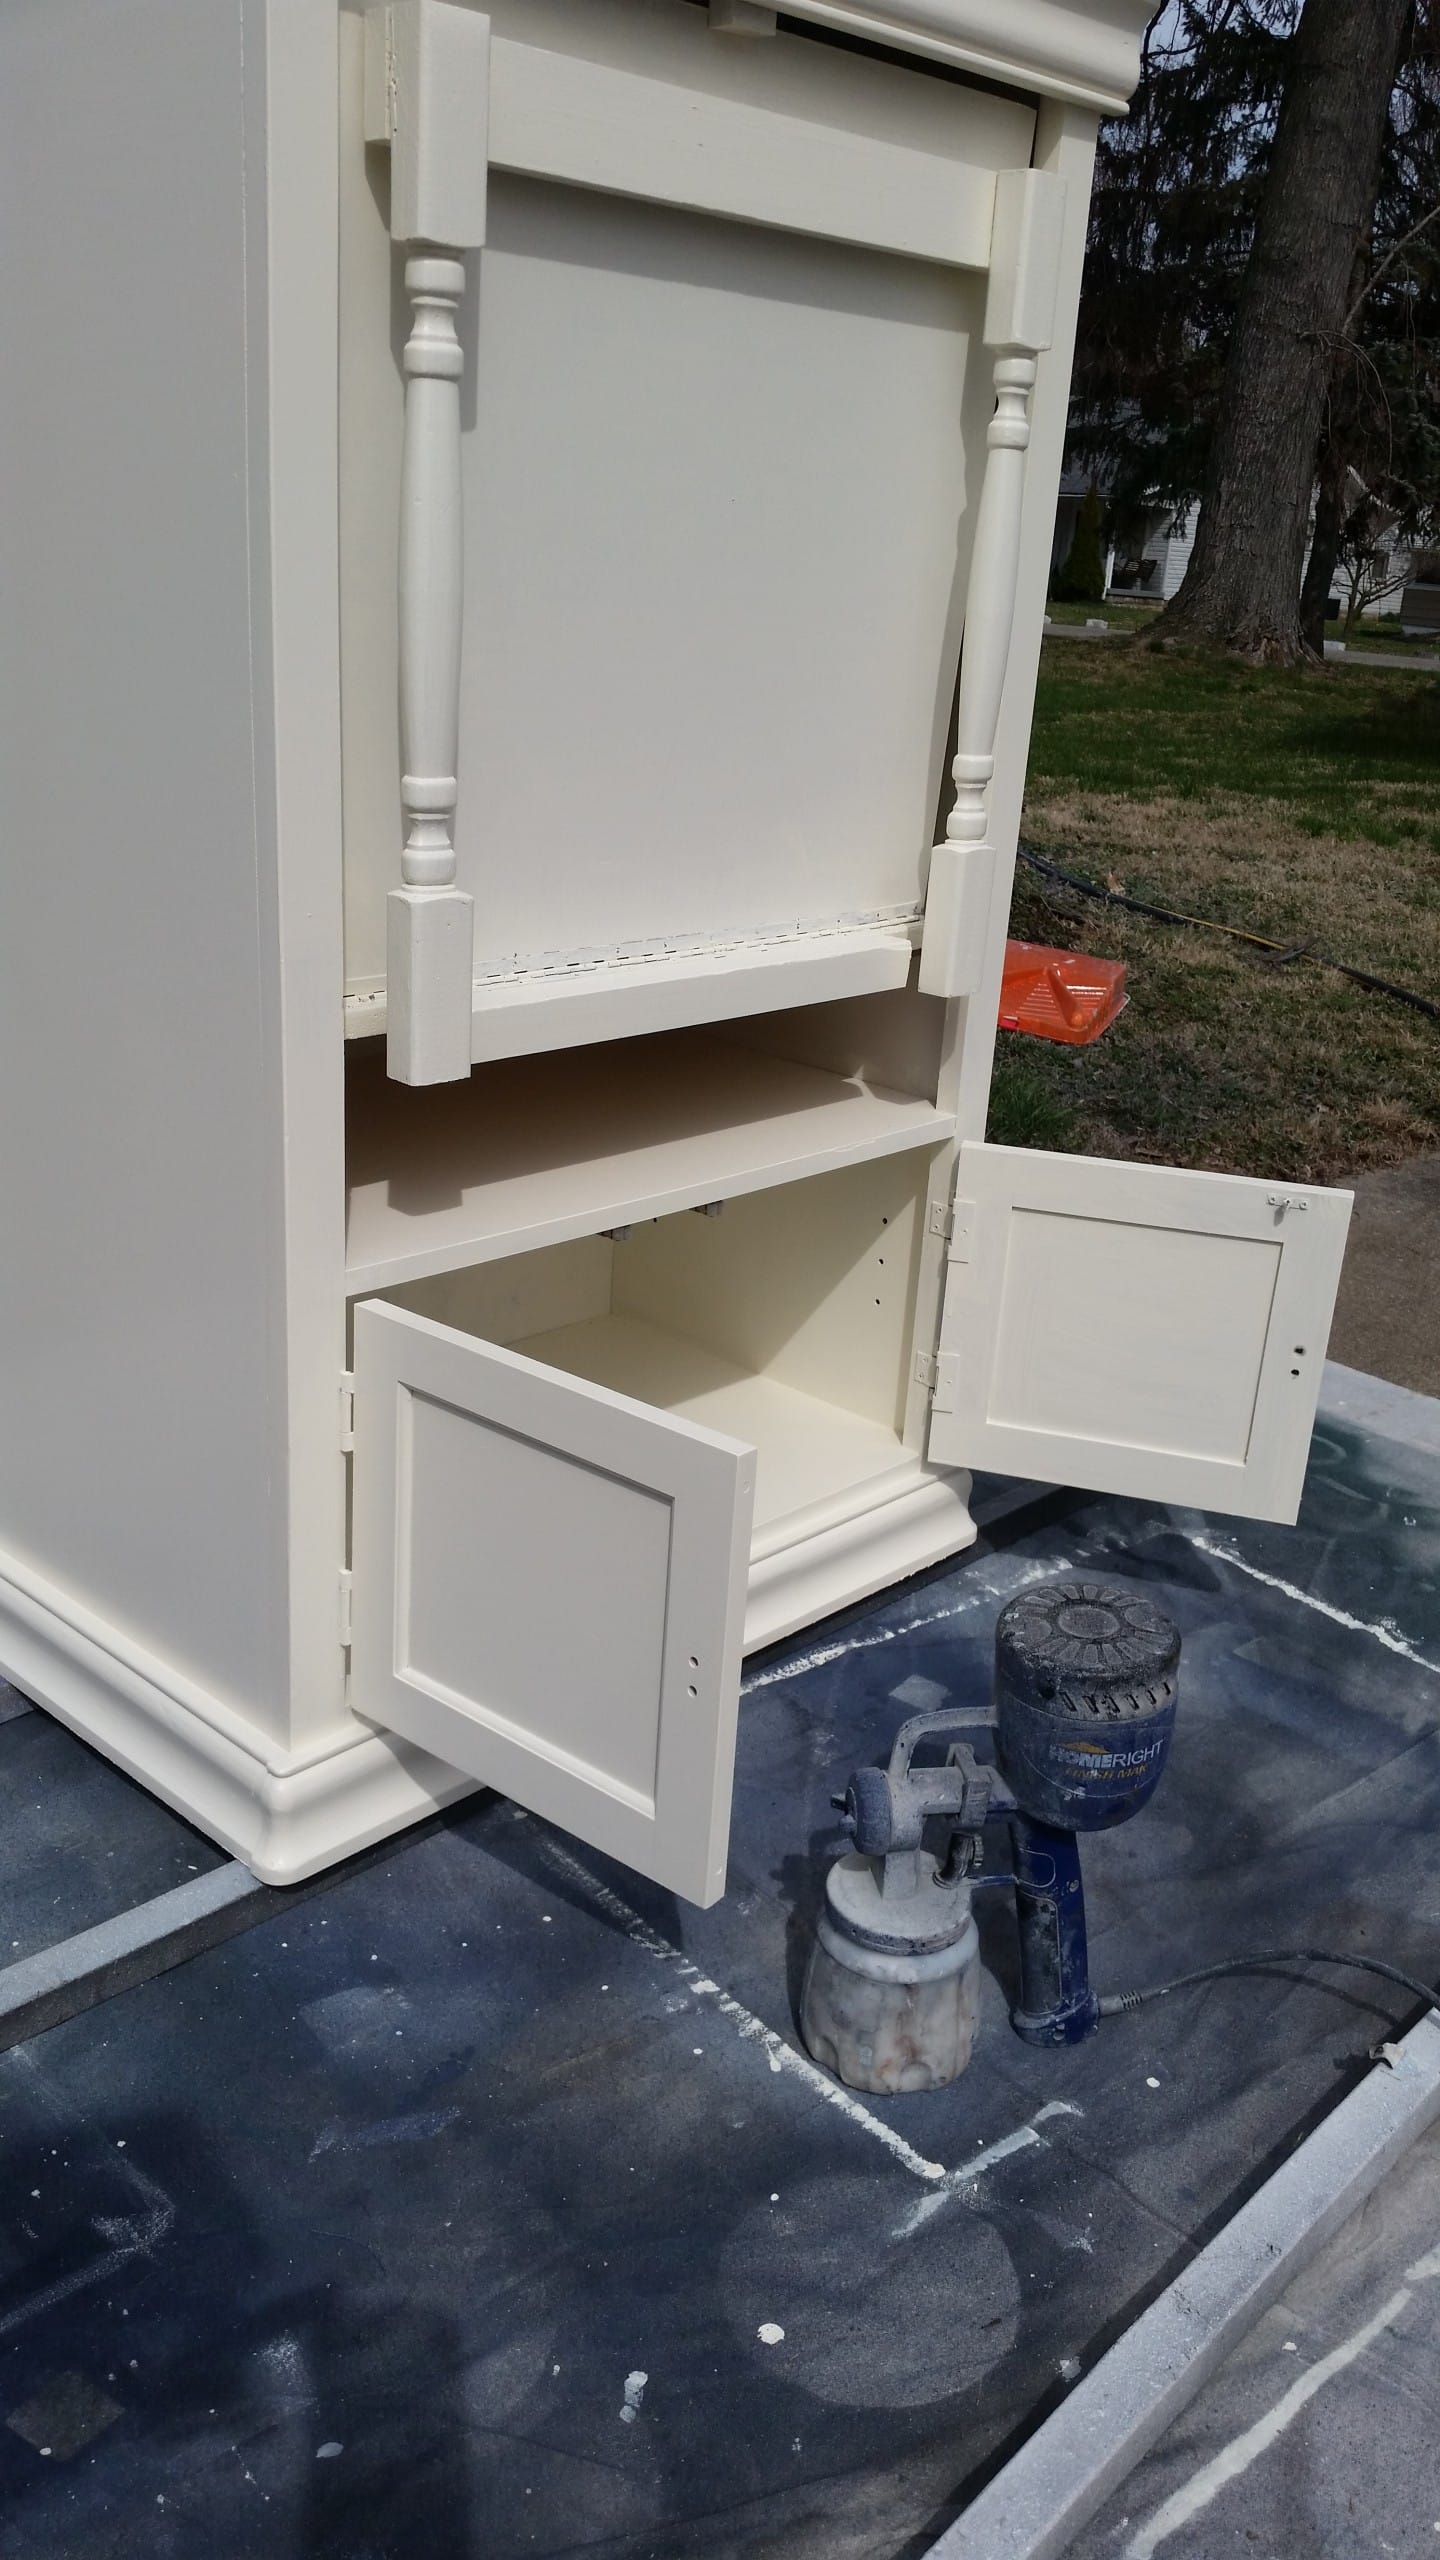
The next day, it warmed up considerably, and I used the Finish Max to spray the semi-gloss paint. I hoisted the armoire up on some scrap 2x2s to aid in painting it.
Things Don’t Always Go As Planned
I found some cabinet door frames in my stash and added thin plywood to make chalkboard doors. I installed the hinges while the cabinet was lying on its back. When I set it up, imagine my disappointment when I noticed the doors did NOT open far enough to allow the child to sit on the side of the table. (If you are making this out of an existing cabinet with doors, this shouldn’t be an issue—check to make sure the doors open fully before you start this project)
- Plan B: Different hinges (purchased at my local hardware store)
- How about plan C? Still more different hinges (another trip to the store, this time Home Depot)
- Plan D: one more set of hinges (dug out of my stash)
Hinges Confuse Me
Those of you who are regulars may know I’m very “hinge challenged) What’s a girl to do? Contact (in a panic) my best friends at D. Lawless Hardware about some hinges. They shipped me two different sets of hinges (to be on the safe side). Guess what? They didn’t work either. My door frames were too thick—but you may have already figured that out.
Plan E: Build some new doors. At this point, I was about to set this project aside and forget it. It was very frustrating. Hmph!
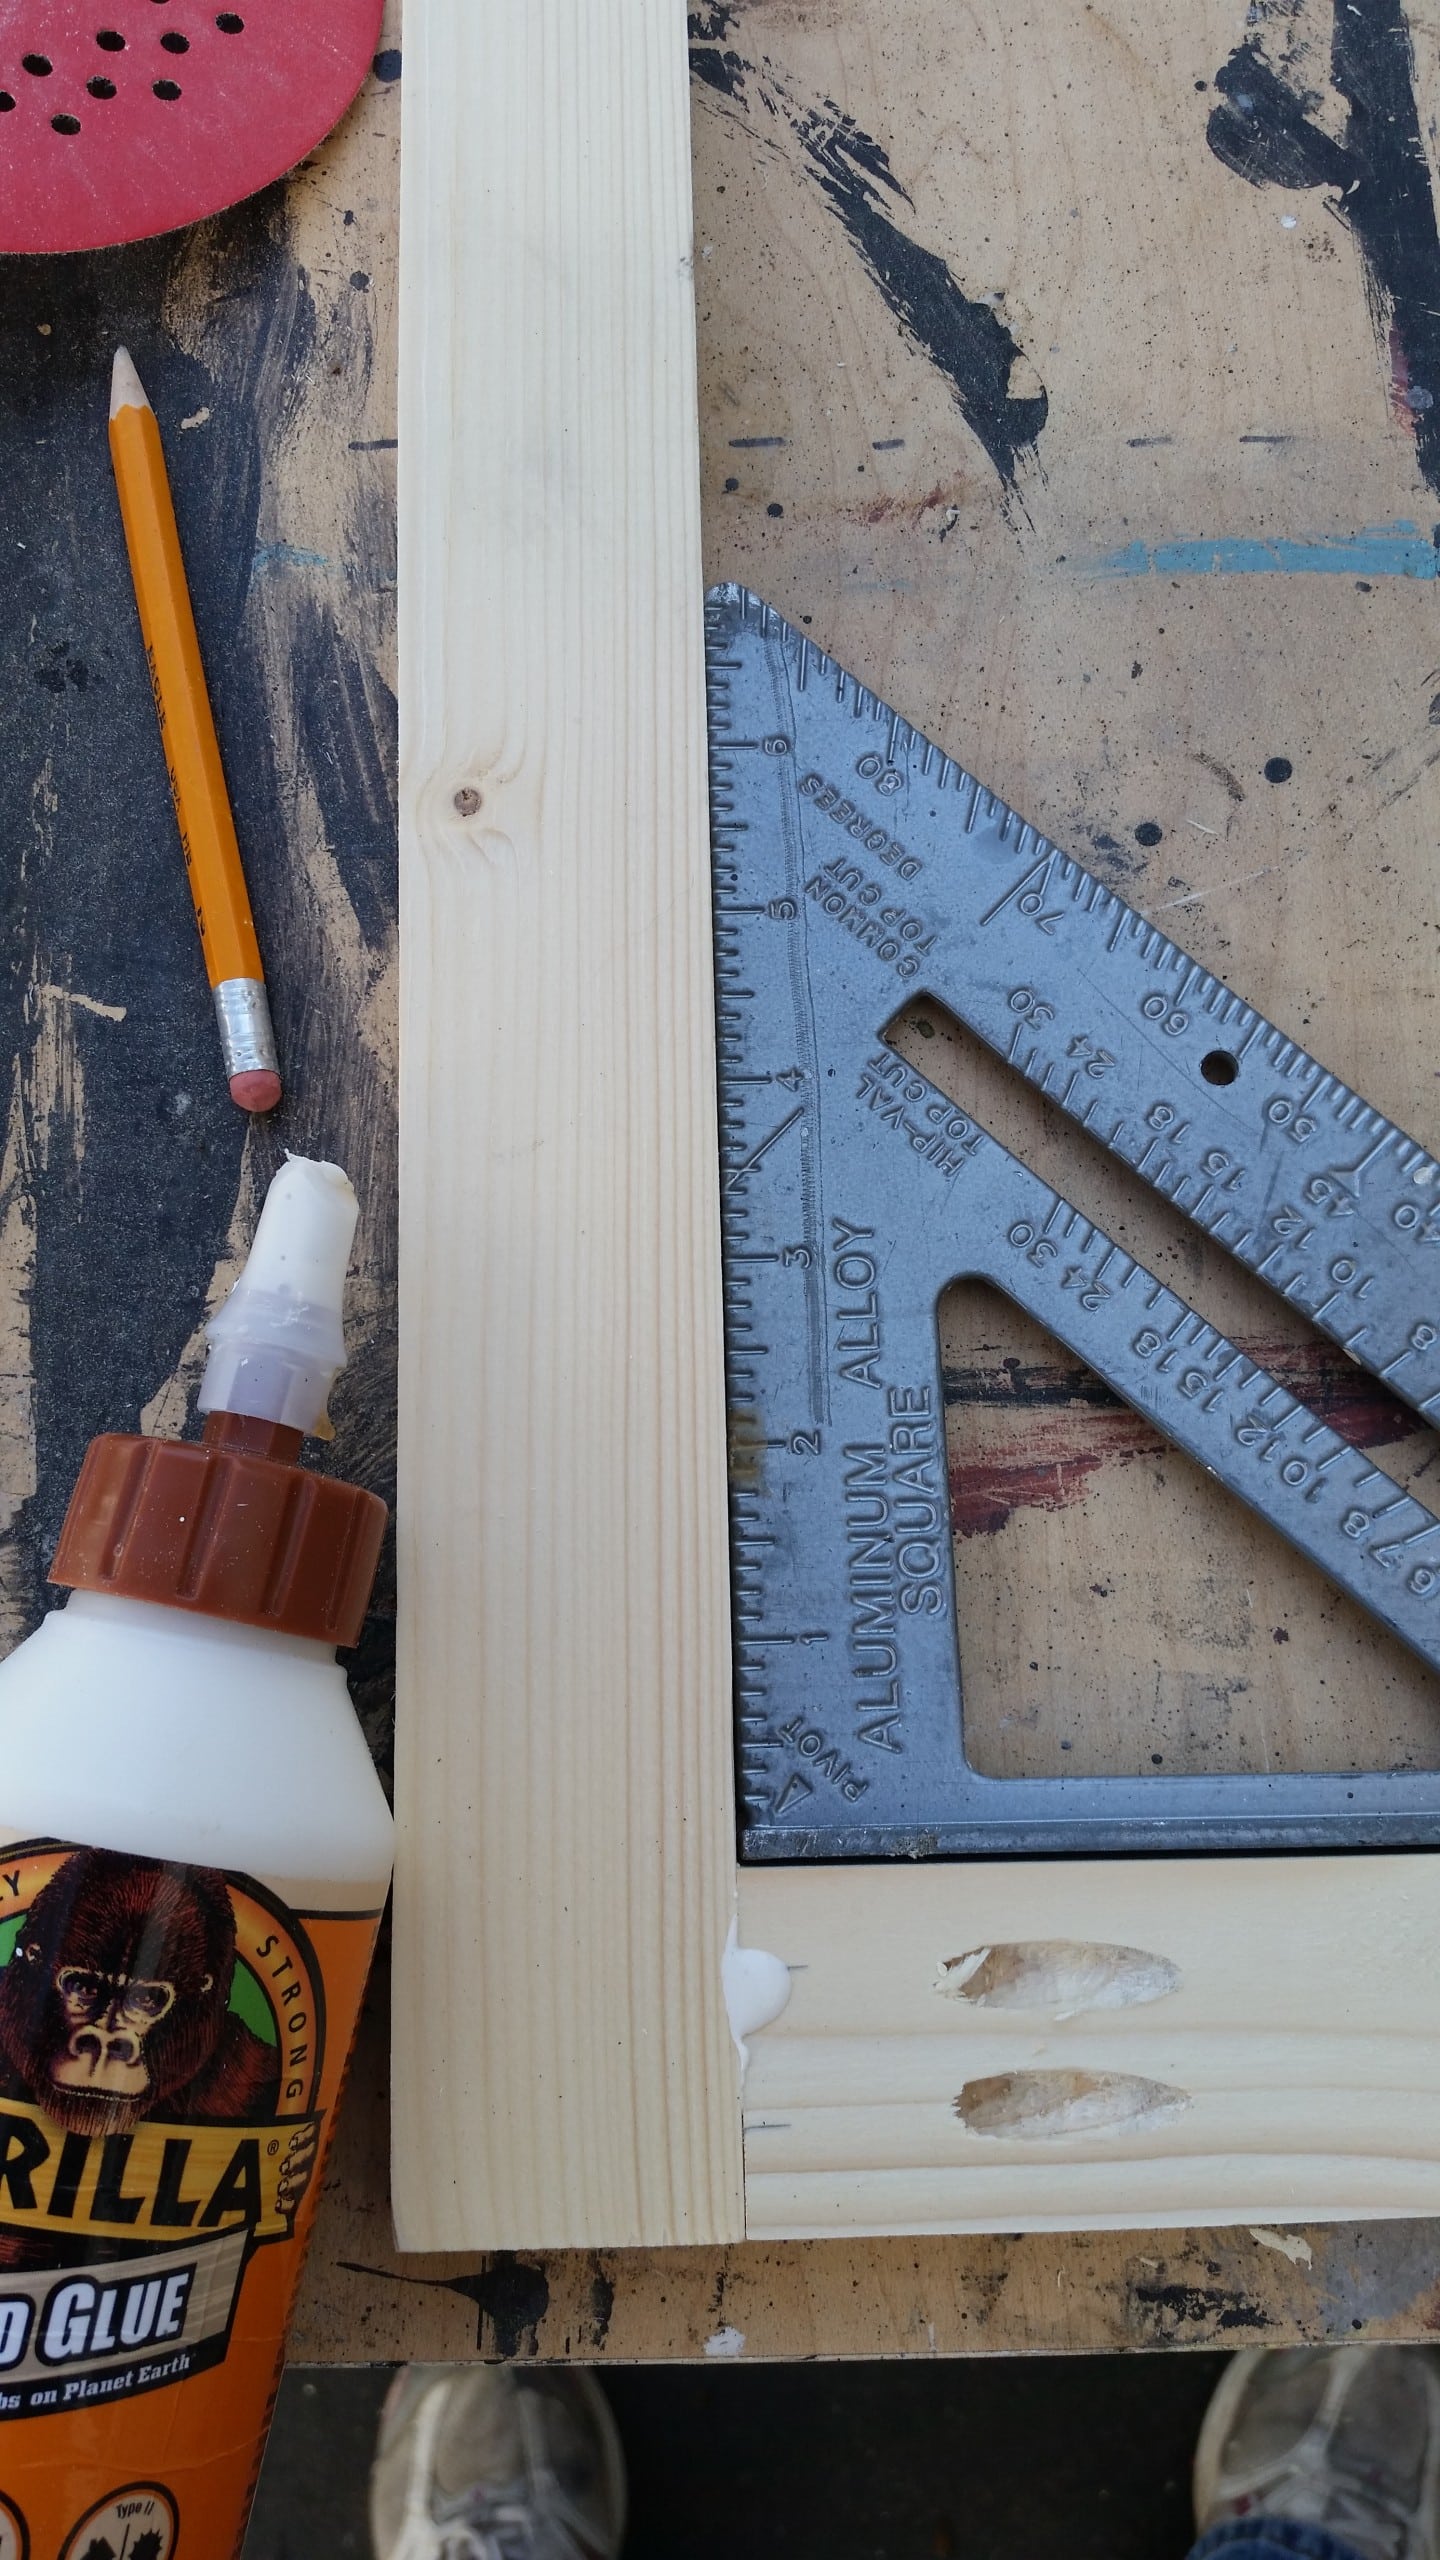
I ripped some scrap 1x’s to fit the opening. I also had to cut new plywood for the chalkboards because the others weren’t large enough. It was a simple build, using my Kreg R3 Jig to make pocket holes and some Gorilla Wood Glue to give it a long-lasting hold.
Need more details on using a Kreg Jig? See my article How to use a Kreg Jig Pocket Hole System.
I used my Ryobi Stapler to secure the thin plywood (chalkboards) onto the frames. At this point, I was so frustrated that I didn’t take any pictures.
More Issues With The Hinges
One of the sets of D. Lawless hinges worked, but it is still not like it is supposed to because the front facing of the cabinet is wider than it should be for those hinges. They are 270° hinges, and they should fold the doors entirely back to the side of the cabinet.
Are you lost? I cannot install hinges, but I find it difficult to explain. If your armoire already has doors installed, this project will be easy for you to replicate.
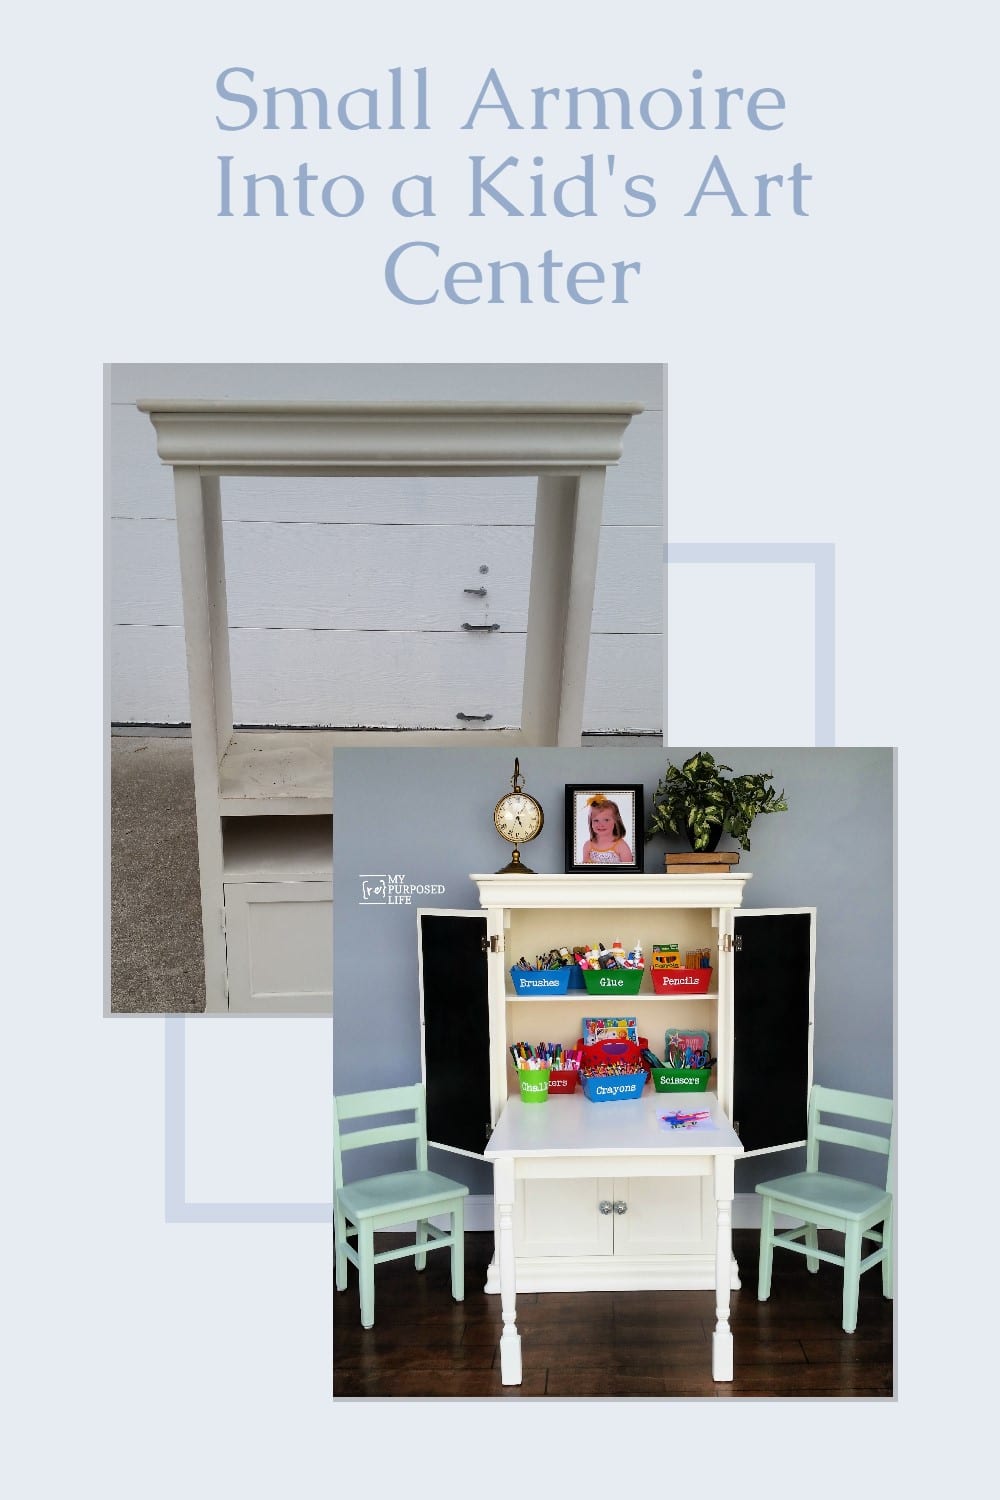
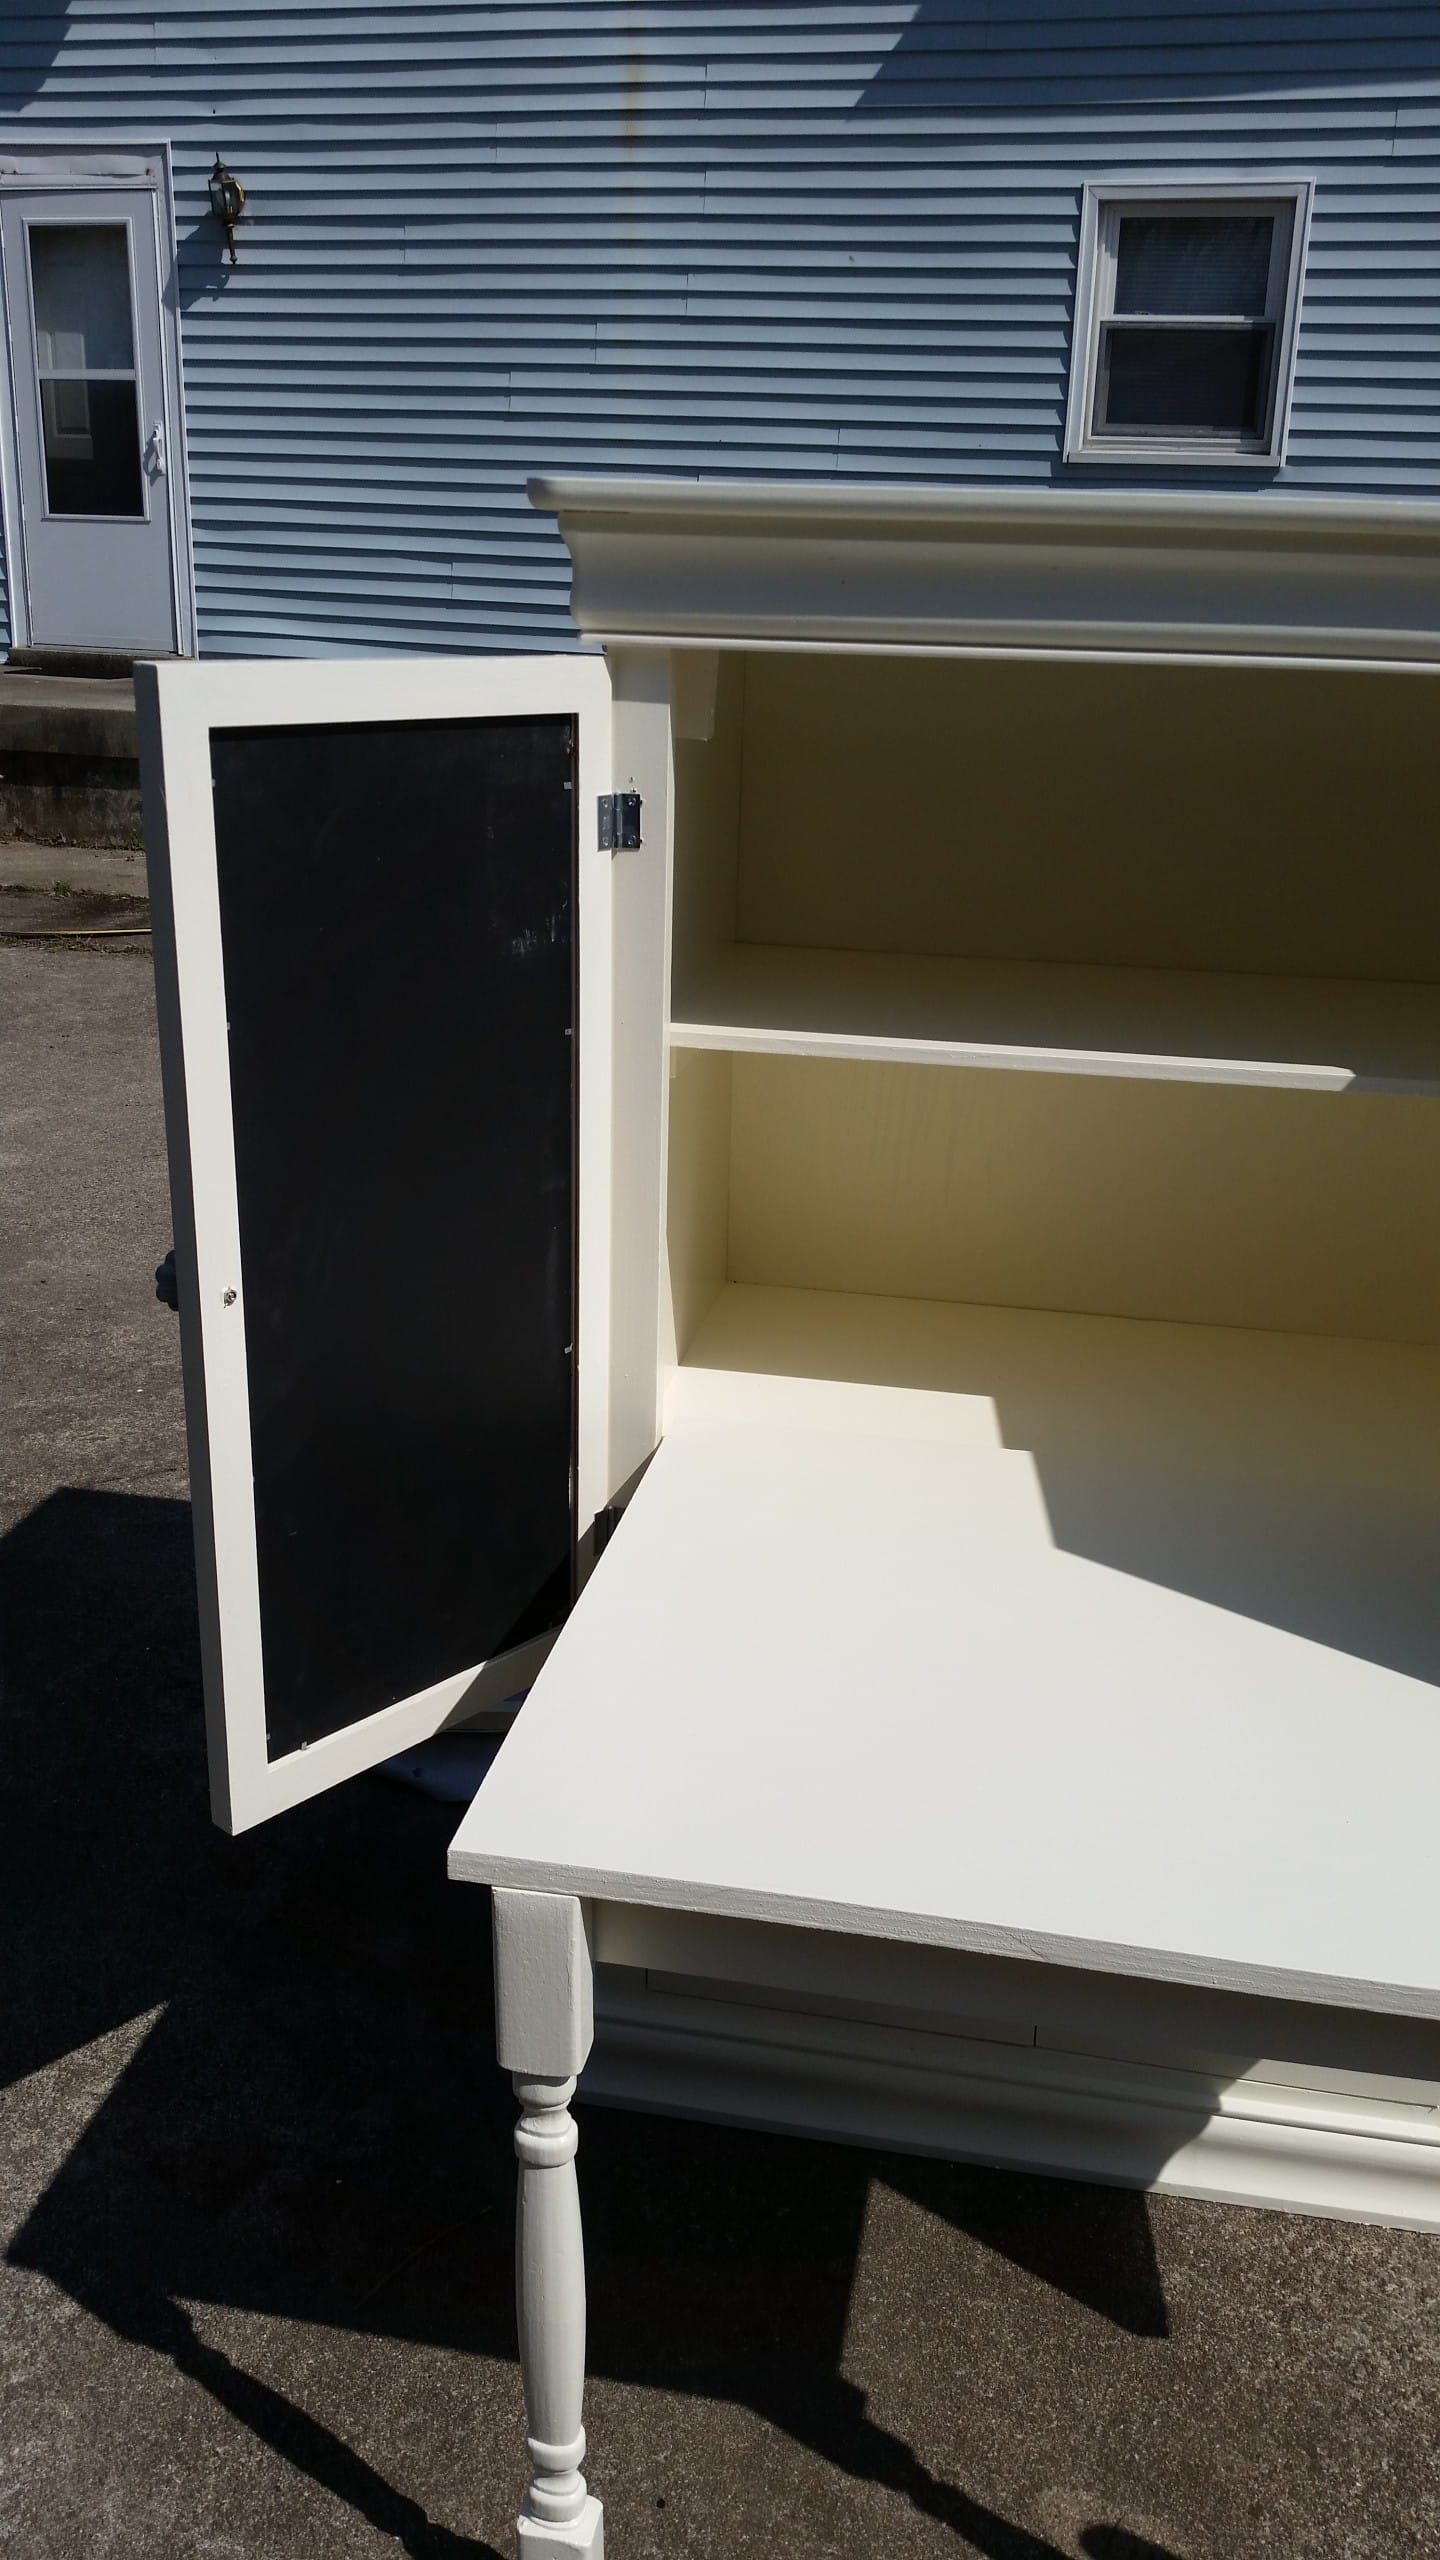
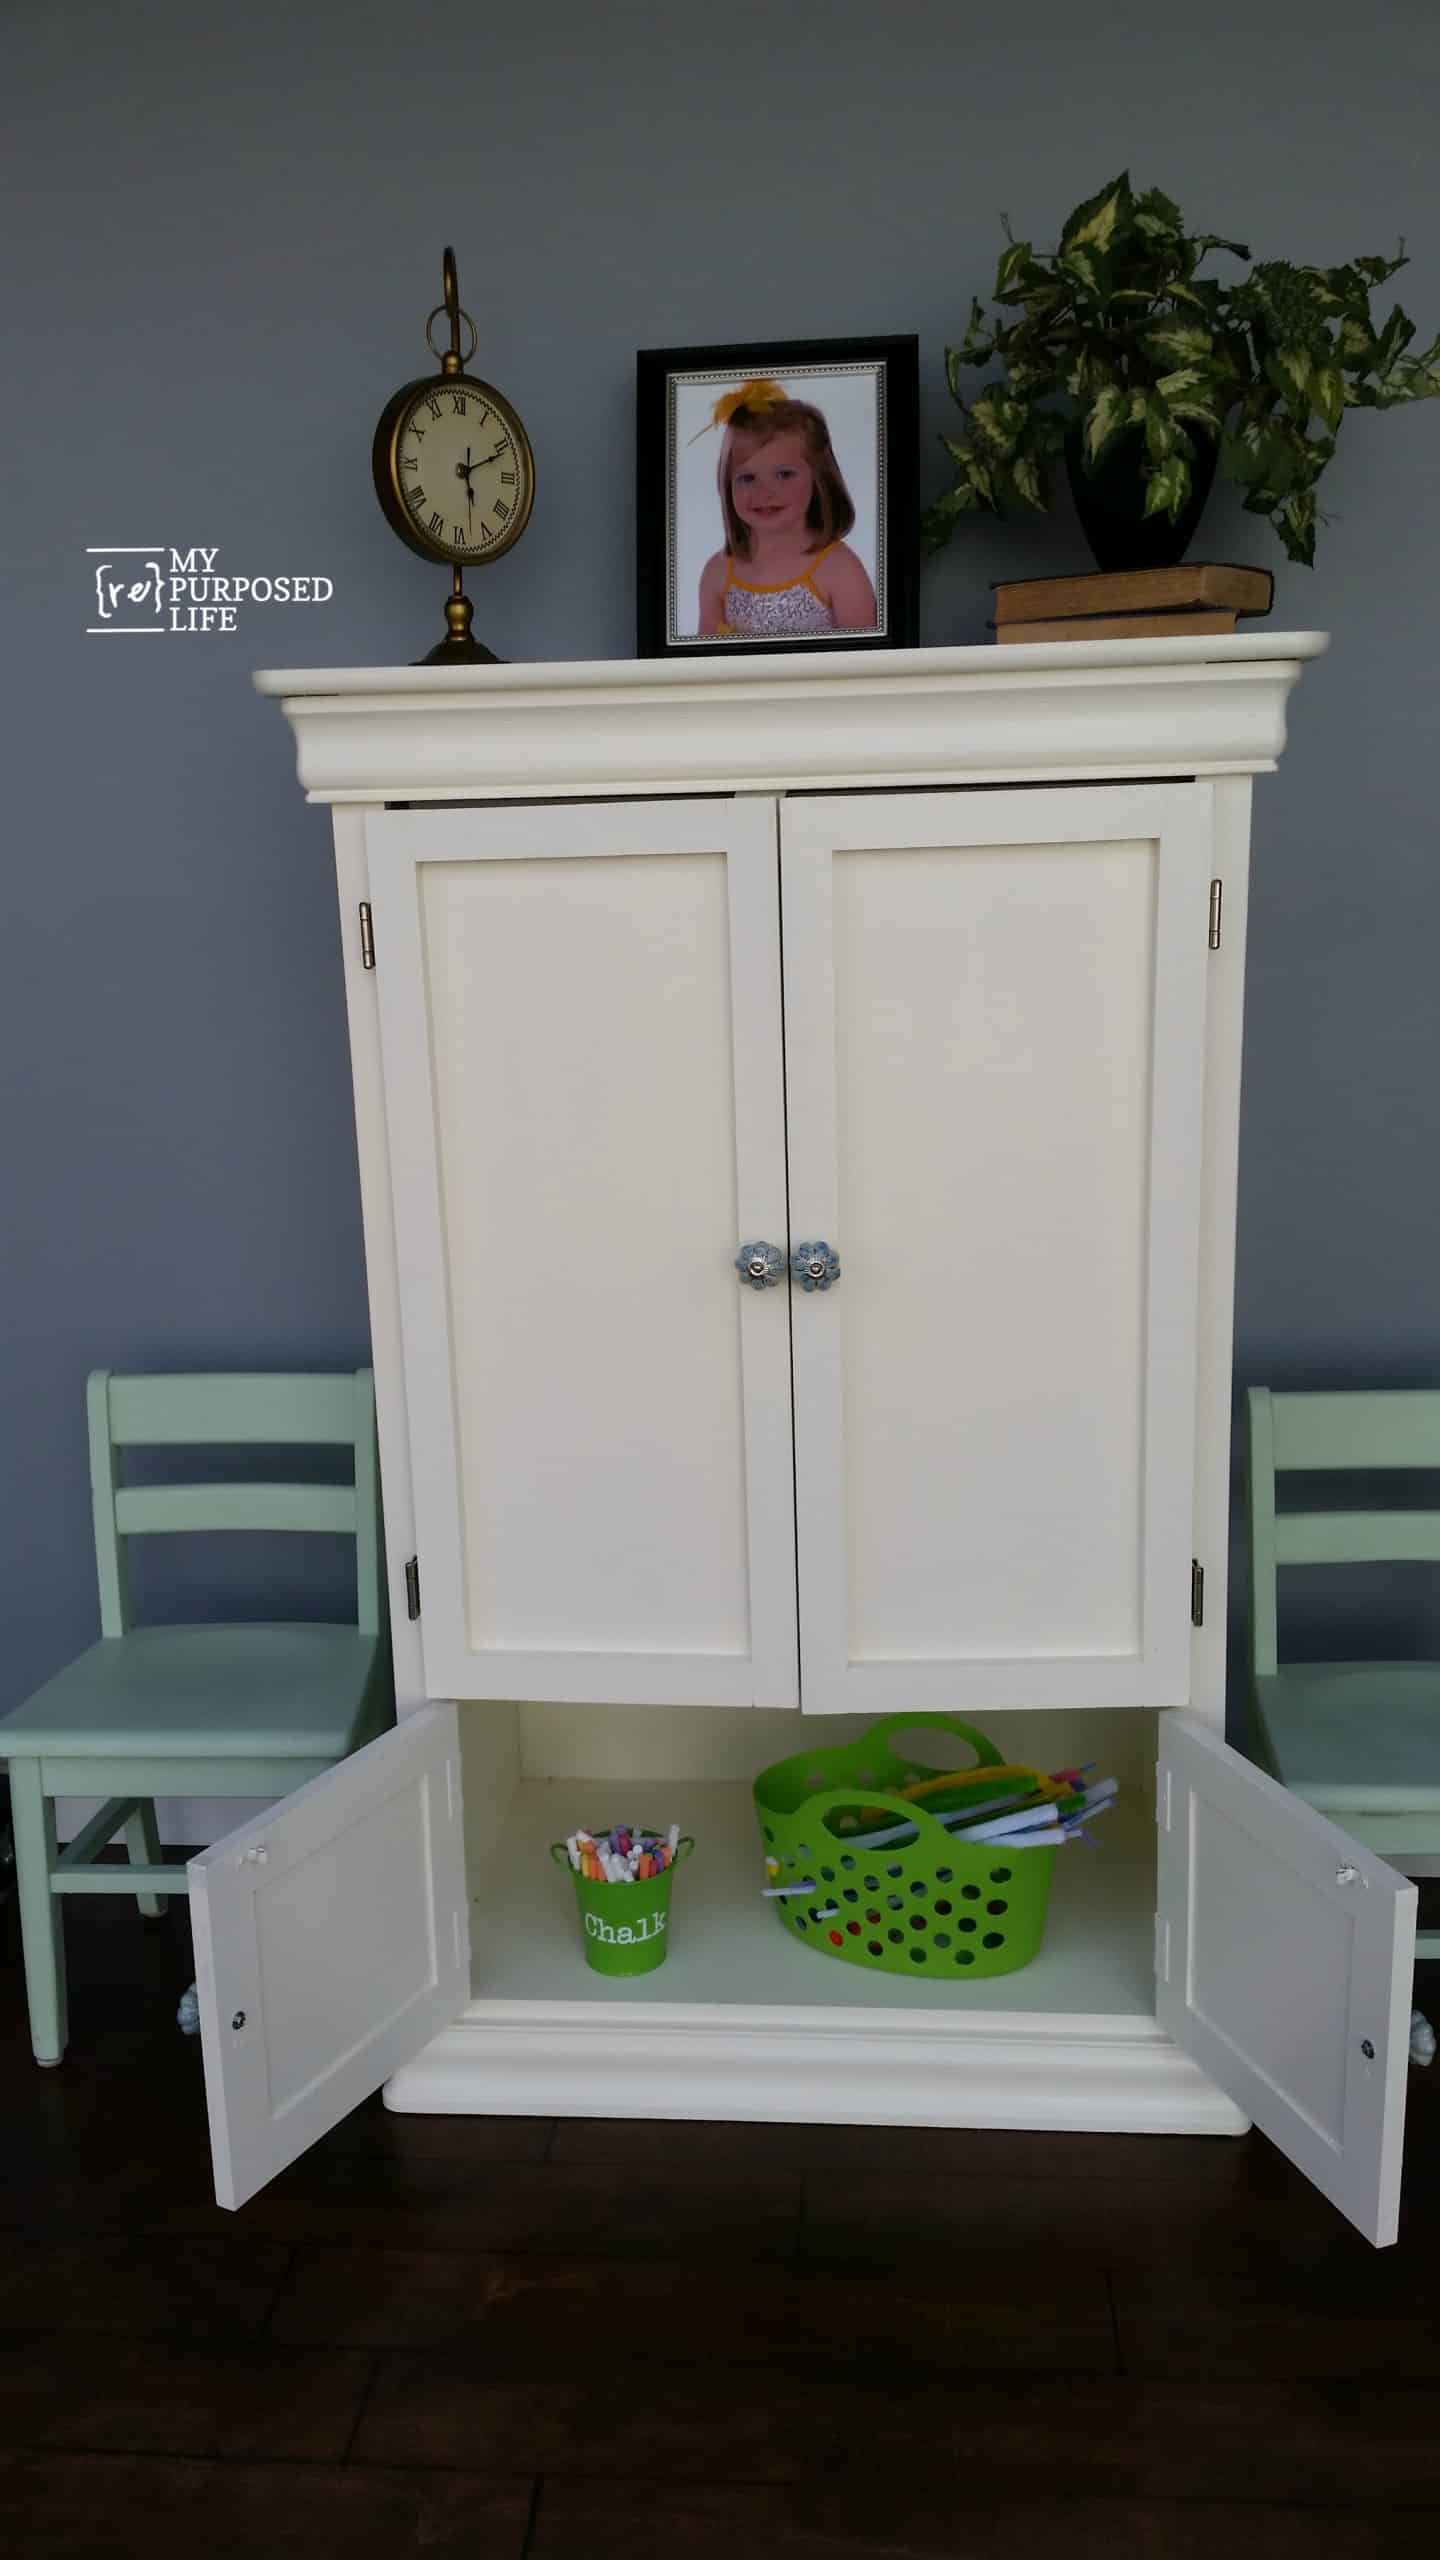
So, here is the final result!
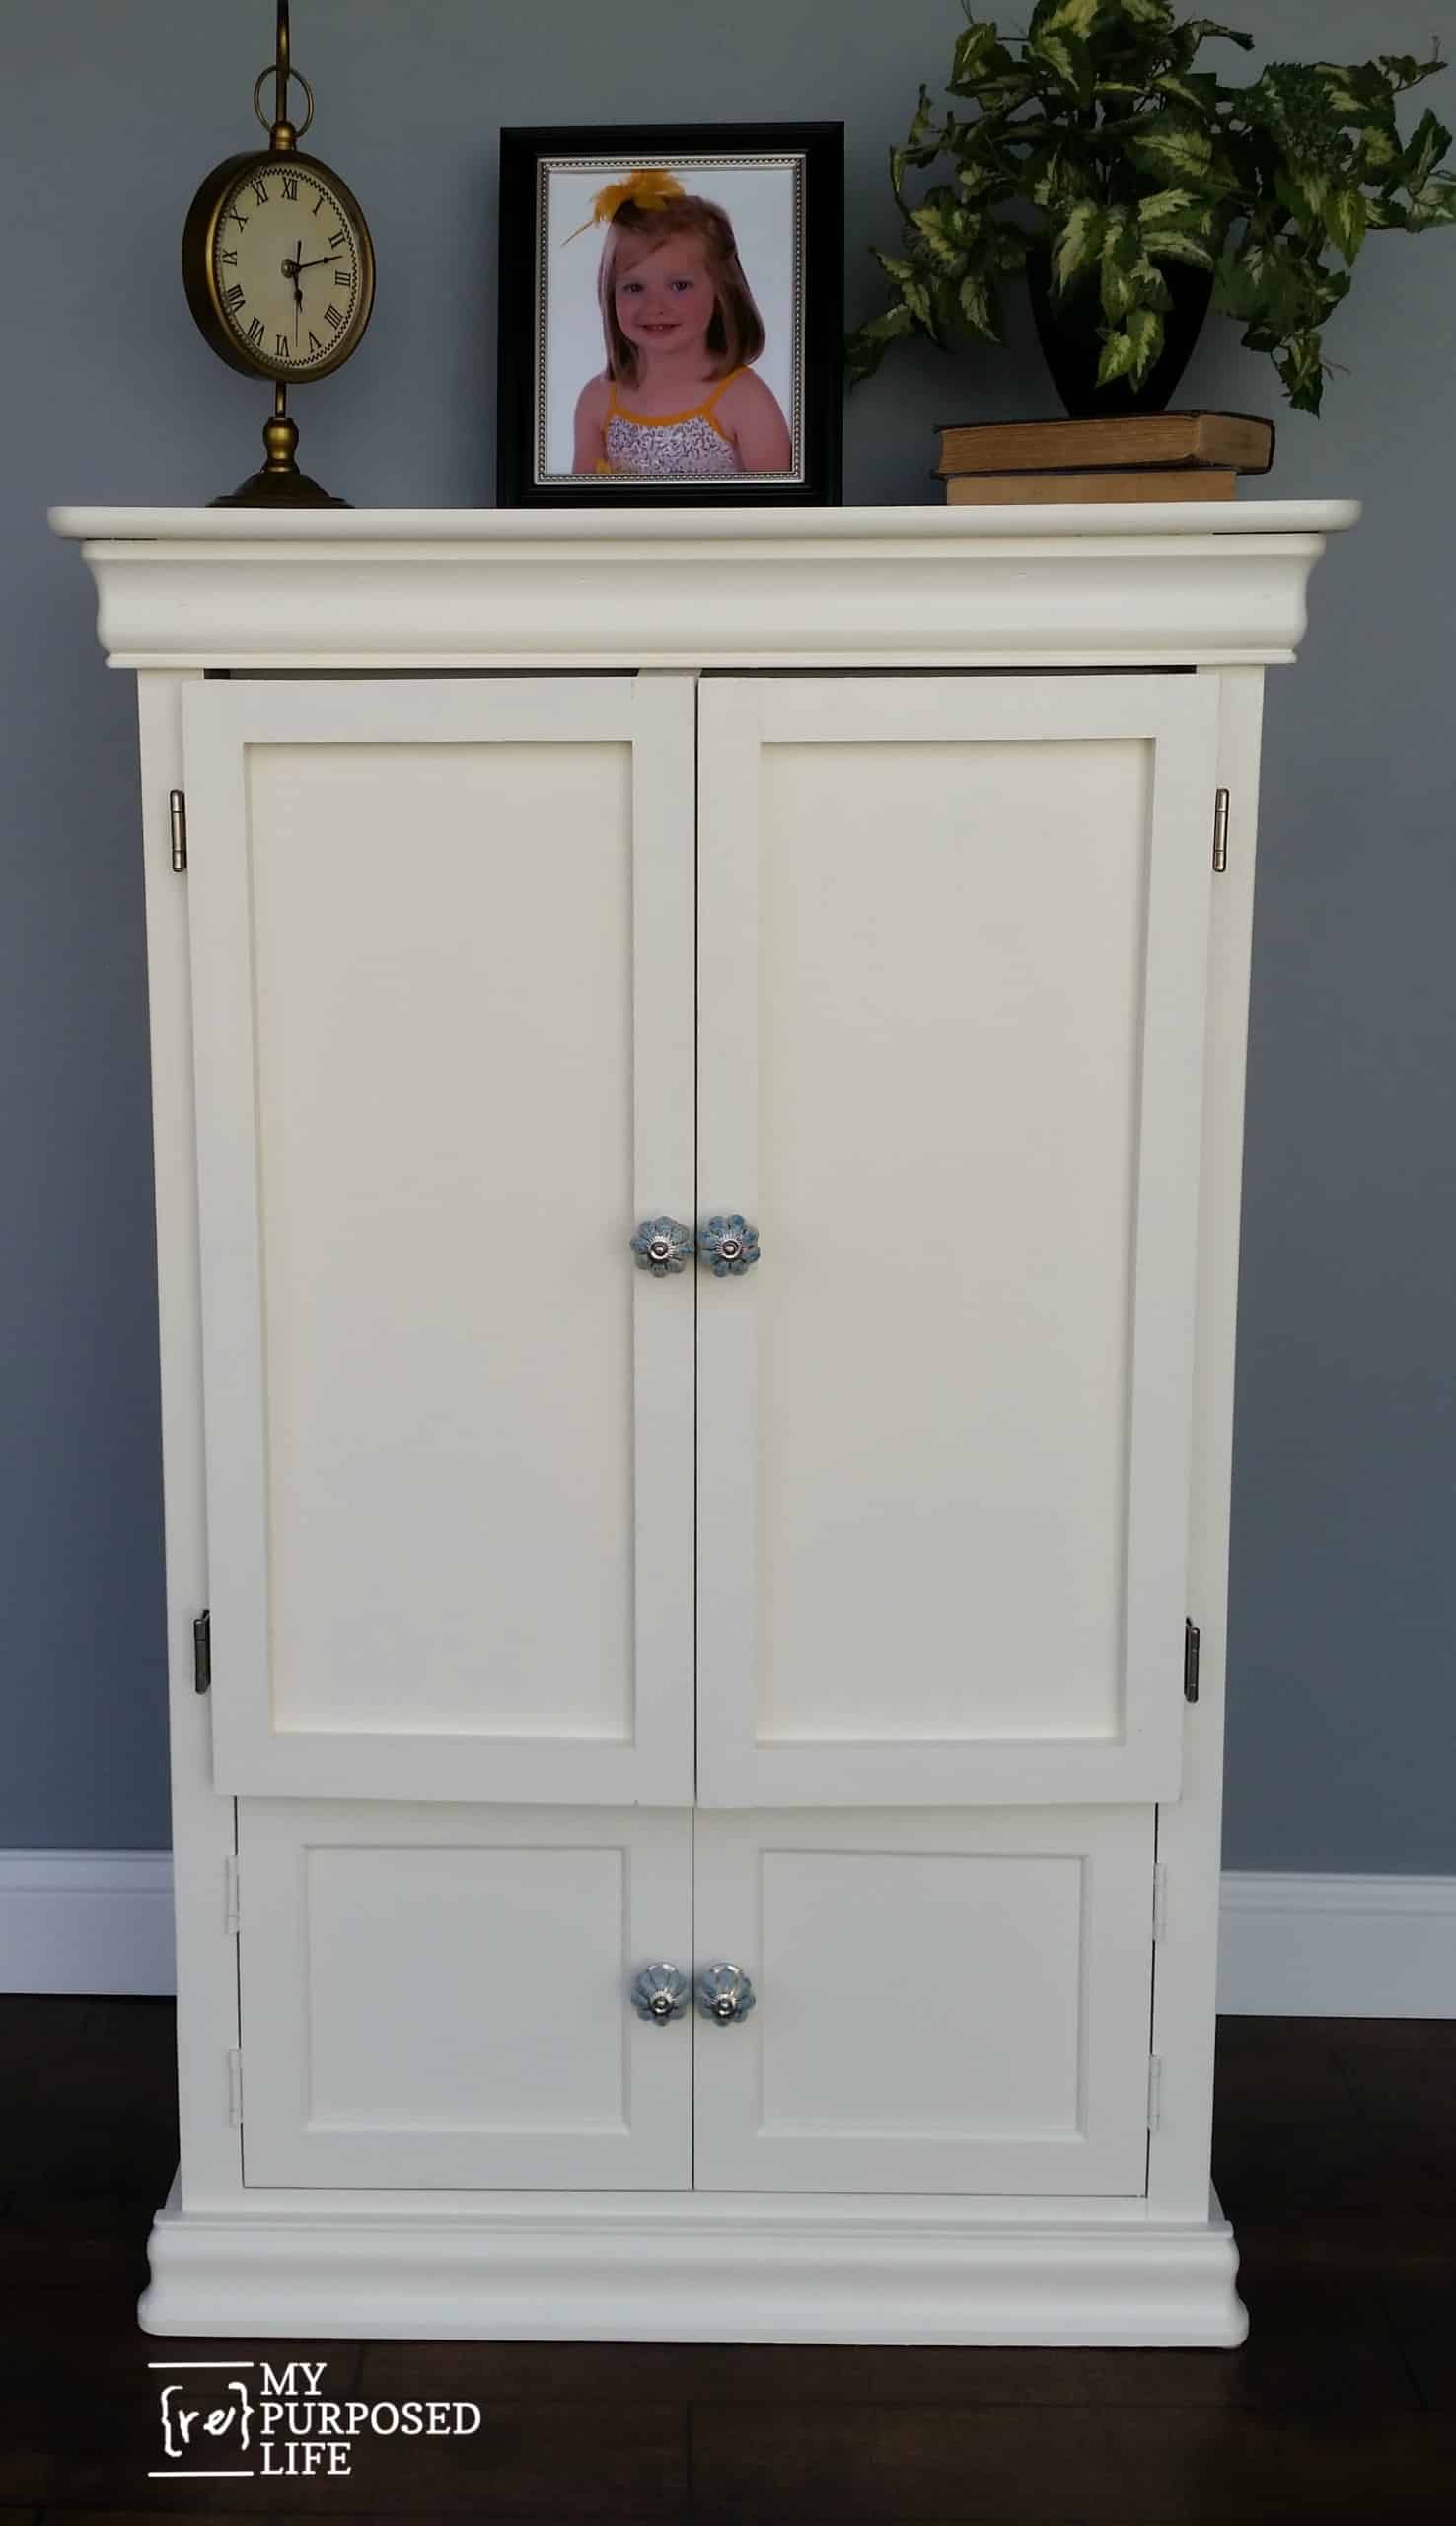
I don’t have pictures of the hinge or knob installation. When I say I was sick of this project, I mean I was not in the mood to take photos. While closed up, it would fit in any room, and visitors would not know the magic behind the doors.
If it were in a playroom, ABC blocks would be a perfect touch as knobs.
Kids Art Desk | Repurposed Armoire
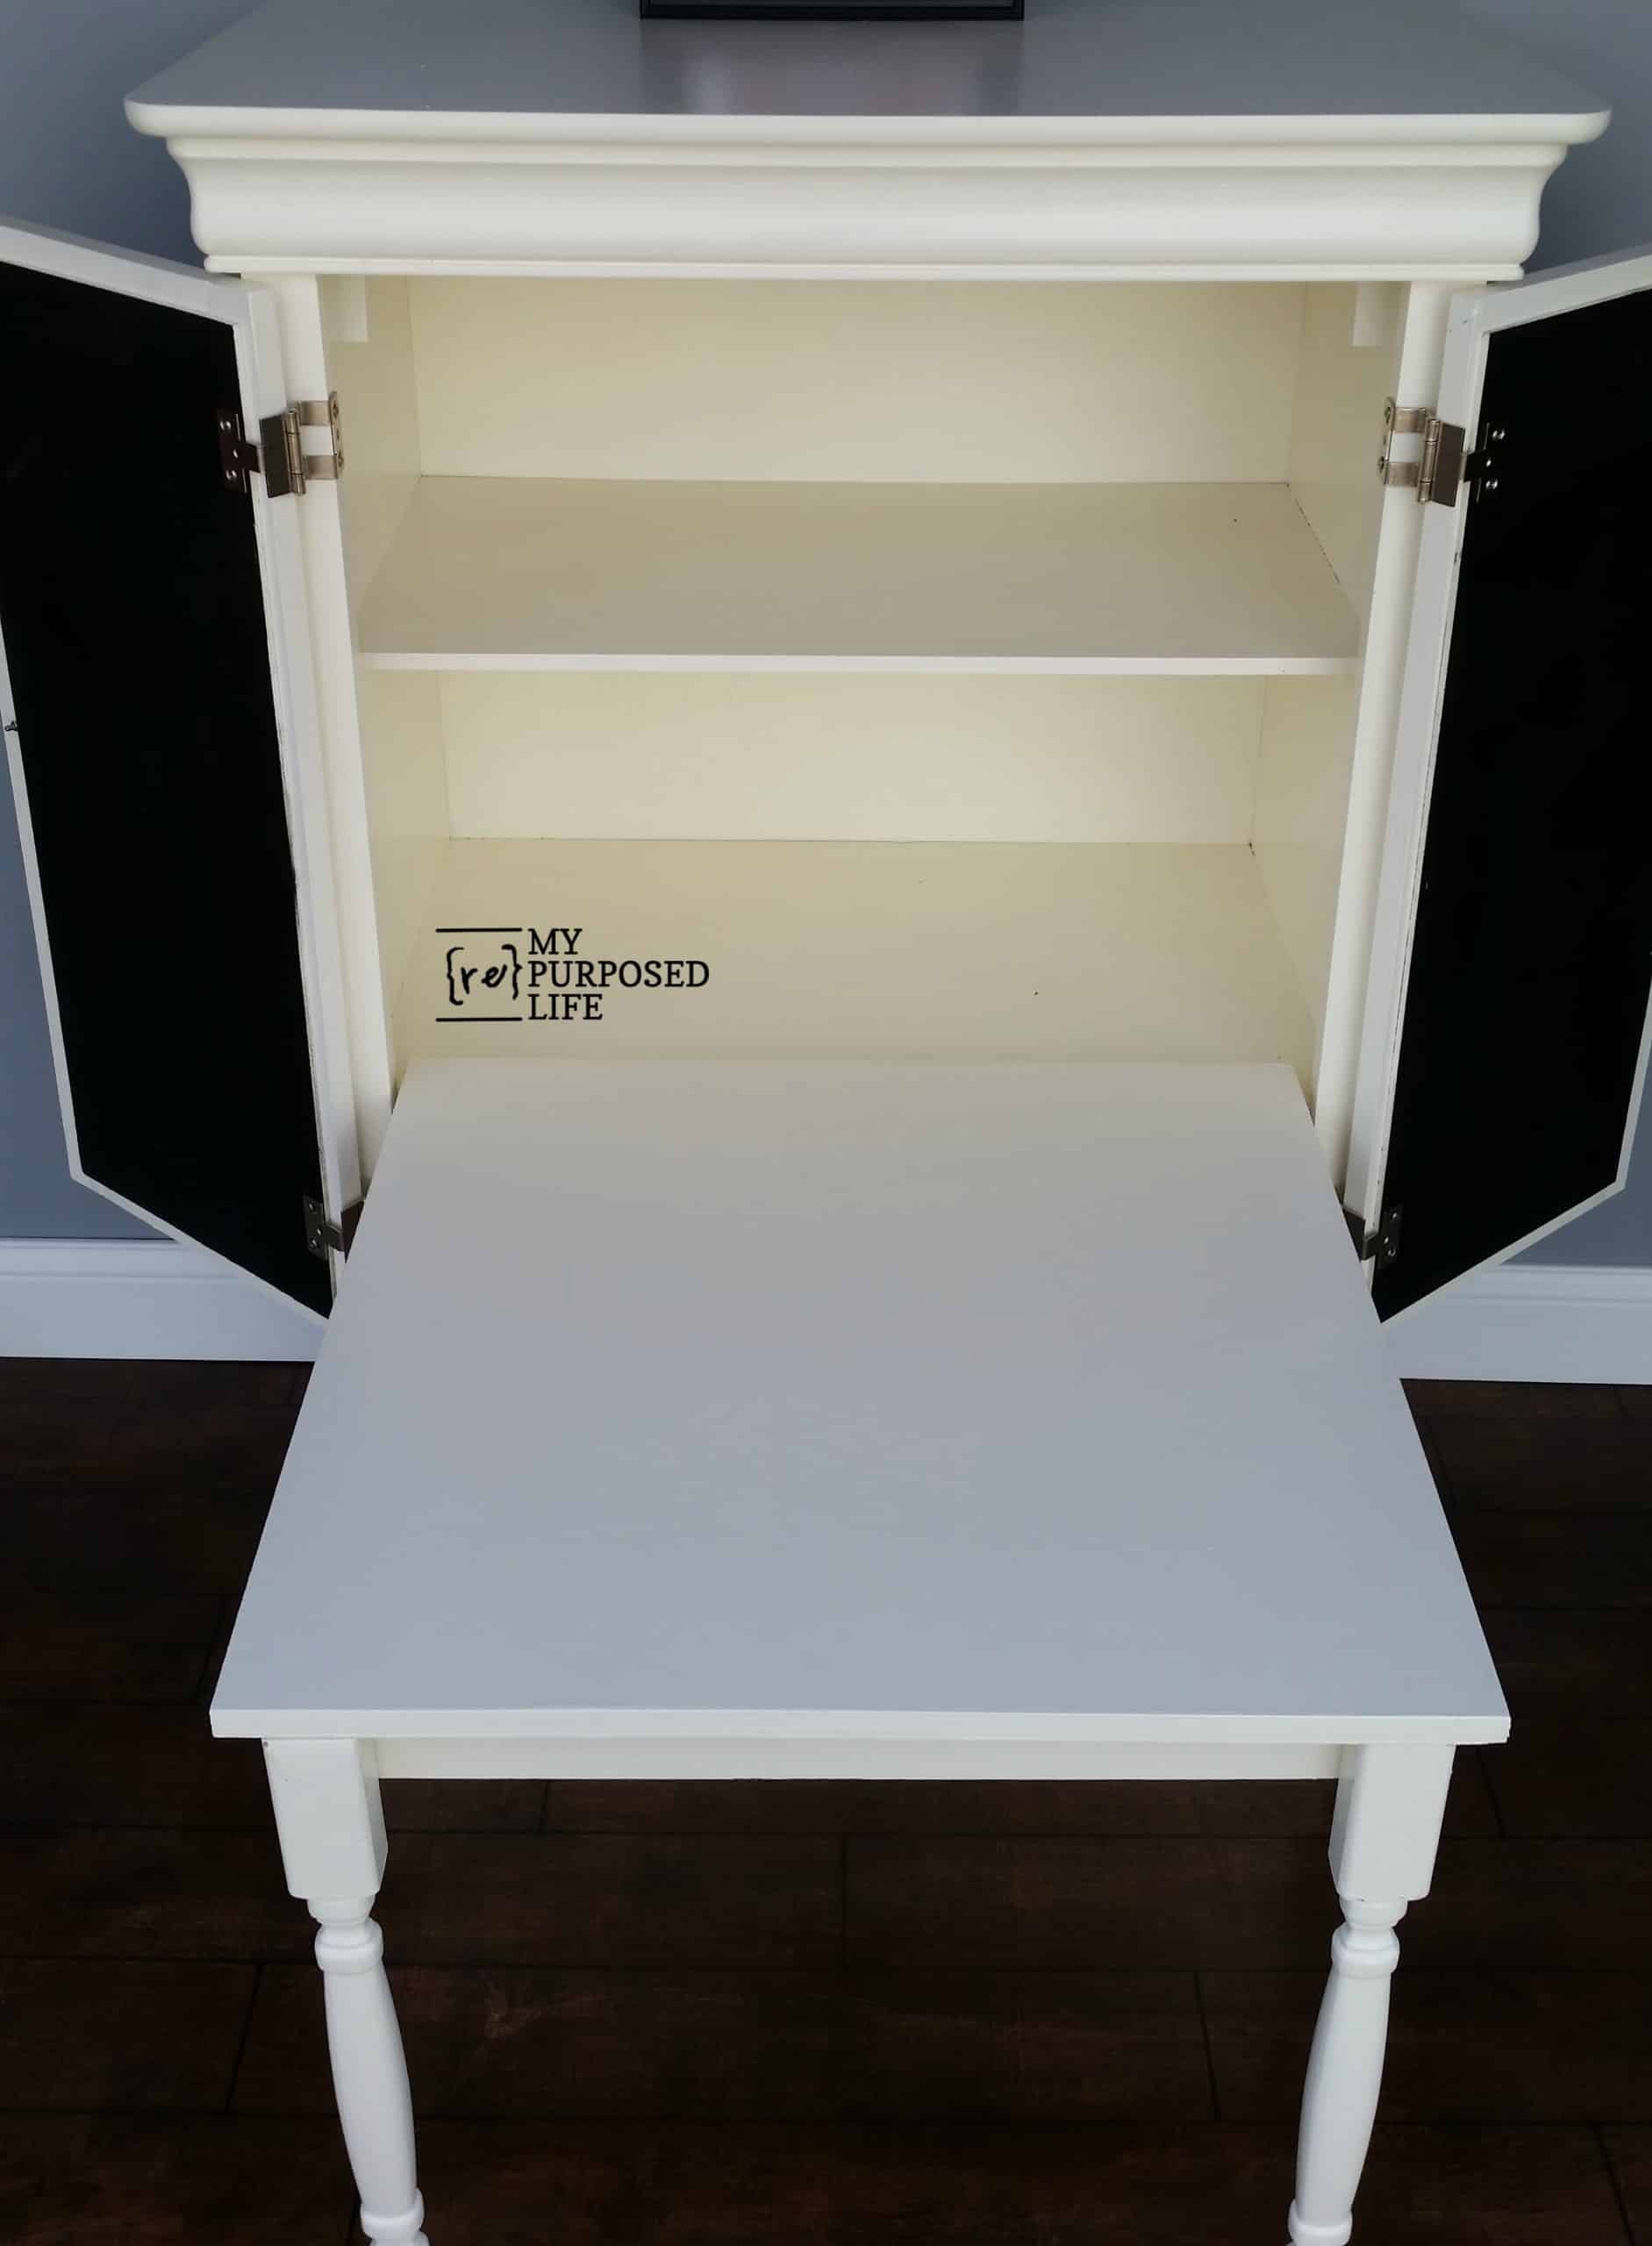
Look at how fabulous the kid’s art desk is when it folds down.
It was an easy project until I got to the doors, and even a lot of fun to see it all come together.
There is even more storage at the bottom of the armoire – the kids’ art desk.
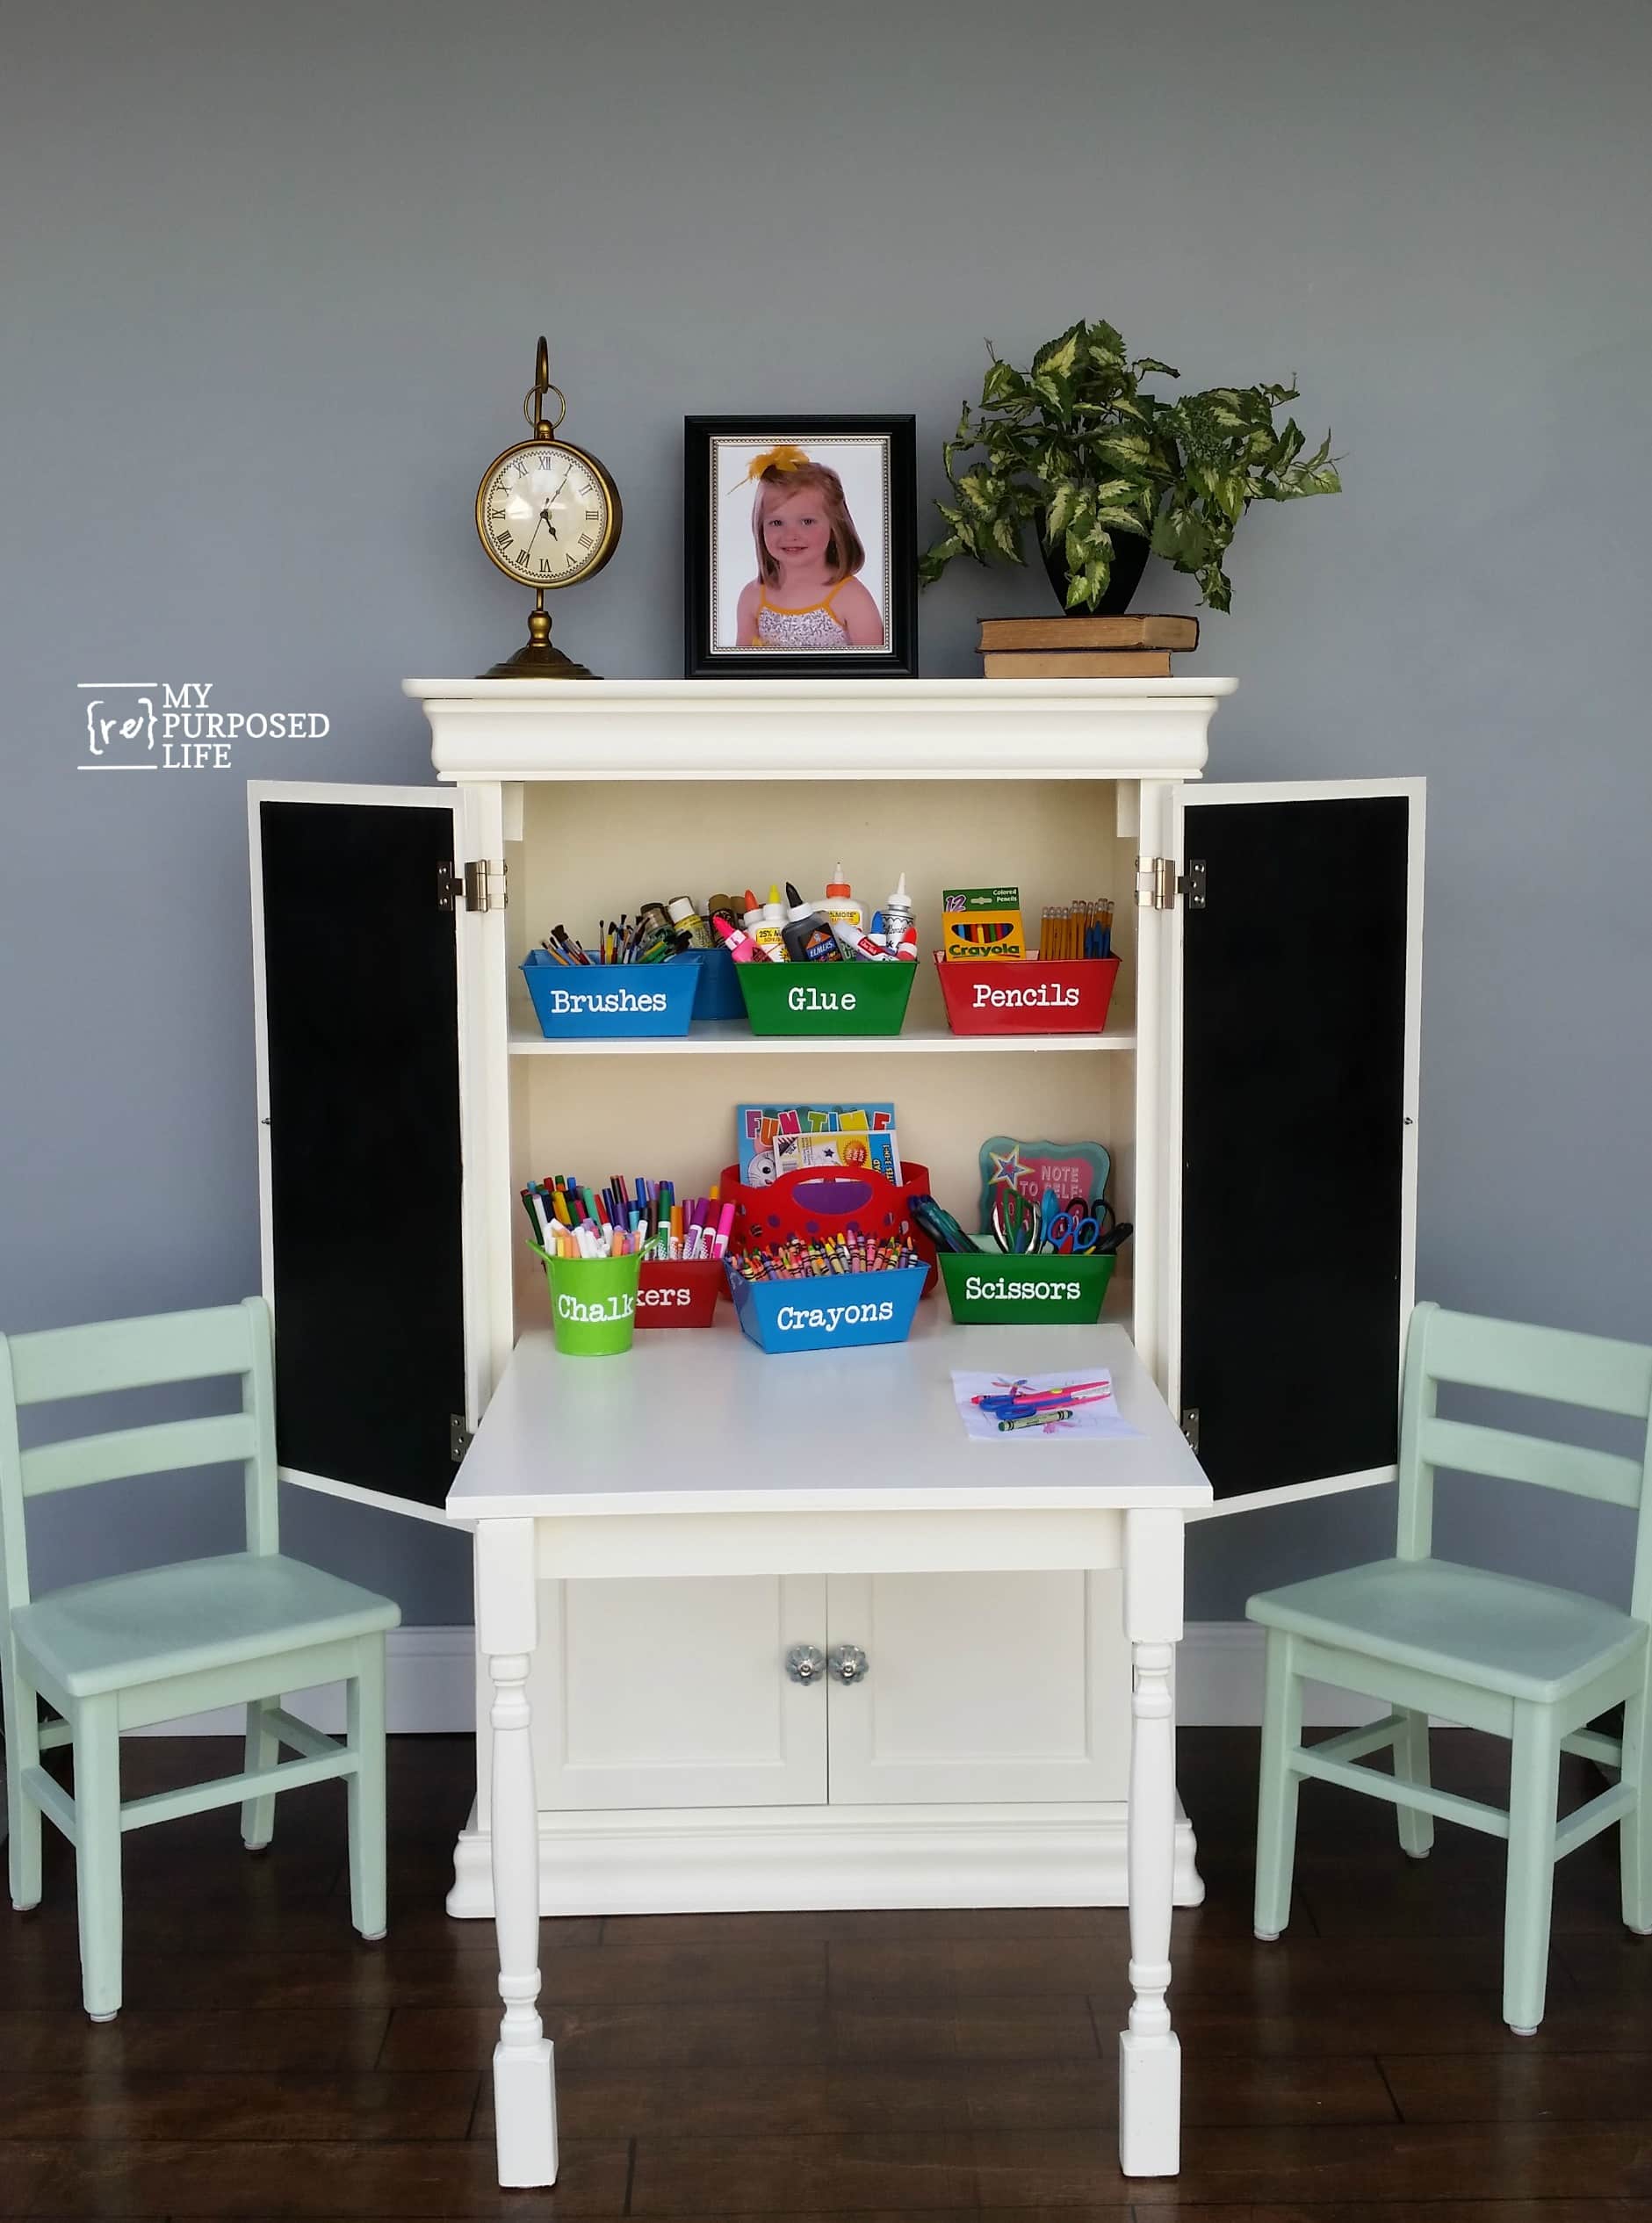
It is pretty, practical, and useful. Thank you, Home and Family and Ken Wingard, for inspiring this kid’s art desk!
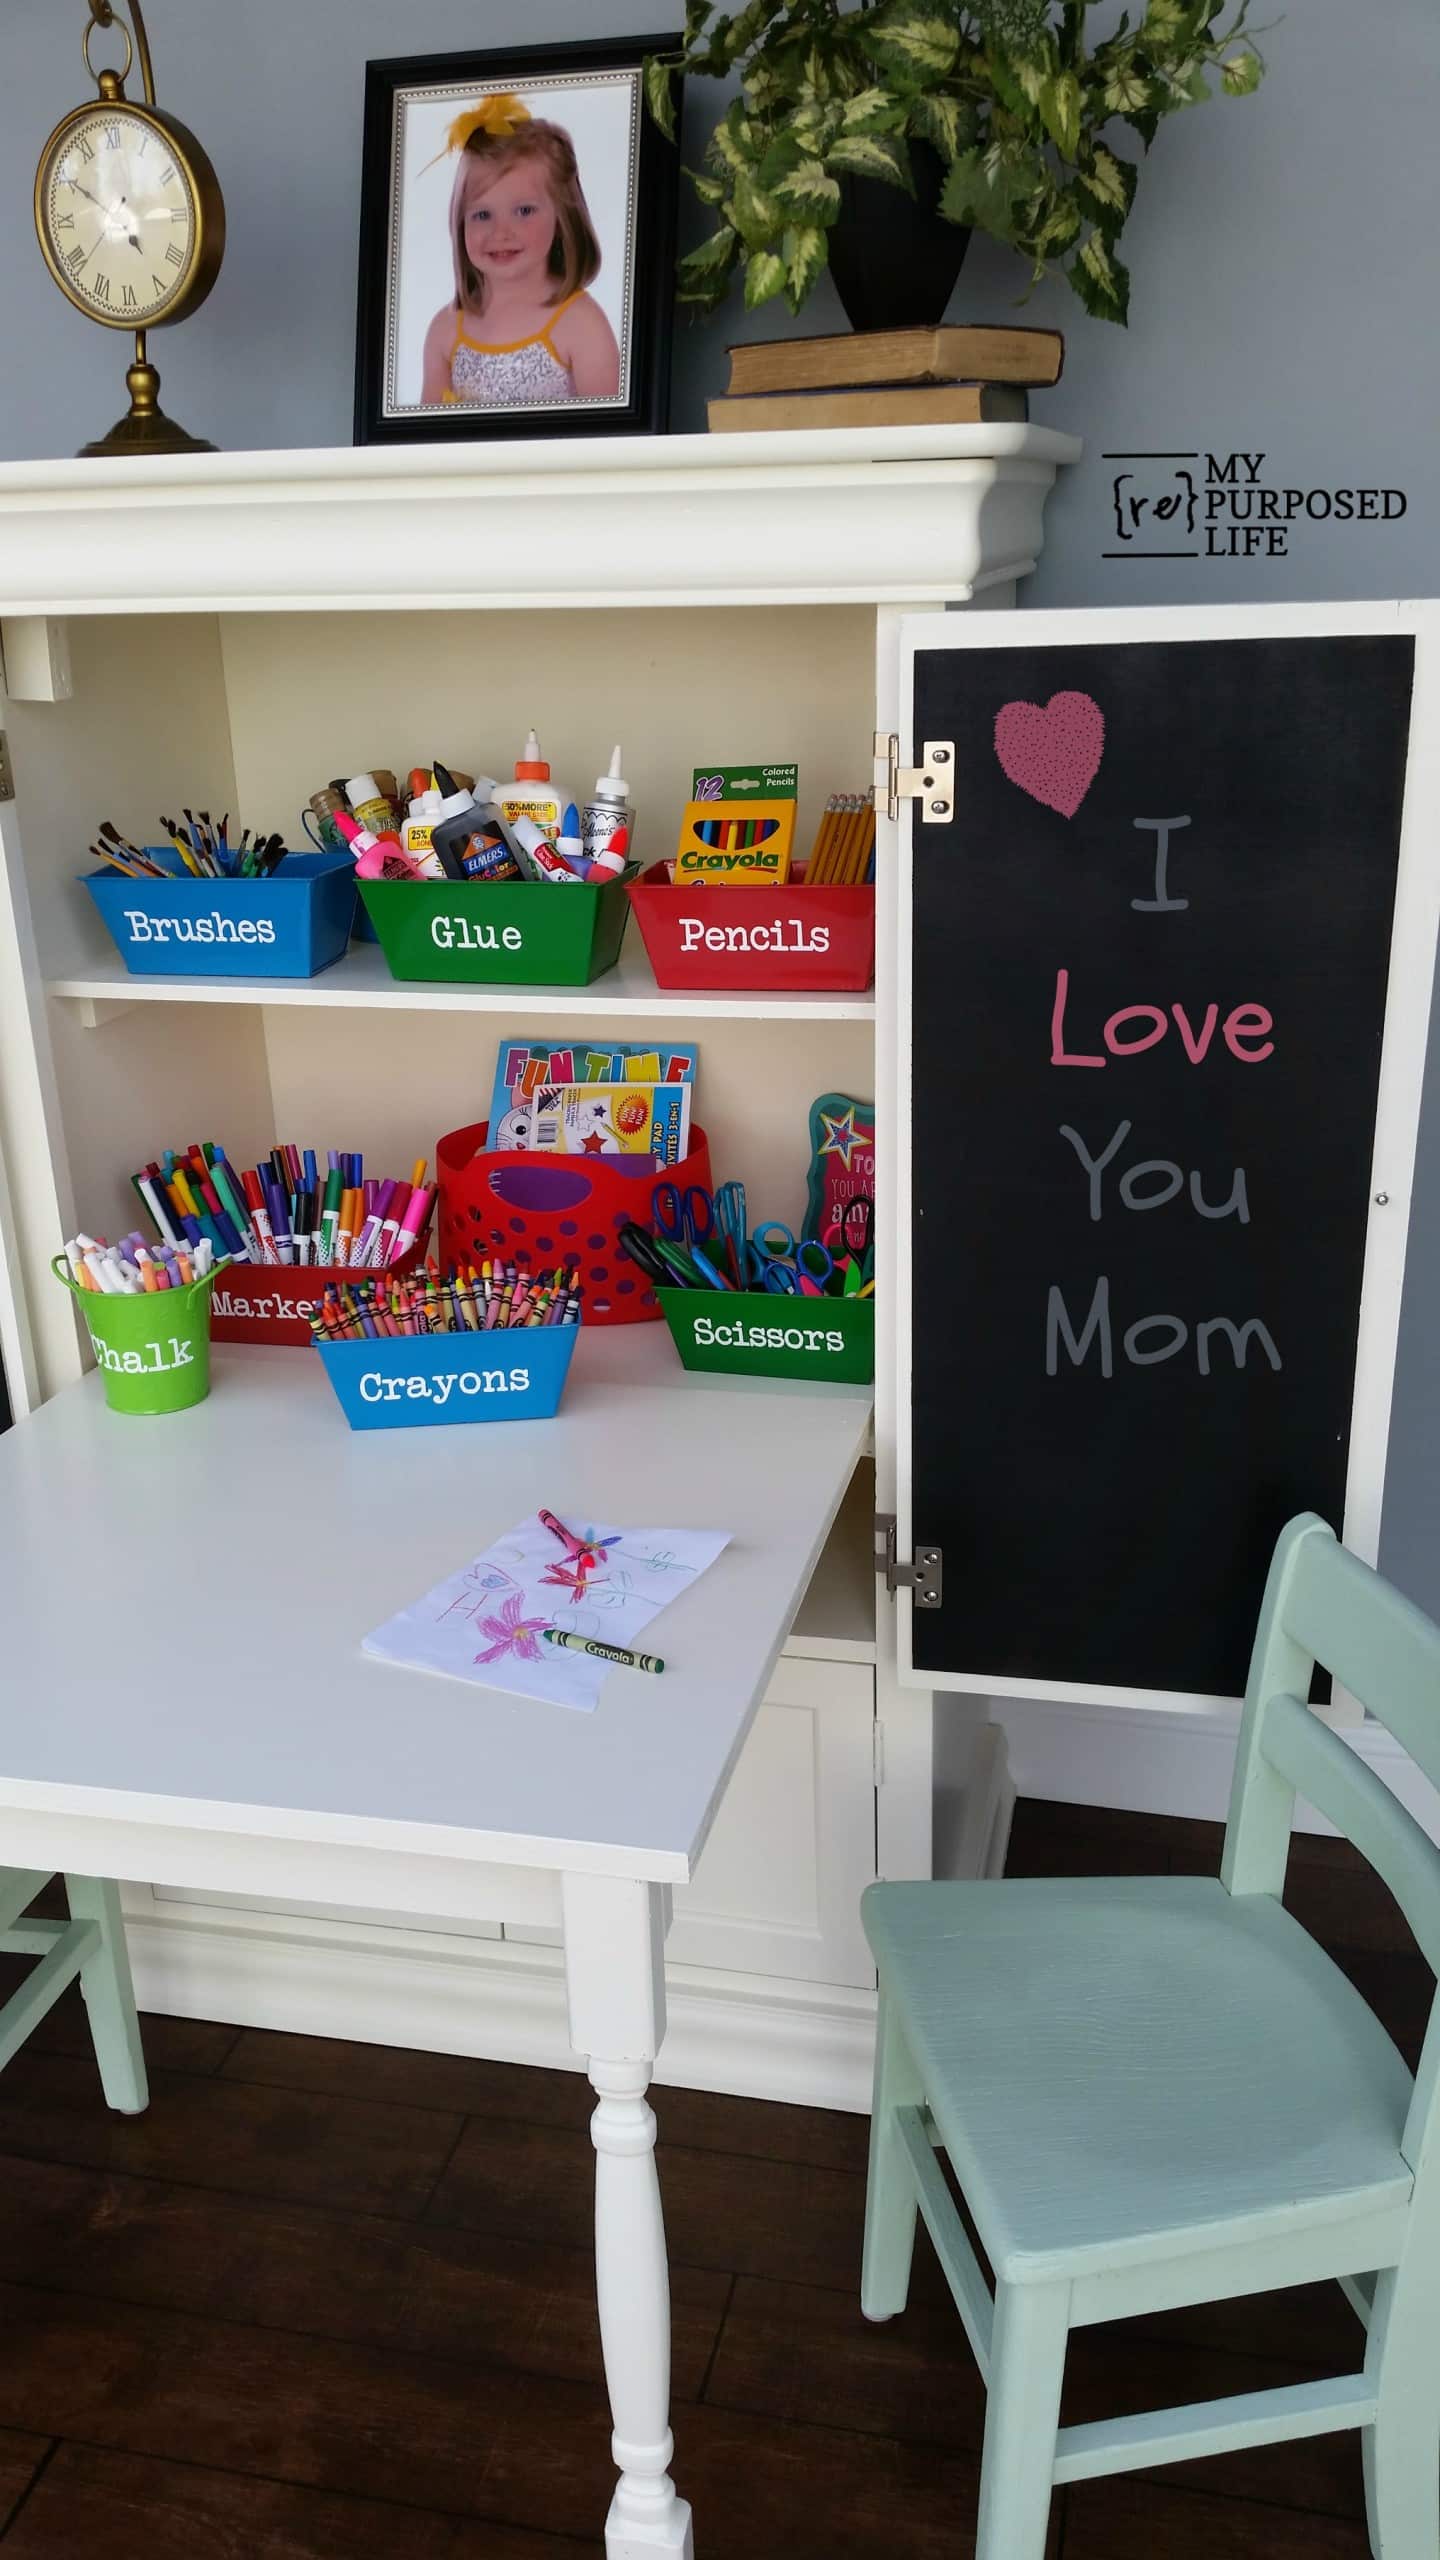
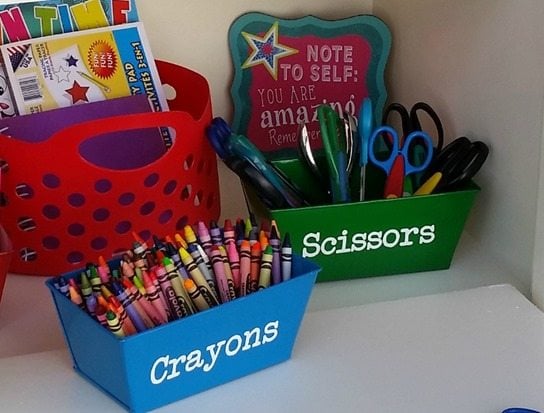
Art Center Accessories
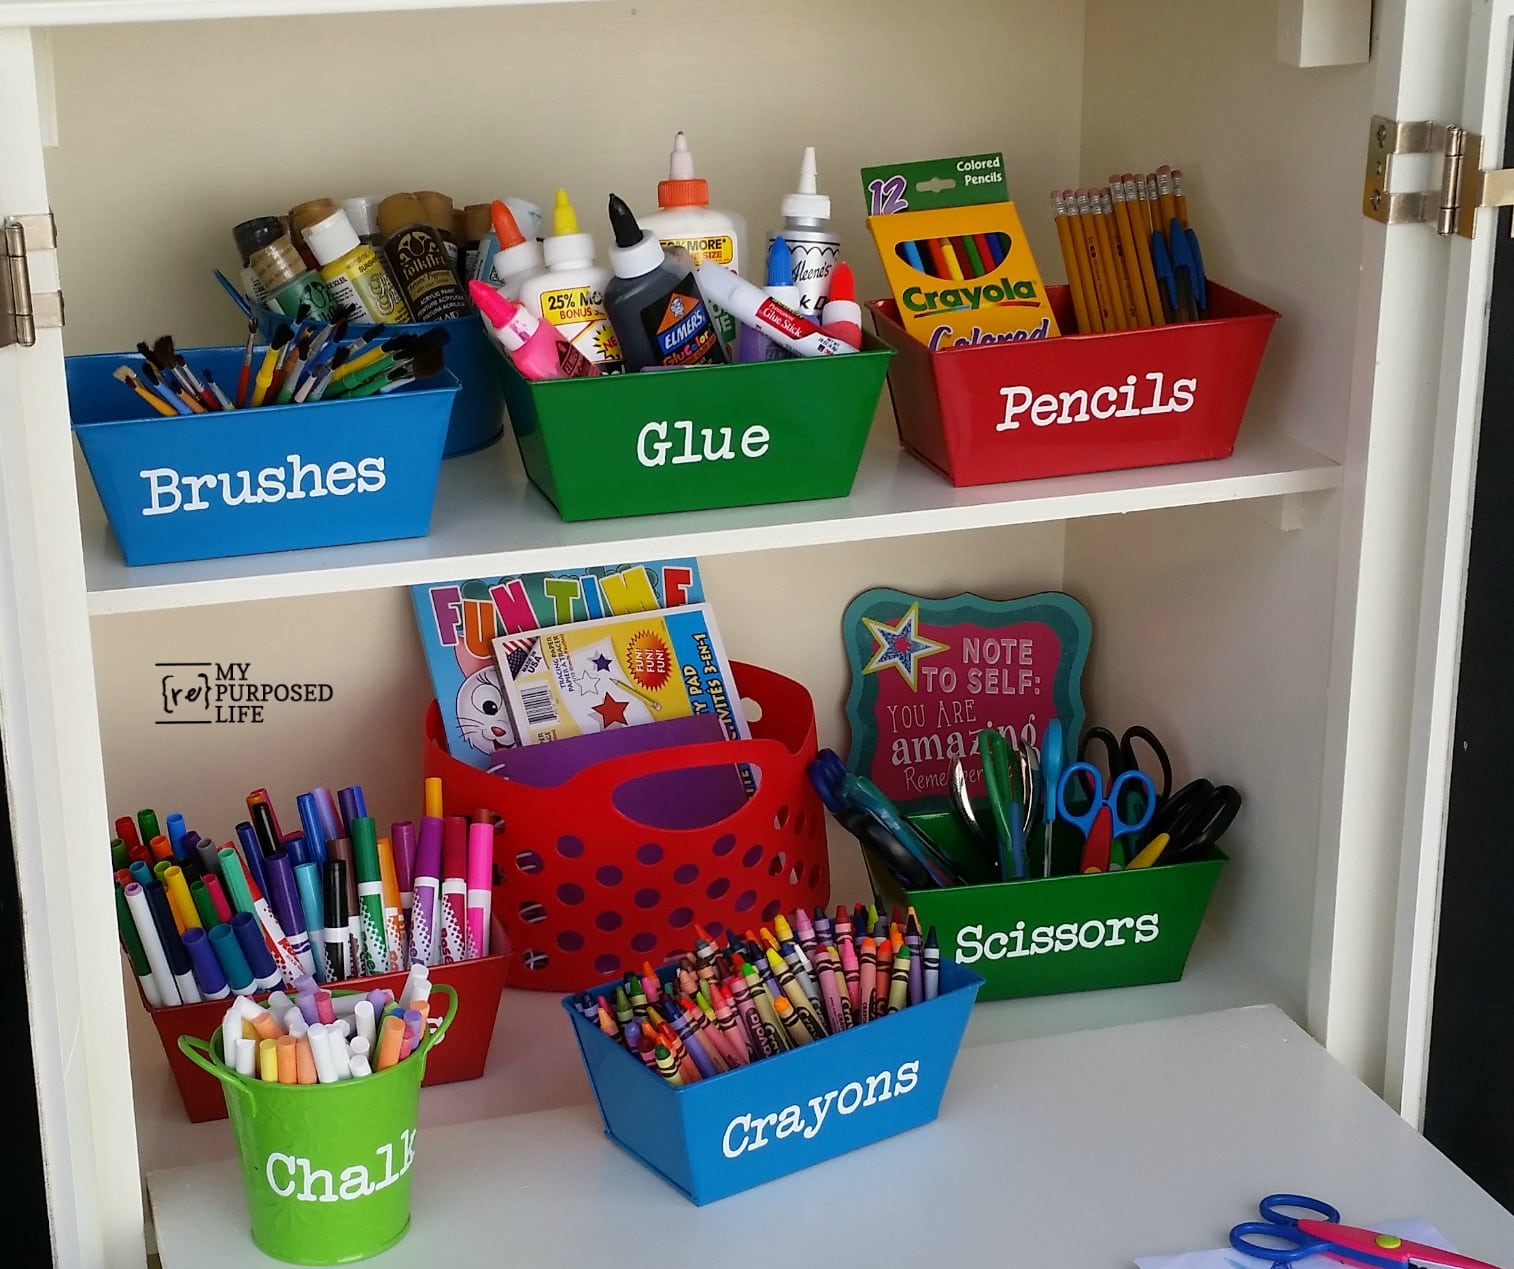
I bought these cute little metal bins at my local $$Tree. After deciding what items to corral, I got busy and brought out my Silhouette Portrait and some white vinyl.
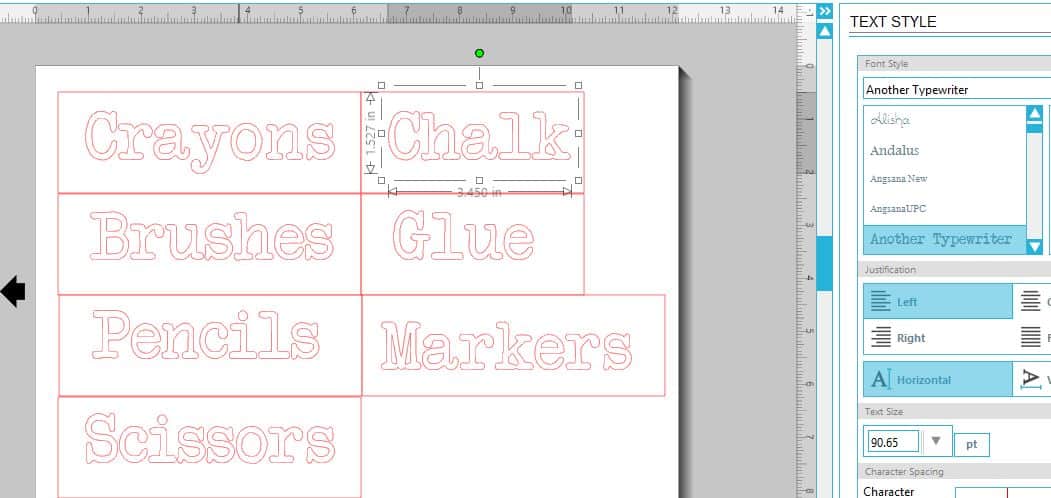
I chose Another Typewriter as the font for the vinyl lettering. I always make little boxes around my text boxes to make it easier to transfer to my project.
I didn’t take any pictures, but I used painter’s tape to transfer the letters like I did for this project. I like this method for small projects with single lines of text.
I also got a small plaque and a plastic tote from the $$ Tree.
Related Content: Kids’ Art Accessories
Kid’s Art Center Chairs
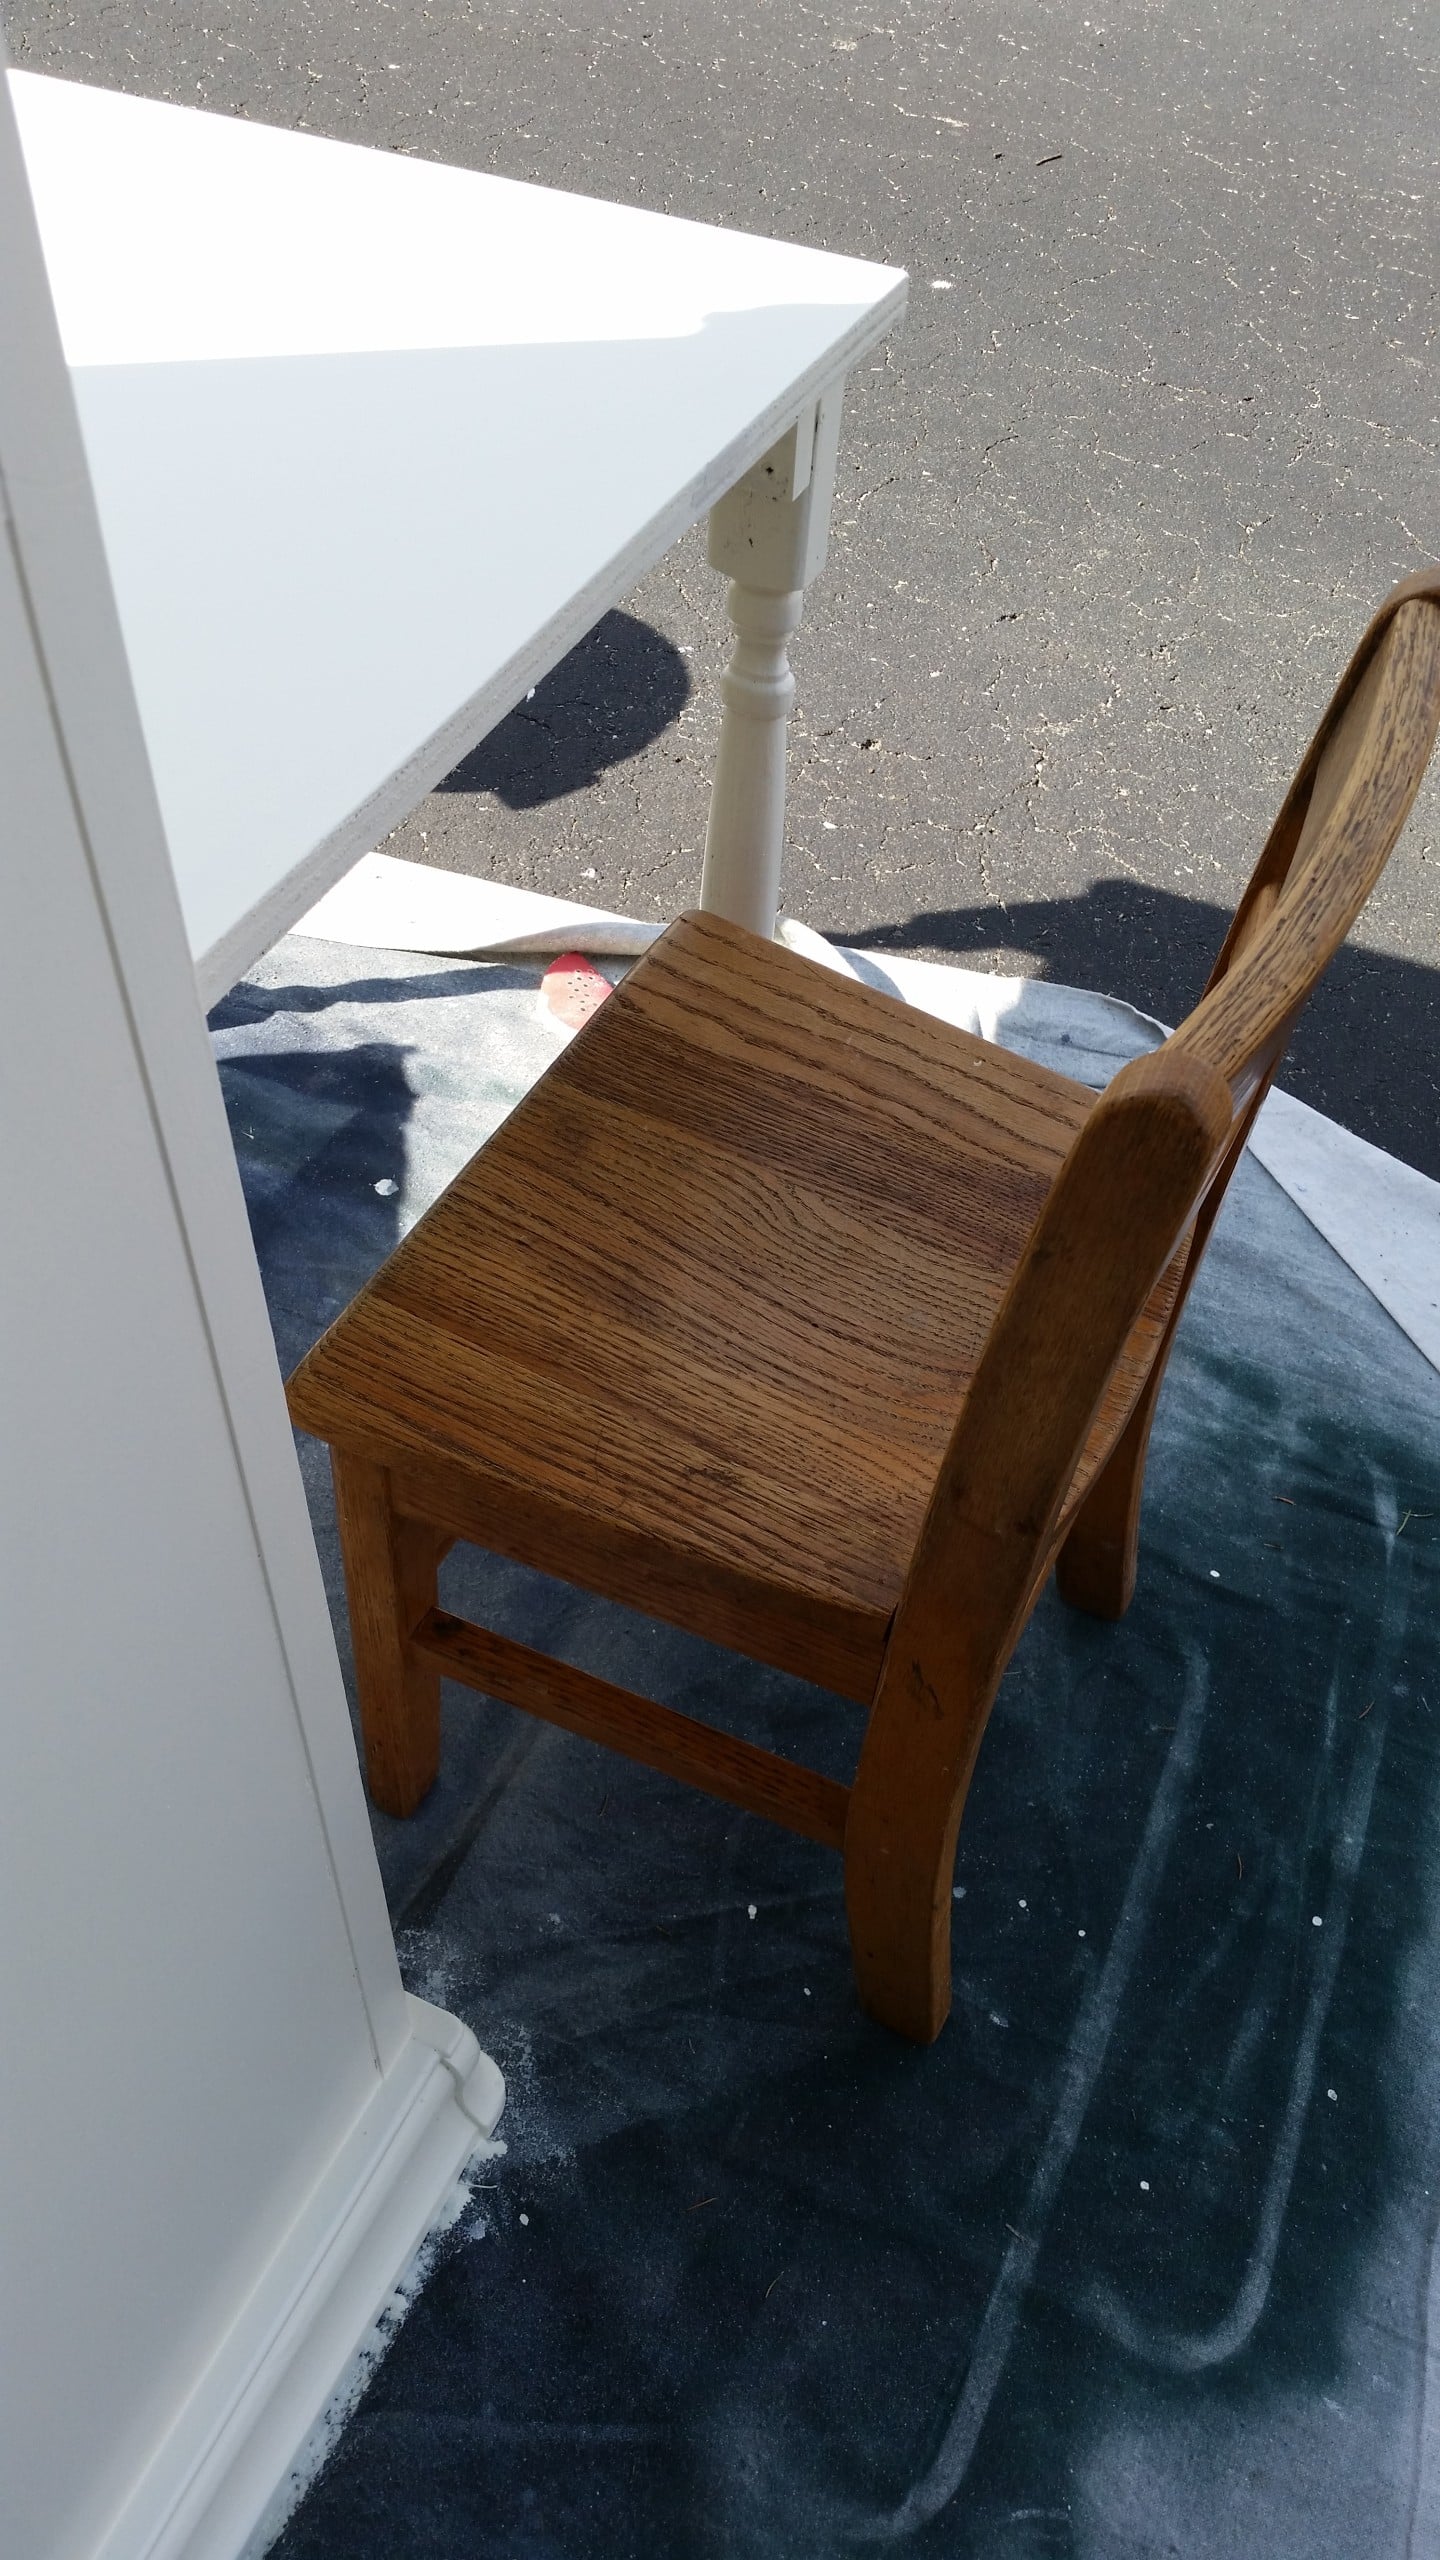
I got out a couple of small wooden chairs to see if they would work for the table height. I washed them down and cleaned off some of the oils built up over years of use.
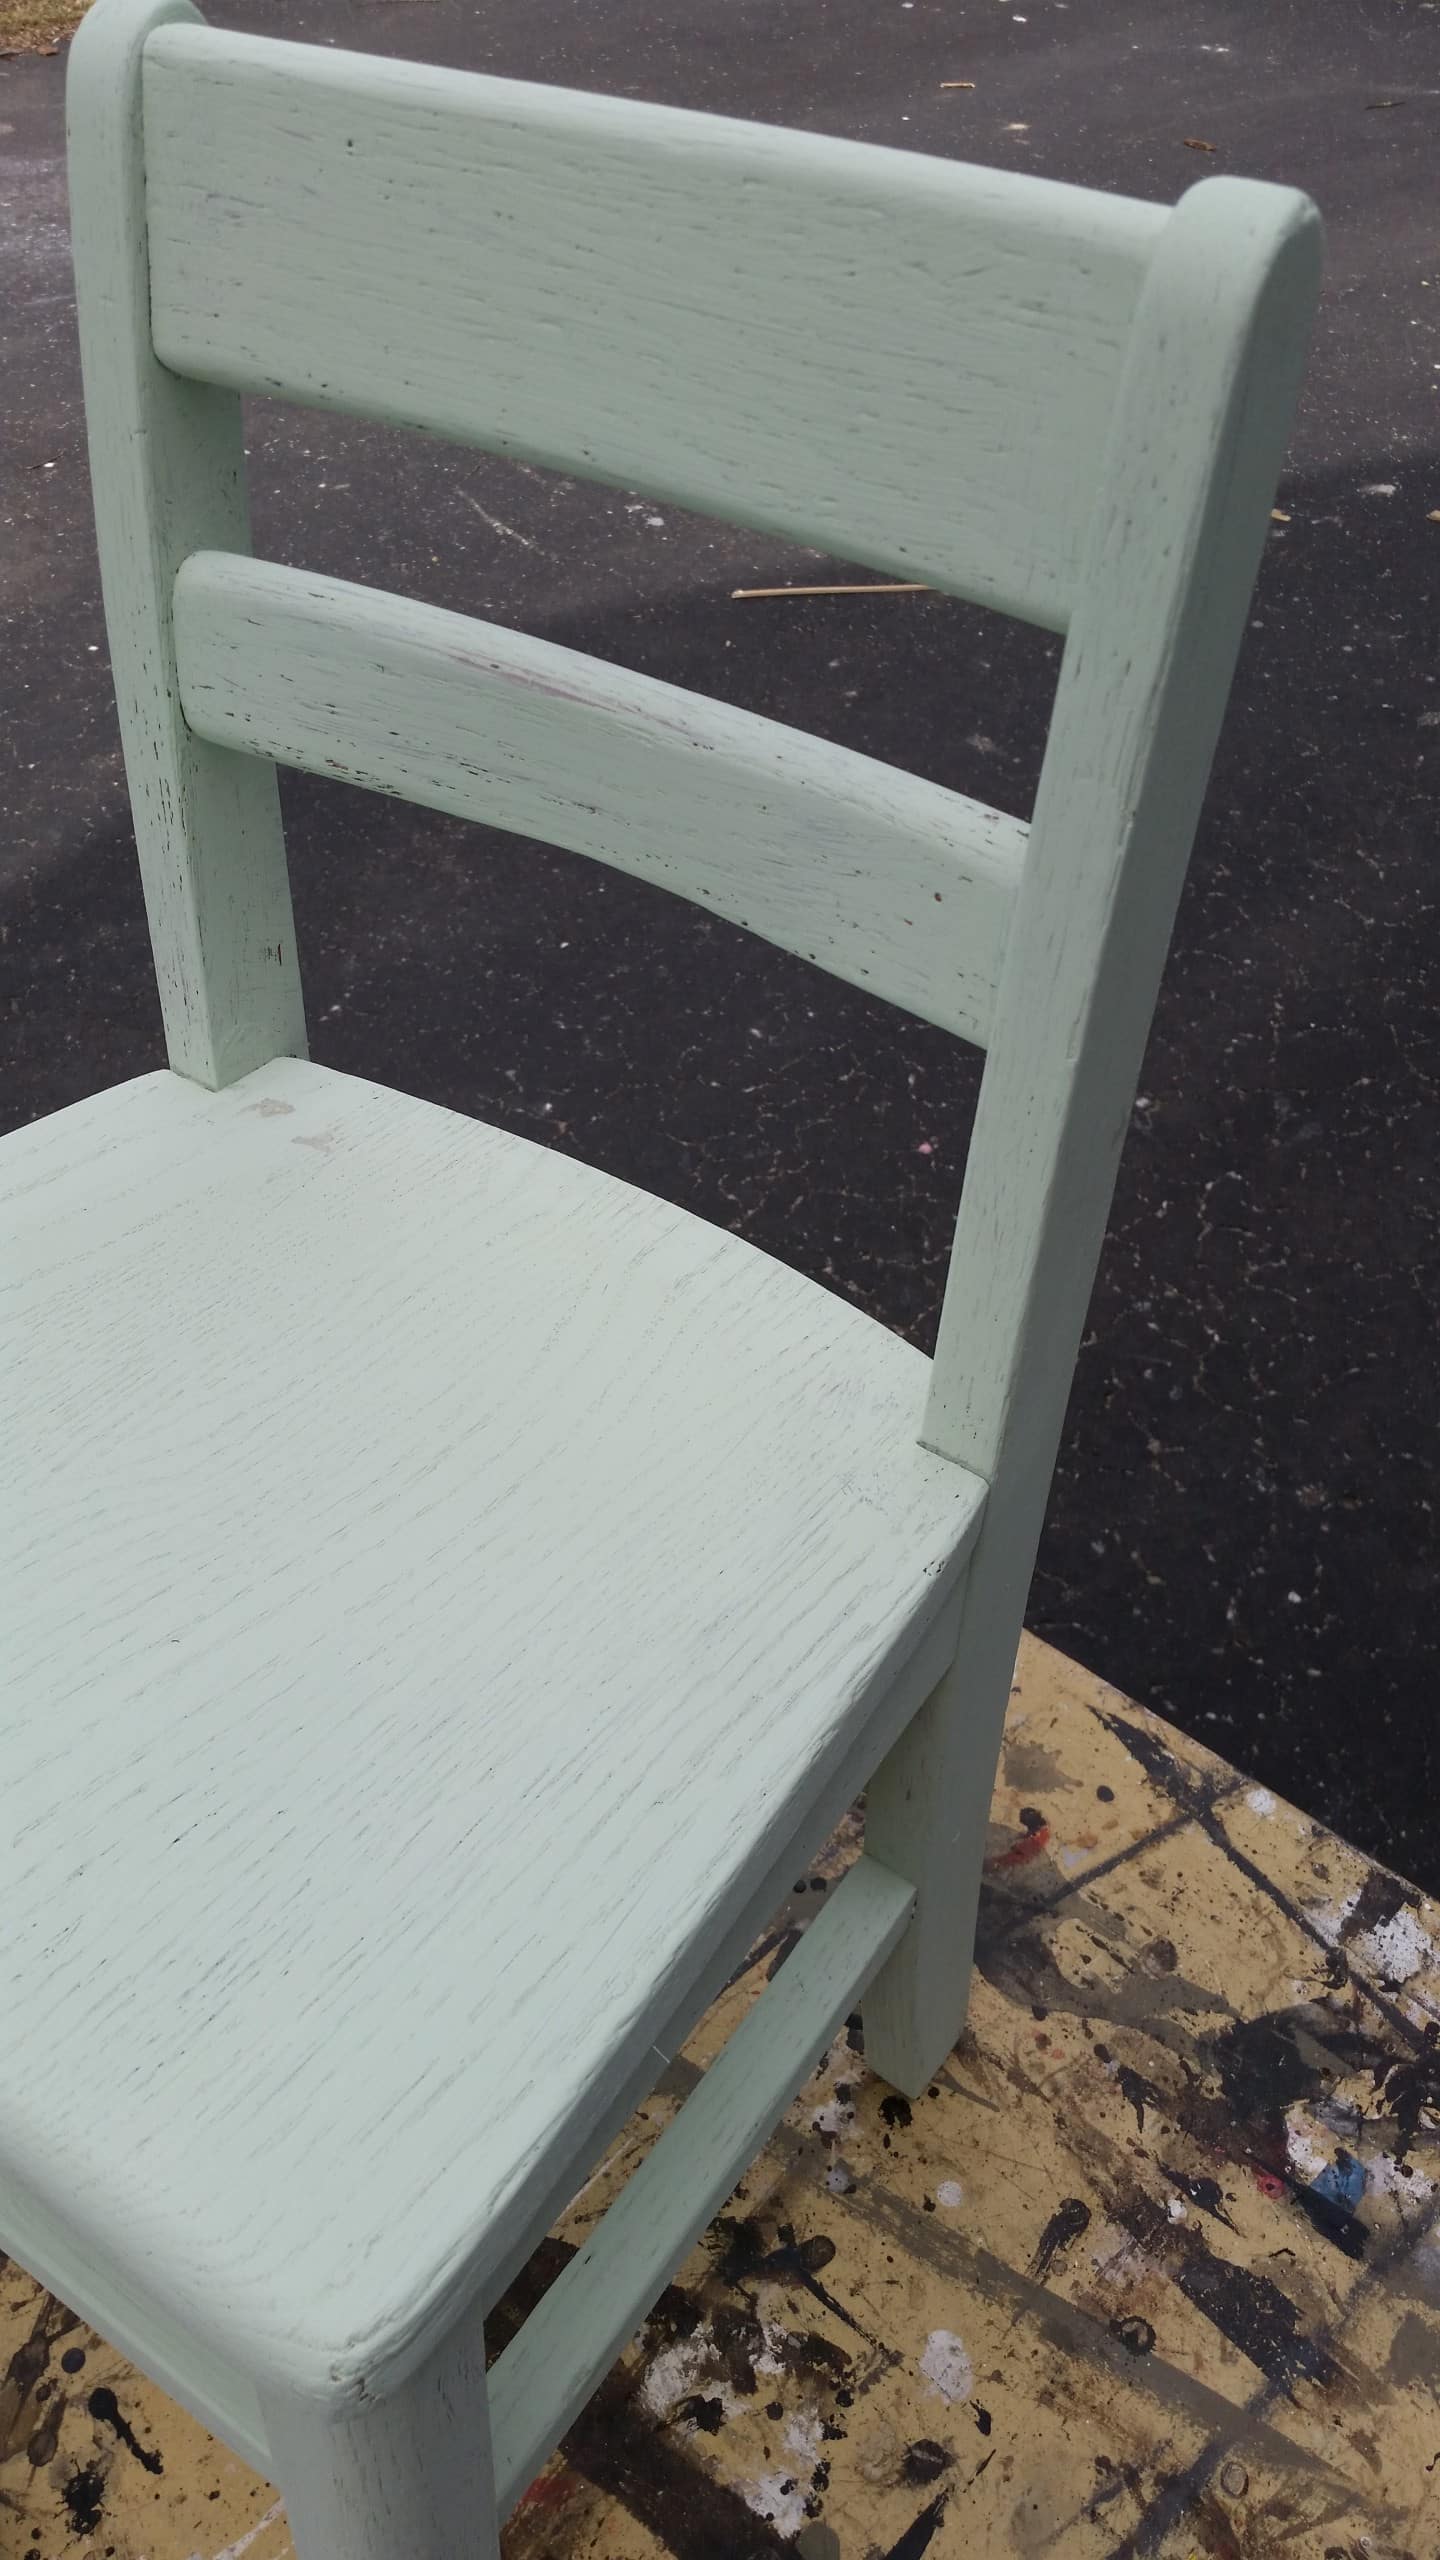
I painted the chairs with some quick, light coats of Heirloom Traditions Chalk Type paint in Luau Green.
I used Heirloom Traditions clear wax to protect and seal the chairs.

I think the light green chairs complement the Polished Pearl cabinet perfectly.
I love the white vinyl on the colorful metal bins, don’t you?
gail
sharing here: That DIY Party
Hi Gail, that turned out so nice.
Thank you Teresa! It was a challenging project (the hinges) but I do love how it turned out.
gail
This is the cutest piece of furniture. I am sure it will be used a lot!!!
I appreciate your kind comment Donna! Thanks for being a friend of My Repurposed Life!
gail
Gail
What a wonderful idea. love your execution and the finished center is fantastic. What little child wouldn’t enjoy painting and creating in this art center! You have the best ideas. Your tutorial is clearly understood, and I love that you show every step and show us the tools you use.
Barbara
what a great job at repurposing.
Thank you!!!
Aaargh… hinges! This would be perfect in my art room for the grandbaby. We could both be creative and I would get more time to be in my art room. That’s a win, win situation.
Great ideas for creating art desk for kids. I like it. I have to make it for my kids. I think they love it. It will inspire their creativity. Thanks for this idea.
Omg…I am sooooooooo inspired by this. I was in the middle of getting an armoire painted to create a creation station for my eldestand was looking for ideas on how to make it use able for the additional kids, we will have three by December. This is fantastic and you made it sound simple enough to add the hinged table to make it useful for more than one child….can I say awesome. I will take this idea and hopefully create something as beautiful as you have!!! Thank u for the great tutorial!
I’m so happy you found my tutorial useful. Good luck with your project!
gail
Love this! I remember talking to you on the phone right when you were in the middle of the hinges dilema. It turned out so cute! Great idea Gail.
Wow Gail, that is awesome! Kids and parents alike would love this. You just keep outdoing yourself!
Such an amazing project Gail, and despite all your frustration it turned out perfect!! I love it! The knobs are super cute! This would be so great for my kids!! Pinned!!
Wow. You’re good.
Thank you Brette! I do love what I do– well, everything but hinges. 🙂