Wall Cabinet | Craft Storage | Repurposed Doors
As an Amazon Associate, I earn from qualifying purchases.
When I got this free dresser, I had no idea I would end up making a louvered shutter door wall cabinet. I just thought I would make a storage bench.
 But to make said bench I had to start removing all the components, including the doors.
 So, I removed all the hardware and set the doors aside while I worked on the storage bench. I hit a small snag with the storage bench and was looking for a quick project to fill the time.
How to make a wall cabinet out of reclaimed dresser doors
 I used some 1×4’s to build a simple box to fit the shutter doors.
*This post may contain affiliate links which won’t change your price but will share some commission., you can read more here*
Construct a simple box using wood glue and brad nails
 Building the simple box was easy with Gorilla Wood Glue and my nail gun.
Cut shelf boards to size
 I cut three equal sized boards to use as shelves. I like to keep sandpaper handy to knock of the rough edges.
 Measuring the distance for the shelves I looked around to find scrap wood that would make that distance—using one board laying and another thin board upright. Placing a block of wood like this will make sure your shelves are all equal without having to measure over and over again. Sort of the lazy woman’s solution—or for the math challenged like me!
Attach plank board for wall cabinet back
 I didn’t have a large enough piece of thin plywood for the back of this square cabinet, in fact I really didn’t have any thin plywood. My neighbor Rodney was visiting and offered up a long piece of underlayment. The back of the cabinet measured 25×25 square. Previously I have used small pieces of plywood and patched them where shelves meet, but I decided to cut them into planks like our friend Mindi did on her Drawer Storage Shelf. I attached them with my nail gun.
Prepare to paint
 I used my diy chalky paint primer in my Homeright Finish Max to give the cabinet and doors a black primer coat.

This lumber wasn’t the greatest to paint. The knots and flaws were looking awful. The plan was to paint it like I did my coffee station cabinet with a sort of glazed red look.
Apparently, I didn’t take any pictures of the process.
Seal with Wipe-On Poly
 I did however take pictures of applying Minwax Wipe-on Poly . It was applied with a rag. However to get in the corners I poured a tiny amount in a bowl and applied it with a cheap chip brush.
 I used hardware—hinges and knobs from my friends at D. Lawless Hardware. The d rings were purchased on Amazon, I buy them by the bag because I use them on all of my hanging items. I LOVE the knobs!
 I added magnetic catches to hold the doors closed.
 It makes the perfect craft cabinet! It holds a LOT of paint and supplies.
Simple Wall Cabinet Holds Craft Supplies
 The shelves are the perfect height for paint bottles, but it would also work great for bathroom storage.

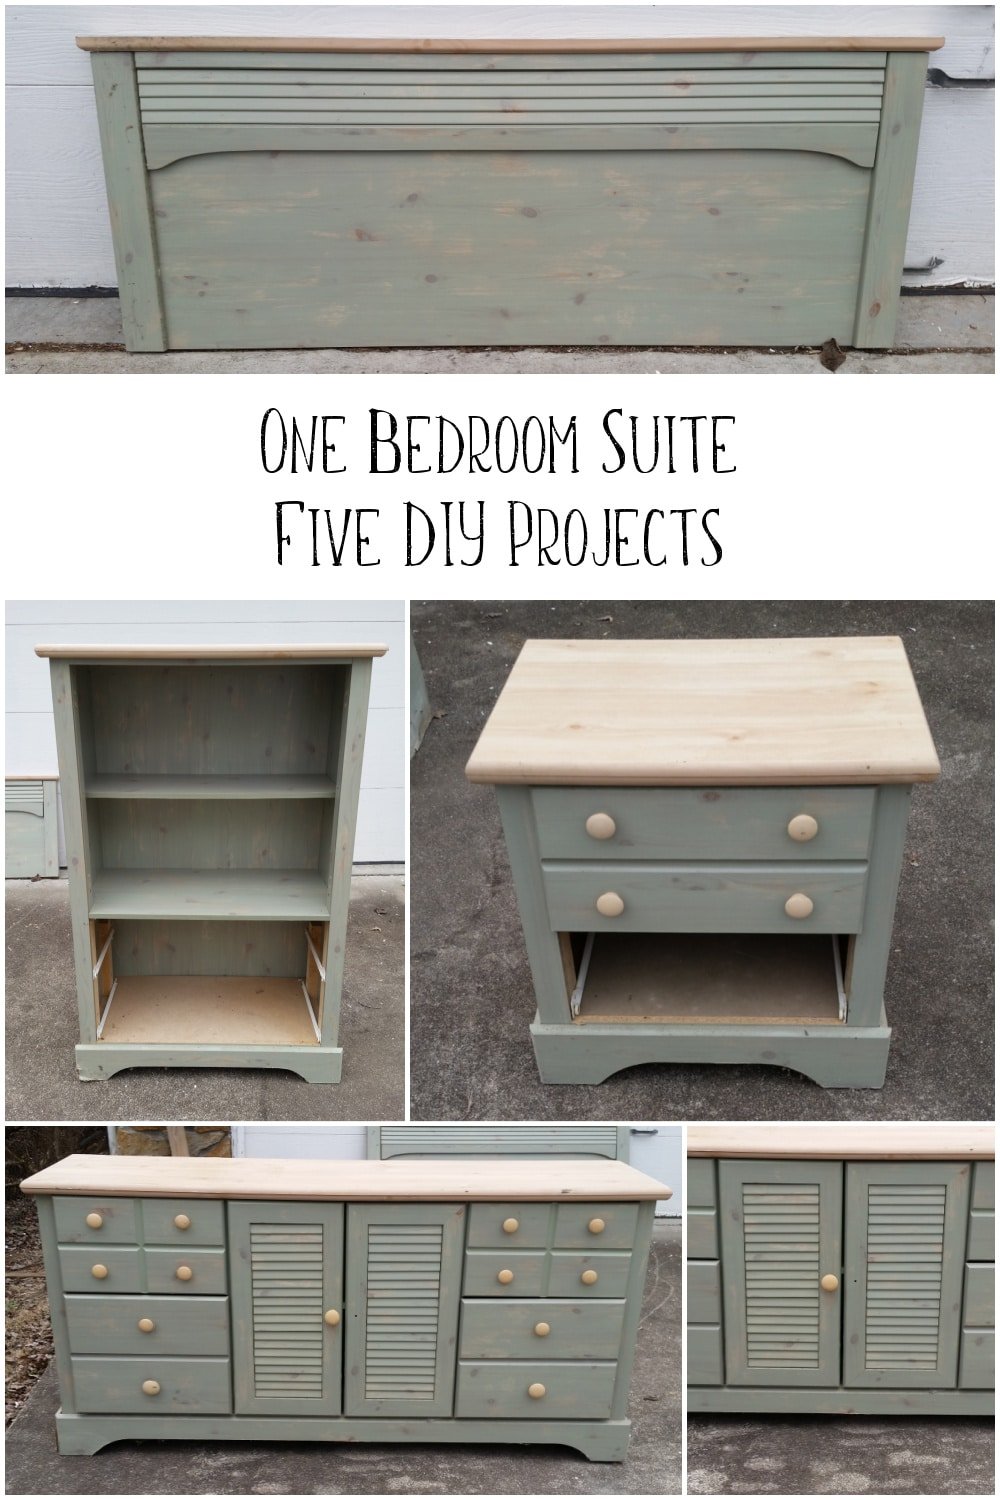
So, if you’re keeping score I’ve made projects using the dresser, the chest of drawers, and now these doors from the dresser.

Building this cabinet was fun and easy, the hinges—as always challenged me. ![]() My friend Regina loves the cabinet and asked “how much”. She said she would probably paint it white. heheheh I said “I just painted it red”. To which she said “it doesn’t look painted”. I suppose I should take that as a compliment.
My friend Regina loves the cabinet and asked “how much”. She said she would probably paint it white. heheheh I said “I just painted it red”. To which she said “it doesn’t look painted”. I suppose I should take that as a compliment.
I have two pieces left of this set, a headboard and a nightstand. Stay tuned!
gail
Beautiful job! You always make it look so easy
Ahmazing! I need one of these in the worst way! On the lookout for cabinet doors now! Pinned & shared 🙂
Way way way cool! Thank you for some excellent ideas! (((HUG)))
Thanks for your comment on my wall cabinet. I love to fill in my time with easy projects from time to time. 😉
gail