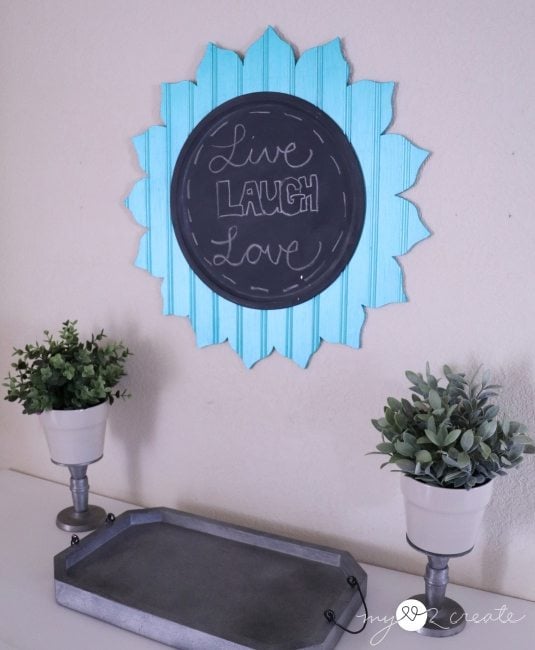
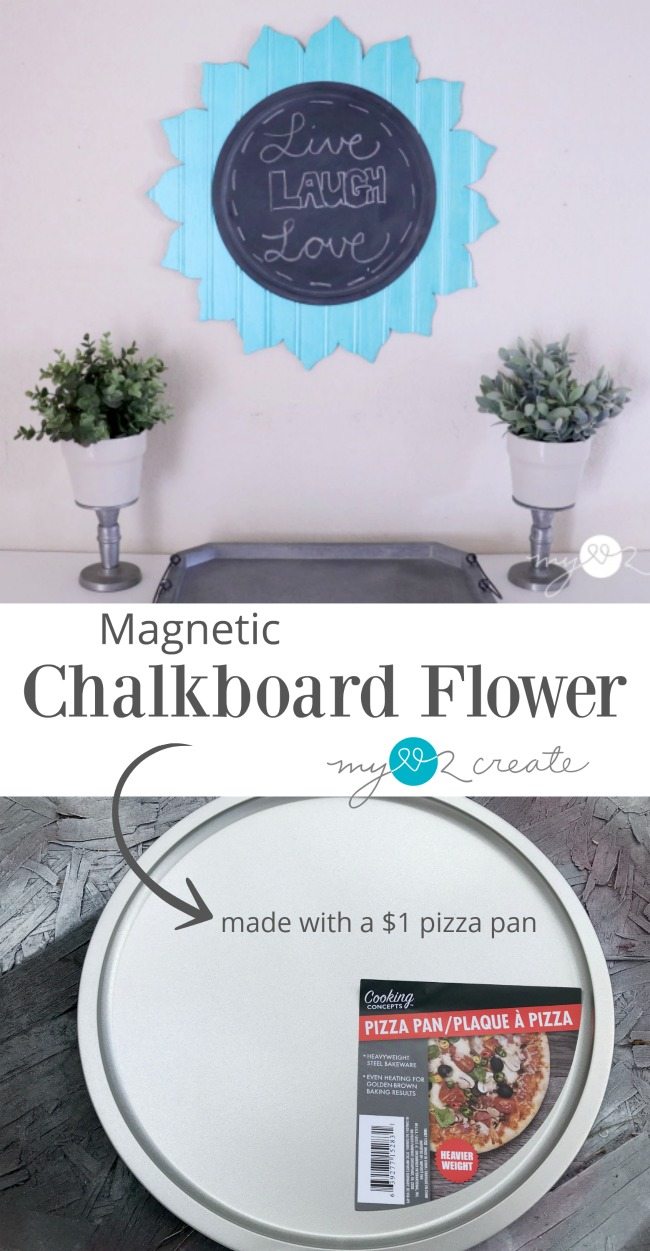
Magnetic Chalkboard Flower
As an Amazon Associate, I earn from qualifying purchases.
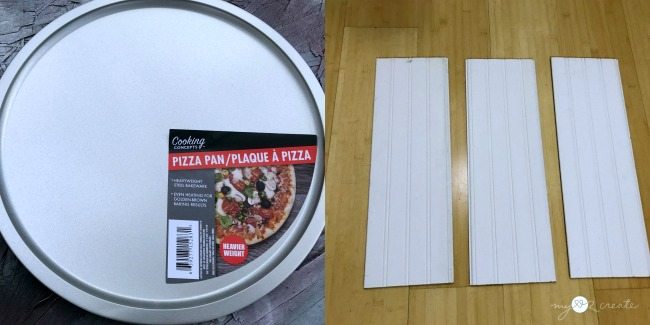
- 1- Dollar store round pizza pan
- Scrap bead board
pieces or 1/4” Plywood
- Paper, pencil, scissors, for cutting out flower petal template or print this
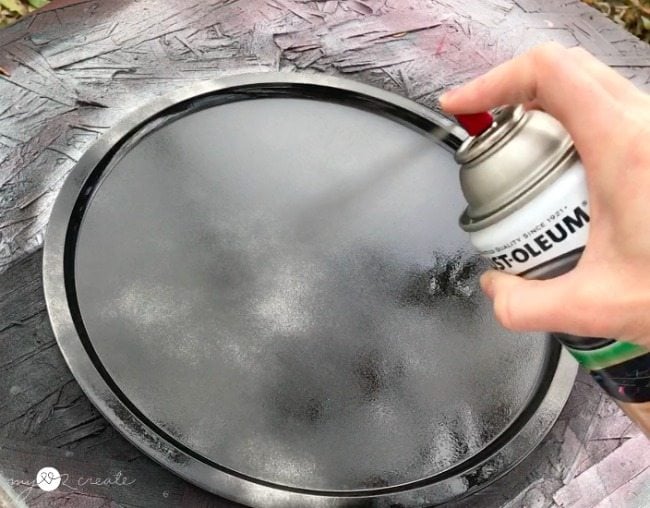
- Rust-Oleum Chalkboard Spray
- Jig saw
- Scrolling Jig Saw Blade
- Gorilla Super Glue Gel (optional for gluing bead board strips, may not need)
- Hot glue gun
- sand paper
- desired paint for flower I used this paint
- small D-ring hanger
- Clamp
Step 1: Trace your pizza pan shape onto headboard (or 1/4” plywood)
I got excited and spray painted my pizza pan first, but I would wait until after you trace, to avoid scratching the paint off when you are using it to measure your circles. Trust me. 🙂
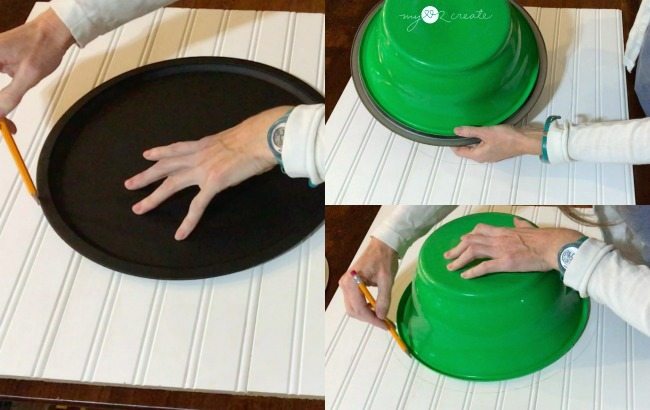
Cut your bead board or 1/4” plywood to a size bigger than your pan, I would say 3 to 4 inches bigger on all sides. Then center your pizza pan on it and trace the outer edge (left photo above).
Because I wanted my pizza pan inset I need to trace a smaller circle, so that the edges of the pan could sit on the bead board for gluing and the rest of the pan would be flush with the bottom of the bead board. I happened to find a bowl the same size and used it to trace the smaller circle, you could just eyeball it too.
Step 2: Trace your flower petal template onto the edge of the outer circle.
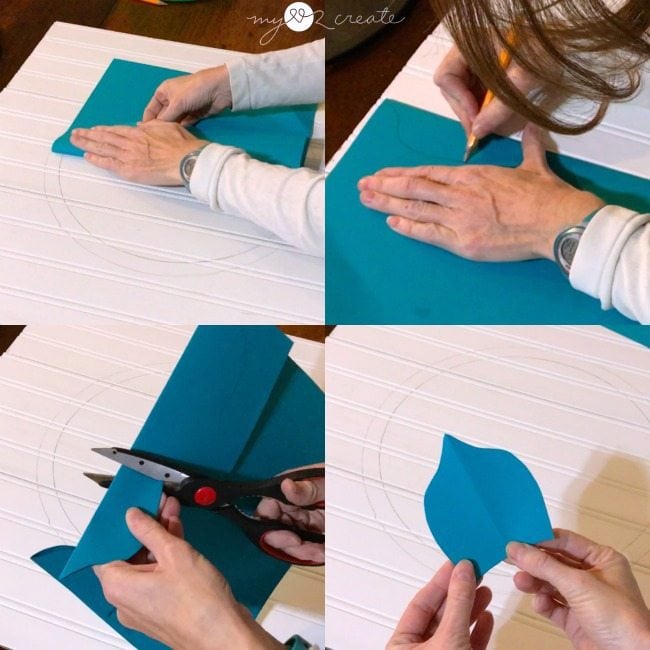
First cut out your flower petal template. I simply folded a piece of paper and traced a petal shape on the folded edge. In the top right photo I placed my paper on the edge of the circle to ensure that my petal template would fit on the bead board. You can do your petals as big or small as you want, just make sure they will fit on the wood. Then I cut it out to get my template.
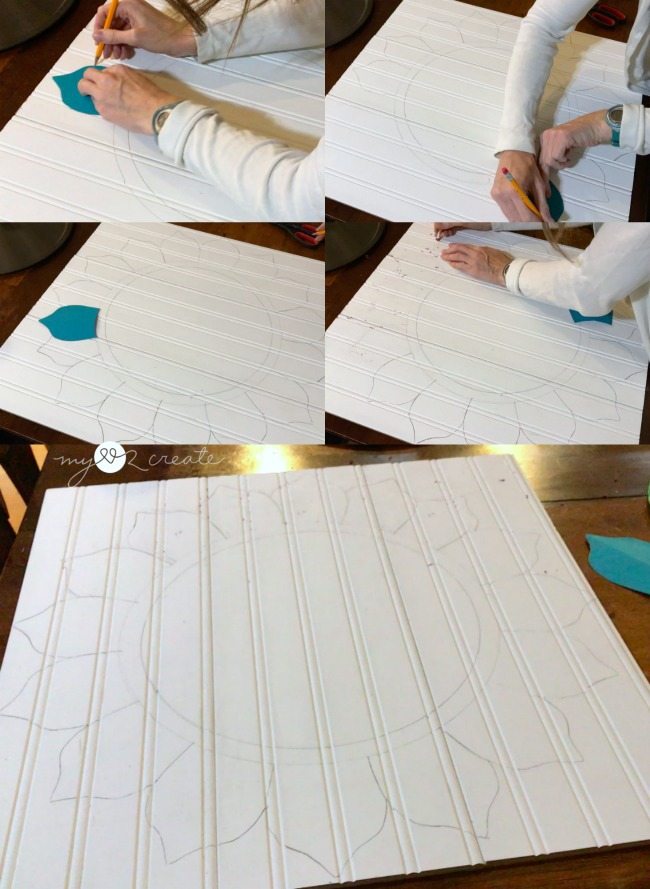
I would suggest you take your template around the circle, and make small marks to see how many petals you will need and get an idea of spacing.
I didn’t do this, and ended up with a too small petal at the end (middle left). So I erased some petals (middle right) and spaced the petals closer. I should have erased all of them and started over, but I was lazy. Hence my imperfectly spaced petals! Live and learn!
Step 3: Cut out your flower shape with a jigsaw.

Since my bead board was in strips I cut out the flower in sections on my jig saw.
*Tip- it is best to have most of your piece supported while you cut, so unclamping and moving your piece often to cut will help avoid breaking.
* Use a scrolling jig saw blade (make sure to check your saw and see what type of shank it takes they are usually T or U shanks) These blades are smaller and are made for turing corners easier. I learned how important they are when I made my DIY Family Cutout.
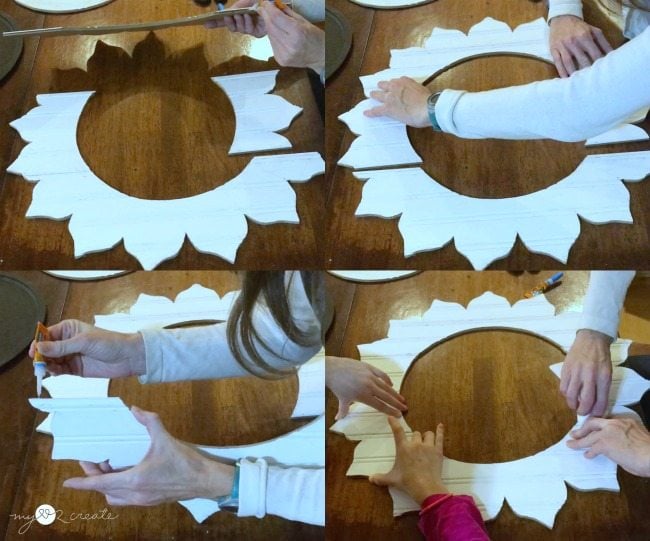
Unless your pieces are separate like mine were, you will not need to do this step. The bead board was tongue and groove so I needed to super glue them together. I added my glue to the edges, put them together, and then held them while it dried. Can you spy my little helper?
Step 4: Make sure your pizza pan fits and then paint your flower.
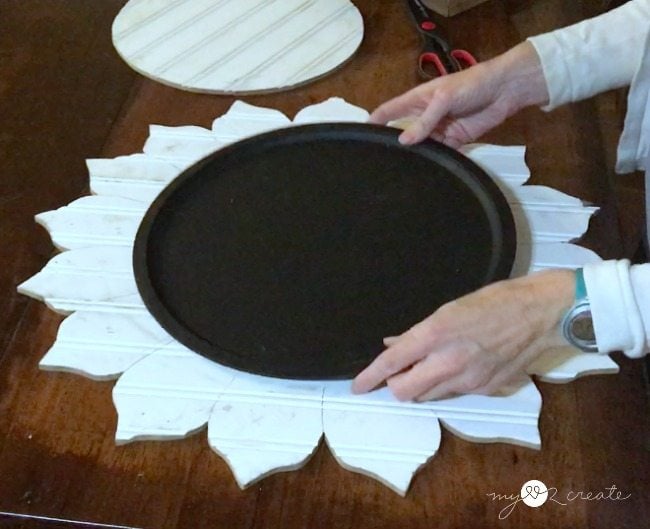
I checked to make sure my pizza pan fit before I painted the flower and I am glad I did! I had to trim a little on the inside circle in a few places so that my pan sat flush.
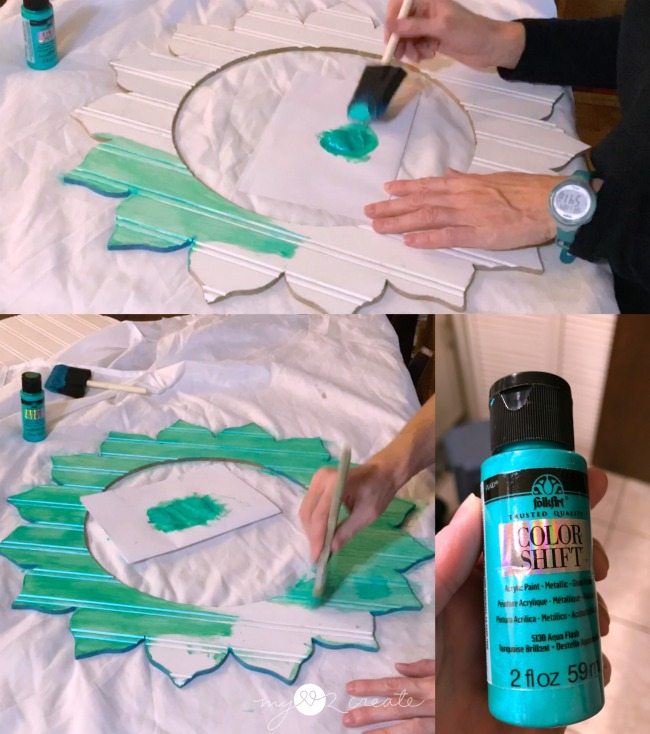
Then I was ready to paint! I have been wanting to try this really cool Folk Art color shift paint that I got at a blogging conference and this was the perfect project to do it on.
It totally changes colors depending on the light or angle, and it is very metallically and shiny, it is so pretty! Much better in person, you just don’t get the same effect with a camera. It has a greenish blue shift…and I LOVE it!
Step 5: Hot glue the pan and the flower together.
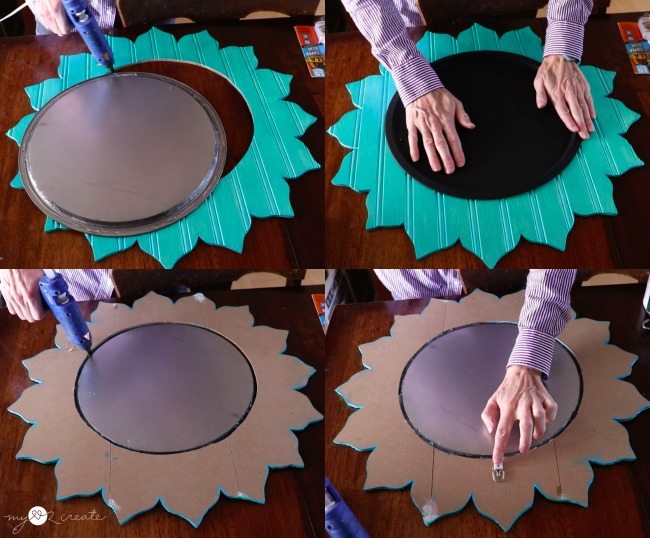
To attach them together I used hot glue. I first put a bead around the lip of the pan and set it on the flower. It sort of worked…I think my hot glue dried on one side by the time I applied it around the whole tray, I wasn’t fast enough!
So I flipped it over and added hot glue from the back. That did the trick! It was nice and solid then!
For hanging, I hot glued a D-ring hanger to the back and that was it! I choose not to screw it in because of the thin bead board, plus it is really light and it didn’t need the screw, the hot glue worked great.
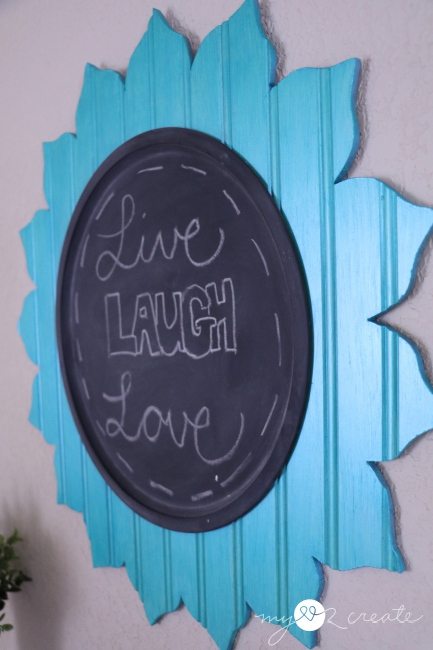
Now I can enjoy it!
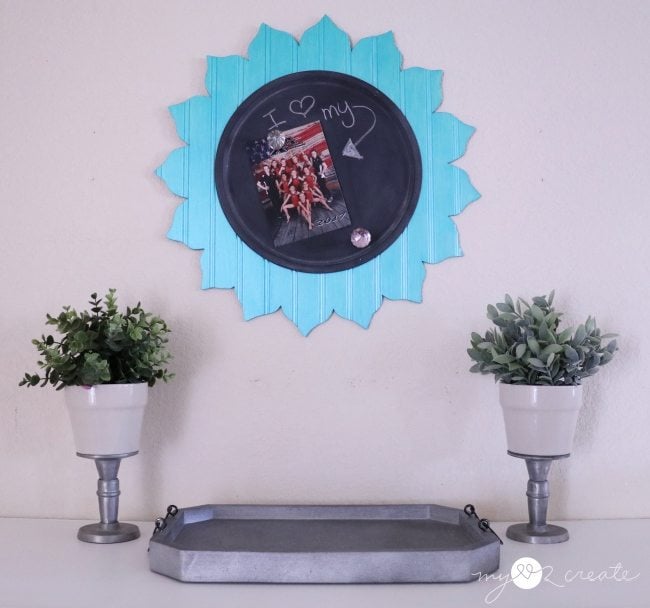
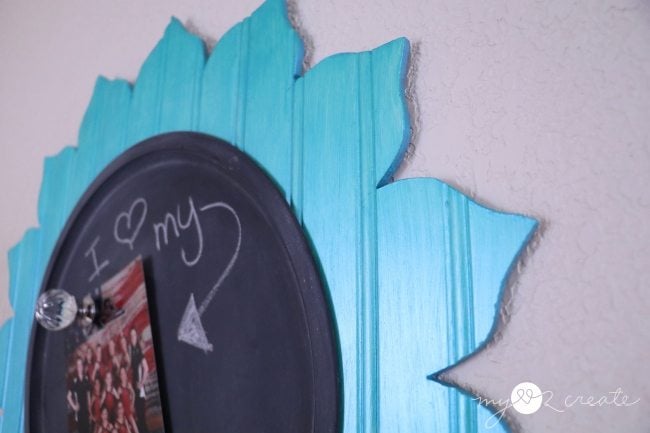
I made sure to check in the store if the pizza pan was magnetic…just put a magnet on it and see if it sticks. Because not all metal is magnetic…FYI. I like the option of being able to use magnets if needed. 🙂 Oh, and if you like my Long Octagon Tray I show you how to make your own!

See how the tray fits nice and snug on the flower? It was worth cutting the center out.
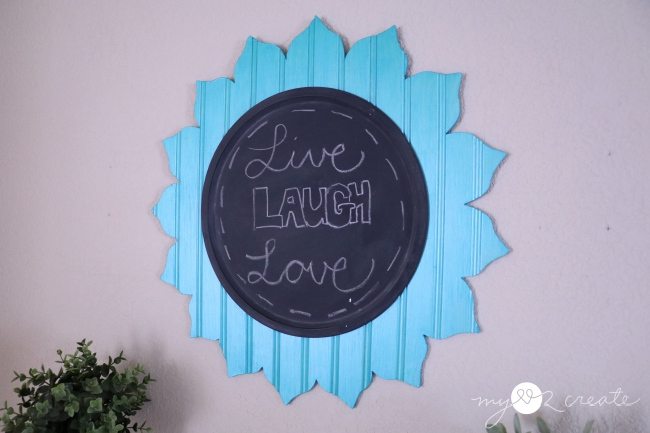
I think this would make a really pretty sunflower chalkboard! Or even with stained plywood petals! You can get creative with the petals and make any type of flower you want!
Now I feel like making some more! Wouldn’t this be a fun gift?
PIN IT!
Thanks for reading!
Come visit me at My Love 2 Create for more great project ideas and tutorial!
Hugs!
Mindi
See more of my projects on MRL!
Mindi,
I love your flower chalkboard! Having the dollar store pizza pan inset makes all the difference in the final project. Thanks for another great project!
gail
Thank you so much Gail!! It was such a fun project!