Mail Organizer with Chalkboard and Cork Board
As an Amazon Associate, I earn from qualifying purchases.


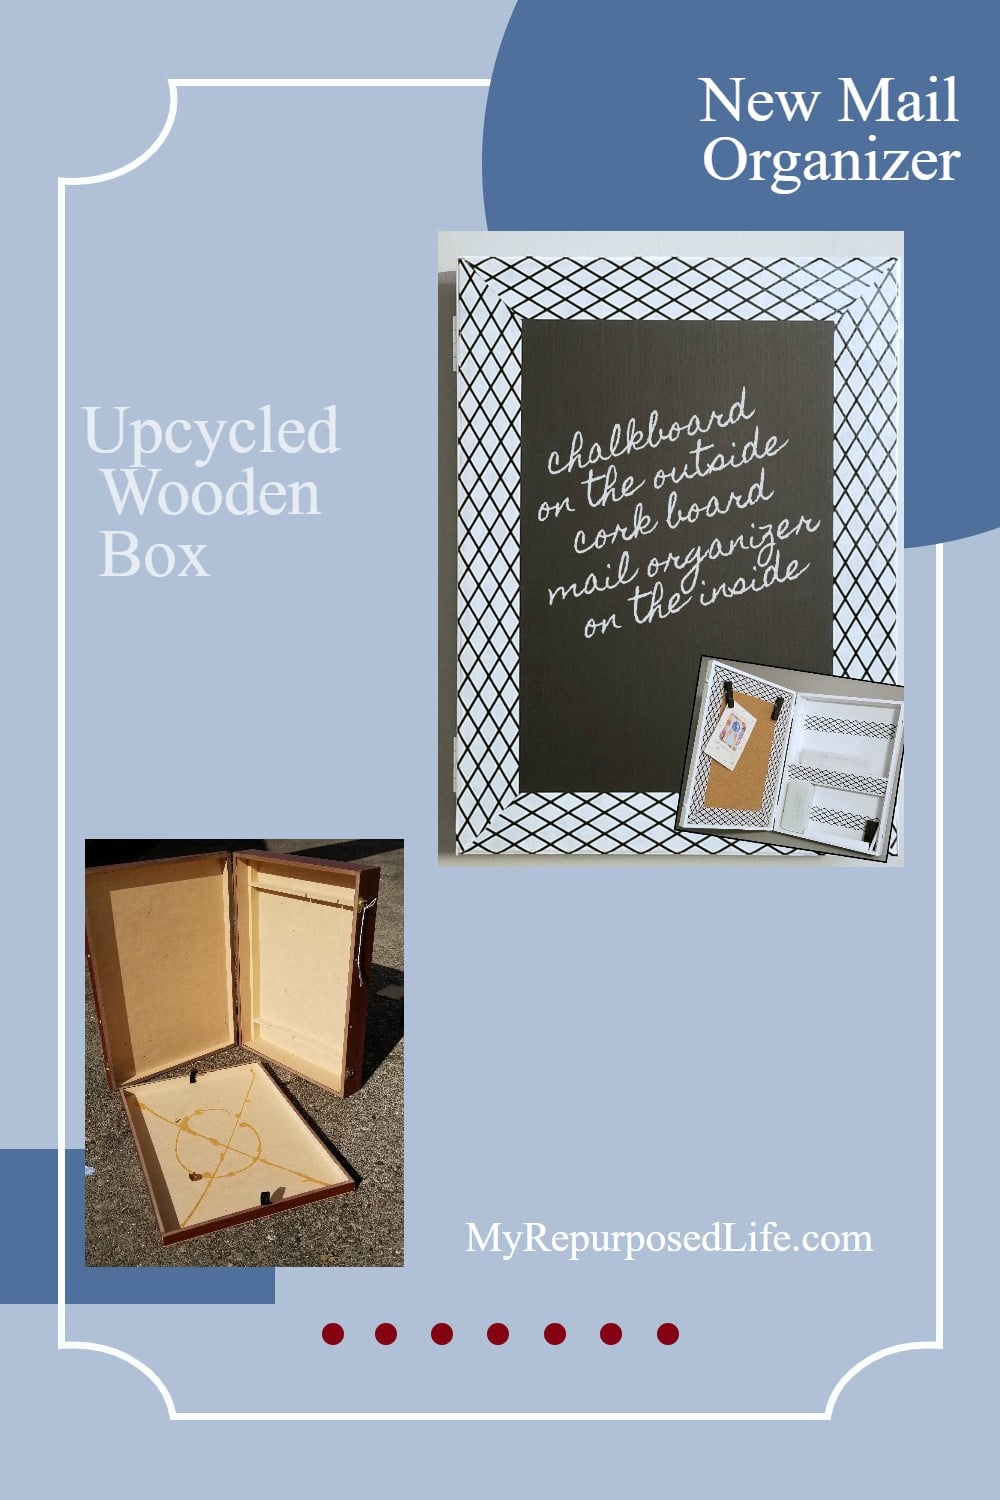
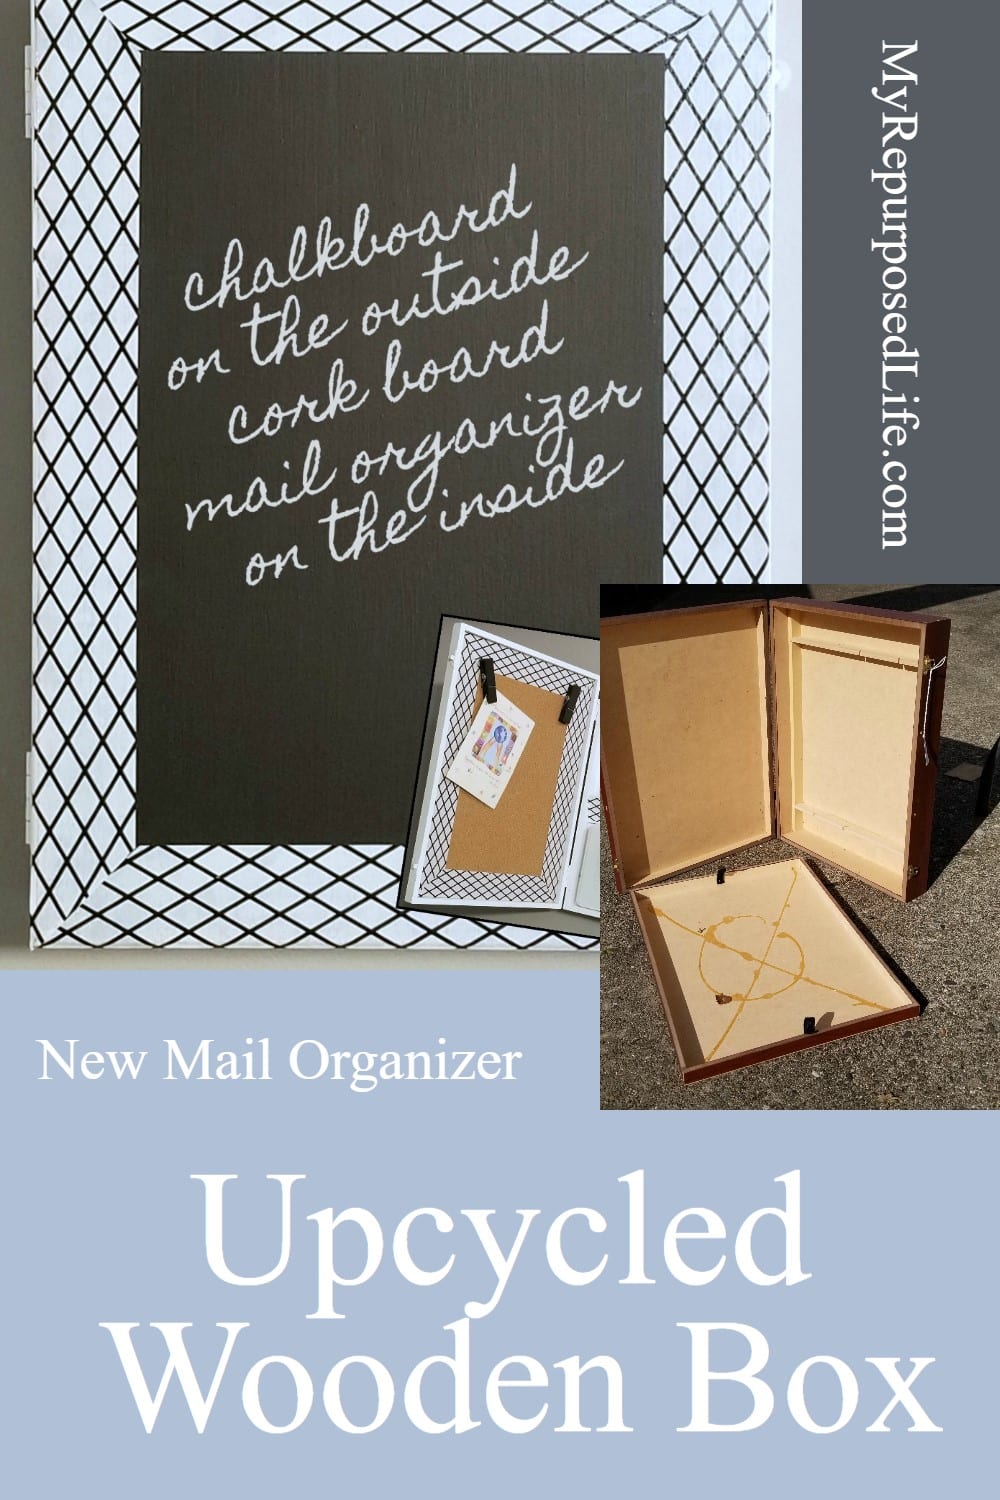
This handy mail organizer keeps everything you need close at hand. You can keep all your notes and bill-paying supplies right where needed.


I’ve had this box for a long time. I’ve had it out to work on for about a month, but I never could figure out what to do with it.

Woohoo, it was a great deal for only $3.50.
Related Content: Double Sided Chalkboard
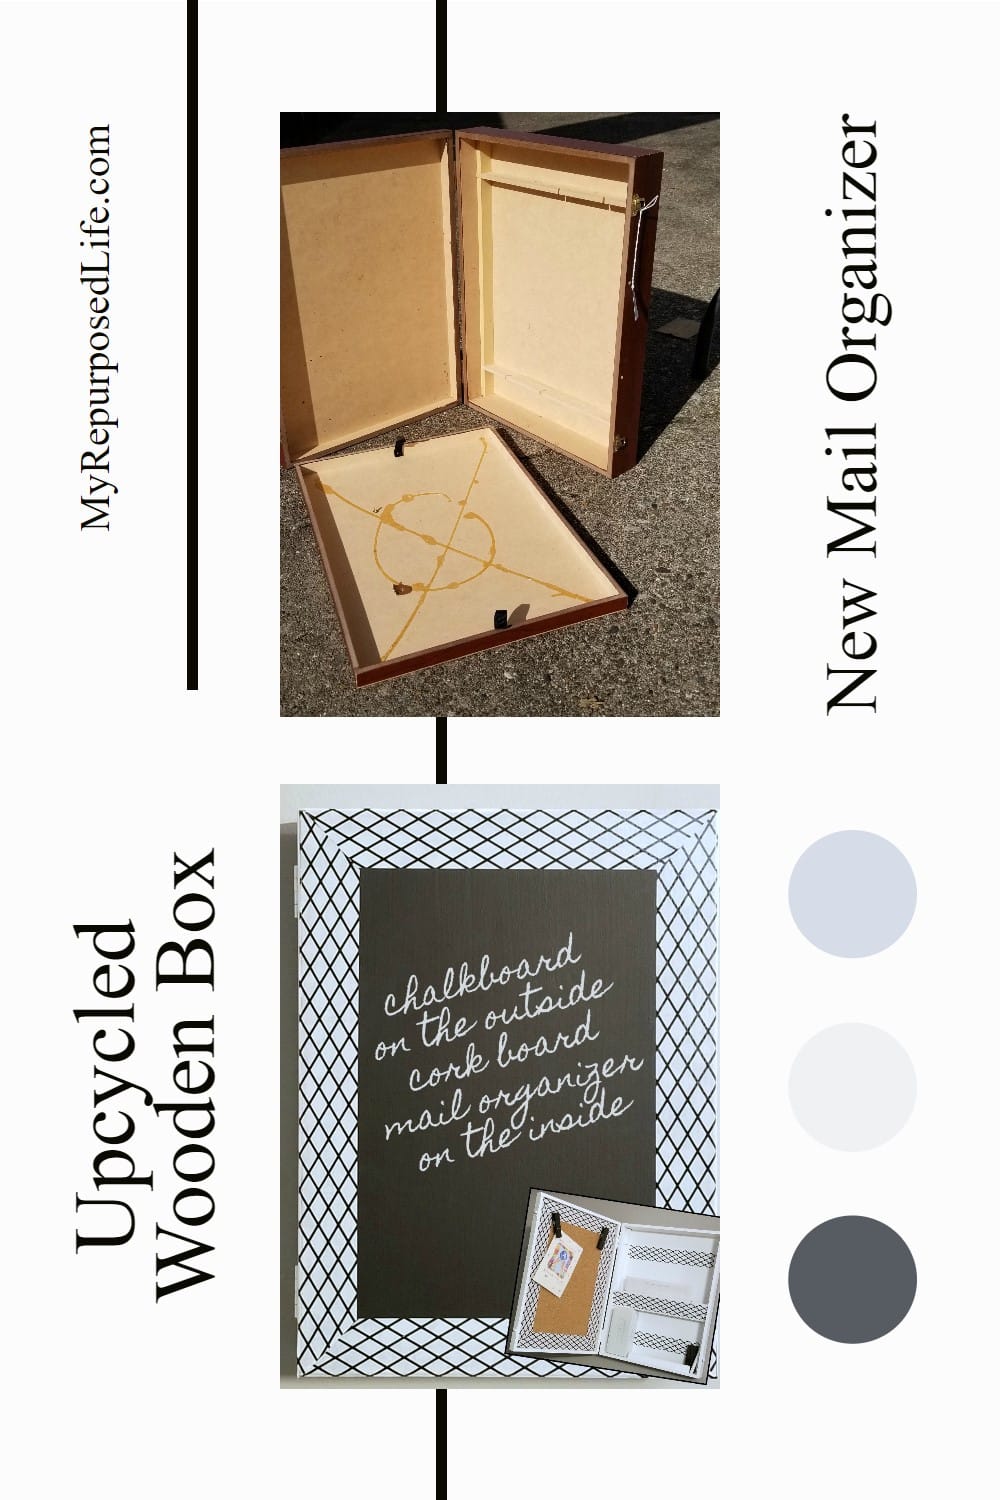
Design the wooden box for items needed in a mail organizer

I started designing my mail organizer after removing the two cross pieces from the original wooden box. First, I cut two small scrap boards to make a mail holder.

I am trying to figure out what components will be most helpful for the mail organizer. I used envelopes to get a good measurement for the mail slot. The small green metal box is from a sewing machine.
Visit the My Repurposed Life Amazon Store to shop my favorite items.

First, a small piece of molding was cut and glued on the bottom ledge to hold items such as pens, pencils and chalk. Then the mail slot wooden pieces were glued into place using Gorilla Wood Glue.
Easily cut cork board on a table saw

I got a massive deal on many large sheets of corkboard last year. Cutting the corkboard is easiest with a saw.

The corkboard fits perfectly inside the mail organizer door.
Paint Mail Organizer project with a Finish Max Paint Sprayer

To make things go quickly and smoothly, I mixed up a batch of DIY chalky paint primer using latex paint and plaster of paris.
Here, I glued the mail slot on a slight angle. It’s time to get busy painting. Using my Finish Max was the best option for this project. Raising the project on my Easy Sawhorses makes it easier to get great coverage.

This is after the first coat of the chalky primer. Notice I didn’t paint all of the inside where the corkboard will be.

As I painted this side, I had it in a “tent” style, but it was so windy that it collapsed. ![]()
Not shown. After the primer coat dried, I did another white semi-gloss latex paint coat.
Tin Sewing Box to Keep Bill Paying Station Organized

I tried putting tape on the metal box, but it didn’t look good.

Instead, I decided to spray paint the metal box. I did the inside first, then used a skewer to keep the lid from closing while I sprayed the outside. I’m an impatient crafter, and we were having wind gusts around 50 mph, so I was spraying this in the woodshed.
Mail Organizer with a Chalkboard

To prevent the lid from getting stuck shut, I placed a piece of packing material all around the edge. Then, using a foam brush, I quickly painted a light coat of chalkboard paint on it.
Paint Light Coats of Chalkboard Paint

Painting several light coats of chalkboard paint with a foam brush is the best way to get a good finish. Notice I still have that packing material in the lid to keep the box from sticking shut.

I used this Scotch Patterned Shipping Tape to frame the chalkboard and the corkboard. I love the way it looks throughout this project. An exacto knife was used to trim the tape in a 45° angle. You could easily use butt corners instead of the mitered corners.
Hot glue was used to hold the framed corkboard in. You can see I used a piece of tape on the mail holder on the right. I’ll be adding more tape on that side soon.

Isn’t it awesome? Using the tape dresses it up.

The small metal sewing box is perfect for accessories, stamps etc.

These oversized chalkboard clothespins were made into push pins. This allows items to be displayed without drilling holes in them.
The small piece of molding corrals pens, chalk, and a small eraser.

I can’t believe it took me so long to figure out what to do with this project. It’s the perfect solution for a mail organizer for paying bills.
What kind of box do you think it was initially? Most silverware boxes have felt or velvet linings. Only the tray of this box must have had a lining.
gail
Related content: Easiest Shutter Mail Organizer
I love this idea but was hard to scroll down and read because of the dead mouse advertisment. Every other block was of the dead mouse.
Reba,
I am so, so sorry you had to experience that. IF only I had control over the ads . . .
Hoping you never have to go through that again!!!
gail
Great idea! I have redone a number of jewelry boxes and never thought to hang one.
Thanks so much for stopping by Robin and taking the time to leave a comment!
gail
That’s a really cute project, and so functional! I’m a lover of boxes and crates, too. It must be an artistic thing.
hahah Lizzy, so it’s not just me? I seriously buy too many boxes and crates “just in case”.
gail
I have 3 of those boxes in my art room that I’ve had forever. The little guys don’t make working in there very easy. I did use one in a friends bathroom. Well small closet (3.5ft x 5ft) that someone thought would make a great 3 piece bathroom. I put a mirror on the top and some pretty molding, and my husband cut the wall board to slide it into then a shelf in the middle.
Fabulous idea Jennie! Thanks for sharing that with us.
gail
This is great. I’m always seeing wooden boxes, or silverware boxes at thrift stores. This would solve the heap of mail on the kitchen table.
what a wonderful idea! love the tape; it really does dress it up.