Double Sided Chalkboard Sign
As an Amazon Associate, I earn from qualifying purchases.
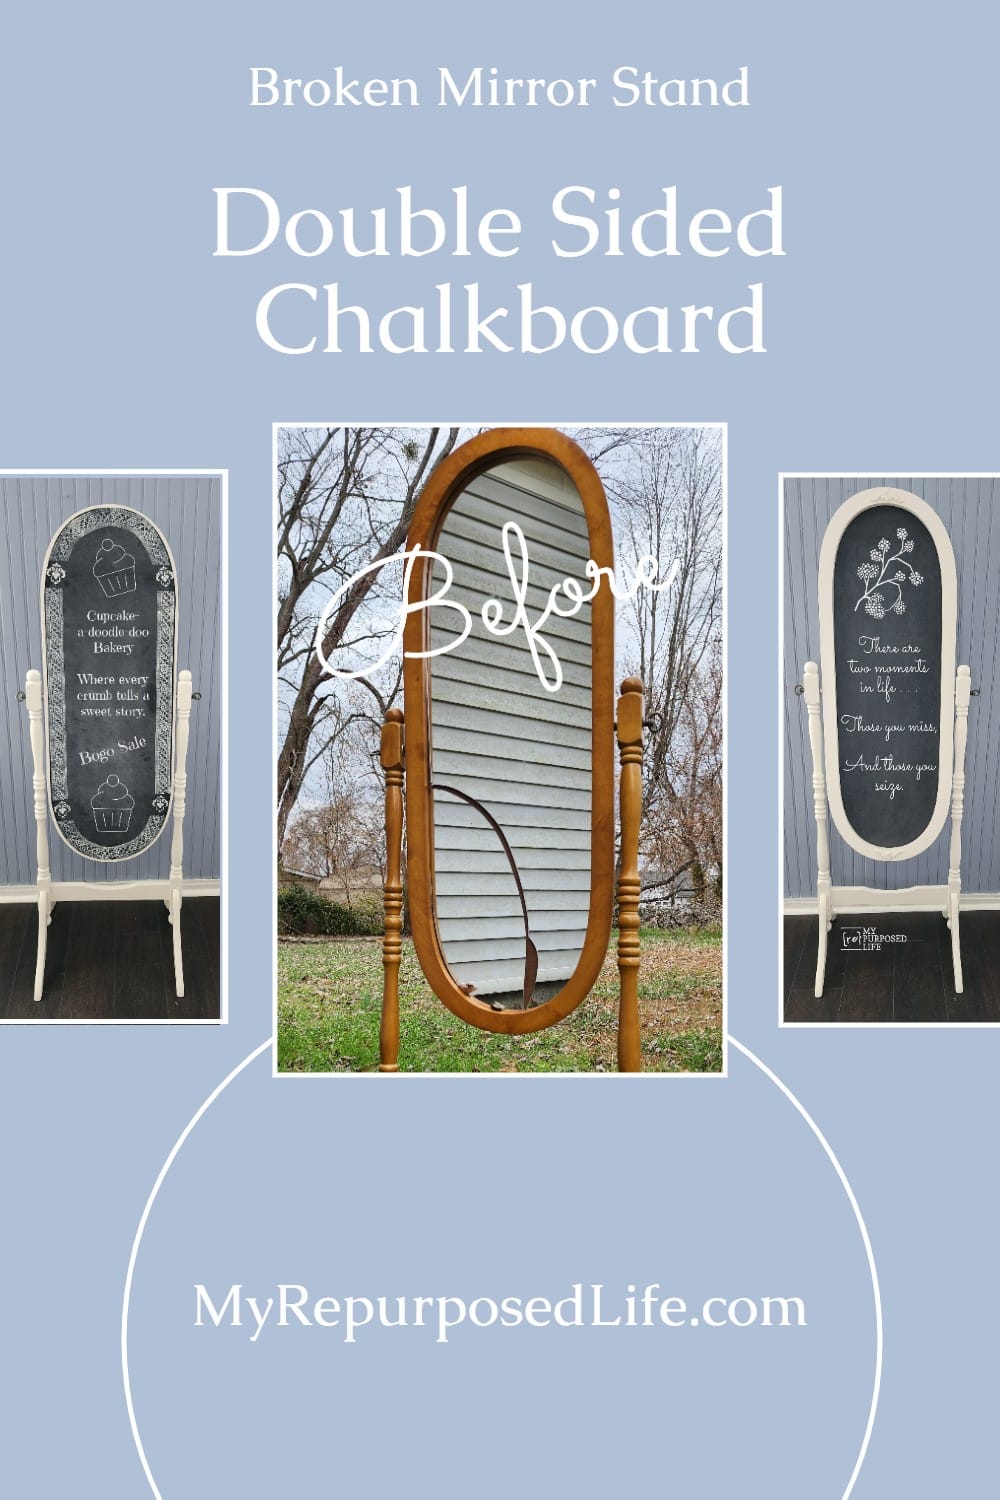
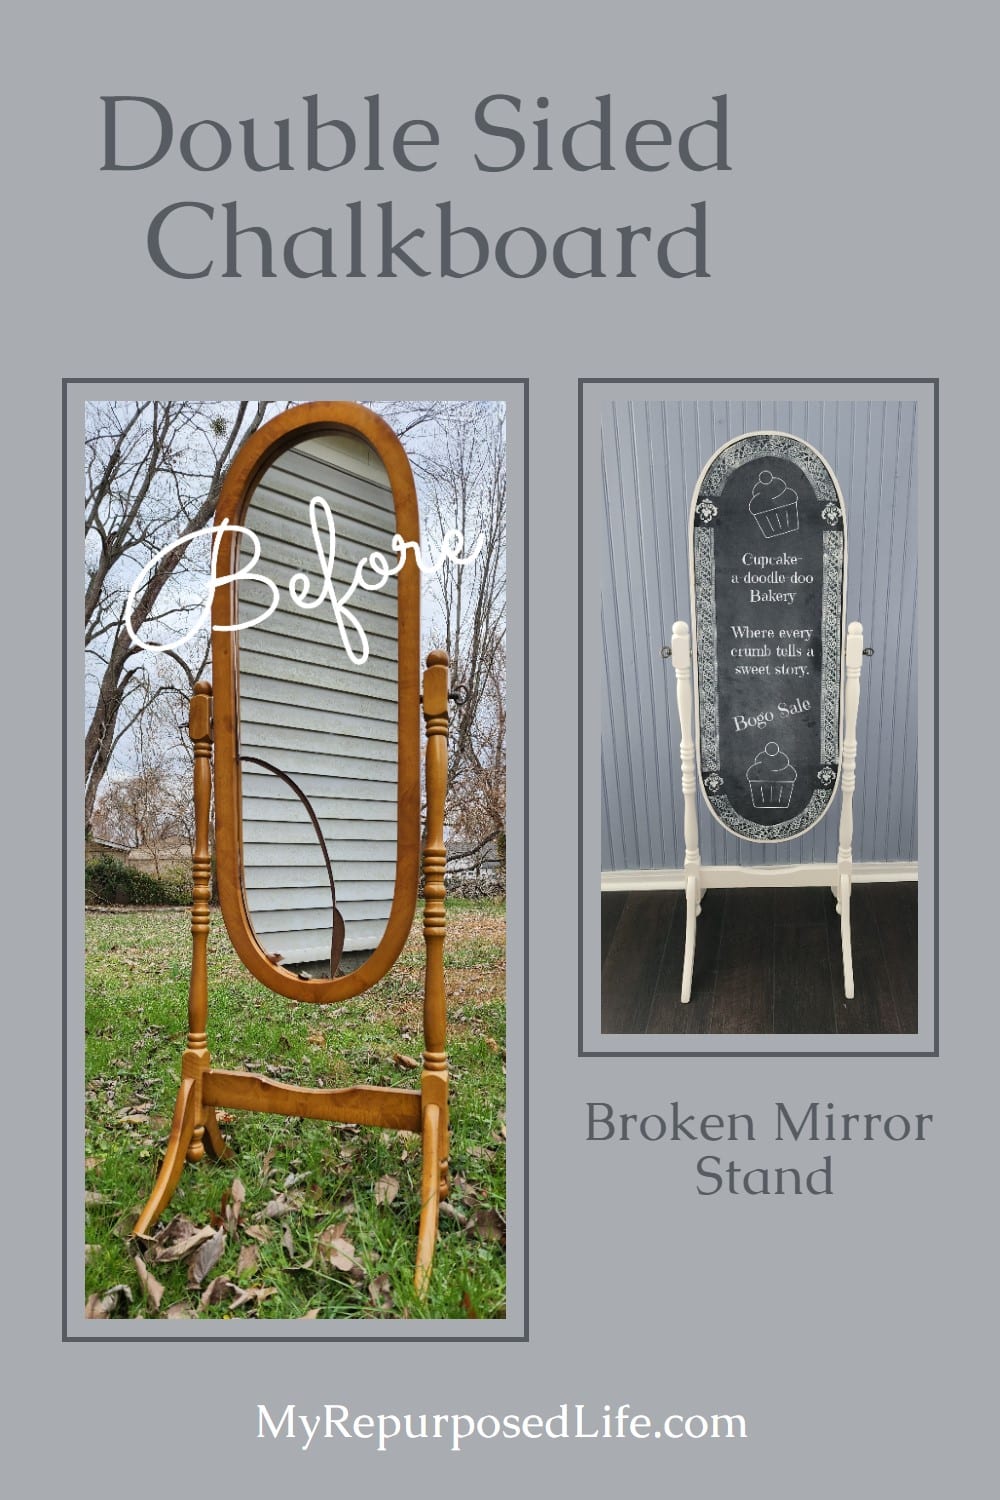
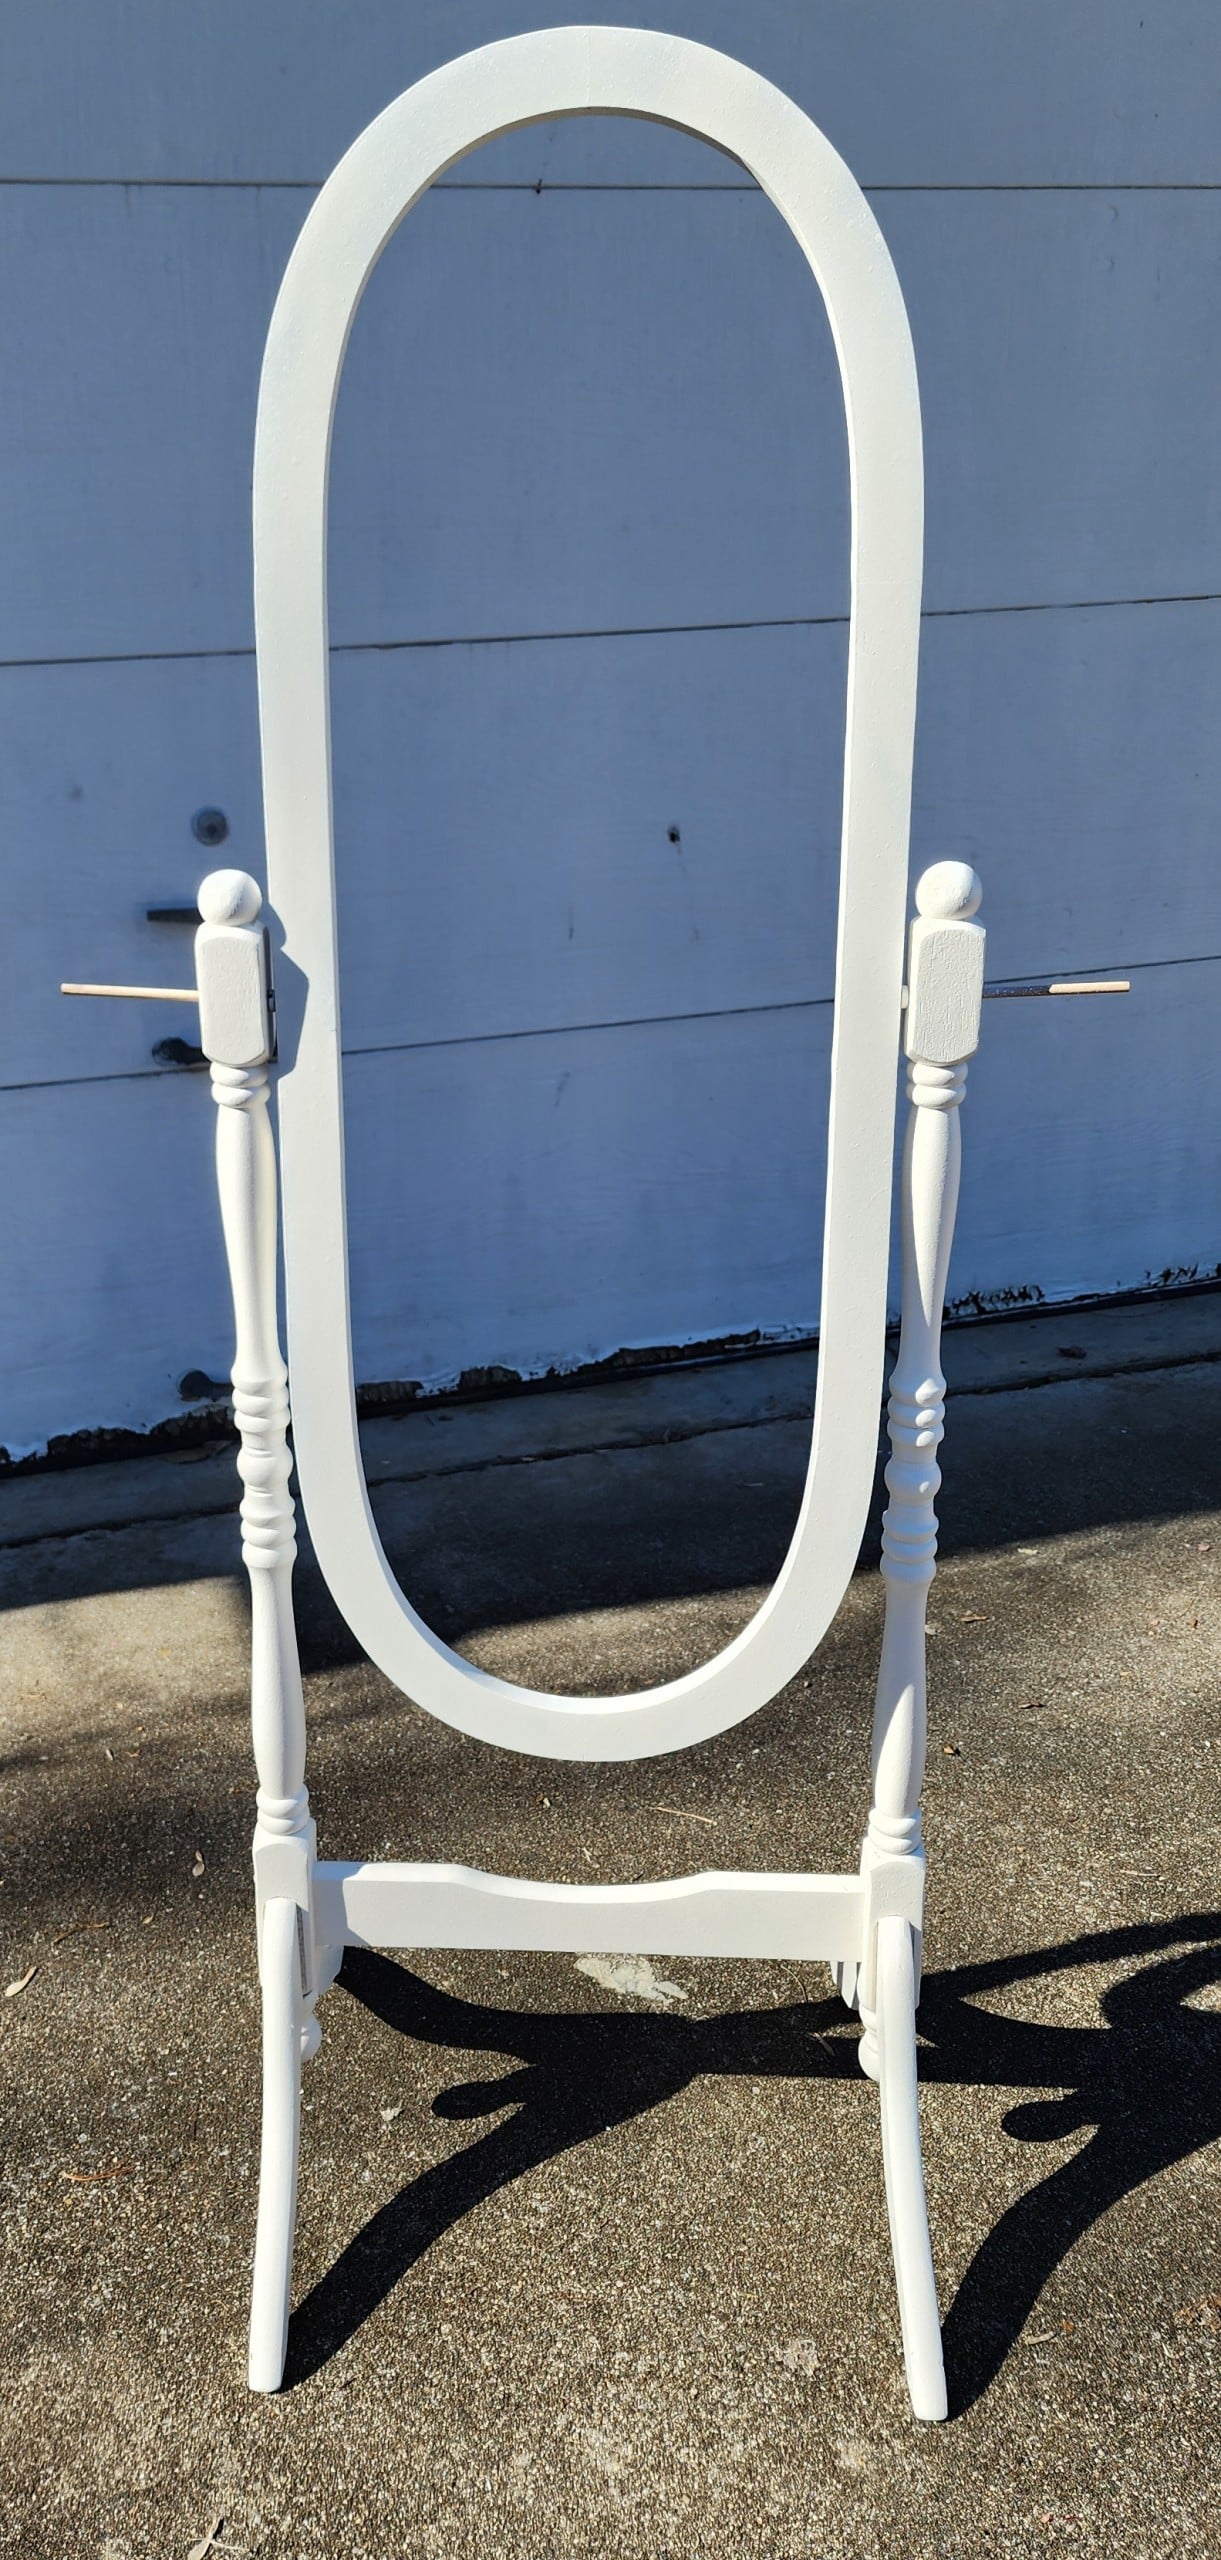
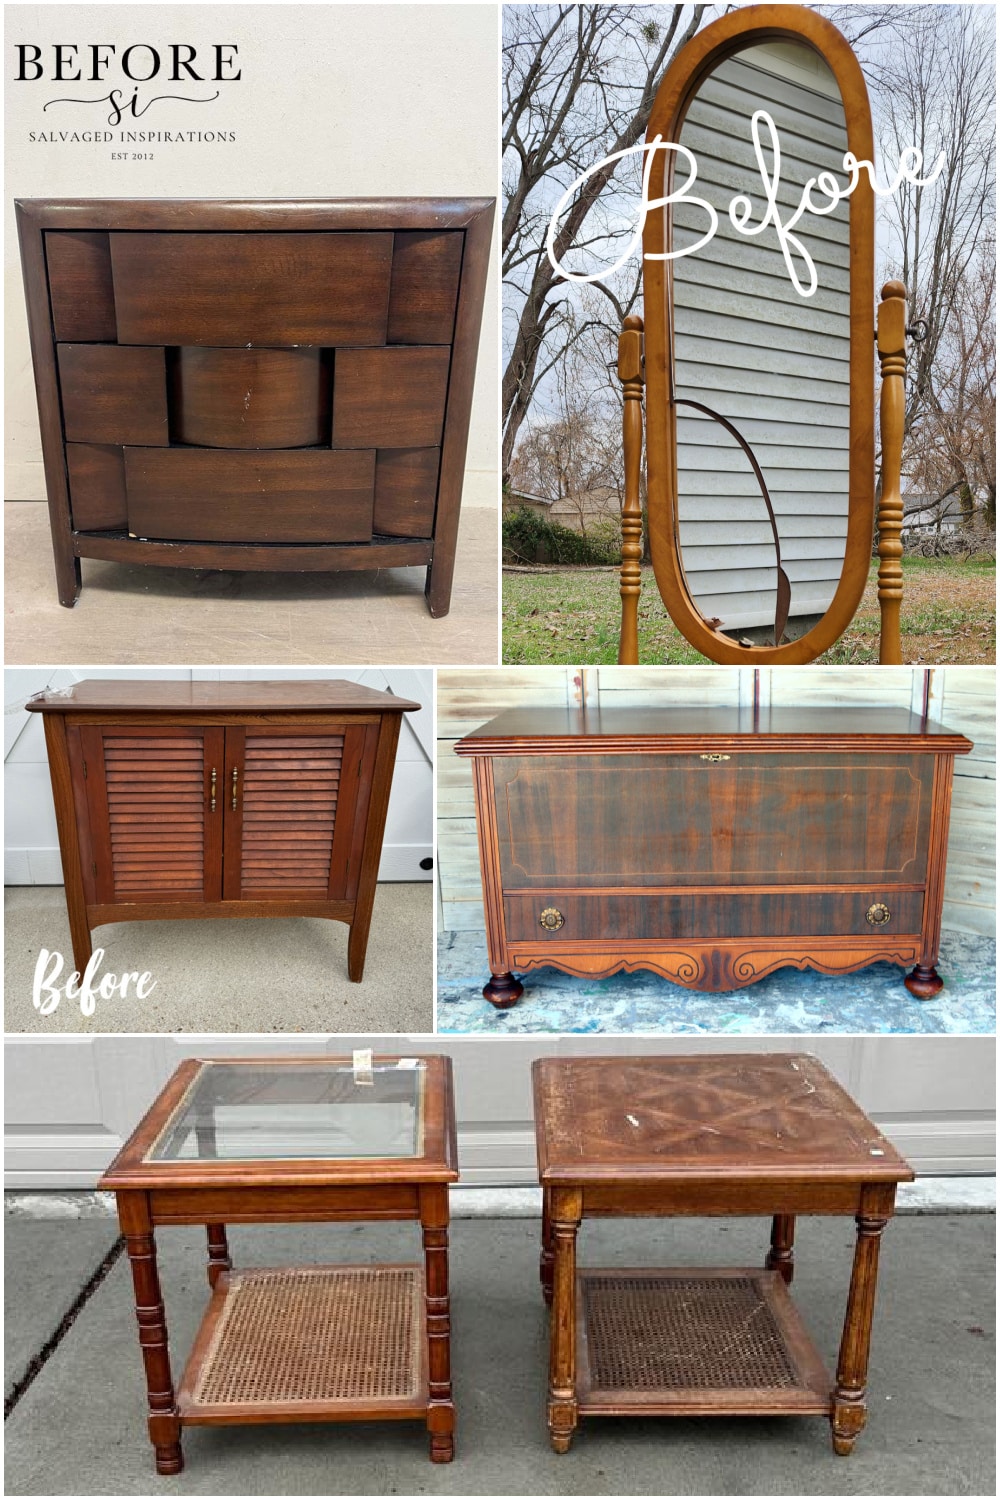
This double-sided chalkboard sign is made from a broken Cheval mirror stand.
I had thought about making the standing mirror into a jewelry organizer. For a brief moment, I considered using part of the broken mirror on the top with sheet metal or something similar to hold necklaces. But I wasn’t sure I could cut the mirror.
Finally, I decided that I could make a chalkboard sign stand. But then it occurred to me that I should use both sides so that the message board could do double duty. In the end, it all worked out. For a while, I was worried the free-standing double-sided chalkboard idea wouldn’t quite work.
Let’s see how a broken, full-length mirror was recycled!
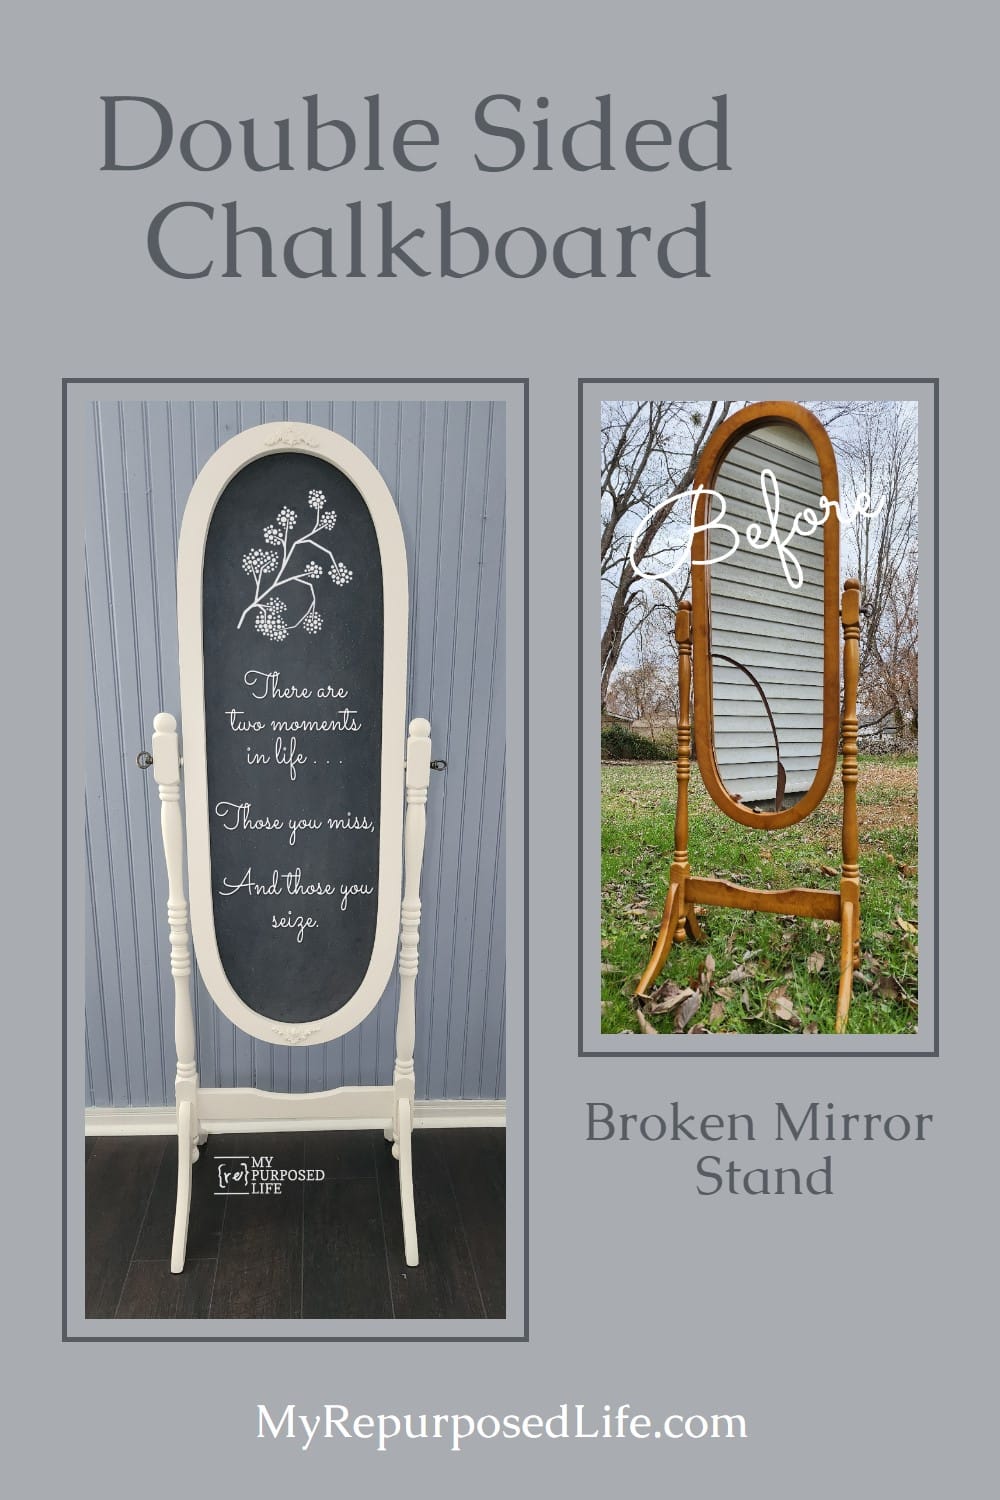
Broken Cheval Mirror Stand
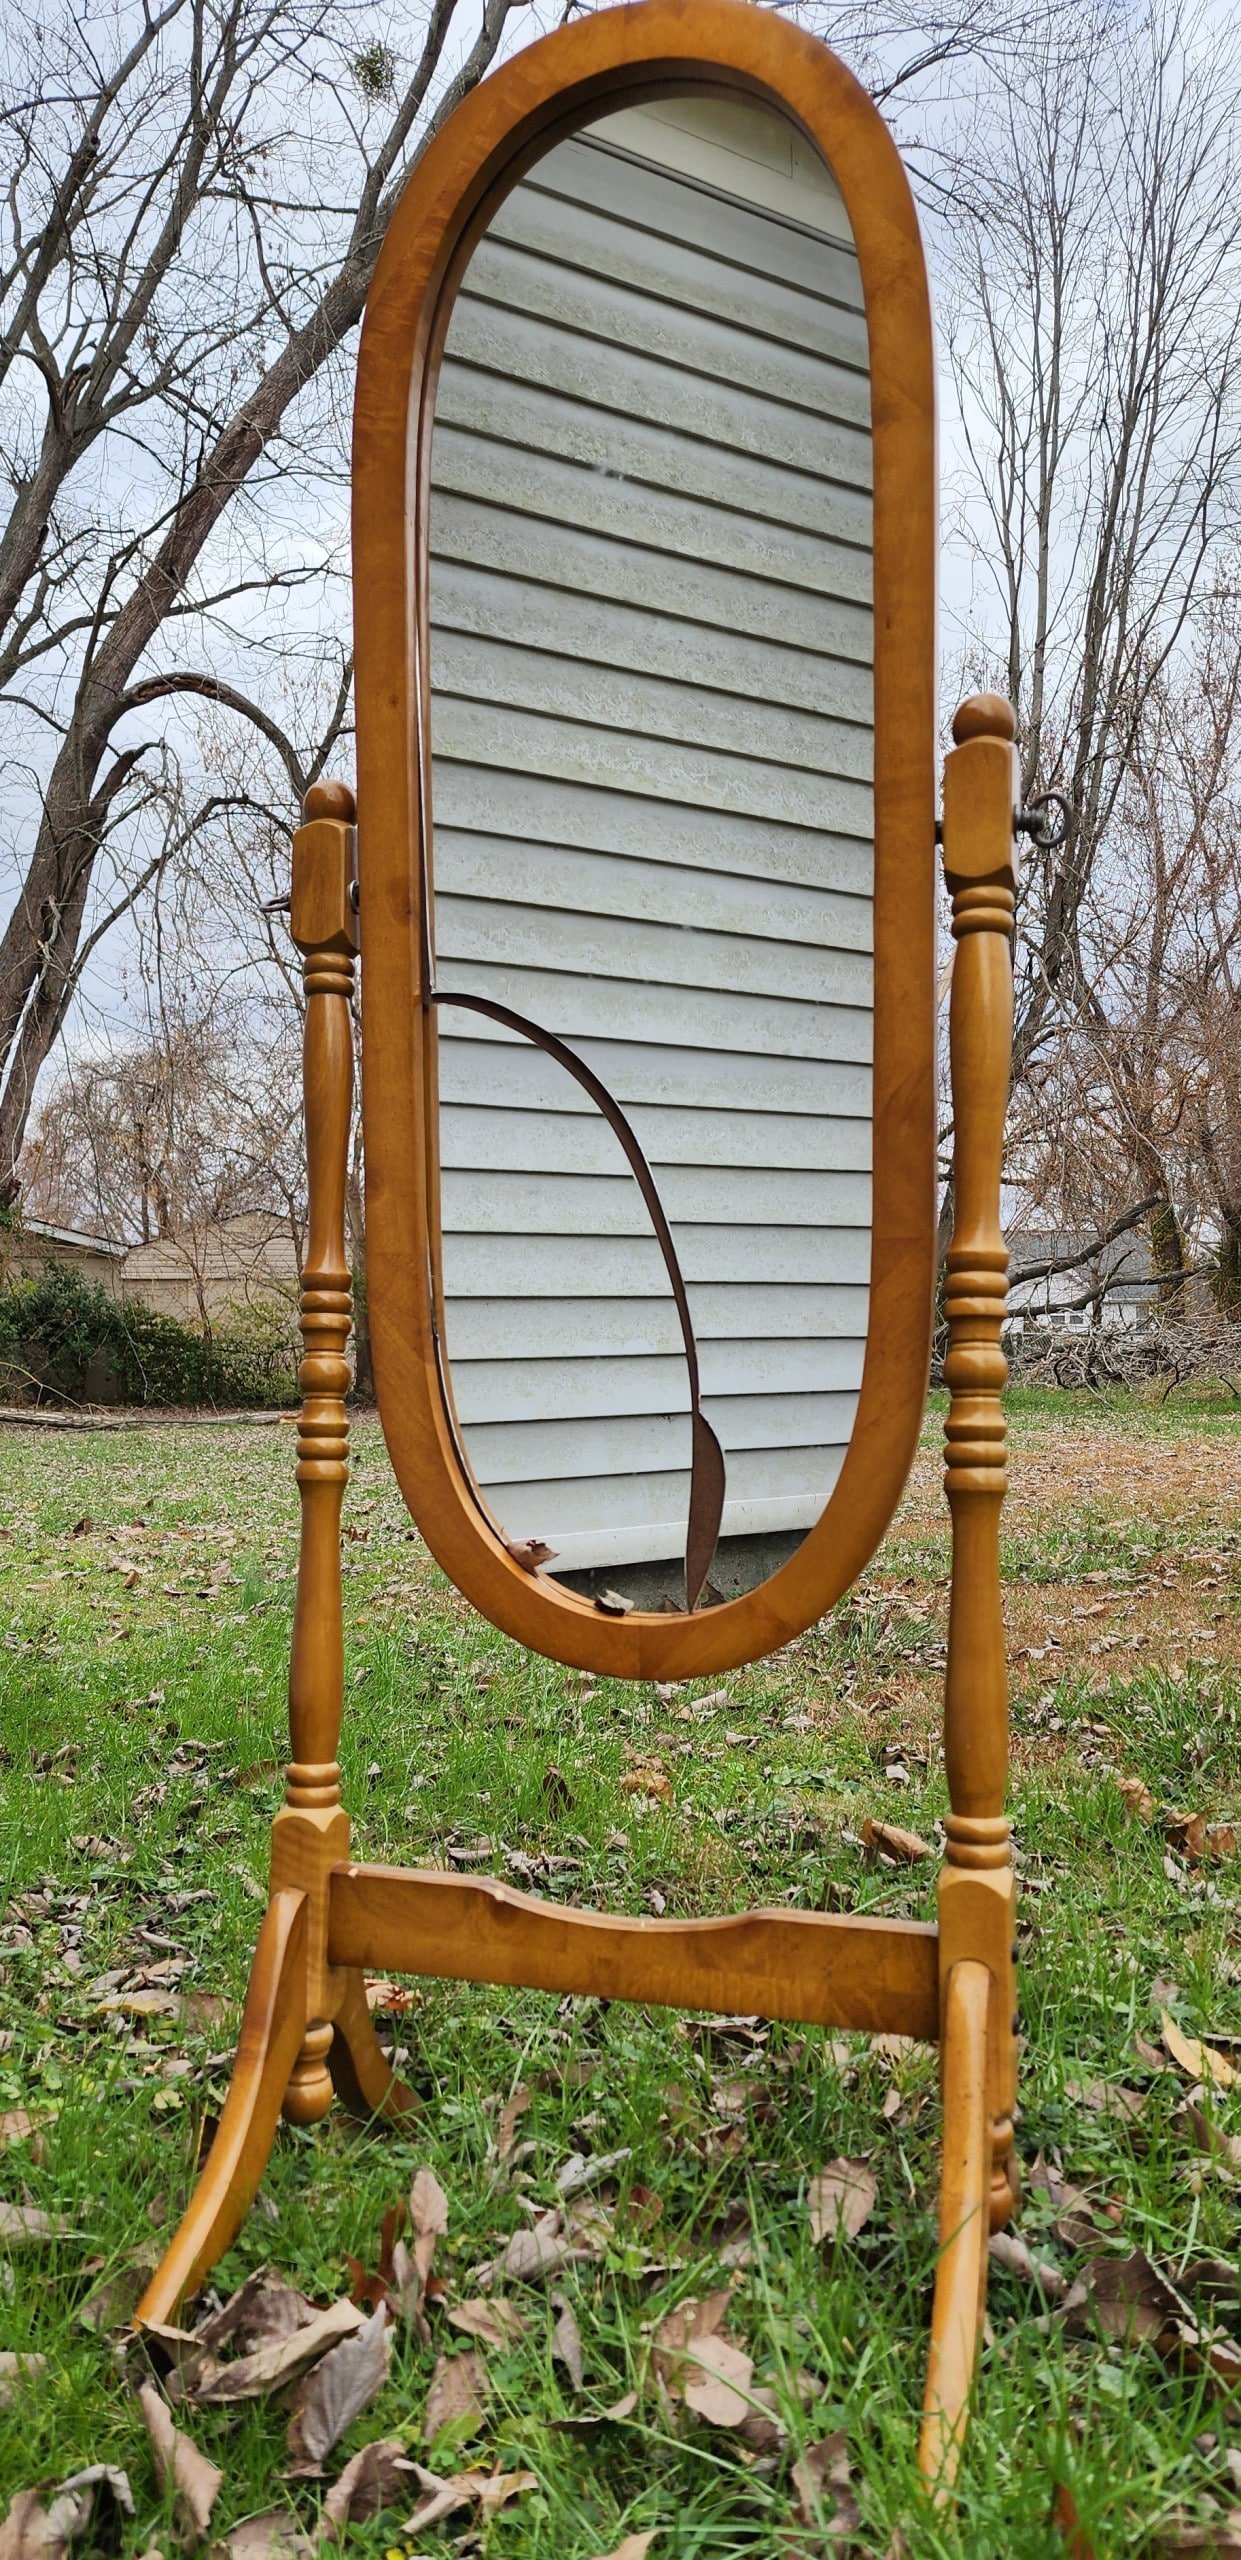
I rescued this bedroom mirror from a neighbor’s garbage can as I was driving down the street. I had never done a standing mirror project before, and since it was free, why not now?
It’s Furniture Fixer Upper Tour Day! Be sure to visit my friends’ projects at the bottom of this post.
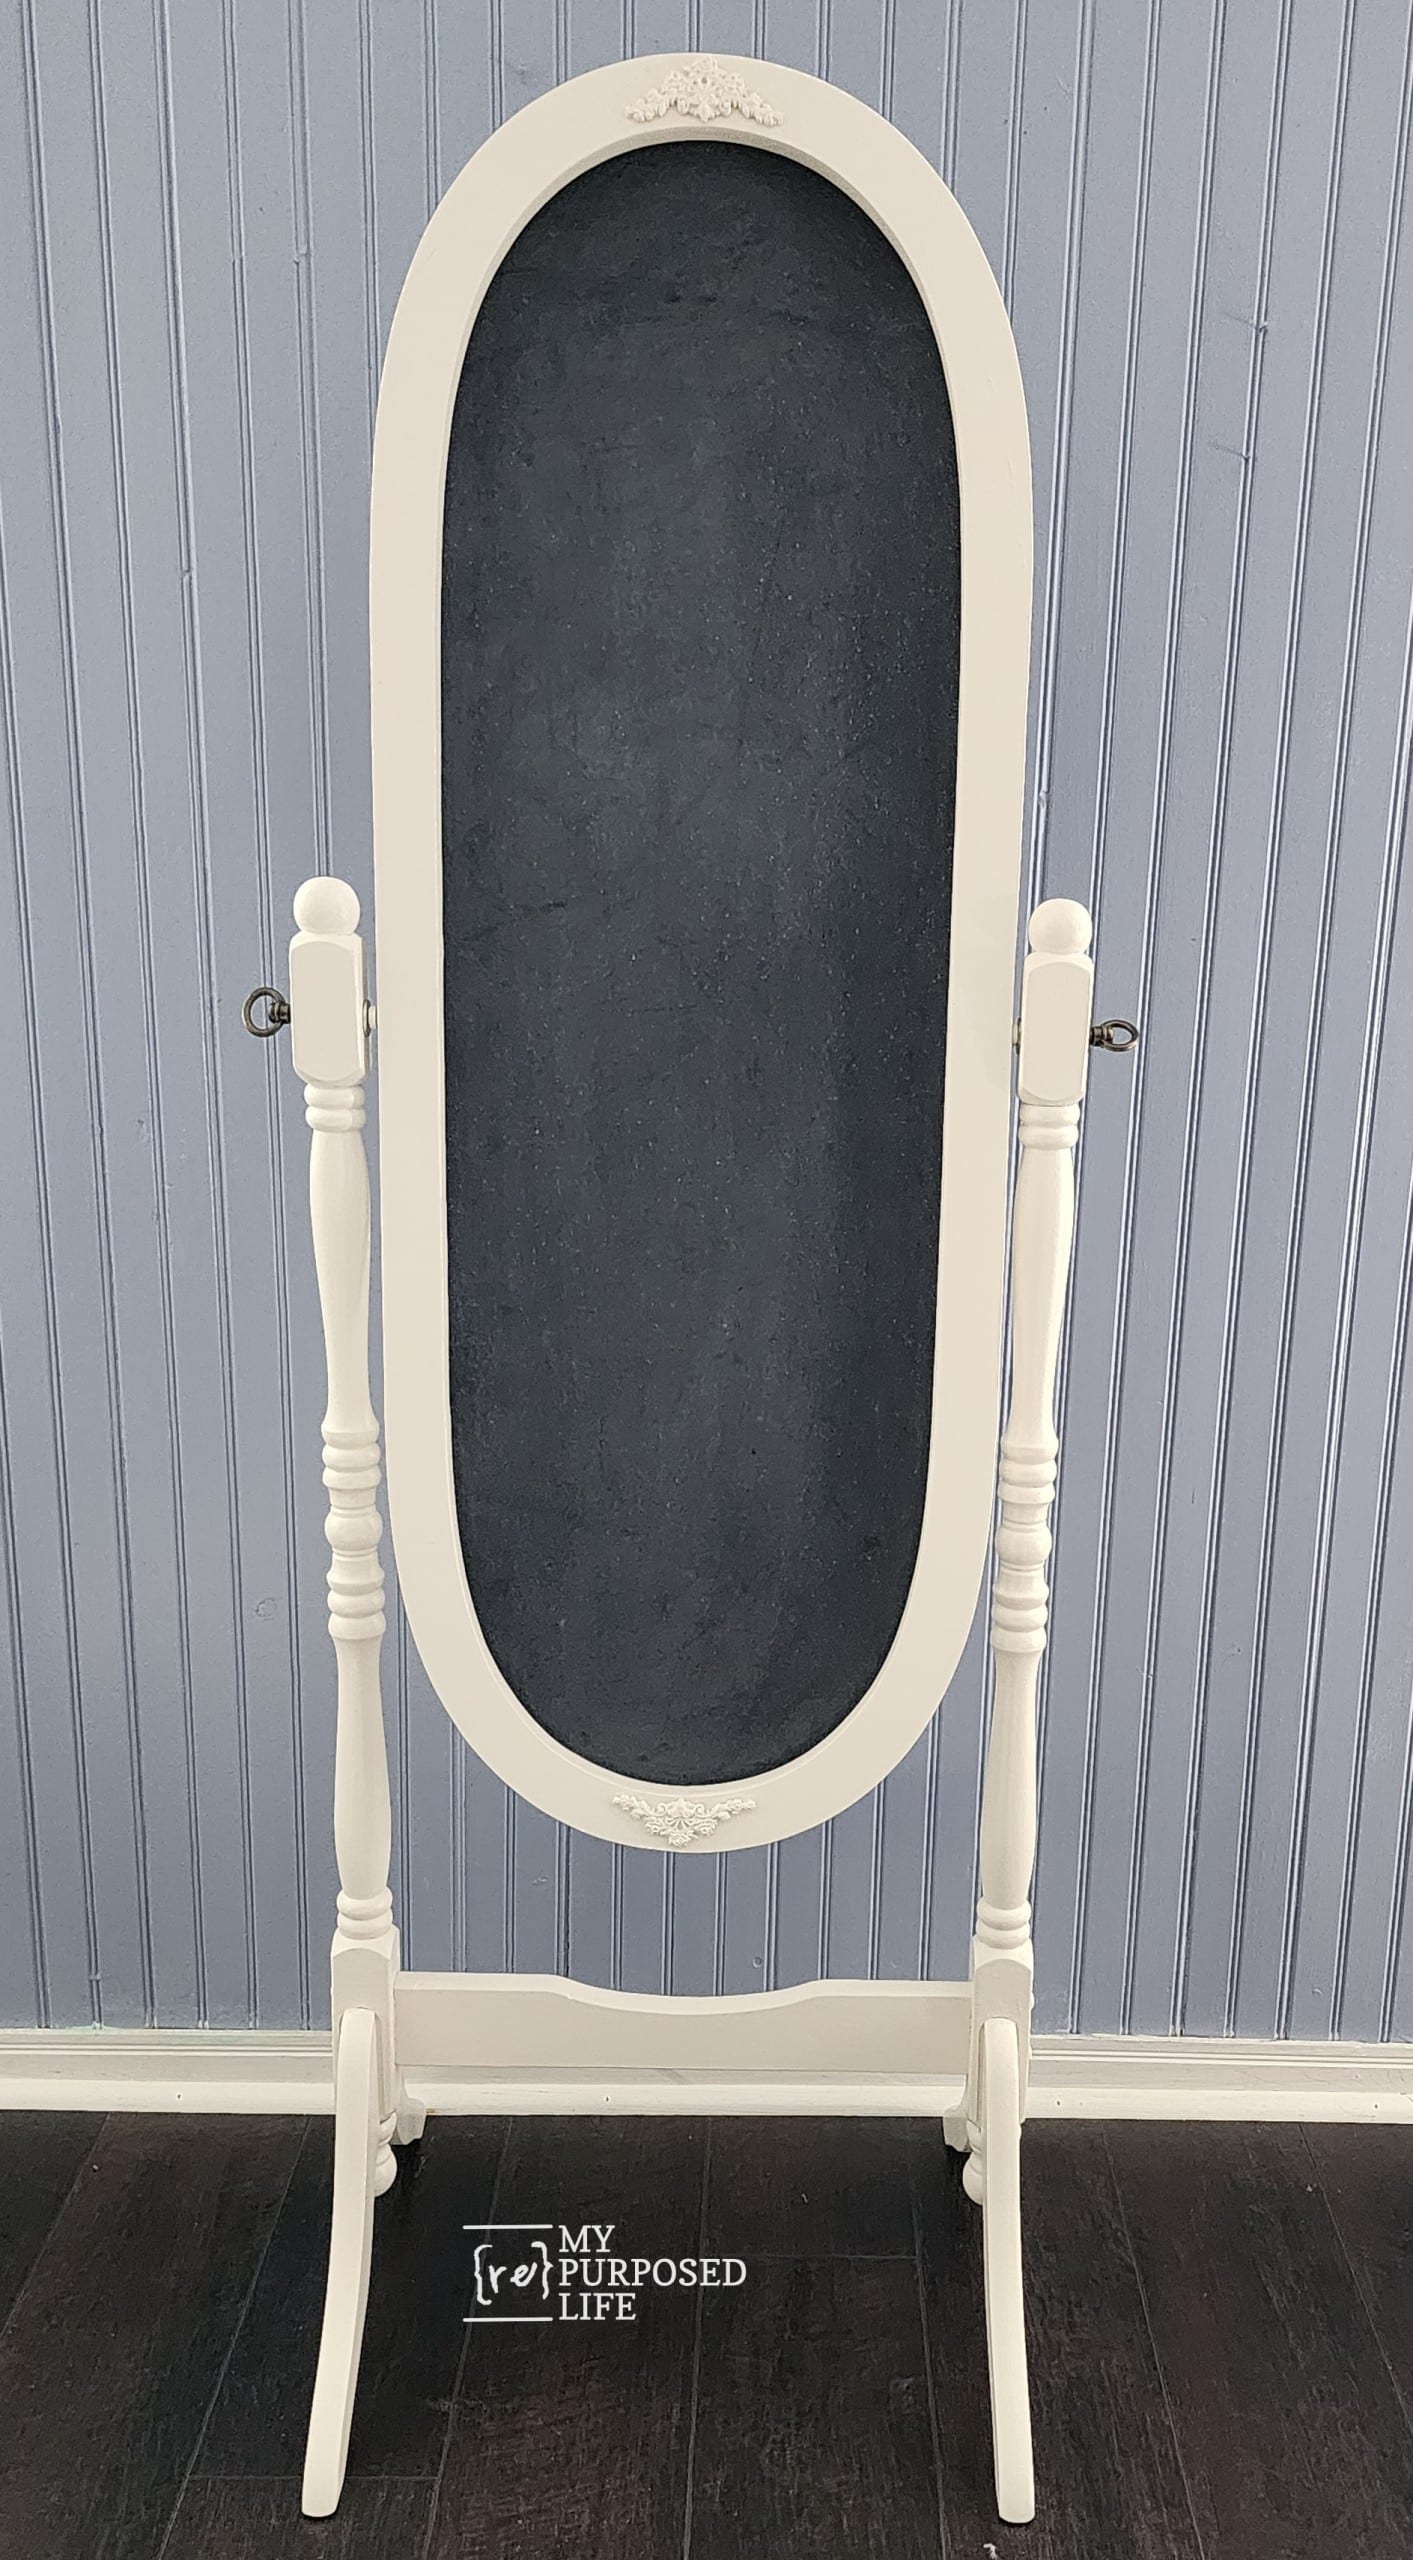
Dismantle Oval Mirror Stand
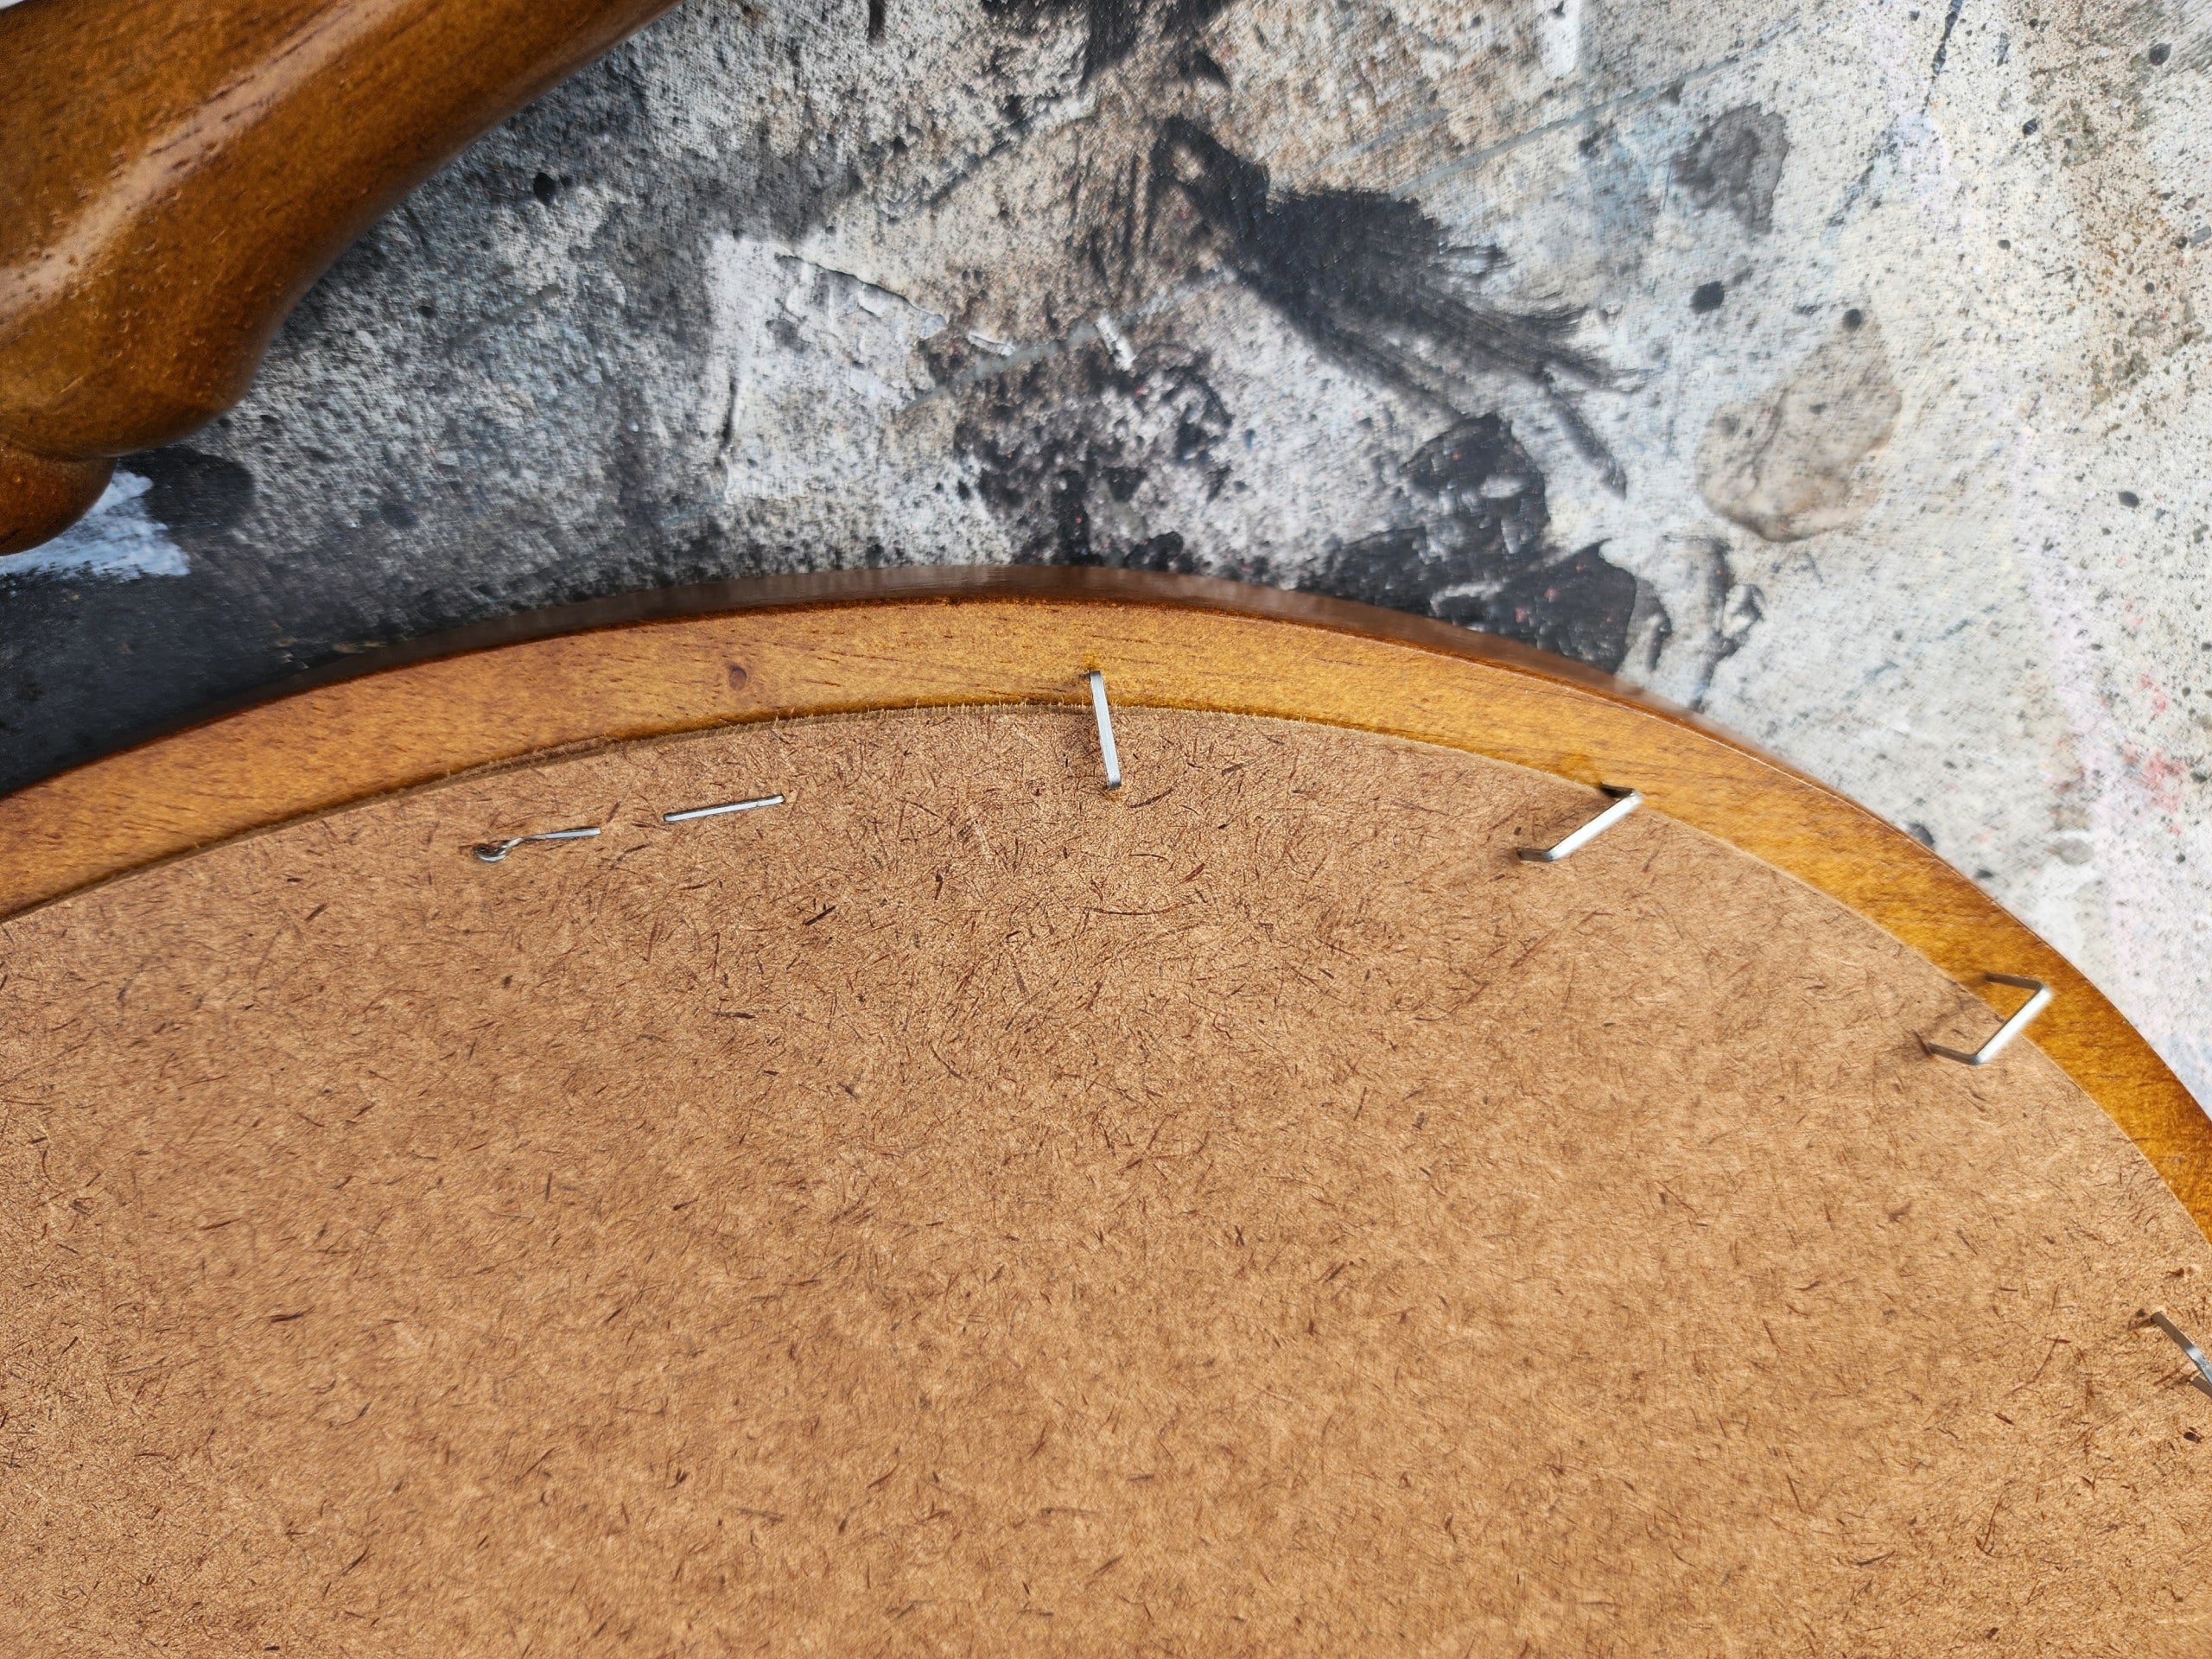
First, I removed the full-length mirror by prying out the staples. You can see some of them were barely attached. I threw away the broken piece but saved the large piece in case the chalkboard idea fell through.
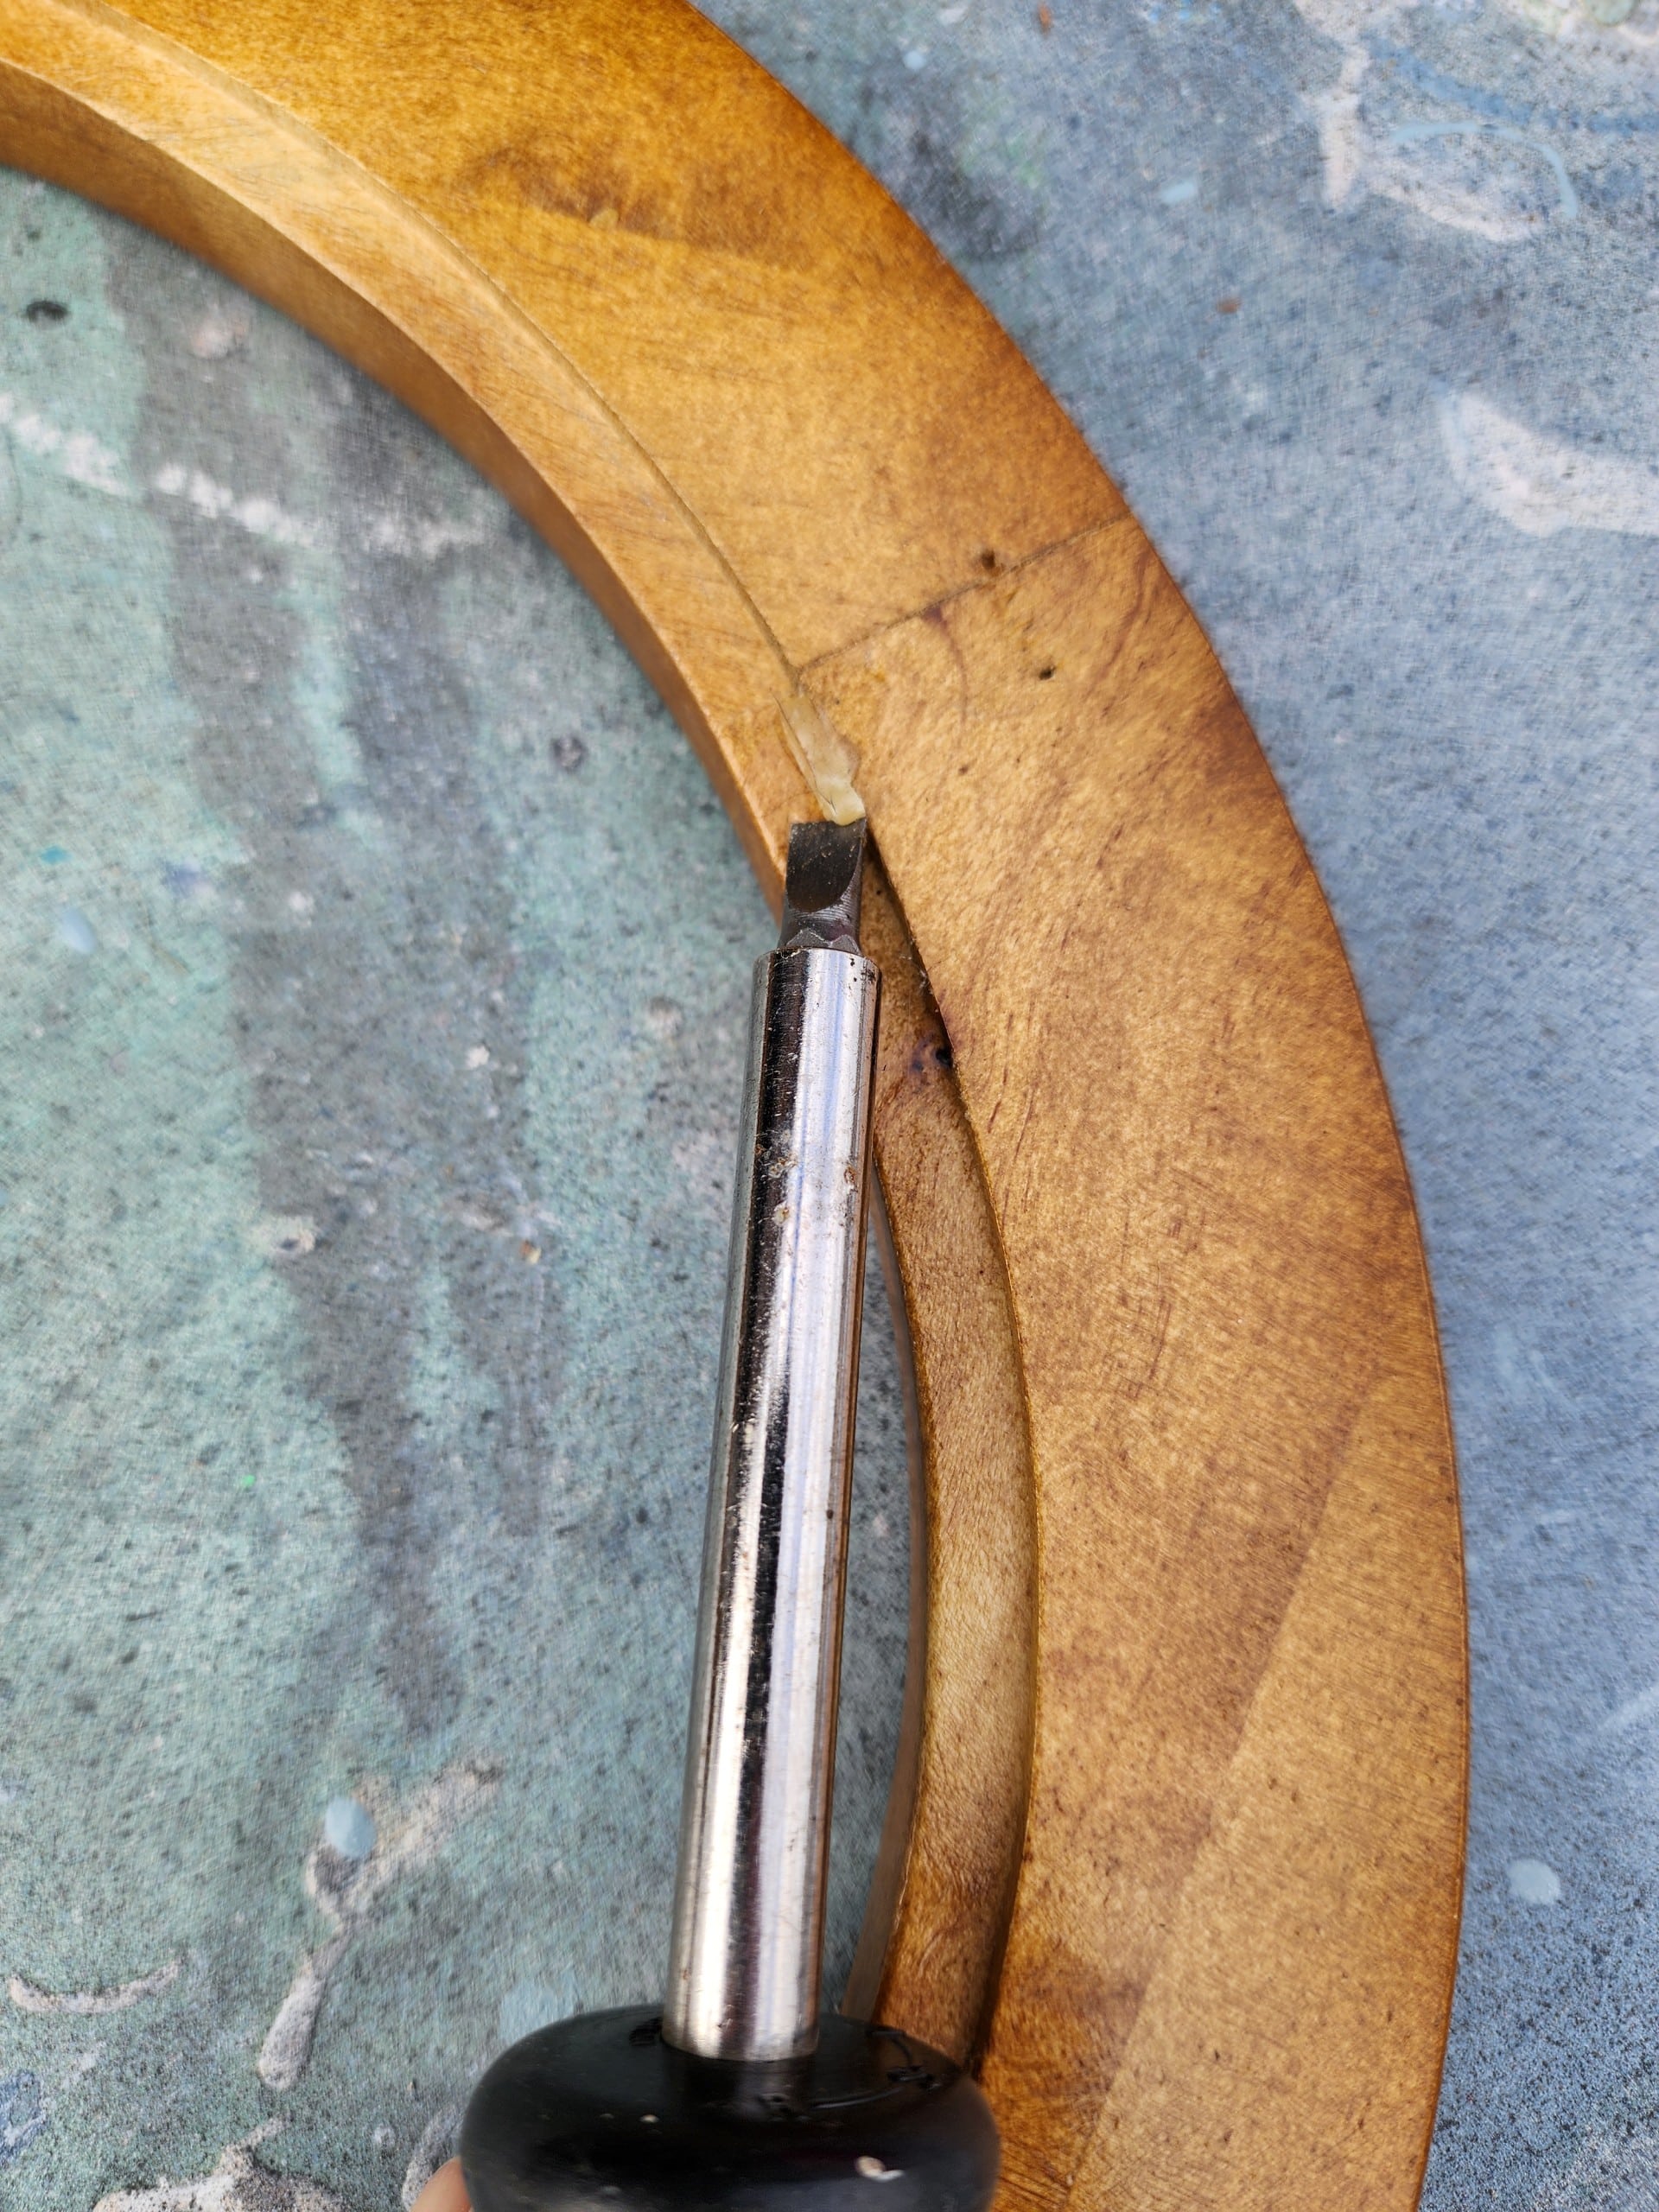
Next, I removed any remaining glue bits left in the rim of the oval mirror frame using a screwdriver.
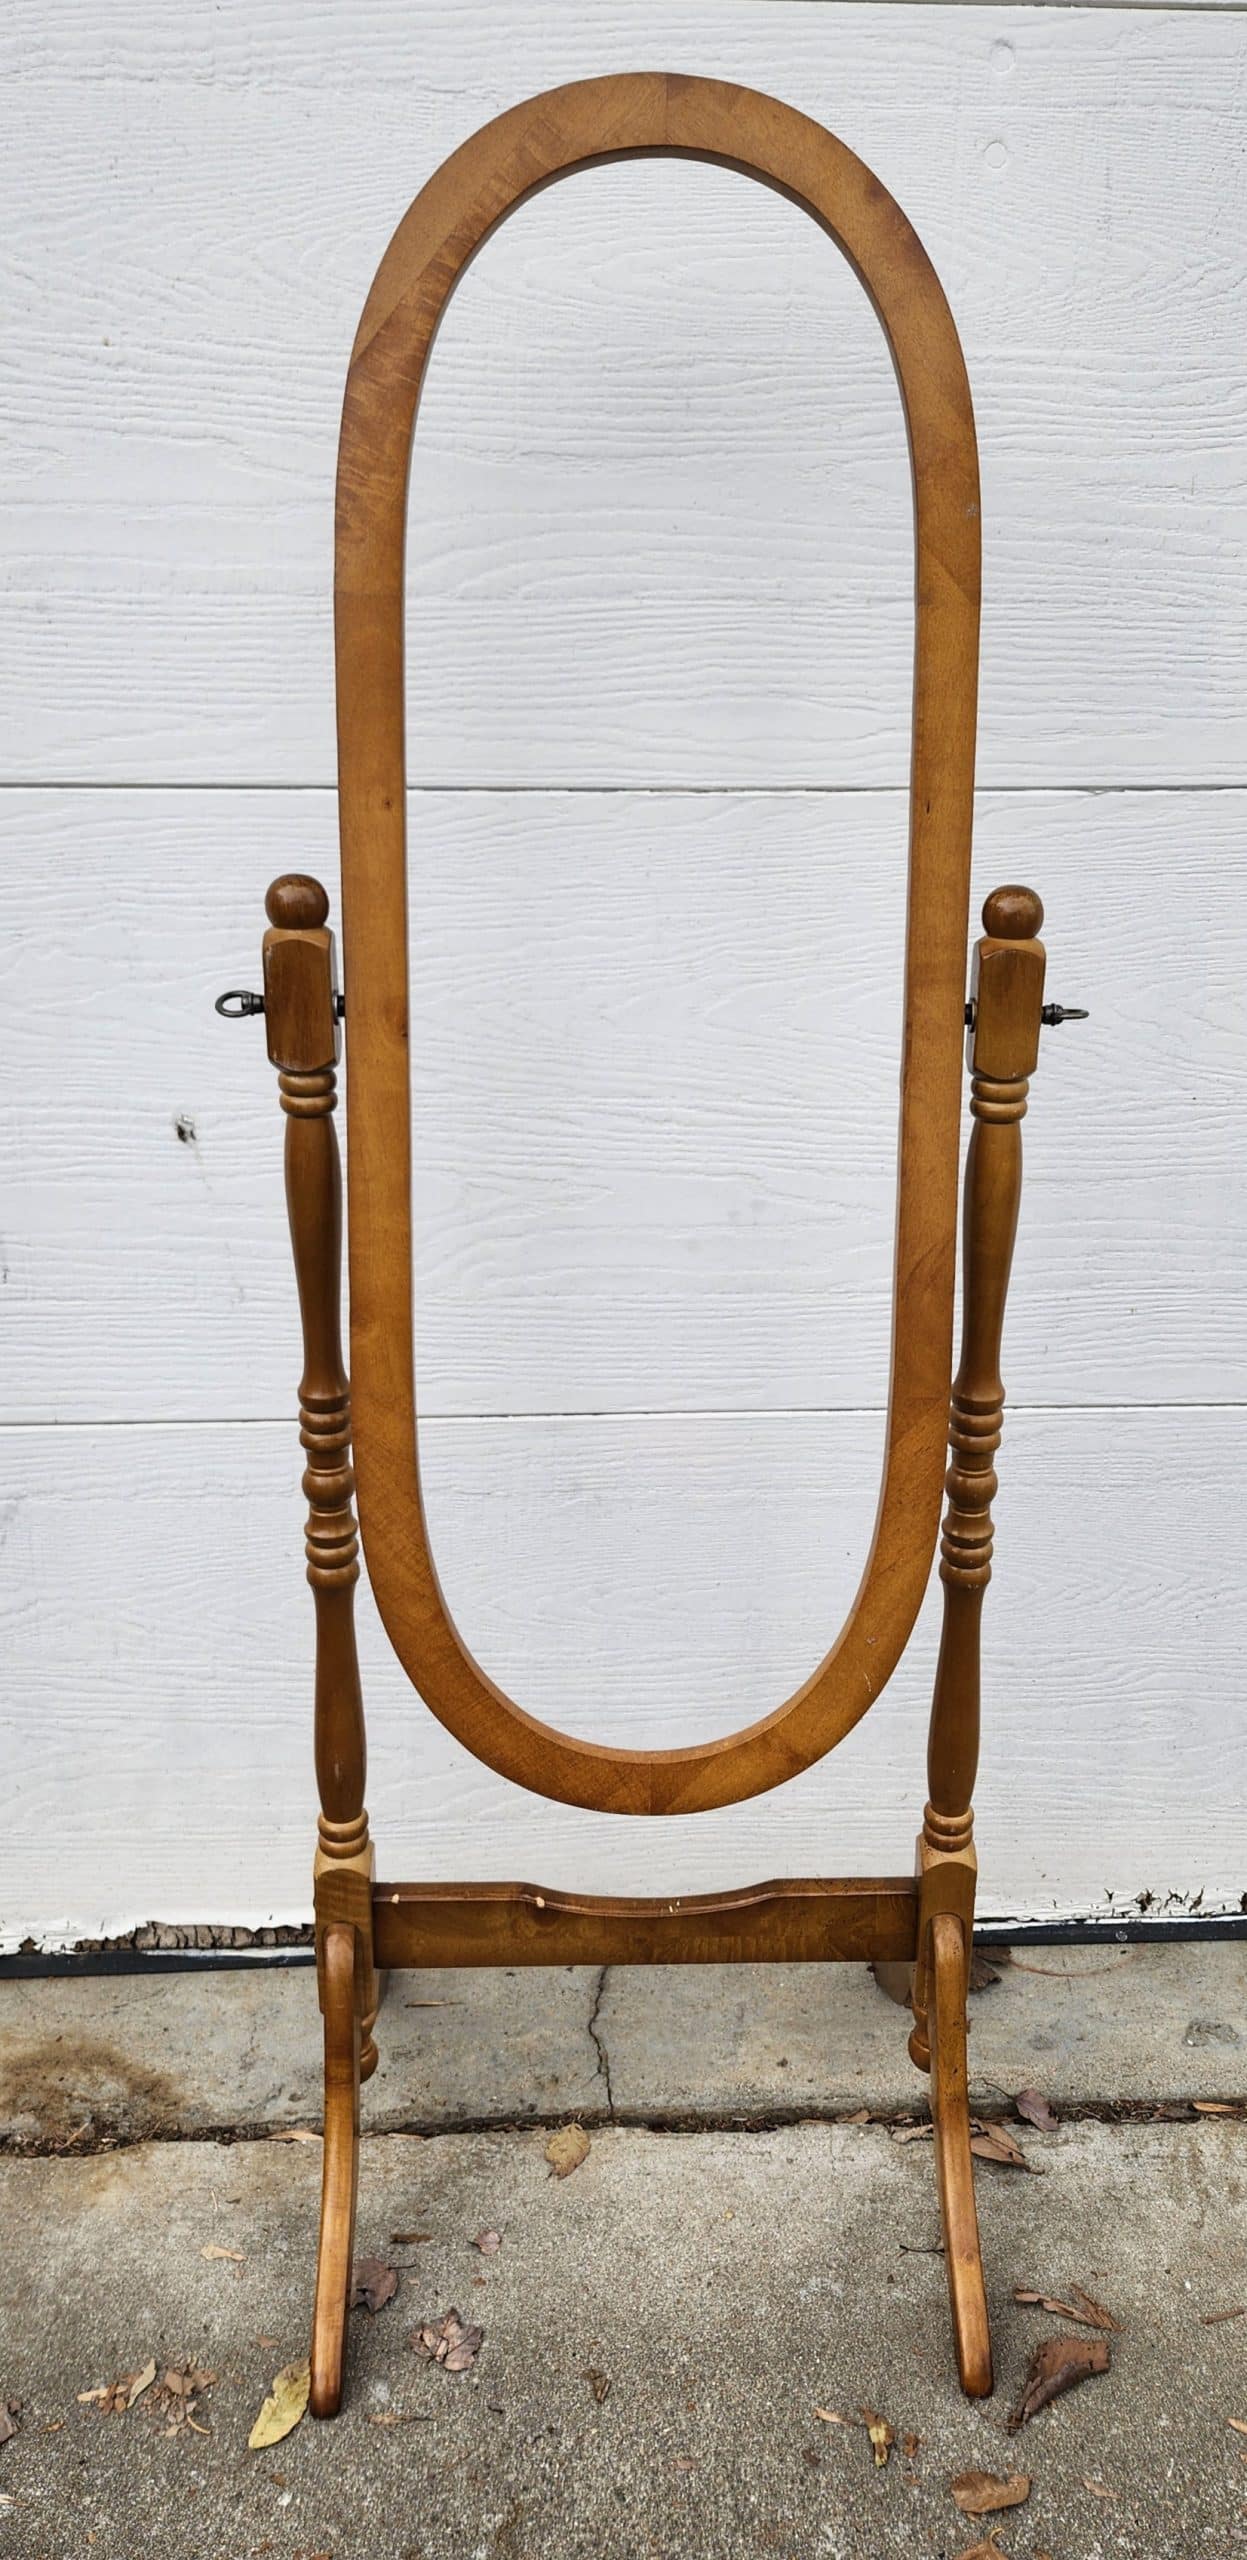
I got to this point, still not knowing what would become of the standing mirror frame that no longer has a mirror. Would it become a double-sided chalkboard sign?
Clean And Prep Wood for Painting
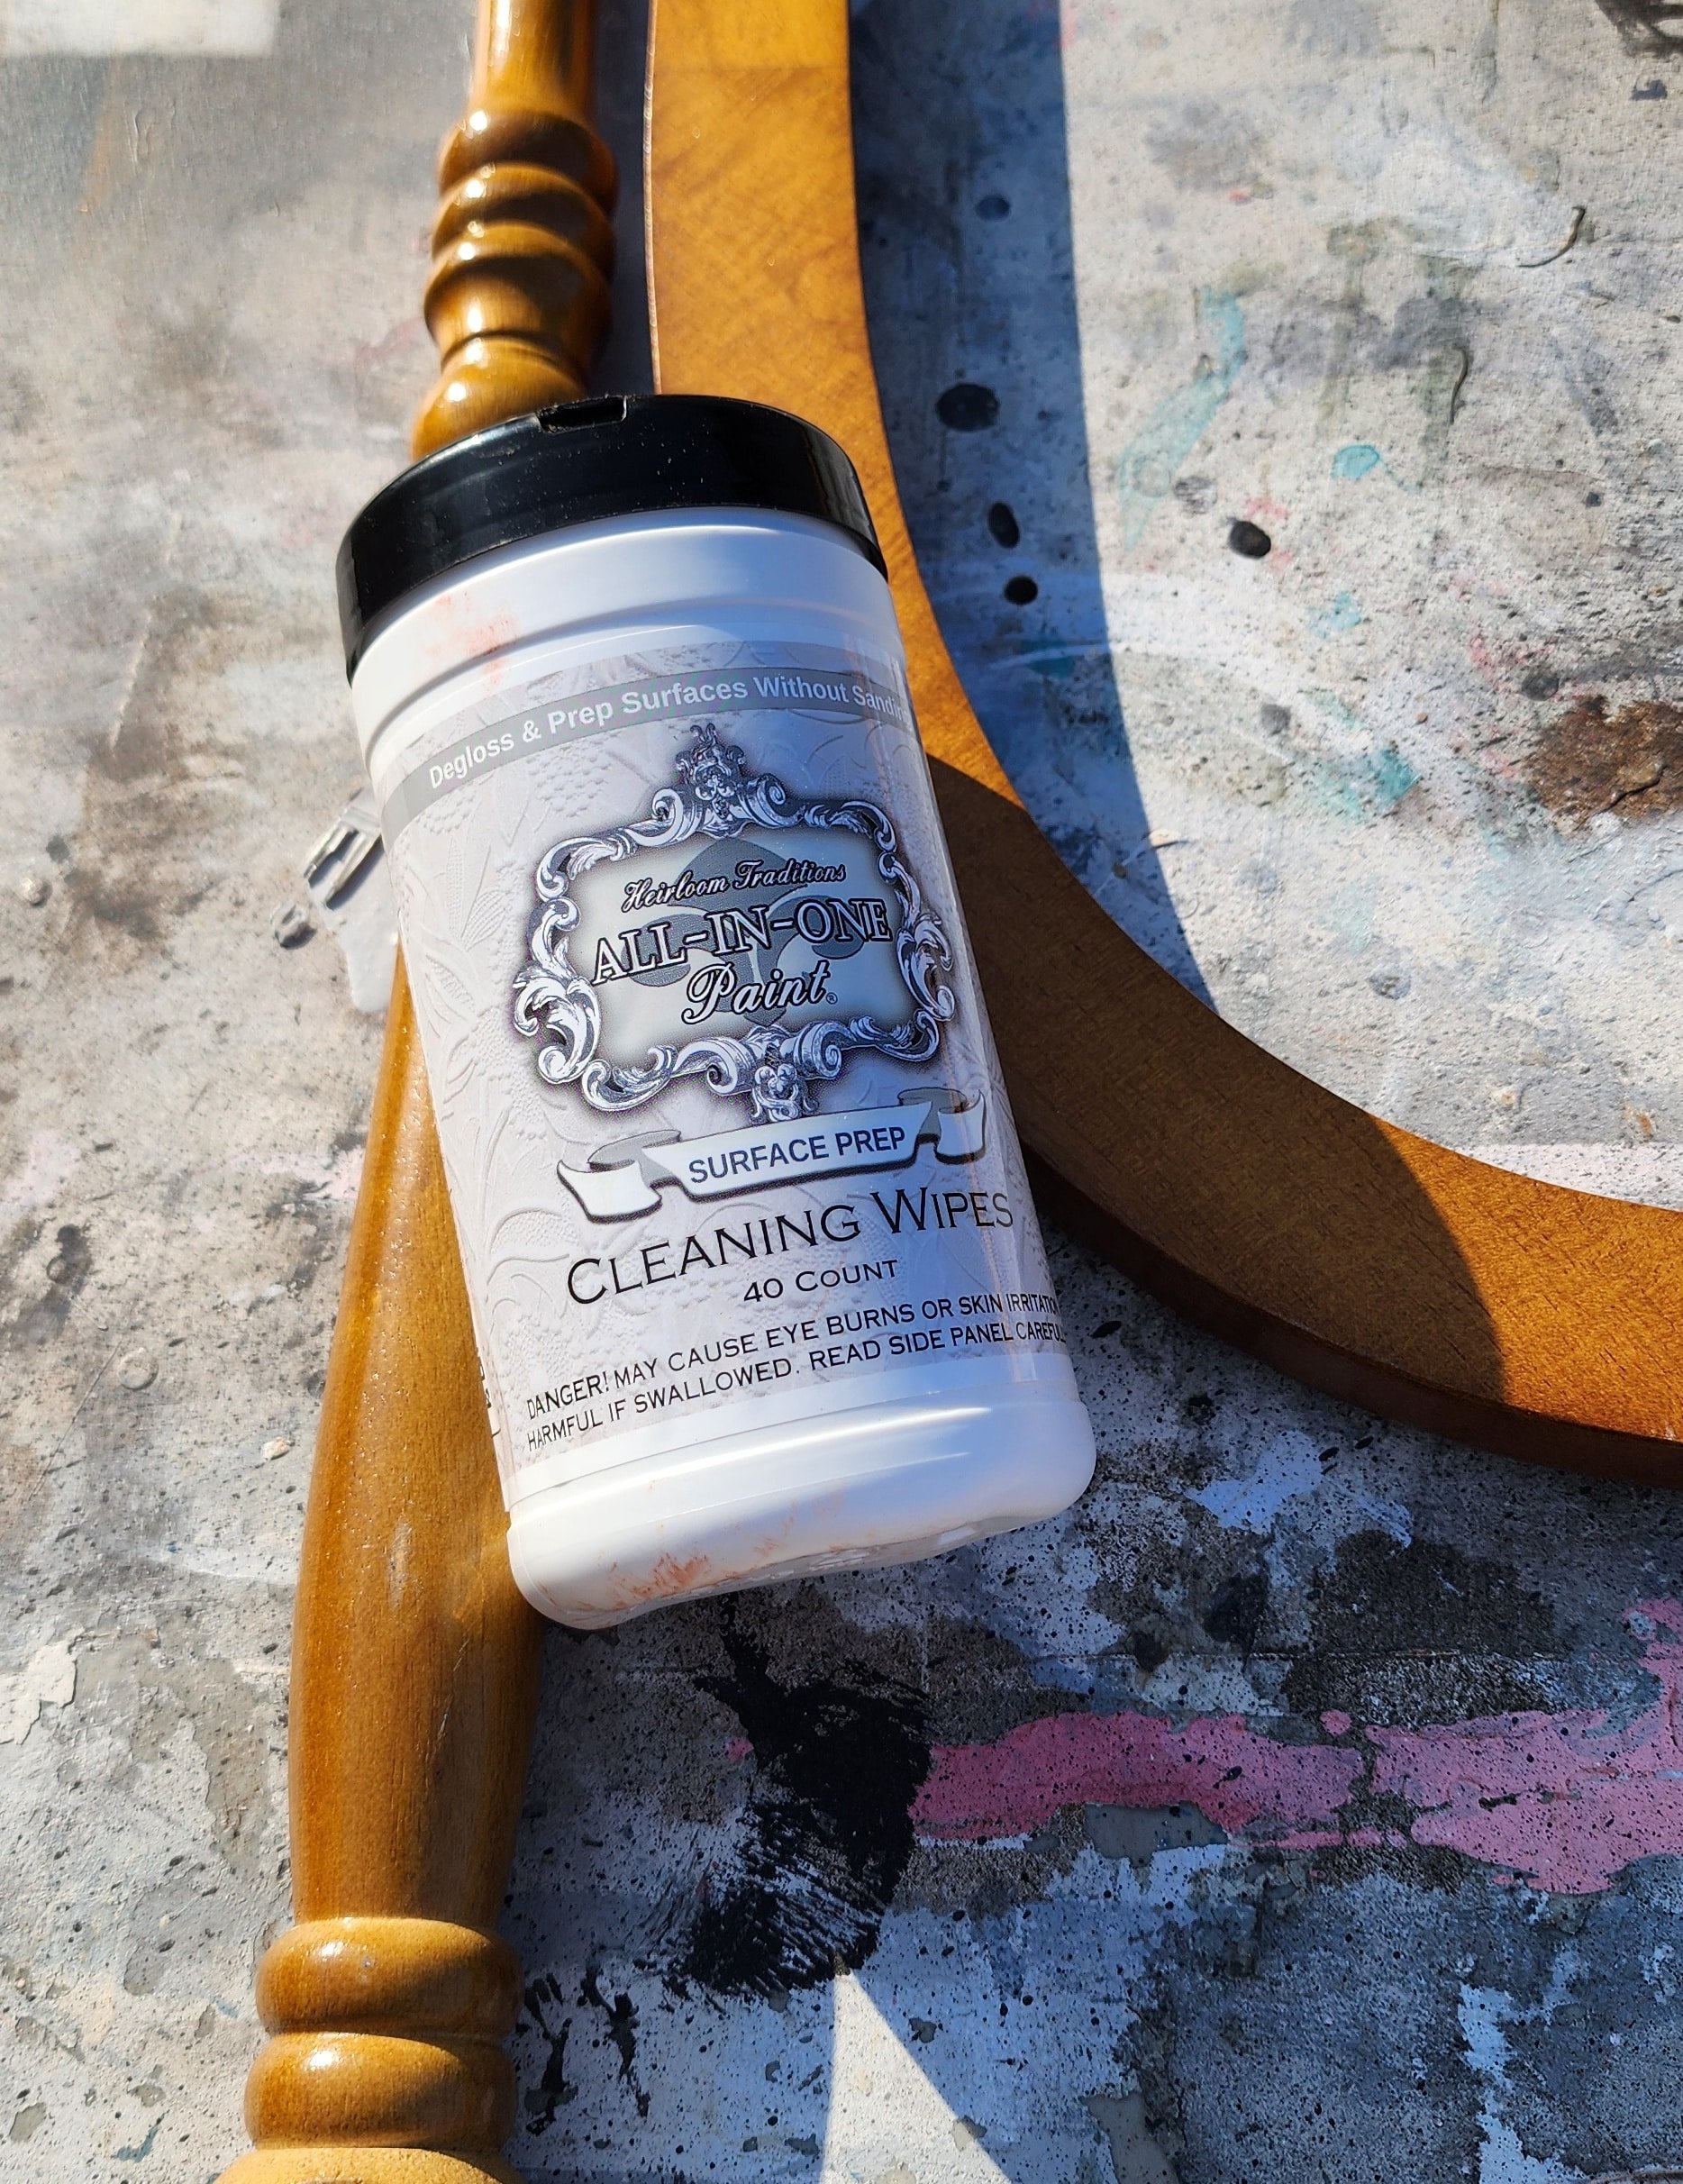
Heirloom Traditions All-in-One-Paint Surace Prep Cleaning Wipes were perfect for cleaning and deglossing this shiny wood mirror frame.
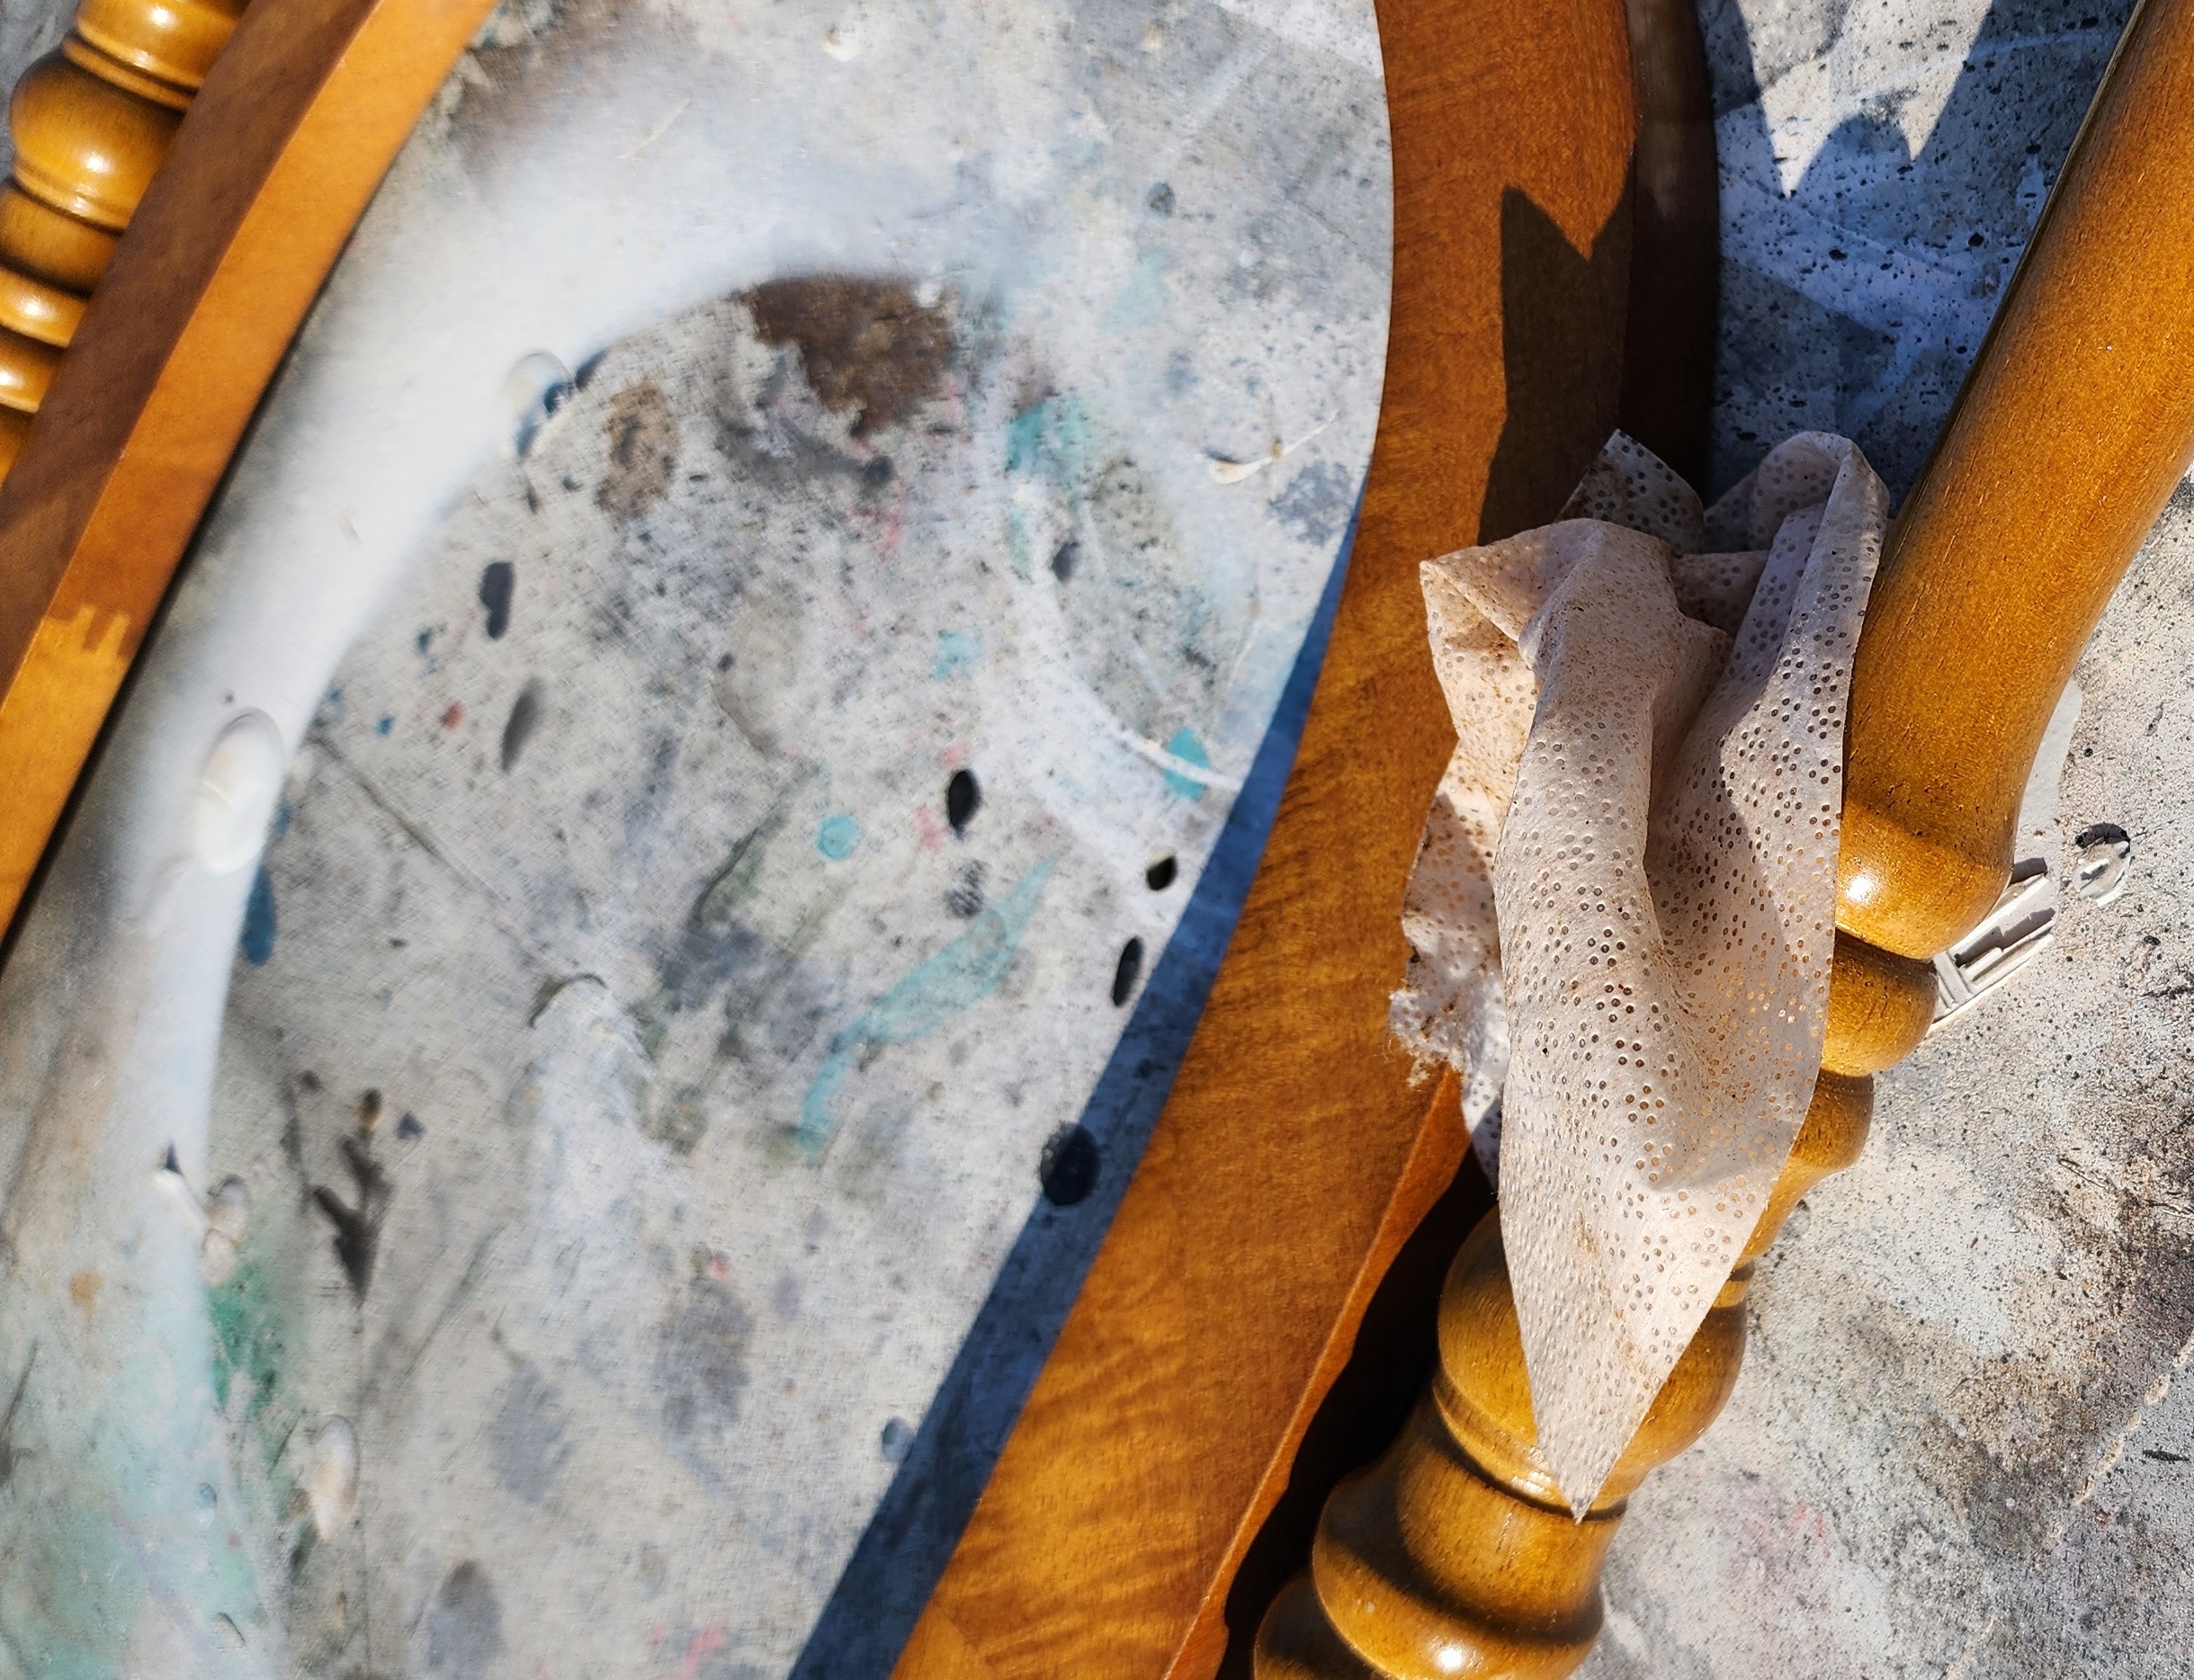
The wipe is large enough to clean the entire wooden frame of the standing mirror.
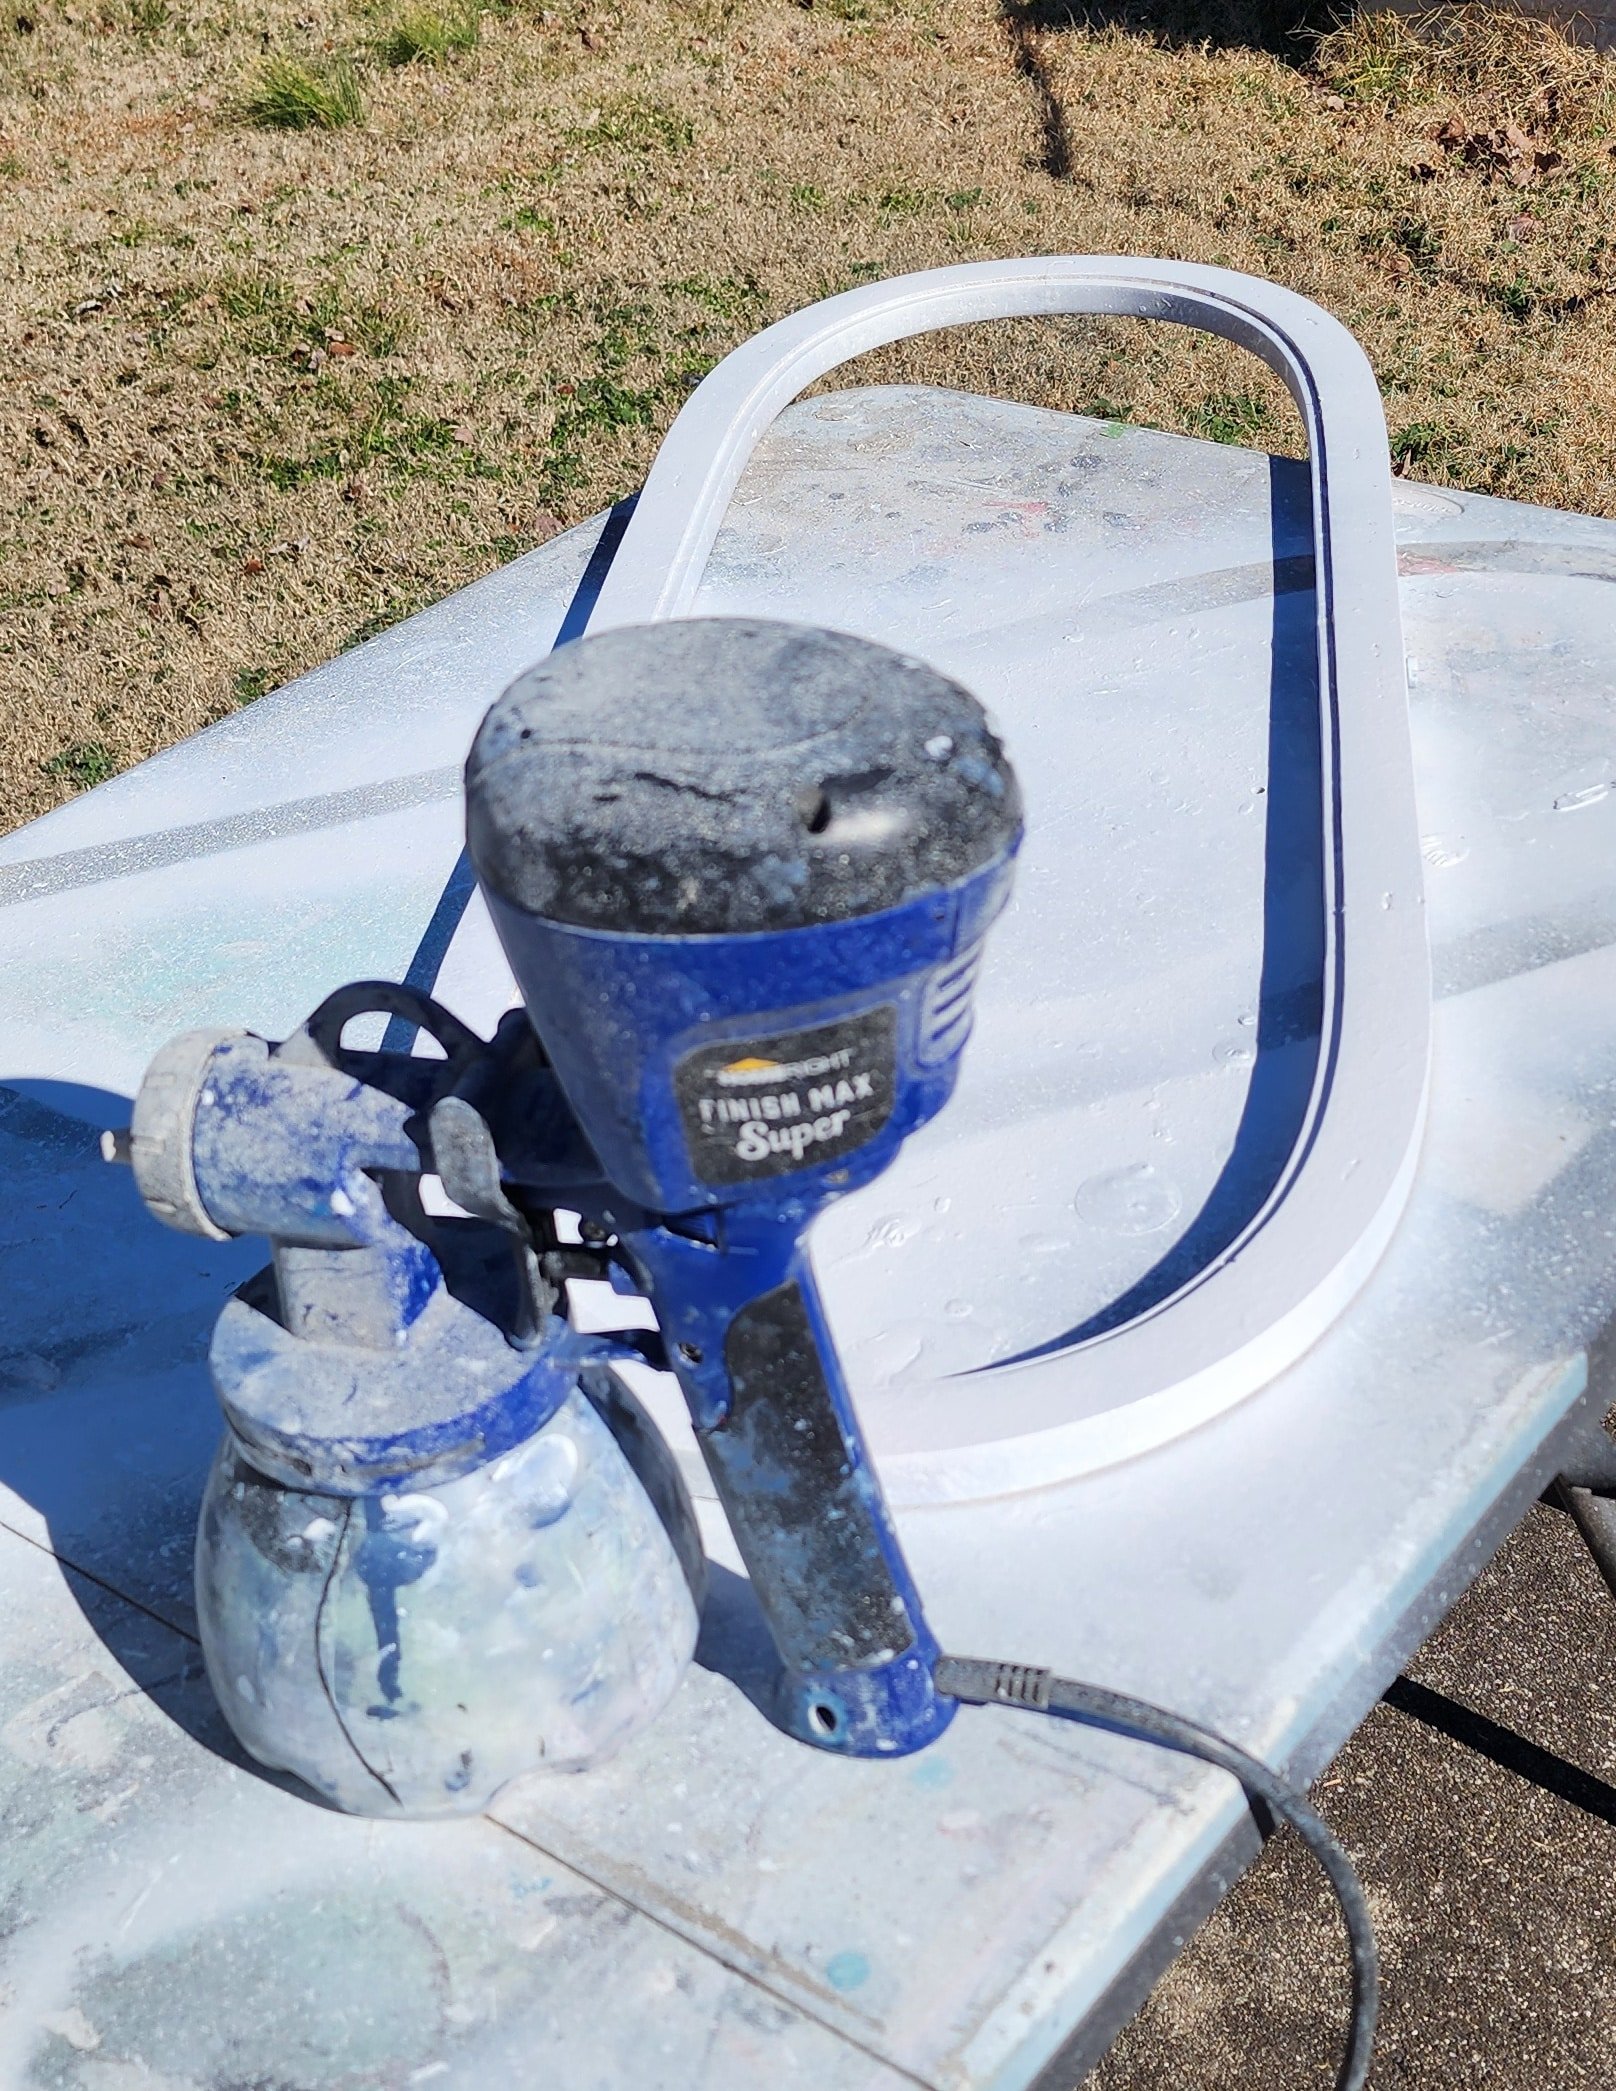
Using a Paint Sprayer
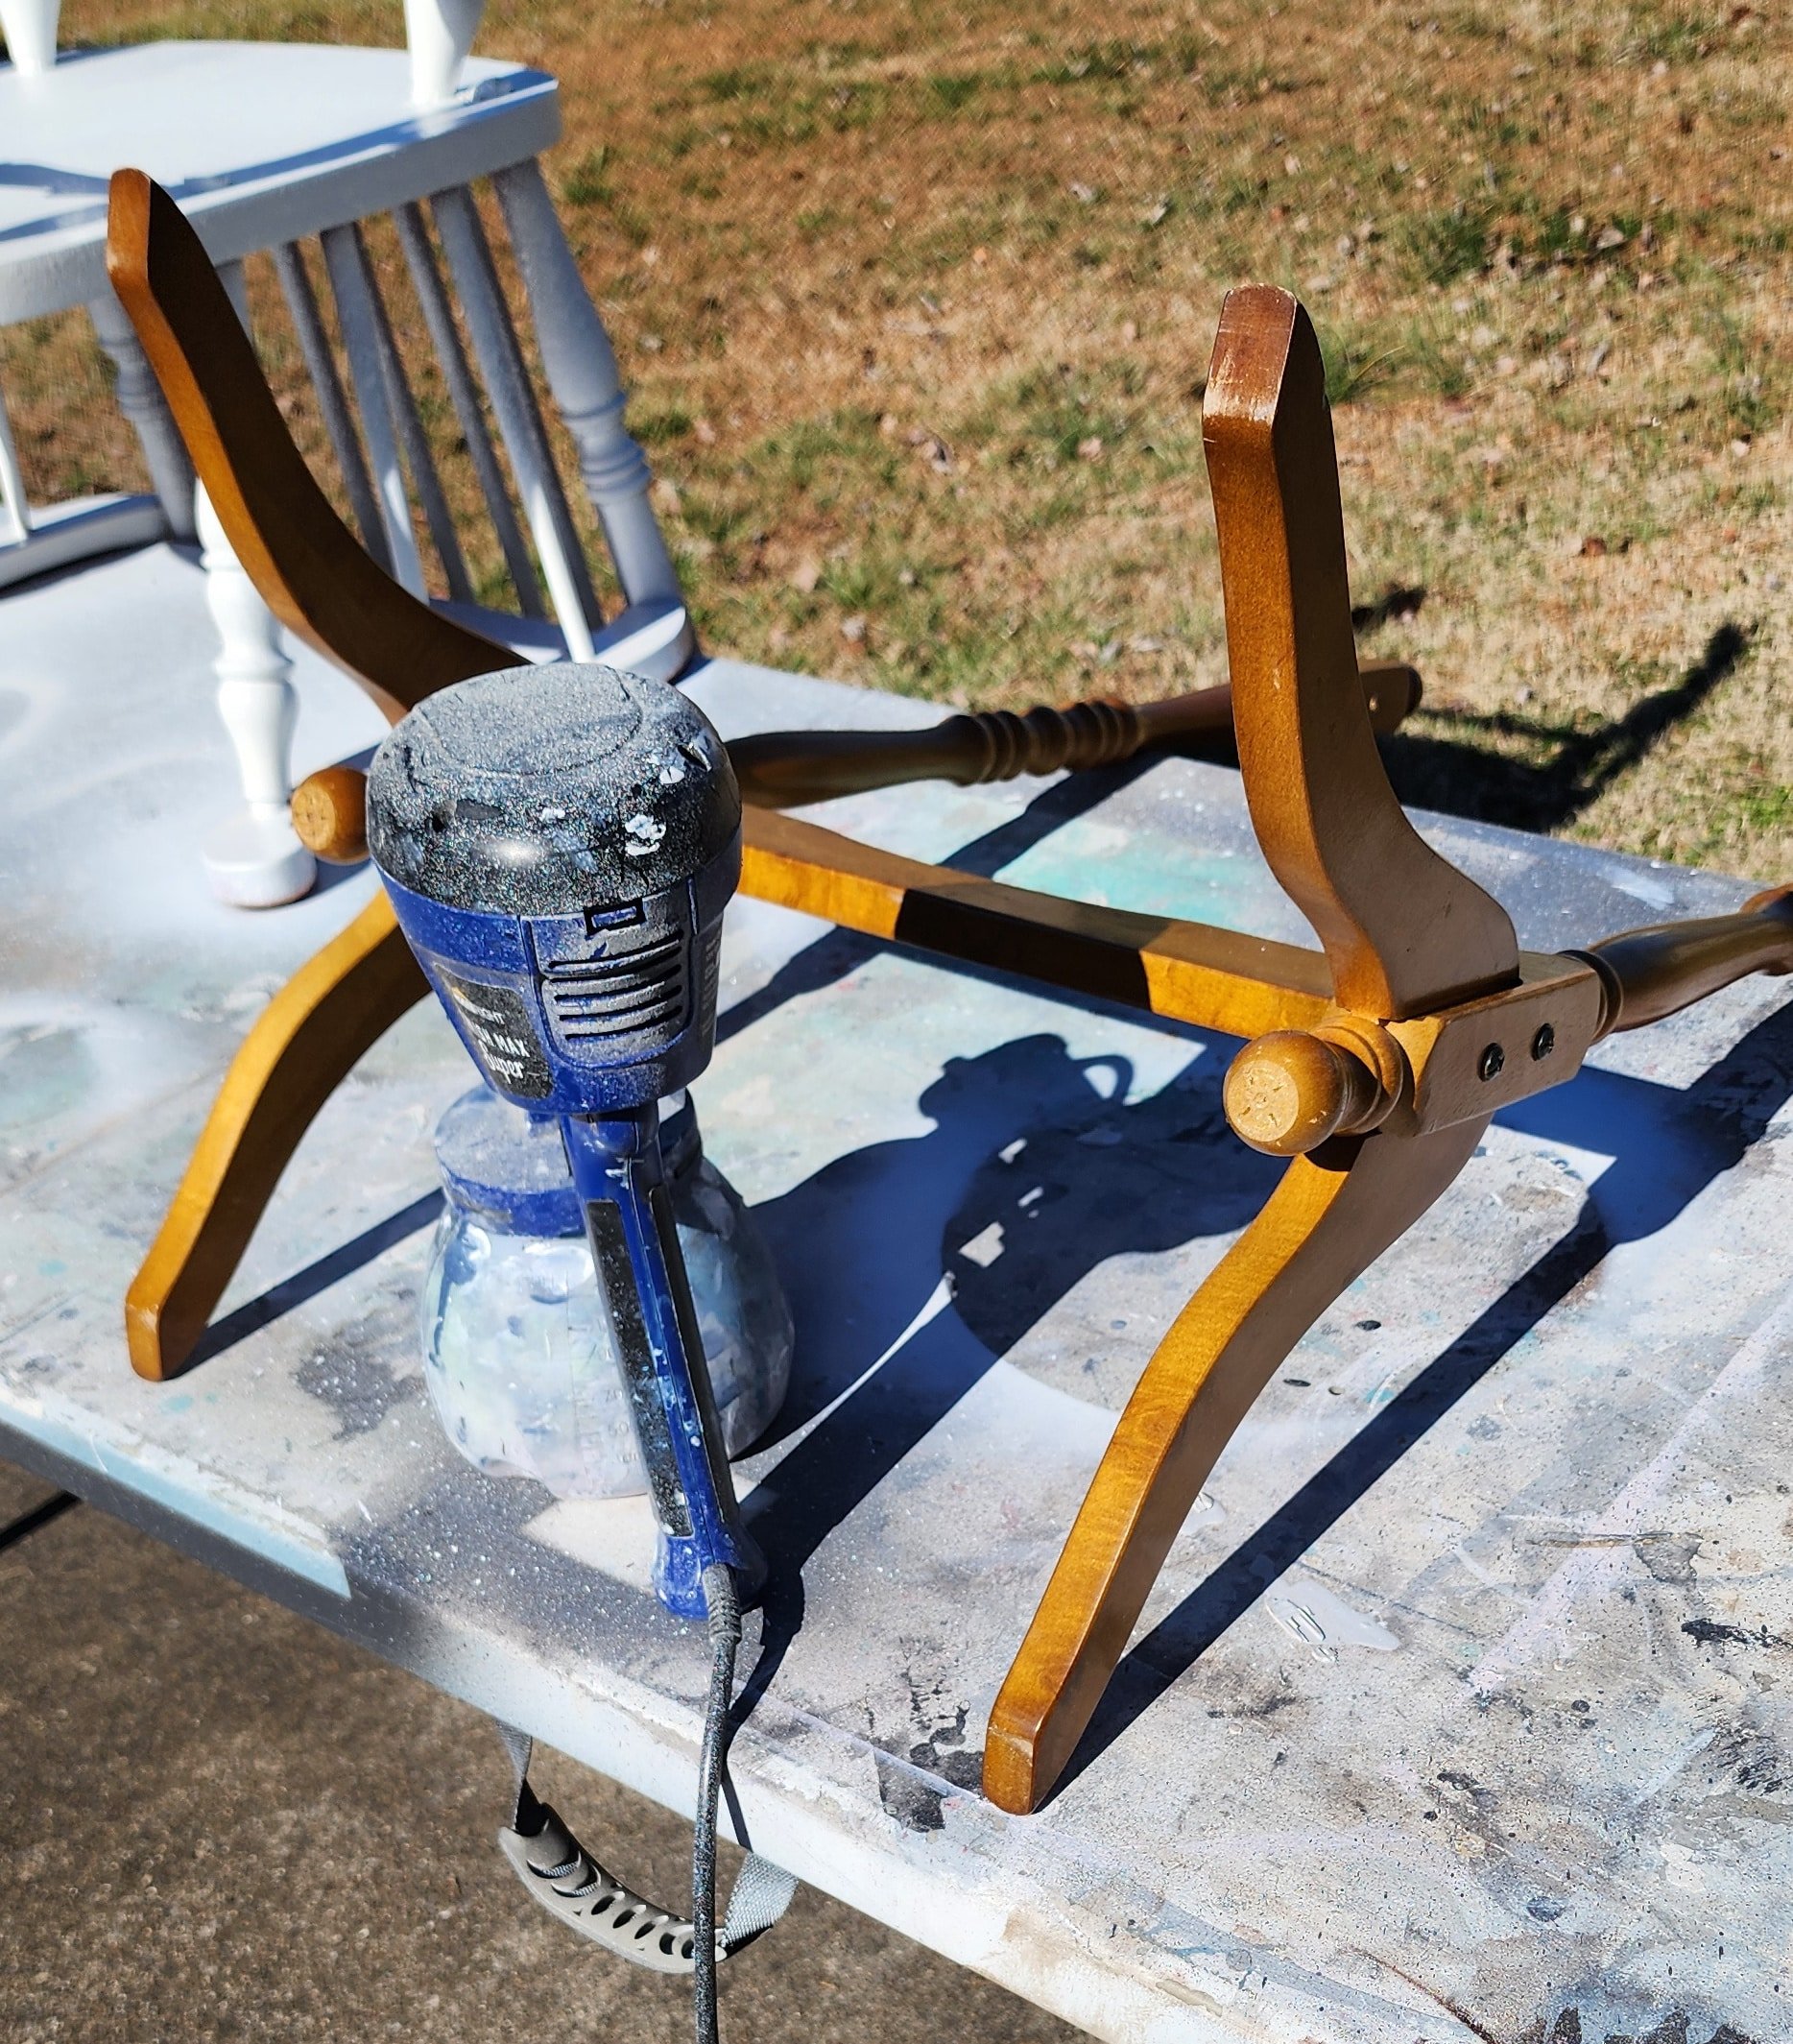
Because I had the Finish Max paint sprayer out for other projects, I also used it for the Cheval mirror frame.
The mirror frame was painted separately from the stand until it was time to do the touch-up painting.
Using Chalkboard Paint in a Paint Sprayer
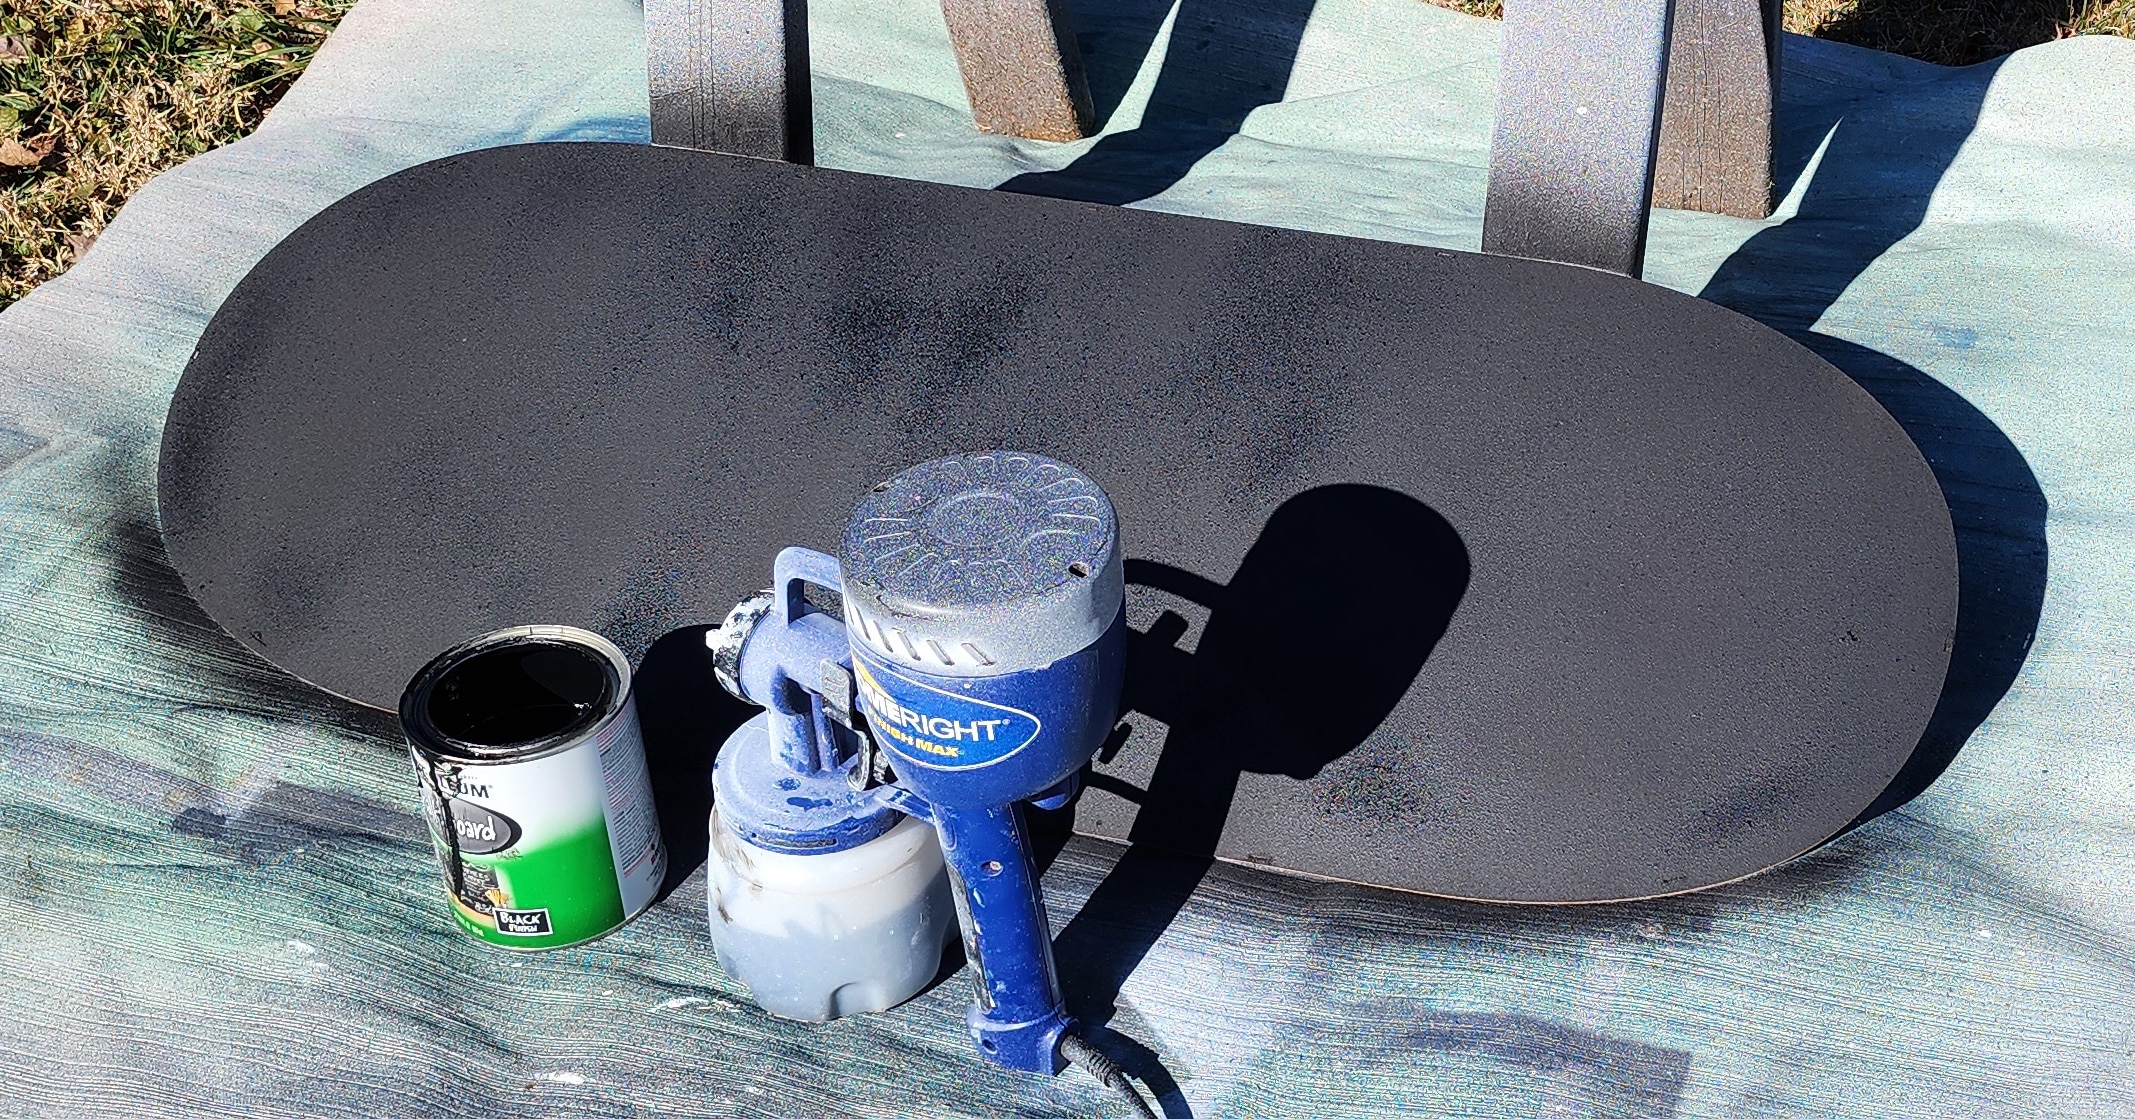
This isn’t the first time I used chalkboard paint in a paint sprayer. However, this project wasn’t as flawless as this recycled coffee table chalkboard.
Why was it less successful? Because the mirror was held in place with a handy panel–a glorified piece of cardboard. The back side was very smooth, but the side facing the mirror had a texture. But I needed to make it work if I wanted to do a double-sided chalkboard stand. Although I sanded both sides, the paint sprayer was not laying down enough paint to get a smooth chalkboard surface. I used a piece of thin plywood called underlayment for the recycled coffee table chalkboard. That wood took the paint a lot better. So, I went with plan b.
Applying Chalkboard Paint With a High-Density Foam Roller

After several light coats with the roller on either side, it looks like I may be able to use this as a double-sided chalkboard, similar to a sandwich board. Or at least that is the plan!
Touch-Up Painting on The Sign Stand
In order to finish painting the mirror stand, a dowel rod was used in place of the hardware. This method allowed for painting both sides of the mirror frame without getting paint on the hardware.
Resin Mold Embellishments
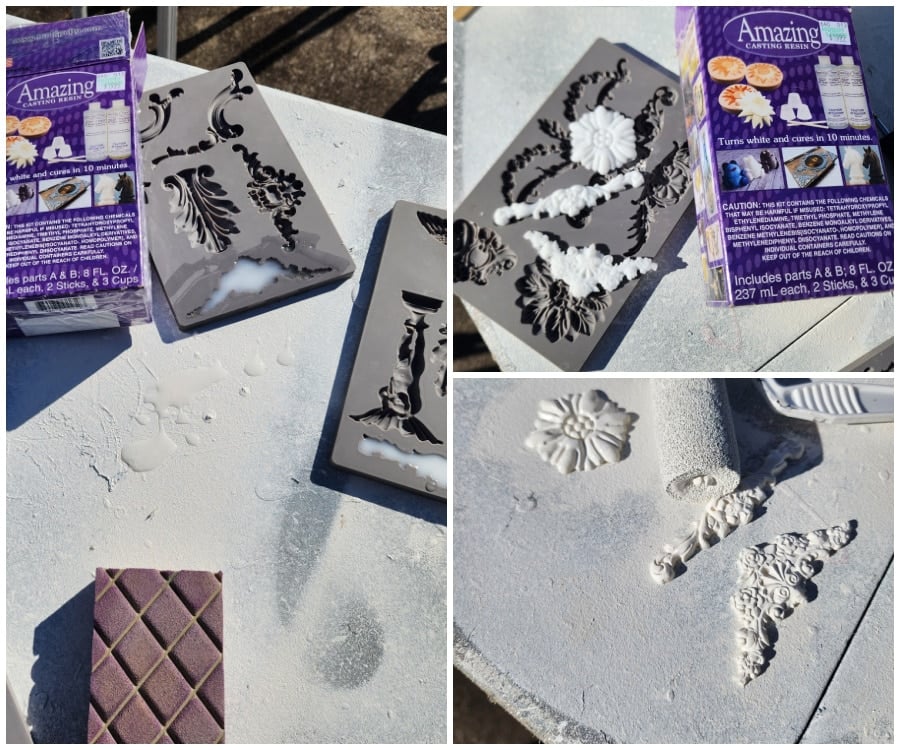
Wood appliques are expensive. Resin molds are easy to work with and can be shaped if they need a curve. Since I had never made them before, I mixed too much resin and made extra pieces so as not to waste it. The directions state that if you’re going to paint the resin, you should do a primer coat right away.
I have had the Prima Re-Design Molds for years. I originally used paper clay, but really love the Amazing Casting Resin for its workability and ease of use.
Decorative Paint Roller
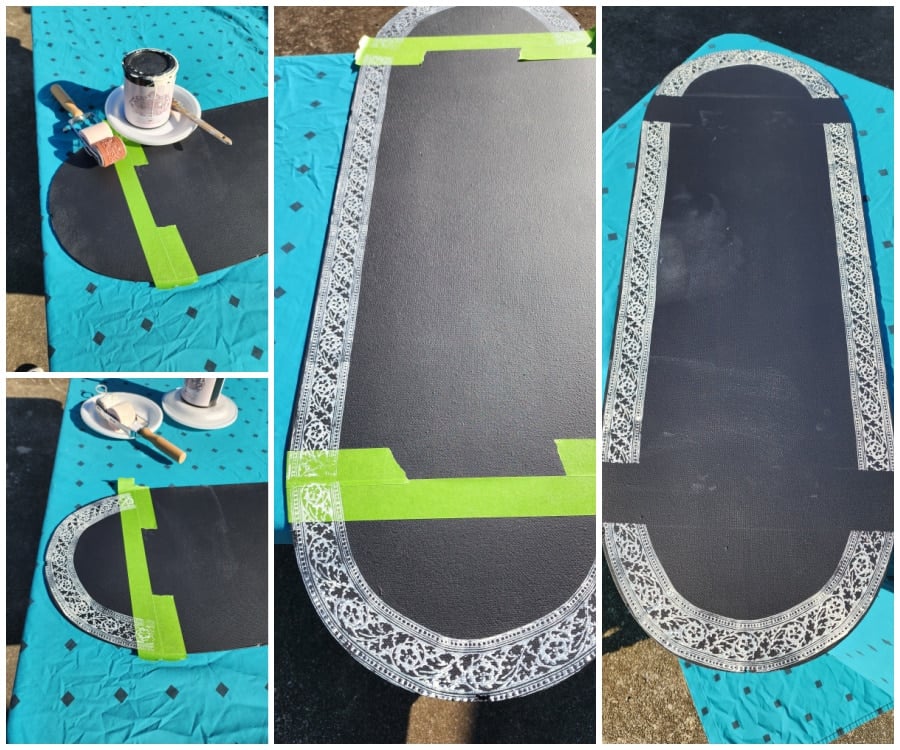
Using a decorative paint roller is a great alternative to stenciling. Do you remember the peek-a-boo drawers I did with a larger roller?
I’ve had this small roller for years and knew it would be much easier than stenciling. However, I also knew I could not keep it steady to roll around the entire edge of the chalkboard. So, I decided to split it up into sections. That would allow me to start on the painter’s tape and end on it on the other side.
That left four small voids to fill in.

I chose a small flourish stencil and used the same paint with my favorite Martha Stewart Pouncers to complete the look. Both sides of the chalkboard were seasoned. I couldn’t find the pouncers to share with you, but there are many options on Amazon.
So, the paint I used for painting the mirror stand is HTP All-in-One Paint in the color Bone. I used that paint for all of the embellishments on the back of the double-sided chalkboard.
Finishing The Details
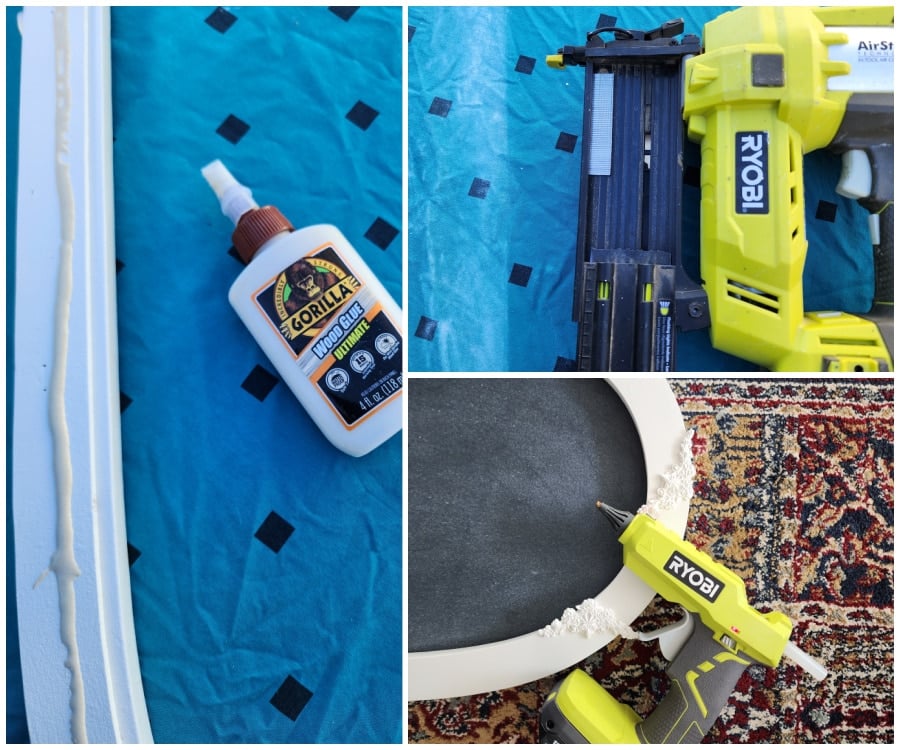
To attach the mirror back to the frame, I used Gorilla wood glue and my nail gun. Because this board isn’t real wood, I had to go a step further and use small black carpet tacks too. The resin appliques would not secure with the wood glue, so I used hot glue.
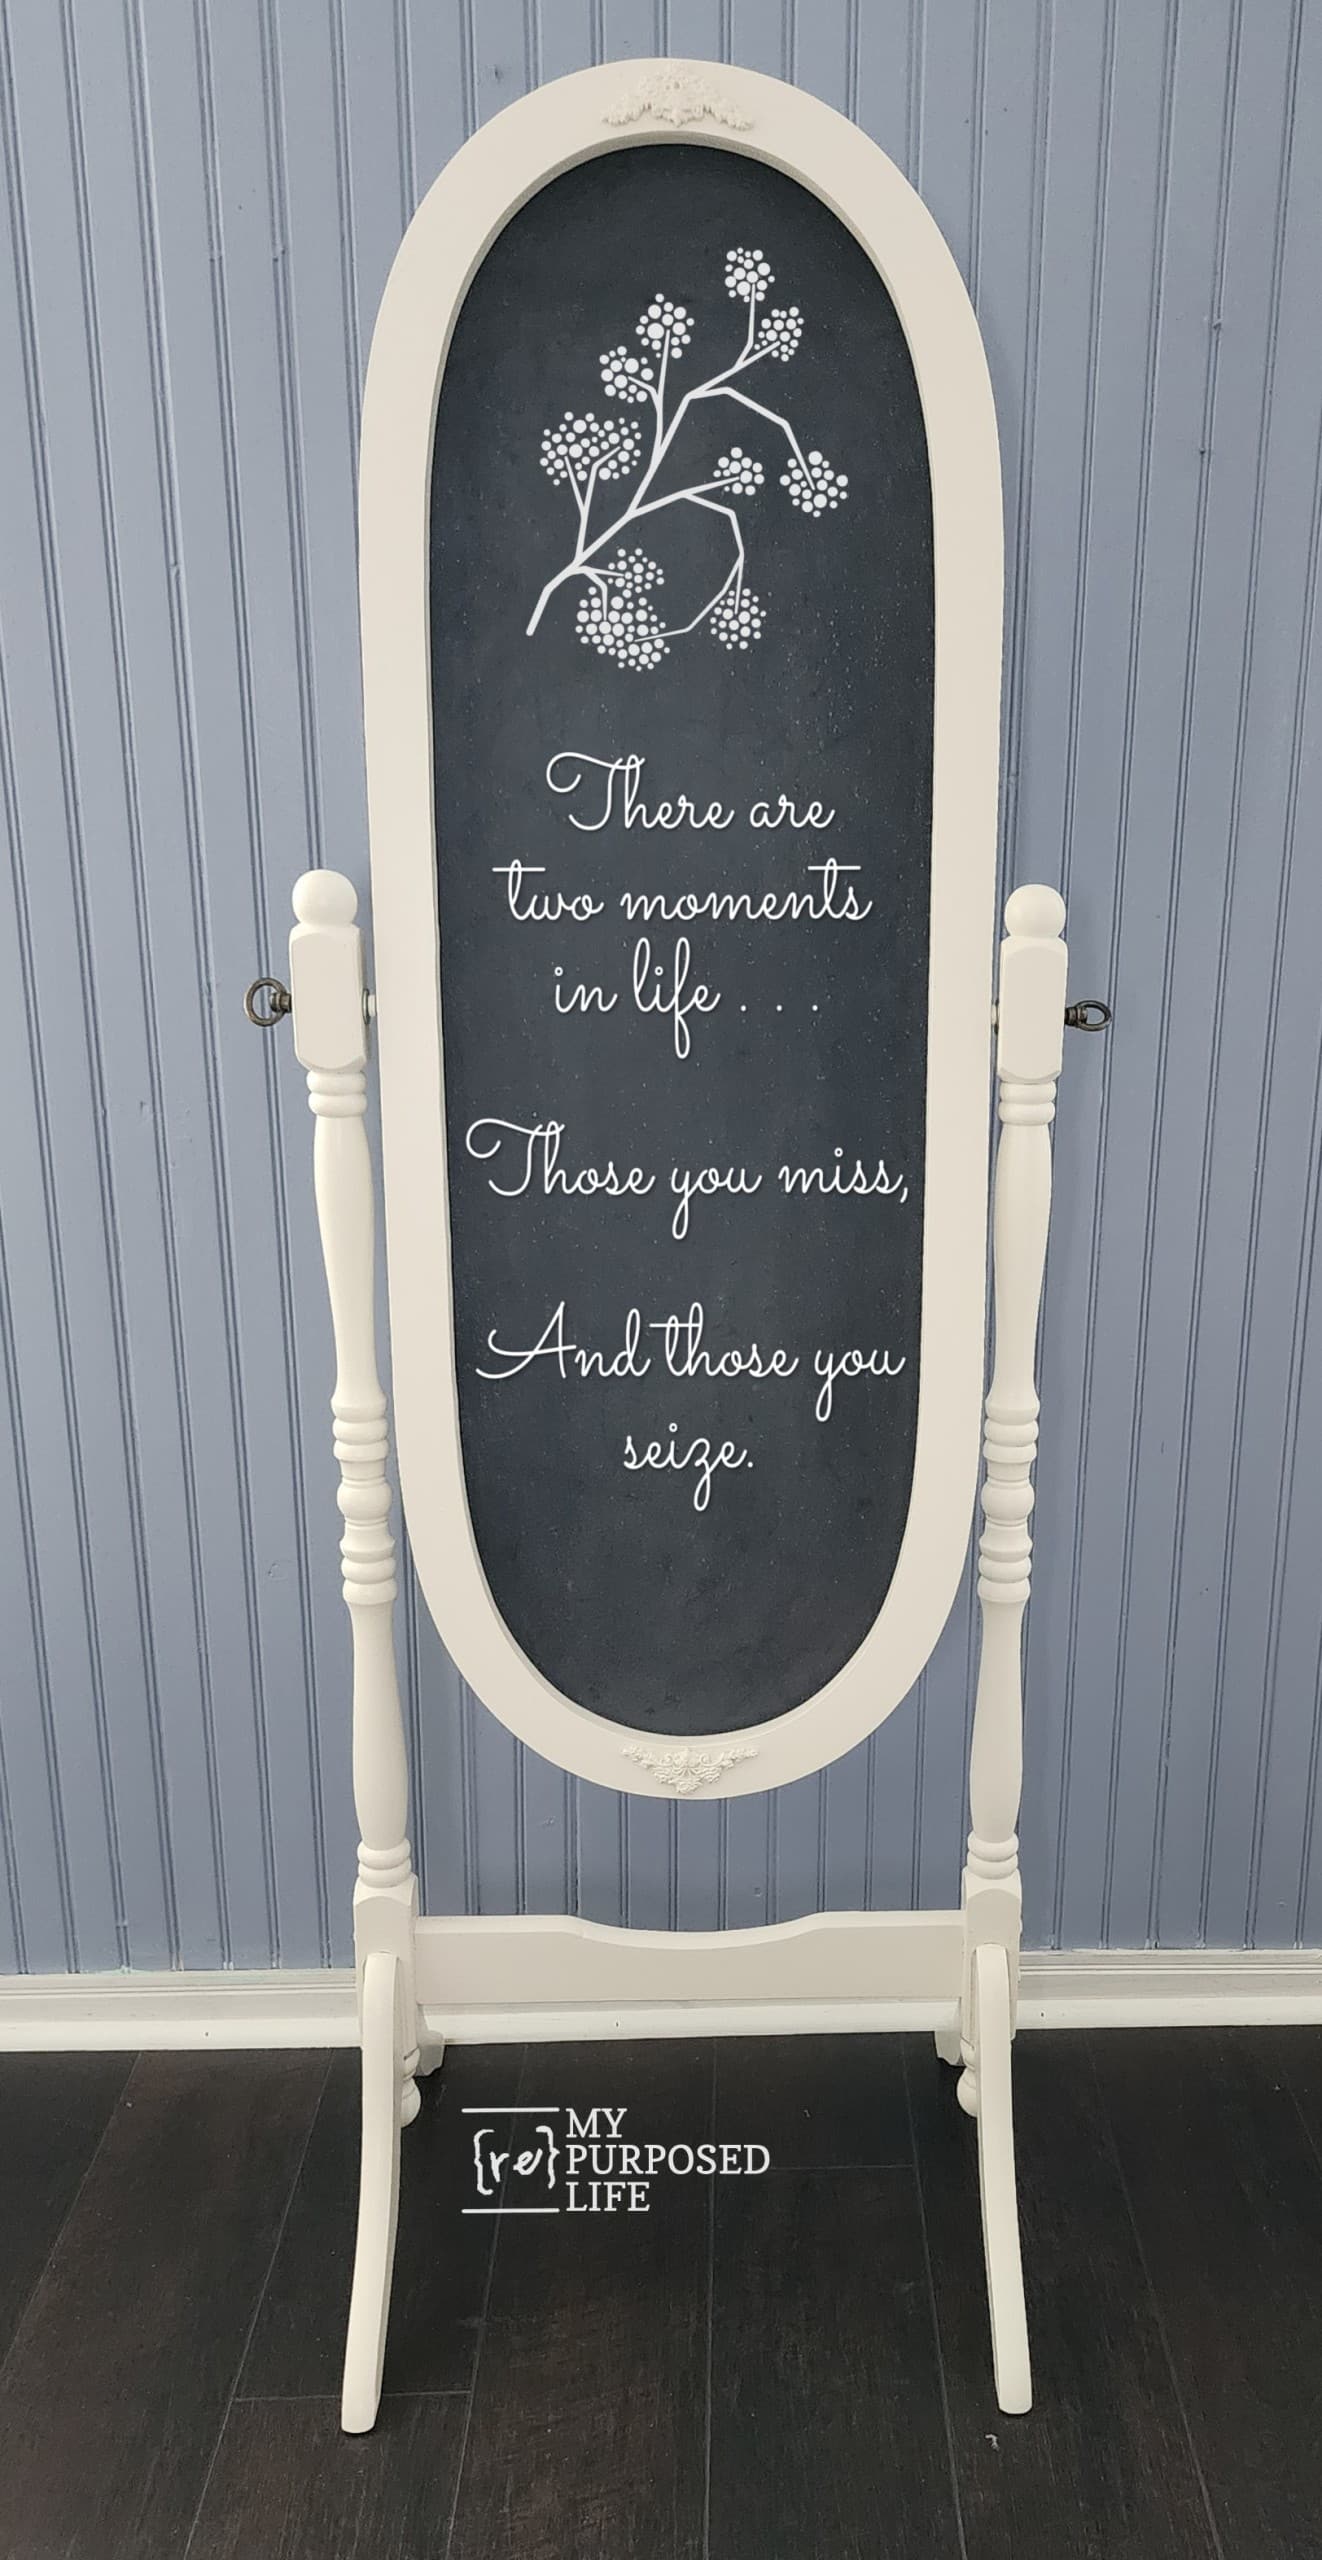
Double Sided Chalkboard Stand
I put the resin applique pieces on the top and the bottom. Why didn’t I use them on the reverse side of the double-sided chalkboard stand? I didn’t want the new owner to have to deal with chalk dust getting stuck in the applique.
I replaced the hardware as is.
This little gal could be used as a sandwich board, a portable sign, or indoor signage for a business or a wedding! Being double-sided, one could turn it around or flip the chalkboard over to reveal the other side. It worked! After all the fuss of trying to figure out what to do with this awesome roadside rescue, it’s finished.
Indoor Signage
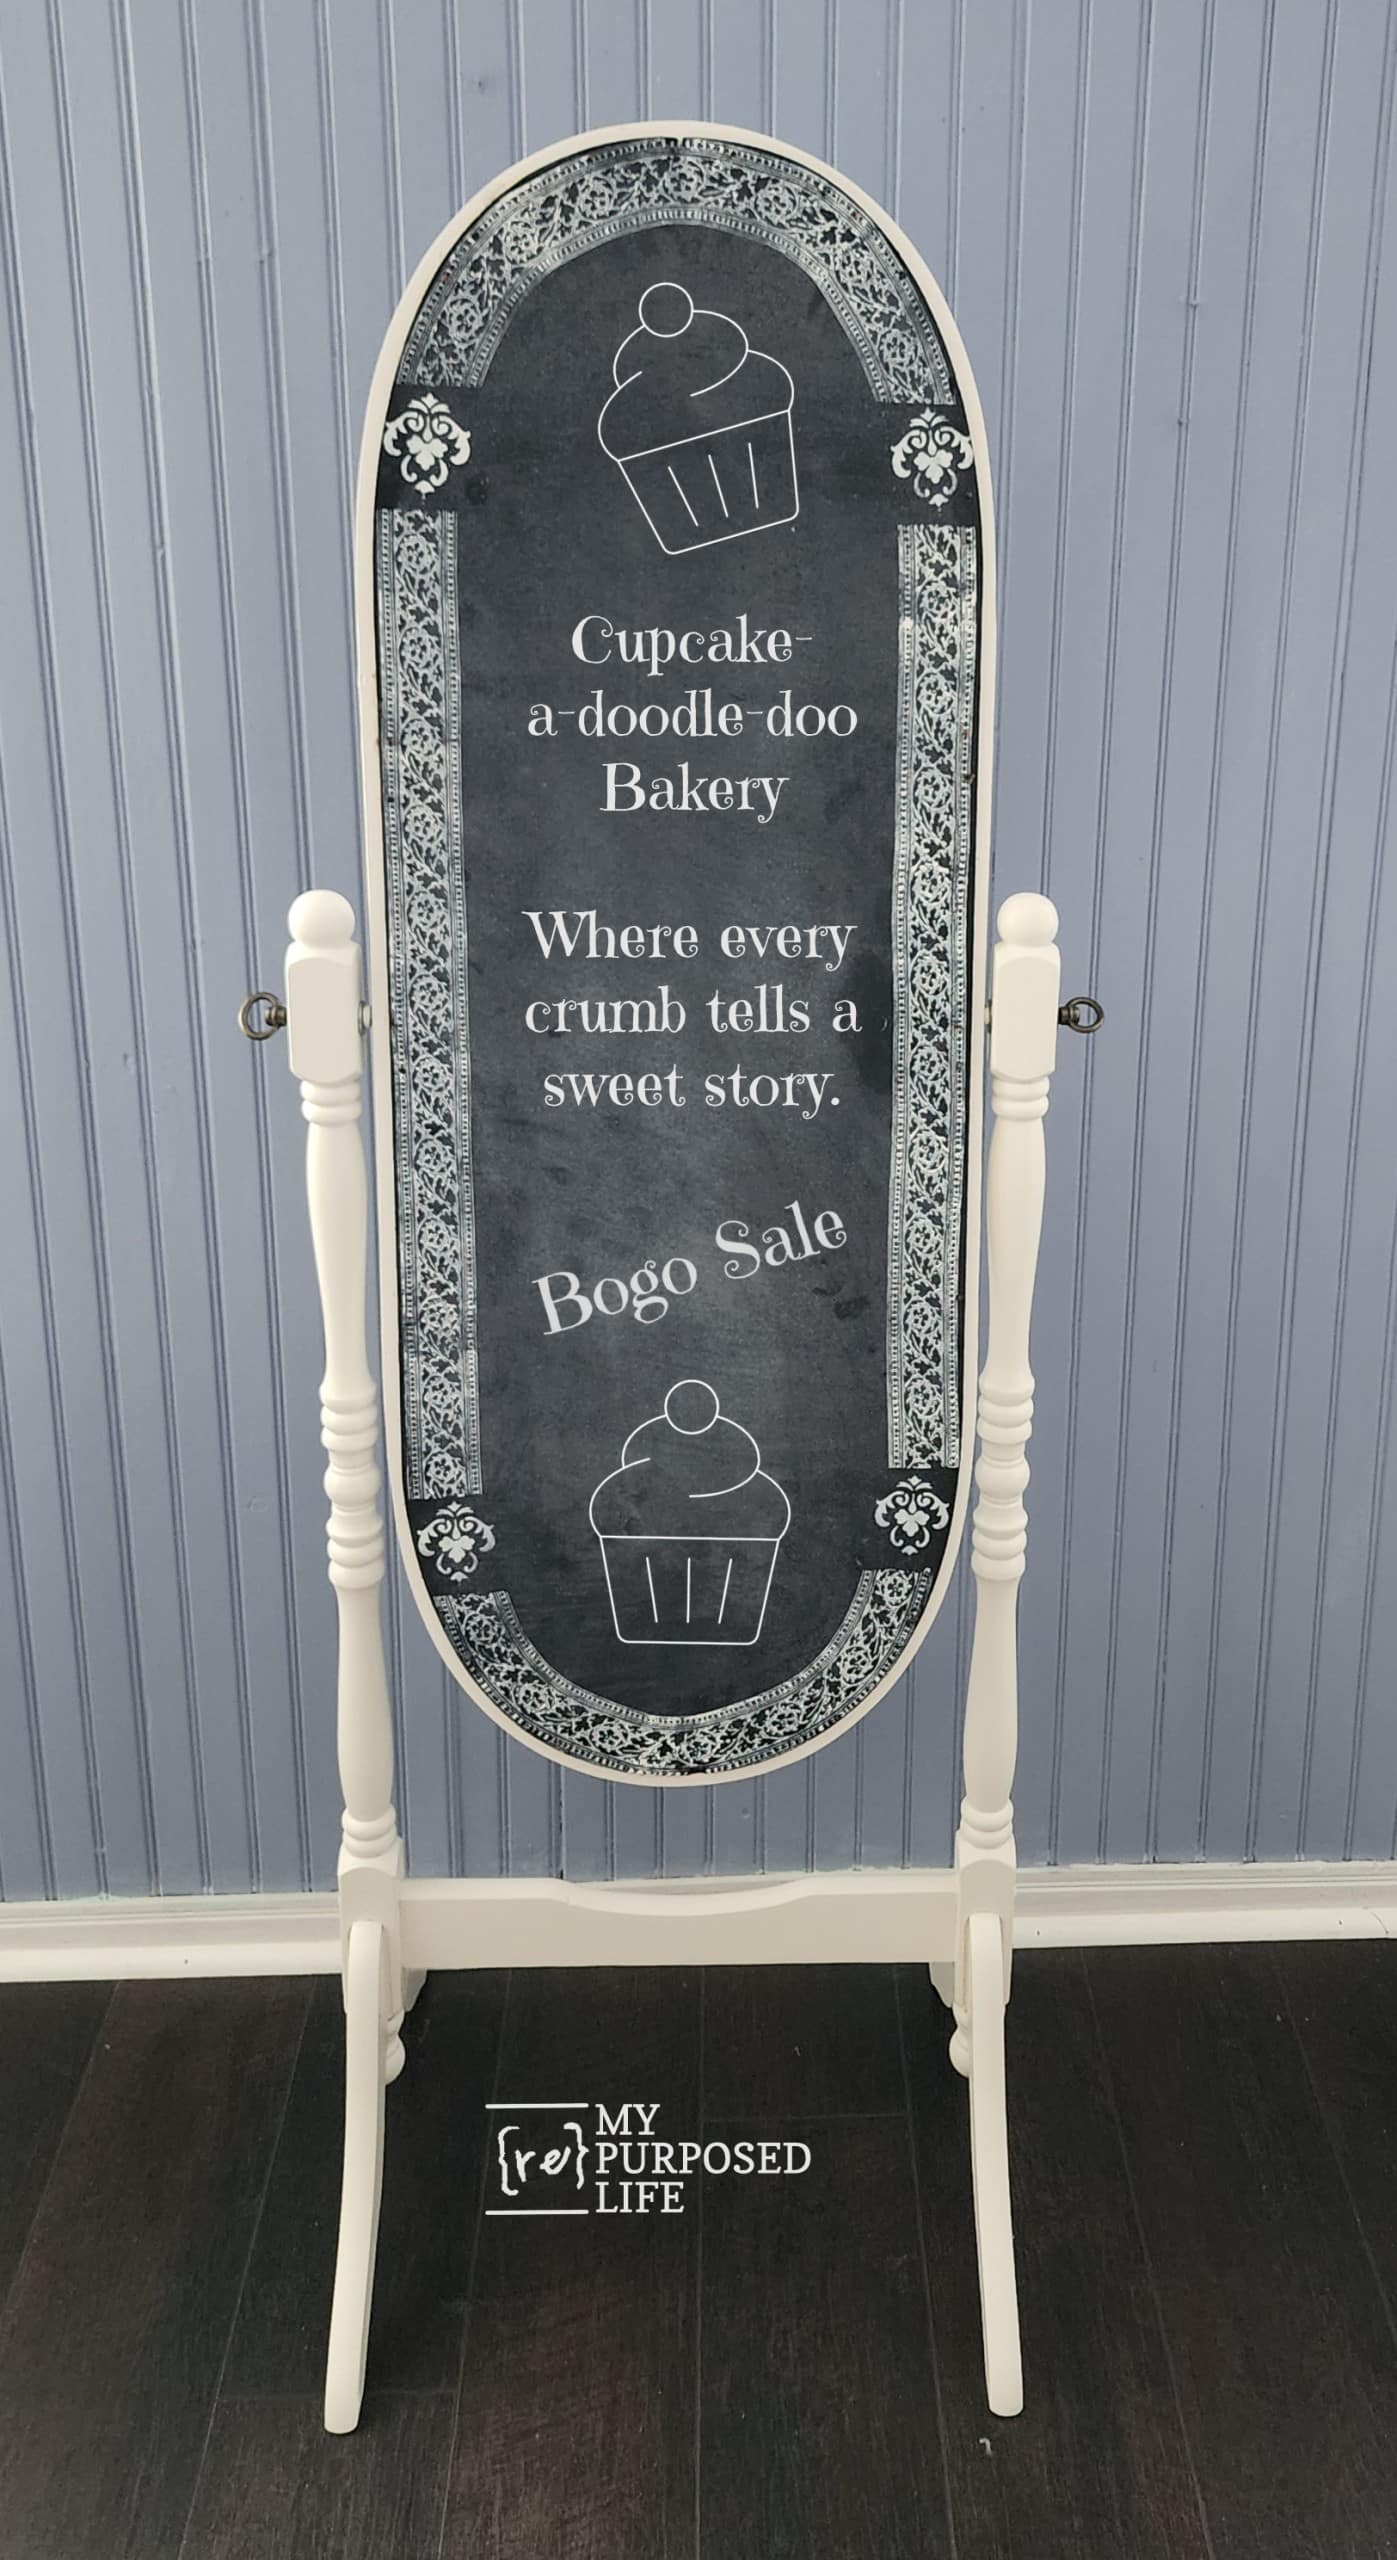
Don’t you think it’s so much cuter than a boring sandwich board?
Chalkboards For Keeping Positivity In Your Life
I think this style is much sweeter to use in your home office or craft room than one of those store-bought sign boards.
Which side is your favorite? Is it the original front or decorative reverse side of the double-sided chalkboard stand?
Now, let’s see more awesome projects from the FFU team!
Five Fabulous Furniture Makeovers
- Painted Bedside Table
- Cheval Mirror Recycle (You are here, thank you)
- Louvered Door Cabinet Makeover
- Petticoat Junktion
- Painting Cane Furniture
Furniture Fixer Upper Tour Projects
If you love seeing old furniture get a second chance, be sure to visit more Furniture Fixer Upper Tour makeovers. Each project starts with good bones and ends with a fresh new story.
See more Furniture Fixer Upper makeovers here
You will find everything from small side tables to large statement pieces, all transformed by talented DIY bloggers who believe in saving furniture rather than replacing it.
You’re so creative! What an excellent idea to change the mirror into a chalk board. Love it!
Thank you Natalie! I was worried it wasn’t going to work out. 🙂
gail
What a great idea! Love the little mould you added. It’s “just enough”. Good job.
Awwww, thanks Caye!
It makes me smile that you like how I embellished the frame.
gail
I love it! This is such a great idea! Both sides look amazing!
An excellent way to use that mirror frame! You did stunning work on both sides. Can’t wait to see much more of your work. Glad you have found purpose after a crisis in your life. Blessings and keep up the good work
Dawn,
Thank you so much for stopping by. I’m happy you like my latest project.
I do love my purpose.
gail
Thank you Pam!
I love it too, and it’s so easy to jus flip it over!
gail
What a fantastic save, Gail! I love it as a chalkboard! XOXO
Thank you Christy. I wish I could have used part of the mirror. Let’s hope someone falls in love with it at my booth. 😉
gail
I can’t decide which side is my favorite because they are both adorable Gail! Love this project and you gotta love FREE! Pinned!! XOXO
Denise,
I like the original side and one of my good friends likes the other side better. We were disagreeing when we took it to my booth to display it. I was surprised she liked the painted side better.
Thanks for pinning!
gail