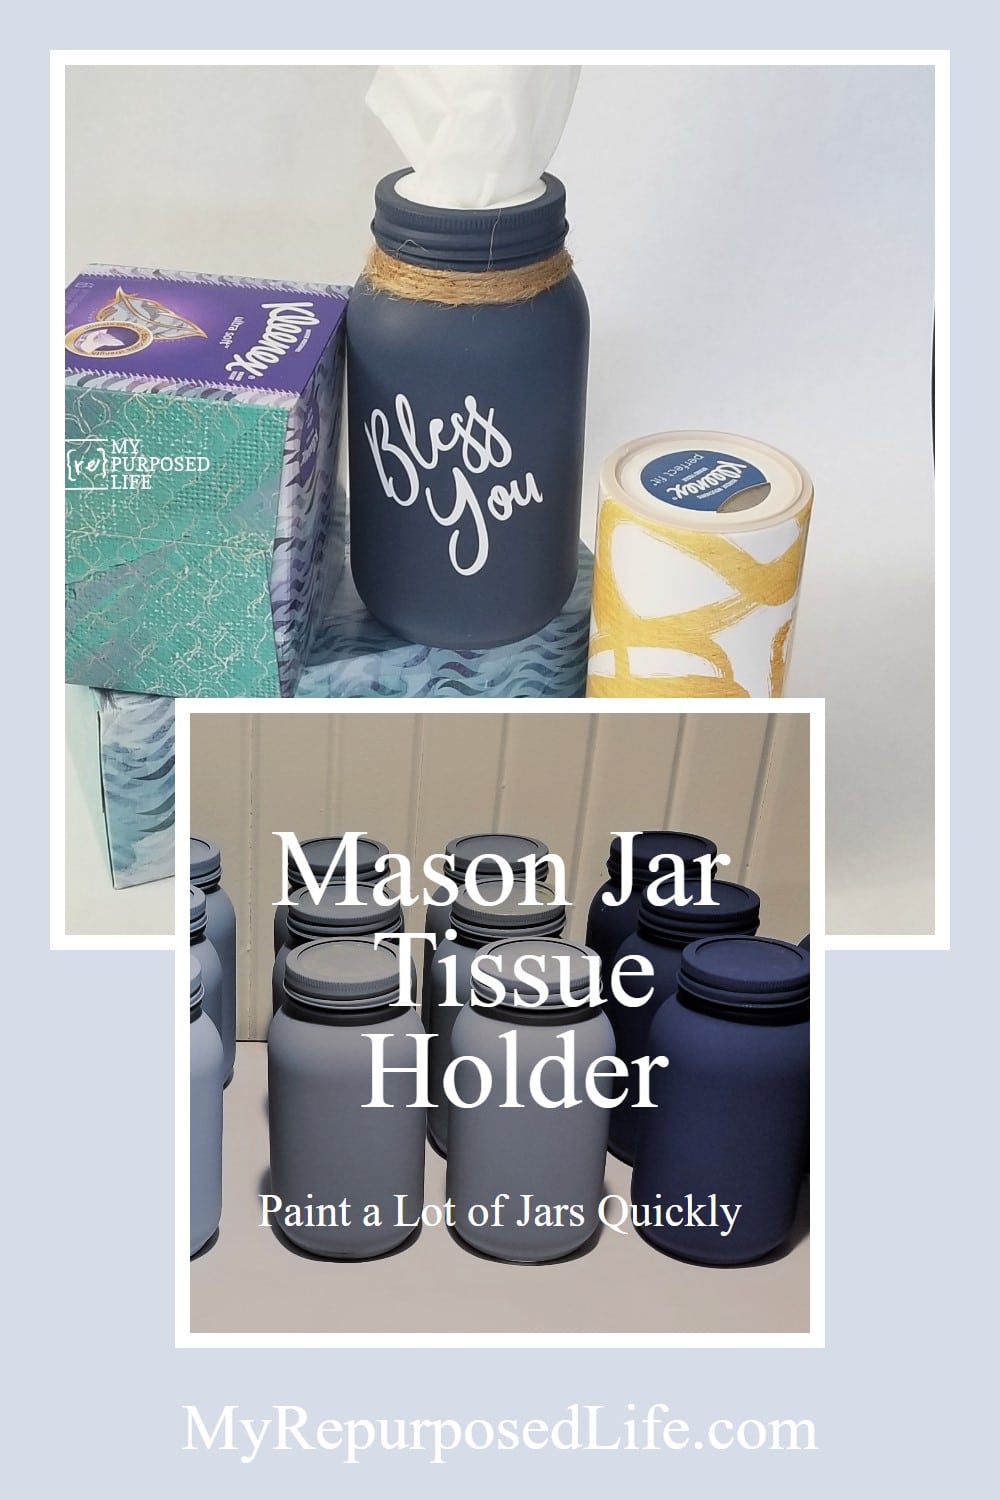
Mason Jar Tissue Holder
As an Amazon Associate, I earn from qualifying purchases.
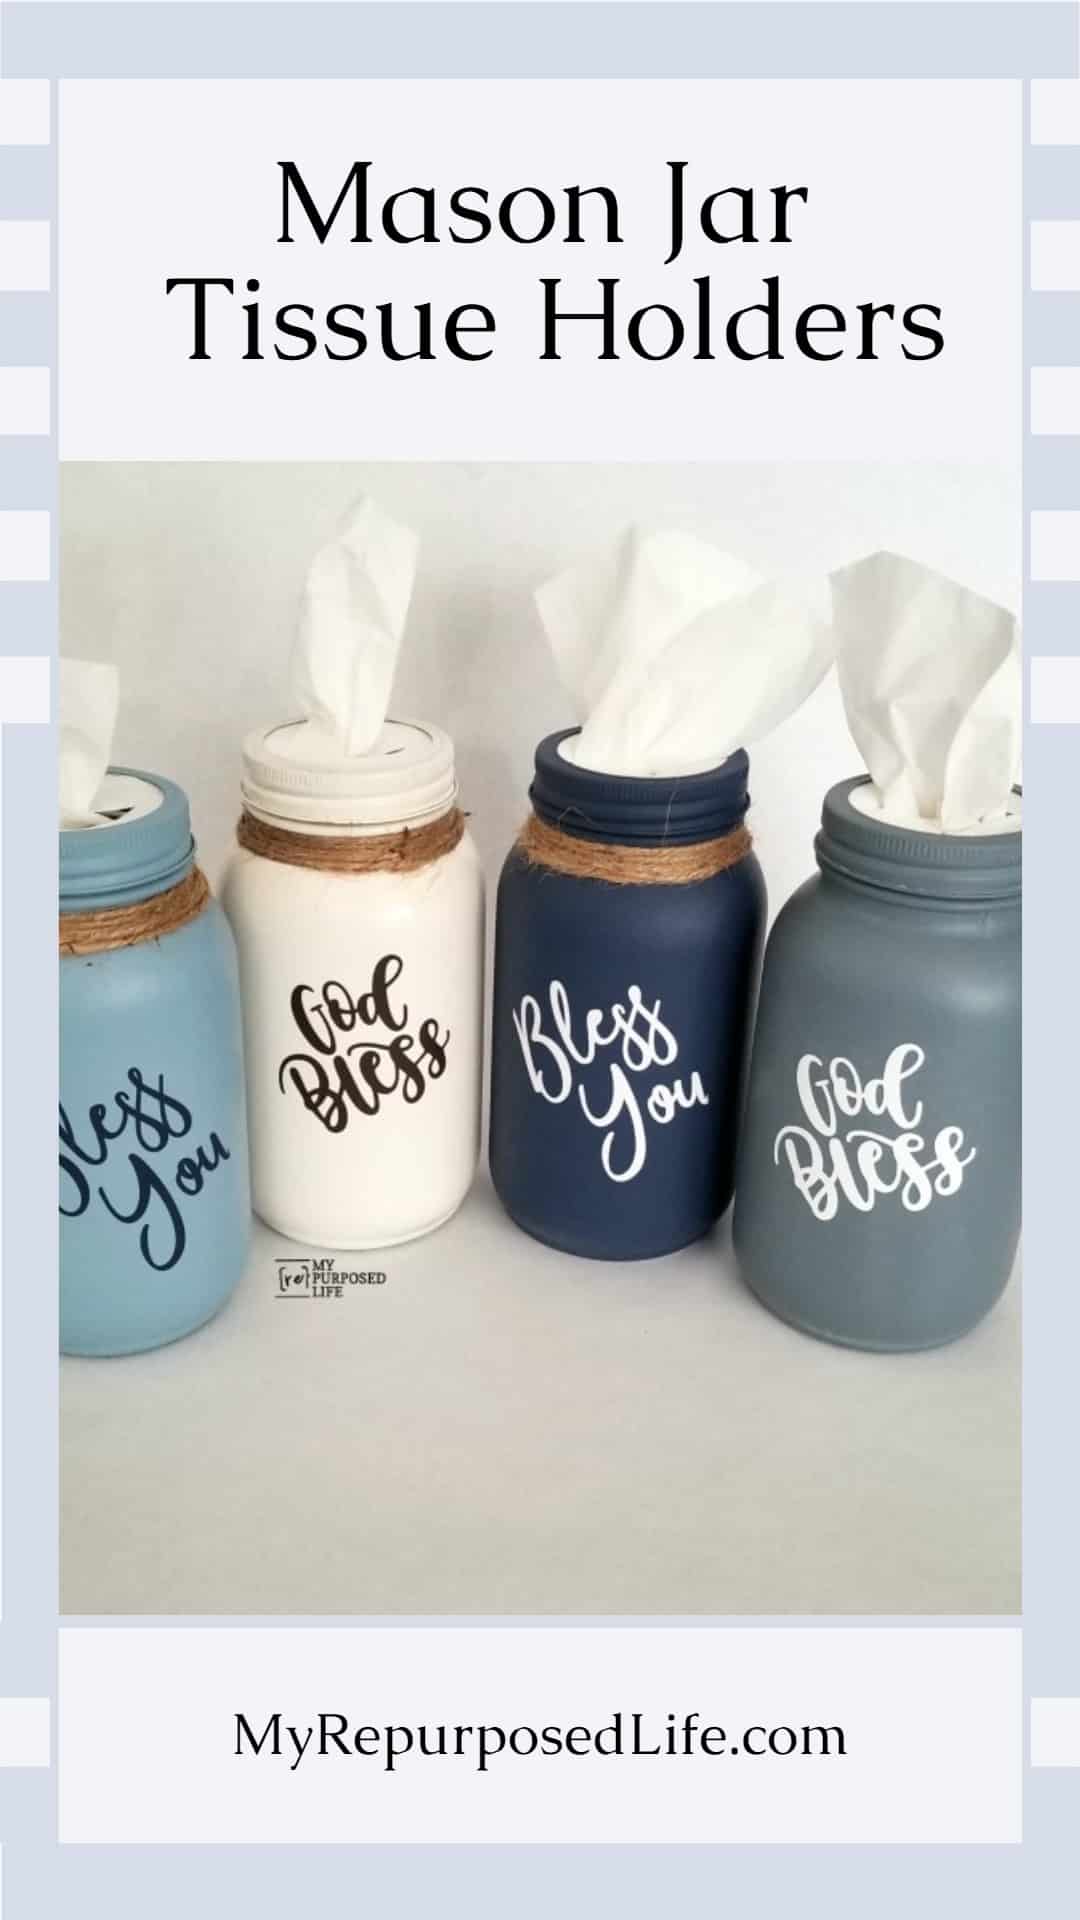

Who knew an ordinary mason jar could become such a charming and practical decor piece? With a bit of creativity, you can turn these classic glass jars into adorable tissue holders that are perfect for adding a rustic, farmhouse vibe to any room. Whether repurposing old jars or using new ones, this DIY project is simple, fun, and makes a great gift for teachers and neighbors. If you want to knock out a lot of jars, you will want to use a paint sprayer!!
A video shows all the steps at the end of this post.
Finish Max Paint Sprayer

Using the Super Finish Max for this project was the easiest way to complete it! Want to see more great finish max paint projects?
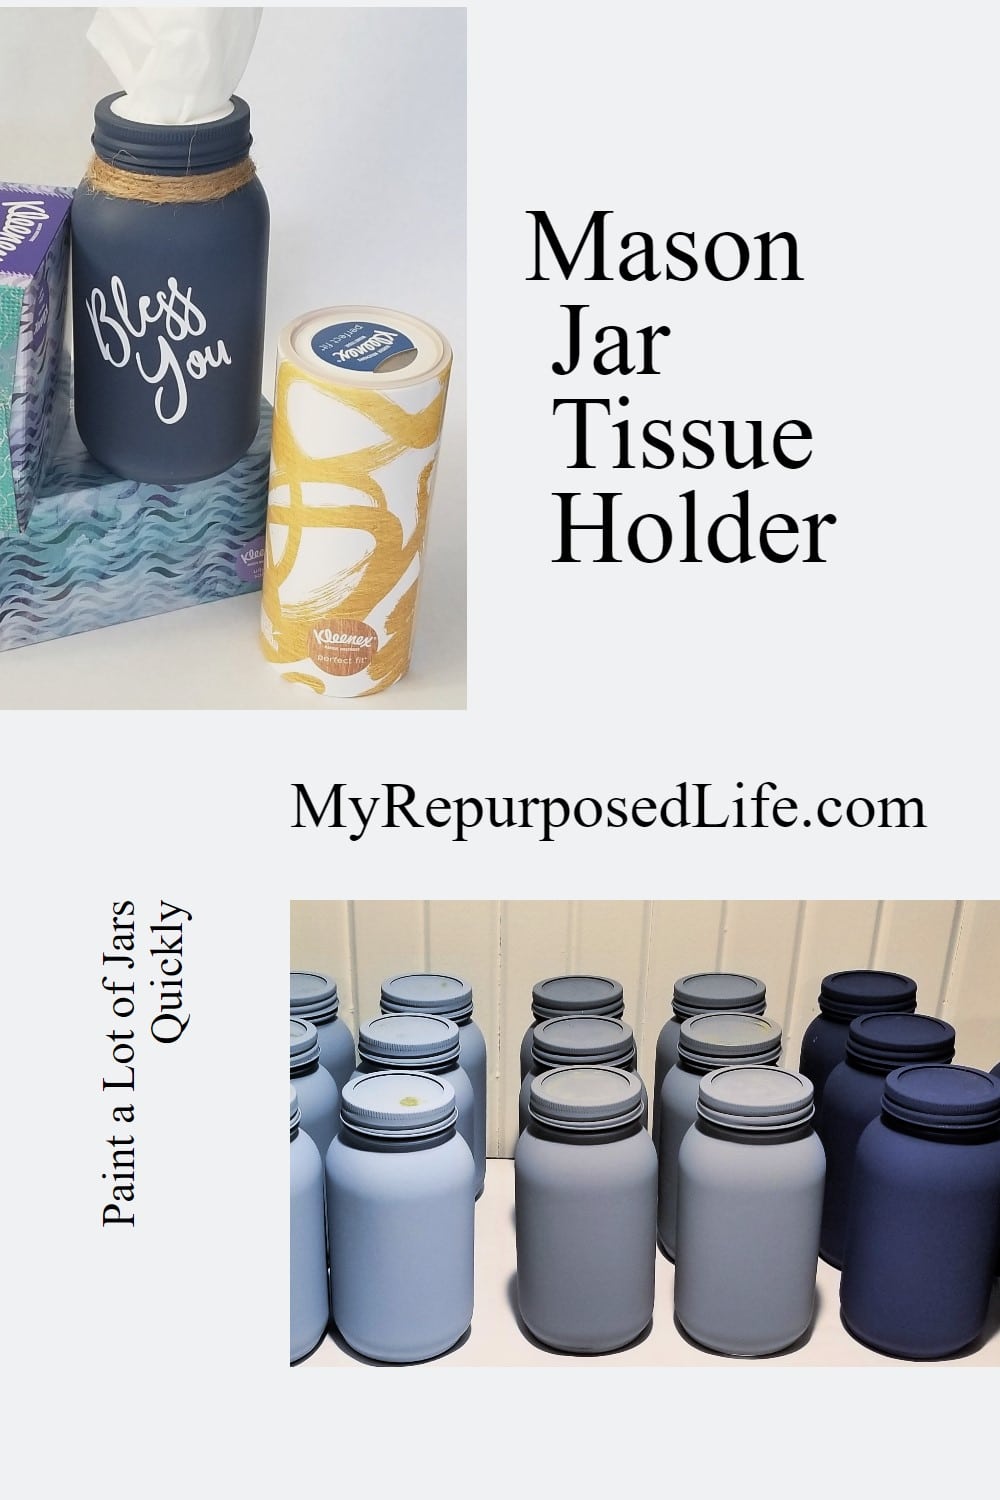
Now, I’ll share my secret for painting two dozen jars with four different colors in record time!
Visit the My Repurposed Life Amazon Store to shop my favorite items.
How to Paint Mason Jars with a Paint Sprayer

The Super Finish Max comes with three tips. This green (2.mm) tip is on the sprayer, and I chose to use it for this mason jar project.
I recommend dialing back the flow control until you see how much paint is going to flow. Every container of paint is different. As always, I used my mesh paint strainers for each paint.
Prep Mason Jars Before Painting

Please don’t skip this step. You will need to clean your mason jars before painting.
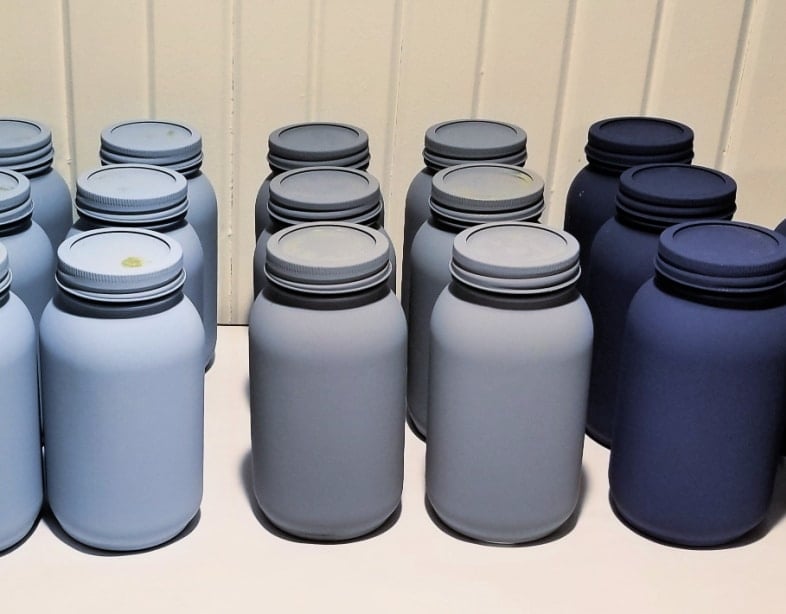
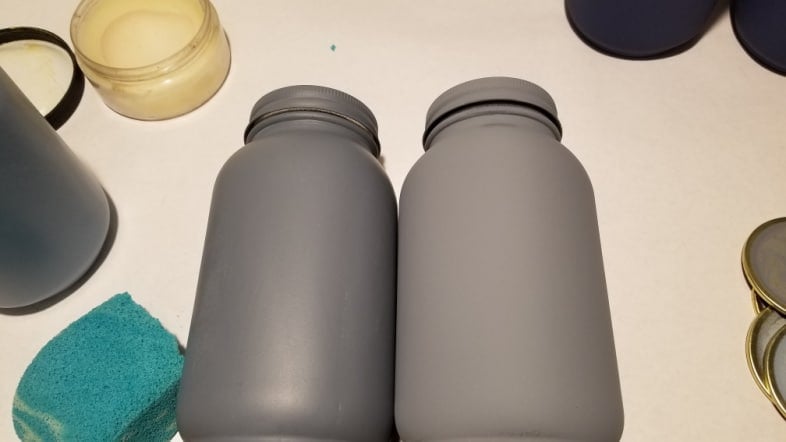
So many Mason jars in FOUR colors! I only cleaned the sprayer once, at the very end! How did I do this? I started with white paint, then moved to light blue, dark gray, and finally navy blue.
I ended up adding too much gray paint, so I removed some of it by storing it in a water bottle before pouring in the navy blue paint.

Isn’t this the best way? I didn’t have to clean the sprayer or empty the cup between colors. This was the pickup tube when I completed the entire painting process. Do you see that I had way too much gray paint?

Here’s a short video showing how I painted the jars on a cold and blustery day!
Materials for Making a Mason Jar Tissue Holder
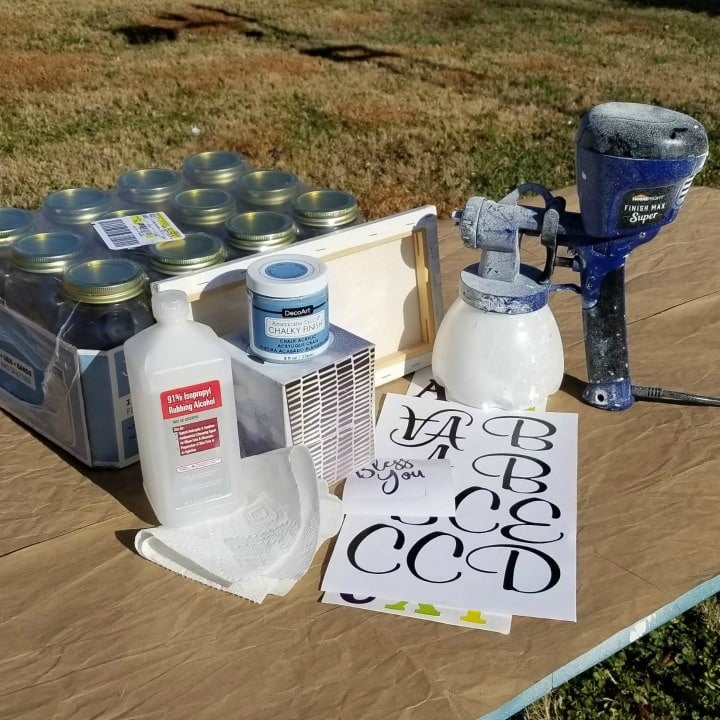
I bought Anchor Hocking Quart Mason Jars instead of ball jars. Why did I choose Anchor Hocking? Because these have no impressions or writing on them. In addition to the jars, you’ll need alcohol, paint, Super Finish Max, tissues, and vinyl stickers of some sort. I used canvas to replace the lids for easy dispensing. You could use cardstock, fabric, and more.
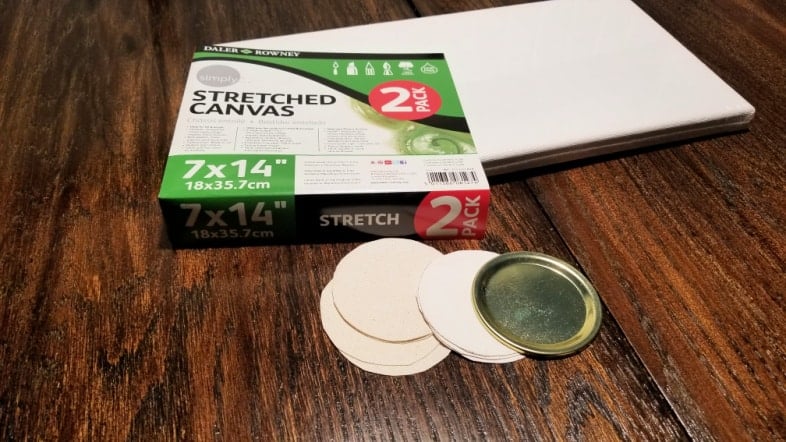
I began by tracing and cutting circles out of canvas material. Initially, I used the lid to trace the circle. However, after assembling some of the mason jar tissue holders, I realized that tracing the outer ring worked better.
How to Wax Painted Mason Jars
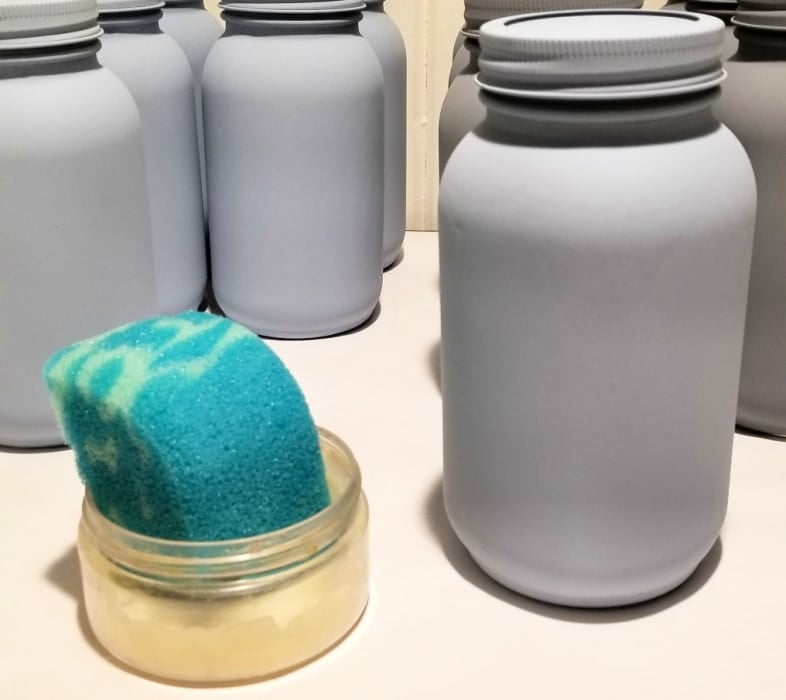
Over the years, I’ve learned that dampening a sponge makes applying wax a little easier.
Does Wax Change The Color of Chalk Paint?
Yes, the wax darkens the color and gives the paint a slight sheen. The very flat paint would easily chip off the glass without a sealant. I buffed each painted/waxed jar with a soft cloth.
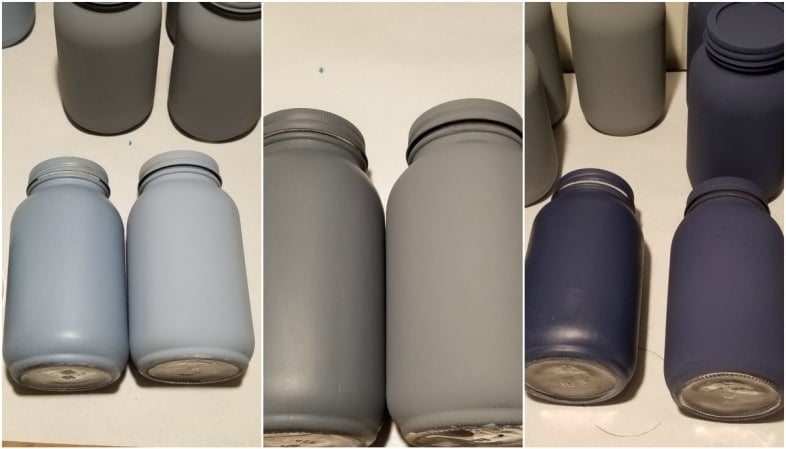
Here are the blue, gray, and navy jars with and without wax. I had a little issue with the white jars. The paint didn’t want to adhere very well, so I only had a few.
Can I use Mod Podge over Chalk Paint?
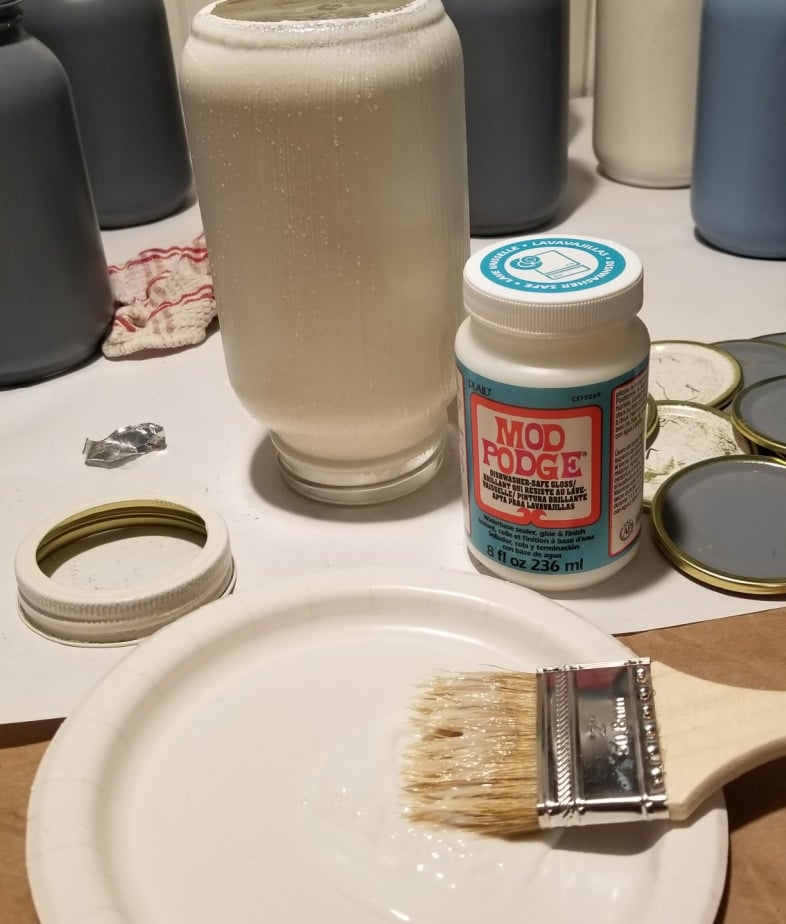
Yes, you can use Mod Podge over Chalk Paint! I applied Mod Podge to a few of the jars using a cheap chip brush. Overall, I prefer the waxed jars for the tissue holders.
Applying Vinyl to a Mason Jar Tissue Holder
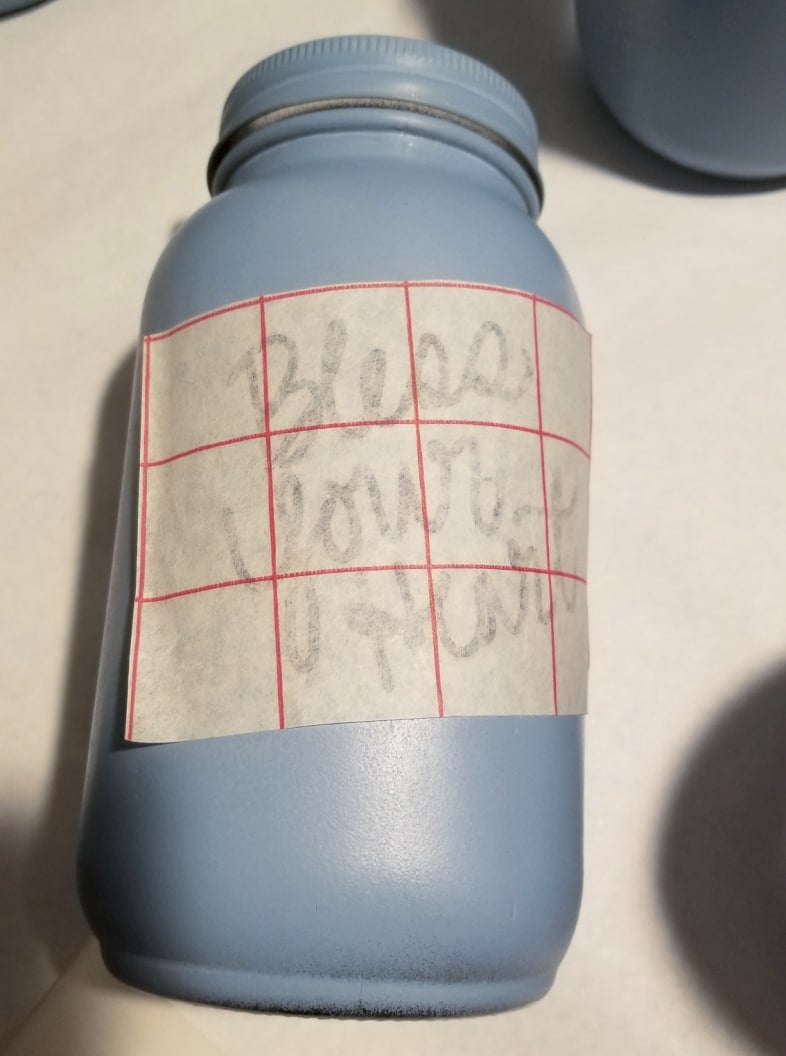
I made some vinyl wording with my Silhouette Portrait.
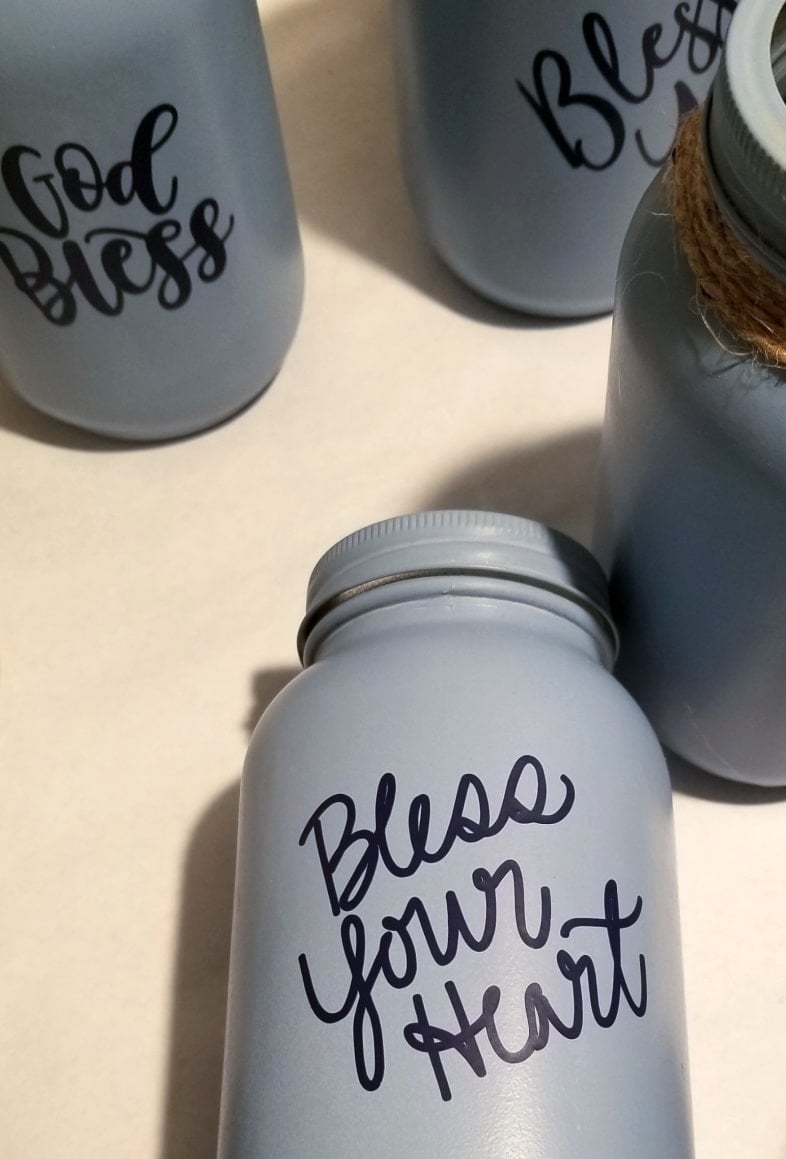
The vinyl adheres well even on the waxed mason jar tissue holders!
Mason Jar Tissue Holder Tops
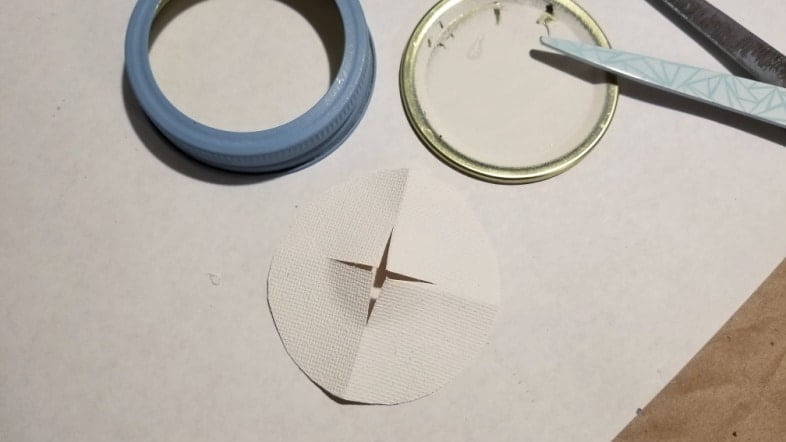
After folding the circle in fourths, I cut it in two directions to ensure the tissues “pop out” easily. Not shown, I added hot glue around the edge of the canvas, placed it on the lid, and set it into the ring. Using the lid to press it into the ring helped save my fingers.
Which Tissues Should I Use for Mason Jars?
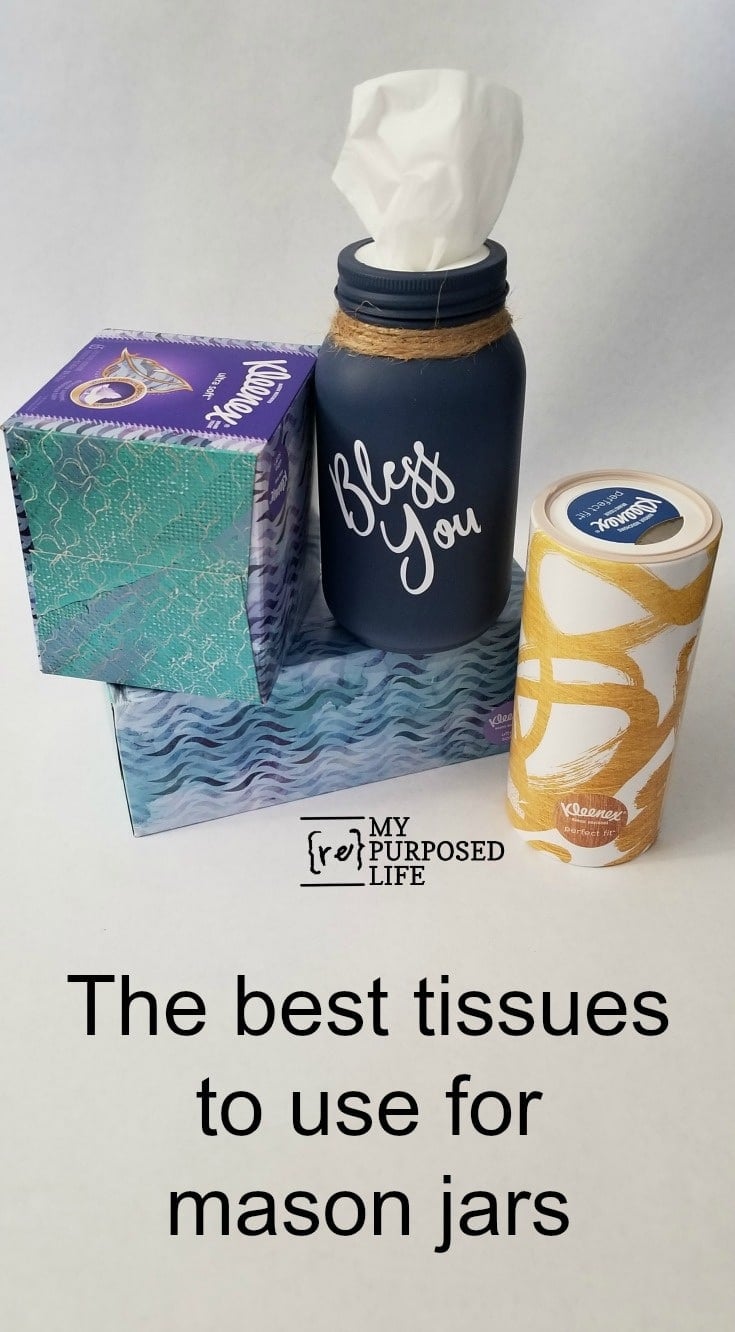
That’s a great question! I ended up trying FOUR different kinds of tissues for the mason jars. Not shown is an off-brand that I could NOT get to dispense at all. Ultimately, the Perfect Fit Kleenex is the easiest type of tissue to use. You probably know I’m pretty frugal, and those are the most expensive options, so I found a workaround. Some people use the square box tissues and fold them. Others use the regular rectangular box of tissues and fold them as well.
After using the Perfect Fit Kleenex, I figured out a way to use part of a rectangular box of tissues to mimic the way the tall container of tissues works. I removed about an inch of tissues and folded them lengthwise with the “pop-up” tissue on the inner part of the fold. Sliding the tissues into the quart mason jar is easy. They are a little tall, so I had to stuff them down slightly. In my opinion, this is by far the best option when making these mason jar tissue holders.
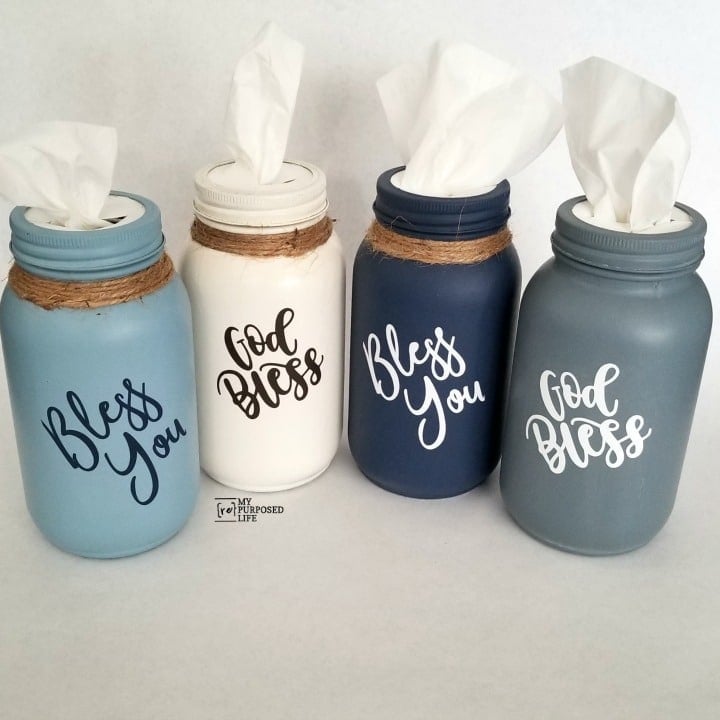
Which color is your favorite?

You can embellish the mason jar tissue holders with charms, twine, and more.

gail
related content:
Thats a very clever and creative idea. Thanks for sharing.
Lynn,
Thank you for stopping by and taking the time to leave a comment.
Happy Crafting!
gail
Gail,
My favorite color is the light blue but the navy would work well in my living room. I have ;made these tissue holders before – gave one to my d-i-l one yr for Christmas. You did a wonderful job!
What kind of wax did you use?
I just used some old stuff I had on hand…. I don’t think it’s even available anymore. I never throw anything out, even when I should.
If I were going to buy some today, I would probably use Ms Mustard Seed’s wax. It’s always been the easiest for me to use. I have used a LOT.
gail
I used the Kleenex Perfect Fit.
These are so cute. I wish I could think of a way to do this with Clorox wipes. But they need a snap on lid to keep them wet
Yes that’s what I’m trying to do too
I’ve made these and I love them! They are just so darned cute. I used the modpodge sealing method over chalk paint and vinyl.
Robyn,
Which tissues did you use? How did you insert them? folded?
gail