Milk Bottle Caps Art
As an Amazon Associate, I earn from qualifying purchases.
Happy Friday, everyone! It’s Angie, from Knick of Time, with a new project for you. I have an ever growing collection of old milk bottle caps that I love, but had never done anything with. I turned them into kitchen wall art that serves a extra purpose, which you’ll see as well! It’s a quick and easy project, which is an added bonus!
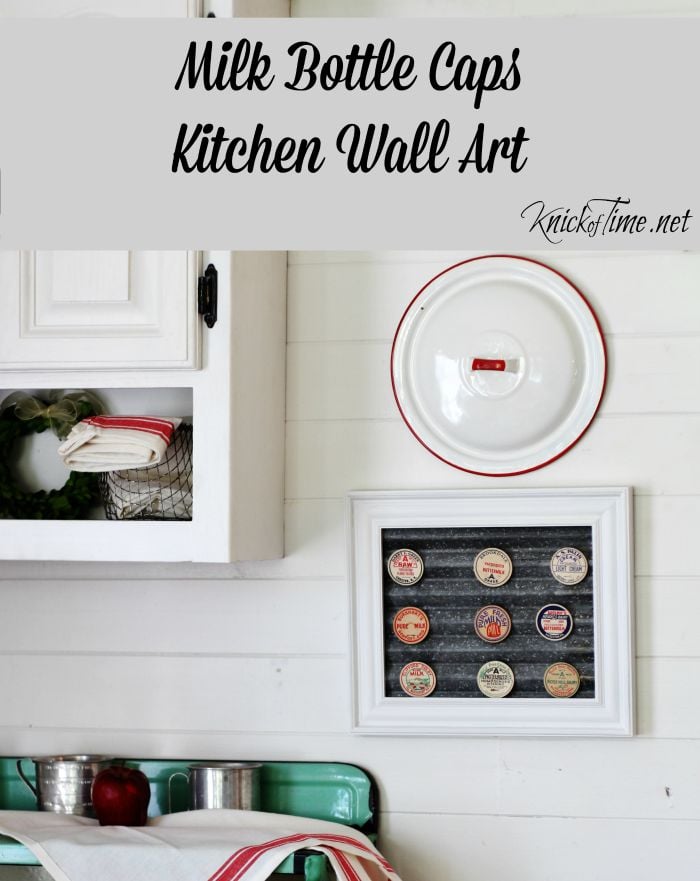

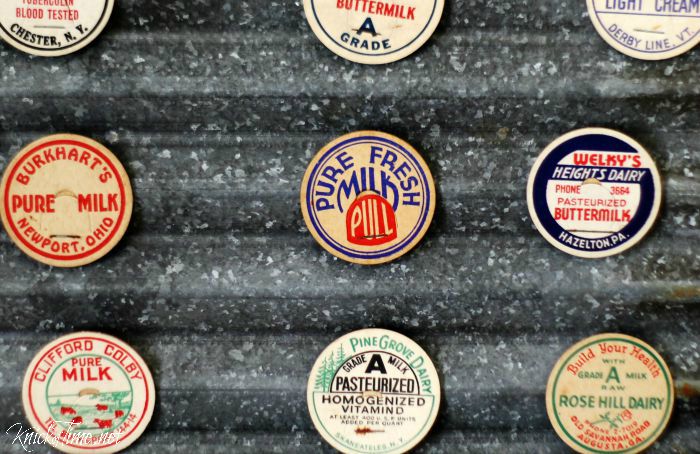
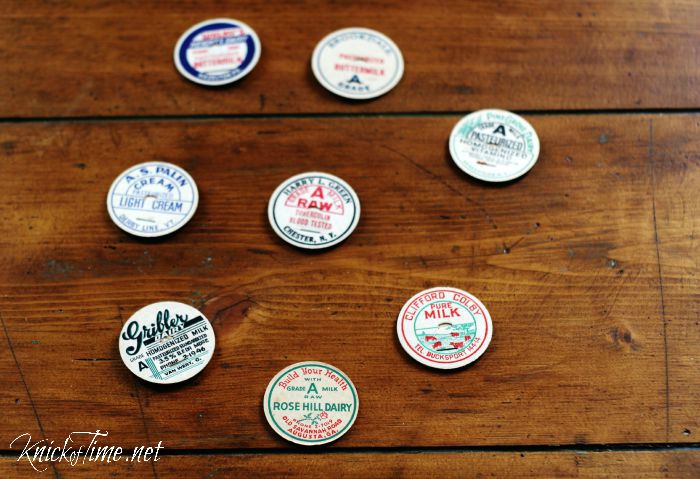
Each cap is like a colorful little work of art, but they are small, so it’s hard to really show them off, but this project does that.
Supplies Needed:
9 milk caps
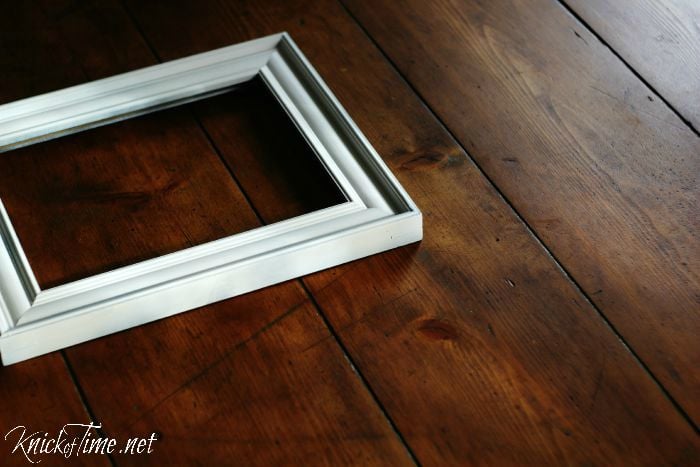
8×10 photo frame
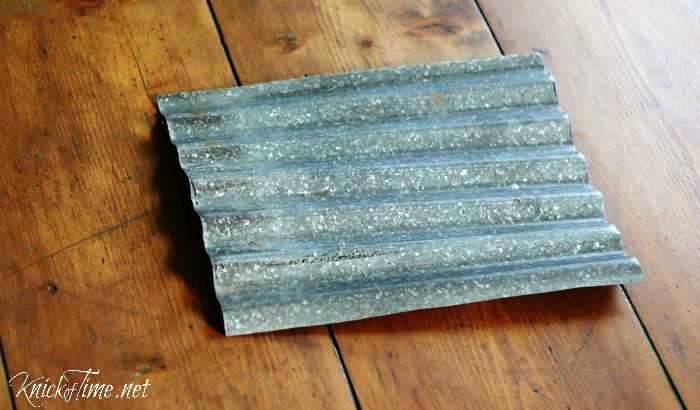
scrap corrugated metal
.25in. diameter neodymium magnets (also called rare earth magnets)
E6000 glue
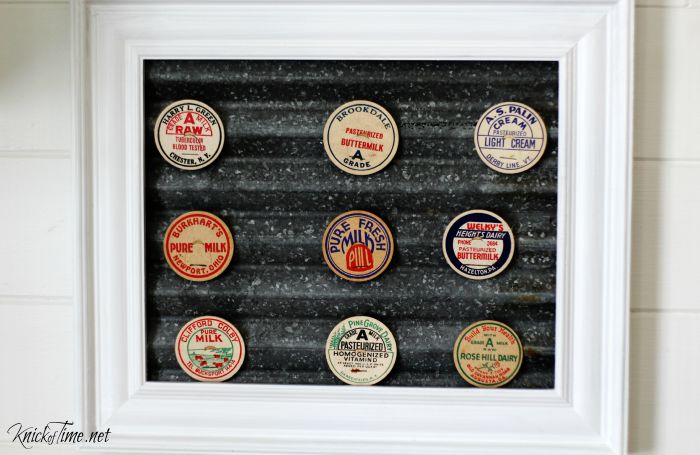
Paint an 8×10 photo frame to match your kitchen decor. Mine was a cheap thrift store frame that I painted white.
Cut a piece of scrap corrugated metal to fit inside the frame with tin snips. It’s easiest to use the mat or glass that came in the frame to trace the cut line on the metal. The edges will be sharp, so wear gloves and be careful when handling it. You can also use flat metal, if you don’t like the waviness of the corrugated metal.
Insert the metal into the frame, then screw washers on the back side, around the frame opening to keep the metal in place.
Round up your favorite milk caps, and if you don’t have any, they can easily be found in most antique stores. I’ve never paid more than 50 cents for them.
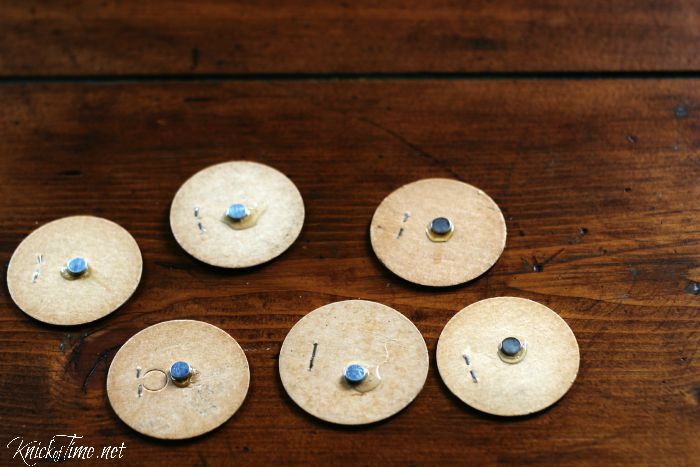
Flip the caps over and put a small dab of glue in the center, then position a magnet on the glue and allow them to dry for several hours. Neodymium magnets are really strong magnets, so use strong glue, like E600, rather than hot glue, which may come off the milk cap because of the pull of the magnet.
Now, just position the milk cap magnets onto the corrugated metal in a way that looks pleasing to you.
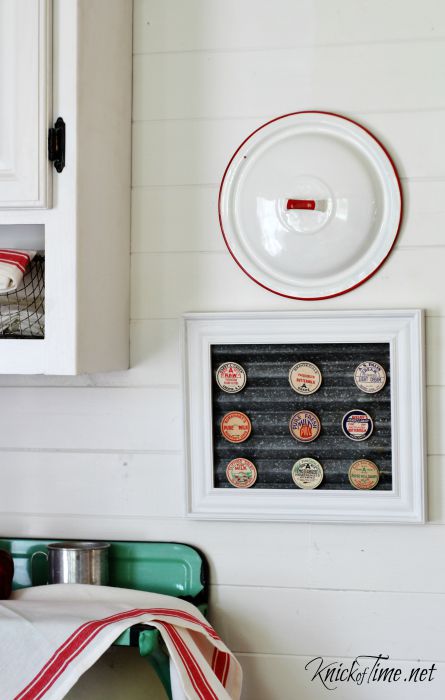
Whenever you need a magnet for your fridge, grab one off your wall art 🙂
Now, just hang it up and enjoy these little cuties all grouped together!
I hope you’ll pop over to Knick of Time, where all of these milk caps are available as free printable images, along with a brand new project idea to make with the printables, HERE!
See you next month!

see more of Angie’s projects here
Related Content: Picture Frame Ideas For Home Decor and More
Yay, Happy that you found that easy woven chair post.
https://www.myrepurposedlife.com/easy-weave-chair-seat/
Yay, Happy that you found that easy woven chair post.
https://www.myrepurposedlife.com/easy-weave-chair-seat/
Yay, Happy that you found that easy woven chair post.
https://www.myrepurposedlife.com/easy-weave-chair-seat/
Yay, Happy that you found that easy woven chair post.
https://www.myrepurposedlife.com/easy-weave-chair-seat/