Photo Display Wall Shelf
As an Amazon Associate, I earn from qualifying purchases.
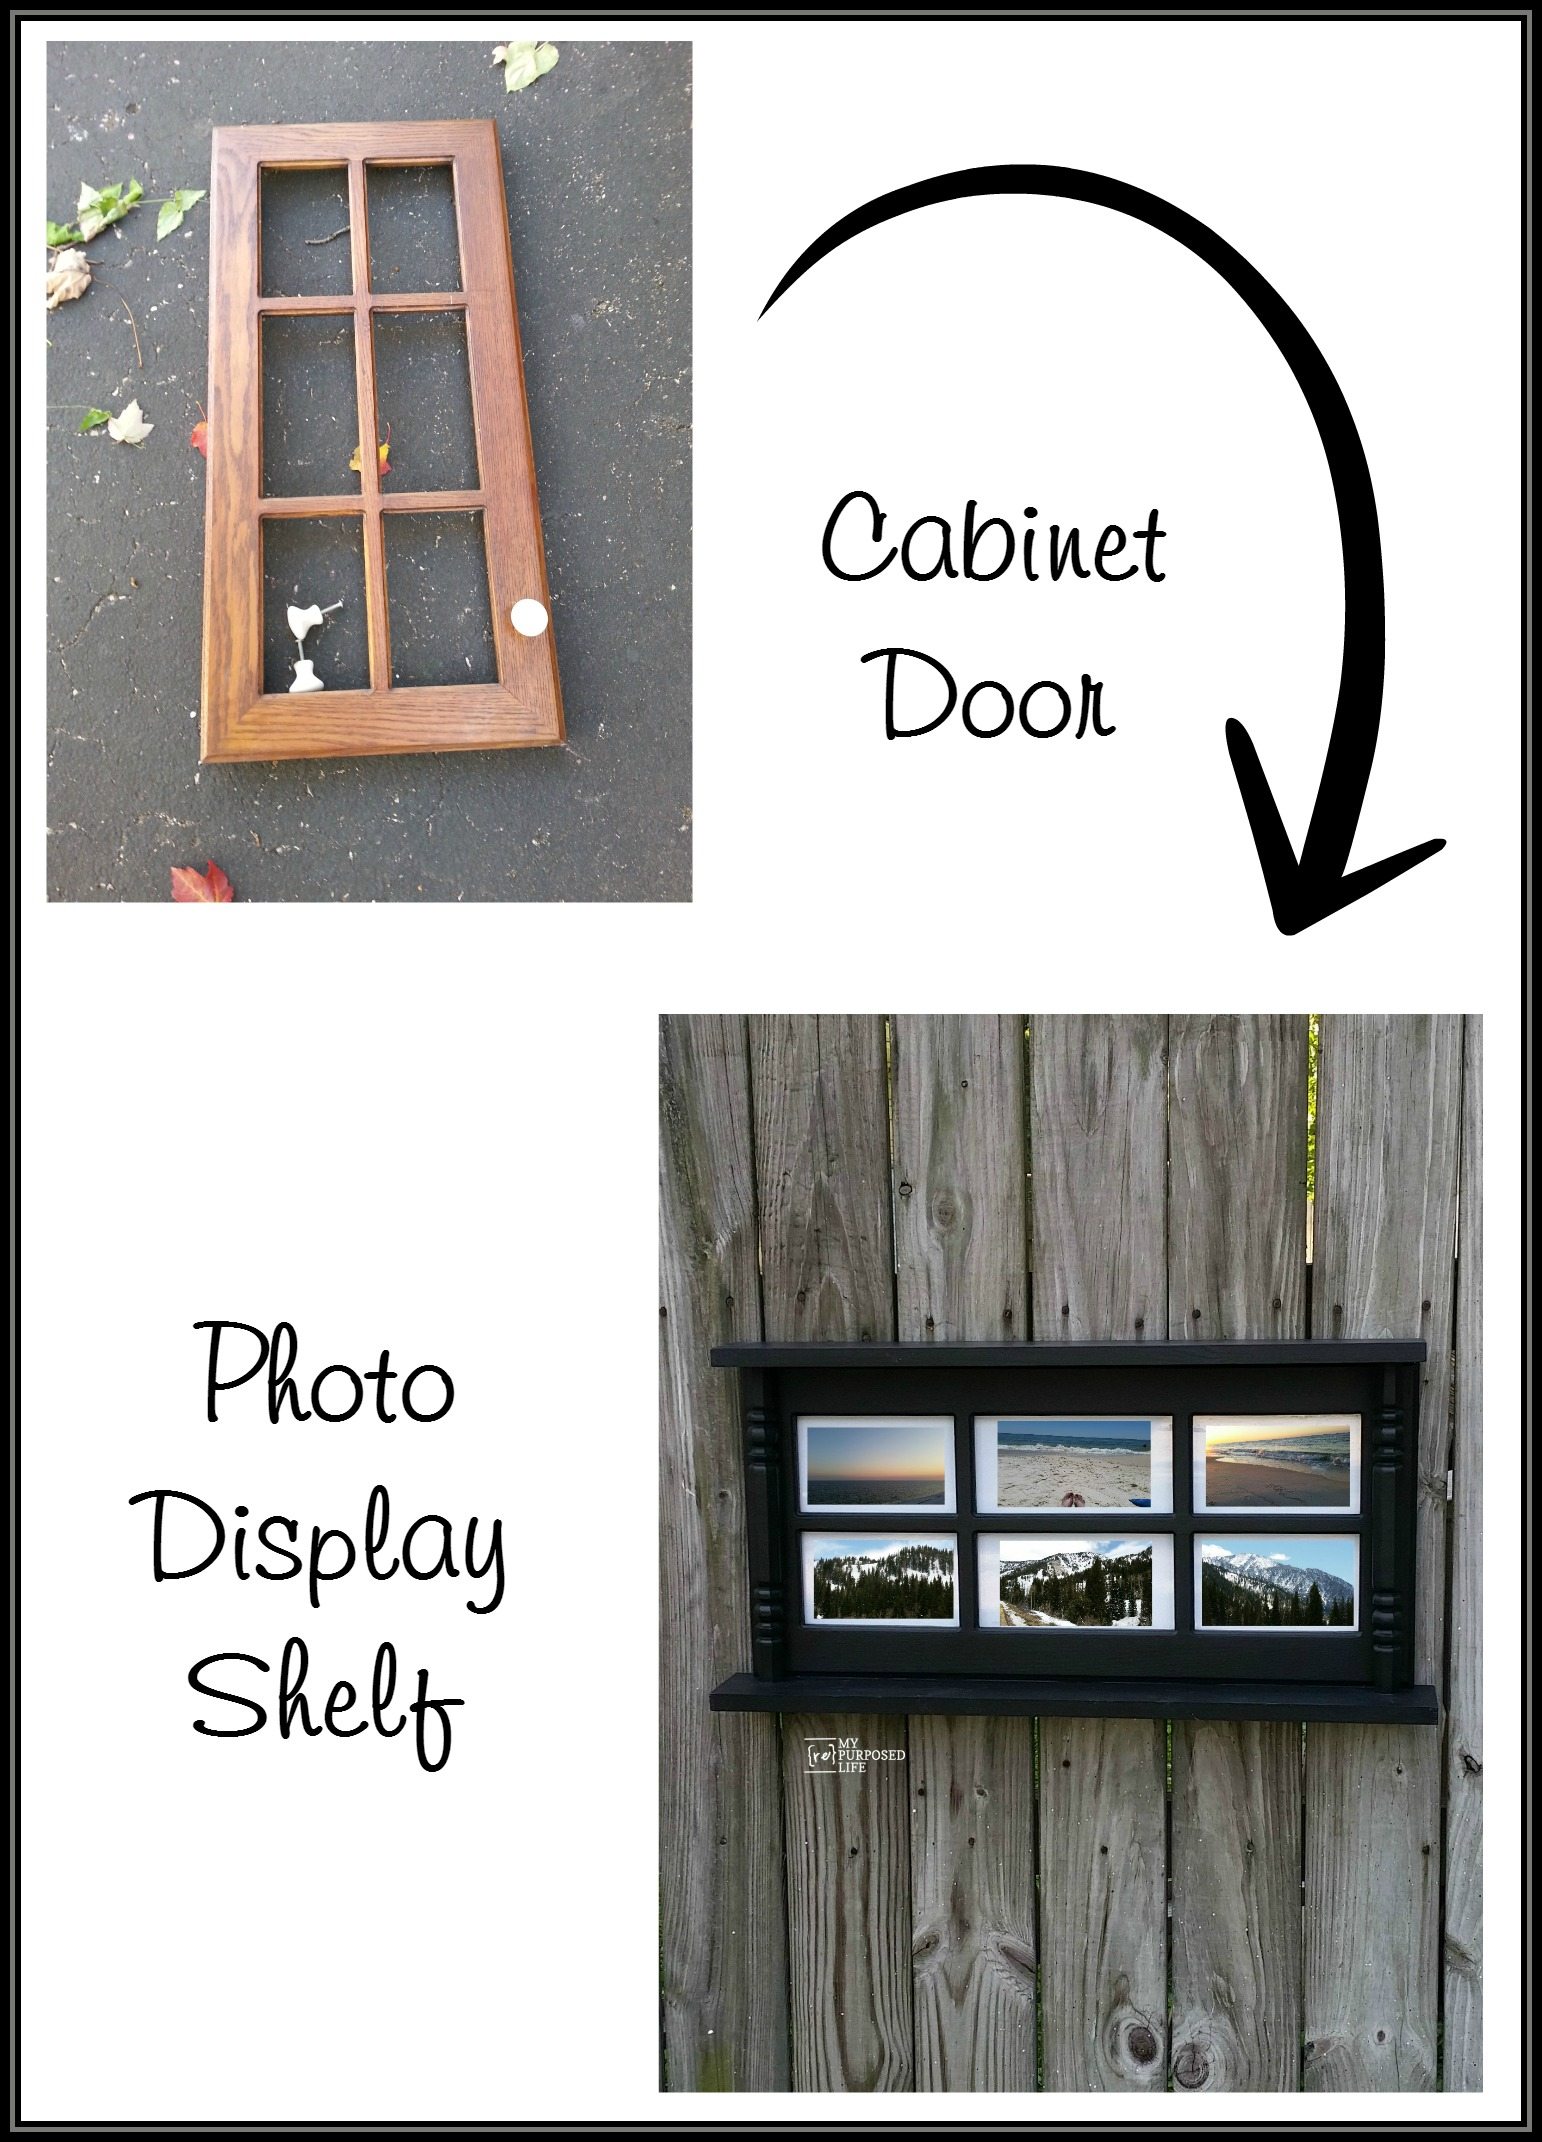
What? A photo display wall shelf made from chairs and a repurposed glass door?

Yep! I used a part of one chair . . .

. . . and one of these glass cabinet doors to make —
Photo Display Wall Shelf
 This unique photo display wall shelf!
Here’s how I made this easy project.
Cabinet door with glass insert
 Remove the glass insert and set aside
**This post may contain affiliate links which won’t change your price but will share some commission.**
Cut chair spindles on miter saw
 Trim chair spindles to size using a compound miter saw
Add a board to make cabinet door wall shelf
 Cut two 1×4’s for a top and bottom shelf
Attach spindles, top and bottom shelf with Gorilla Glue Construction Adhesive and or brad nails.
Fill knob hole with spackle
Stain wall shelf project
 Stain new wood and old parts with Minwax Wood Finishing Cloths
 Admire your new wall shelf
Paint project with paint sprayer
 Paint wall shelf with a Homeright Finish Max
Replace glass insert in cabinet door with metal mirror clips
 Replace old mirror clips with new handy metal mirror clips.
 View of the backside of the photo display wall shelf
 Add scrap piece of foam core board using two more mirror clips (not tightened all the way).
note: the foam core board is easily removable by turning one or both clips
 Add d rings for hanging wall shelf
Cabinet door photo display wall shelf
 Hang new shelf on fence to take pictures (because it was too hot to stage it on my portable wall)
 Digitally add pictures from two trips in April—the beach and the mountains!

In conclusion, I really loved the look of the original chair spindles—the way they were painted black, but had the brown wood showing through. That is why I stained this shelf. I wanted to distress it a little, but in the end changed my mind.
I LOVE these mirror clips. They are so easy to use, and so much better than the vintage plastic clips. They are sort of reversible. There is a SLIGHT difference in depth depending on how they are installed.
The garage where my staging wall is located is very full of future projects, and it’s been too hot to clear stuff out of the way in order to stage “beauty” shots, that is why this shelf is hanging on the fence.

This is the other project I made with one of these small glass hutch doors, a cabinet door coat rack.
I still have one more of these small cabinet doors, what do you think I should do with it?
gail
Sharing here: Elizabeth and Co Be Inspired
I love what you do I’m so jealous. I have the will, but not the skill! Instead, I just keep buying more stuff to do and it sits in my garage. Do you ever give classes or seminars?
Lynda,
I totally understand what you’re saying. I didn’t have the skill when I started, I’ just kept moving forward, learning as I went. 🙂
I wish I could do classes, but a) I dont’ have the time b) I don’t have a place to hold them.
gail
I don’t even know what to say Gail. This is brilliant. It’s amazing what some imagination could do. Scratch that…YOUR imagination. I would have never thunk it. 🙂 You make we wanna run to Restore. I just might tomorrow, to see what I can find. I love the use of the chair legs. Did they fit flush against the cabinet door? They seemed curvy and as if there would be some gapping. I’m just curious. If I tried this I just didn’t want to think I was doing it wrong if there were little gaps. Kudos to you sistah!
Tania,
Awwww you make me smile! Thanks so much for your sweet comment. These particular spindles had flat sides, so the mostly sat flush agains the door. BUT, after I made it, I wondered to myself, wouldn’t they look okay if I had brought them forward a little. That’s the thing about these one of a kind pieces. We can do it however we want, because there’s really NO WRONG way to do it! So, you go for it!
I’ve got another one coming up in the next couple of weeks. It’s not totally finished yet . . . I think I’ve found a new style. LOL
have fun!
gail
I think this is one of the best upcycle projects I have seen in a long time. I love it. I love your blog, it has amazing ideas everytime. Have a great day and thank you for sharing.
Thank you so very much Tracy! I really, really love the challenge of making things the best they can be. 🙂
thanks for stopping by and taking the time to leave such a thoughtful comment.
gail
Love it Gail! Especially the spindles.
Never saw that coming from what you started with. Always inspiring.
Thank you Joan! It was a fun project, and I will probably do more using variations of this spindle idea. 🙂
Cute and inspiring!!!
such a smart idea, gail! it looks awesome!