Picture Frame Shadow Box
As an Amazon Associate, I earn from qualifying purchases.
Repurposing is all about seeing hidden potential in the everyday, and this Picture Frame Shadow Box project does exactly that. By combining an ornate thrifted frame, reclaimed drawer wood, a splash of spray paint, and a few simple building tools, you’ll transform odds and ends into a stylish, multi-directional shelf that fits any room. Whether you’re after rustic charm, farmhouse flair, or a bold pop of color, this DIY lets you personalize every detail, no expensive materials required.


Thrift Store Picture Frames
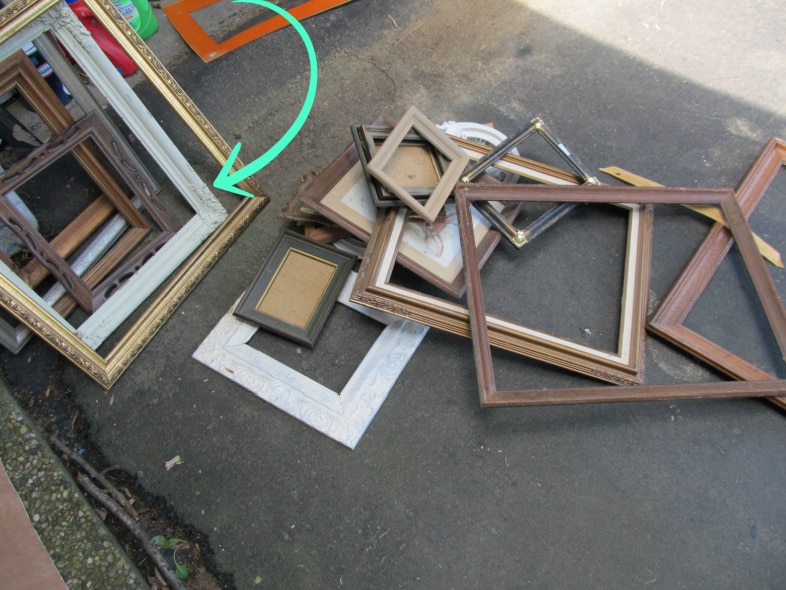
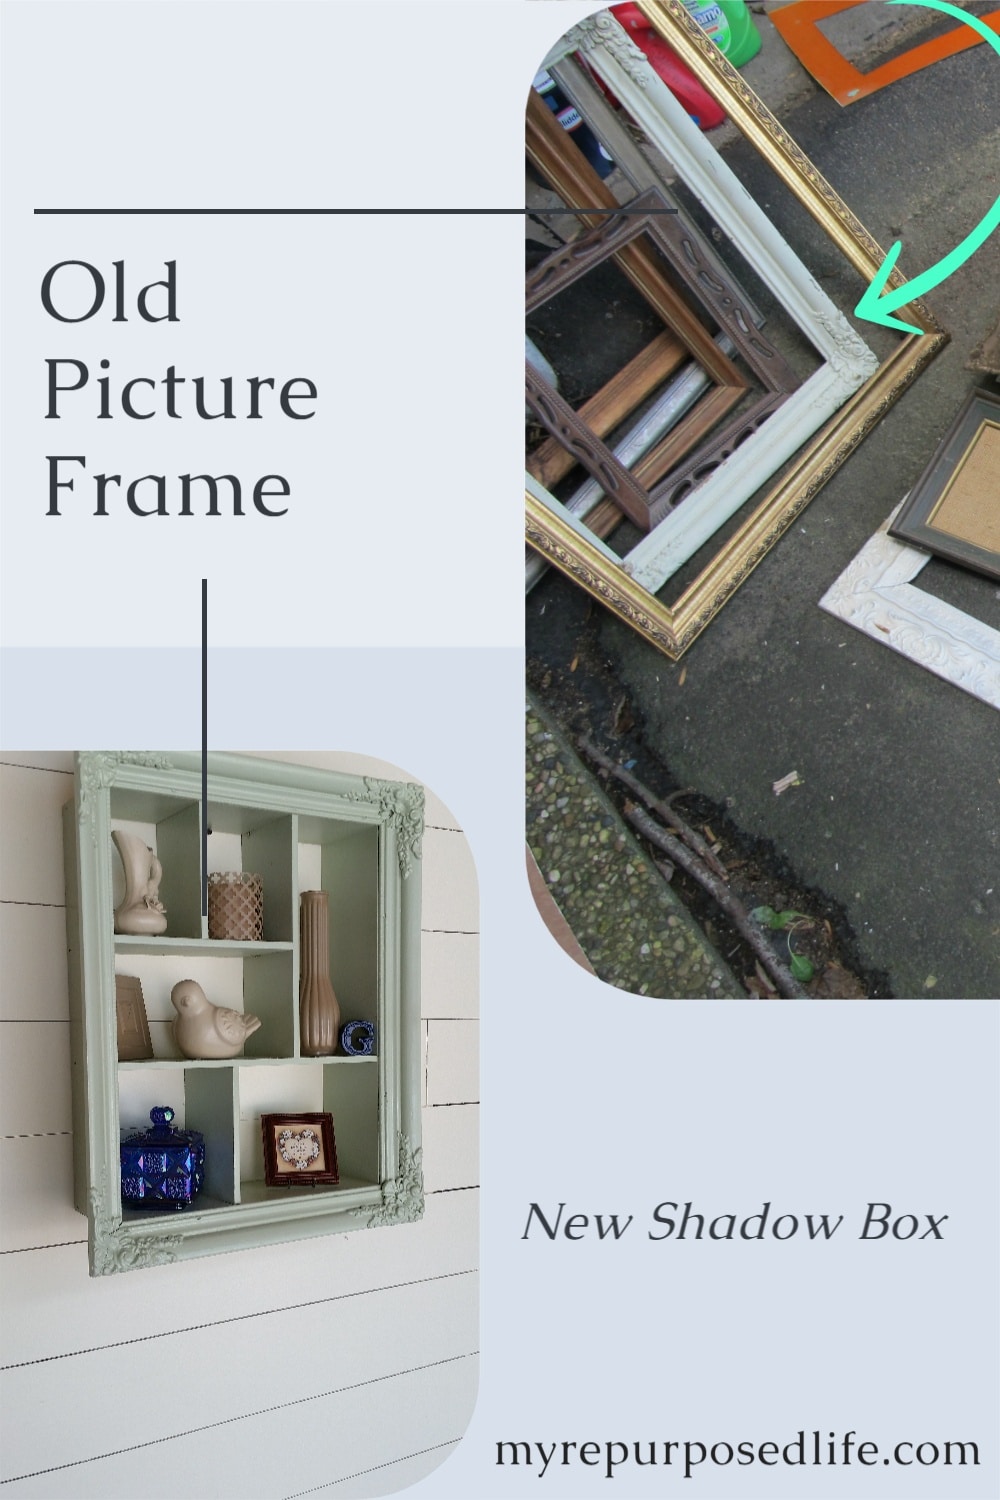
Let’s begin at the beginning. ![]() I am a hoarder and lover of frames. I even have a frame “dept” in my garage where I store my extra frames. The repurposed picture frame shadow box project I’m sharing uses the frame the green arrow points at.
I am a hoarder and lover of frames. I even have a frame “dept” in my garage where I store my extra frames. The repurposed picture frame shadow box project I’m sharing uses the frame the green arrow points at.
This Picture Frame Shadow Box was featured in Country Sampler Farmhouse Magazine!
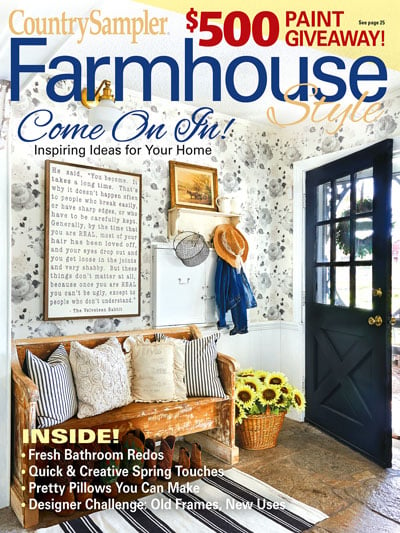
Designer Challenge: Old Frames, New Uses!
I sold this shelf years ago. Can you imagine the owner or her friend looking through this magazine and seeing the shelf inside?
Paint Sprayer Marathon of Old Frames
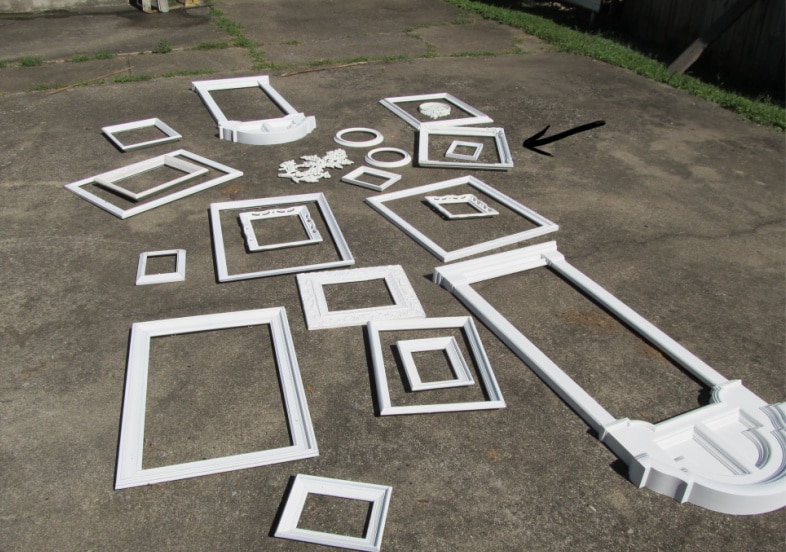
A couple of years ago, I had a primer painting party where I painted a whole bunch of frames at once. The frame in question is shown with the black arrow. So, I’ve had it for a while, and it’s been waiting for the perfect repurpose.
The problem was finding some sturdy wood for the box and dividers, but my typical 1x’s would be too thick.
Repurposed Drawer Parts
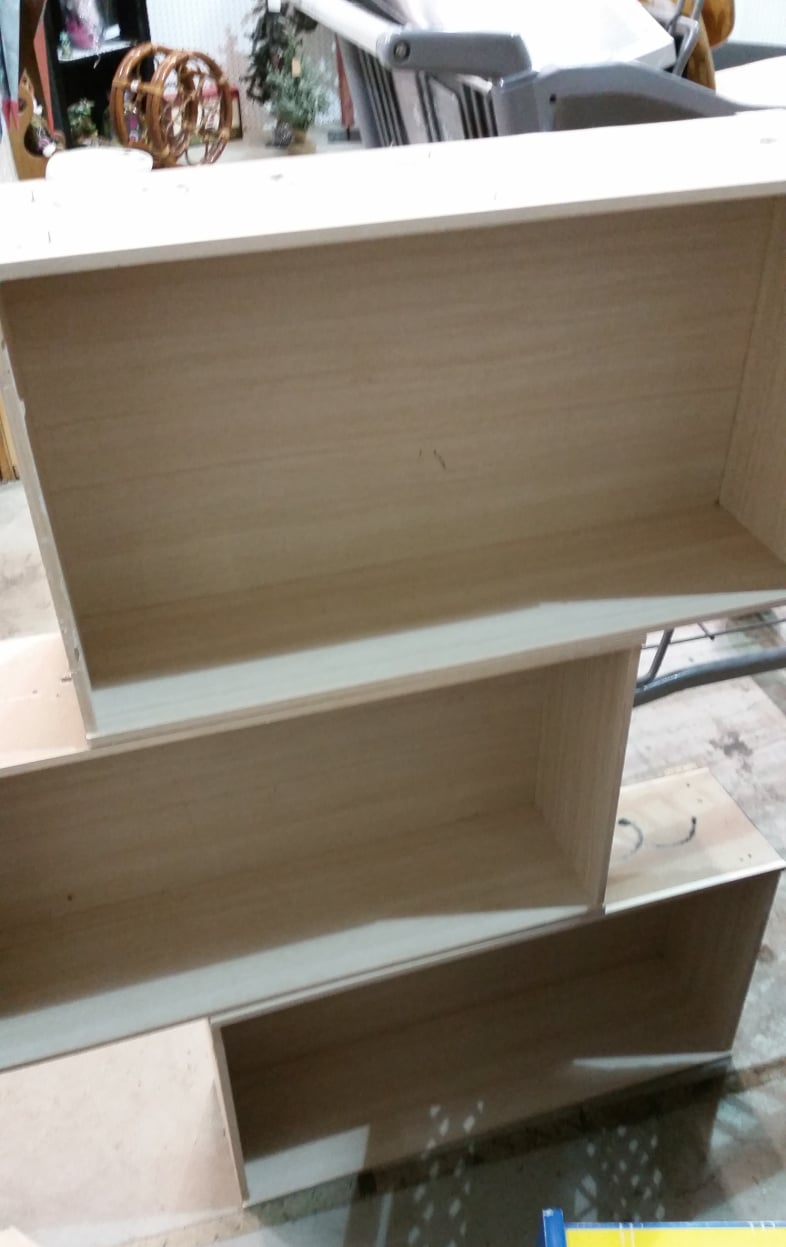
My solution? I’m using the wood from these thrift store drawers. You can see it’s thicker than underlayment (too thin) but thinner than 1x (too thick).

Handy Tip From Gail-Dismantle drawers to harvest wood for future projects!
Dismantle Dresser Drawers | Harvest the Wood
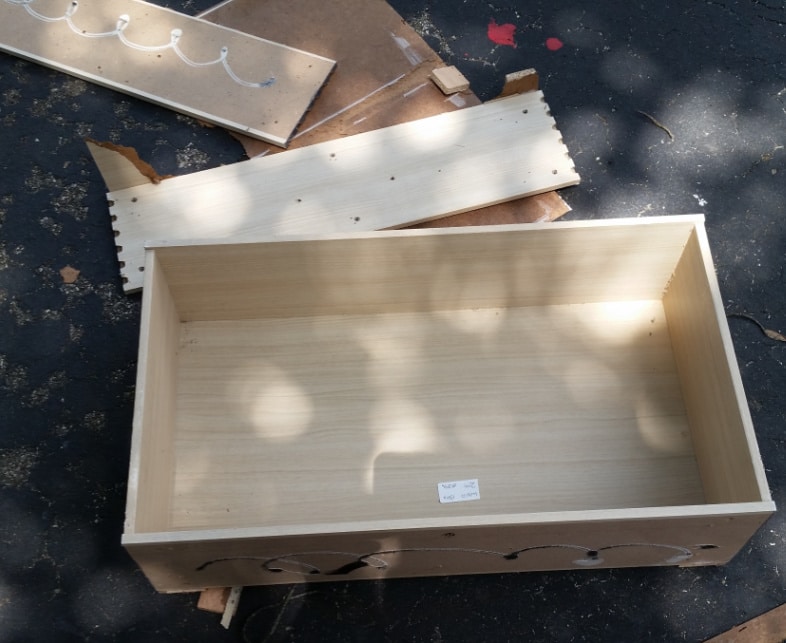
I dismantled the drawers with a rubber mallet and used mostly the longer rear boards for the shadow box’s frame. The front board had some holes and glue residue on it.
Related Content: Repurposing Wood From Old Furniture
How to Build a Picture Frame Shadow Box
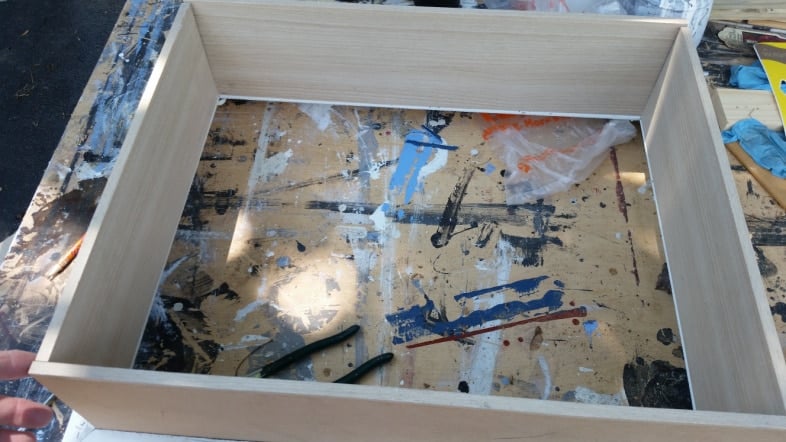
I cut my repurposed drawer boards to size to fit them inside the picture frame.
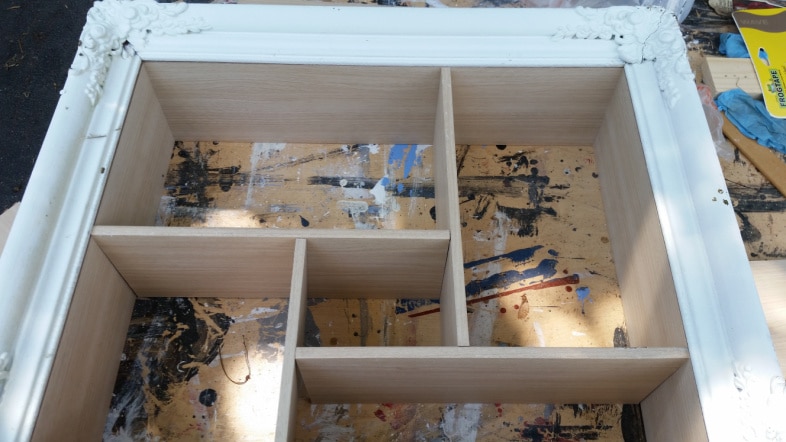
This is a dry fit while I figure out the configuration of the shadow box dividers.
Visit the My Repurposed Life Amazon Store to shop my favorite items.
Use Clamps and Wood Glue

It was a bit tricky to get all of the dividers in place. I used Gorilla Wood Glue, a speed square, and my Ryobi nail gun.
Of course, a clamp is handy for holding the pieces in place while you nail.
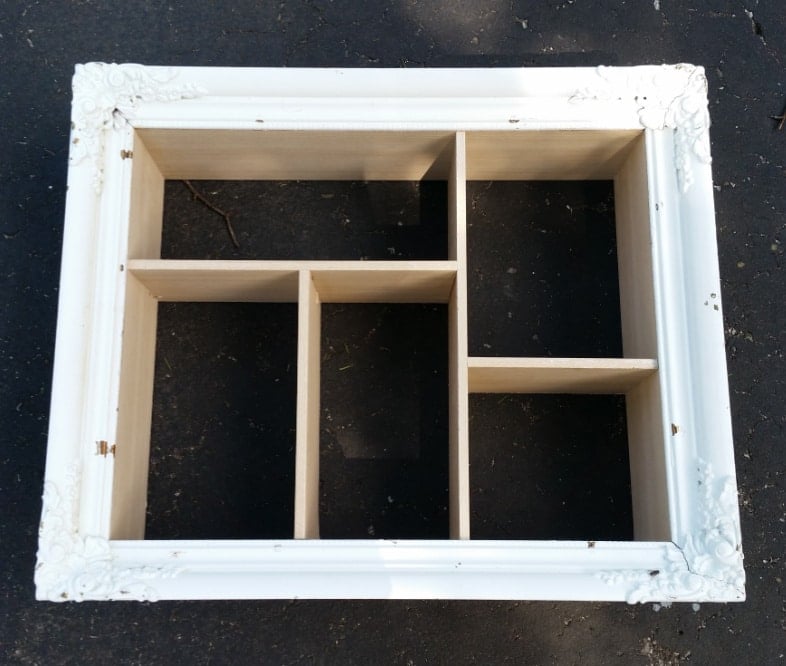
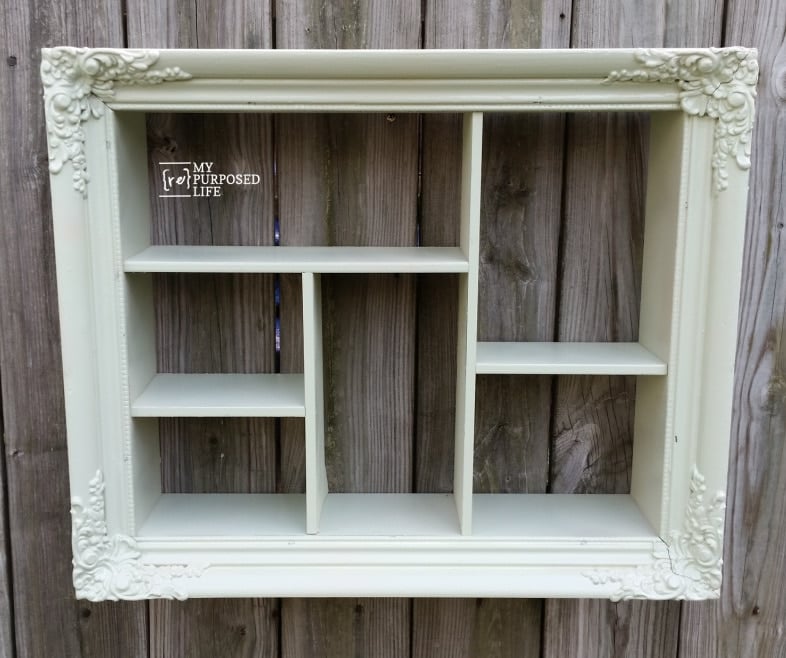
This is the final design of my picture frame shadow box.
Spray Paint Picture Frame Shadow Box
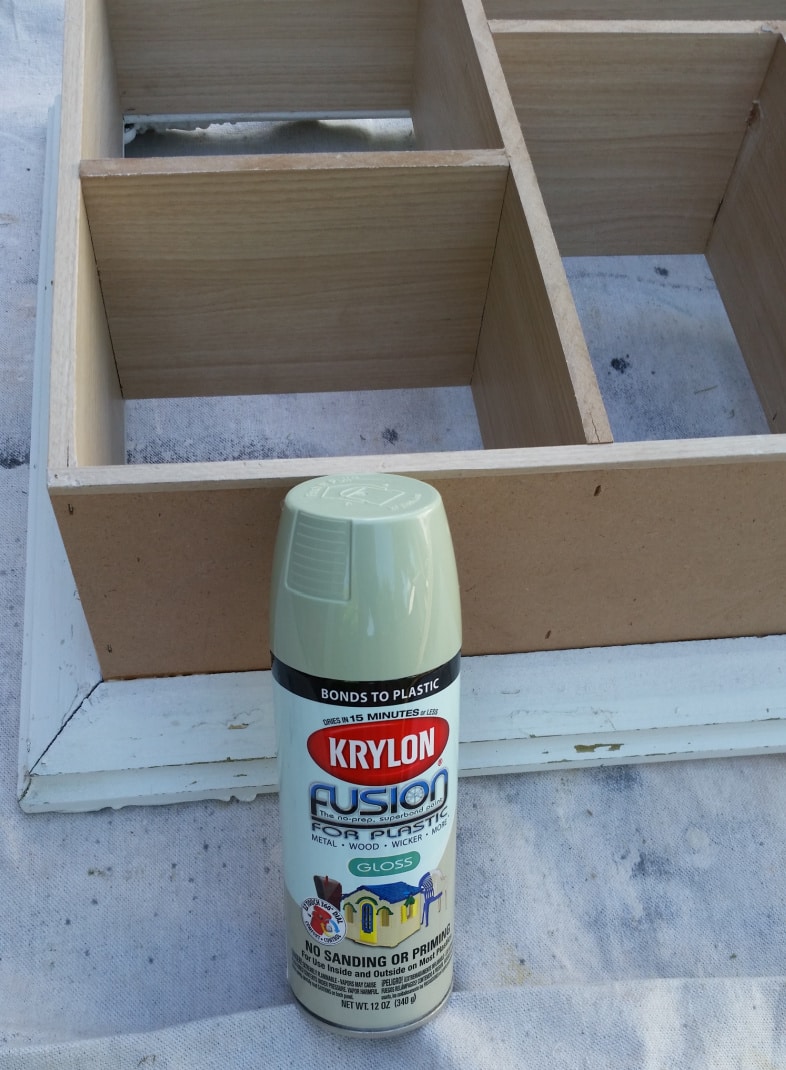
I used Honeydew spray paint; it’s the prettiest green! In this photo, you can see where I shot brad nails with my nail gun.
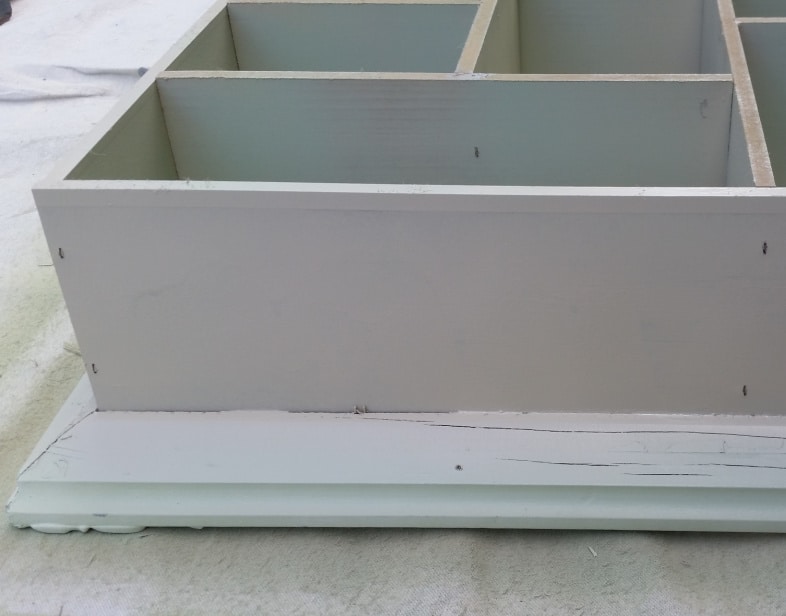
The Fusion paint didn’t want to adhere to this cheap MDF wood, so I used the Almond MAXX as a primer. As you can see, the Honeydew worked great on the frame.
After a quick coat of the Almond, the Honeydew looked great on the cheap MDF dresser drawer wood.
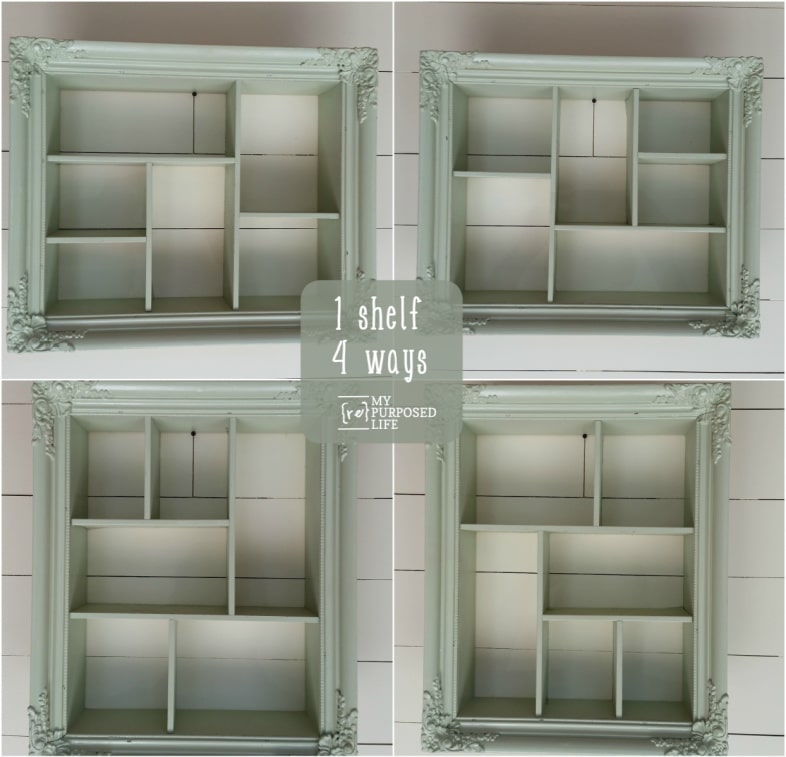
Do you love this shelf’s versatility as much as I do? Depending on the items you want to display, it can be hung four different ways.
Please Save & Share on Pinterest!
Updating Thrift Store Items With Spray Paint
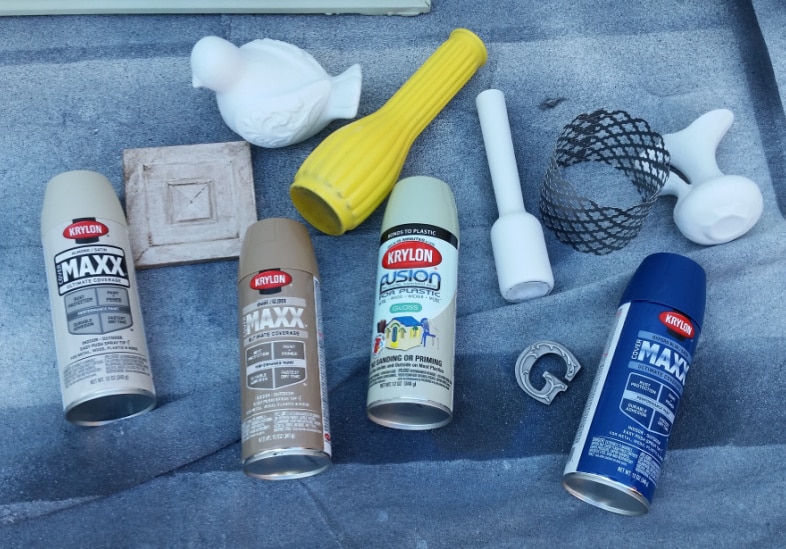
These are the thrift store items I gathered to spray paint. Some had already been used (and painted) by me. That’s the great thing about painting—it’s so easy to change up your décor!
Homeright Spray Shelter
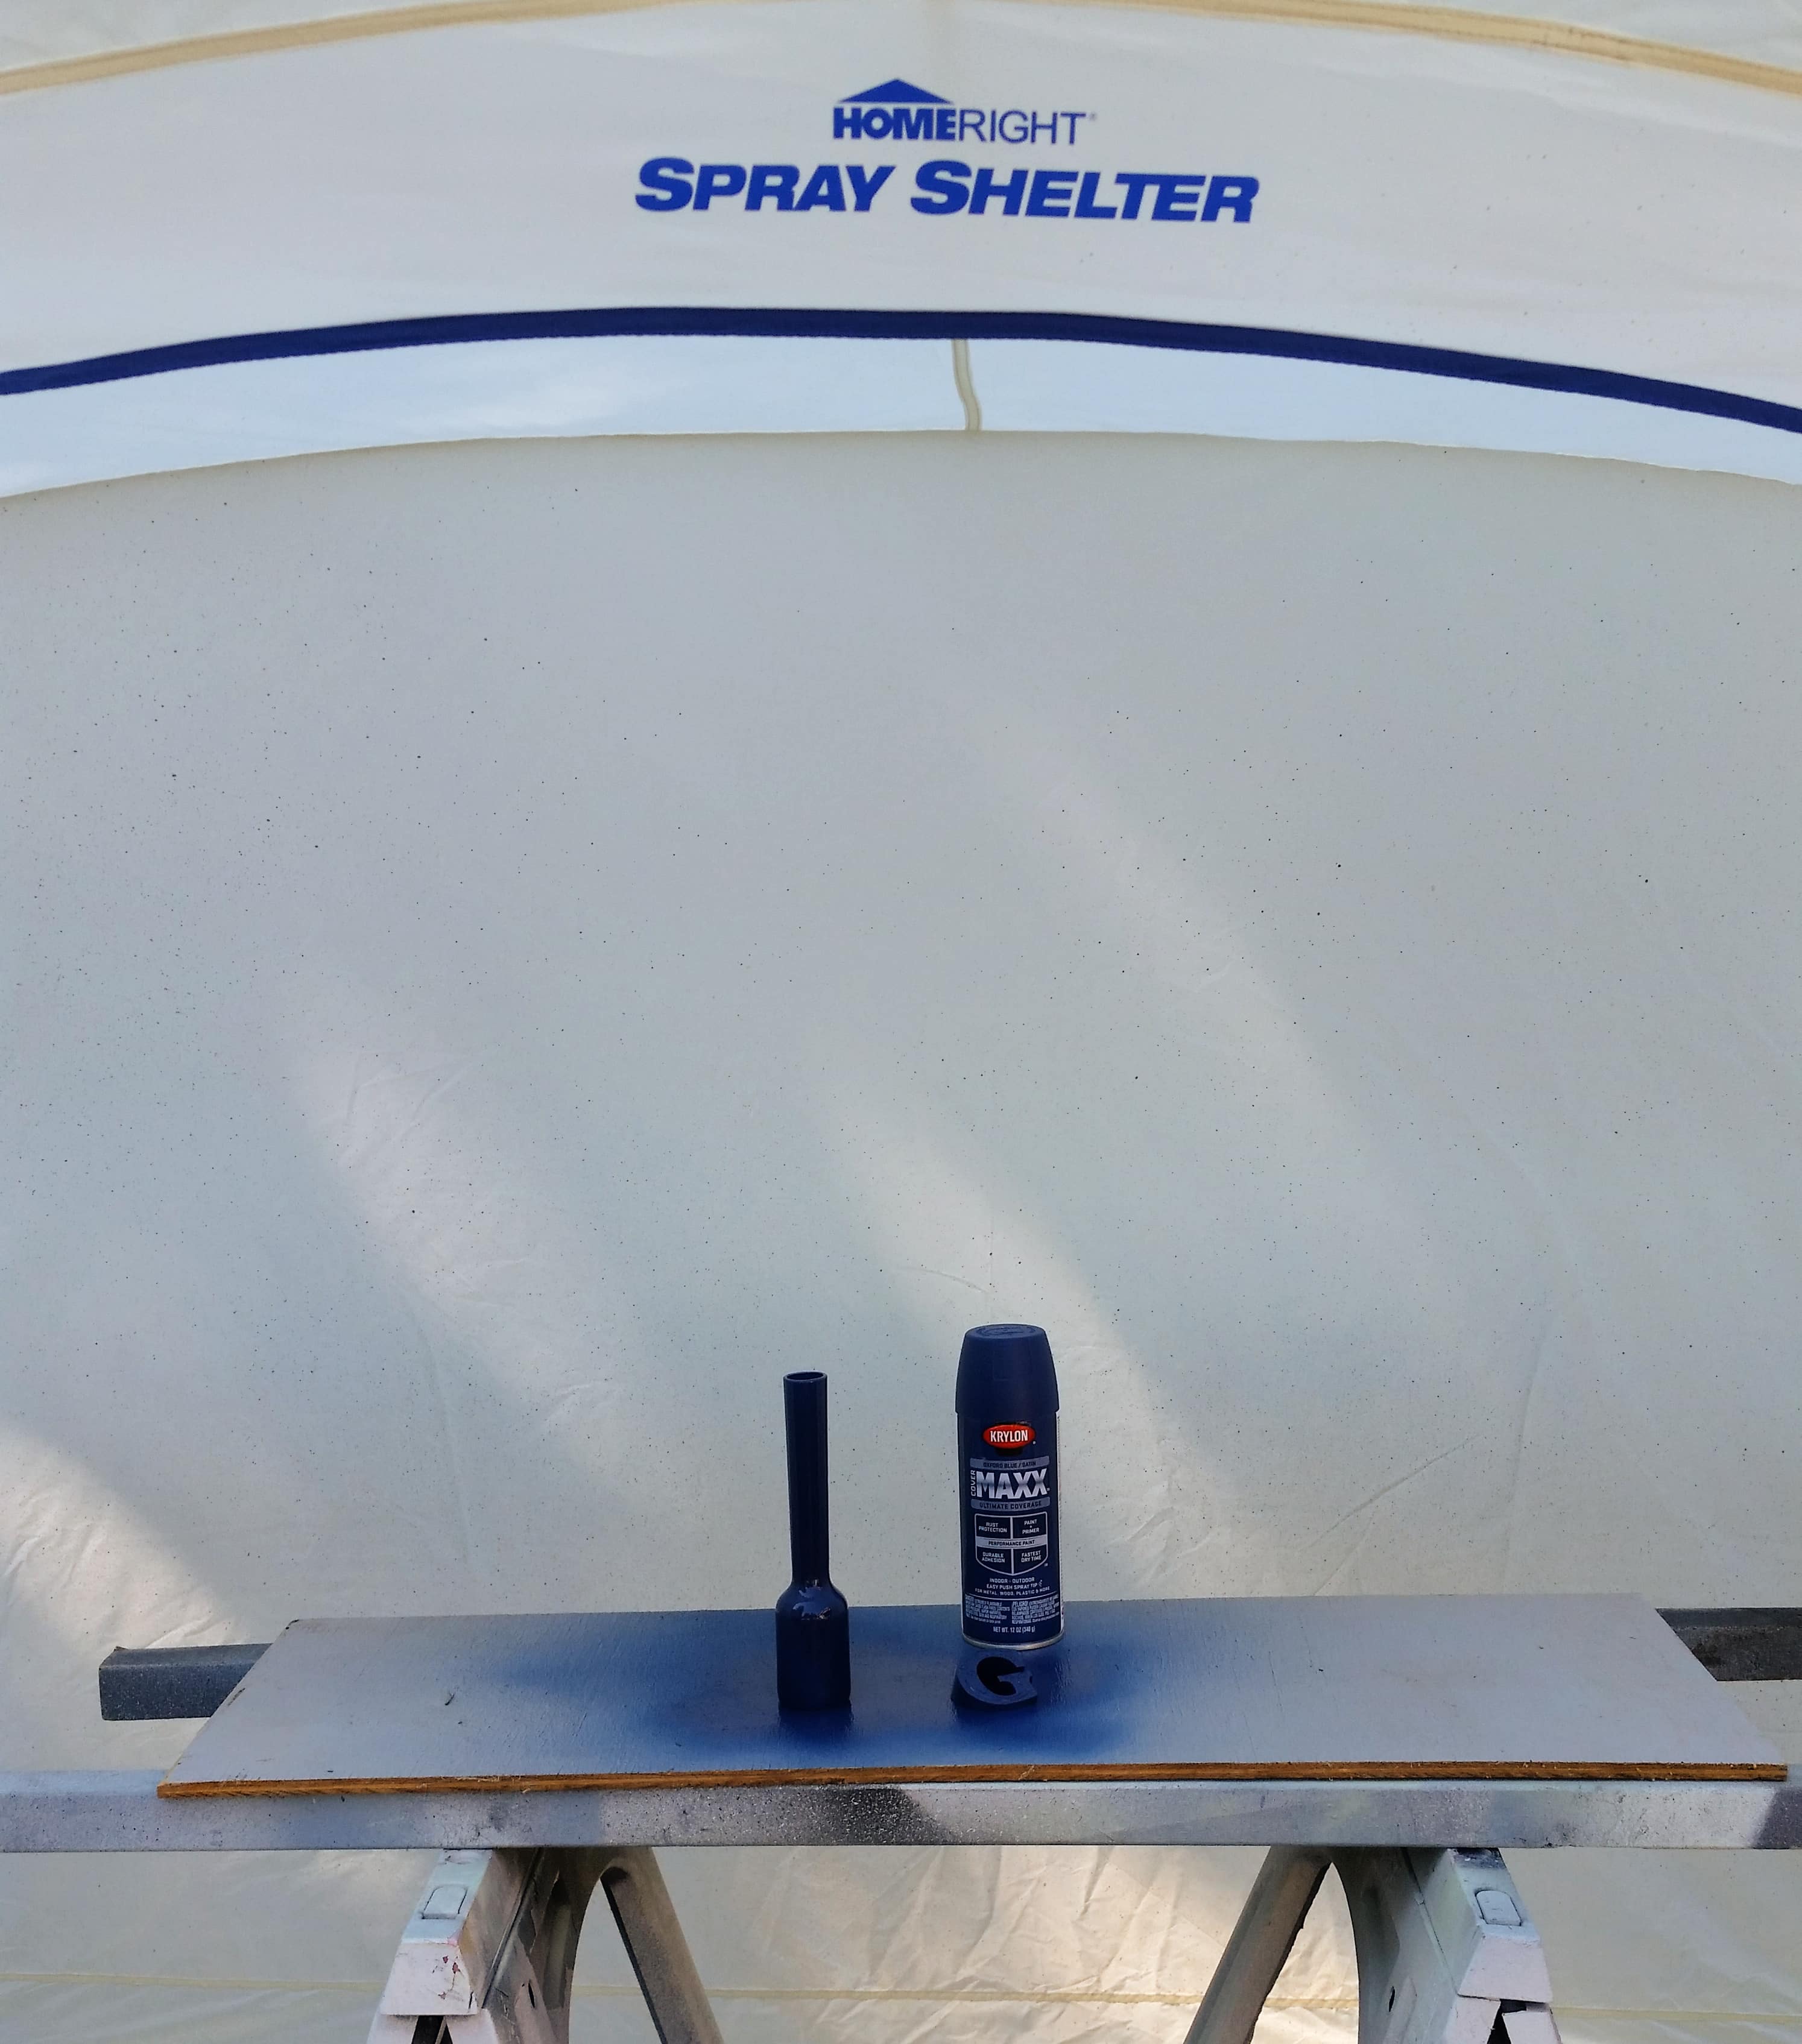
The small white vase got an Oxford Blue finish. I spray-painted it in my Homeright spray shelter on scrap plywood. I picked up the board and moved it aside to do another color.

The vase, candle koozie, and little architectural piece were spray painted with Khaki.
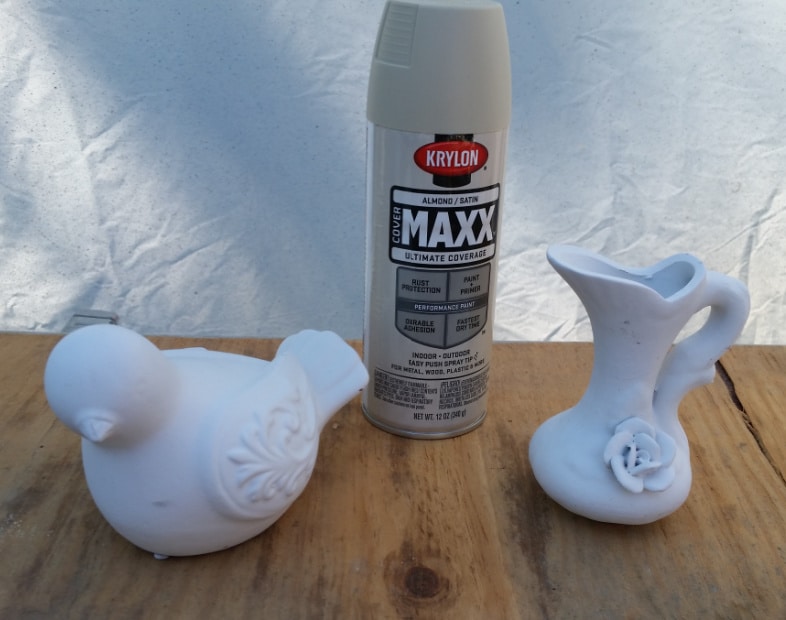
This bird and vase were painted with Almond. I liked both of these items in the white chalky paint, but I loved them even more after I painted them with this Almond color.

My “G” also got some Oxford Blue. Isn’t it fun to see the shadow left behind when spray painting?
Pretty Green Shadow Box
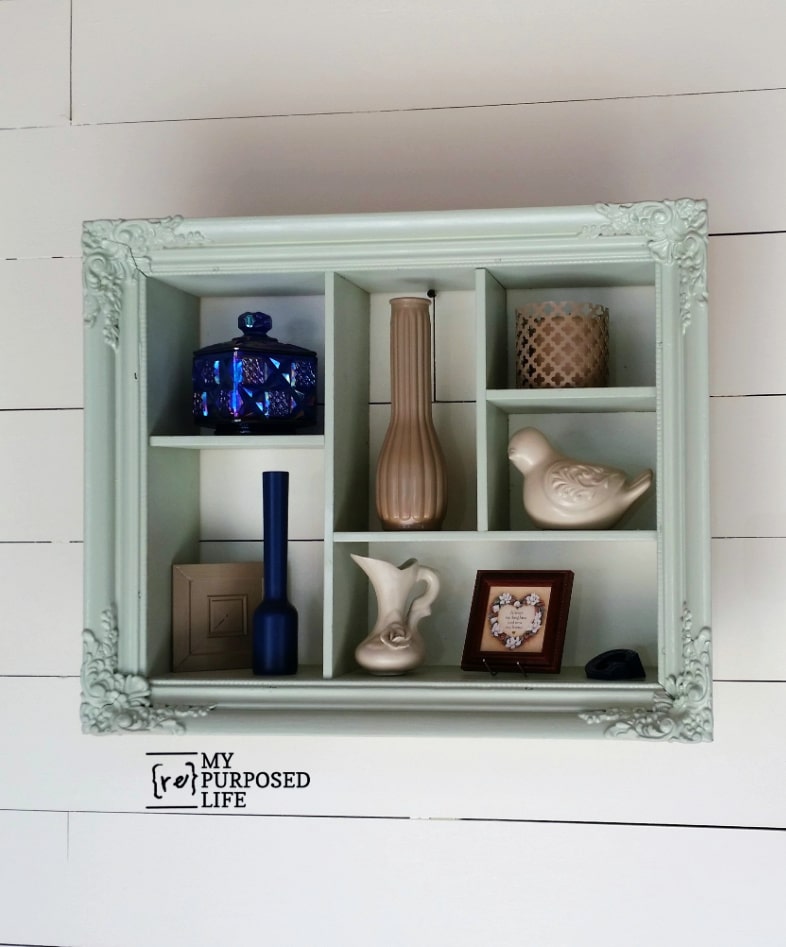
Ah, my shelf makes me smile! I thought I loved the Oxford Blue the best, but I really love the bird and vase in Almond.
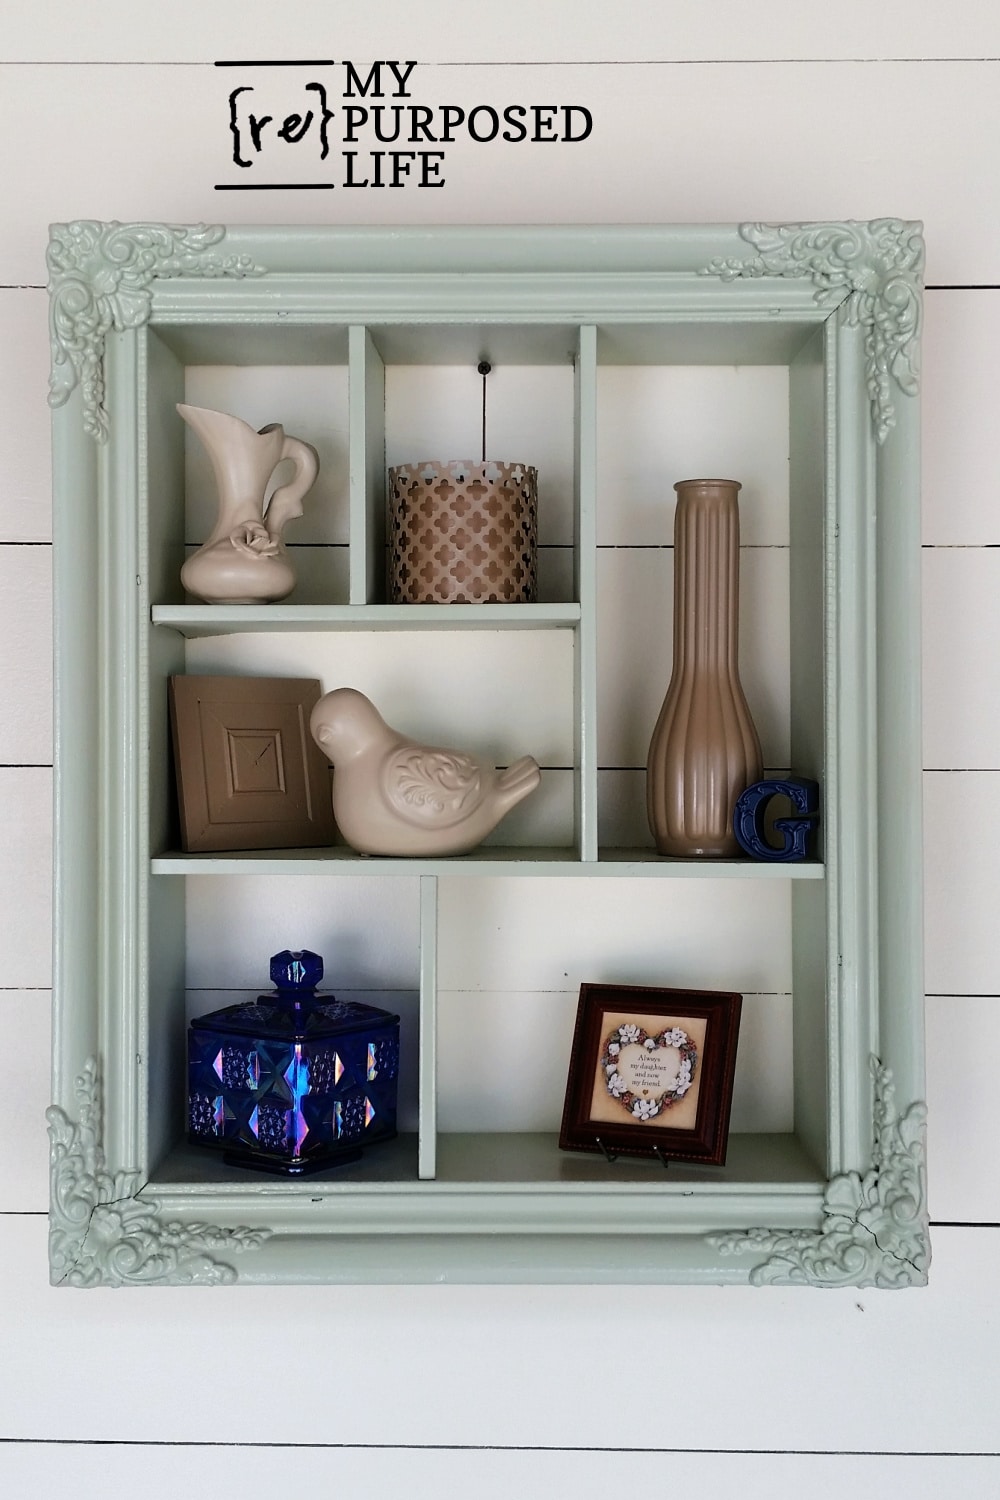
Here, it is styled vertically instead of horizontally.

I chose not to put a back on this piece to let the wall color show through. It would be easy to put a back on it or even decoupage some fabric on the back. There are many ways to customize a project like this, especially if you’re using spray paint to quickly (and easily) change up your items to suit your mood or the season. ![]() It’s paint!
It’s paint!
See an easy tutorial in my post Small Black Shadow Box, or Simple Rustic Shadow Box.
There is something satisfying about giving forgotten objects a second life. This shadow box demonstrates that a bit of creativity and patience can yield a project that feels fresh and personal. From the color you choose to the way you style each section, you make it your own. Once it is finished and ready to hang, the shadow box will serve as both storage and decoration while sharing your story.
Soooo — about my shelf …… what would you do differently?
gail
Related Content: Picture Frame Ideas For Home Decor and More
sharing here:
Great idea and the nice thing is the wide variety of picture frames to choose from.
Hi can you please tell me how you attached the frame to the boxes? Thanks
Christine,
great question! I didn’t really explain that, did I?
I used Gorilla Wood glue and my nail gun, just like I did while forming the small boxes.
looking at the first picture with the Honeydew spray can, you can see that the thin boards just rest right inside the frame. (where the artwork would usually rest) Using wood glue all around the edge holds everything in place. Some nails with my nail gun sort of “clamp” it allowing the wood glue to set up.
A piece of mirror on the back of the box would be reflective and interesting, too. You could also make 3 boxes and group them on a wall like a trip tic. Great project…thanks!
I think a mirror on the back would be great. Since most of my projects go to new homes, I like to make them for the masses. I figure after someone takes it home, they can change it up to suit their personal tastes. 🙂 Isn’t that the best thing about paint? So easily changeable. 🙂
gail
What a cute shelf and I love that you can use it so many ways! The colors are so pretty, I especially love the blue, but that is no surprise! Great way to repurpose those drawers Gail!!
I love this shadow box. I have two frames that I want to do this with. Now to just find that paint! Love the colors!
What a wonderful idea to give new life to an old frame! Also a fun way to inject some color into a room’s decor. I will be stealing this idea once I score the ideal frame. Thanks for another dose of DIY inspiration.
Love the shelf and that color is awesome!!
Great tutorial! These items are out rageous to purchase.
Thank you
great idea for the fame. i may need to do something like this soon. will be looking at the thrift store for a frame to use!
I love this! What a great idea! This would look super cute in my Michigan room with my adorable gray table!
Love your shadow box! (Don’t tell hubby but now I need to find some frames.)
The good thing about frames… they don’t take up a lot of room if you store them correctly. Currently mine are not stacked so neatly. 🙁
thanks Julie!
gail
I love Krylon–it’s the only spray paint I use. The shadow box looks great, Gail! (And I would love to go to the world’s longest yard sale…but I’m back to school the following week. Maybe I can find the closest spot and shoot over for the day?)
Kirby
I was thinking the same thing…. to find the nearest spot and hit it up. It’s less than 2 hours away, so if the weather is nice Saturday, I think I’ll make a day of it. 🙂
Thanks for your nice comment on my shadow box. It’s been a long time since I’ve made one. It was time to do another!
good luck with your first week of school. (and this next year)