Queen Headboard Coat Rack
As an Amazon Associate, I earn from qualifying purchases.
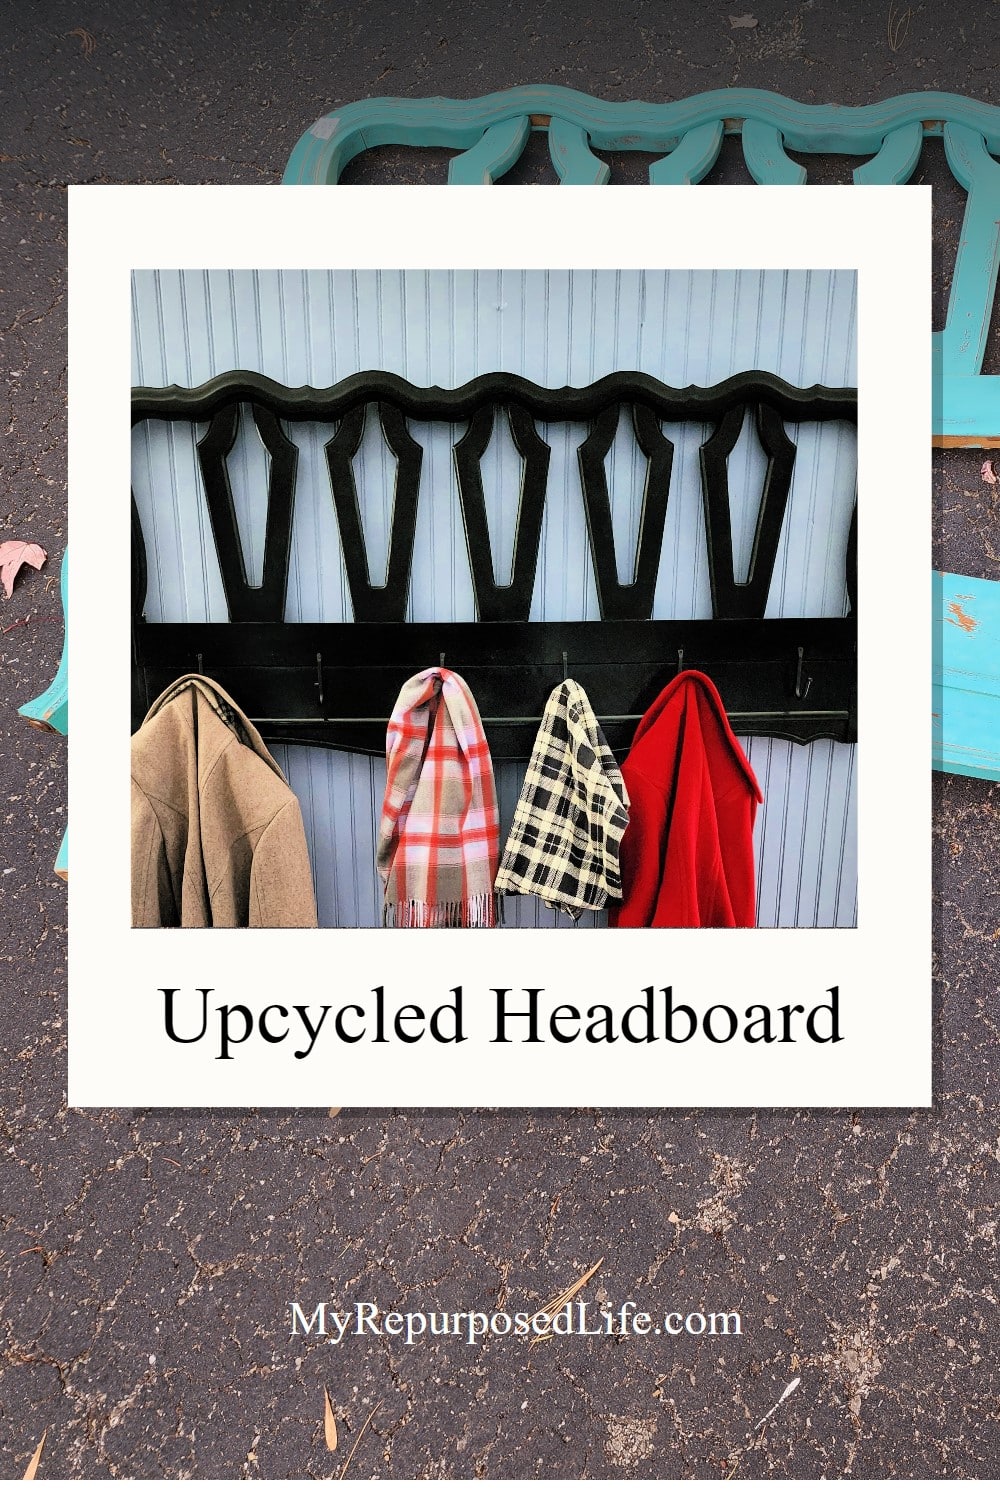
I don’t think I’ve ever made a queen headboard coat rack. Using a queen bed as a coat rack gives you more coverage in a large wall space. Maybe you have a sentimental headboard, or you ran into a good deal at a yard sale or a thrift store. Both are very good options to pick up beds at a great price.
Large Headboard

Buying yet another large headboard was not on my list. But as I was walking through the mall where I have a booth, this gal caught my eye. I was really wanting to keep this color, but that ended up being too difficult.
My original plans were to make this into a headboard bench. But after taking the before pictures and storing it for a few days, there was a new plan running around in my head.

After laying the headboard and foot board on the driveway, I came up with a design change. Initially, I was only going to use the headboard, but then I noticed that to add more detail to the queen headboard coat rack, I would use the cross brace on the foot board. To dismantle it, I began by removing the wooden joint thingy, and then used a rubber mallet to separate the boards. Lastly, I cut the long board on the miter saw to make it fit smoothly in between the legs on the large headboard.
Modified Queen Headboard to Make a Coat Rack

Seriously, isn’t it so much better being beefed up??? I love the shape that the foot board adds, don’t you?

In order to attach the foot board to the queen headboard, I chose to use my Kreg Jig to make pocket holes. I placed pocket holes about every 8 inches or so on the long board.

Using long pocket hole screws, I secured the single board all the way across the queen headboard.
Related Content:
Smaller Antique Headboard Coatrack Repurposed Thrift Store Headboard

Yep, I’m so so glad I added the board.
Remove Headboard Legs

Removing the headboard legs was quick and easy with my cordless jigsaw.

Where the boards join, there was some unevenness, so I used my orbital sander to smooth things out.

I was afraid that the queen headboard coat rack may not hang properly. So I tested it on my fence. It may need some tweaking.
Time for Paint

As you can see, I had to sand a lot. That is why I wasn’t able to keep the original paint color. I chose General Finishes Milk Paint in Lamp Black.

I sort of liked it with the original color peeking through. What do you think?

Because I didn’t have much of the milk paint, I chose to spray paint the back of the queen headboard coat rack.
Spray Gloss Sealer

Meanwhile, I wasn’t loving the way the old milk paint as drying–so I decided to use some gloss spray sealer.
Attach D Rings for Hanging

I love using these D rings for hanging my projects. They are strong and heavy duty.
Black Hook Options

I had two options for coat hooks. The wider hook has two screw holes. The more narrow hook has just a single screw to hold it. Sometimes, it’s difficult to get a hook perfectly straight with 2 screws, so I opted for the single hole hook.

Using an adjustable combination square made sure the hook placement was correct. I marked the holes and pre-drilled them in order to install the hooks.
Queen Headboard Coat Rack
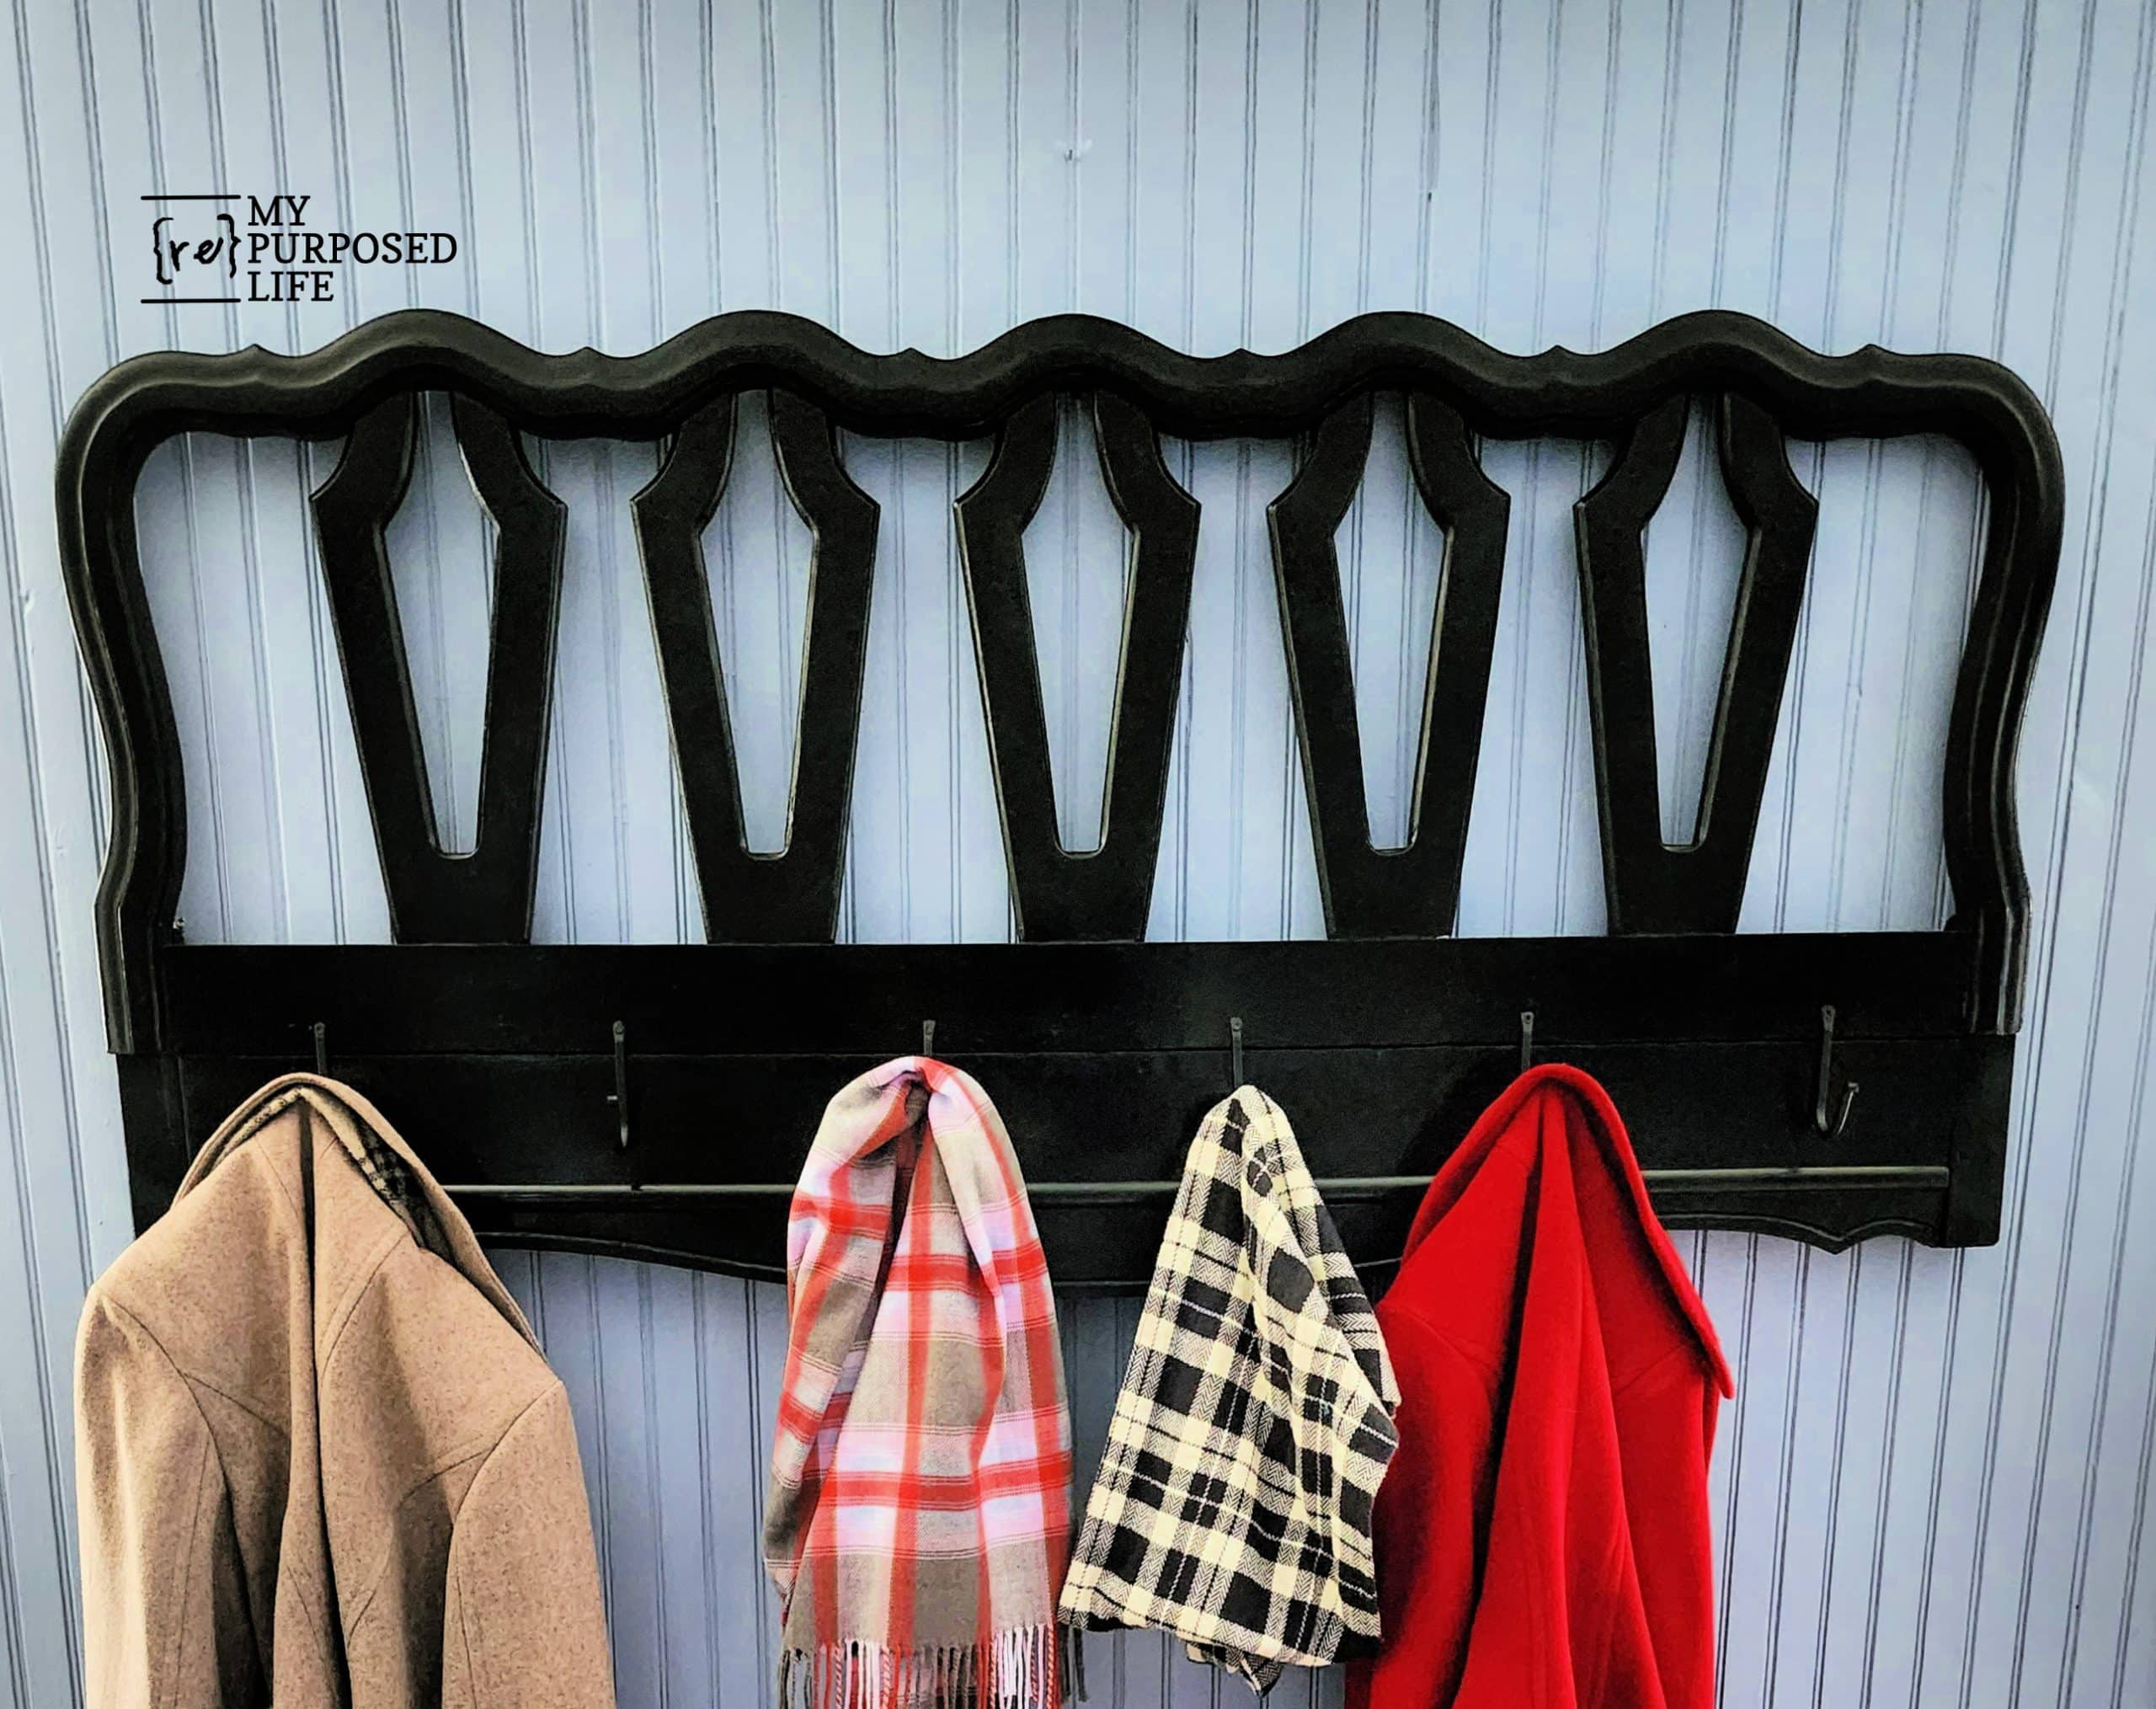
The queen headboard coat rack is perfect for coats, jackets and scarves.
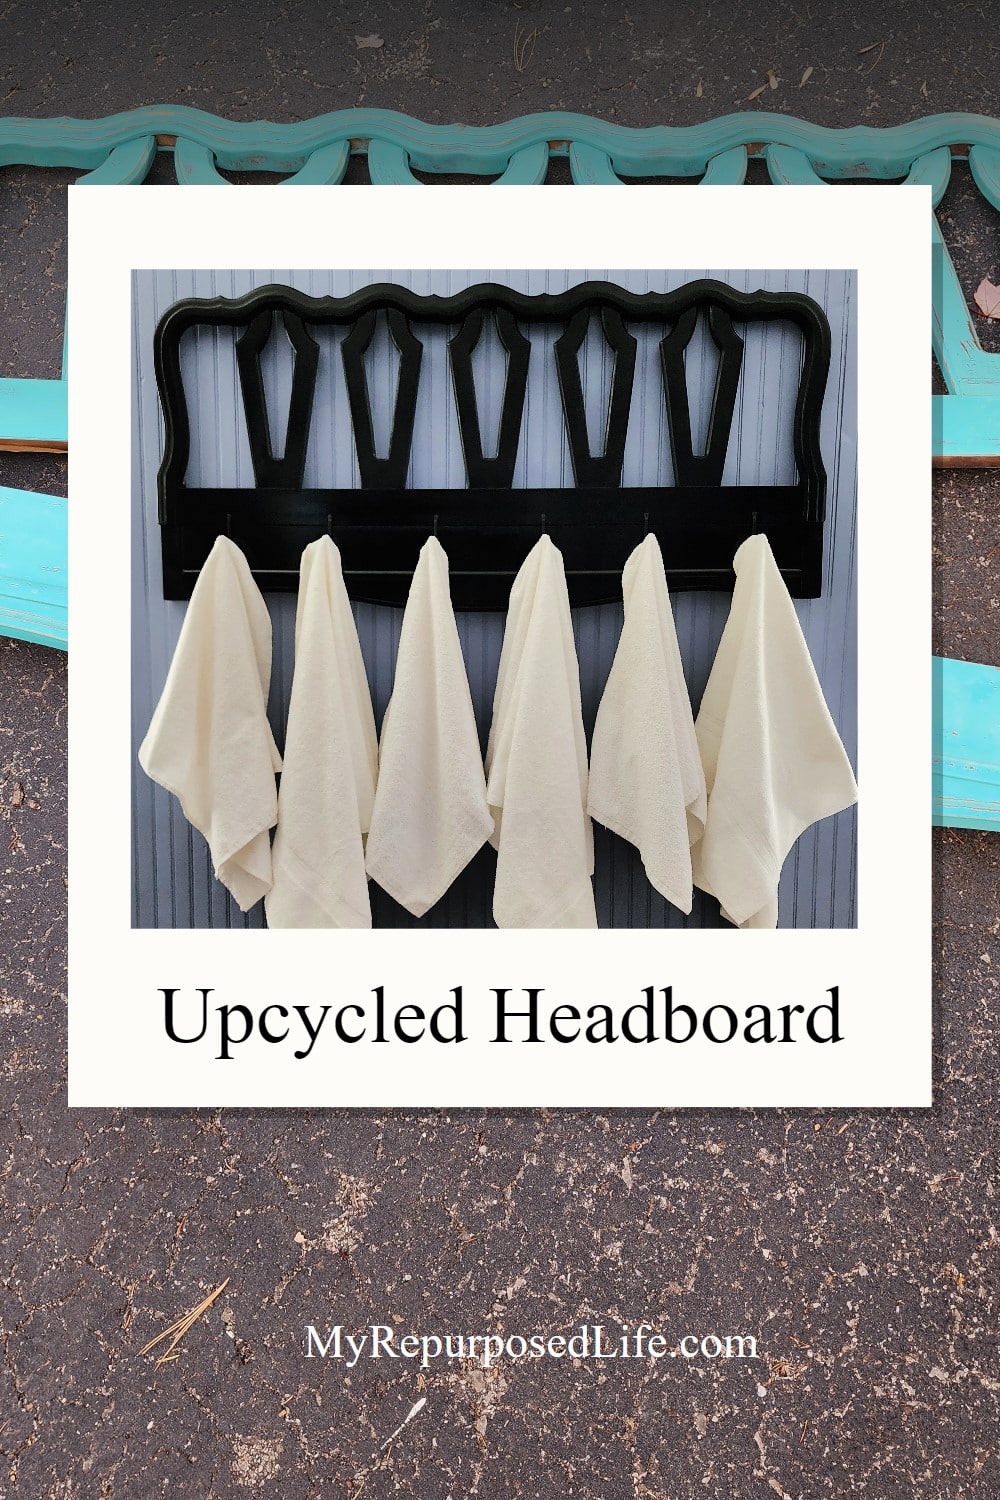
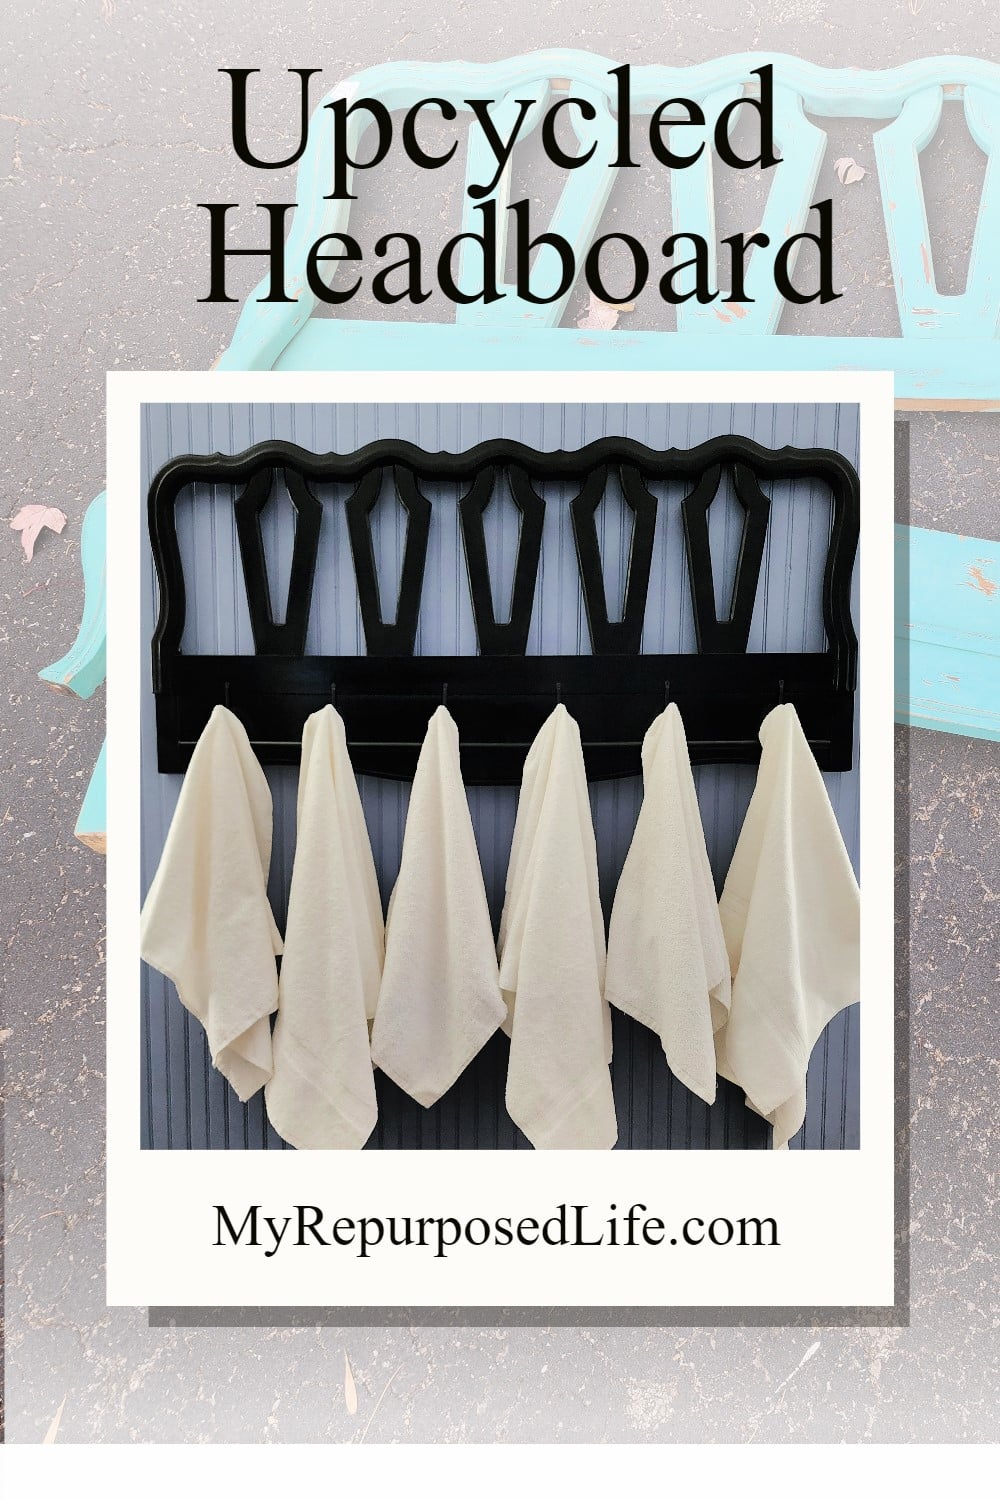
The Large Coat Rack Doubles as a Towel Rack
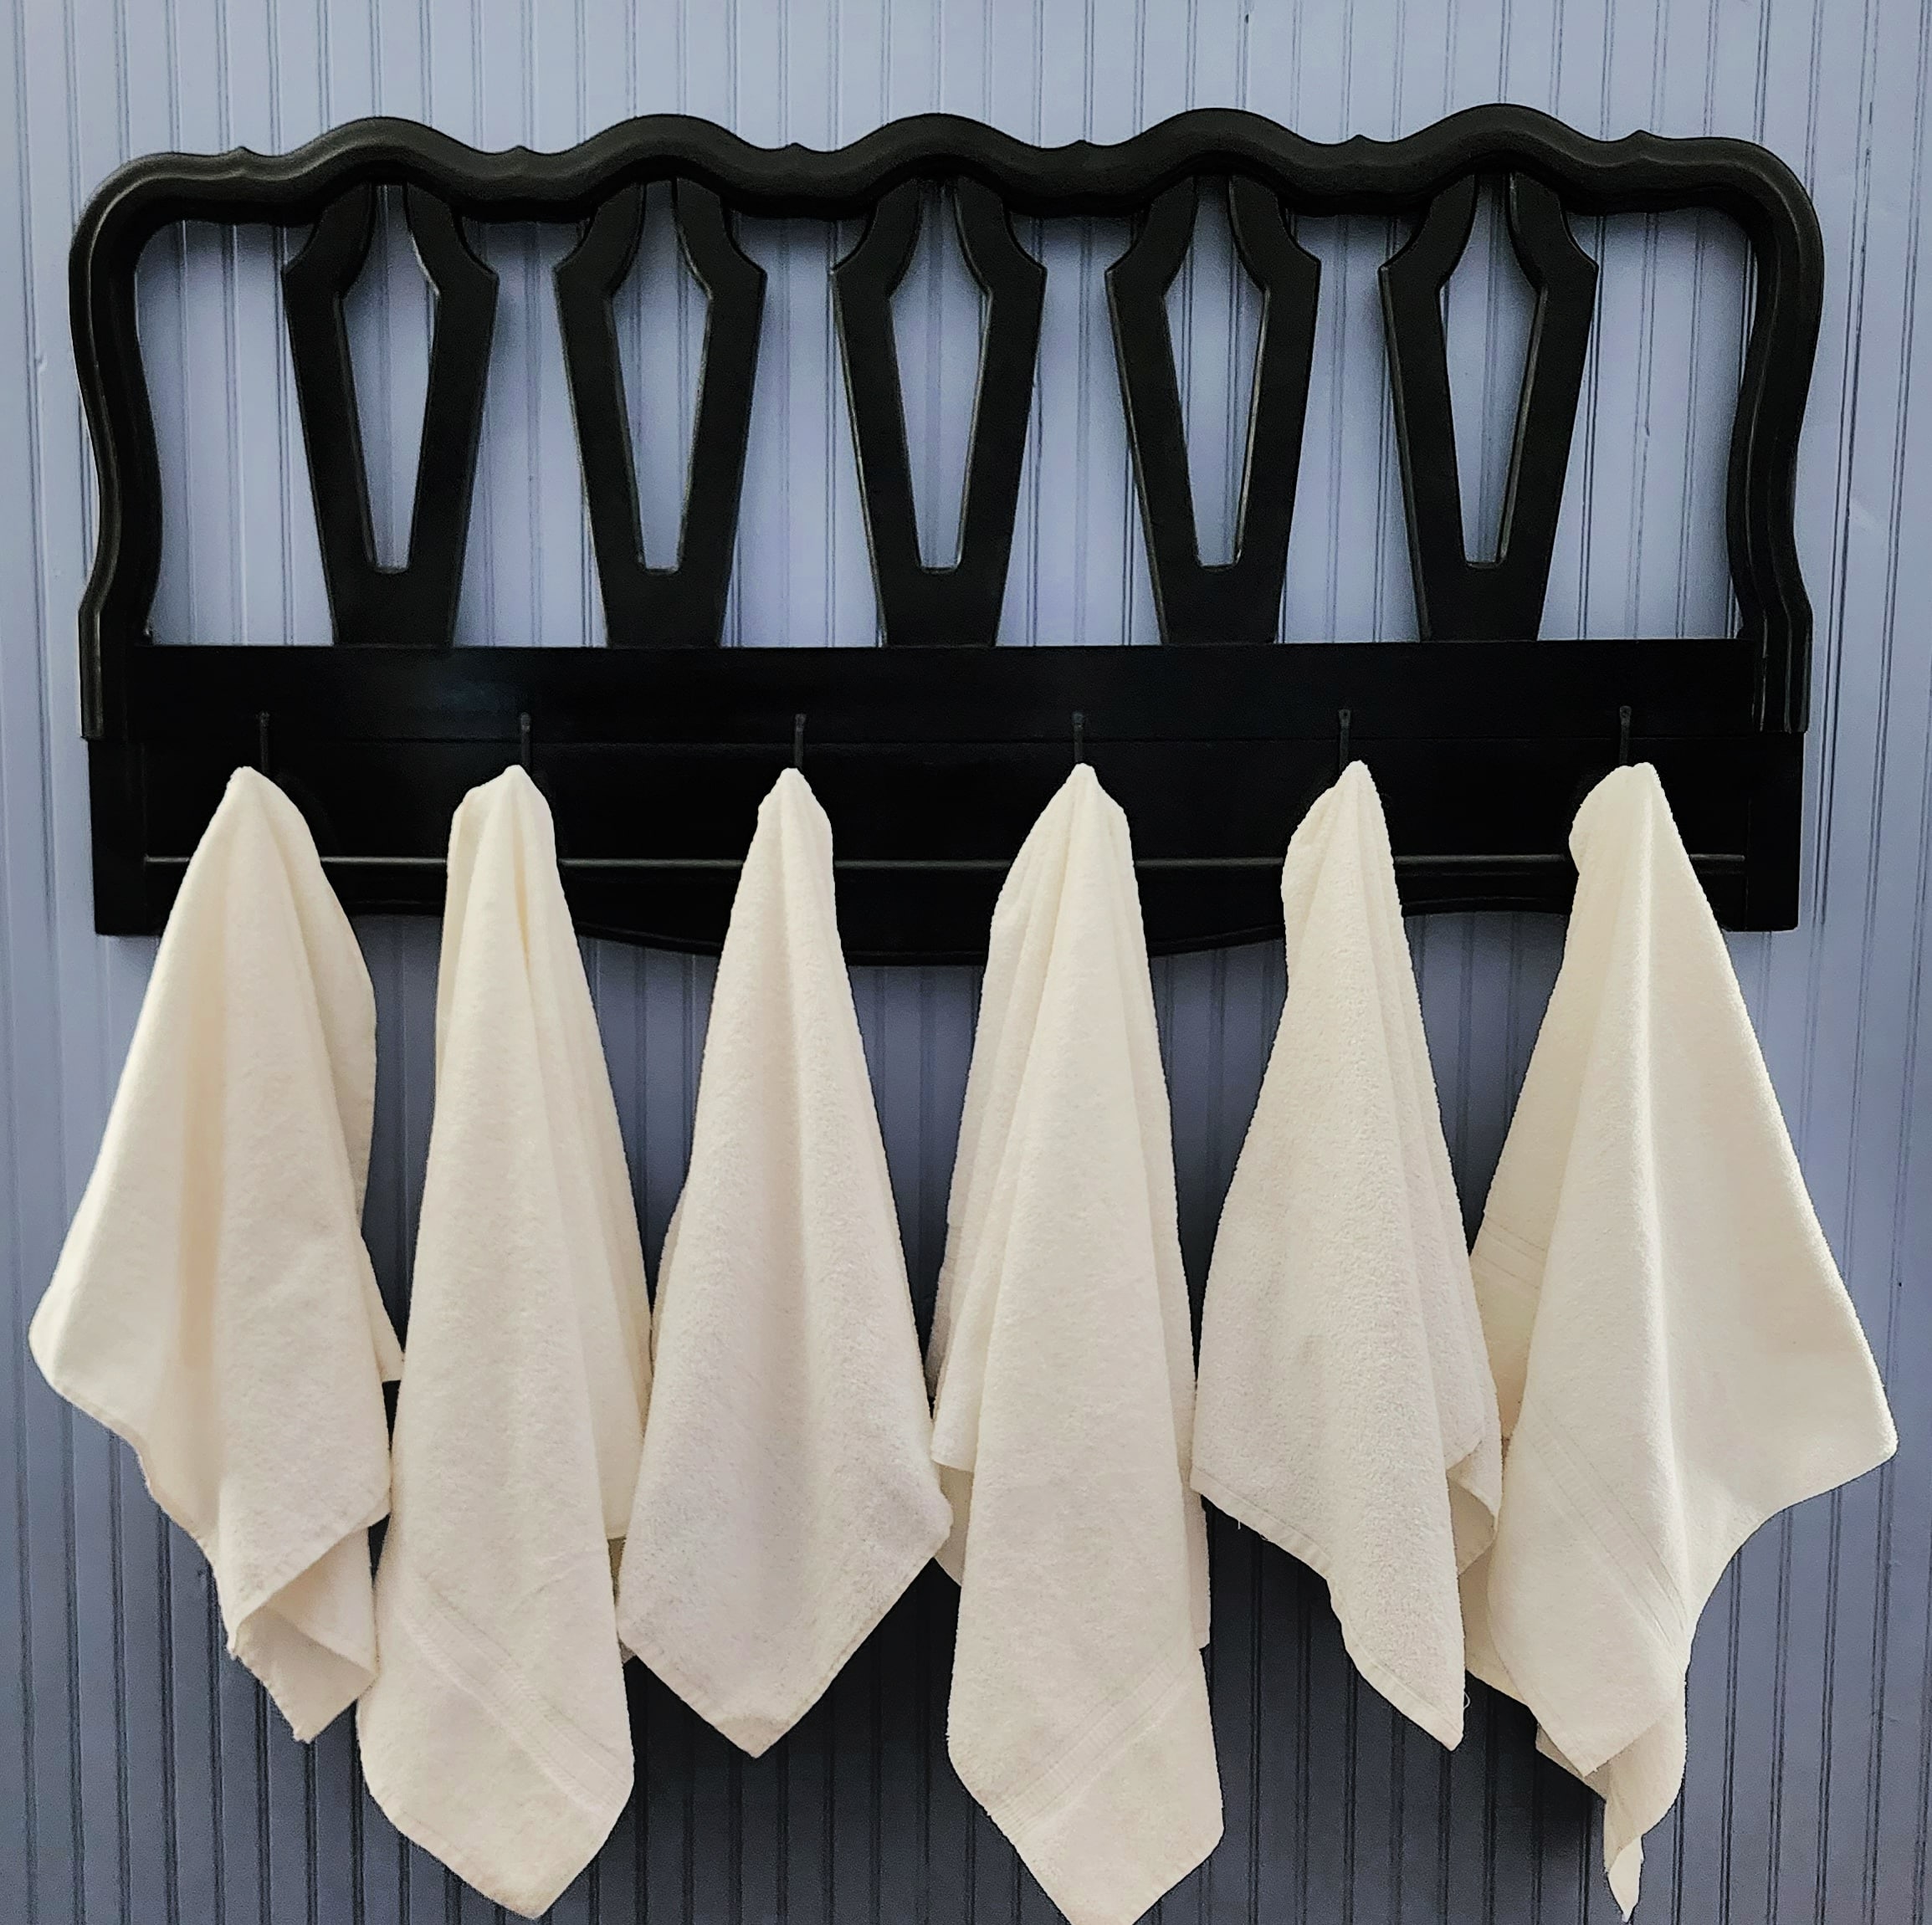
I’m not sure who would need such a large towel rack, but it seemed like a good idea to take it for a ride with some towels.
love, love this!!!
Thank you so much Marla! I appreciate you taking the time to leave a comment on my latest project.
gail
Great job!
Thank you Rebecca!
gail
Really cute. Great work.
awesome! love how it turned out.