Railroad Tie Lamp
As an Amazon Associate, I earn from qualifying purchases.
Hello once again My Repurposed Life friends, its Joan from Scavenger Chic. Today’s project is an awesome Railroad Tie Lamp.
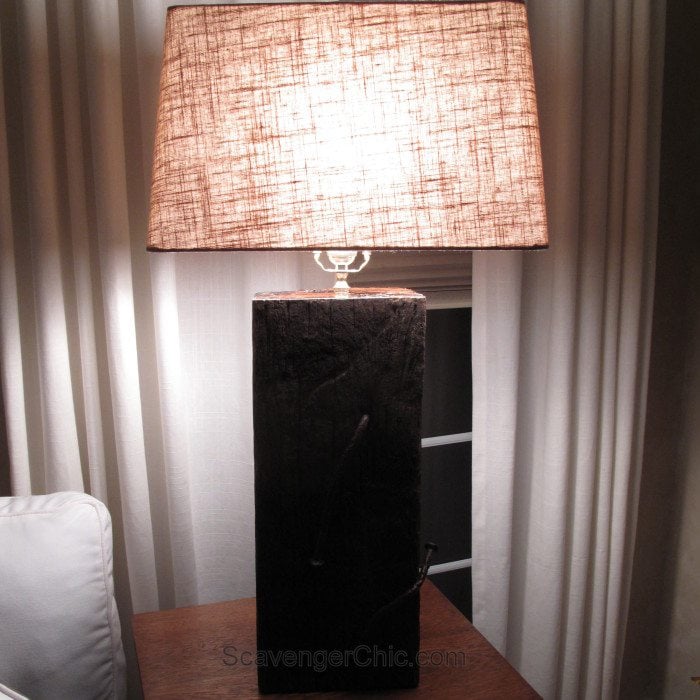

If you follow my blog, you know that I love to create lamps out of junk. Homemade lamps have so much more character than store bought lamps and they are way less expensive. If you can drill a hole, tie a knot and tighten screws you have what it takes to make your very own lamp. It really is that easy.
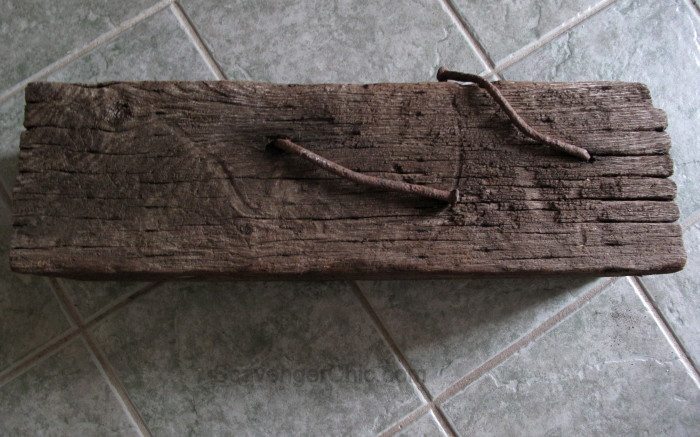 As soon as I saw this tie, I knew it had to become a lamp. Those rusty nails give the tie so much unique character.
 I believe this railroad tie was used in someone’s garden in its previous life and that big hole in one end is probably the reason it was ripped out of the garden.
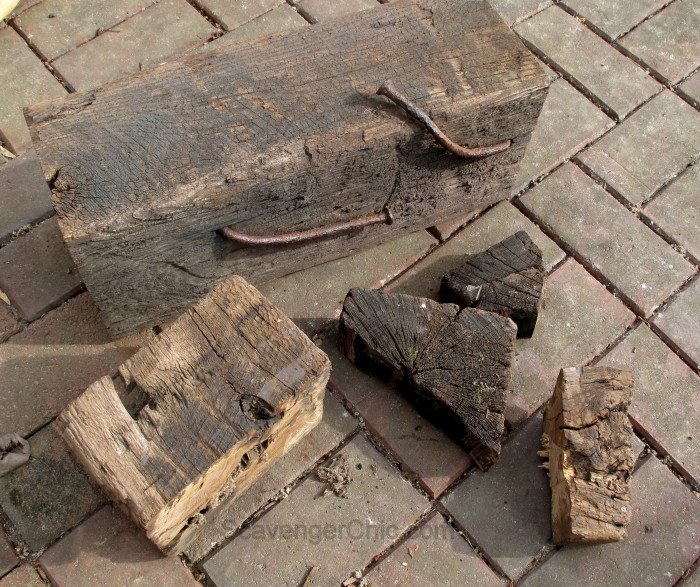 It was way too long for this railroad tie lamp as it was, so the first order of business was to trim it down to a much more manageable length and to get rid of the rotten hole.
The other end also got a bit of a trim so the lamp could sit level.
Cleaned off the outside of the tie with a wire brush and sprayed with about 5 coats of a flat spray on varnish. Whatever the tie was treated with, I wanted it to be sealed.
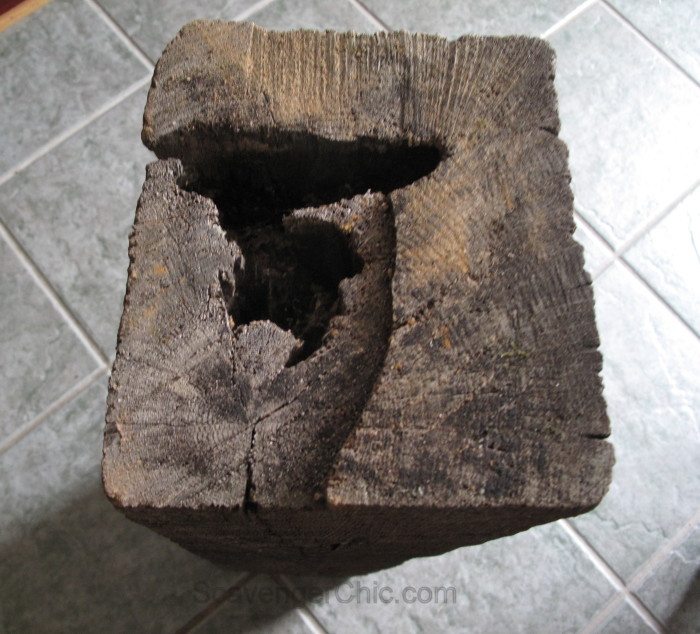
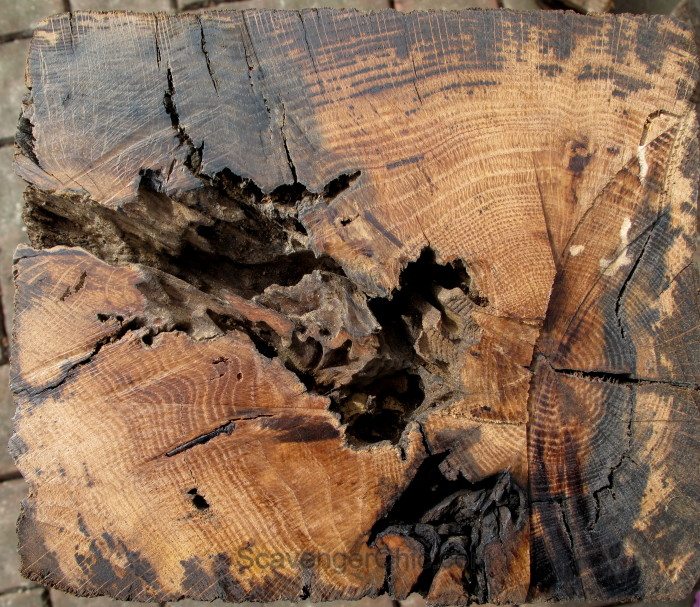 After 6 inches was chopped off of the top of the tie, I was still left with this nice looking insect damage. I never did see a bug, whatever was living there had long ago found a new home.
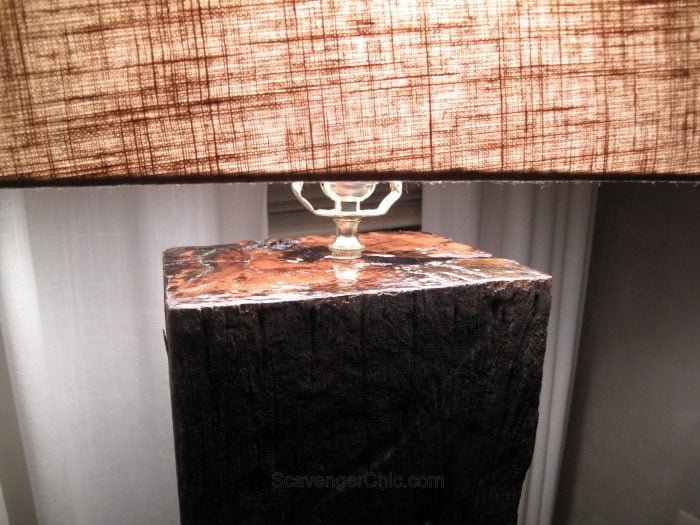
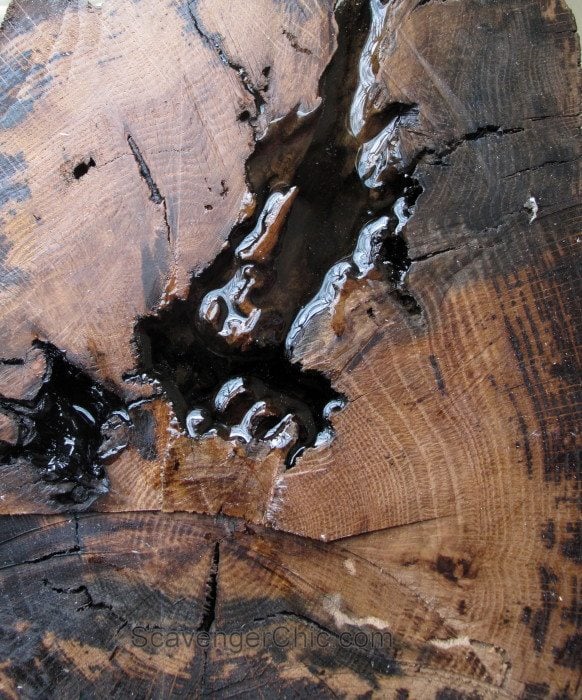 Instead of chopping off more of the tie, I decided to preserve my hole. After a bit of research I found clear plastic casting resin at Hobby Lobby. It’s a bit expensive at $29 but I had a 40% off coupon and I still have a lot leftover for my next project. The same size casting resin at Amazon is a bit cheaper but you may have to pay for shipping.
Apparently you can use the resin to embed coins, flowers, rocks and insects. Who knew. One person on Amazon said it worked great to preserve her pet scorpion that died. I just wanted it to stabilize a rotten hole…which it did.
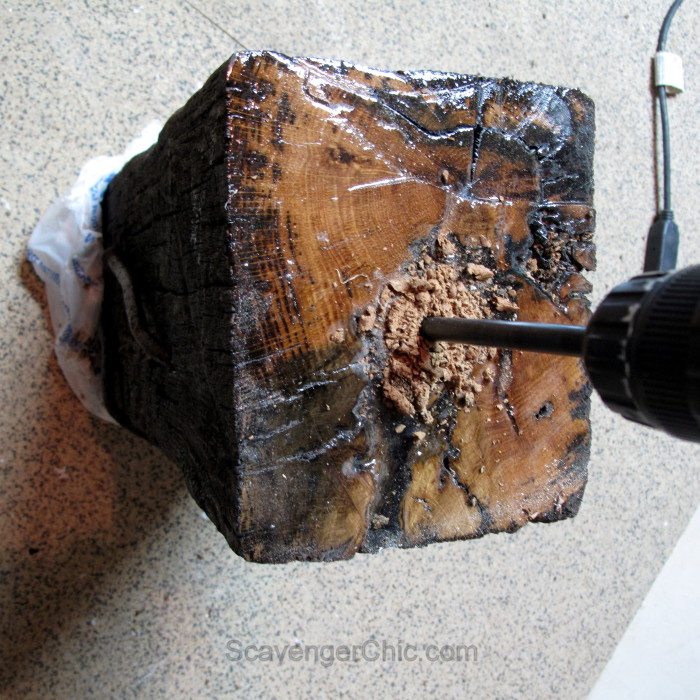 With the hole finally filled it was time to complete the lamp. With a drill and a very long 3/8″ drill bit, I drilled a hole the length of my tie. When drilling a hole for a lamp, the drill bit needs to be at least half the length of the lamp so that you can drill from both sides and meet in the middle. If you can drill from only one side, that would be even better, then you wouldn’t have to worry about lining up your holes.
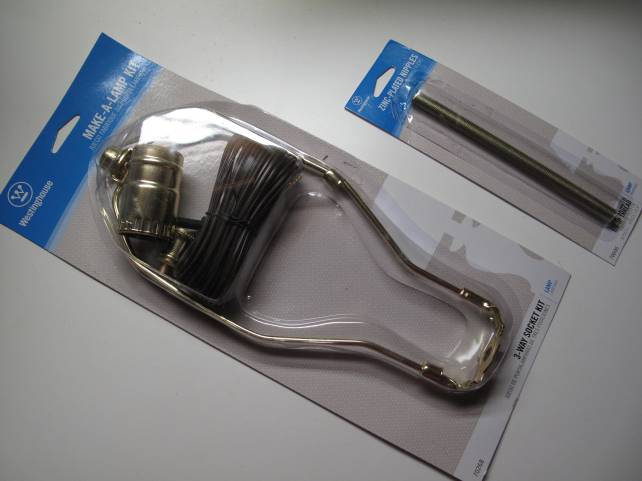 To complete the lamp, I needed a lamp kit and a long threaded nipple. The threaded nipple that comes with the lamp kit is not long enough to make your own lamp, it’s more for rewiring an existing lamp. Walmart seems to have the best price on the lamp kits at $8 (GE brand) but you’ll have to go to a hardware store for the threaded nipples.
How to wire your new railroad tie lamp
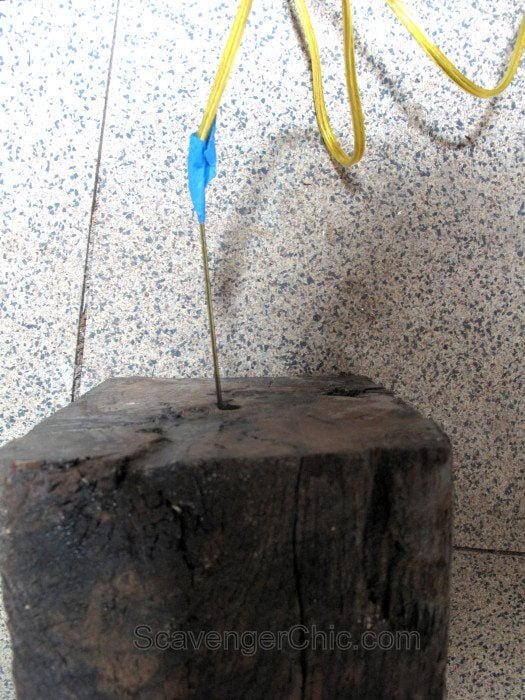 Starting from the bottom of your lamp, pull the lamp cord thru the hole you just drilled. I inserted a hangar wire thru the base and taped the end around the lamp cord to pull it thru.
Thread the lamp cord through the nipple (threaded rod) and insert into the top of your base until all but 1 and 1/4″ is sticking out of the top of the lamp base.
 Follow the instructions in the lamp kit to wire your lamp. These three pieces are not tightened yet, just wanted to show you the order of assembly.
If you like your instructions with pictures, check out my post from 2014. It really is way easier than you think.
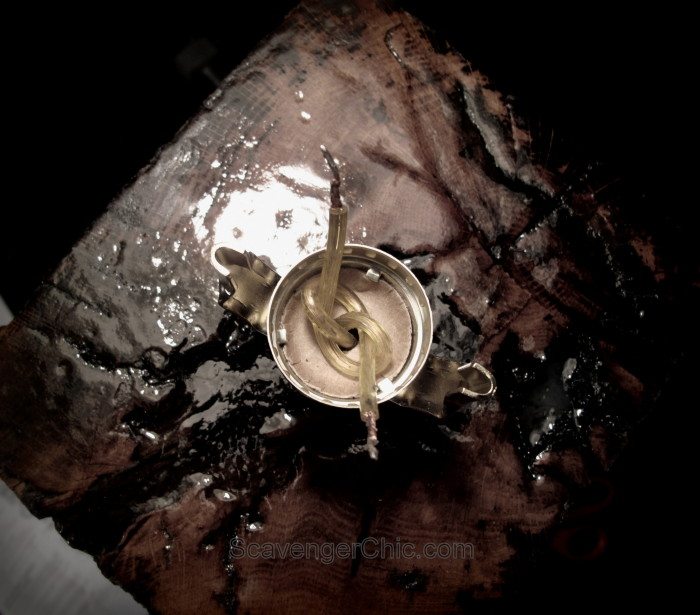 An underwriters knot keeps the wire from slipping back thru the base.
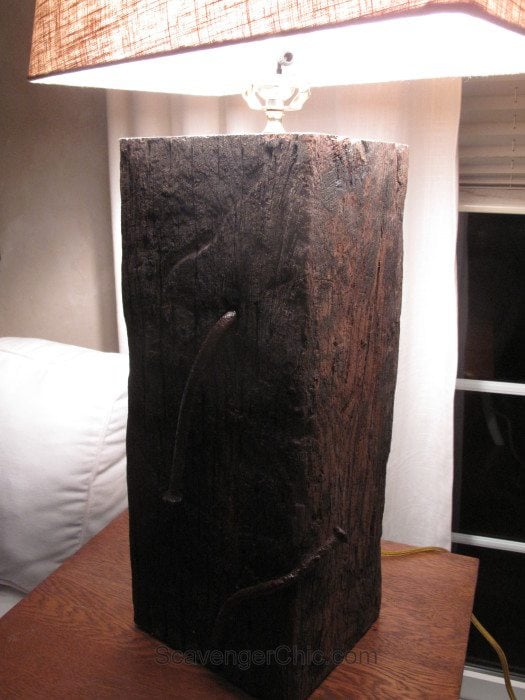
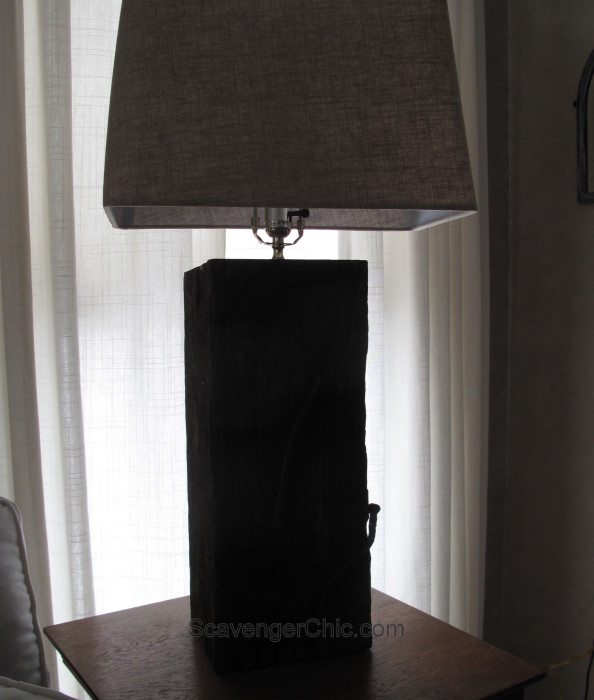
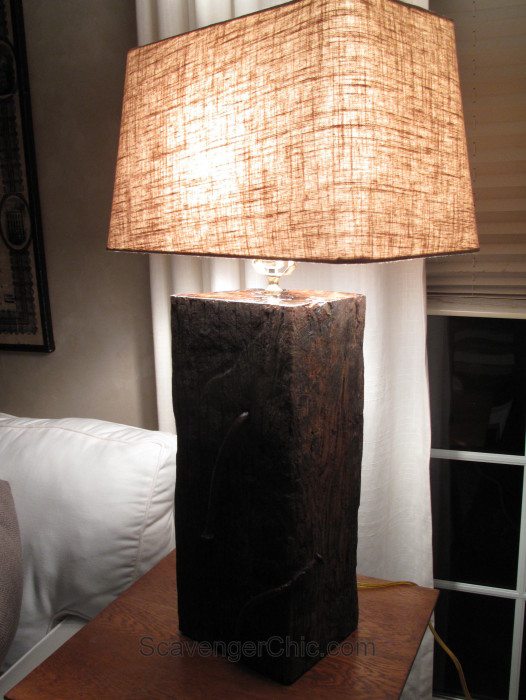
You are now ready to make your own unique, one of a kind railroad tie lamp. Once you make one, you’ll be seeing lamp possibilities in everything.
Joan
see more of Joan’s projects here
Joan,
I love your railroad tie lamp! It’s pretty, in so many ways. I think you did a fabulous job. The only thing I would have done different is to use old lamp guts from a thrift store lamp. 🙂 Lamp kits can be very expensive!
Thaks for another great project this month!
Thanks Gail. you are difinitely the queen of Repurposing. I missed a great opportunity.
Love it ! Who’d a thought a lump of old wood could look so good. You definitely have an eye for seeing the beauty in junk.
Your lamp is lovely and unusual but I think you need to be concerned about the coal-tar creosotes that railroad ties are soaked in. They aren’t considered safe to be used as retaining walls in gardens so I can only imagine that they are even less safe to have in you house. Maybe if the whole thing was coated in the resin, it would be safer–an that looks really neat where you used it to seal the top.
Bambi
That is definitely a valid concern that is why I put 5 coats of a spray on varnish on top of the wood. Right now I don’t detect any odors coming from the wood. The resin would make a great sealer and I may still use it if I notice any bleed from the tie.
That is great Joan. Now I’m looking around at something to preserve with resin. Darn, I’m fresh out of scorpions.
I really love this. I think a lamp like this would sure cozy up a room.
Love this! I’ve never rewired anything other than an existing lamp base. Now I’ll be looking at objects in a whole new way!
Think logs, newel posts, anything with the basic shape.Once you make one you won’t be able to stop.
That is beautiful. Want to try this, I live by the tracks and it would fit right in.