Antique Record | Radio Cabinet Makeover
As an Amazon Associate, I earn from qualifying purchases.
I purchased this antique record/radio cabinet on December 11, 2014. So, this might seem like a really long project tutorial, but just stick with me.
Vintage Record Radio Cabinet

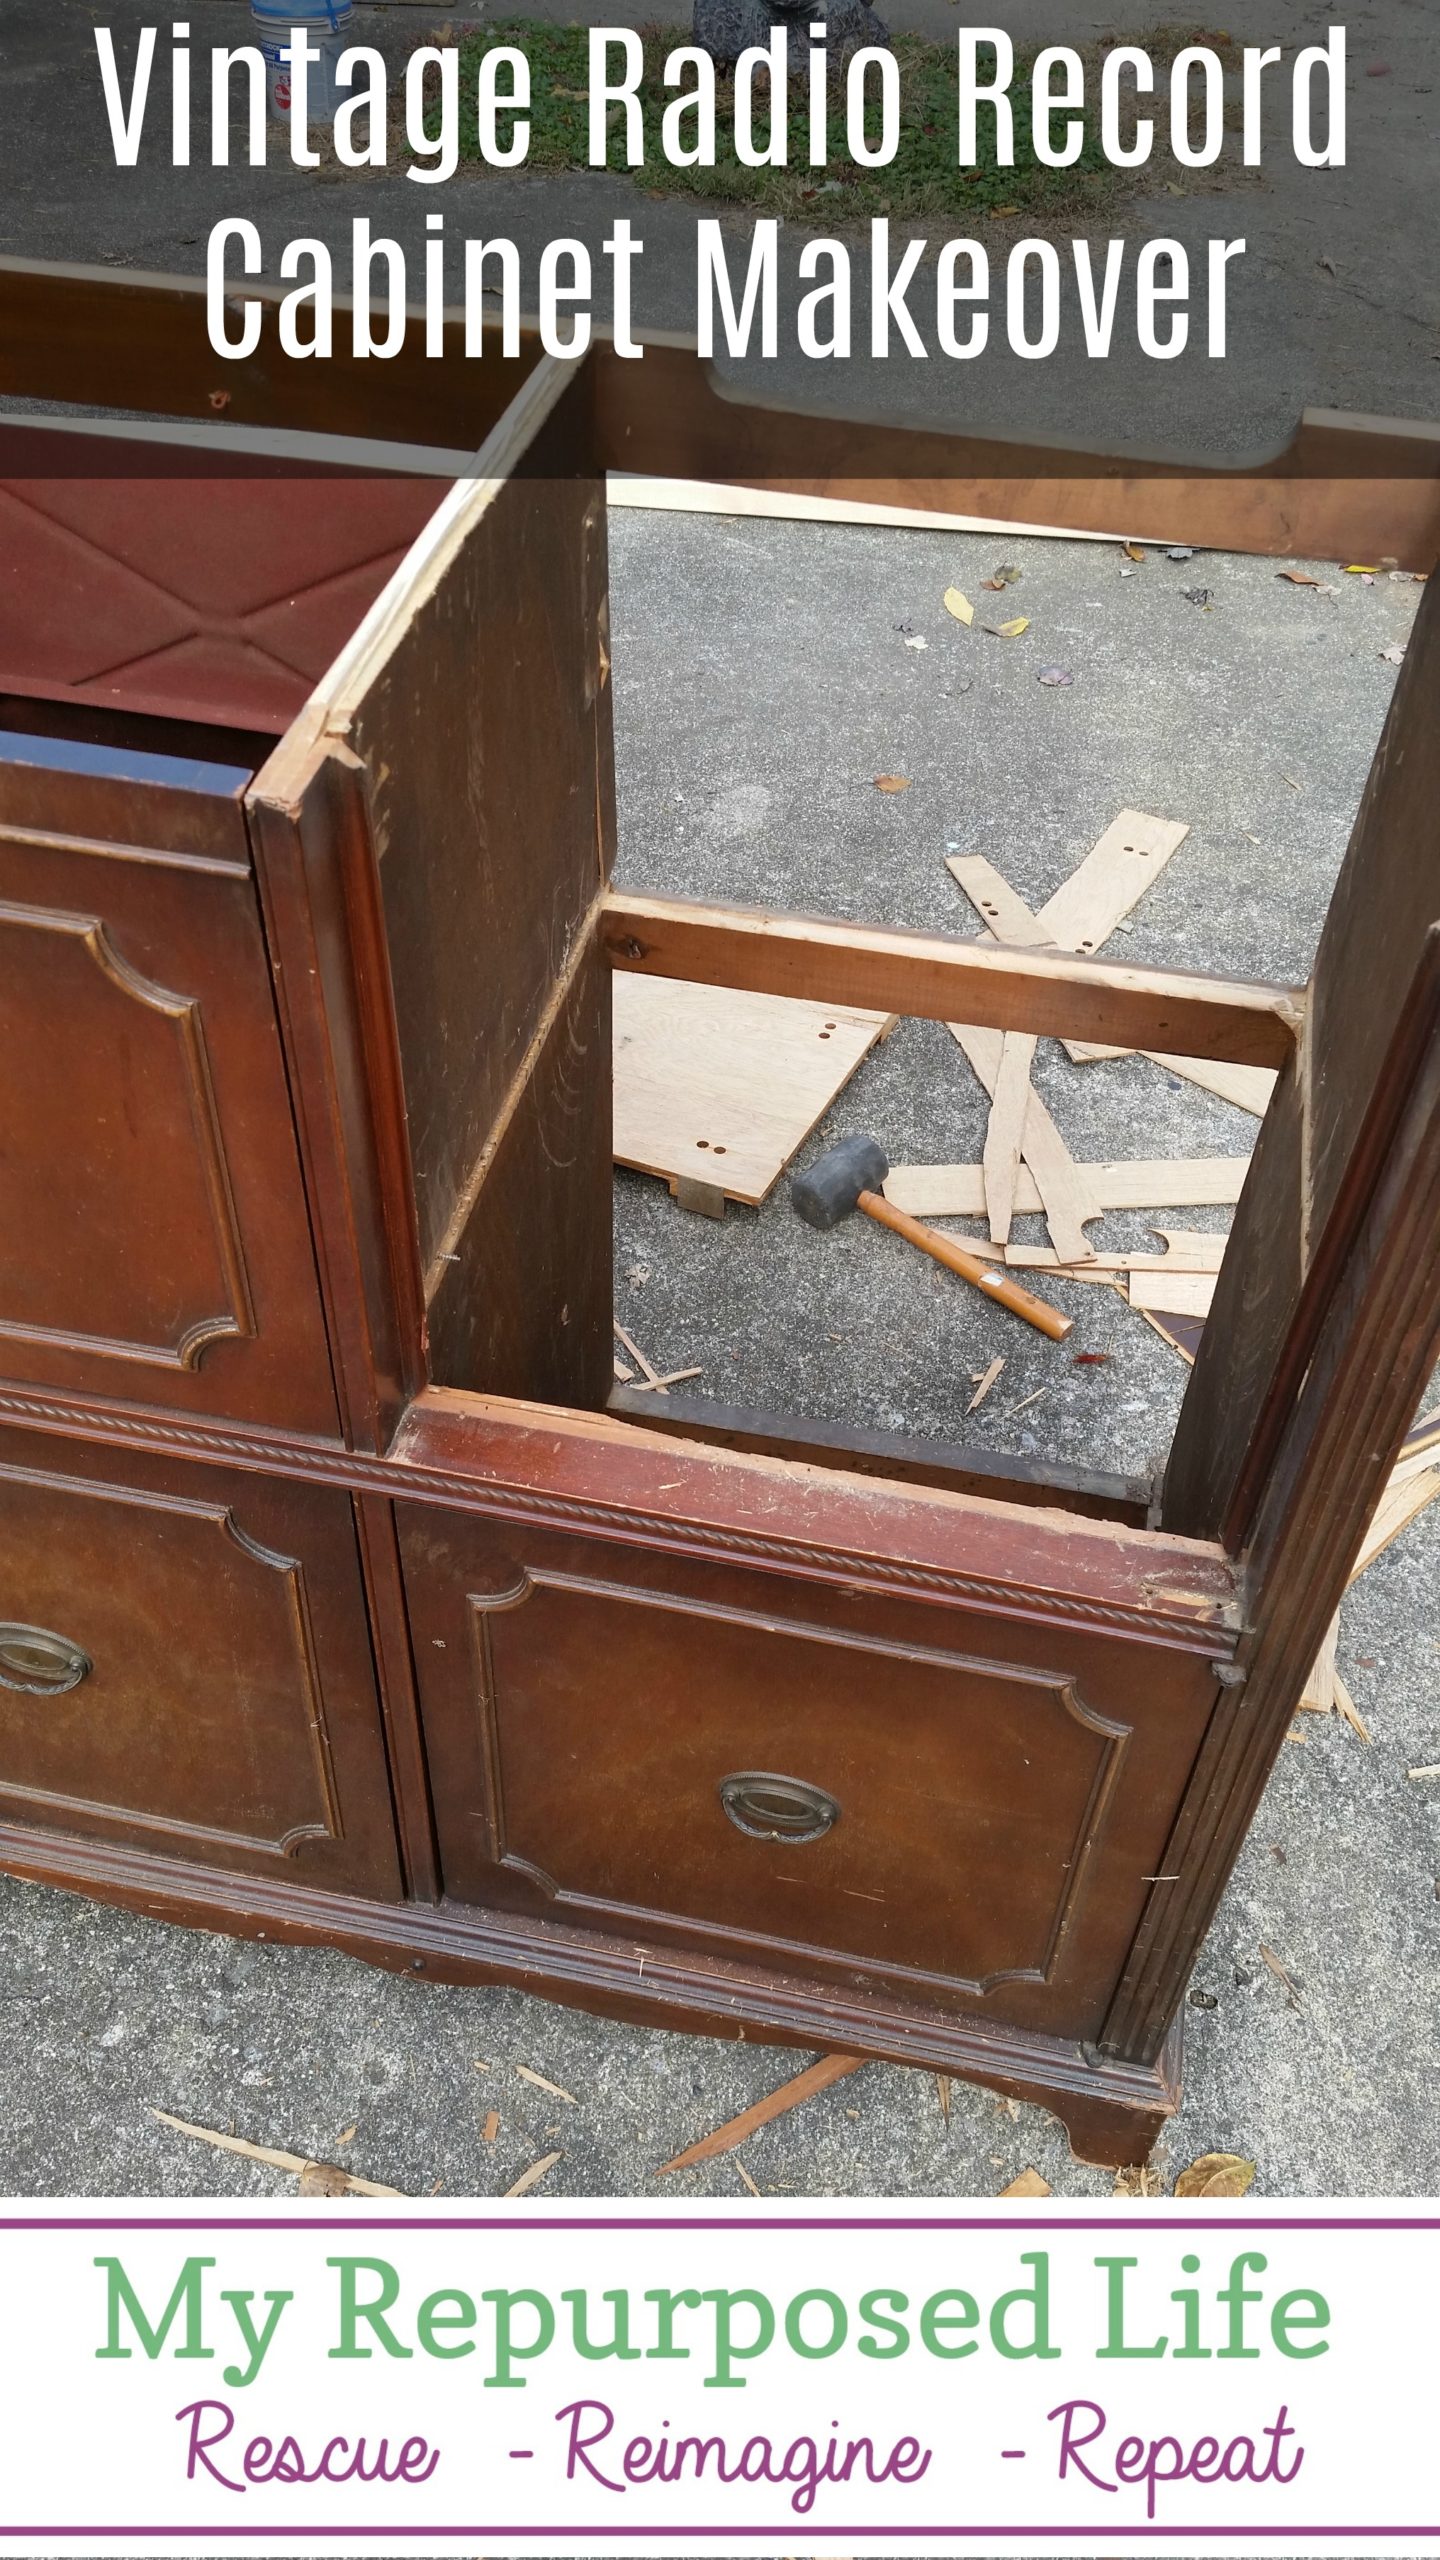
This is what it looked like when I brought it home.

The top was in really rough shape.

These are the areas behind all the doors. So, basically, there was only one section of storage. I’m going to change up the old record radio cabinet for sure!

Having grown up in Louisville and being here my whole life, it was fun to look at the old radio stations.
*this post contains affiliate links, read more here*

Dismantling was done with a rubber mallet.
Making a New Plan for the Record Radio Cabinet

I found a large cabinet door in my stash that will work well for a new top.

The one side was raised more than the other. I used a Dremel Multi-max tool to even it up.

The record radio cabinet needed new shelving. Using my Kreg Jig to make pocket holes was the easiest way to add shelves of plywood.

A Kreg Right Angle Clamp held the shelf in place while I secured it with pocket hole screws.
 Two new shelves added quickly and easily.

Because the sides were in rough shape, I cut thin pieces of plywood to “patch” the old record radio cabinet.

I stained the old cabinet door that would become the top for the antique cabinet. At this point I’m guessing that I was going to paint the cabinet, creating a two toned look that is easily one of my favorites.
But then, I was contacted by Paula from Heirloom Traditions Paint . She spoke about a collaboration and offered to paint this piece for me. That was in December 2015. A year after I had first brought this record radio cabinet home.
But Then This Happened . . .

Life got busy and this little gal got forgotten. The record player drawer got lost in the shuffle.

I picked up the cabinet probably a year or so later, and stored it in the garage.
Years Later . . .

The old gal never really got put back together. The staged picture at the shop was with the doors just placed in their spots. Last month I unearthed the piece to work on it. So, if you’re keeping track, I bought this 5 1/2 years ago.
Removing Textured Paint from Radio Record Cabinet

The faux finish had a lot of texture. I wanted to remove that. I started with a piece of 60 grit sandpaper wrapped around a small block of wood to get into the small trim areas.

Using the sandpaper wrapped around the block really made it a lot easier to get into the small places. The texture on the door front was pretty thick.

To sand the sides of the record radio cabinet, I laid it on a piece of vinyl wallpaper and used my orbital sander.
Yes, You Can Use a Hose on Furniture

The weather was sunny and breezy. Because of that I used the hose to clean off all of the sanding dust and other dirt and debris. I knew the cabinet and doors would all dry very quickly.
Let’s Add Some Color to the Radio Cabinet

I decided that the cabinet would look good if I painted it similar to another black record cabinet I worked on years ago. Therefore, I mixed up some diy chalky paint primer with some old paint and plaster of paris. Because I wanted a good coverage on the inside of the doors, I hand painted them with a large chip brush.

I opted to paint the inside of the cabinet the same pretty turquoise using my beloved Super Finish Max.

In order to keep the original tag in tact, I covered it with blue painter’s tape. I chose to paint the inside from the back instead of the front.

Here, you can see the painter’s tape covering the branding as I was busy painting the inside of the cabinet and the doors as well.
Painting a Radio Record Cabinet with a Paint Sprayer

Placing the doors into the cabinet, it was time to add some black paint. At this point, the doors and the top are just resting in place.
Eventually, I replaced three of the doors’ hinges. The fourth door was a pull out drawer for the original phonograph player. (that makes me sound so old, doesn’t it?)

It’s beginning to look a lot better, but I can see that I should have sanded it better to cover up the textured paint.
Replace Missing Top with Pocket Holes

‘In order to attach the new cabinet door top for the record cabinet, I drilled pocket holes with my Kreg Jig.
Oops! It Needs One More Shelf!!

As I was adding the pocket holes I realized that I totally had forgotten over the years to add a shelf to this one section on the left. This cabinet is large and awkward, but I found a way to move it with my furniture dolly.

In my stash, I found a scrap board that was perfect for the shelf. I did have to trim it up on the table saw to make it fit.

The shelf was painted, and here, you can see the cabinet branding plaque that I had taped up.
Secure New Cabinet Door Top to Cabinet

Pocket hole screws were used to secure the top of the vintage record cabinet.
Restore Original Hardware

After soaking of the textured paint, I decided to clean up and sand the original hardware. It’s not perfect, but I appreciate it’s age and beauty.

Again, I’ll mention that the fourth “door” of the vintage record cabinet, wasn’t really a door, so I don’t have any hinges for it.
Sadly, this is how it sits, waiting to be finished.
I had this project post in queue to publish and it slipped through the cracks while I’m off with an injury. I fully expected for it to be finished before the publish date and forgot to pull it out of the queue.
Stay tuned, it will be the first project finished when I get an okay from the Ortho. Meanwhile, some older projects will be refreshed and highlighted each week until I’m released for work.
For those who have asked, I fell while camping in March and after many weeks of no improvement, I’m in a brace to keep my left wrist immobile for a few weeks. 🙁
gail
will be awaiting to see it once you are healthy and back at work. looks fabulous so far. love the cabinet!
Gail I love the cabinet and wanted to pin it for later inspiration. Pinterest won’t let me without a picture and your pin doesn’t have one. Can you please help me by sending a picture I can use? I have an old radio cabinet to repurpose. Thank you.
Peggy,
This project (post) slipped through the cracks and was published before it was finished. I have updated the post with more recent pictures, but the cabinet isn’t totally finished as I am off for an injury. You should be able to pin it now. Thank you for wanting to save it. Stay tuned for more pictures and details when I can get back to work.
gail
So what happens next? Since you’ve sanded it smooth. The green and gold faux finish, though well done, made it look very dated.
If it were mine a dark stained top and dove gray body would be very pretty. Maybe adding just a touch of the glaze. Not much, just a touch and I’m not really sure of the glaze at all. (Did you hear the plain wood people gasp) I like the hardware, but they’re brass, or painted gold, (now here is where I’m totally not myself. Paint them something to compliment. I’m growing up in my old age.)
hahah Sorry about leaving you hanging Jennie. This project (and post) were not finished, but I set it to publish weeks ago and forgot it was in the queue to be published. Since I am injured, I have to take some time off working for a few weeks. I have updated the post with more pictures, but the cabinet still waits to be finished. I just got some hinges for it this week, but with a brace on my wrist to keep it immobile, it’s impossible to finish it at this time. Stay tuned for more details, but for now–visit the post to see it’s current (painted) progress. 🙂
gail