repurposed Brass Vanity Light
As an Amazon Associate, I earn from qualifying purchases.

First, let me say this repurposed brass vanity light didn’t turn out quite like I expected. In fact I’d almost say I really don’t like the way it turned out. So, when you see the steps I’ve taken, if you have any insight about what you would have done differently, let me know.
In my defense, I had to use what I had on hand, unable to shop for different options. You see, it’s really the solar lights that I don’t like. Let’s get this show on the road, shall we?
Brass Vanity Light

Did you know that for years I had a $5 spending limit on my thrift store finds? That’s before the blog starting making money. But I still scour the aisles for the BEST deal I can find.

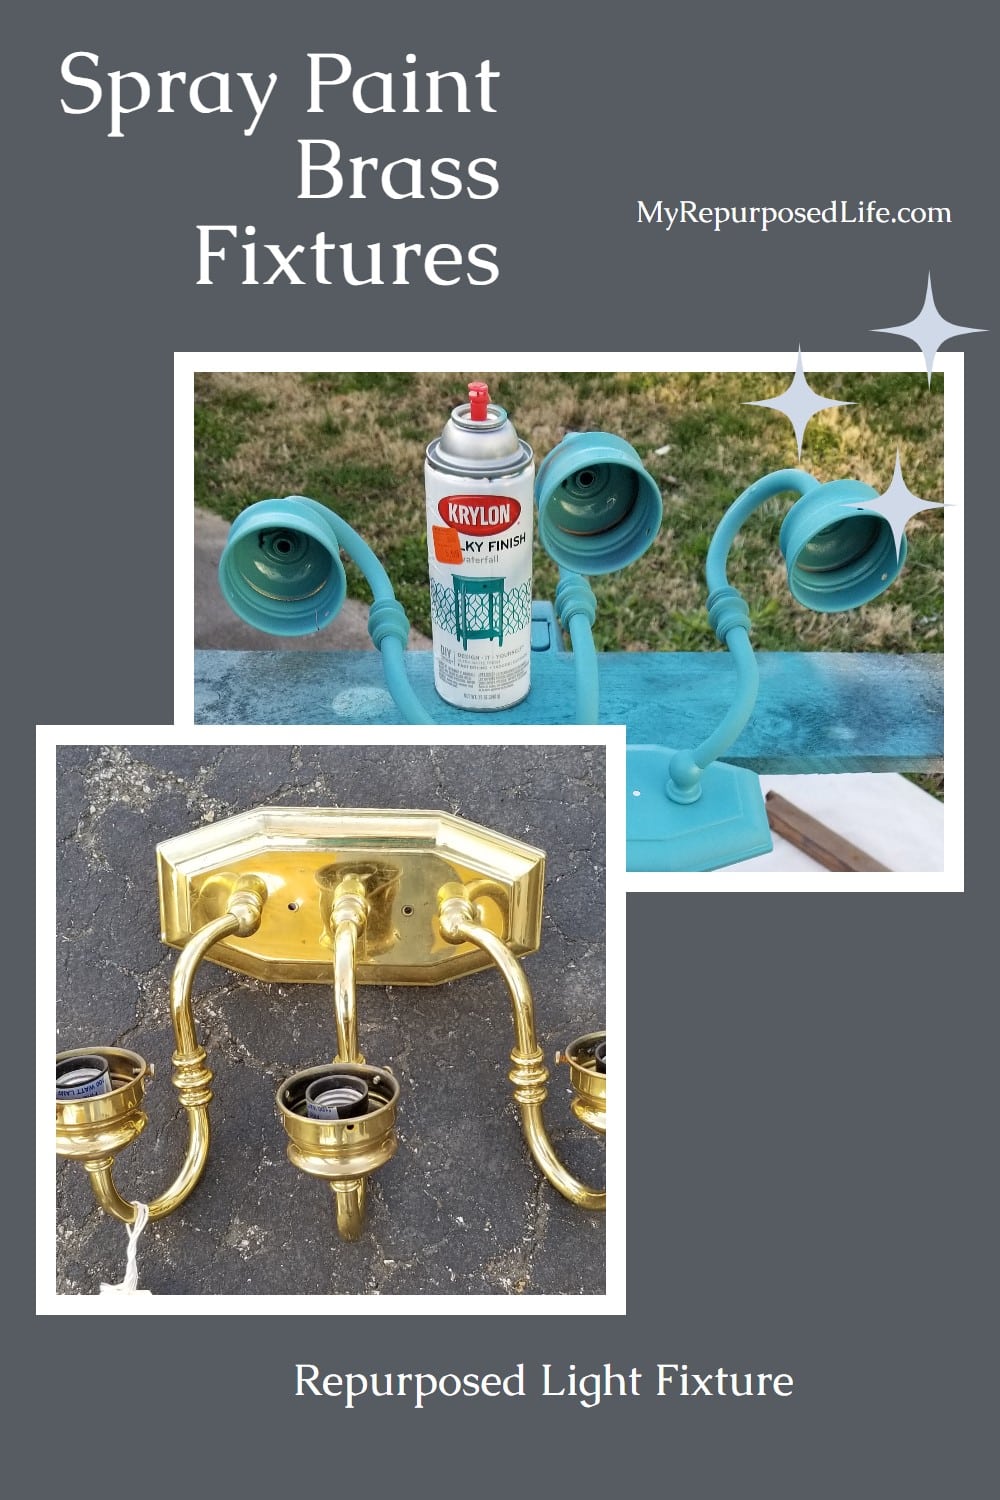
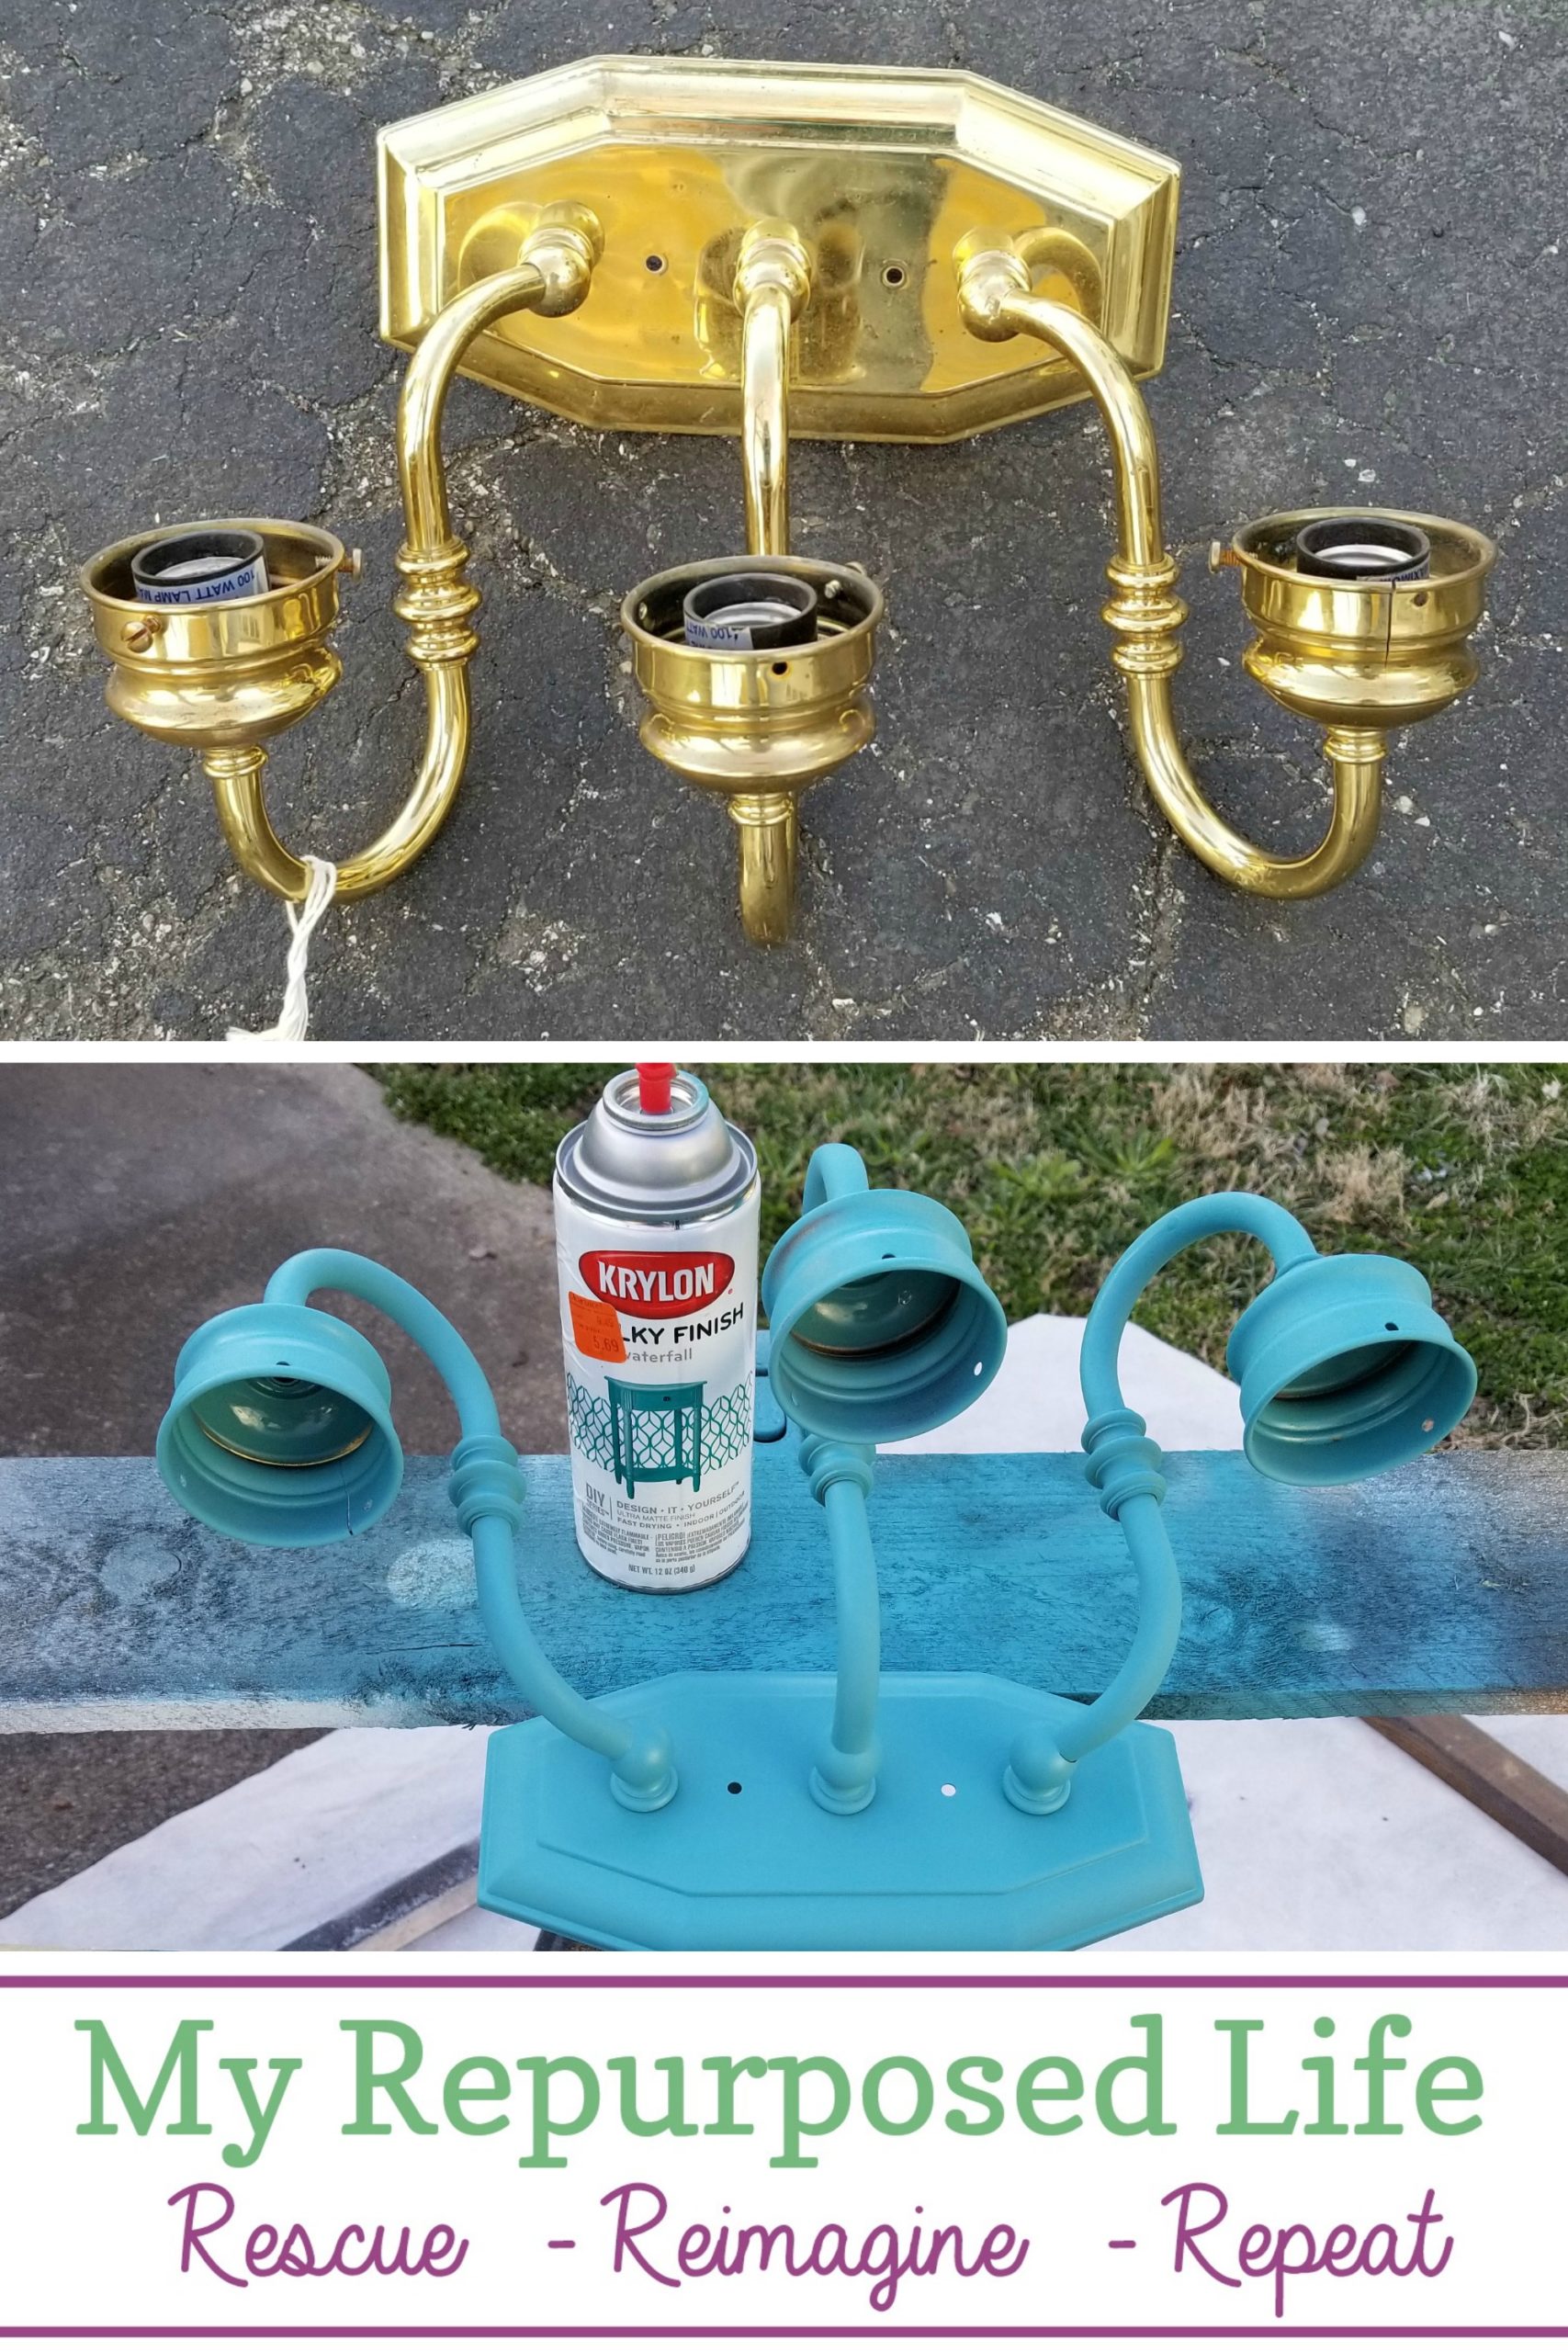
Do you shop the ReStore? Their prices drop as the time goes by. I can’t imagine why someone didn’t scoop up this brass vanity light in the months and months it was there. What I didn’t know was that eventually they go even lower than the cheapest price listed. I purchased this 3 light wall sconce on March 6, 2020. When I checked out, it rang up for $5 !!!

Here’s a closeup so you can see it in all it’s glory. Would you have picked it up for $5 ?
Dismantle Brass Vanity Light Fixture

First you need to unscrew the candle cup and snip the wire that is holding the socket in place.

After snipping the wires, bend the threaded piece back and forth until the tab breaks off.

I like to reuse all the hardware that I can—that tab would just be in the way.

Next, pull the wires out of each arm of the brass vanity light.
*this post contains affiliate links, read more here*
How To Clean Thrift Store Finds

Since we never really know what a thrifted find has been through, we need to expect the worst. I like to use TSP for cleaning and degreasing. This spray on TSP substitute worked really well! It removed grime I couldn’t even see.

Don’t forget to rinse away the TSP. You probably won’t have to scrub it, the TSP cleans really well if you let it set for a few minutes.

Because I’m an impatient DIYer, I used my leaf blower to help dry the joints on the brass vanity light. You’d be surprised how much water can “hide” and ruin your spray paint project.
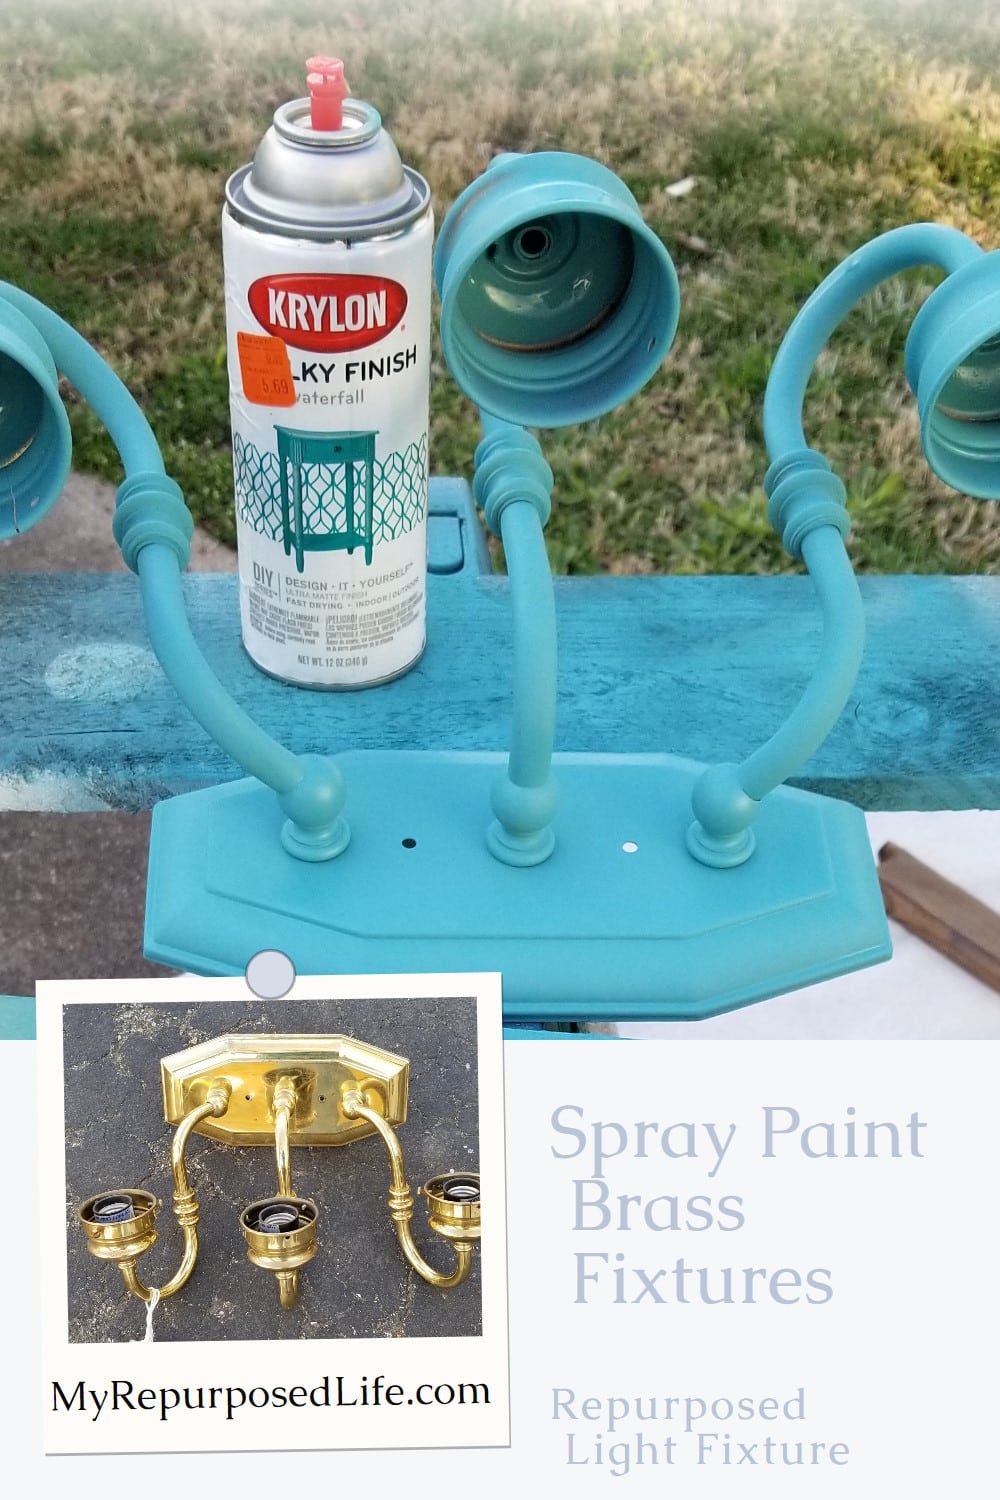
Spray Paint Brass Vanity Light

It was a little challenging to get the spray paint into all the little nooks and crannies of the wall sconce. I prefer to do several very light coats of paint. Always read the directions for best coverage! Times vary by brand and the type of paint.

I could paint everything this color!
Solar Lights on Brass Vanity Light

I experimented with some $1 solar lights. I’m sort of leaning toward removing the wide candle cups.

The painted brass vanity light fixture was very easily attached to the fence with two wood screws. This is when I started not liking how it looks. The arms seem to go in a funny direction since in reality, they’re upside down.

I used spray paint on the heads of the wood screws. These solar lights are temporarily placed on the arms of the painted brass vanity light. I had two different solar light styles to choose from and I didn’t like either style. (the others were shown earlier while working in the kitchen)
This new solar light fixture is to the right of my gate, and the repurposed shutter vertical garden succulent planter is to the left of the gate. I’ve been busy cleaning up the backyard camper retreat and it makes me happy to add more color to the space! In times of stress, it’s great to have a place that makes one happy.
Please Save & Share on Pinterest!
This is where I’d like your opinion on what you would do about the solar lights?
I hope this project inspires you to makeover a brass light fixture even if you don’t repurpose it!
gail
Related Content:

Hang it upside down and use globe solar lights? I wonder if the solar collectors are omni-directional?
I have cut the black ‘stems’ in half and used them. They look better shorter in some lights.
Thanks Lynn! I’ve done that too for a chandelier I did. As soon as I can get out and shop, I’ll update the project and the photos.
gail
Hi, Gail! And yes, I would definitely pay $5 for this! I see what you mean, kinda looks unfinished with the lights just sitting on it…maybe something in the shape of a cupcake paper turned upside down and attached to the area of the solar light above the “stem” part. That way it would hide that whole connection to the lamp and just display the upper part of the solar light with a pretty “skirt” of sorts!!?? Make sense? (I, too, love that color!!)
Yeah, unfinished is a good way to describe it. 🙂 I do get what you mean. I thought about small saucers and even washers. But with this “stay at home” business I could only use what I have on hand. 🙁
I’ll scrounge around in the garage to see what I can find. Thanks so much for your suggestions.
gail
The dollar solar lights work great. Before you stick them outside and they get dirty give the solar collection plastic a couple of coats of clear nail polish, or a friend used a spray acrylic clear coat. They both seemed to last Less than a year with regular cleaning. Here our sun is so hot it does melt the clear plastic on the tops. And turn it milky color.
Jennie,
I’ve never heard of that before. The cheap ones I put out last year in the backyard are still hanging in there. Solar lights sure have improved over the years, haven’t they?
Thanks for your tips!
gail
Love the color! I think if you can paint the caps of the solar lights the same color, you’d like it better.
That’s a fabulous idea Dottie. I’ve done that before, don’t know why it didn’t occur to me to do it this time! I appreciate you taking the time to share your thoughts with me!
gail